After the owner of our visiting goat had to leave, we needed to figure out how we could make use of the chicken wire he left behind for us.
I knew there was a pile of wood in the barn, and I thought there might be some 2x4s on the bottom.
As soon as we were able, my younger daughter and I headed for the barn to dig them out.
Once they were cleared of the stuff on top, I discovered they were not 2x4s.
They were 3x4s. In pine – some still had bark on them. They were very roughly cut, some of the ends were wonky, and they were definitely not high end cuts. But they would do the job!
I decided to find a way to make a small corral of sorts, in such a way that we wouldn’t have to cut chicken wire that isn’t ours. I figured I could frame out the sides and ends of a sort of paddock, with uprights the same height, or slightly taller, than the chicken wire, then longer boards across top and bottom. With the wire attached across all of the sections at once, it could then be “folded” to create a fenced in area with a “gate” at one end.
The boards turned out to be 100 inches long.
Well… most of them…

So we cut uprights at 50 inches long. Four boards to make 8 uprights.
Then we unrolled the chicken wire and used the remaining long boards we’d brought to see if we could fit 4 of them, with spaces in between to create gaps that would allow us to “fold” the fence.
The wire was not long enough for 4 full length boards, so we ended up cutting a couple in half. This would give us 2 long sides and 2 short ends.
Once we figured that out, we measured out where we wanted to drill pilot holes for the screws in the uprights.
They were all marked the same distances at the top, then the bottoms were marked at 4 feet from the top, which is the height of the chicken wire. This would leave slightly more “leg” at the bottom, if we lined the wire up with the top.
Of course, it didn’t quite turn out as planned. Thankfully, this is not intended to be a permanent structure!
We only drilled pilot holes in the uprights. With the boards all being slightly wonky in size, there was just no way we could measure out where to drill matching pilot holes in the cross pieces.
Oddly, we also don’t have any longer drill bits, which would have allowed us to drill pilot holes through more than one board, so we couldn’t even try drilling pilot holes after putting the boards in position, first.
Then we discovered that not being able to drill pilot holes through the cross pieces meant we couldn’t even use a power drill with screwdriver attachment to screw the pieces together. The wood is hard enough that even our new drill didn’t have enough power to put a screw through on it’s own!
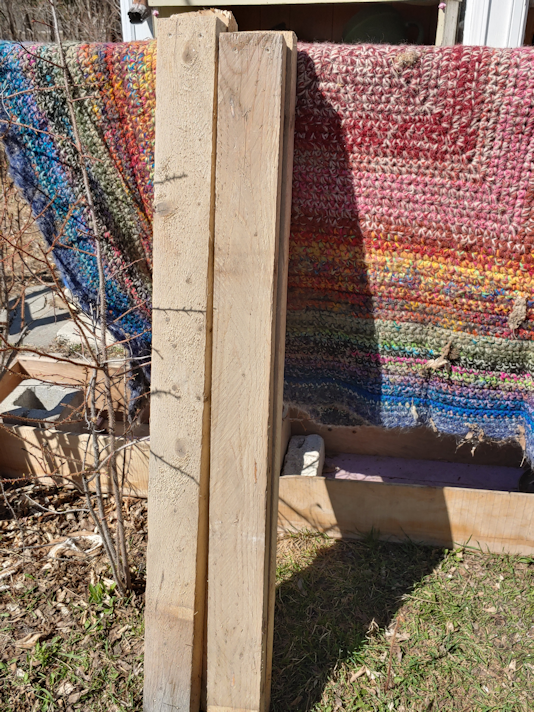
Still, we managed to put them together, with three of us screwing corners together at the same time. 🙂 Here is the first frame assembled.

My thought in orienting the boards this way was that the wire would be attached to the uprights, making it easier to grasp the cross pieces while moving everything around.
Here is all 4 sections, ready to have the wire attached.

With the shorter sections, the wire is now too long, but we figured we could fold it back around the ends on one side, and on the other side, it could be used to wrap around the corner after closing the “door” section.
Unfortunately, the only thing we had to attached the wire to the frames was a staple gun – and not a larger, heavy duty one. It is enough to attach the wire mesh we used to make the new basement cat safe, but it was a bit more difficult on this. For starters, the wood is hard enough, and the staples small enough, that the staples tended to not want to stay at all, never mind hold wire in place. We hoped using enough staples would do the trick, but once we picked it up, most of them just popped right off!
So, my daughters got creative.

They used rope around the top cross pieces to hold the wire in place, making sure to anchor the corners. Then, because it was still wobbly, rope and tent pegs were used to create support.
The whole time we worked on this, we were watched with much curiosity!

Once it was set up and secure, we tried to make it tempting.

There is straw for bedding, the bucket of water, and a container with food in it.
We will just leave it like this for her to get used to, and not try to close her up in it. I am hoping she will use the bedding tonight instead of sleeping on the hard concrete step.
So far, she has gone to sniff at it, but we haven’t seen her actually go in, yet.
I have just been informed, however, that the goat can get up onto the board sheltering the window into the old basement that used to be used to throw firewood into the basement!
While up there, the goat allowed my younger daughter to touch her nose!
None of us have been able to get close enough to touch her until now.
Progress!!
Little by little, with lots of patience, we hope the goat will finally let us near. Then let her owner near her, too. He really, really wants to trim her overgrown hooves!
I hope our goat catcher works. 🙂
The Re-Farmer


Patience. Sounds like you’re on the right track.:)
You may want to check how high those goats can jump or climb though, to make sure that pen will actually hold her once she’s in it. From my limited understanding, goats are poor jumpers but great climbers.
LikeLiked by 1 person
Thanks. The poor owner keeps trying to rush it. He knows better, but he feels bad about his goat being a burden for us. I made sure to let him know, we are quite happy to have her!
LikeLiked by 1 person
Yeah, we’re hoping she’ll be calm enough with it to not even try. From what we’ve seen so far, she’s more likely to try and plow through a side than jump. 😀
LikeLiked by 1 person
Pingback: Fall clean up: I think I went overboard! | The Re-Farmer
Pingback: Let’s get fungi! | The Re-Farmer
Pingback: Anniversary | The Re-Farmer