In truth, we might not actually plant these seeds. It will depend on the space and conditions we have. However, I do want to have them in my seed collection, just in case, or for future planting.
Here is what I ordered (all images belong to Heritage Harvest).
This is something we got as free seed last year and planted in our 2022 garden. They germinated quickly, then completely disappeared! It is described as one of the best tasting turnips, and a good storage variety, so I would like to try them again.
This time, making sure to use floating row covers to protect the seedlings from whatever has been eating them!
The early season watermelon variety we tried last year died off almost immediately after transplanting. Whether that was due to transplant shock or the flooding, I’m not completely sure. Very likely, both. I couldn’t find it again, so I would like to try this one. This is not a storage variety, due to the very thin rinds, but it is described as extremely tasty, so storage likely won’t be an issue! With only 80-85 days to maturity, we might even be able to direct sow these, instead of starting them indoors.
Yes, we already have two varieties of corn seeds, including a popcorn. These are a dwarf variety that matures in only 60 days. They are also described as being extremely rare. There’s only 50 seeds per packet, so I ordered two.
This variety matures in only 55 days. While not a dwarf variety, the stalks grow to only about 4 feet in height. This variety was introduced from the University of Alaska, so they should do all right here!
These also come with only 50 seeds per packet, but I decided to just get one.
Which variety or corn, or how many we end up planting, is a decision we will make once we have a better idea of what we have to work with in the spring. After the past couple of years, we know full well that whatever plans we make now can change very quickly. Hopefully, I will plant at least the popcorn, plus one sweet corn variety, but if we can manage more, that would be great.
I actually removed several things from my cart in order to get this book, and stay in budget. How to Save Your Own Seeds.
I do know how to save seeds for quite a few things, but there are some that I’m not as sure about. With availability of seeds, or specific varieties of seeds, fluctuating so much at the best of times – and these are not the best of times! – I figured this would be a valuable resource for our library.
I was so, so tempted to order more! I saw the Tropeana Lunga onions were in stock, but decided against them this time. They did really well, but their super thick necks prevented them from curing properly, so we’ll stick to other varieties that will hopefully not have that issue. I was looking at giant sunflowers and herbs, flowers, and even more tomatoes. It’s hard not to over indulge! Especially when they are things we do want to grow, like herbs that will also attract pollinators, or flowers that can be used as trap crops for insects.
All in good time. We’ve still got a lot of work to do, before we’re ready to grow many things we are planning for!
Today is the fourth day of Advent; the day of Peace. With that in mind, here is a classic performance with Bing Crosby and David Bowie, singing Peace On Earth/Little Drummer Boy.
Okay, it’s that time! I’ll be working on a serious of posts, going over how our 2022 garden went, what worked, what didn’t, and what didn’t even happen at all. This is help give us an idea of what we want to do in the future, what we don’t want to do in the future, and what changes need to be made.
Our 2022 garden had a lot of challenges, and a lot of failures. Some of challenges and failures started well before we planted a single thing outdoors.
With our short growing season, we need to start a lot of things indoors. That, in itself, is expected and not a big deal. Our circumstances, however, have thrown in some major difficulties.
Fourteen of them, in fact.
Well. Sixteen, when we were trying to get them going this year.
Our indoor cats.
The other challenge is a combination of space and light. This house is oriented to the East. Our largest windows face the sunrise – with a grove of 60’+ spruces not far away. Our south facing windows are smaller and inaccessible for the purpose. The exception to that is the sun room, however the sun room is not warm enough to start seeds in when we need to. Plus, during colder weather, we allow the outside cats to use it for shelter.
Which means we need to figure out how to start seeds indoors, provide adequate artificial light, and protect the seedlings from cats that are determined to either roll on them, or eat them!
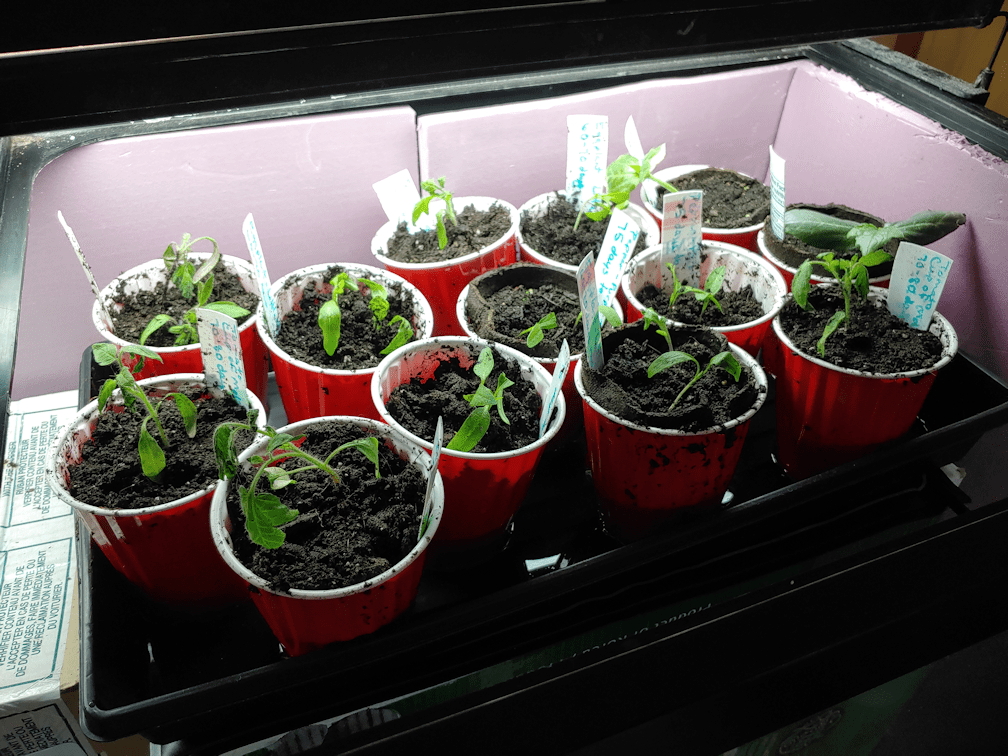
The first solution was one that we started doing last year. We have two aquariums that we have been able to convert into greenhouses, of a sort. When we moved out here, we brought our big tank, with a second light fixture to replace the kit light. Both work just fine, and provide adequate light for starting seeds.
The corner of the living room the tank sits in gets cold, so we added rigid insulation against two walls for extra protection. We were also able to get a warming mat to place under seed trays of things that needed extra heat. Since the lights can’t be raised or lowered, we used cardboard boxes under the seed trays to adjust the height, with new plantings closer to the lights, and larger ones lower down, rotating and adjusting as needed. We built frames with hardware cloth to cover the top of the tank, which both protected the seedlings from the cats, but also allowed more air flow.
This above picture was taken with the hardware cloth covers removed for access. As you can see from the bedraggled seedlings, we didn’t quite manage to protect them from the cats. More on that later.
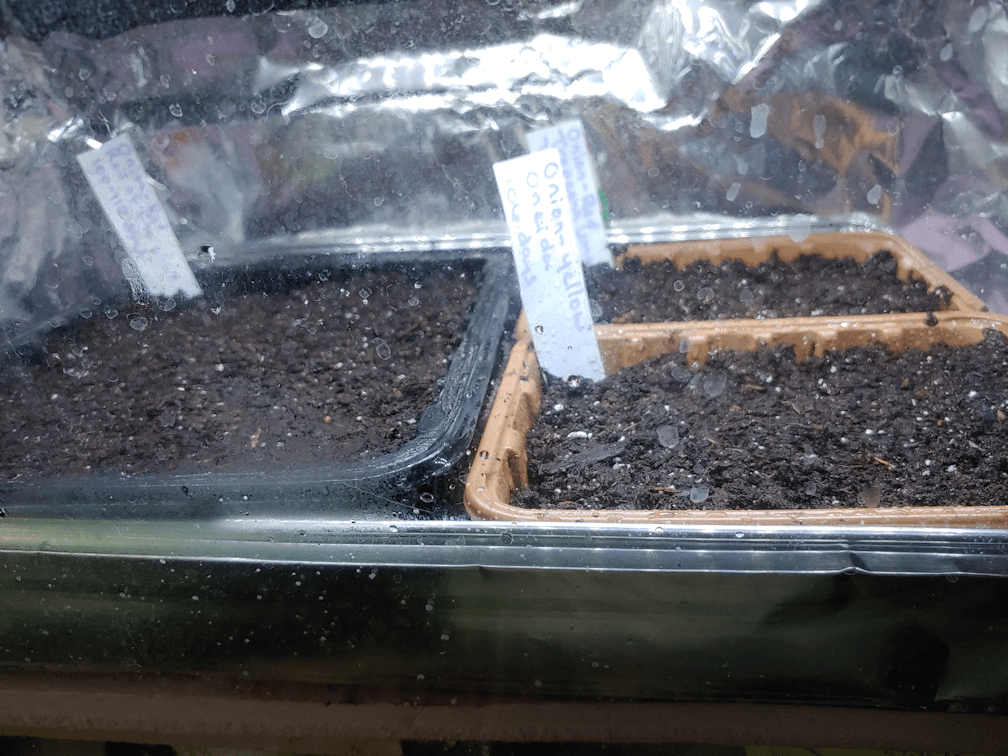
The other tank is much smaller; just a 20 gallon tank. It, too, tended to get chilly, plus the light it came with was not as bright as having two lights, as with the large tank. It has insulation on three sides to protect from the chill walls, which also got covered in aluminum foil to reflect the light.
When we first started using this tank the previous year, we used the original lid it came with. The cats were incredibly determined to get at the trays below, and were able to reach through the opening for the filter, no matter what we used to block it, completely destroying the trays below. This year, we found some window screens in a shed, and used one of those as a lid, weighted down with hand weights. We removed the light from the bottom of the original lid and attached it to a foil lined piece of rigid insulation, and simply set it on top of the window screen. The cats still sometimes managed to knock the weights around and displace the screen but, over all, it did keep them out.
The problem with both tanks, but especially the little one, was air circulation. For that, we used a tiny fan we found in one of the basements while doing clean up. We could put it right into the big tank, or on top of the hardware cloth covers, aimed downwards. For the small tank, we could just set it on the screen, also aimed downwards. Ultimately, though, we used the small tank as little as possible.
We had an awful lot of seeds to start indoors, however. Way too many to fit in the tanks. Since the seeds needed to be started at different times, we could start the earliest ones in the tanks, then rotate them out when the next seeds needed to be started.
The question was, rotate them out where?
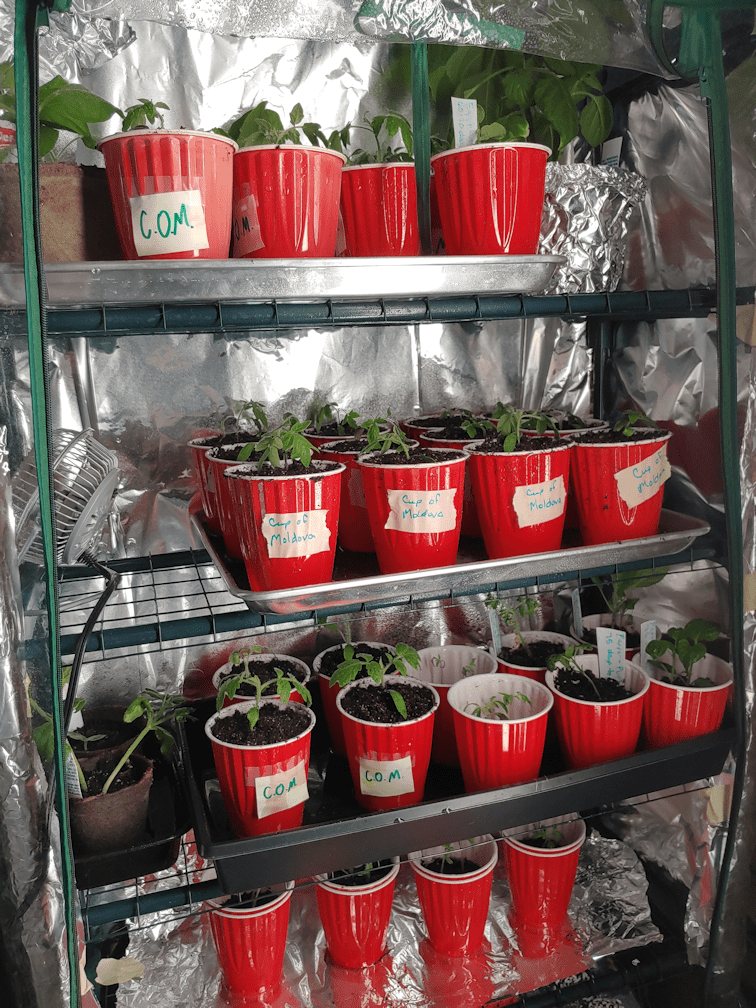
One of my daughters had bought a mini greenhouse for me the year before, so we brought that into the living room. We also bought a long, narrow, LED shop light to illuminate it better. That worked out well enough that we later bought a second one.
We set it up as close to the window as we could, on a chair to catch more light. The only way we could use the light, however, was to hang it from a plant hook in the ceiling above, so that it rested on the chair as well, oriented vertically.
The cats were absolutely determined to get into it!
They managed to squeeze in from under the chair, so we tried taping the plastic cover to the chair.
That wasn’t enough.
We added pieces of cardboard to block the spaces they were squeezing through.
It… mostly worked.
In the end, it was a combination of taping the bottom, the cardboard, and covering the back and sides of the frame with aluminum foil – which also helped reflect light onto the seedling better.
They still managed to get in.
I came out one morning and found cats had somehow squeezed through one of the zippers, pushing it open more, and rolled all over a couple of the trays.
It was such a disaster!
We did managed to save some of the seedlings, but not all. Thankfully, we had seeds left for some of them and were able to start over.
We were eventually able to keep the mini greenhouse sealed up well enough to keep the cats out, but it meant keeping the plastic cover on and closed up at a time when the seedlings didn’t need a cover. This meant no air circulation in there at all. Even so, there were times when a cat or two managed to get in, and try to eat some of the seedlings!
I was able to rig the little fan up inside the mini greenhouse, aimed at the walls in such a way that the air flow would be pushed upwards and around the whole space.
That little fan got one heck of a work out!
So we finally got that working, but there’s not a lot of space in between the shelves. Before long, some of the seedlings began to outgrow the mini greenhouse. They needed to be moved out, and the only place we could move them to was the sun room – but we had to wait until it was warm enough!
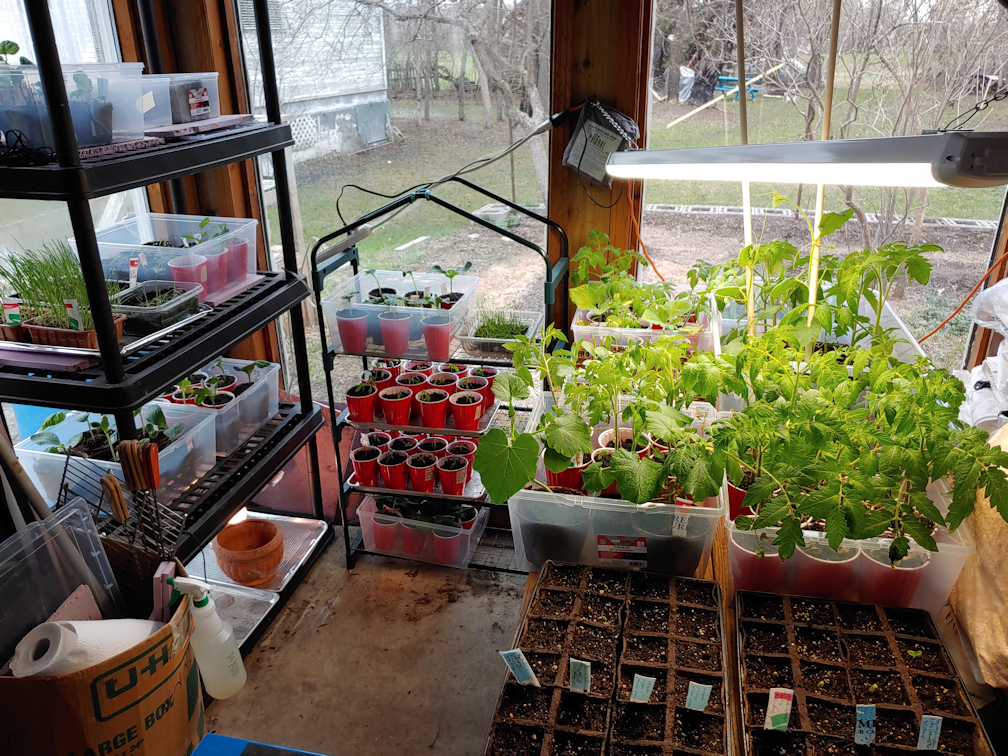
Eventually, we were able to move the largest seedlings onto shelves in the sun room, while other seedlings got rotated into the mini greenhouse, and newly sown trays were set up in the aquarium greenhouses. We had our seeds organized by when they needed to be started, with the earliest started 10 weeks before our average last frost date, then 8 weeks, 6 weeks and finally 4 weeks.
We still ran out of space.
In the end, we set up a surface to hold seedlings over the swing bench, and eventually we could move the mini greenhouse to the sun room – and finally take the cover off! The second shop light was hung above the plants over the swing bench, and we eventually hung the one from the living room on the inside of the shelf.
For a sun room, the sunlight doesn’t actually reach far into the room.
There were so many things that needed to be started indoors! In fact, most of what we were growing needed to be started indoors, with only a few things that needed to be direct sown.
That’s not really going to be changing, so we need to figure something better out. How do we provide the seed trays and seedlings with the light, air flow and space they need, while also protecting them from the cats?
Well, the girls and I have been talking about it, and the only real solution we have is to find a way to keep the cats out of the living room completely, and turn the living room into a plant room.
The question is, how?
There are floor to ceiling cabinets between the living room and dining room. On one set, the living room side is completely covered. On the other, there is a “window” at one shelf that allows access from both sides. It’s a favourite lounging place for David! Between the cabinets is an open space somewhat wider than a standard sized door for access between the two rooms.
The only way to prevent the cats from getting into the living room is to build a barrier in that space, with a door in it, plus another barrier to cover the “window” in one of the cabinets.
Barriers which need to be strong enough to withstand cats trying to get through, yet still be easily removeable.
One of my daughters has drawn up plans for a barrier with a doorway, while the “window” will just need a simple rectangular frame to fit the space. It’s basically going to be all wooden frames and hardware cloth.
Unfortunately, we’ll need to actually buy the lumber for this, and lumber is extremely expensive right now. There is nothing in the piles of salvaged lumber in the sheds and barn suitable for what we have in mind.
It’s something we’ll have to figure out soon. Some things, like onion seeds, could be started as early as January. February at the latest. Honestly, I just don’t see how we can get the materials and build the barriers that quickly. We could start off using the large aquarium, which might give us until March to get it done, but… I’m not very hopeful.
It would be a lot easier, if the cats weren’t so absolutely determined to destroy the seed trays!
If you’re going to have someone invade your space while you’re in the bathroom, you can’t do better than David.
He loves that sink.
He fills that sink!
What a chill, laid back, precious boy!
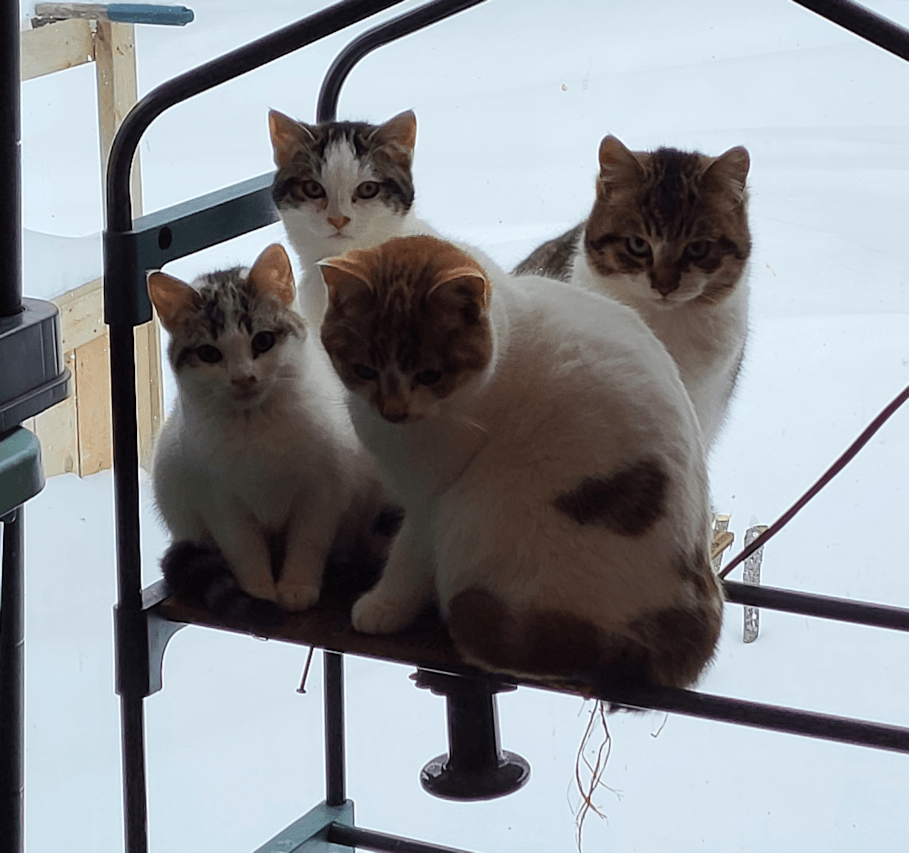
Then there’s these guys.
By the time I’m done my morning rounds, the outside cats have finished eating and are settling into their favourite spots to hang out. The littles just love sitting on top of the board the heat bulb’s fixture is attached to! They don’t hang out under the bulb, which you’d think would be warmer. They like to be above it!
While doing my rounds, I did a bit of shoveling, but the snow is deep enough, we’re going to have to clear the driveway. Not because it’s too deep to get out, but because I don’t want it to accumulate too much the next time it snows.
We’re supposed to get more snow today – 97% chance of precipitation – and a high of -11C/12F this afternoon. The next two days are supposed to have highs of -16C/3F, which still isn’t too bad. It’s the wind that’s going to make it miserable. After that, we’re supposed to start going below -20C/-4F, or close to it, probably for the rest of the year – depending one which app I look at. Another tells me we’ll be around -10C/14F during the week around Christmas, which is about half what my desktop app tells me. Well within the 30 year average, either way, so not a major concern. It’s January and February that are typically the harshest. The AccuWeather website has long range forecasts all the way to March 16 and, according to them, January and February are going to be downright tropical, compared to the last few years! If they’re right, we’ll be warmer than -10C/14F for most of those two months!
I’m not counting on that. 😄
It’d be nice, though.
I was happy to see the road seems to be well plowed. I say “seems to be”, only because everything is so glaringly white, it’s blinding. We’ll have no problems getting out anywhere, if we need to.
With the Christmas and New Year’s holidays coming up, it changes when my husband’s disability payments come in. CPP Disability, which typically comes in just a couple business days before his private insurance payment, will be coming in on the 21st. Which means (weather willing) that’s when I’ll be making a trip to the city for what will not only be our last Christmas dinner shop, for the fresh things we won’t buy in advance (we don’t really buy gifts anymore), but it will be our first large shop for January.
I’m not looking forward to shopping so close to Christmas, but it does mean we will probably not need to do any sort of major trip again until next year.
Okay, it’s that time! I’ll be working on a serious of posts, going over how our 2022 garden went, what worked, what didn’t, and what didn’t even happen at all. This is help give us an idea of what we want to do in the future, what we don’t want to do in the future, and what changes need to be made.
2022 saw us making some significant steps towards our perennial and food forest plans. This included getting nitrogen fixing berry bushes that will also act as privacy barriers and wind breaks, and annuals that are known to easily reseed themselves and can be potentially treated as perennials.
Let’s start with the berry bushes.
The majority of what we got in 2022 were silver buffalo berry, which came in a pack of 30 bare root plants.
As you can see by the first picture, they certainly got affected by the flooding! Mostly just at one end, though – around where you can see the old saw horse in the second picture.
We also got a package of 5 sea buckthorn, which were planted along the lilac hedge, to fill in a gap in the hedge that the deer jump through.
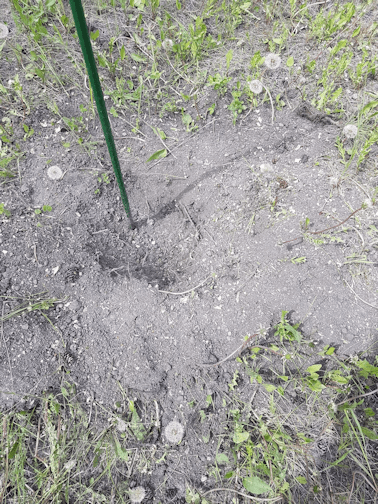
Those are the nitrogen fixers, but we also got a couple of highbush cranberry, which were planted at the ends of the rows of silver buffaloberry, not far from the sea buckthorn. Unfortunately, one of the cranberry saplings got chomped by a deer.
Twice.
That sapling now has the sawhorse over it, to protect it.
The deer seem uninterested in any of the other saplings.
Unfortunately, of the 5 sea buckthorn, one transplant didn’t seem to take at all, and another died soon after. A third got broken somehow and never recovered. So we are down to just two sea buckthorn.
As for the silver buffaloberry, they all seemed to survive. We might loose one of them, but that’s my fault. While I was weeding around them, I accidentally pulled one up. I replanted it immediately, but we won’t know if it survived until next year.
Conclusion:
I’d say our first food trees did okay, for their first growing season here.
We will need to get more sea buckthorn, but we were going to do that, anyhow. Sea buckthorn requires 1 male plant to pollinated up to… I think it’s 5 female plants. The problem is, there’s no way to sex the trees until they are at least a few years old. It’s entirely possible all the saplings we got were female. We were planning to get more later on, which would increase our chances of having both male and female plants.
With so many silver buffalo berry, even if we loose some, there should still be plenty to have the privacy barrier they are partly meant to be.
Now, if we can just keep those two highbush cranberry alive, that would be a good thing!
Thanks to getting the branch pile chipped this summer, we also had plenty of wood chips to place a thick mulch on the carboard around the berry bushes. That should help them a great deal.
It will take a few years before we know how well these do. They are all supposed to be prolific berry producers. If it turns out we don’t like sea buckthorn or silver buffalo berry, they will still serve to help feed the birds, and as nitrogen fixers, privacy screens and wind breaks.
As for increasing our food forest, we currently have two different varieties of apple trees on order. We have a lot of crab apple trees, but we’ve found only one of them tastes good. The very small apples are good for making vinegar and hard cider, plus we have made apple sauce with them. There was a second crab apple tree that had tasty apples, but it seems to have died over the summer.
We’ll have to cut down others that have either died, or have a fungal disease. We will likely end up with just two crab apple trees in the row along the main garden area. Those will be able to serve as cross pollinators that the eating apples we ordered will need.
Also on order is a pair of mulberry bushes specific to our zone, which will arrive in the spring, about the same time as the apple trees. Little by little, we’ll be adding other cold hardy fruit trees, such as plums and pears, but we really need to get started on planting nut trees, as those can take a decade before they start producing.
Speaking of which…
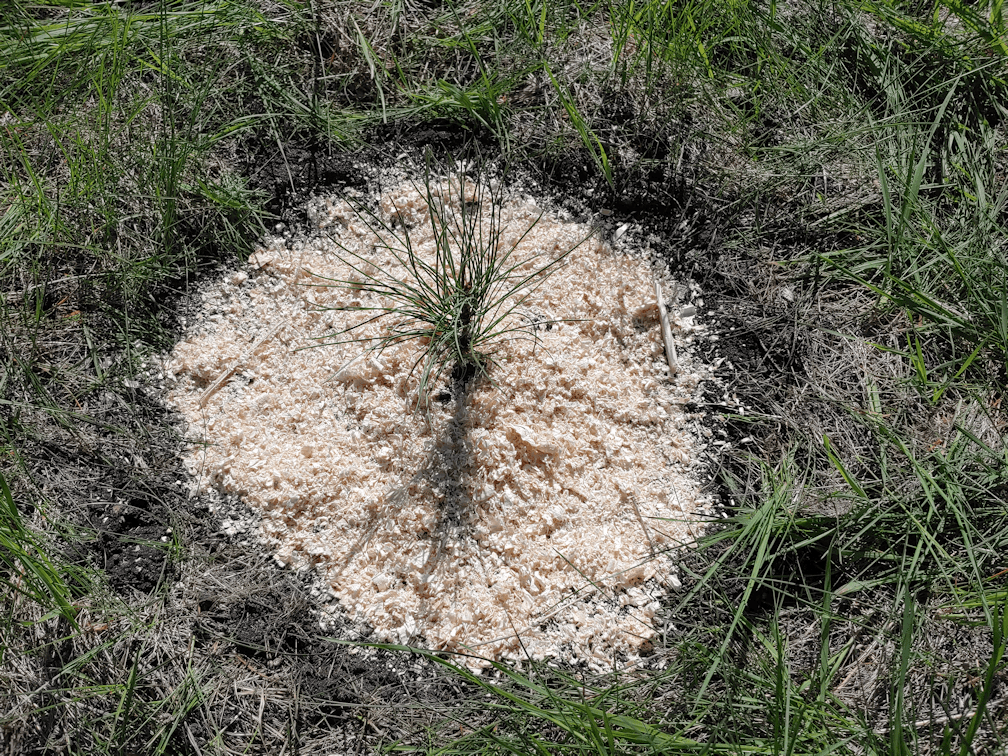
We also planted 6 Korean pine, in the outer yard.
Of the 6 we planted, one promptly got dug up by something. I found the seedling and replanted it, but it did not survive. After that, I picked up some dollar store picnic protectors to put over them. The white fabric made them easy to see, too.
Over the summer, one other seedling died, so we are now down to four. They started to get too tall for their covers, so I used chicken wire, sprayed with orange marking paint for visibility, to create larger protective cages for them. My mother gave us an ash tree she’d grown from seed, and that was planted in one of the spots where a Korean pine hadn’t made it, also with a chicken wire protector around it.
Conclusion:
With the Korean pine, loosing 2 out of 6 is not a major concern. One mature tree would be enough to meet our needs. Anything beyond that is gravy. It’ll be a few years before we really know how they do. These are 2 yr old seedlings, making 2022 their 3rd year. I’ve read that they grow slowly for the first 5 years, then suddenly start getting huge. They are still considered a slow growing tree, and we’re looking at another 6 years before we can expect to harvest pine nuts.
These trees can potentially reach 30 ft wide and 60 ft high, which meant we had to plant them far apart, and take into account other ways we use the area – such as keeping a vehicle sized lane open to access the secondary gate. Over time, we will probably plant other nut trees in the area, as many of them have a chemical they release into the soil, so they have to be planted well away from our vegetable garden and fruit tree areas.
This is all long term stuff. Let’s take a look at the short term stuff now!
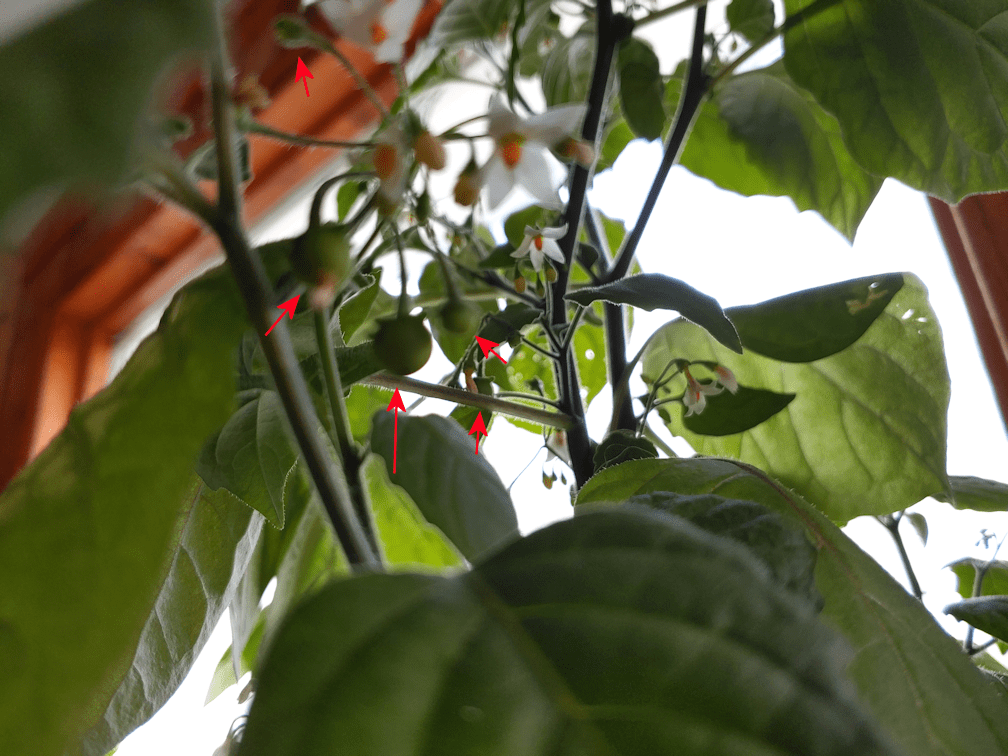
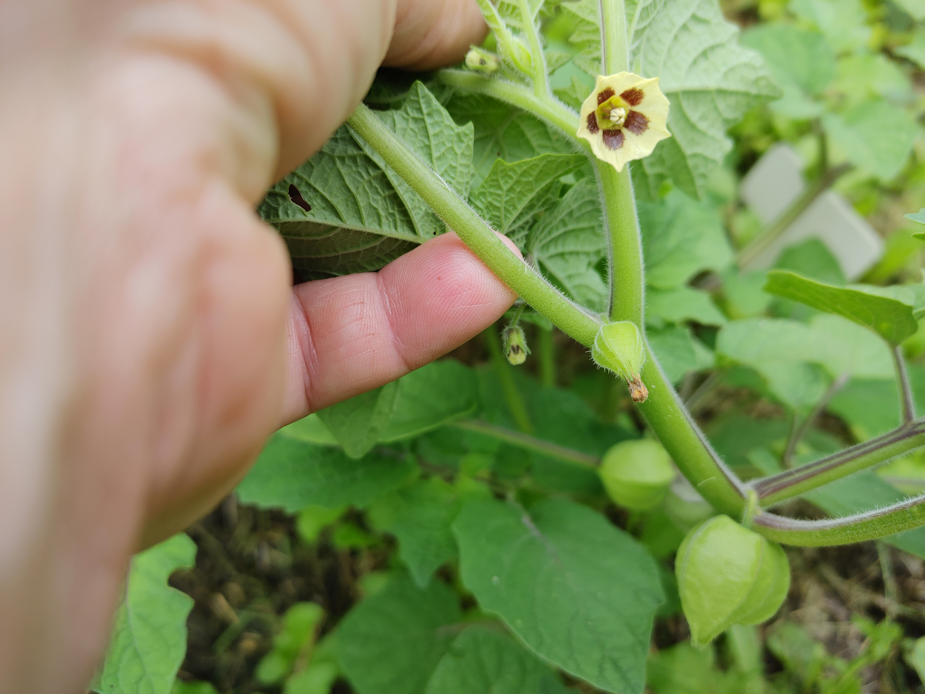
This year we planted Aunt Molly ground cherries, and Wonderberry.
The ground cherries are something we’ve grown in containers on a balcony when we were still living in the city, so we at least knew we like them. I’ve seen this on lists of things not to grow, because they reseed so easily, but for me, that’s a bonus.
The Wonderberry is something we’d never grown before, but they were also described as being something that reseeds itself easily, and comes back year after year. We had never tried them before, but the berries are supposed to be good for many things and, if it turned out we didn’t like them, they would still be a good food source for birds.
Which meant that, for both of them, we had to consider planting them in locations where we could allow them to come back, year after year.
The Result:
Based on research, we started the Wonderberry indoors quite early. They were among the seedlings that got damaged by cats and had to be restarted. In the end, we had three plants that could be transplanted, and they actually were doing a bit too well!
The Wonderberry quickly became too large for our indoor growing spaces, including the plant shelf we set up in the sun room. They ended up having to be on another shelf on the side, where there was nothing above to constrict them. They were blooming and forming berries before we could transplant them! We put them around the stone cross in the yard, after pulling up the invasive bell flowers as best we could. Hopefully, the Wonderberry will crowd out the weeds, instead of the other way around!
The ground cherries were planted in a new bed near the compost ring. I had concerns that the transplants would not make it, as the ground was so incredibly saturated. Make it, they did, and they thrived in that location! They got so big that they could barely hold themselves up. After high winds knocked some down, I had to set up supports on one side. They kept right on growing and blooming, and setting fruit.
Conclusion:
After transplanting, the Wonderberry seemed to take a while to recover, and they never got much bigger. However, they continued to bloom and produce berries until the frost finally got them.
The berries themselves are… not anything special. They didn’t live up to their descriptions. They were surprisingly prolific, considering how small the plants remained. We were fine with eventually leaving them to go to seed, and we shall see if they come up again in the spring. The only problem is their location: I kept forgetting they were there, when I was weeding and watering! So they were a bit neglected. I think they can handle that all right, though!
The ground cherries, on the other hand, were amazing! They got very large, and started continuously producing so many flowers and berries! The plants got so thick, it was actually difficult to reach and harvest the berries. Mostly, I picked what had fallen to the ground, as I knew those would be ripe. Ultimately, though, I just let it go, so that more could fall to the ground to grow next year.
If they do start growing, I want to put in a support structure using some horizontally placed 4″ square fence wire we found, to help support the plants as they grow taller. In fact, I might put two layers of the wire supports, given how tall the plants got!
These berry bushes, whether shrubs or annual plants, are all part of plant to feed not only ourselves, but birds and even the soil. I think we got a good start on the whole thing. This is definitely an area that requires long term planning, and careful decision making. As much of a problem the flooding was, it did give us information that will be quite useful as we make these decisions.
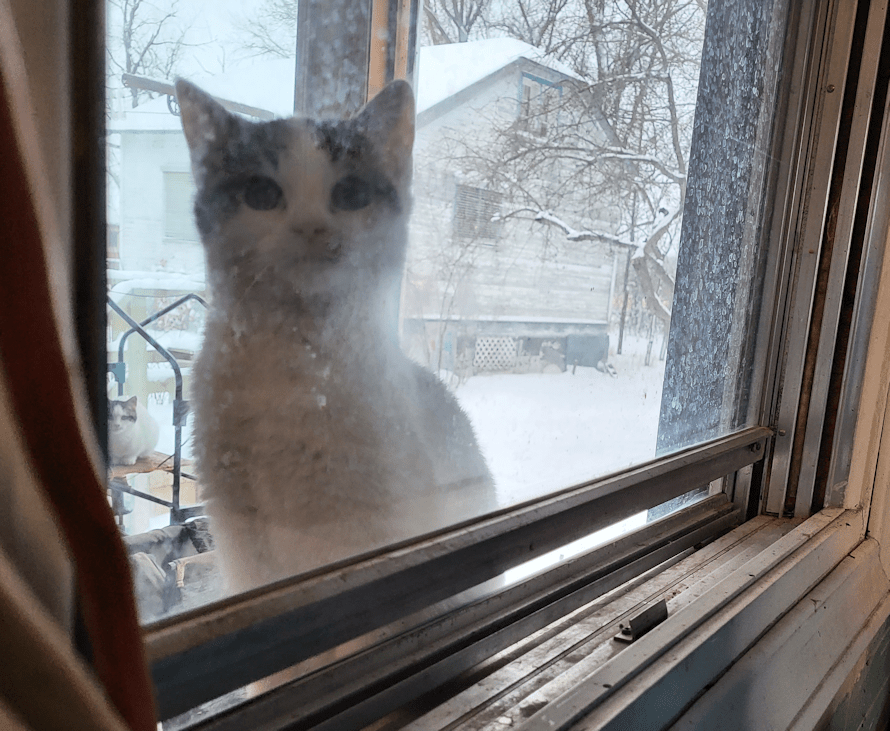
I had a little one peeking, while I was adding lysine to the kibble for the outside cats.
The ledge on the outside of that window is not only quite narrow, but at an angle, so that snow and rain would flow away, back when this was an outside window. Only the smallest of the kittens can sit on there without falling off!
I just got some updates from the cat lady. She’s still got some of our littles as they are being treated before going to their forever homes (except Muffin, who is staying with them). She had taken them to the vet today for an exam, and they got treated for ear mites. They were supposed to be checked for ear mites while they were being spayed, but that didn’t happen! The mites were very deep in the ears and difficult to find.
Princess, however, had a surprise for everyone.
The vet pulled out a small piece of metal. About the size of a pellet. The ear drum needed to be sewn together. Apparently, she’s been deaf in that ear, all this time. She can probably hear now – or at least will, then it’s healed up and no longer packed.
She exhibited no signs of pain and had no balance problems. The only reason they looked in her ear at all was because she was there for an exam. With Princess, the vet’s reaction was “where are the ear drums?” !!! The vet thinks it’s been there for months. Princess is the youngest of the kittens the cat lady took in. I’m guessing she was born in June, but we don’t know for sure. Which means she may have had that in her ear for most of her life!
We’re just flabbergasted. For a piece of metal to get into her ear is weird enough, but for it to get so deep into her ear that it damaged her ear drum? The vet wondered if she’d fallen on something metal and a small piece broke off. With yard cats, who knows? There is just so much stuff they can get into, all over the place.
The people that are adopting her have been informed. They will monitor her and take her to their own vet for follow ups.
It does mean we’ll likely have to treat the inside cats for ear mites, too. There isn’t anything we can do about the outside cats. Mineral oil in each ear for 10 days will kill them.
We’ll need to get more mineral oil. 😄
So that is our weird and rather shocking news of the day!
In other things, we were able to get at least some shoveling done, before the snow started to fall again. From the beeping sounds I’m hearing outside, the plows are out, which is good. From what I’ve been hearing from friends online that live in the area, the highways are pretty dangerous right now.
Okay, it’s that time! I’ll be working on a serious of posts, going over how our 2022 garden went, what worked, what didn’t, and what didn’t even happen at all. This is help give us an idea of what we want to do in the future, what we don’t want to do in the future, and what changes need to be made.
This is our second year for the purple asparagus. We should have one more year of letting them establish themselves before can we start harvesting anything.
I’d read that strawberries are a good companion plant for asparagus, so we bought some transplants this spring. Eventually, we plan to have a lot more strawberries as part of our self-sufficiency goals, but this was just a start. I hoped that we would be able to use runners to expand our strawberries next year.
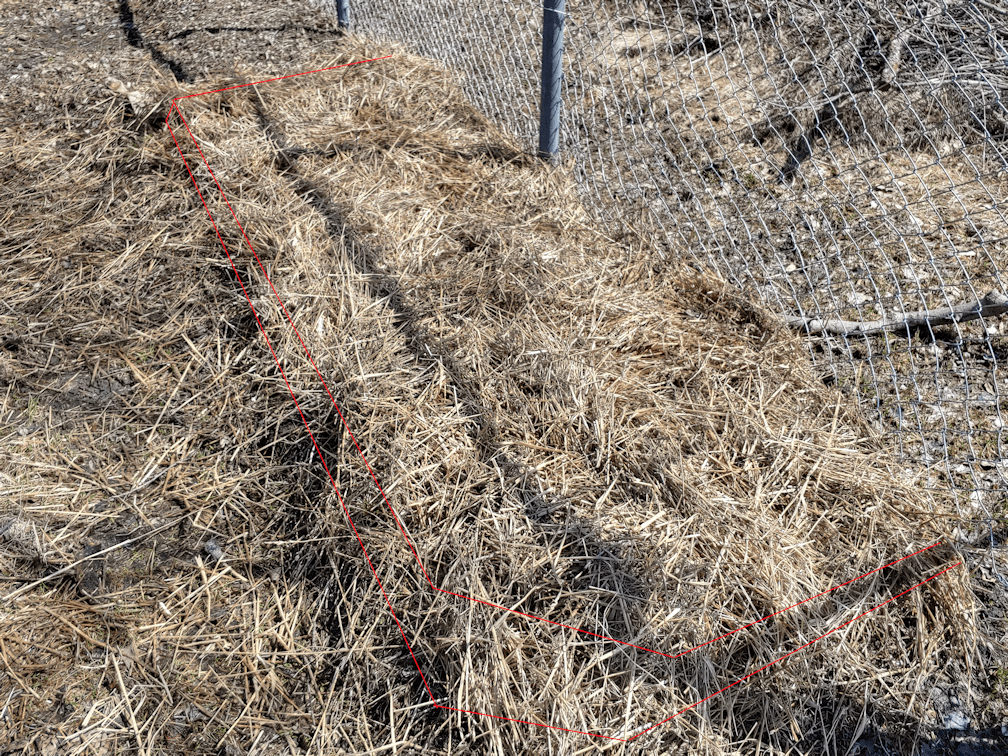
I also snagged a package of 10 bare root, white strawberries as a spur of the moment purchase. We planted those in a new bed along the chain link fence, where the potato grow bags had been the year before.
The Results:
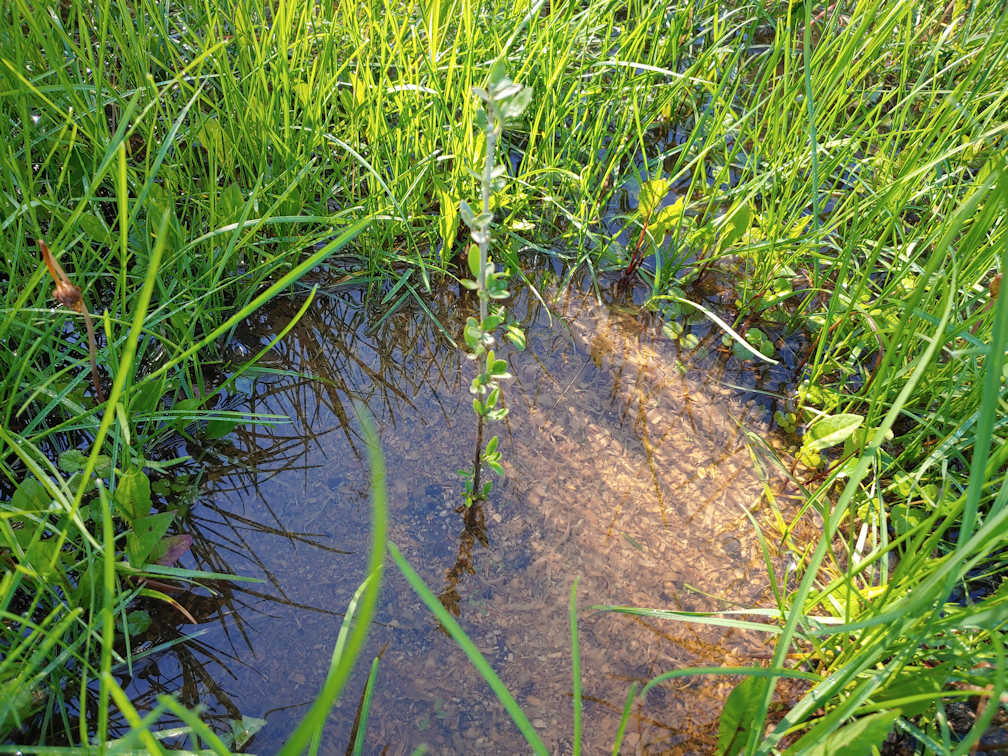
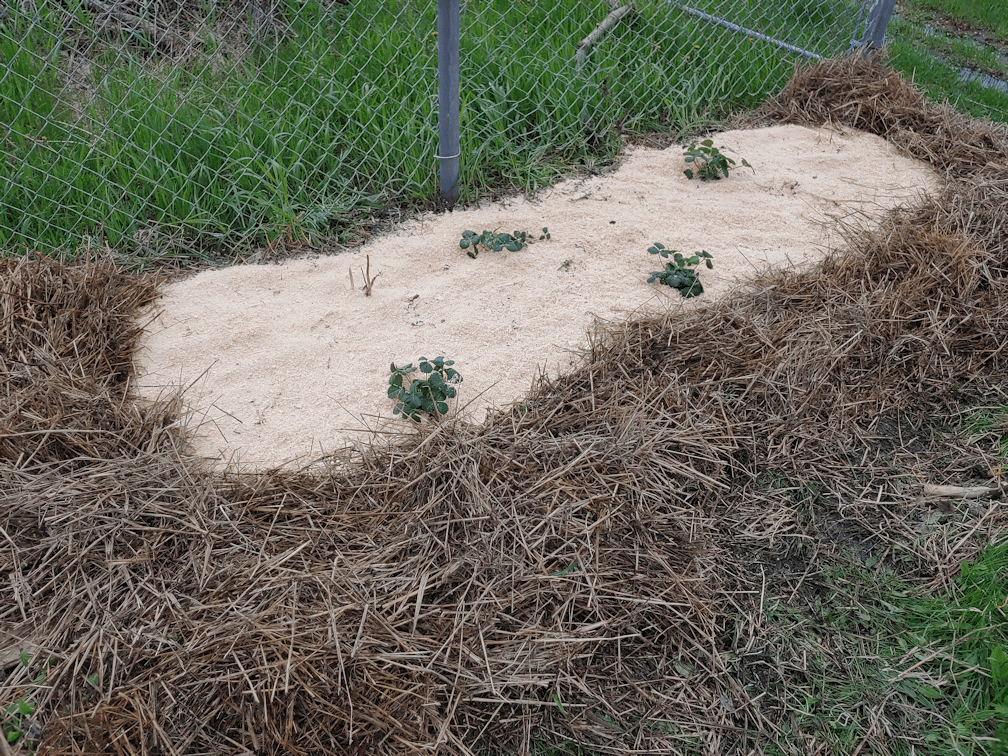
The asparagus and red strawberries may have been in a low raised bed, but the asparagus crowns get buried quite deep, and that bed ended up affected by the “moat” that formed around the garage with this spring’s flooding. (click on the images to see them full size)
The asparagus bed had been well mulched for the winter. When we transplanted the strawberries, the straw mulch was moved to around the bed, and wood shavings were added for a lighter mulch on top of the bed. That was done in early June and when the straw was moved, we could see that some asparagus spears were starting to make their way through the straw.
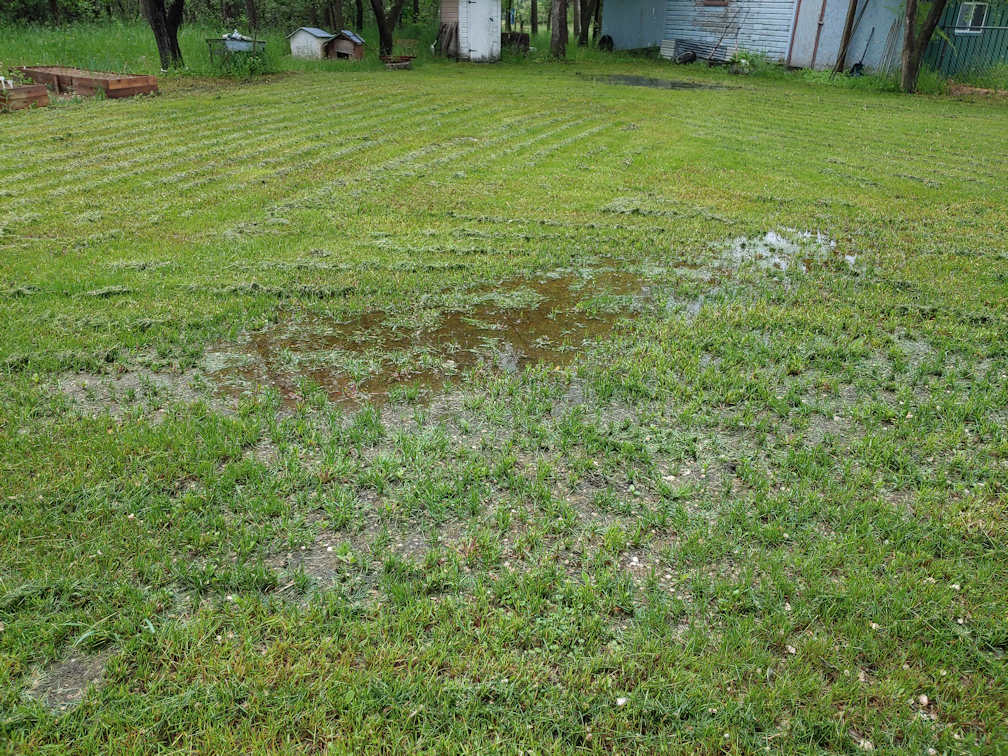
Then the flooding happened. I don’t think I’ve ever seen standing water that close to the house before! It’s hard to tell in the picture of the flooded yard, but the path around the beds at the chain link fence were filled with water, too.
Where the white strawberries were planted, however, was high enough that it wasn’t affected by the flooding in any significant way.
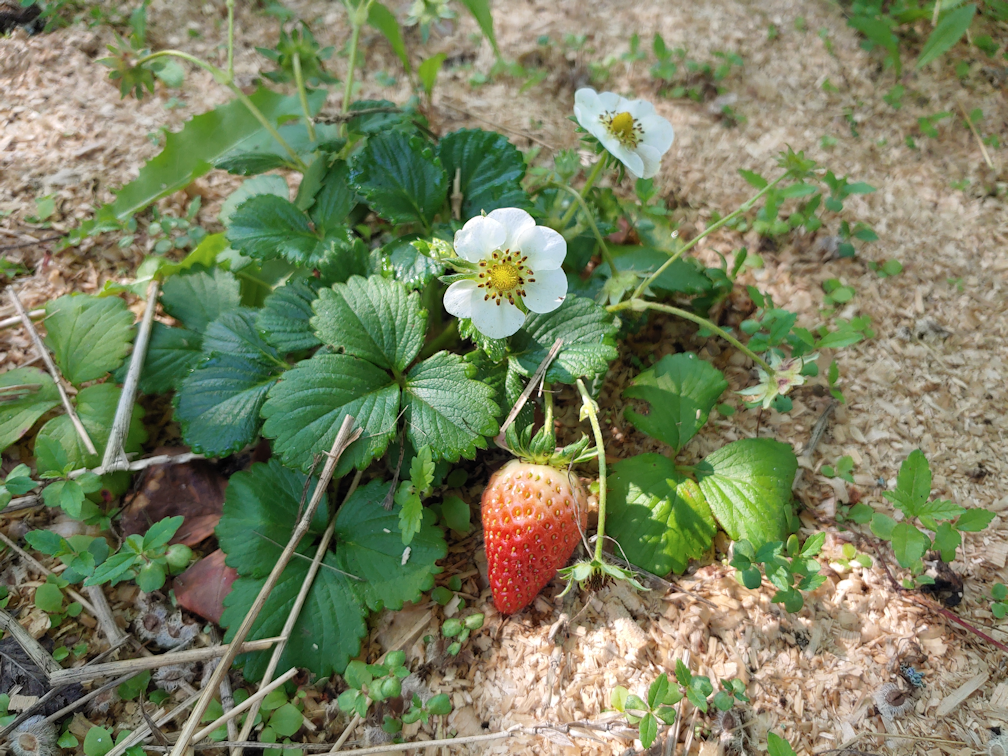
We did get a few red strawberries, but most of the berries ended up pretty misshapen and didn’t fully ripen. They just did not do very well at all. Lack of pollinators may have played a part in that.
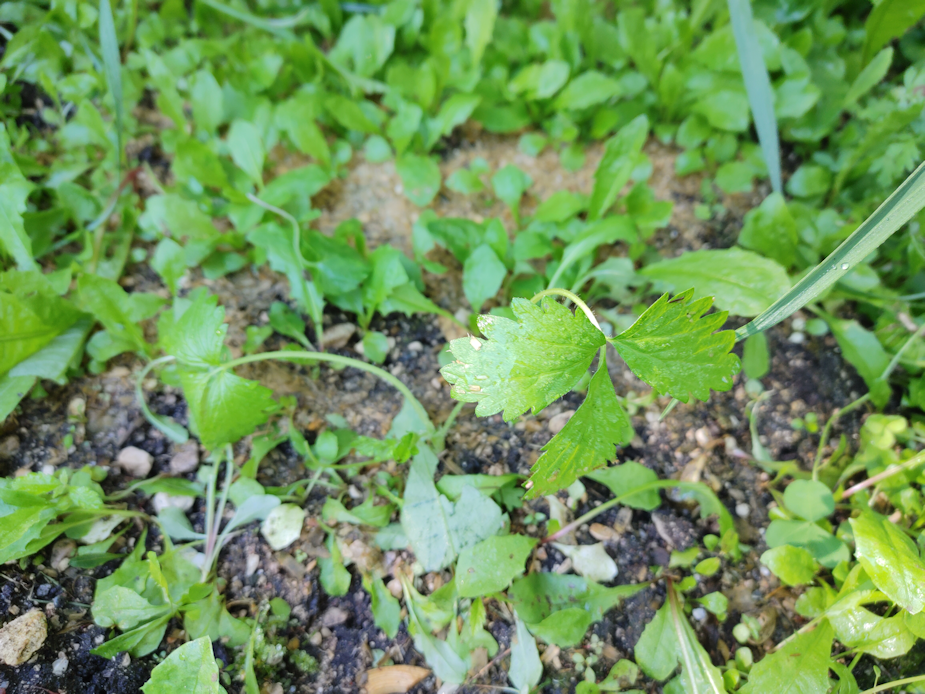
As for the white strawberries, I thought we might have had some start to grow, but what I thought was a strawberry turned out to be a local weed that has leaves similar to strawberries. Not a single white strawberry grew, and I don’t really know why.
Conclusion:
With the asparagus, we are looking at 20 years of production in one place, so it’s not like anything is going to change, there – as long as they survive! There were fewer spears this year, than in their first year. I suspect that they have been set back at least a year, by the flooding.
Part of the plan had been to get more asparagus crowns every year, with both green and purple varieties, but that just didn’t happen for 2022. Finding a spot that can be given over to something for at least two decades is always a challenge, however with this spring’s flooding, that just wasn’t going to happen. We will have to keep in mind what areas so the most water collecting, and make sure to avoid them.
As for the red strawberries, the bed has been mulched, so hopefully they will survive the winter, and we’ll see better production next year.
The white strawberries were a complete fail. I would still like to try them again, but will likely order a different variety from somewhere else.
Strawberries can be planted under other things as a productive ground cover, so we have more flexibility when it comes to deciding where to plant them. We could order the roots in packages of 25, to be shipped in the spring. I’m thinking of getting at least one 25 pack, and planting them around the Silver Buffaloberry. Something we still have to decide on.
… while sitting at my computer, this is what I often see.
She loves that spot!
The problem is, other cats like that spot. Especially Leyendecker. Every now and then, he’ll go up there and, even if he’s just lying on the lower spot beside her, she starts stressing out and backing off – and has fallen right off the shelf, several times!
Silly Anxiety Bear.
Ginger has gotten very difficult to get pictures of! If his head is anywhere near my hands, he will grab my hand and pull it to his head, so I can scratch his ears for him, and he doesn’t care if there’s a phone in my hand, as I try to get his picture! 😄
The snow has continued, off and on, all night. There’s about 6 inches/15cm in most places. Very light and fluffy snow, but deep enough that it’ll be worth breaking out little Spewie to clear the paths and driveway. By tomorrow morning, we’re supposed to get another 5-10 cm/2-4 inches of snow.
We’re at -7C/19F right now, and are expected to get only a degree warmer, with one more relatively mild day before the temperatures start to drop. We’re at the edge of a large system that’s slowly spinning counter-clockwise, and most of the severe weather is at the south end of our province, and in the US.
At times like this, I really appreciate that our “job” is to take care of this place, and we don’t have to commute anywhere.
Actually, we’ve got it pretty good. A friend of ours is on the East coast, and they got hit with a major storm and no power. As I write this, they still don’t have electricity! Thankfully, they have a fire place to keep warm around, and are in an urban area, so they can drive to places that do have power, to recharge their devices, have a hot meal and stay warm!
We’ve been getting a gentle snowfall all day yesterday, and it’s continuing today. It is supposed to continue for the next three days, after which the temperatures are supposed to drop quite a bit. Nothing unusual for our region, but it’s going to be when we’ll get a good idea of whether or not the new roof will make a difference in how cold it gets upstairs. Looking at our 30 year records, on this date we reached a record high of 6C/43F in 1997 – and a record low of -36C/-33F in 2013!! So I’m quite content with our current -2C/28F.
The outside cats don’t seem to mind it, either!
Thanks to the cat lady’s donation of wet cat food for them, I’m still doling out a large tin of cat food, with lysine mixed in, twice a day. After I put the last and largest amount of it in the tray inside the cat house for the bitties, the bigger kittens are quite content to clean the bowl and spoon for me!
Yesterday, I counted 27, including the bitties. This morning, I “only” counted 23. I couldn’t see the bitty tuxedo in shadows, so I’ll just assume the head count was actually 24. 😁
As for the inside cats, Marlee is still doing very well. When the girls come in, she’ll go right over for pets. With one of my daughters, she really likes to hop up on the bed and start rolling around, showing us her belly.
Which had been shaved! When the cat lady trapped Marlee and was finally able to get a vet to look at her, one of the things they did was see if she need to be spayed. She had already been spayed, but had no tattoo, so along with getting other basic treatments, they gave her a tattoo. The cat lady didn’t mention they’d shaved her belly in the process, but there is a very distinct area of shorter fur still growing back. It’s a reminder of just how short the time has been, since she was rescued.
She is such a sweet little lady!
She still snarls at the other cats, though. Of course, she’s only been here less than a week, so that’s not much of a surprise!
In other things, the girls and I finally were able to do some decorating for Christmas. They’d hung the tree against the dining room door a while back, before everybody got sick. Since then, the only decorations on it where the berlingot decorations I’d hung up while the glue I’d hung while the tips dried.
Because of the cats, my daughter had to hang the tree pretty high against the door, which made adding the tree topper a bit of a challenge! 😄
Aside from the tree, we added lights and garlands along the walls and cabinets, up near the ceiling, where the cats can’t reach.
I think that’s about all we’ll do for decorating the house. It’s just too much of a pain to try and protect everything from the cats! As it is, during the night, they knocked one of the boxes of decorations onto the floor. My daughter found most of them and put them away, but I found an apple decoration somehow jammed into the toe of one of my snow boots this morning!
The girls and I also had a chance to talk about future plans. For me, it’s getting a chicken coop built and getting chickens as quickly as possible. They, on the other hand, keep trying to delay it until we can adopt out more cats. My daughter is the one that’s been paying most of the more recent vet bills, and we’ve had some very expensive cats. They’re just going on the assumption that if we get chickens, they’re all just going to get sick and we’ll have lots of vet bills. So that’s another objection they have.
When I was a kid, we had lots of chickens. At least 50, probably closer to 100, at any given time. Not once did we call a vet for them. If they died, they died. Very few of them ever got sick. Which is pretty amazing, considering my parents really didn’t make any extra effort to prevent it. We had more losses due to skunks than anything else. I keep forgetting. My daughters are essentially city girls.
One of the main reasons I want to have a mobile chicken coop that is suitable for our winters, rather than just a chicken tractor, is because I want to incorporate the chickens into prepping soil in our gardens for us. They would be excellent for eating up weed seeds, insects and other pests, while loosening the soil and fertilizing it at the same time. For that, I want to be able to move their coop to different locations, and have electric chicken fencing to keep them in place – and most predators out. My daughters, however, are concerned about things like coyotes, the cats, hawks, eagles and owls. So they are thinking of having a completely enclosed chicken yard. Which we would definitely have for the winter months.
So… I expect to be on my own when it comes to getting ready for chickens.
What they are really interested in getting started on is building our outdoor kitchen. My younger daughter and I spent quite a bit of time talking about it, while she sketched things out. We’ve worked out where we want to build it – basically, about where the shed with the collapsed roof is. If we can dismantle that and build it in the same spot, that would be great. Otherwise, right in front of it would be good, too. Among the things we need to consider is that it’s a space free of trees, and where the prevailing winds are. In that location, it’s wind from the south that we’d have to shelter from the most.
One wall will have a multi-function cooking area. We want to incorporate an oven, much like the earthen or cob ovens, where the fire gets built up inside, then the ashes removed for baking and roasting. There will be an area with a grill, and my daughter specifically wanted an area where we can incorporate a wok, both of which would have their own smaller fire areas under them. We will also incorporate a smoker, so smoke from the cob-style oven and under the wok will be directed into the smoker. We’ll just have to make sure we can allow the smoke to escape if we’re cooking, but not smoking anything.
The question is, what will we build all this out of? For the shelter itself, it will likely be a timber frame, and we’ve agreed that a metal roof, with the rafters and any other wood above treated against fire. We plan to incorporate stone a lot – we have so much of it! – but for the cooking area, we will probably hit a salvage yard for bricks. We wouldn’t be able to “harvest” our own stones for that, as what we have is porous and can absorb moisture; it has been known to explode when exposed to heat. It would be great to find fire bricks from a salvage yard, too, but that’s something I’d consider worth buying new. The cooking area would also basically make up one wall, but for the other sides, we’re thinking to have at least half-walls. Likely of stone – again, because we have so much of it!
We’ll need a lot of mortar.
For the top half of the walls, I’d like to have the option of switching between screens in the summer, and wall panels in the winter.
Along with the cooking area, we will have another wall with a work table from end to end. That can be mobile, along with any seating. We’re also going to include a sort of cut-out corner for an open fire pit, too. Something we can sit around and have a nice, sheltered, wiener roast. Our current fire pit is much enjoyed, but over the years, the trees have grown too large, and there are too many branches the sparks could potentially ignite. Winds from either the northwest or the southeast can be quite a problem, too. For that area, we will likely build a gazebo shelter that we can use for things like hanging garlic, or laying out potatoes to cure, and not have to worry about it getting rained on. We’ve used our 10×10 market tents for that, but we want a permanent structure.
Somewhere around the outdoor kitchen, my younger daughter also wants to built a forge for the blacksmithing she wants to do. We found some of my late fathers old blacksmithing tools while cleaning up around the pump shack, but what he used for a forge had been gutted, and no longer had the blower fan that had been in there. Who knows, though; perhaps my daughter can still find a way to use that old thing!
So we were able to hash out some plans and ideas. My daughter is now doing more research on blacksmithing and building a forge, while I’ve been doing more research on building a timber frame shelter, and different ideas for the cooking area. There are actually a few multi-function designs out there – some even incorporating a smoker – but of course there are none with all the stuff we have in mind. Which is fine. It’s the different ways to build them that interests me.
When we’ll actually be able to start building this is the question. We’ll need to start accumulating the materials. Once we know what materials we can find or acquire, we’ll be able to make final decisions on the construction and know which materials we’ll have to buy, as well.
I did find an entire playlist on YouTube with a guy building a timber frame “forest kitchen”, by himself. I’ll be spending some time watching those!
That’s one benefit of our long winters, when you can’t do much outside. It’s a good time for making plans and doing research!