$253.11, to be exact, but the total stock up shop was more. I just didn’t get a picture of the rest.
After my doctor’s appointment was done, I needed to have lunch somewhere. I decided to go to a Subway near the Walmart, which decided the order of the rest of the shopping.
I got a 12″ teriyaki chicken sub and a bottled flavoured water to drink, which came to $20.81
The next place I remembered I wanted to go was the Dollarama. I was looking for some sort of cheap garden fencing to use around the bed with the Arikara squash and bush beans. There wasn’t much left in gardening supplies, though, so the only thing I got in that section was some soft ties for my tomatoes. I remembered to grab a new spatula to replace a broken one, and I also grabbed a small memory foam bath mat, as the ones we have just don’t work out for the space. I also grabbed four of their larger storage bins (which are large for a dollar store, but small for other stores). I need to get more of these, little by little. I’ve decided I need to pack away most of what I have in my room. It is a large room that serves as my bedroom, office and craft room combined, but with the cats taking things over, and particularly with Butterscotch still refusing to leave the room, I haven’t been able to use my craft table as a craft table in ages – and no matter what barricades I set up, some of the cats still keep trying to get to the top of the wall shelf. I’ve got stuff stored up there specifically to keep it safe from cats, but a couple of them still manage to get up there, usually causing quite a mess in the process. When I came home from the shopping today, I found all sorts of things knocked out of shelves and scattered about.
Plus, I need to get rid of the carpet in this room. It’s a sort of felted carpet, and I’ve never seen anything like it, anywhere else. It is a dirt and fur magnet. I’ve talked to my brother and he remembers that the original floor under it is just painted wood – and it was painted about 70 years ago.
So, I need to pack everything away and eventually empty my room. Since the things I’m packing are things I actually want to use, I want to pack them in clear plastic storage bins. I only got four today, but it’s a start. Around Christmas time, places like Walmart get huge inventories of storage bins, and I can wait until the go on clearance after Christmas. The most difficult thing about getting rid of the carpet will be moving my king size bed frame, and the wall shelf.
In total, what I got at Dollarama cost $41.72
My next stop was Walmart, and I got things on two separate bills for two different budgets.
The first one was personal items, which included a new pair of work shoes. My boots finally gave up the ghost and are toast, and I wanted to get steel toed shoes to replace them. This store is still under renovation, so it took me a while to find the men’s work boots, which weren’t moved to the new shoes section yet. I found two styles available in size 9s. The first ones I tried had several boxes on a mostly empty shelf, and there were two price stickers right next to each other, below them. One for $74 and change, the other for $3.
That detail turns out to be important.
Whatever the $3 item was, I figured it was completely out of stock, or moved to the new shoe section. The other pair I tried on were about $10 cheaper. After trying both, I found the more expensive pair to fit better and were more comfortable, so those are the ones I grabbed.
Along with those, I got myself another night down and some personal hygiene items, to go together with the shoe budget, then I got the rest of the stuff.
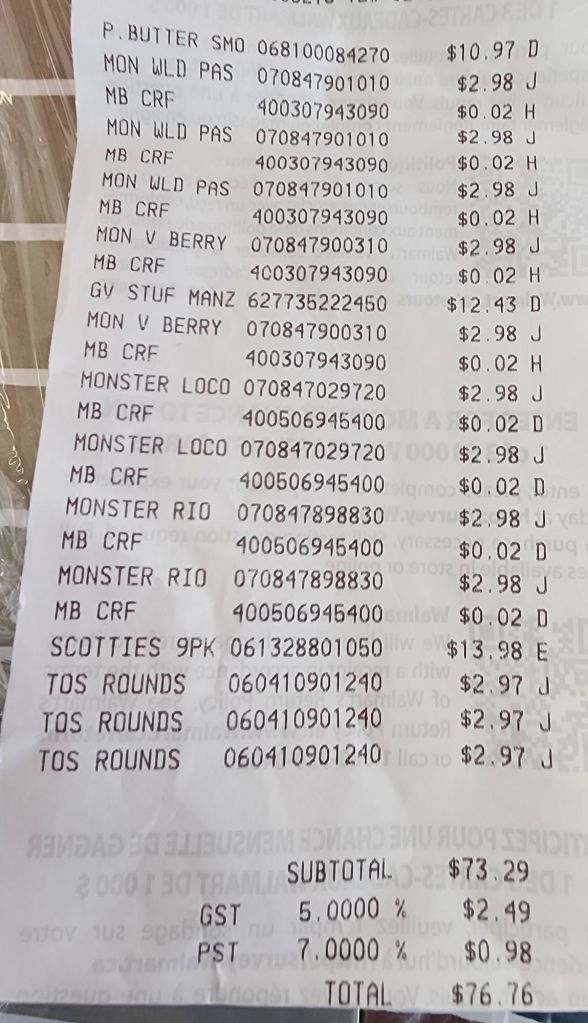
Since I had other places to go, I was not going to get anything that require refrigeration here. I got two big bags of cat kibble and a 9 pack of facial tissues. My husband requested nacho fixings, so I got round tortilla chips and a giant jar of green olives for that. I remembered to grab some peanut butter as well. Then I got a total of 9 cans of Monster for myself and my daughters.
Total cost, $76.76
Oh, my gosh.
I just realized something.
I didn’t get charged for the two bags of kibble!!!! She forgot to scan them!
I’m going to have to go back and take care of that. I just took pictures of the bar codes. They should be able to scan the photos, or manually input the code, and I can pay for them.
I do remember thinking the total was a bit low, but I had already paid for my personal items, and that threw my count off and distracted both of us.
This is why.
Check out my $3 shoes.
Yes. $3.
When she opened the box to scan the bar code on the shoes, she paused, looked at me and said “Three dollars?”
I had no context for what she was saying and must have looked confused when I asked her to repeat herself. She told me, they scanned as $3.
???
I was rather shocked. I told her, I’d seen a tag on the shelf saying $3, but I assumed that was for something else.
She called the cash supervisor over. They compared the number under the bar code with what was on the screen.
They matched.
They compared the number under the bar code on the box with what was on the shoes.
They matched.
Eventually, the cashier was told, if that’s what it scans as, that’s the price!
So I got what I thought was a $75 pair of shoes for $3. My total on that receipt, which I was expecting to be about $120 in total, came out to $45.77
!!!
That cashier asked me if there were more, and I told her there were two more on the shelf. A size 9 and a size 11. Oh, she says… I need a size 11!
I hope she was able to go and take advantage of this. I’m guessing someone made a mistake at head office somewhere and input the wrong price. These weren’t marked as being on any sort of sale.
Once these items were packed into the truck, I drove across the street to the Canadian Tire. The main thing I wanted to get there were litter pellets, but I had a few other things I wanted to look for as well.
I did find the sort of garden fencing I hoped to find at the Dollarama, but wasn’t filling to pay their price for them.
I did grab some more bug spray, plus a couple of Quick Connect hose attachments, one for each end of the hose. The one at had on the metal construction grade hose burst in a heat wave not long ago, and I wanted to replace that, plus I have an extra for the other end. I also got a replacement end for the soaker hose that is the right size; I had managed to fit a larger one on, but the soaker hose has started to leak badly at the connection, so I will try again. I then went looking for a small fan to replace one we’ve got set up in the bathroom window. The ceiling fan in the bathroom stopped working some time ago, then started again, then stopped again… We can’t find a reason why it’s doing that, so we’ve set up a fan to blow the heat and moisture out the window, instead. The fan we’re using was already here when we moved in, and it’s starting to sound like it’s wearing out, so I wanted to replace it. Fans the same size, though, are now USB or battery operated. I found a nice little 7″ fan – slightly larger, but it will still fit in the window quite nicely. Last of all, I got myself a cold drink to have while heading to my next stop.
Total bill at Canadian Tire was $88.59
From there, I went to the Safeway. Not somewhere we normally go; particularly since this location is in the downtown area of this city, though the city is so small, “downtown” is nowhere near as crowded or difficult to drive around as the larger city. The main reason I went to shop there instead of just shopping at Walmart is that they give out gas coupons.
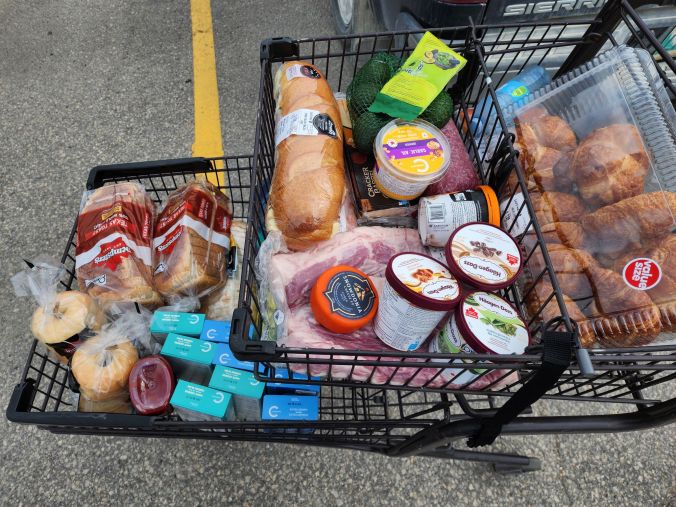
This is what $253.11 looks like – and what got me a 10¢ off per liter coupon to use.
There really wasn’t a lot to get here, since I plan to do Costco tomorrow – or Saturday, if I find I’m not up to it after getting my blook work and EKG done.
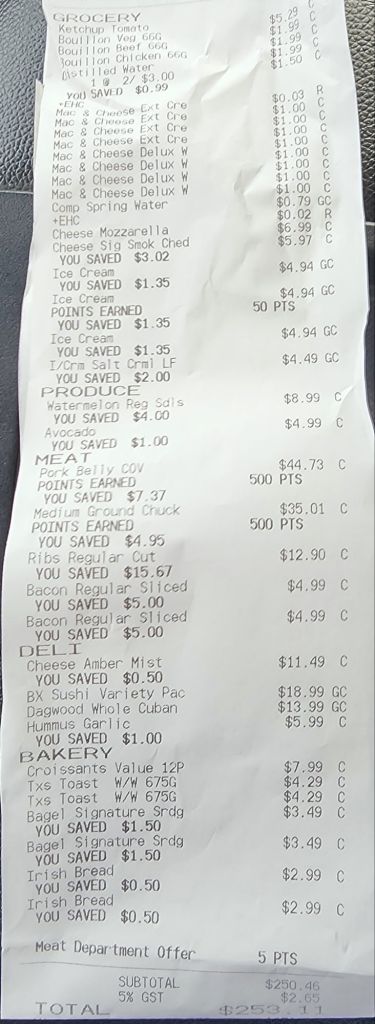
Under “grocery”, I got some ketchup, bouillon cubes in three different flavours, a jug of distilled water (I forgot to get that at Walmart, where I usually buy packages of 4), and house brand Mac & Cheese, four boxes each in two flavours. I got mozzarella and smoked cheddar cheese for my husband’s nacho request. There was a deal on little tubs of ice cream, with both a sale price and a points bonus, so I got one for each of us, in different flavours, including a lactose free one for my husband. Last of all in that category was a large watermelon and a bag of 5 avocados.
Under the “meat” category, I got slab of pork belly that was on sale, plus had a point bonus, as did the ground chuck. I also got ribs and two packages of bacon, all on sale.
Under “deli”, I got a cheese for us to experiment with – Amber Mist, which is made with aged whiskey. For my husband and I to share for supper, I got a massive Dagwood sandwich, while for the girls, I got a fresh sushi tray and, finally, some garlic hummus to go with the nacho fixings.
Lastly, under the “bakery” category, I got a large package of croissants as a treat, two packs of Texas Toast, two packages of bagels and two loaves of Irish bread.
Total at Safeway: $253.11
With the total being over $200, that got me the maximum discount available for a gas coupon at Shell, and there’s a Shell station right next to the grocery store, so that was my next stop. They have pre-pay only, which needs to be done to use the coupon anyhow. I also have my CAA card, which gave me another 3¢ off per liter, so I got $60 of gas at $1.689 instead of $1.819
I was down to a quarter tank at the time, so that still only got me to 3/4 full. I’ll do a complete fill and reset my trip counter at Costco tomorrow.
So… today’s total, including lunch and a few extra items, came to $586.76 A total that is missing the two bags of kibble which, after taxes, should have added another $70 or so.
Oh, I almost forgot. On the way home, I stopped at the general store and picked up a 40 pound bag of kibble. After taxes, that came to $50.40 That came out of a different budget, but brings the total for the day to $637.16
Ouch.
And that’s after some major unexpected savings, like the $3 shoes, along with the missed bags of kibble, too.
*sigh*
The Re-Farmer


