Today, I finally started working on the Christmas decorations I was planning to make with the dehydrated orange slices I’d prepared earlier.
Of course, things didn’t work out to plan! :-D
Do they ever? ;-)
I was going to use cinnamon sticks, plus some little decorations I’d saved from Christmas crackers over the years – they would have been the perfect size – to decorate the orange slices.
I couldn’t find them.
Many of these were collected before we moved, and now I’m second guessing myself. Did I bring them along with my other craft stuff, or did I give them away before the move? I had to pare things down quite a lot for the move.
And yet… I’m sure I saw them since the move, as I’ve had to reorganize my crafting materials a couple of times, since unpacking them.
No worries, though, I decided to use some pine cones I’d gathered from our spruces a while back.
I didn’t have enough to put two on each slice, though. We kept finding them with our feet, around the house, before I discovered one of our cats digging in the container they were in, stealing a pine cone, and running off!
I had enough left for this project, though. I just made sure the biggest cones went on the smaller slices, and paired up the smallest cones on the bigger slices.
Now, I just need to see if the adhesive will work. If not, I’ll break out the hot glue gun, but it’s not like anything is going to stick to dried orange slices very well! :-D
I haven’t decided if I will do more to these or now. I might use a spray adhesive on them, and dust them with ground cloves. It’s more about making them smell unappetizing to cats than anything else! :-D
Leyendecker is undisturbed by human regulations and restrictions! :-D
Normally, our tree would have already been decorated, and the Advent wreath, with its candles, set up.
It doesn’t look like we’ll be able to have a tree this year. The cats just seem to wait until we’re not around, then go after it. The main problem is, there’s really just one place that works well for a tree in this house, and there isn’t any way to stabilize it. At least not without making holes for hooks in places I really don’t want to put holes.
So we’re thinking of using a garland that looks like spruce branches in place of a tree, and focus more on decorating the house.
At least, up near the ceiling! :-D
As for the Advent wreath, I forgot we no longer had candles. There are supposed to be 4 of them. Three in blue or purple, one in pink. One after another is symbolically lit on each Sunday of Advent. A 5th candle, in white and representing Christ, can be included, to be lit on Christmas day.
If I’d remembered we burned away the last of our supply of these candles last year, I would have gone hunting for them long ago. I’d found them at Michael’s before, but outside of boxed sets specifically put together for Advent, it’s hard to find the right colours, this time of year. Michael’s, of course, is shut down right now, along with all the other “non essential” stores. Churches are shut down, too, so there’s another potential source no longer available.
I did have other candles, though. I have a silver candelabra my husband bought for me years ago, that holds 3 candles – and I had kept the candles from the last time we’d used it. They’re gold instead of blue or purple, and only about 4 inches long, but they’ll do. In place of the pink candle, I have a white one. For the Christ candle, I have another white one, marked with a cross, that had been included in our traditional Easter basket for blessing.
Yesterday, I helped my mother do her grocery shopping. Her building is closed off to all but residents and staff, so she had to meet me outside. She wasn’t wearing her face shield, but the surgical mask under her nose again. When I asked why, she ignored me, so I suspect she’s afraid of being hassled, even with the shield. She had to go to the bank, first and had called ahead to make an appointment the day before. She was told she could come any time during opening hours, and given instructions. They don’t allow anyone into the bank anymore. There’s a table set up in the vestibule. Only one person allowed at a time. Not that there’s room in there for more. My mother filled out what she needed, then knocked on the door. When someone came over, they couldn’t even open the door very far, because there was no room with her walker in there.
I waited outside while she sat in her walker. Some guy came by, wanting to go in. After confirming with me that my mother was not waiting in line, but had already been helped, and that I was not waiting in line, either, he read the signs while putting on his mask. He read the “one person in the vestibule at a time”, then asked, “what’s a vestibule?” :-) It is not a word that is commonly used out here!
Then he decided to try and get into the bank.
Yup. Went in, with my mother, and tried to open the locked inner door.
*sigh*
I don’t know what my mother said to him, but I heard him answering “I know that” as he left. :-D
We started chatting about the ridiculousness of it all (seriously; in that tiny space, if the virus were an issue around here, which it isn’t, it’s like they’d created the very conditions it would most likely be spread!), and he started going on about how the reason we were having so many problems was because all the kids are allowed to go to school and spread the bacteria.
Yes. He said bacteria.
Thinking he may have misspoke, I mentioned it was a virus, and he just brushed it off and kept talking about how all these asymptomatic kids are getting everyone sick by spreading the bacteria.
Thankfully, my mother was soon done and I had to help her with the doors. Because, of course, they’re not using the entry with automated doors for persons with disabilities.
*sigh*
The rest of the trip was uneventful, and my mother is now well stocked for a while. I made a point of bringing our folding wagon along, so while my mother unlocked the side door closer to her apartment, I loaded it up and brought it over. She then had to push her walker while pulling the wagon to get her groceries in, then bring it back. If I weren’t concerned about her being hassled, I would have gone in anyway. :-(
Since I was out with my mother yesterday, it was today that I started something for Christmas that I’ve been wanting to try for some time.
I cooked up a baking soda and cornstarch dough. My intention was to make cookie cutter ornaments with it. I have a set of cutters that are meant more for gingerbread house type dough, that make interlocking pieces. Once dry, the pieces can be put together to make a 3D tree, star or reindeer. I had another set of cookie cutters in a variety of Christmas themed shapes.
It didn’t work.
I think I might not have cooked the dough long enough or something, but I cooked it until it was so thick, I couldn’t stir it anymore, so it should have worked. Yet it was way too soft to be able to do anything after cutting the shapes I wanted. After several attempts, I gave up and offered the dough to the girls. They made a bunch of little sculptures, instead, which will take several days to dry.
I guess I’ll just stick with the orange slice decorations I was going to start on while the baking soda dough ones dried.
It’s funny. With having moved so many times over the years, and now with my husband’s mobility so reduced, there is nothing unusual about having Christmas with just the 4 of us. Since we were already living on my husband’s disability payments, we’re used to being extremely fugal. Living in relative isolation, a lot of the restrictions and regulations don’t affect us directly most of the time. Yet, the long tentacles of government overreach is affecting even us. When we do go into town, we’re not allowed to buy anything Christmas related (unless it’s for pets; you can buy all the Christmas themed pet toys you want, but you can’t buy toys for human children), nor books and magazines, most clothing, and so many other things government talking heads have decided are not “essential”. All of this is affecting everyone, as prices for basic necessities, have to go up in response. So people like us and my mother – who at least have incomes, as small as they are – are going to be having a harder time of it. Gas prices are going down again, but there is nowhere to go. Supposedly, the lock down is going to end on Dec. 11, but our premier is already saying it’s not going to be lifted much, and telling people not to get together with family for Christmas, even with the reduced restrictions.
Meanwhile, it’s our seniors in long term care in the city, surrounded by people in PPE, but no family or loved ones, and no activities to help combat cognitive decline or loneliness, that are dying. Not necessarily of the virus, but of starvation, dehydration and neglect. Meanwhile, my mother can’t even find out how her sister is doing; her niece isn’t returning her calls (not sure what’s going on there), and my mother can’t navigate the automated phone system to talk to a human being. I’m not on the list of people they’re allowed to talk to, so I can’t find out for her.
I think I’ll call, anyway, and ask them to phone my mother or something.
Last night, I prepared the dough ball from our previous baking. I was really curious about our bubble!
Seeing this reminded me of a story my mother told me, when I was a child, helping her bake bread.
There was a young couple and, while the husband was at work, the wife decided to bake bread. The only problem was, she’d never baked bread before!
She followed the recipe and set the dough aside to rise.
It wouldn’t rise.
After a very long time, the wife decided she had failed somehow and was feeling quite ashamed of her failure. Her husband would be coming home from work soon, so she decided to hide the evidence by burying the dough in the garden.
It was, however, a sunny and warm day. Some time later, her husband happened to glance out the window and saw what appeared to be a giant white mushroom growing in the garden!
The wife didn’t realize the house was too cold for the bread to rise properly, but once warmed by the sun, it rose quite enthusiastically!
Alas, the poor woman’s secret was out, and she had to explain to her husband why there was a giant bubble growing in their garden. :-D
I was talking to my mother on the phone just a little while ago, and told her about the bubble that emerged from the flour, asking if she knew what it made me think of when I saw it.
She knew exactly what that was!
We got a good laugh over it!
So what did this bubble look like when I dug the bread egg out?
Rather funny, I thought!
Like last time, it was light, with a dried, crisp outer shell, and lovely, bubbly dough inside.
I broke it up into pieces, putting it in a crock with 2 1/2 cups of warm water – the full amount I would be using in the dough – and set the crock into a warm oven with the light on, and left it overnight.
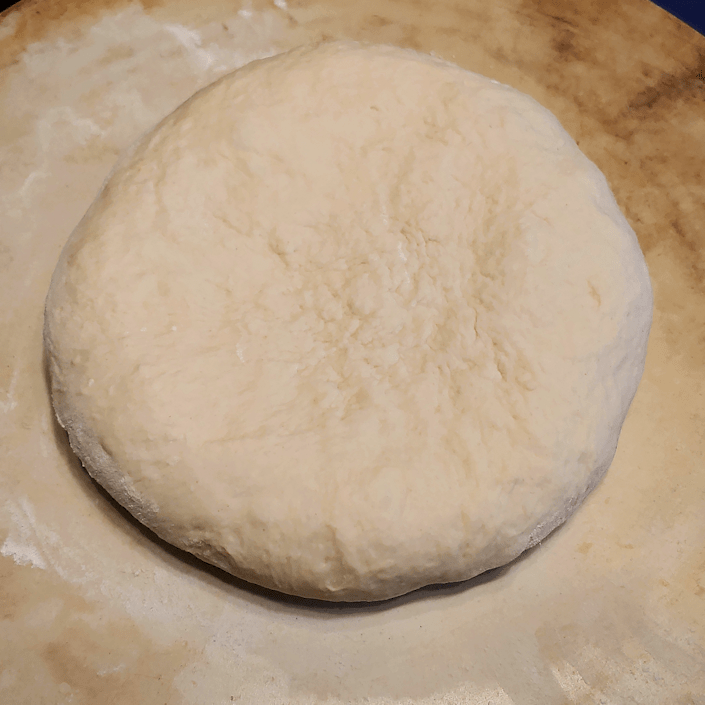
Here, you can see how it looked the next morning, after a good stir, and how the finished dough looked as it was set aside to rise.
Since I expected this to take a while, I decided to make a 2 loaf recipe of basic bread. In the time that took to rise, the old dough bread still needed more time!
With the plain bread, I took half of the dough, cut it into a dozen pieces, rolled each piece into long, flattened strip, which got wrapped around a hot dog wiener.
It’s been a long time since I made these!
That worked out quite well!
The other half of the dough, meanwhile, also got split into a dozen pieces, which got made into buns.
I baked those in a cast iron pan, to make pull-apart buns.
My Babcia’s Bread experiment still wasn’t rising, so while the buns and wieners were rising, then waiting their turns for the oven, I made another batch of bread.
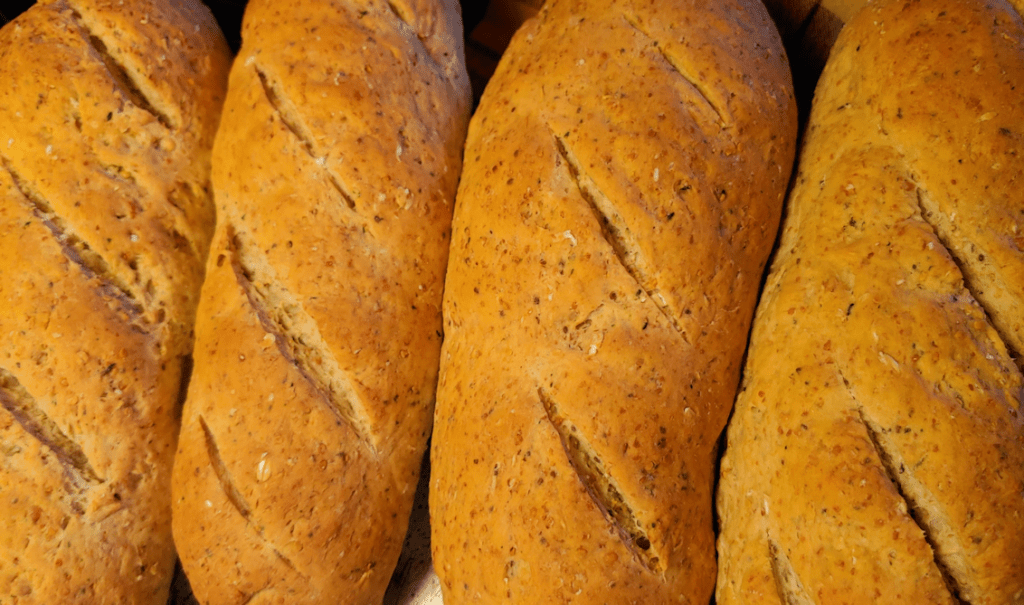
This bread was my usual oatmeal flax bread, with the addition of chia seeds and hemp hearts. I made a 2 loaf recipe, but divided them into 4 smaller loaves.
By now, my Babcia’s Bread was still not risen a much as I would have liked, but with the oven in use, there wasn’t anywhere I could keep it warm. Besides, it did rise at least some.
I decided not to do three risings this time.
Plus, I cheated.
The bread egg is the same principle as a sourdough, without the moisture levels. Which means the developing yeasts would become increasingly acidic.
I decided to take advantage of that and employ a bit of chemistry.
What happens when you mix baking soda and vinegar?
Lots of bubbles, of course!
What happens when you add baking soda to an acidic bread mixture?
More bubbles!
I sprinkled some baking soda onto my kneading surface and worked it in quite thoroughly. The dough turned out to have risen more than it appeared to have, so it was already pretty light and fluffy. As I kneaded in the baking soda, I could actually feel the dough becoming even lighter and puffier in my hands!
After kneading it enough to ensure the baking soda, along with a little more flour to keep it from getting too sticky – and remembering to take off a ball of dough for the next baking! – I divided it into 4 small loaves and set them aside to rise some more more.
While my Babcia’s Bread dough was still rising, I had time to make yet another batch of bread. Surprise bread!
This time, I made a plain 2 loaf recipe, then added parsley, garlic granules, paprika and dill. After letting it rise, I made a dozen buns, each stuffed with 1 cube of mozzarella and 1 cube of old cheddar cheeses.
It turned out pretty awesome, if I do say so myself!
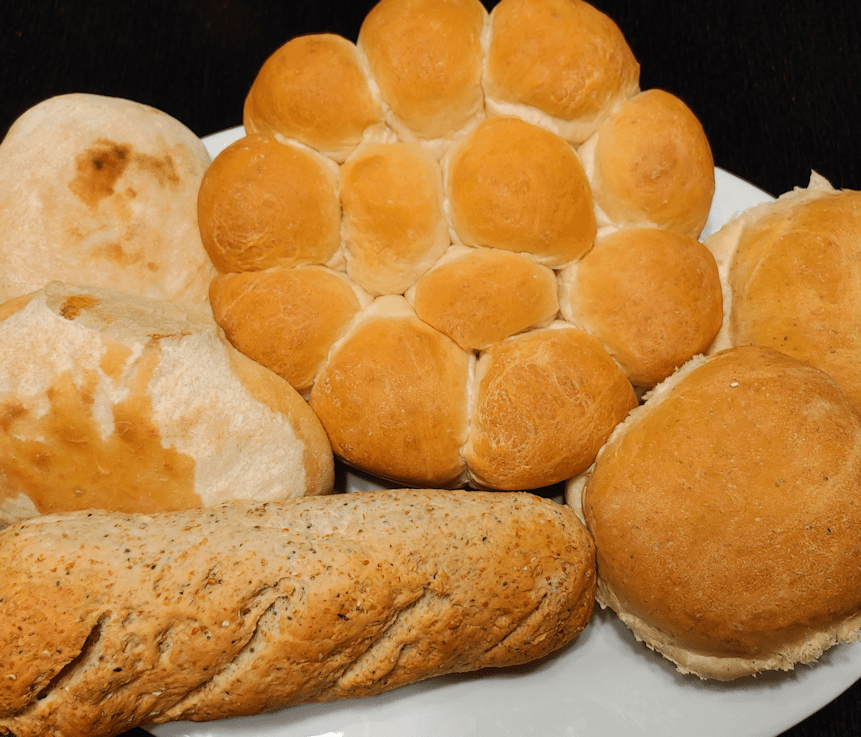
Here is my bread baking for the day – minus the hot dogs, which were already eaten! Top left is 2 loaves of Babcia’s Bread. In the middle is the pull-apart buns that were baked in a cast iron frying pan, and on the right are a couple of surprise bread buns. In the foreground is one of the oatmeal flax loaves.
First up, Happy Thanksgiving to all our visitors from the US! I hope you are having a wonderful day! :-)
Today was my day to go into the city for our monthly stock up.
I was really dreading it.
I’m part of a local, private, online group where people around our province share where it is safe to shop for people who can’t wear masks. Since our province went into “enhanced lock down,” some places have gone full gestapo. The Costco I normally go to has always been really great, but something changed. Now, masks or shields are required, or no one is allowed in. I know quite a few people who cannot wear even a face shield, at all (largely due to PTSD), and they reported some pretty awful responses from the management. Worse, people were reporting that police have started patrolling the stores and parking lots at all Costco locations. They have been approaching people in their vehicles, when there is more than one person, demanding to know if they were from the same household. One woman had an officer come back to her vehicle and ticket her, for being part of a freedom protest a couple of weeks ago. How the officer determined who she was or if she were even at that protest, she didn’t know. Inside the store, people were reporting being hassled, medical exemptions being denied, and management being downright abusive. A different Costco location than the one I usually go to, which was already known for not being a safe place, has gotten even worse.
As you can imagine, I was quite concerned. Yes, I would be wearing a shield, but even people with shields were reporting being denied entry to some stores, getting harassed by security, and so on.
Normally, a daughter comes with me, but with the “enhanced lock down”, I wasn’t sure we would both be allowed into any stores at the same time. So I went alone, just in case.
Normally, we do a drive through breakfast, then Walmart, then an international grocery store, then Costco, so that stuff that is frozen, or needs refrigeration, is in the vehicle for the shortest possible time.
Today, I skipped the drive through, and bought most of what was on my list at Walmart. I walked in with my shield, and no one batted an eye. I was the only person I saw with a shield instead of a mask, the entire time. I did get odd looks from a couple of customers, but with their faces hidden, I really couldn’t tell what their full expressions where. One old guy just stopped dead in his tracks and stared at me. ???
The last thing I got at the Walmart was a small tray of sushi for breakfast to eat in the van, then headed to the international grocery store. I was able to get the rest of what was on my list there. This place is awesome, and I probably would have been fine without even the face shield, but I didn’t want to take a chance of them getting fined $5000; something else our provincial government has started to do.
Along with what was on my list, I also found something I was quite excited about, in the Indian food aisle.
Duram wheat flour!
We’re going to be making pasta! :-D
It doesn’t take much for me to get excited. ;-)
Best of all, though, I was able to skip Costco entirely.
Since neither place had flat carts, I wasn’t able to get things in the same amount we normally would. I basically did a half-shop, as far as quantities go, so we will need to make a second trip. Especially for the heavy stuff, like cat food and litter. Most of the smaller, lighter stuff, we can get locally without hurting the budget too badly. The lock down is supposed to end on Dec. 11, so we have at least enough to last until then. I don’t expect the lock down to actually end, though. From what I’m seeing, I expect things to get worse, not better. And I don’t mean the virus. I hope I’m wrong.
Once I got home, and the girls and I were putting everything away, I happened to see something odd through the semi-transparent lid of our flour container. So I opened it to check.
It’s a bubble!!
The “bread egg” I buried in there managed to expand a bubble far enough to break through the top of the flour!
Well, at least I know that yeast is still active and happy! :-D
Tonight, I’ll be fishing it out to soak overnight, to continue my Babcia’s bread experiment.
But I digress…
One thing I made sure to do as I headed out, was bring our pulse oximeter. After the issues I had before, I wanted to monitor myself. I used it before I left and I can’t say I was surprised to see my heart rate was at 112 – I was already pretty stressed! – but my oxygen was at 95%. I typically read at 97 or 98, so this is low for me. The “normal” range is 95-100%, unless a person has something like COPD or some other lung disease. Anything from 88-94% is still considered safe, but below that, it’s recommended to get medical help.
While I was shopping, every now and then I would pause and take a reading. When my levels were below 95%, I would do some breathing exercises, watch my levels go back up again, then continue. I remember one reading where my % was okay, but my heart rate had gone up to 126!
I am really glad I brought it along.
I’m really glad we had one I could bring along!
One thing all of these mask mandates and trying to wear a shield has done, is make me more aware of my own breathing. I mean, really, who even thinks about it normally, right? Well, I’ve started to notice that I’m having issues at other times. Like while I was driving home, I found myself short of breath, and opening the window a bit to get more air flow. I’ve even noticed times when I’d be sitting at my computer, then suddenly gasping for air. What the heck?
I have kept the oximeter with me since getting home, and every now and then, I’ll do a quick test.
My heart rate has gone down to about 68-70, which is good.
My oxygen has dropped down as low as 93%.
What the heck is going on?
I don’t feel anything is off or out of the ordinary, except possibly my sinuses. My husband suggested I might be having an allergic reaction to something. Normally, I get that in the summer, when I’m working outside. I have no idea what I’m allergic to, other than it’s something environmental. I’ve had allergy tests to try and find the source of my chronic cough, and I’m not allergic to pollen or cats or any of the other usual stuff. So I think I will try taking antihistamines for a few days and see if that changes anything. This is all so very strange.
Anyhow.
We are now stocked for about half the month. With Christmas coming, we don’t expect to do much for special shopping. Most of us have already purchased gifts online, which I hate doing unless it’s for things we cannot buy locally. I’ll have to increase the number of times we go to the post office for the next while. :-)
One thing I did do, since we will be starting to make pasta, is order a manual pasta machine and a pasta drying rack. They should arrive in the first week of December.
Meanwhile, my daughters let me know we were running low on yeast. At the Walmart, they were mostly out. I got a vacuum packed brick of “instant yeast”, and a small jar of traditional yeast, which is what we prefer. At the international grocery store, however, they had plenty of large jars of the traditional yeast, so I snagged one.
Between our ample stock of flour, yeast and other basic ingredients, we’ll be able to do all sorts of bread baking in the next while, if we want. :-)
Now that this trip is done, we shouldn’t need to go anywhere, other than the post office or the dump, for quite some time! Hopefully, I’ll at least be able to help my mother with a grocery shopping trip. No visitors are allowed in her building right now, but I can pick her up outside, then bring her bags to the outside doors. The social workers at the senior’s centre have offered to get groceries for her, too, so she should be okay. In her building, they slid notes under everyone’s door, telling everyone that they had to wear masks, even in the hallways – but “graciously” allowed them to be mask free inside their own apartments. !!
How did we ever get to this point? Have we learned nothing from history?
Every year, before we are ready to decorate our artificial Christmas tree, we dig it out of storage and set it up. The idea is to get the cats used to it being there, and we get a chance to remind the older cats, and train the newer cats, that this is NOT a thing they are allowed to go into.
It usually works fairly well, but it’s hard to train the cats to stay out, when there’s no one in the room to catch them in the act.
We have several Christmas trees. One 6 ft “family” tree, and the girls have their own smaller trees for their rooms. Now that they have the second floor as their own “apartment”, they’ve been setting both up in the same room.
With so many rambunctious “teen aged” kittens in the house, my older daughter suggested we use her 4 ft Ikea tree. If we could find a way to raise it up, perhaps we could keep the cats out of it?
Well, we’ve had that tree up in the dining room for a few days now. I went into the storage shed and dug out a couple of tall plant stands to see if one of them would work as a stand.
On the first attempt, the girls set it on one of the stands and used Bungee cords to hold the tree stand in place.
That got knocked over pretty quickly, even though it was on the more stable of the two stands.
We set the tree directly on the floor, and hoped the cats would just investigate it and leave it alone.
Which is generally what they did, when we were around.
Then we could come into the room and find it knocked over.
I even tried putting it on the dining table, which they are not allowed on. Of course, tiny paw prints on the table in the morning shows they still go on it while we are asleep.
Today, I think I found a solution.
I flipped a plant stand upside down.
This might actually work.
We might still have to find a way to attach it to the wall to keep it from being knocked over, but so far, so good!
After a while, we’ll put the lights on and leave it for a day or two. If all goes well, we’ll get it decorated, then hide the stand with something pretty.
Big Rig, at least, appears to have been foiled by the stand! :-)
Our first batch of bread using old dough, in the manner my Babcia used to do, is now done. I did mess up a bit, which I will talk about below.
Here is how the dough looked after the first rise. I had left it for about 1 1/2 – 2 hours, give or take.
That is just beautiful.
My mother described my Babcia as “punching down” the dough. I know exactly what she was talking about, since this is what she did with her bread baking. My mother used a huge, enameled bowl with a lid, which we still have, for one big batch of bread. She would get it ready for its first rise before going out to milk the cows in the morning. By the time those chores were done, the dough was overflowing the giant bowl, knocking the lid askew. She would put the dough back in, scraping dough off the lid and adding it in, too, then literally punch it down with her fist. She would then put the lid back and leave it for a second rising, which would also overflow. She would gather it up again and punch it down before continuing on to form loaves and buns.
For such a small batch, I just took it out and gave it a light kneading.
The dough felt beautiful! Soft, light, fluffy and elastic. I probably could have skipped a rising, but I really want to recreate what my Babcia did as much as possible, so back into the bowl it went.
Both times, I set the bowl into a warm oven with the heat off and the light on.
This is possibly where I made my first mistake. The dough did not rise as much the second time. Usually, dough rises faster during a second rising, but after an hour, it really hadn’t risen as much as I would have expected. I probably should have left it for another half hour, at least.
I didn’t do that.
With this batch being rather small, I formed just one loaf out of it (after removing a portion for the next batch), then giving it another light knead.
In my starter batch, the two round loaves I shaped had puffed upwards quite a lot, so this time I pressed the loaf flat, then set it aside, covered with a tea towel, to rise while the oven preheated to 425F.
Which may have been my second mistake. I probably should have let it rise for a while, before preheating the oven. Not only am I too used to how quickly yeast bread rises, but our new oven preheats faster than the old one!
Meanwhile, I used the piece of dough I’d set aside to pick up the bits of dough stuck to the bowl and table top, as my mother described my grandmother doing, kneaded it enough to incorporate it all, then buried it in our canister of flour. I took out slightly more dough this time, as in the next batch, I intend to increase the quantities of flour and water.
When the oven was ready, I scored the loaf and put it in, checking it after half an hour, then adding more time.
I’m certainly glad I flattened the loaf as much as I did! It still became very much a ball!
This was taken out at about 40 minutes.
Which was most definitely a mistake.
Though I made sure to do the “thump” test to check if it was done, when I finally cut it open, the centre seemed slightly underdone. I probably should have left it in the oven for at least 5 or 10 more minutes. I am really bad for taking bread out too early, as I am constantly thinking they are going to burn! :-(
What to do?
Toast it!
Sort of.
I cut it into pieces, laid it back on the baking stone, and put it back in a 350F oven. After about 15 minutes, I flipped them and put them back for another 10 minutes.
Here is the end result!
It looks really great, at least! It still felt a bit heavy and dense, though.
The first taste test was with a plain piece.
The flavour is a bit milder than the starter batch. This makes sense, since that one used a commercial sourdough yeast. The sourdough yeast included rye, which I could taste in that starter batch, but I am not getting any rye flavour with this batch. There is, however, a very slight sourdough flavour. I expect this flavour to develop with every batch we bake. Overall, though, the flavour was very neutral.
The texture was slightly dense and chewy, but not under-cooked and doughy, as I feared it would be.
The one thing I had an issue with, was the crust. It had a thick, crunchy crust that crossed over to that “watch you don’t cut your mouth up” level. This may have been exacerbated by “toasting” the bread pieces again, but from what I saw when I was cutting it, I could see it was already going to be an issue.
The second taste test was with butter and, of course, that one tasted better. Fat is flavour, after all!
I found myself thinking this would be a very good bread to dip in an herb infused olive oil! The neutral base flavour would make a great carrier for other, more strongly flavored things. That neutrality will likely disappear over time, as each batch should develop a more distinct “sourdough” flavour.
So this first batch of bread using old dough was both a success and a not-quite-success.
The use of the old dough in place of yeast or sourdough started worked very well. There was plenty of yeast activity in there. Even without the use of sugar in the bread, the yeast did its job – when I gave it the time to do so!
The other success was reducing the amount of flour. It did mean making one loaf instead of two, but the dough itself turned out much better for it.
The not-quite-success part of it had more to do with my not giving it the time it needed, I think. I’ve made sourdough bread were I’ve left the dough to proof for an entire day, so it’s not like I don’t have the patience for that sort of thing. But I did see the signs and simply chose to go ahead, anyway. The end result was probably not as could as it could have been, because of it.
Plus, of course, I need to be concerned less about over-baked bread, and more about underdone bread, and leave it in the oven for longer! I should probably increase the oven temperature to 450F. That’s the temperature my daughter bakes her French bread in, and her much larger loaves bake up wonderfully.
I will leave the “bread egg” in the flour for a couple of days, then make another batch, tweaking things with what I’ve learned with this attempt.
When setting the old dough to reconstitute and ferment overnight, I had some concerns about temperature. The crock was sitting on our dining table, and that room gets pretty chilly. I did warm up the rice bag we have been using to warm our fermenting hard apple cider (which is probably ready to be bottled, but we haven’t gotten around to it yet) and set it under the crock, to help keep it at least a little bit warm.
While investigating some cat noises in the wee hours of the morning, I checked it and found it was looking pretty much the same as when I’d left it. So I warmed the oven up a bit, then put the crock in, shut the oven off and left the light on.
This is how it looked about 3 hours later.
Warming it up, did the trick! I’ll have to keep that in mind, as we continue experimenting.
I warmed the oven up a bit again, then put the crock back for another 3 hours or so, before I was able to start making the dough.
That’s looking nice and puffy!
I find it interesting that the pieces are still distinctly separate. When I stirred it, before adding it to some flour and salt in a bowl, I found the pieces separated and stretched, before starting to mix together. The water under the old dough pieces was pretty much clear until I mixed it, too.
I added this to a bowl with 3 cups of flour and 2 tsp of Kosher salt and mixed it together. I kneaded another 4 – 4 1/2 cups of flour in before turning it onto my table and kneading it for another 5 – 10 minutes.
Normally, I would oil the bowl the dough will be rising in, but my grandmother would not have done that, so I used flour, instead.
With this batch, I’ve got the same amount of water as the first batch the old dough came from, but I’m using less flour. That first batch was too dense. With only a little more than 4 cups of flour in here, after I remove some dough for the next batch, I think I’ll just make one large round loaf this time, instead of two.
Next time, I think I’ll up the water and flour quantities a little bit, and make a bigger batch. I don’t think I’ll adjust the amount of salt, though. Not unless I end up doubling the recipe or something.
The dough is now covered and set aside for its first rising. I’ll give it at least an hour, probably two, before punching it down and leaving it for a second rising.
I will post again, later today, with the final results! :-)
There was a light snow overnight, and while I was out doing my morning rounds.
I noticed this, on the roof of the cat shelter.
Melted snow on the roof of the cat shelter, above the ceramic terrarium heater.
You can certainly tell where the heat bulb is!
There is no insulation on the walls or under the roof at all, so it wouldn’t take much for there to be heat leaking through, even with the aluminum shield between the bulb and the roof.
The cats are quite enjoying their warm shelter! There’s usually several that can be seen, watching me through the window closest to the heater. :-)
They will also sit inside the kibble house, even while not eating. Sometimes, I’ll spot one of the more skittish ones under the floor, watching to see if I come closer, before squeezing out again.
We still have very little snow right now. When it starts getting to where we need to shovel it, I want to make sure the cats still have access to under the shelters, as well as into them. They have claimed every bit of shelter these structures provide! :-)
Tonight, the plan was to continue with my attempt to recreate bread, as much as possible, in the way my mother remembers my grandmother baking.
I spent some time doing research on the method, but there is nothing out there that quite matches what my mother describes. I gave her a call today with more questions, and got more of the story. :-)
This video was the closest I could find to what my mother described, but it left me with a lot more questions.
Obviously, my babcia didn’t put the piece of dough into a jar and stick it in the refrigerator. They didn’t have refrigeration. The dough in the video is almost a batter. Also, did my babcia use rye flour? Since she baked only once a week, she had to have been making a LOT of bread. How much did she bake, and how much of the dough did she set aside for that much baking?
My mother had difficulty understanding some of my questions – and she’s at a loss as to why I am even bothering with all this! Using commercial yeast is just so much easier. :-D
So it took a while, but this is what I was able to find out.
My babcia’s weekly baking was for about a dozen round loaves. This was all one big batch. Her dough bowl must have been huge! She worked up the dough, using the old dough that was reconstituted overnight for leavening, then left it to rise. She then punched the dough down and left it to rise again. After the second rising, she would punch it down again, then knead and shape her loaves, laying them out on a flour covered surface. The shaped loaves would be left to rise one more time before baking in their masonry oven.
It would have been when she was forming the loaves that dough was taken out for the next batch, and all the scrapings from the wooden dough bowl and leftover bits of flour, would be incorporated into the ball. My mother says the ball of dough was about the size of a loaf of pumpernickel bread that she sometimes buys at the local grocery. That would make it about 3 – 4 cups of dough, before proofing, though I do take into account that, given her age at the time, her memory of the size might be distorted by her own small size.
Still, it’s enough information to assure me that my egg sized lump of dough is probably about the right size for a 2 loaf recipe.
I also learned that my babcia did use rye flour, as well as the wheat flour and corn flour my mother had already mentioned. Basically, whatever they had on hand. Or whatever was left, after either the Russians or the Nazi’s came through and took everything again.
It was a rather precarious existence for them!
I also confirmed that my grandmother’s dough was NOT a wet, almost batter like dough, like the one in the video above. My mother described it as being more like the sort of bread she used to bake all the time, when I was a kid. Considering that I helped her with bread baking for many years, that gives me a very good idea of what I will be looking for.
Armed with more information from my mother, I started on reconstituting our bread dough “egg” in preparation for baking with it, tomorrow.
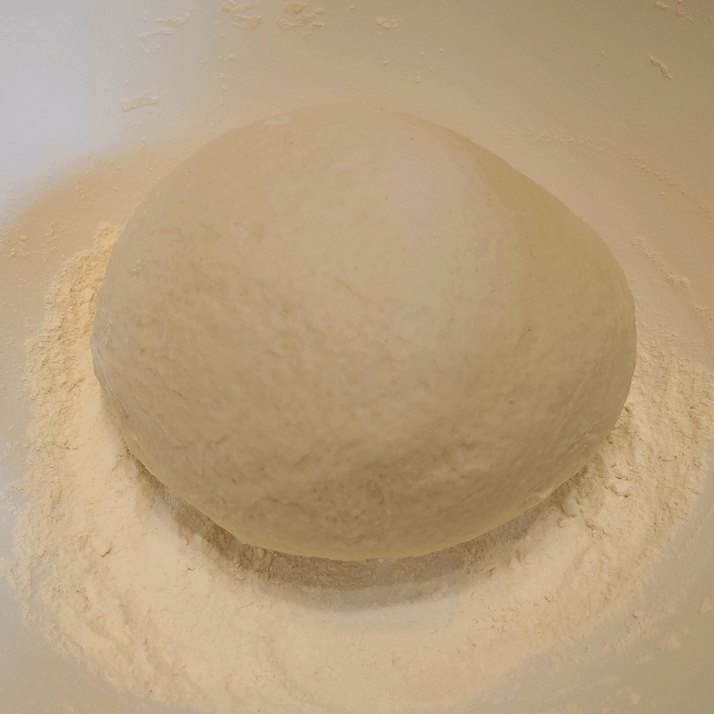
Here is how it looked, when I dug it out of the flour.
It was most definitely larger than when it first went in! Not extremely so, but enough to really notice.
It also felt a lot lighter than when it was first put in. I was very interested in seeing how it looked on the inside!
Ooooo!!! That looks amazing!
The outer shell was almost flaky in texture, and was clearly doing a great job of allowing the yeasts to continue to ferment without contamination.
It actually rather reminded me of the sourdough in this video, minus the fire.
It’s interesting to note that, historically, people did conserve their sourdough starters while traveling by putting it into their bag of flour and allowing it to dry out. What I am making now will certainly result in a sour dough, eventually, though it is not at all the same as maintaining a sourdough starter.
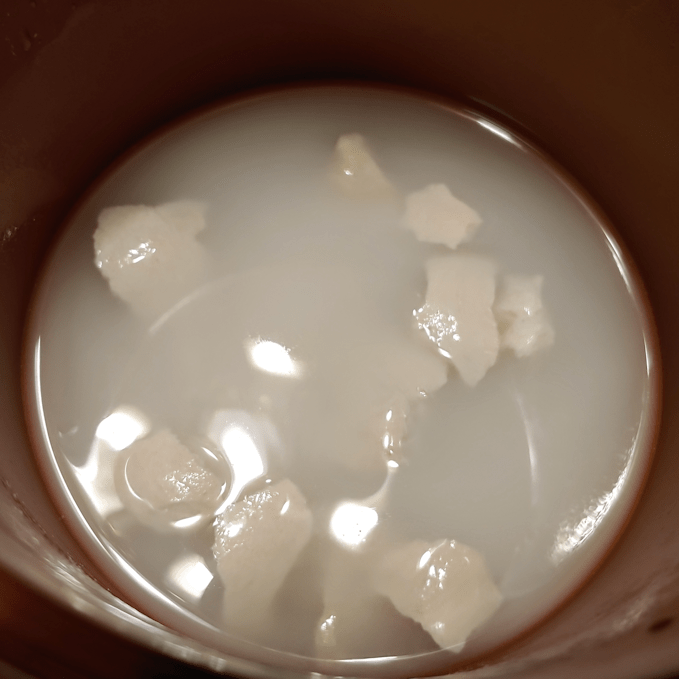
Since I will be making another 2 loaf recipe, I decided to reconstitute the dough ball in the full 2 cups of water that will go into the recipe. I could probably have used half that amount, without any issues, but I figured, why not sue the full amount? I wouldn’t use the full amount of water if I were, say, making a dozen loaves, like my grandmother did, but for a small batch of bread, it should be fine.
I used water that had been boiled, first, as a precaution with using our well water. Once the water had cooled down enough, I put it in a small crock style canister that I have, then added the broken up pieces of old dough.
After that, it just got a quick stir, to make sure all the pieces were thoroughly immersed.
I don’t expect this to overflow as the yeast develops but, just in case, I placed the covered container on the lid of a large mixing bowl.
Now, it just sits for the night. :-)
I am very interested in seeing what this looks like in the morning!
Okay, here it is! My very first attempt at slowly recreating my grandmother’s bread, with her use of “old dough” yeast that she kept stored in flour in between baking day. (Part 1: the story)
The first goal is to create the bread dough yeast starter, and for that, I need to make a yeast bread.
Here are the ingredients.
Water, yeast, salt and flour.
That’s it!
I used Kosher salt, as I figured that was more like what my grandmother had available to her.
For a 2 loaf recipe, I used 2 cups water, 2 tsp salt, about 2 tsp yeast, and between 5 and 6 cups of flour.
The yeast is my “cheat”. Back in the spring, when everyone started panic buying, yeast was among those things that became hard to find. One of our local grocery stores now not only stocks lots of the usual big name brand or two, but a wide variety of brands and types of yeast. When I spotted a “sourdough” yeast, I grabbed a packet, just to try it.
Since some of the dough from this batch will become the “mother” of future batched, I thought it was appropriate to use it.
The ingredients list is interesting. Both wheat and rye is used.
“Sorbitan monostearate (abbreviation SMS), or Span 60, is an emulsifier esterified from sorbitol and stearic acid with the European food additive number E491. This ingredient is mostly used in baking yeast by improving the activity of instant dry yeast when the yeast is rehydrated before use. “
Speaking of rehydrating…
For the 2 cups of water, I boiled it first, because I have doubts about our well water. We really need to get the water tested, but a full test is really expensive, so… boiling it is.
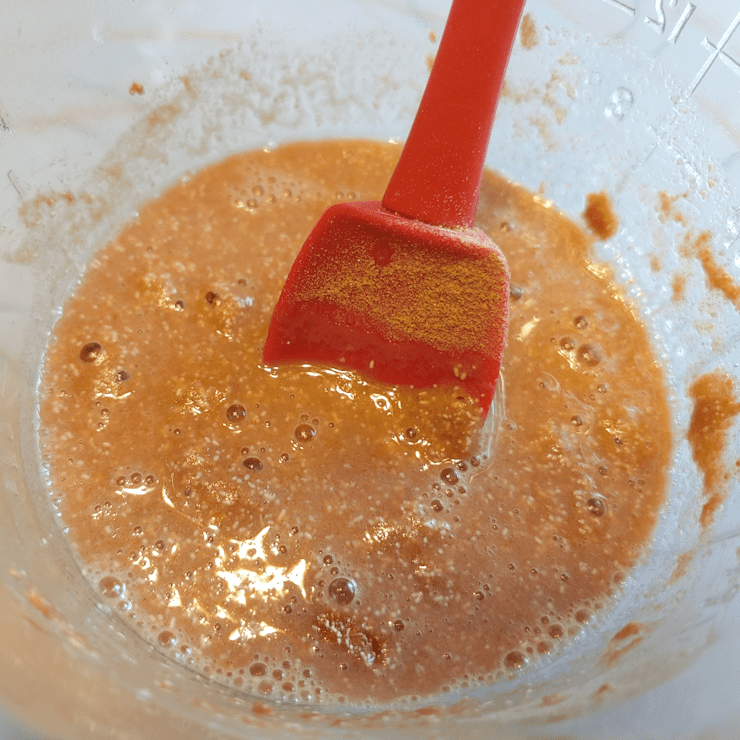
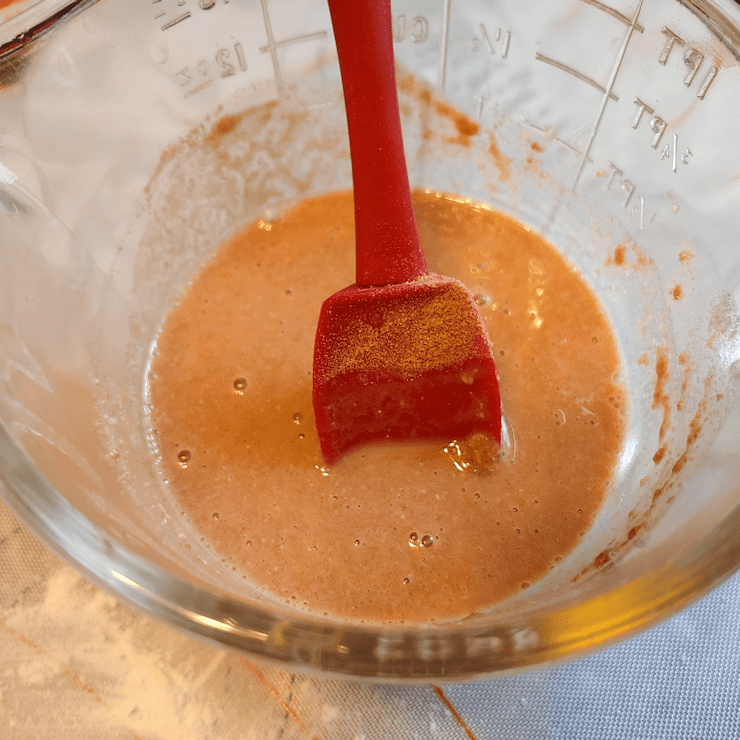
I measured out half a cup of water into another measuring cup to rehydrate the yeast. I could have done it in the full 2 cups, but the half cup cooled down to a safer temperature for the yeast faster.
The inclusion of rye in this really changes the colour!
I let it proof for 5 minutes. I don’t know if I should have proofed it longer – I have recipes that call for anything from 5 to 15 minutes. It’s bubbled up, though, so I decided to go ahead.
While it was proofing, I mixed the salt into about 2-3 cups of flour. Without a wood bread bowl, I decided not to use a plastic one, and tried “dump your liquids into a well in the flour” method.
That looks…
Unpleasant.
The next while was spent with very messy, sticky hands, incorporating the rest of the flour and water in.
Thankfully, my daughter came down to give me a hand, adding the flour and water as I kneaded it in.
Once it was all mixed in, I kneaded the dough for about 15 minutes.
I may have used too much flour. I’ll have to keep that in mind for next time.
I did notice a difference in texture from my usual bread. Although I kneaded the dough until it felt smooth and satiny, it never looked smooth.
In fact, the longer I kneaded, the rougher it began to appear!
So I went by feel rather than appearances when it came time to set it aside for a first rising.
It went into an oiled plastic bowl, turning to coat all sides with oil. After covering the bowl with a tea towel, it went into a warm oven to rise.
Earlier in the day, I had prepped a baking stone and was curing it with oil in the oven. The oven was off but still warm; prefect for proofing the dough.
Once it was in the oven and rising, I set a timer to check it in an hour while my daughter started a batch of French bread. Checking it at an hour, I decided it needed more time, by my daughter’s bread was rising by the, too. So I took the bowl out and put my daughter’s dough in the warm warm oven, and set my timer for another hour.
This is the dough, after 2 hours.
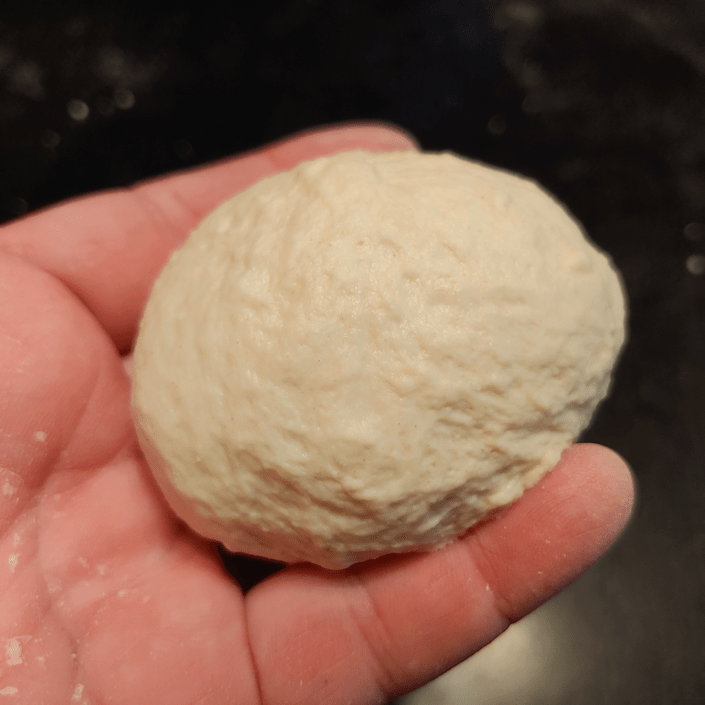
After turning the dough out to prepare the loaves, I had to make sure to do that most important part.
Collect a dough egg! :-D
This humble little lump of dough is what it’s all about.
Into our flour canister it went!
I almost forget to get a picture before burying it!
My other daughter labeled the container for me.
She is a hoot! :-D
The ball of dough will now dry out until the next time we bake this bread.
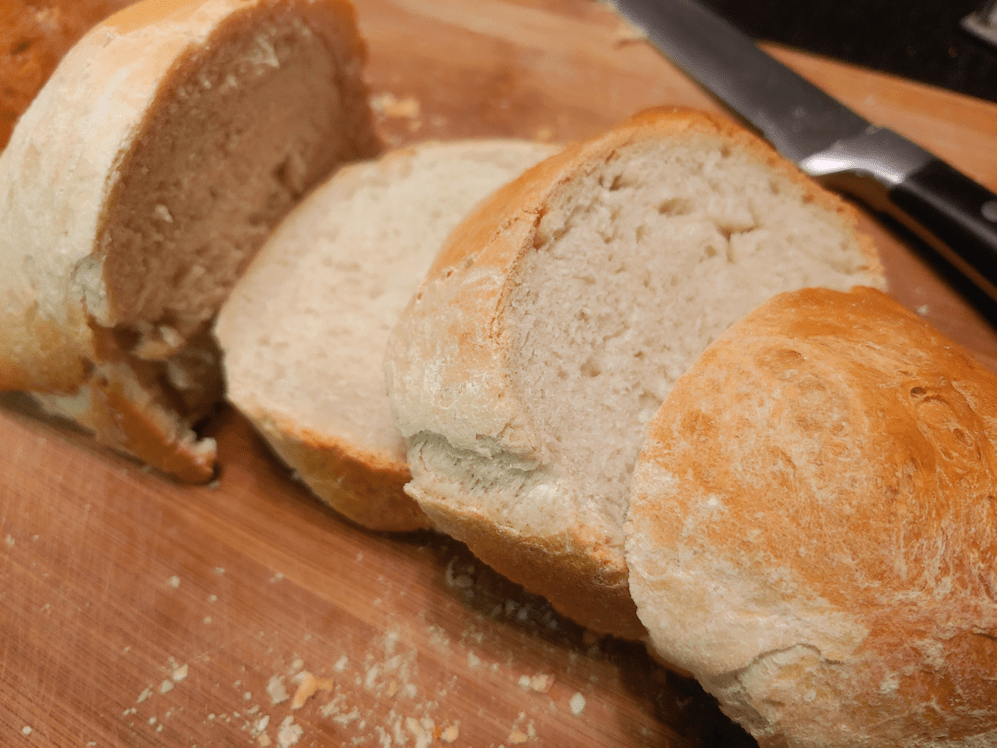
After dividing the dough, I decided to form it into round loaves.
By this time, my daughter’s loaves were in the oven.
Where she forgot to take out my curing baking stone.
So they got to have their second rise on a normal baking pa, instead.
In kneading and shaping the dough, once again, the dough got rougher rather than smoother! You can really tell in the one of the left.
I then left them to rise, checking them after about half an hour.
My daughter’s French bread was done well before my second rising was done!
The ended up needing another hour of rising time.
The baking stone had cooled down quite a bit by then, but was warm enough that I transferred the loaves over, and I think that residual warmth helped them rise even more. The above photo was taken just before they went into a 400F oven.
All done!
I am not sure how long they took to back. I set my timer for half and hour, then kept peaking and resetting the time for another 5 minutes, over and over. I think it took about an hour to bake.
I was quite impressed with how much the loaves rose in the process!
The next part was the hardest.
Waiting for the loaves to cool down!
For all that the loaves rose so much in the oven, they still felt surprisingly dense. I was also a bit surprised by how fine a crumb there was.
I taste tested one piece plain, one with ordinary butter, and one with a garlic herb butter.
I’m having a hard time describing the flavour. It was certainly tastey, but I think I was picking up the rye flavour in the “sourdough” yeast. It did have a “sourdough” tang, but one that is quite different from any sourdough we’ve made ourselves.
The sponge was soft, yet toothsome. The crust was crusty enough to be a good chew, but not so crusty as to cut up the mouth (something I have issues with, when it comes to most “crusty” breads).
The plain slice was tasty, but the buttered slices definitely were better. With no fat in the bread itself, the butter really brought out the flavours that were more muted in the unbuttered slice.
All in all, this very plain, very basic bread was a success.
It is, however, just the first step in the process. It’s purpose was to provide us with some dough to reserve for the next batch. Every batch of bread we make using the bread egg now sitting in the flour canister will be another step closer to recreating my Babcia’s bread.
While my grandmother did her bread baking once a week, we will probably make our first batch using the bread egg in 3 or 4 days.
I am really curious to see how it will look when we fish it out of the flour, and how the overnight soak will turn out! For a first time use, I don’t expect the flavour will be much different, but who knows? I’ve never done this before! :-D