Our 2024 garden: planting garlic Plus updates

Yes!!! The garlic is in!

On my way home from running errands yesterday, I was able to stop at the post office and found our garlic order had come in earlier than the tracking information has said, the last time I looked. Since I then ended up going to my mother’s to get her to a dentist, that meant the garlic went into the ground today.

Before I get into that, though…

I followed up with my mother and, sure enough, she isn’t going to fill her new prescriptions. She already takes sooooo many pills, you see.

She also feels great. My mother has an amazing constitution!

The pharmacy had called her about the prescriptions, she told them how she was feeling and what she was doing (at least she’s following the instructions about things like swishing with salt water), and he said he would hang on to her antibiotic prescription for her, just in case she needed it.

I brought up about getting her dentures done after things are healed up, to fill the empty spots, but she’s already hedging on that. When I mentioned she might have problems eating (she already was, with the top tooth breaking off), and she told me she’ll just eat soft food. *sigh*

We’ll see how that goes.

On another note, I also found a message from the financing company when I came in from planting the garlic. They’ve found a deal that fits our budget, and have already told our mechanic to look for a vehicle that fits the amount. Which is pretty much what I’d told our mechanic we could afford payments on, almost two years or so ago, when I first asked him about getting a vehicle. Whatever we get will be $10,000, maximum, after taxes. The only thing was the banking records I’d sent in to show proof of income. Since I logged in to my bank account, it only had my name on the statements, even though it was for a joint account. It looked like the income was in my name, instead of my husband’s. So we were able to get around that, and the final confirmations can now be made. After that, it’ll just be waiting for our mechanic to find a vehicle for us that’s within the price limits.

I’m really trying not to get my hopes up, but wouldn’t it be amazing if he found something in time for us to be doing our big monthly shops in the city?

So… that’s done as far as can be for now.

Meanwhile, I got some gardening for next year done!

We ordered only one type of garlic this year; three pounds of Purple Passion hard neck garlic.

Since the bed I’d intended to plant them in still has the Jebousek lettuce that I’m allowing to go to seed in it, we had to change our plans. I decided the old kitchen garden, where we’d planted the red thumb potatoes, would do.

I wasn’t sure how many cloves we’d have, so I decided to prep both the long, thin bed, and the end of the wattle weave bed. The old mulch was removed and the soil loosened. I’ve got one bag of sheep manure left. Though I kept the bag covered with a mat, it was still quite wet from the last time it got rained on, so I spread it out by the hand full. I used about half the bag on the two beds, then worked it into the soil. Once that was done, I gave the beds a deep, thorough soaking.

I then left the water to be absorbed and went inside for a while. When I came back out, I soaked it again, then moved over to the tiny raised bed. The shallots in there could have been harvested a while ago, but I was letting the self seeded poppy pods dry out, first. There were still a few tiny green pods, but I left those. Once the pods were trimmed, I could remove the cover and pull out the poppy plants, the self seeded dill, and some of the weeds, then gather the shallots. They’ve been there long enough, they’re already cured.

In the photo with the gathered shallots, you can see some seedlings above them. Those are Chinese elm. They have remarkably long and persistent tap roots. Once the shallots were gathered and removed, I made sure to carefully loosen the soil first, so I could get those out without breaking them.

This bed was redone last fall and, my goodness, the soil was so nice and loose! Almost no compaction at all. It was great! Once it was all cleaned up of weeds and roots, I worked in a few hand-fulls of manure, too.

While I was working on that, my daughter was able to come out and help. She started by separating all the cloves from the bulbs while I finished with the tiny raised bed. I figured it could be a back up bed, in case there were more bulbs than could fit in the other two beds.

By the time the tiny raised bed got a good soaking, my daughter had finished separating the cloves from one bag, though she did find one bulb had started to rot. Only one clove out of that one was salvageable.

In the past, we planted two types of garlic in a pair of low raised beds. By spring, one bed was almost a complete loss, while the other had maybe half of them survive. Since the ones that survived all seemed to be closer to the middle of the bed, it seemed that they had frozen, even under the mulch. We can mulch the top, but not the sides. So for these ones, I wanted to make sure they were planted away from the sides. I used a stick that had been used as a garden marker to make holes to put the cloves in. With the long, thin bed, I made three staggered rows. It took about 1 1/2 bags to fill them. In the wattle weave bed, it is wider at the end, then narrows a bit as it goes towards the corner, so I was able to get a couple of rows with 4 cloves, then the rest with 3.

I fit the rest of the second bag in there, with room for only 4 cloves from the next bag. My daughter finished planting those, then counted the rest, while I started making planting holes in the tiny raised bed. That bed could only hold another 17 cloves, in three staggered rows, and my daughter counted about 32 or 36 – they moved around in the bag, so she wasn’t sure.

There was only one place that made sense to plant the remaining cloves, and that was the bed with the volunteer tomatoes transplanted into it.

So while she planted in the tiny raised bed, I pushed aside the mulch in the bed with the tomatoes, made more planting holes at the end by the rose bush, then down the middle, working around the soaker hose, making sure I had more than enough, then watered each individual planting hole with the jet setting on the hose. In the end, the remaining cloves fit all down the middle, between the rows of tomatoes, and we didn’t need to plant closer to the wall at the end of the bed.

If we hadn’t been down that one bulb that had gone soft, we would have had to try and find yet another spot to plant a few last cloves! As it is, we just managed to fit them all.

After all the cloves were covered, they got watered again to settle the soil around the cloves, then lightly covered with mulch. The mulch itself got a light watering, just to dampen it. When things start to get colder overnight, they’ll get a thicker mulch but, for now, it’s more to protect the soil.

I am quite happy to have so much garlic planted! The only thing is that, if we get the mild fall being predicted, they might actually grow too much before winter hits. That’s where a good, thick mulch will come in handy.

It feels so good to be already started on next year’s garden!

The Re-Farmer

Our 2023 garden: still alive! (sort of)

My morning rounds still includes checking the garden beds, and there are still a few surprises!

The Tom Thumb popcorn could probably be harvested now, but I’m going to leave the stalks for as long as I can before we do that. Just to make sure the kernels get all the time possible to fully mature and dry out on the stalks. So far, the critters seem completely uninterested in both corn beds!

Today was not as hot as yesterday, but still quite warm, hitting 21C/68F while I was working outside. Which is good for the remaining beds that will not be harvested for some time, like the Red of Florence onions next to the popcorn, which still have a lot of growing to do.

A real surprise this morning was seeing a bright yellow flower in the squash patch! The yellow patty pan squash plant is still alive, in spite of all the frost damage, and one of the female flowers actually bloomed this morning. There are several more female flower buds, too, but there are no male flowers to pollinate, so nothing will come of it. The green patty pans have squash that were big enough to survive the frost, and they are getting bigger, too. Even on the green zucchini, we found one little zucchini that had gotten bigger and could be harvested!

Later in the day, I finally cleared the tiny raised bed in the old kitchen garden, which required snipping off the dried poppy pods that had grown through the wire cover. These self seeded poppies have openings in their tops, so when I put them upside down in the container, the seeds just poured out. It really shows how these self seed so readily. The Hungarian Blue poppy pods do not have these openings, so are less likely to self seed.

Another surprise is seeing flowers on one of the volunteer tomatoes that got transplanted! They’re still so tiny, but they seem to really like where they were transplanted to.

I was going to plant garlic in the bed by the chain link fence, after it was reworked, but the garlic came in yesterday. The Jebousek lettuce is blooming now and I want to save the seeds, so the garlic had to go somewhere else.

Which is what my next post will be about!

I’m just loving that we’re past the middle of September, and there’s still gardening happening!

The Re-Farmer

Trellis bed progress: stripping

The plan for today had been to get the ends onto the trellis bed. Just before I headed outside, however, the power went out.

All I’ve got is an electric chainsaw, so cutting logs to size was out.

Which was fine. I needed to strip the logs of bark, first. I can see into the house from where I’m working, so I could keep an eye out for any lights back on again, letting me know the power was back.

Three hours later…

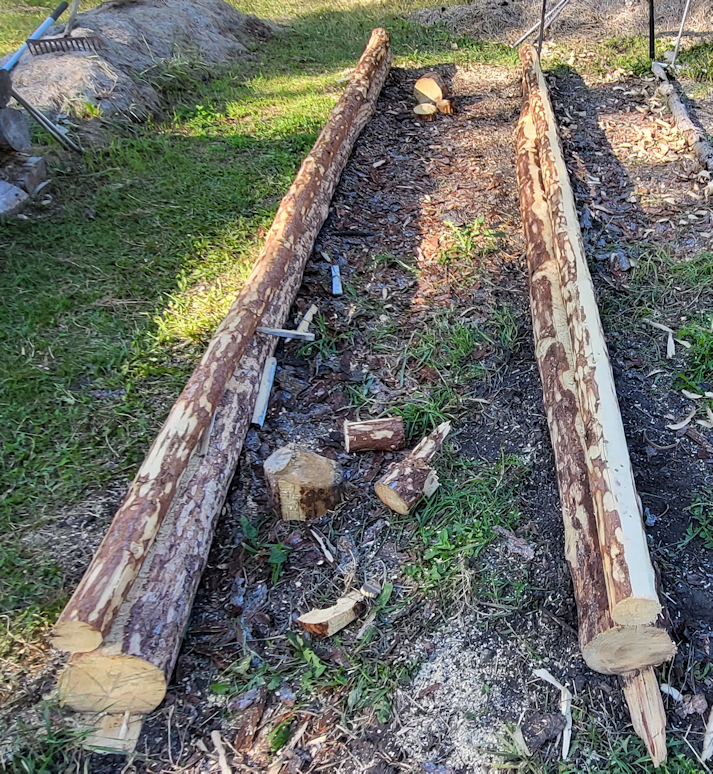
I started with the 2 dead spruces intended for the end pieces, one of which you can see on the saw horse. Then I started stripping the poplar that will be the vertical supports.

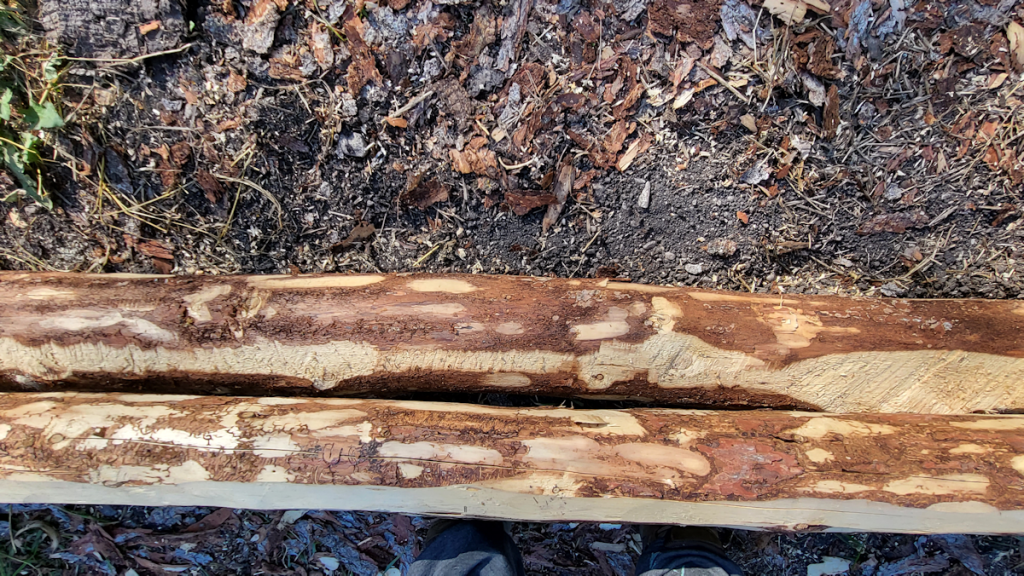
The poplar was much easier to work with, for the most part. The spruces have been dead for quite a while, so much of the barks is dried stuck to the wood. The poplar is still quite green. The draw knife could slide between the bark and the wood quite nicely, and just glide through.

Except for the branch nubs and damaged bits!

I ended up stripping them completely, as I could see critters were already getting under the bark and causing damage. The shorter lengths made them easier to handle, too, though I ended up putting the larger of the spruce logs back on the saw horse, just to stabilize it. With the lighter logs, there wasn’t enough weight to counter using the draw knife, and the darn thing kept rocking back and forth, and threatening to tip over.

Once stripped of bark, I lay them across the log walls to stay dry. Some of the logs I picked up were so damp from the grass, the undersides were covered with slugs!

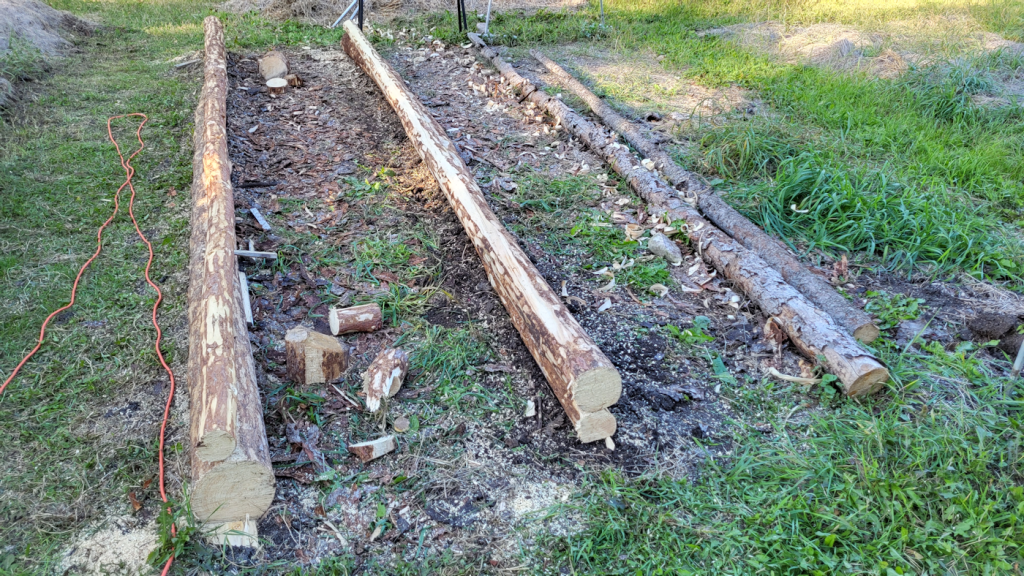
After I got 9 of them done, my back was telling me it was time to do something else. So I grabbed a rope and dragged over the last 3 posts, then went back for the odd pieces. Those were light enough that I could drag 2 or 3 at a time, so that was done faster. These odd ones may or may not be usable as part of the trellis. If not, they will go into the bases of the trellis beds and buried, to break down over time.

I had just finished dragging over the last pair of odd sized logs when I saw a light on in the house. By then, I was done with this job for the day. I’ll continue tomorrow.

As for the power outage, it was likely due to high winds. Not long after ours was back on, my house sitting daughter let us know the power went out at my brother’s place, too. He’s got multiple back up generators, though, so she is just fine!

The power loss was just for 3 hours this time, but it’s a reminder on how we need to get our back ups done. Like the outdoor kitchen. With the high winds we had today, we could not have done any outdoor cooking, if it came to that. The outdoor kitchen we have planned will allow us to cook outdoors in pretty much any weather conditions.

The other thing is to get that old well checked. If all we need is new leathers for the hand pump, we’re set for water, too. Plus the outhouse will do until we build the more comfortable outdoor bathroom with a composting toilet we have planned.

Little by little, it’ll get done!

The Re-Farmer

Trellis bed shift

I’ve been analyzing that side wall of the trellis bed with the bowed log on the bottom, and decided we needed to make a change.

The plan had been to cut joins into the horizontal logs and the vertical posts, then secure them in place. There will be four of posts, about 6′ apart but, the more I looked at it, the more I realized that in order for the posts to be in line with each other, I’d have to cut away far too much wood. It would weaken them too much.

There was one solution, though, that could be done before the end pieces were attached. The pairs of logs are attached to each other, but not to the ground.

So I snagged my daughter and some rope, and we reversed the wall.

I neglected to take photos at the start. To carry the logs, we wrapped some rope around the ends and used them as handles to lift and carry the logs around to face the other way. It was awkward, but it worked.

The rebar that joins the logs goes all the way through. At the end in the foreground, barely an inch goes through. At the far end, there’s almost 3 inches of rebar that could be jammed into the ground as we lined up and set the logs in place again. Since I cut the ends of the walls in line with each other, we had to make sure they still matched, so that the walls at the ends will be straight once they’re added.

This shows better, why I decided to switch it around. You can see where I used the chainsaw to flatten the top of the base log, for the other log to rest on! 😄 That worked out on the ends, at least! This is where the bow sticks out the furthest, pretty much in the middle. The vertical posts would have been on either side of this section. The top log is pretty straight, so I’ll probably just flatten the logs where they will come in contact, rather than actually cut joins.

But that will be done after the end pieces are added. Technically, once those are in place, we could still move the entire bed if we had to, but that would not be a very good idea!

The Re-Farmer

Pruning day

Well, I managed to get at least something done outside today!

The before and after pictures. I was losing light by the time I was done, so the second shot turned out pretty bad. Sorry.

My goal was to take care of the one at the end of the row of crabapples; far left in the photos. I’ve been tasting apples from different suckers, and there were two that have good apples on them. Everything else got cut away. Quite a bit of it was already dead. In the second photo, you can see the remains of the original tree that, from how rotten that stump is, died a very long time ago.

As I was clearing that one, I found quite a few branches from the tree next to it were entangled, so I started pruning that one, too. It has lots of little apples on it, but they are inedible. I was pretty ruthless in pruning it. The trees are too close together, and I don’t mind if we lose that one. The critters can eat the apples, though, so as I cleared away the branches, I made sure to shake off all the apples onto the ground. I’m sure the deer will enjoy them.

Since I still had some light, I did some work on the next tree. This is the one that has the really tasty little apples – a wonderful combination of tart and sweet. Unfortunately, this tree is dying. There were several large dead branches that I cut away, and wow did that ever open the whole thing up! One of the branches was so entwined with others, I had to cut it into three pieces, just to get it out.

All of the trees could use more pruning, but I did as far as I could reach. I could bring the little scaffolding over to work on them, but I think they’ve had enough pruning for this season. I don’t want to over do it. I’m not going to bother with the other crab apple trees, since they really should be cut down. One of them, diseased as it is, still has lots of tiny apples on it that the grosbeaks love to eat in the winter. I don’t want to remove a food source if I can wait. It will be a while before the silver buffalo berry start producing berries but, once they do, they are supposed to be quite prolific and should make up for the loss of crab apples as a critter food source.

Before starting on this, I went through all the tomatoes outside, boxed up the ripe ones and brought them inside. Tomorrow will be a day of preparing and freezing most of them, and maybe setting more up to dehydrate in the oven. We’re also supposed to be warm and dry over the next few days, so I hope to be able to get back to work on that trellis bed. Plus, our garlic should be arriving next week, so I want to make sure to have a bed prepared for them, too.

Lots of work to get done, before winter comes!

Oh, that reminds me. No word from the financing lady today, so I don’t expect to hear from her until Monday. It’s probably quite a challenge for her to find a deal that fits our budget for monthly payments!

Ah, well. What will be, will be.

The Re-Farmer

Our 2023 garden: still alive!

It’s always interesting to go through the garden after the first frost of the season, and see what survived and what didn’t. I’m rather used to finding things that end up dead after a few days, but it’s a real boost to my day when I find things that not only survived, but continue to grow!

The first photo is of the Ozark Nest Egg gourd, near the compost pile. All the volunteer squash in the compost pile were frost killed, and it looks like this little thing was, too, yet here it is, blooming!

The second photo is the yellow patty pan squash. There were some developing squash that were killed by the frost, but now I see that lower down the stem, there are both male and female flowers growing! I am not cutting back any of the frost killed leaves, since clearly they provided enough protection to keep the plant alive. In fact, I’m not pulling or cutting back any of the squash plants. Not even the winter squash. There’s no rush to do it, but who knows how many others are like this.

The last photo was a real surprise to see. The second light frost did damage the luffa leaves more, but they are still alive. What I did not expect, however, was to see fresh vines climbing the lilac, and new female flowers! I don’t see any male flower buds anywhere, but they might just be hidden among the lilac leaves.

The last couple of days has seen rain, off and on, especially overnight. Just enough that I’m not getting out there to do work that involves things like the electric chainsaw. We’re supposed to warm up again over the next few days, then get cool again.

We’ll see what actually happens.

The Re-Farmer

Another step forward, and don’t eat THESE berries!

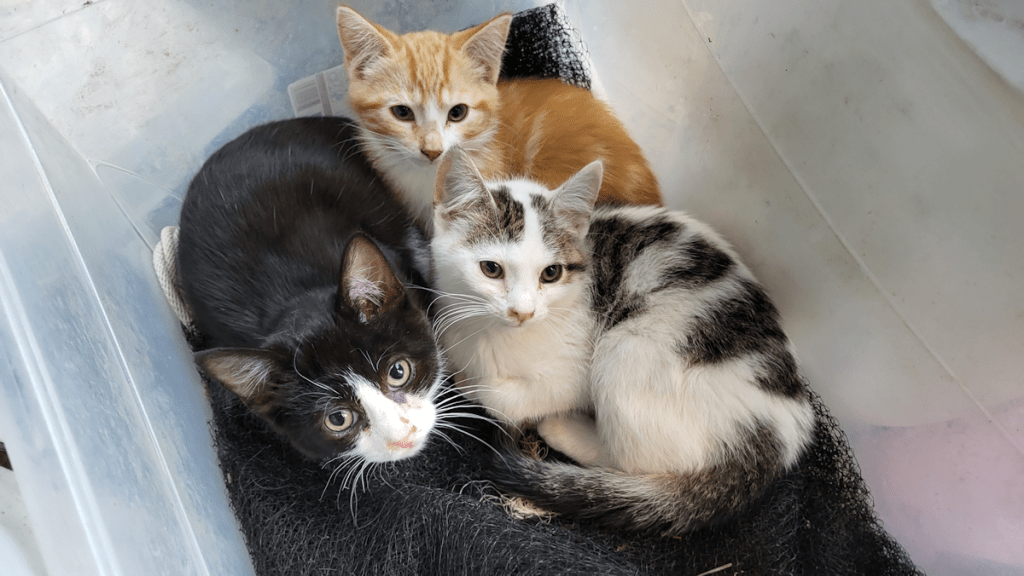
First, some adorableness!

When I came out to feed the outside cats this morning, I spotted these three. The tabby was curled up and asleep when I came over. I reached in to pet them, and the other two started purring before I even touched them! I got to pet the tabby while it was asleep, but once it woke up, it would not tolerate pets and ran off – though I did manage to pet him more while he was trying to get out of the bin and onto the shelf above!

As I was finishing my morning rounds, I decided to pick the potato berries from the large volunteer potato plant from last year’s potato patch. The frost has killed the plant off completely, which is interesting, because the potato plants in the grow bags are still undamaged by frost and barely dying off for the end of their growing season.

Potato berries are toxic, but these all should be full of potato seeds. I will do a bit more research on what to do with them, but during one brief search, I read that the seeds need to be fermented, much like tomato seeds. Which makes sense, since they are related.

For now, though, they are tucked away in the cat proof living room.

This morning, my husband had his meet and greet medical appointment with a new doctor. That went better than he expected, and he now officially has a new primary care doctor. The paperwork to transfer his medical files have been signed, and he’ll need to update the pharmacy and disability insurance company.

Some of the medications my husband is on are not at all familiar to her, so she’s going to be doing some research. We will probably do a follow up appointment with her in the near future, if only because some of the blood test results from yesterday are not in yet.

My husband was happy with her. More so than the interim doctor, that’s for sure. I had my issues. The first being, she was the only person I saw all day wearing one of those useless masks. After years of being surrounded by mask nazis, being treated like trash, and having an ever shortening list of places I could go without risk of being physically or verbally assaulted, either by customers or staff, spending so much time around a faceless person is still something that triggers anxiety. That we still have medical professionals, who should know about the mountains of data and research showing how wearing them are more harmful than beneficial, also immediately lowers my opinion of their competency. There were a few other things that came up when I asked questions about medication that are red flags for me, such as her response on my husband being on statins (he should not be on statins) or Ozempic (the side effects can be very… messy), neither of which have actually done anything to improve his health. But, this is a first time visit, and beggars can’t be choosers.

After the appointment, I did ask at the desk about any other doctors taking patients, which my mother in mind. It turns out that no, even this doctor we just saw is already closed to new patients. My husband is basically the last one. Not that I would ever make an appointment with her for my mother. She has a hard enough time with a doctor that is black (and has an accent strong enough to make it difficult for my mother to understand what she’s saying). This doctor may be the “right” colour but, in a passing comment, she mentioned her wife, and that would just be too much for my mother to handle!

The receptionist suggested I ask again in a few months about doctors taking new patients. Which is much the same situation in the other clinic. As much as I’d like to have the same doctor as my husband, since I go to all his appointments, anyhow, I’ll see if I can have the same doctor as my mother for the same reason. It’s just convenient to have the same doctor.

After the appointment, we were going to try and get my husband’s photo ID, since he has no up to date photo ID right now. Unfortunately, there’s a public sector union strike going on right now, so he decided against it. Even if we got the ball rolling locally, who knows when the processing will actually happen. So he decided to skip that – though I think the state of the streets might have had something to do with his decision. They are rougher to drive on than our gravel roads, and his back feels every bump!

Our daughter was a sweetheart and send money for take out. We were going to get Chinese food, but the place was closed today, so we ended up getting a whole lot of fried chicken, instead. It’s good, but we got less food for her money with that. Ah, well. It was still delicoius food that someone else cooked for us!

After we got home, I found a couple of messages from the financing company. I called her back and she told me everything is proceeding well. We have a conditional approval, and there are two banks vying for our file. She will choose the one that gives us the best deal, then negotiate the best contract for us. Meanwhile, we’re at the stage where we have to send in our ID, income confirmation, etc. She had tried to email us already, but the emails bounced back. Turns out she misheard part of mine, and had the wrong language spelling on my husband’s – pretty common problems with our emails, to be honest! 😄

One thing I’ve never heard of before is that they want an “ID selfie”. Basically, a photo of ourselves holding our photo ID next to our face. Which does make sense, with everything being done electronically, but it’s the first time I’ve heard of that being requested.

I mentioned that my husband does not have current photo ID, which may be a problem. He does have his old driver’s license, which is expired, but still a government approved photo ID. He also has his Metis card from when we lived in this province before. That has no expiry date, but I don’t think it counts as government approved. So for him, we got pictures of the fronts and backs of 4 different IDs, when only 2 are needed, plus a picture of him holding both his old photo IDs next to his face. I had to get one of those for myself, too. Then there’s the proof of income, which was his annual letter from the insurance company saying “yes, you’re still disabled, yes, we’re still paying you!” , etc.

So that’s all sent in. Hopefully, it’ll be enough. One bit of info I did include was that the vehicle will be in my name only; with all his medications and pain levels, my husband simply doesn’t drive. Even when he still had his license, he voluntarily stopped driving, long ago. That might also make a difference. It did with a previous company, and my husband’s name was removed from the application completely.

Either way, we’re one step closer to approval, and getting a replacement van.

Which we really, really need. The check engine light on my mother’s car has turned on again, plus I had to pull over at a gas station to top up the air in one tire. It might have a slow leak, and will need to be checked. I did a cursory check, myself, but could see nothing. I’m so paranoid about tires. We’ve had way too many problems with tires, on three different vehicles, over the years!

The Re-Farmer

Our 2023 garden: frosty harvest

I’m just going to post this photo for now; I took some video and will upload that later.

Until then, this is what I was able to harvest today.

We did get another frost last night. I was out doing my rounds early enough to see some frost still on the ground. Once again, there was no frost warning and, according to the official past 24 hours record, we never dipped below 6C/43F, while I know I saw 4C/39F on my app when I checked before heading out this morning.

I should get one of those high/low thermometers that have needles to mark the highest and lowest temperatures on the dial.

So for now, all the stuff affected by the frost has been harvested that could be harvested. I left the melons, because they look like enough of the vines survived for ripening to continue. We’re supposed to warm up over the next while, so that will give more time for things like the melons, peppers, Spoon tomatoes and the one eggplant to ripen. The other things, like the carrots and onions, can handle frost so they’ll be fine for quite a while longer.

Our gardening season is not done yet!

The Re-Farmer

Trellis bed progress

I headed out to check the garden as the day warmed up, to get a better idea of how much frost damage there was. As things warm up, the damaged/dead parts turns a lot darker, which showed me that the tomato plants in the main garden area did get killed off. Not the ones in the old kitchen garden, though! The melon plants might make it. Lots of dead leaves, but not the entire plants.

Tonight, we’re looking at a low of 5 – 6C/41 – 43F which, if things go the way they have been, lately, may actually end up being 3 – 4C/37 – 39F.

The high for today ended up being 18C/64F. I took advantage of it and got some work done on the trellis bed. It was actually feeling too hot while I worked! This is where I stopped for the evening.

The first thing I needed to do was finish off the wall on the left. I rolled the top log off, then used a chain saw to try and smooth and flatten things a bit, mostly to get rid of odd lumps and bumps, then putting the top log back. I still ended up with some gaps, but those will be filled with pieces of wood from the inside

The next thing was to use an auger to match the size of the pieces of rebar I have. Thanks to my husband, I have a nice set of long auger bits for my drill. They’re a touch shorter than the rebar, so after drilling holes through both logs, I removed the top log again, then drilled further through the bottom log. Once that was done, the rebar got hammered through the holes in the top log until it came out the other end, which I could then use to position the top log back again before hammering the rebar flush with the top.

The base log for the other wall was already debarked, but needed some clean up to remove bits of branches and other lumps and bumps. Then I got out the garden fork and loosened the soil between the markers where the log would be positioned. I found a large rock in the process that would not move. Since it’s under a wall, I left it. Once the soil was loosened, and the worst of the weed roots removed, I spun the log around so that the wide end was facing the other way. The ground is a bit lower on that side. I should have laid the base log in the other wall that way, but didn’t think of it until I’d already positioned it.

This base log itself has a long bend in it. I made sure it was positioned to bow outwards. That will be taken advantage of later in the build. Once in place, I used the chain saw again to remove any parts that looked too uneven and lumpy, and trimmed a few branch stubs a bit more.

The top log then needed to be debarked and prepped. This wood actually took the knife a lot better, so I went ahead and shaved a flat strip, so it would lay flatter on the base long.

That didn’t quite work out!

While the top log is a lot straighter than the bottom one, when I put it in position, the narrow end of the top log, which is set above the wider end of the base log, was floating at least 8 inches above! After rotating the log until it finally set the most evenly, the shaved part was now on the top!

There were still some lumps and bumps in the way, though, mostly on the base log. The wood on that tree did not take to the draw knife well, so I used the chain saw to level it off some more, then made another matching flat area on the top log.

With the bend in the base log, though, the top log is lined up on each end, but almost completely off the bottom log at the bend! It wasn’t going anywhere, though, so I repeated the process for inserting the rebar, more or less matching where the ones in the other wall are set.

With the rebar holding the logs together, I used a board to line up and mark the ends for cutting, then removed the jagged ends of the logs. I had to be careful with the bottom logs, so as not to be cutting into the ground!

The two logs you can see set aside in the photo will at least partly be used to close up the ends of the beds. These beds are meant to be 18′ long and 4′ wide on the outside. With the ends trimmed, they are no longer 18′ long, but the end pieces will be used to make up the gap. It doesn’t have to be exact, but I’d rather they be a bit longer than shorter. With how the logs taper, I might have to find thicker pieces of logs to finish the ends and get that 18′.

Once the end pieces are in place and secure, I’ll start working on attaching the 4 vertical supports for the trellis, which will then get horizontal supports across their tops. They’ll be added after the verticals are in place. The ground is uneven, but I want the horizontals to be level. Since I’m not going to be digging post holes as originally intended, and just attaching them to the outside of a wall, I’m no longer going to be losing about a foot of height on these 7′ posts, so I will likely mount the horizontals at 6 1/2′ rather than 6′, then trimming off the excess height. When the second bed is built at the other markers, it will have matching trellis supports and, eventually, they will be joined at the top to create a tunnel.

If all goes well, we’ll make at least one more trellis tunnel set up in line with this one. My priority, however, is going to be making more high raised beds, once this is done. Mobility, reach and pain reduction while tending the beds are becoming more of an issue for me.

Not before this bed is finished, though, and that will include filling it and preparing it to plant in, next year. That means layers of carboard on the bottom, maybe some small branches, wood chips, fresh green material such as the frost bitten bush beans I pulled earlier today, grass clippings and topping it with some of that purchased garden soil we still have left. Last of all with be a grass clipping mulch to protect the soil over the winter.

The bed the Roma tomatoes were in needs to be prepared for the winter, and if I could at least make that into a high raised bed, that would make life easier for next year!

The Re-Farmer