One of the first things I do in the morning is check on the seedlings, turn on the lights, and do any tending they might need.
The newly transplanted and potted up plants seem to be doing very well – with one possible exception.
The Wonderberry we have left from the first planting is just too big for the top of the mini greenhouse.
I mean, look at this beast! It’s getting huge!
And what’s that I see???
Yup. Those are flower buds!!
I planted these really early, after doing some online research, but it seems it was too early.
So what do I do with the poor thing? We can’t leave it out, or the cats will destroy it.
The only safe place for it is in the sun room.
Except…
Yeah. It’s too big for the shelve space, too.
There was only one thing left to do.
I now have it sitting in the window on the other side of the door, which is a pair of smaller windows with a shelf in between. It’s actually a great spot for a plant like this. The problem is mostly the temperature, though it also gets less light. In the other shelf, there is at least the lights provide a bit of warmth. This spot is too far away for that to be any help.
I don’t think the sun room dipped below freezing last night. When I first looked in, in the morning, it was at about 8C/46F, but I expect it to get above 20C/68F in there as the day warms up. However, we’re supposed to start cooking down again, with a high of -5C/23F by Thursday – and more snow on Wednesday, Thursday and Friday. The Southern parts of the province are even getting weather alerts, as a Colorado Low swoops in, potentially bringing as much as 20cm/8in of snow. That, in turn, is leading to flooding alerts in regions to the North.
None of which is anywhere near us, but we’ll still be affected by the system with cooler temperatures and more snow.
At least the current warm weather is reducing the amount of snow we have now, so if we do end up with more, it’s not going to be as much of an issue.
The receding snow is starting to reveal that we are going to be picking up quite a lot of fairly large branches, once we’re able to do the spring yard cleanup.
The new beds along the chain link fence are now clear of snow, including the asparagus bed. Which, unfortunately, has a lot of grass and weeds already starting to grow. There’s less than half an inch of thawed soil on the top, but that’s enough for the weeds.
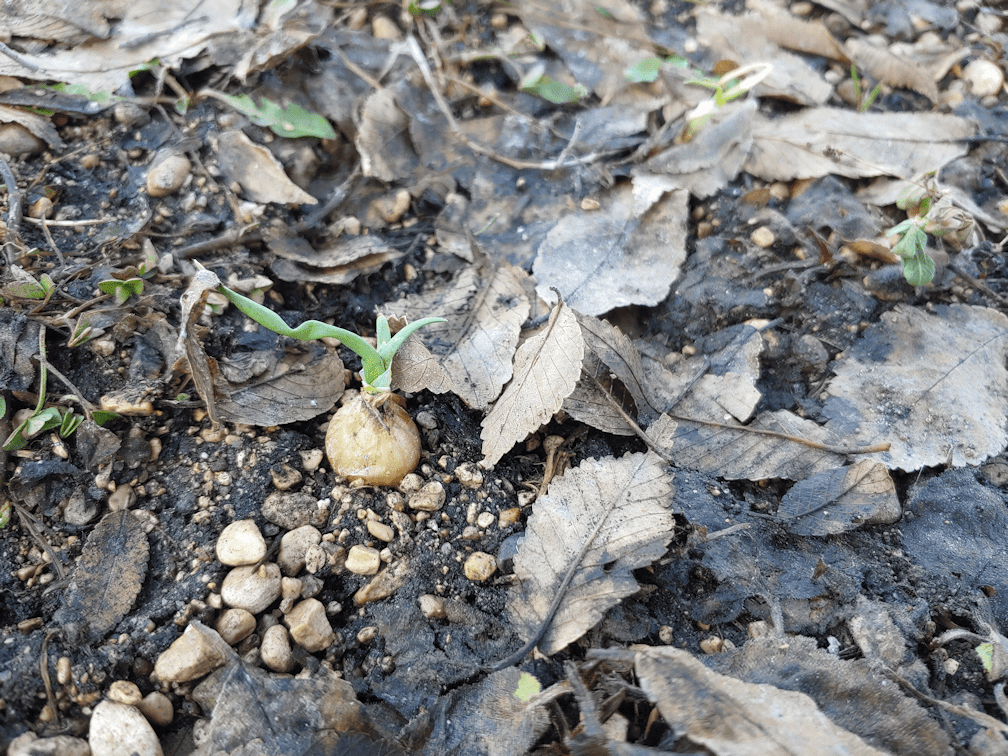
There was a surprise, though.
There are onions growing!
We had transplanted the tiniest of seedlings around the asparagus bed last year, mostly because I didn’t want to toss them. They established themselves, but hardly grew at all, and we just left them. Even when cleaning up in the fall, we just let them be.
I found about 8 or 10 of them, starting to grow!
It should be interesting to see how they do. As this would be their second year, if we leave them, they should go to seed.
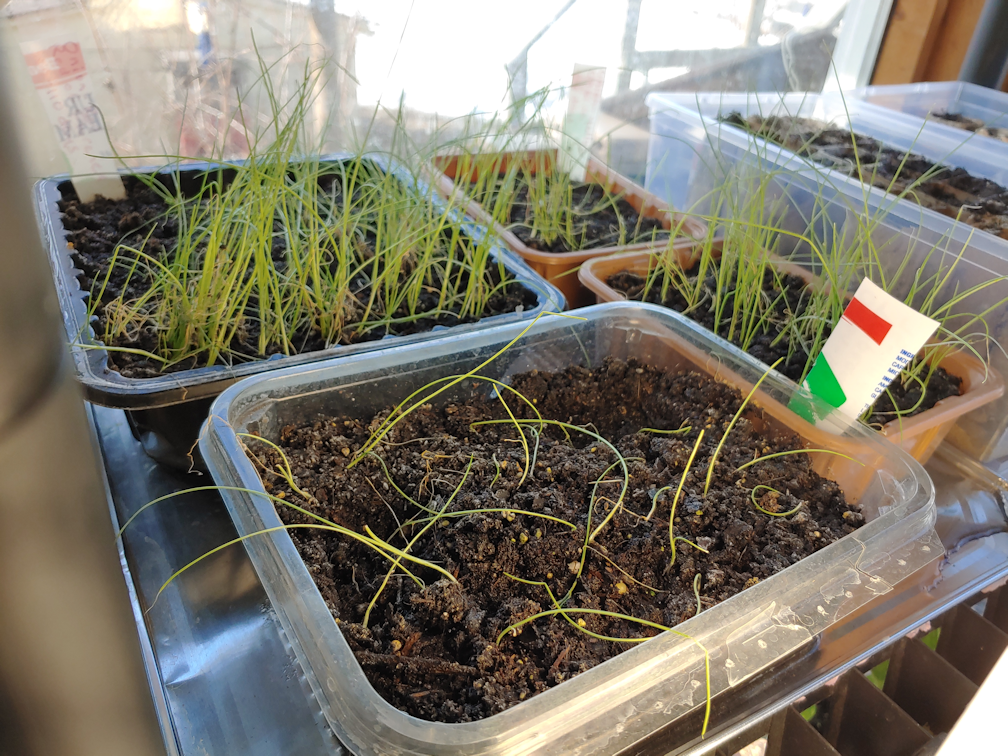
Speaking of onions and seeds, the seedlings we moved to the sun room seem to be doing rather well.
In fact, I think they’re actually perking up and getting stronger. Well. Maybe not the shallots. It’s really hard to tell with what’s left of those! But the red and yellow onions seem to be getting bigger and stronger.
We might have something to transplant, after all!
I might still get sets, though. In this household, we just can’t really have too many onions! :-D
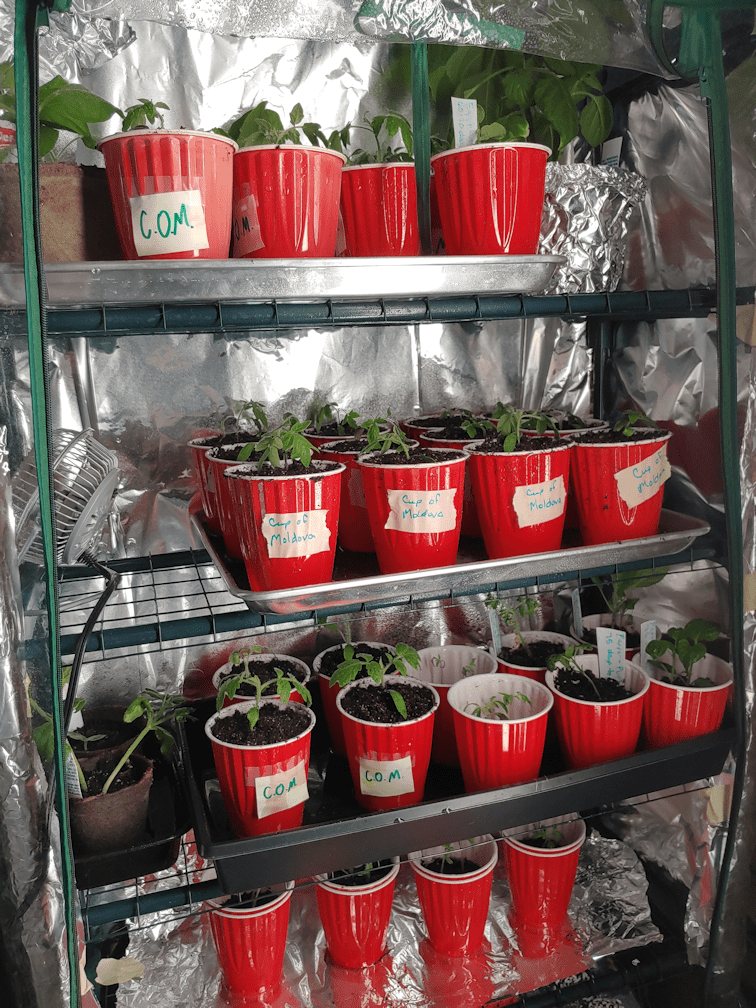
With our average last frost date of June 2, today works out to be 8 weeks for seed starts. In addition to starting new seeds, our replanted Cup of Moldova seedlings were ready to be thinned and potted up.
We also needed to make space.
While the sun room’s daytime temperature neared 20C/68F, while the outside temperature reached a high of 4C/39F, the overnight temperatures dropped to just above freezing.
We decided to take the chance, and move the onions and shallots to the sun room. I’m not very encouraged by how they seem to be doing, and I figure we’re going to need to buy sets later on, anyhow. More on that, later.
We also had to pot up the Wonderberry. The only one that survived from the first planting is large enough that it can only fit into the top of the mini-greenhouse, where the frame comes to a peak. The second planting had two that were getting pretty big, so they got separated and repotted, too. There was also a whole lot of removing of pots where the seedlings did not survive, and re-arranging the big aquarium greenhouse so that the new seed starts could go on over the heat mat.
Eventually, we were able to start the new seeds!
There were only two things that needed to be started, as the others on the list were for 8-10 weeks, and we’d already started them at 10 weeks.
One was Aunt Molly’s Ground Cherry. The seeds are so small and few, they came in a separate envelope in the packet. Still, my daughter divided them up, and planted 6 pots with them.
While she worked on those, I started on the Red Baron bunching onions.
They have such pretty seeds!
These were densely planted in a repurposed grocery store salad container.
These are now on the heat mat.
The pots that had been on the heat mat got shifted over, but are still in the big aquarium.
Here we have our squash and gourds, and the second planting of eggplants and purple peppers. There are a few survivors of the first planting, but the way things are going, I figure extras will always be a good idea!
This tray had the second planting of the Cup of Moldova paste tomatoes, planted in Red Solo cups. A couple of them had only one seedling in them. For the rest, I gently removed all but one from each cup. The cups were only half full of seed starting soil, so my daughter potted them up by simply adding more to fill the cup. While she worked on that, I filled more cups and transplanted the tomatoes that had been removed, burying the stems until they were much like the others. I ended up doing a dozen cups, on top of what my daughter filled.
Hopefully, most of these will survive to be transplanted!
We were able to fit them all into the mini-greenhouse, though a bit more re-arranging needed to be done. The Sophie’s Choice tomatoes are much smaller, and not ready to be thinned or potted up, yet.
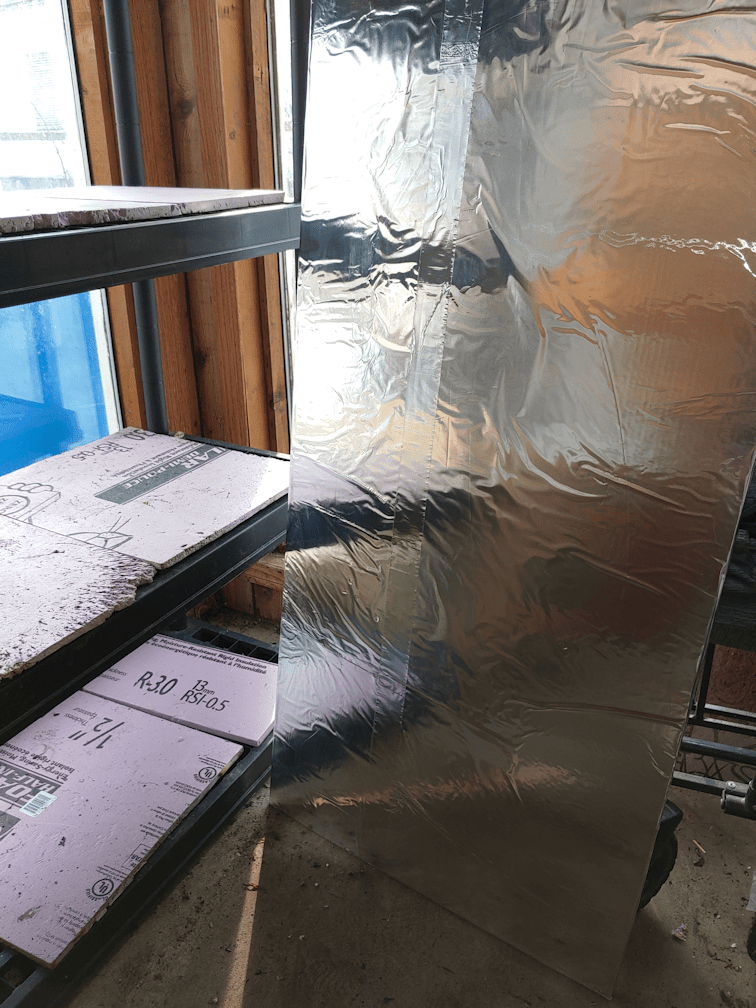
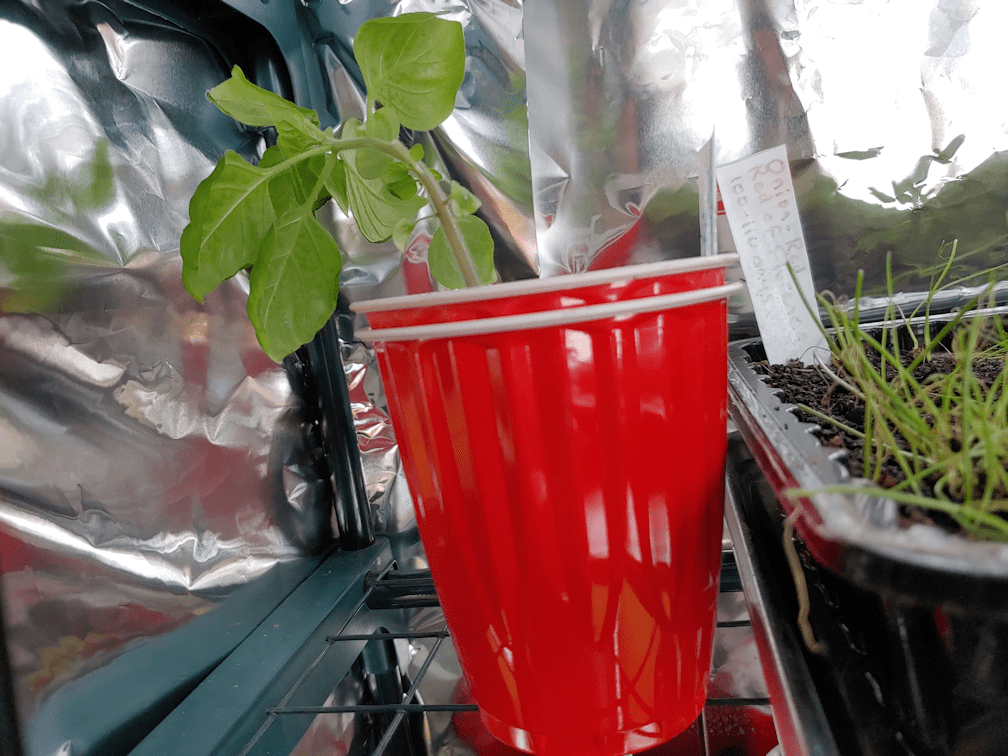
The largest Wonderberry is now in one of those Jiffy pots that can be buried directly into the ground, as are the two smaller Wonderberry. The smaller ones are in the tray, where they can be watered from below, but the big one was on its own. To allow for watering and not making a mess, my daughter wrapped the pot with aluminum foil.
Since we have to keep the mini-greenhouse enclosed, I have the mini fan set up to blow are up one side, so it can circulate under the cover without blowing directly onto any plants. A salvaged window screen gets set across the bottom, then the flap is brought down, its bottom tucked under the screen, and the zippers pulled down as far as the screen, so hold it in place. It’s the best we can do to keep it from getting too hot in there and to allow fresh air in. For seedlings this big, the cover would be removed completely, but certain cats would simply destroy everything.
It will be good when all the plants can finally go into the sun room! These are, however, much more fragile than the onions.
I had a couple of spare oven liner trays that I picked up for inside the small aquarium greenhouse. We’re not using that right now, as anything that goes into it seems to struggle. That’s where these onions had started out. They should be quite a bit bigger, and there should be more of them.
That one tray that looks the sparsest is the shallots. The soil even looks dug into. I suspect one of the cats actually managed to reach through a gap in the cover flap over the screen we put in front of the mini-greenhouse.
Concerned for the overnight temperature drop, I remembered a small light that we’ve used in the sun room before. It has an incandescent, full spectrum bulb in it.
It also gets quite warm, and we’ve made use of that heat for everything from keeping plants warm, to keeping recovering cats warm!
So that got set up on the empty shelf under the onions. The shelves all have scrap pieces of rigid insulation on them. Most of the inside of the shelf is covered by the reflector we made using a larger piece of rigid insulation. So the space should hold warmth a fair bit. The light fixture would help, plus even the LED shop light does warm up, just a bit. Between all that, I’m hoping the shelf itself will hold a pocket of warm compared to the rest of the room.
We’ll see what difference it makes.
So this is where we are at, 8 weeks before last frost. We have a few more seeds to start at the 6 week mark, but it’s the 4 week mark that is going to be a doozy. The fast majority of our seeds, both in variety and in quantity, are supposed to be started by 4 weeks. This includes the winter and summer squash, pumpkins, remaining gourds, melons, watermelons, and the last of the tomato varieties. We don’t plan to start many of the tomatoes, but we do intend to plant quite a lot of the various squash and melons.
Finding the space for everything is going to be quite the challenge. It’ll be May by then, though, which means the overnight temperatures in the sun room should be warm enough that we could even start some seeds in there, and not just in the large aquarium greenhouse. Some of what we’ve started will be ready for hardening off, too.
Looking at the long range forecast, we’re going to have a rather chilly Easter weekend, and things aren’t going to warm up very much after, either. I’ve been looking at the 30 year averages, though, and these temperatures are pretty much bang on for the average.
The girls and I had to do a fair bit of clean up and pick up from what the cats and skunks knocked about while we had the run room doors propped open. Then one of them stayed out to tend the burn barrel. I’d gotten it going this morning, then covered it to smolder, but the cat litter sawdust just can’t dry out enough for that to work very well.
It’s just too wet out there for anything to dry, even in the burn barrel!
We got the shelf in the corner of the sun room ready to hold seedlings. Only the bottom three shelves will get used, because the eaves shade the top shelves too much. We’re going to see how using the scrap pieces of insulation on the shelves will help.
I cut another piece of rigid insulation to cover the three shelves we’ll be using, then covered one side with heavy duty aluminum foil. The foil is adhered with ordinary white glue, watered down enough that I could apply it with a cheap, dollar store paint brush. It took two overlapping lengths of foil to cover it and, just to be on the safe side, the overlap has a strip of aluminum tape over it as well. Much to my surprise, I found that at the dollar store, too! The back just has strips of duct tape holding the foil edges.
I found a way to hang up the new shop light I picked up at Costco. If we needed to, we could set up the second one on the other side of the foil covered sheet as well. These lights are designed to be hooked together, too, so one can be plugged into the other.
The problem is, we don’t have any way to safely set up the ceramic heater bulb overnight. When we used it before, we used the frame of the mini-greenhouse to hold it securely away from any potential fire hazards, but that’s being used for seedlings in the living room right now.
The aluminum foil will help reflect light from the window, but we will have to be careful during the day, to makes sure it doesn’t reflect too much heat, too. We want a solar reflector, not a solar oven. I’m hoping, however, that it will help keep the shelves warmer than the rest of the room during the night.
We’ll be testing it tonight, with the tree seeds.
Which I am sure are a total loss.
After transferring the seeds from the slide lock baggies into the toilet tube pots, they went into the mini-greenhouse. There is a little fan in there to keep air circulating but, because of the cats, we can’t open it up like it really should be.
Which is probably why this happened.
*sigh*
It’s a good thing these are a total experiment. It is possible the seeds are still viable and may actually germinate, but my goodness!
Now that they’re in the sun room, and not enclosed in the mini-greenhouse, the mold might dry up and die off. The seeds themselves are supposed to develop a tap root long before the leaves break ground, so I was still not expecting anything to be sprouted. Who knows? Some might still survive. There is that one slender bit of green growth in the tulip tree bin, after all. No idea if that’s a tree seedling, or some weed that managed to get into the seed starting mix.
We’ll monitor things for a day or two, then will probably move the onion and shallot starts into here, as they can handle cooler temperatures better than anything else we’ve got sprouting right now. Even just moving these two little bins has freed up a fair bit of space. After that, we’ll have room to move things out of the big aquarium greenhouse, and use that for the next batch of seed starts.
It always amazing me just how fast some seedlings grow!
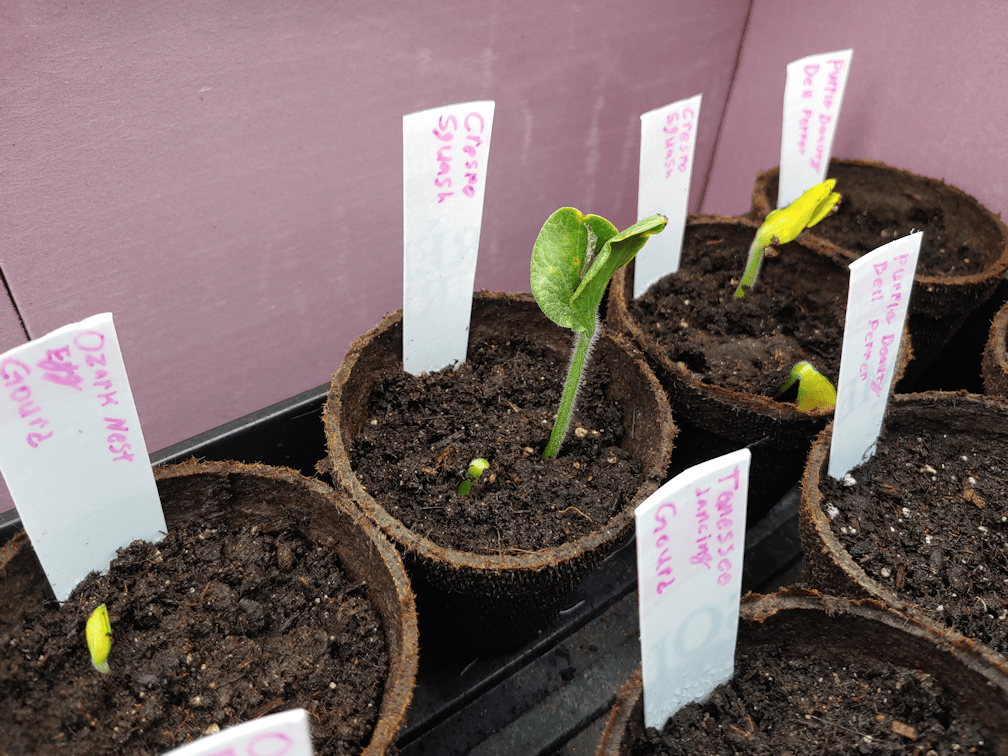
It’s like they’re bigger, every time I look in the tank. Just look at those Crespo squash!
These two pots each have 3 seeds in them. Two that were scarified, and one that was not. I think the scarification made the difference!
To the left is the Ozark Nest Egg gourd, and…
… you can see a Tennessee Dancing Gourd emerging, too. In the background, the luffa are starting to develop their true leaves.
What is interesting is that, while these squash and gourds are germinating, there is no sign of germination in the pots with eggplant and peppers seeded into them.
Last year, it took forever for the squash and gourds to germinate, and many pots never did. This is a huge improvement. I think there is a combination of reasons. One being the scarification of the seeds – except the dancing gourds, which were too small – and the other being the use of a heat mat.
I know we’re supposed to thin the seedlings down, but I’m thinking we’ll thin them by transplanting the extras. When it’s time to transplant outside, I want to have extra, just in case some don’t survive transplanting, or in case critters get to them. The more we plant, the better the chances of having at least one survive!
This morning, while tending our seedlings, I spotted a newcomer!
That is a Crespo squash seedling!
This tray, on the heat pad, needs to be watered about twice as often as the tray next to it.
Where the Cup of Moldova tomatoes are doing quite well! The big aquarium greenhouse has been working out the best among our three set ups.
The Sophie’s Choice tomatoes got moved from the small aquarium greenhouse to the mini-greenhouse, in hopes that they will start doing better. I’m not sure why things are not doing as well in that little greenhouse. I suspect it has to do with lack of air circulation. The mini-fan we had on the aquarium greenhouses, moving it back and forth between the two, is now set up in the mini-greenhouse. We can’t open up the cover because of the cats, so the fan is needed more in there, than with the aquariums. I hope we can figure it out, though, because that’s little tank is currently wasted space that could be growing things! We do have a pedestal fan, but it’s not tall enough to provide air circulation in through the screen covers on the tanks. We’ve looked at different ways to set it up, but so far, we haven’t been able to come up with anything suitably cat proof.
It’s become such an issue, that we’re coming up with plans to build a “door” between the living and dining rooms, so that we can turn the living room into a safe zone for plants – all our plants – and not have to have all these barricades and shields around them. My older daughter has diagrammed a plan for a removeable frame to fit into the opening between the two sets of shelves between the living room and dining room, which would support a “door”. It would be made using hardware cloth, for maximum light and air to pass through. One of the shelves has an opening through it that we’ll have to frame a screen on, as well. We’ve really got to come up with something, because all the stuff we’re doing to try and protect the plants from the cats isn’t all that good for the plants! Especially since we are starting so many seeds indoors and, next year, will likely be starting even more. That will be a summer project, if we can get the materials we need to build it.
Last night was the first night we had the outside doors to the sunroom closed, so no cats – or skunks – could come in. It had reached temperatures of 20C/68F in there yesterday, yet this morning, it was just barely above 0C/32F, which means it was even colder, overnight. There is no way we can move any of our seedlings into there, without having to bring them back into the house overnight, which we won’t be able to do. Our overnight temperatures are going to be warming up, though, so we’ll have to keep monitoring the room. I might set the ceramic heater bulb up overnight, just to see what a difference it makes.
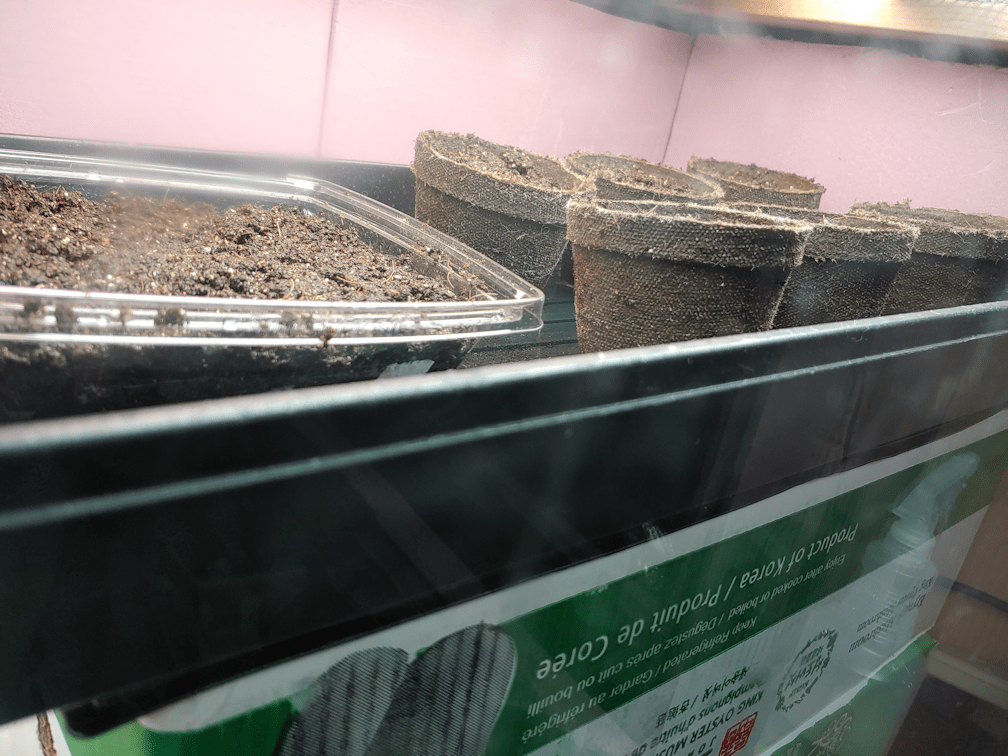
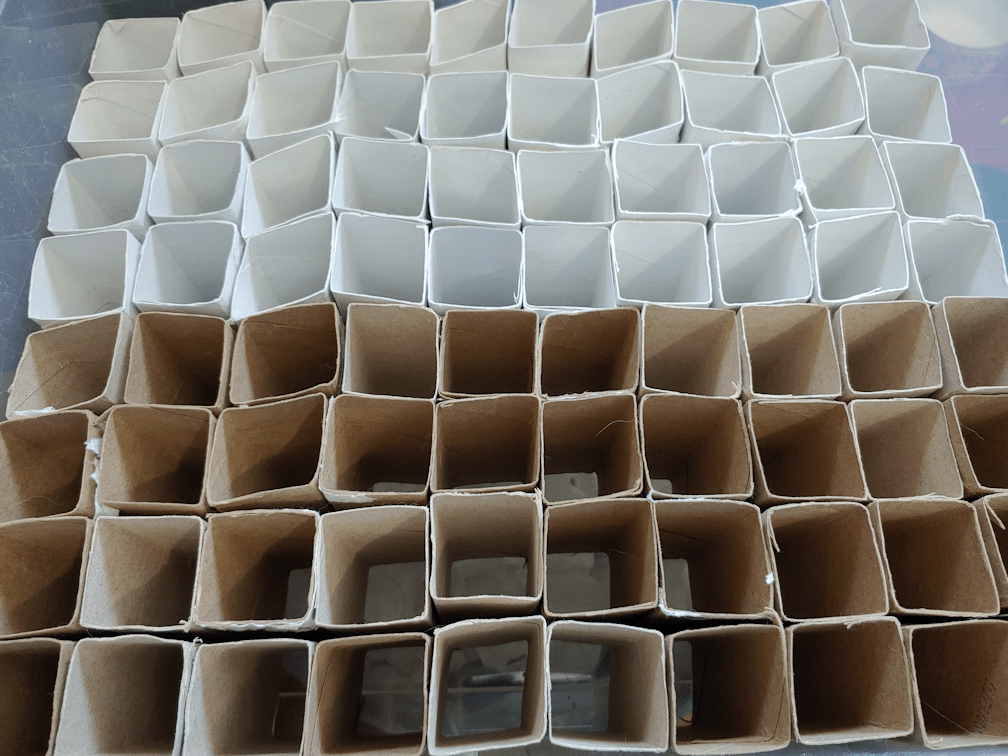
Some things will be started right in the sun room, but not for a while, yet. We’re still preparing, though, including getting the toilet paper tube “pots” set up in a bin.
This will be for the black Kulli corn. I’m not going to bother folding bottoms onto the tubes, so as to give the roots more depth. We have a total of 100 Kulli seeds (unless there are extras in the packets, which sometimes happens), and I thought I’d be able to put 100 tubes in this bin. If it had been square, it would have worked but, alas, it is a rectangle. Instead of the 10 rows of 10 I thought would fit, we could only fit 8 rows of 10. We do have more of the smaller bins we used to start the tulip tree and paw paw seeds in (still no signs of anything in those, but I’m not expecting it, yet). They can fit 4 rows of 8, so we’ll be able to work it out. The corn won’t be started until early May, though. The sun room’s overnight temperatures should be just fine by then.
I picked up more bins in this size; there was only 2 left in the store I found them in, so I now have 3 “spares”. I also got more of the smaller bins, and we now have 4 available to use for new starts. With their transparent lids, they can be used as little greenhouses, and they will make things much easier to move around when it’s time to harden off the seedlings. The toilet tube pots fit really well in these, so we’re going to continue collecting the tubes to use to start seeds in the bins.
It took a long time, but the second planting of luffa seeds has finally germinated, just this evening.
There was nothing, when I checked them this morning.
I’m glad to see them, because it looks like the one surviving luffa isn’t going to make it. Another casualty of the Great Cat Crush. :-( At just under 10 weeks before our last frost date, I’m hoping it’s enough time for them, still.
Some of the Sophie’s Choice tomatoes that got moved out of the big aquarium greenhouse and into the little one, to make room for the newly planted seeds now with these luffa, have suddenly withered. After a bit of rearranging and squeezing things closer together, I moved them into the mini-greenhouse. It has the brighter light, plus the little fan to maintain air circulation. Hopefully, that will help them recover and grow stronger again. There are still lots of others, though, so for now, I’m not too concern. We only need a couple of plants from this variety, along with the two or three other tomato varieties we’ll be starting in a week or two, that are being grown mostly for fresh eating.
Things are supposed to start warming up tomorrow, and keep warming up from now on. At least for daytime temperatures. It’s time to prep the sun room and start keeping the outside cats out again, so we can be ready to move things over as soon as the overnight temperatures in there get, and stay, warm enough.
Today is 10 weeks from our average last day of frost, and we had a few seeds to start.
But first, we needed to make space. These would be going into the big aquarium greenhouse, on the heat mat, which meant the Sophie’s Choice tomatoes had to be moved. All the pots have seeds germinating in them, so it’s okay to take them off the heat mat now.
Space was made for them to fit onto the tray in the small aquarium greenhouse, which is where we have a few rescues. At the bottom left is the only luffa we’ve got so far. The seed leaves have wilted away, but the true leaves are still holding out. In the top left corner is the rescued Canteen gourd. It had seemed to be doing well, then suddenly it started wilting and the seed leaves started wilting away, but it has actually perked up again. If it can manage to develop some true leaves, there’s hope for it. With the Canteen gourd, however, the replacement seeds we planted are doing much better. The two plants with the largest leaves in the photo are Canteen gourds, as are the not quite as robust pair in between the luffa and the original Canteen gourd.
There’s also one surviving tomato plant in there; I can’t remember which type is it. There are a few others in the mini-greenhouse, too.
The one Wonderberry that sprouted from the first planting has gotten big enough that it was too tall for the lower shelves in the mini-greenhouse, so I couldn’t put it in one of the trays with other pots. So it got double cupped and tucked in with the bulb onions at the very top, where the mini-greenhouse has a peak. It didn’t like my attempt to put it in a lower shelf, but it should be standing tall again, soon.
Here we have the pots that my daughter and I started today, joining the luffa pots that we planted a couple of weeks ago. Still no sprouts. :-(
Everything got two pots each. Two types of gourds got started today; the Tennessee Dancing Gourd, and the Ozark Nest Egg gourd. Both did surprisingly well last year, in spite of the drought.
The Crespo Squash was also started. Then, we decided to plant extra eggplants and peppers. We do have surviving ones from the first planting that seem to be recovering all right from being flattened by a cat, but we’ve decided to play it safe and plant extra. The last of the Little Finger eggplant seed were planted, but we still have a few left of the Purple Beauty pepper.
The next batch of seeds should be started about 2 weeks from now. Hopefully, we’ll be able to move at least the onions to the sun room. They can handle cool weather better than anything else we’ve got started right now.
When finishing the toilet tube seed pots we made yesterday, we had to put the lids on the bins, to keep the cats out, so it took quite a while for them to dry.
They still weren’t totally dry, but I figured it was good enough! After all, we’re just going to be bottom watering these, anyhow, so they’re going to get soaked, soon.
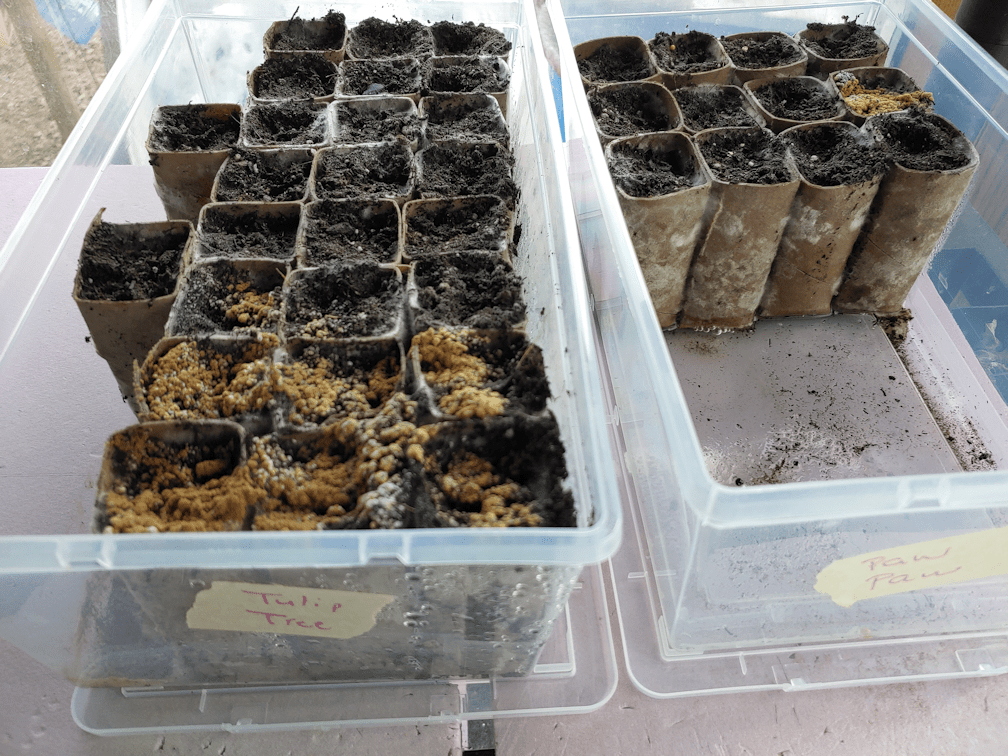
I started with the tubes intended for the paw paw seeds. After filling them 3/4s of the way with pre-moistened seed starting soil, I started carefully finding the paw paw seeds in their baggies, while my daughter continued to fill the tubes intended for the tulip tree seeds.
After placing a seed into a pot, soil from the baggie was used to top up the pots. In the above photo, the two on the left have seeds in them.
None of the paw paw seeds showed signs of roots, though they did look more… filled out, shall we say. More rounded. Which is to be expected, considering they’ve been in damp soil all this time.
Once filled, they tucked into the bin a bit more tightly than while empty, which is what I want. It’ll keep them from falling over, and keep the toilet rolls from unraveling when they get wet.
After putting the filled pots back in the bin, they got watered, and any that showed the soil settling quite a bit, got topped up with more soil. Then water was added to the bottom of the bin.
The tulip tree seeds also did not show any signs of roots. In fact, they still looked almost exactly like they did when we first got them, except a bit darker from being in damp soil.
They got watered from above, topped up with more soil as needed, then water added to the bottom of the bin, as well.
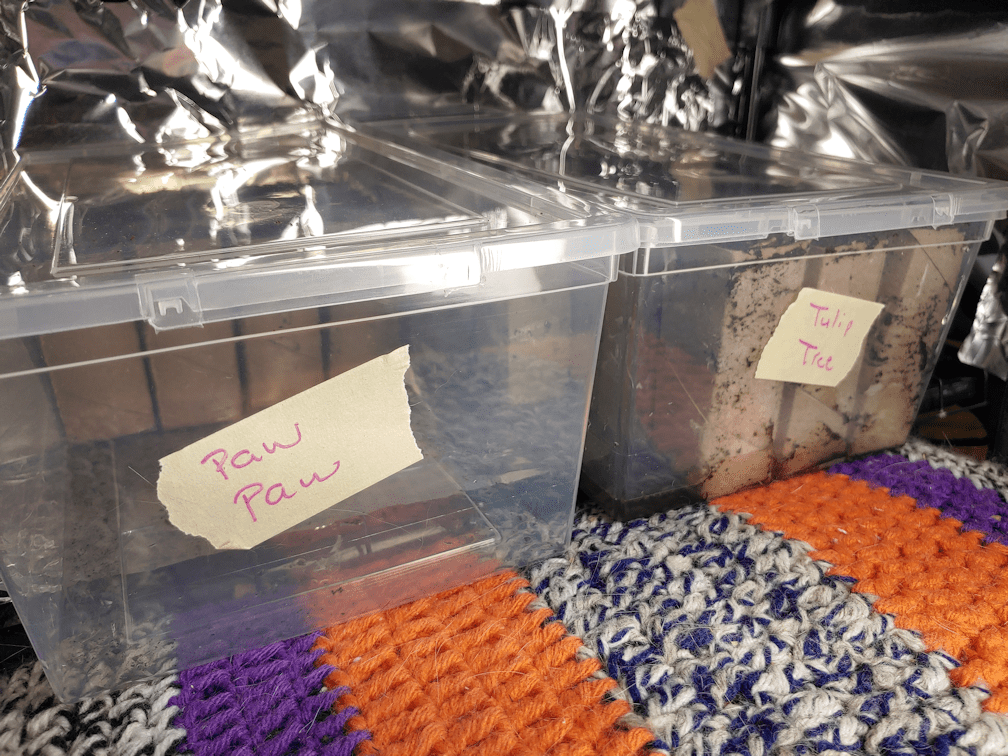
They then got lidded and labelled, ready to go into the mini-greenhouse.
The lids will be left on, loosely, to help keep the moisture levels even.
A bit of re-arranging of the other seedlings and trays, and I was able to put these on the two bottom shelves where, even if the cats manage to get in, they will be safe.
Now there’s another reason to use these bins for seed starting. Cat protection!
The instructions they came with said that these take a very long time to germinate, and that the roots will be growing long before the leaves start to show. So we will just keep these moist and otherwise leave them alone. Not having them in the baggies anymore means we won’t get to see those roots, but I think it will be better for them to be in these little pots instead of the baggies. Less chance of the roots getting damaged, I think. It will also be much easier to move them around in these bins, than in the tray that was holding the baggies. Those black trays may fit the shelves in the mini-greenhouse just right, but they are awfully wimpy things, and hard to move around. A couple of them have already started to crack on their edges, from bending in the middle when picked up.
So this is now done. The tree seeds are in little pots and, perhaps in a month or two, we might see sprouts emerge. I have no idea what to expect from these, and am just hoping for the best!
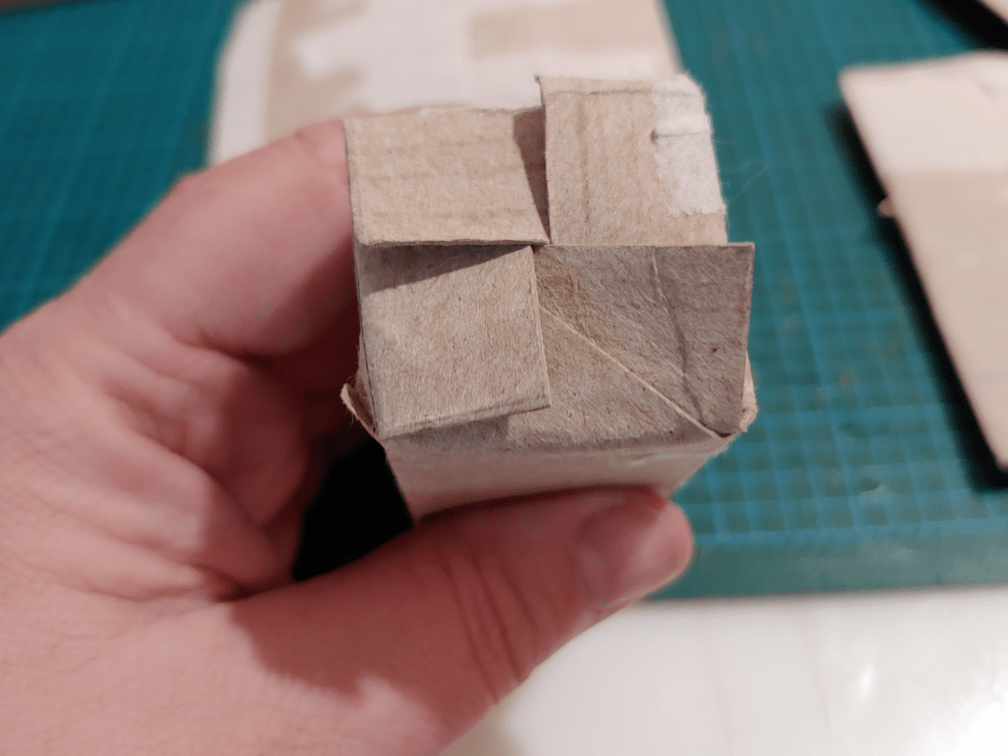
While I have purchased pots that can be planted directly into the soil when it’s time to transplant seedlings, the sheer number of such pots we will need makes buying enough for all of them bad for the budget. In particular, I want to start the kulli corn in biodegradable pots, for as little root disturbance as possible.
After last year’s attempt to use toilet paper tubes failed dramatically, largely due to using peat as a growing medium (it simply would not absorb moisture all the way through!), we’re going to try things a bit different this time.
There are a lot of web pages and videos on how to make pots from toilet paper tubes. This one is the best one I’ve seen so far. There’s the added bonus of it showing the pots made into squares, which was what I was thinking of doing already.
It’s pretty basic, really.
We knew we’d need a lot of tubes, so we’ve been saving them for many months. Last year, I had a fairly large box that we would drop the tubes in, and when we ran out of room I’d transfer them to a storage bin, to make more space.
Which was really silly, now that I think about it. It only matters if you want to keep the tubes round, and there is no need for that at all.
This little box has two layers of tubes in it. After flattening a tube, I’d drag it across the edge of the bathroom counter, to crease the fold even more.
It’s amazing how many tubes can be fit into such a small box this way!
Today, I snagged some of them to make pots for the tree seeds. I don’t know if there are any roots starting to show in the little baggies of soil. I am thinking it would be much less disruptive on the roots to “transplant” them now – when there may not even be any roots yet – into little pots, compared to trying to move them out of the baggies when the roots are actually visible.
So I grabbed a dozen tubes for the paw paw seeds, first. The different brands all have different tubes. The ones I grabbed were the tallest, with the thickest carboard.
This first batch was done like in the video.
The first thing that needed to be done was give them all a second crease for the square, keeping the sides even by lining up the first creases with each other. The carboard was way too thick to fold them like he does in the video.
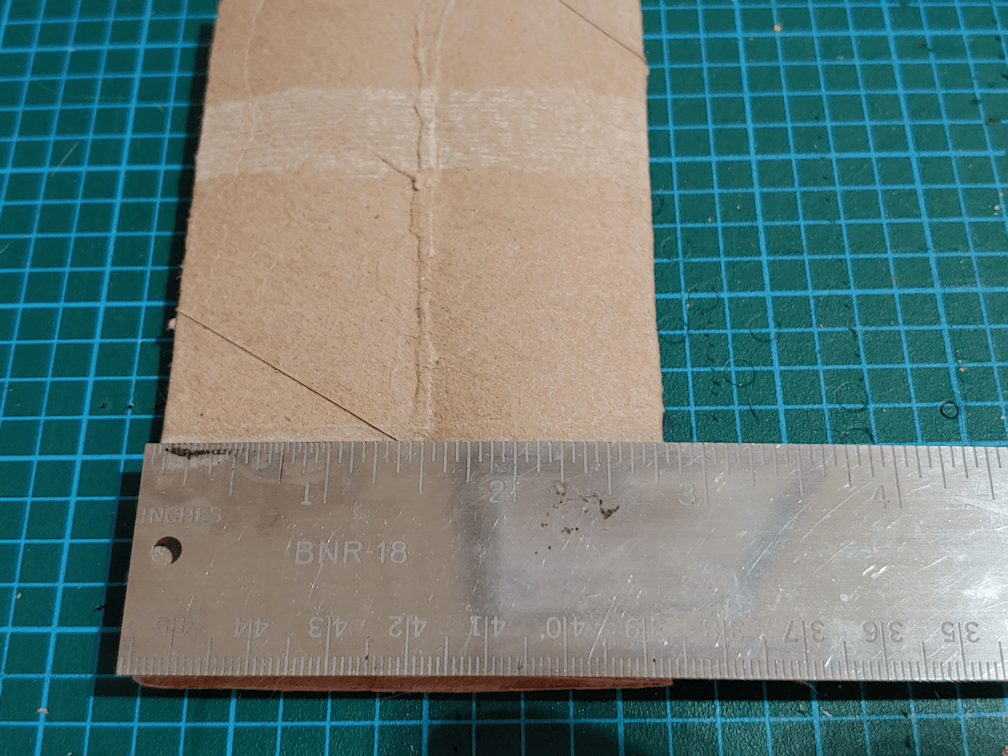
Then, just because I prefer sharp creases, I ran the tubes over the edge of the desk I was working on. You can tell the difference it made in the photo above. The tube I am holding is not being squeezed in any way. For the other one, I’d laid the tube flat on the desk and pulled my metal ruler over it to sharpen the crease. Which it did, but not as much as using the edge of the desk.
The creases were about 1 1/2 inches apart, so that is the distance than needed to be marked from the edge.
Since I had the cutting mat and a metal ruler, I only needed to mark one tube out of six. After lining them up along the bottom edge of the cutting mat, I could line the end of the ruler up to the side edge and the long edge with the mark on the first tube, across all the tubes.
Using the ruler to hold the tubes in place, I could mark them all at once, then repeat for the next batch. This way, it only took two lines to mark all 12 tubes.
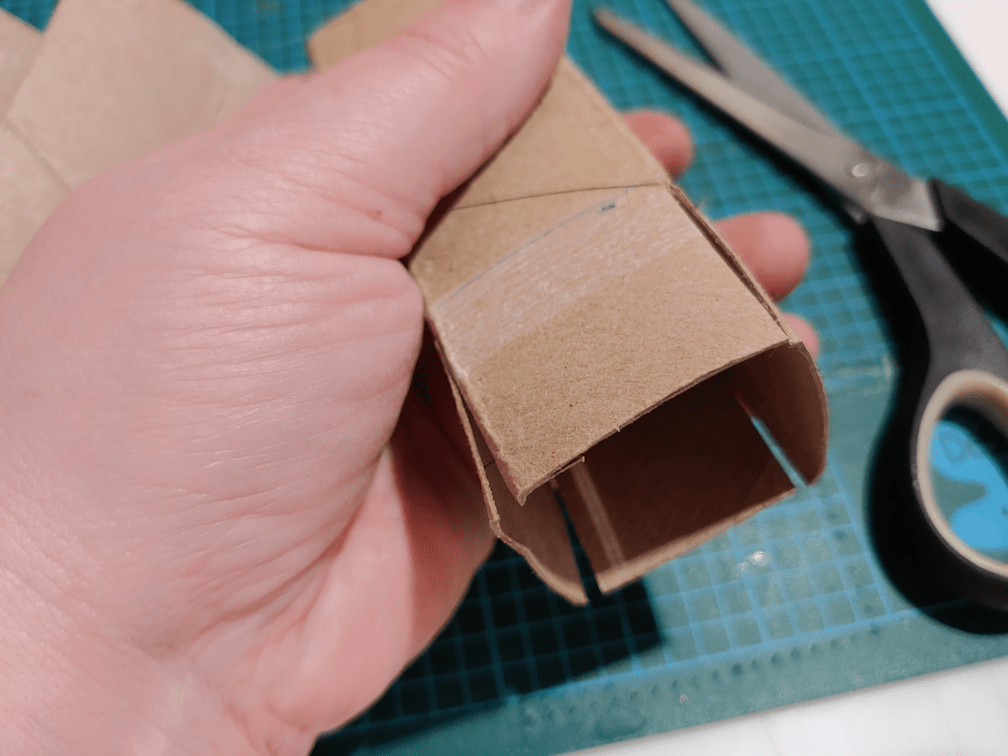
The next step was to cut slits at the creases, up to the marked line, to create flaps.
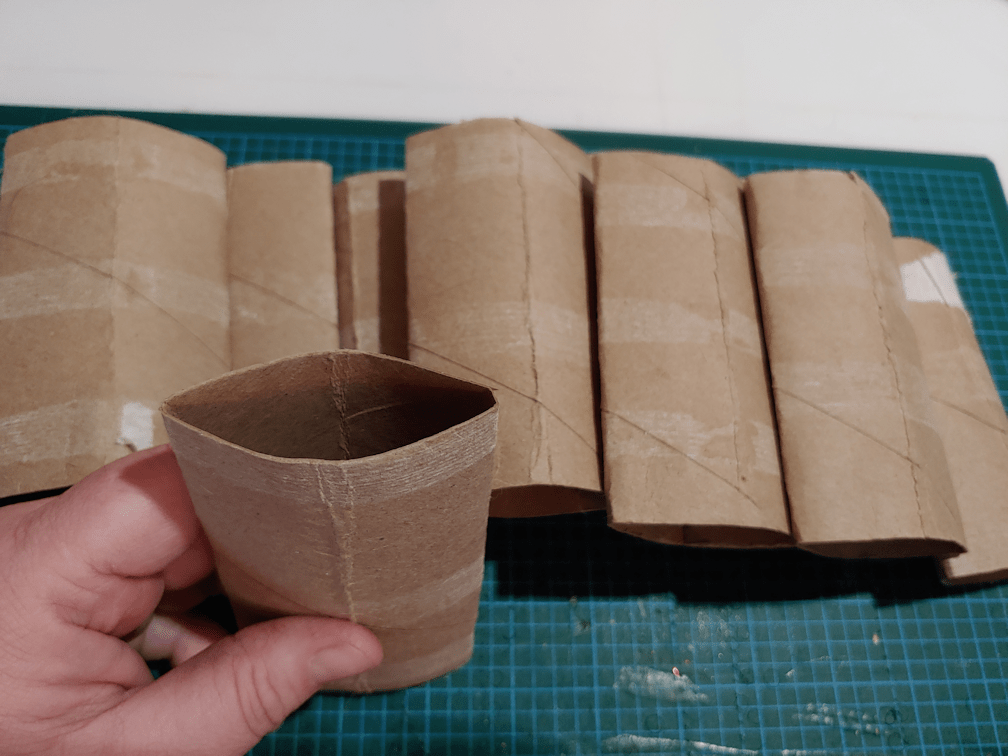
Then the flaps were all folded inwards to create a bottom.
Once they were all folded under, I set up the storage container I got for them, and some water.
All the bottoms got dipped in water, then tucked into the storage box.
With these tubes, four of them fit snugly across a short side, so they’re not going to flop around. This was an important consideration when I went looking for bins to use for this. When we used the toilet paper tubes last year, the tubes came apart completely once they got wet, even as the peat in the middles remained bone dry. I wanted straight sided bins that were fairly small, to hold them all tightly. If the tubes were still round, they would have taken up more space, but there would be gaps between them, and I didn’t want those gaps, either.
These now will be left to dry, and we’ll fill them tomorrow.
For the next batch, more tubes were needed. We have 26 tulip tree seeds to transfer.
After grabbing a bunch of tubes, I found a couple of shorter ones. There is a surprising amount of variance between brands! I switched out the shorter ones for taller ones.
Height is why I wanted to change how the bottoms were done for this batch. With how the first ones were done, each flap completely covers the bottom, making a 4 layer thick base. There’s no need for that.
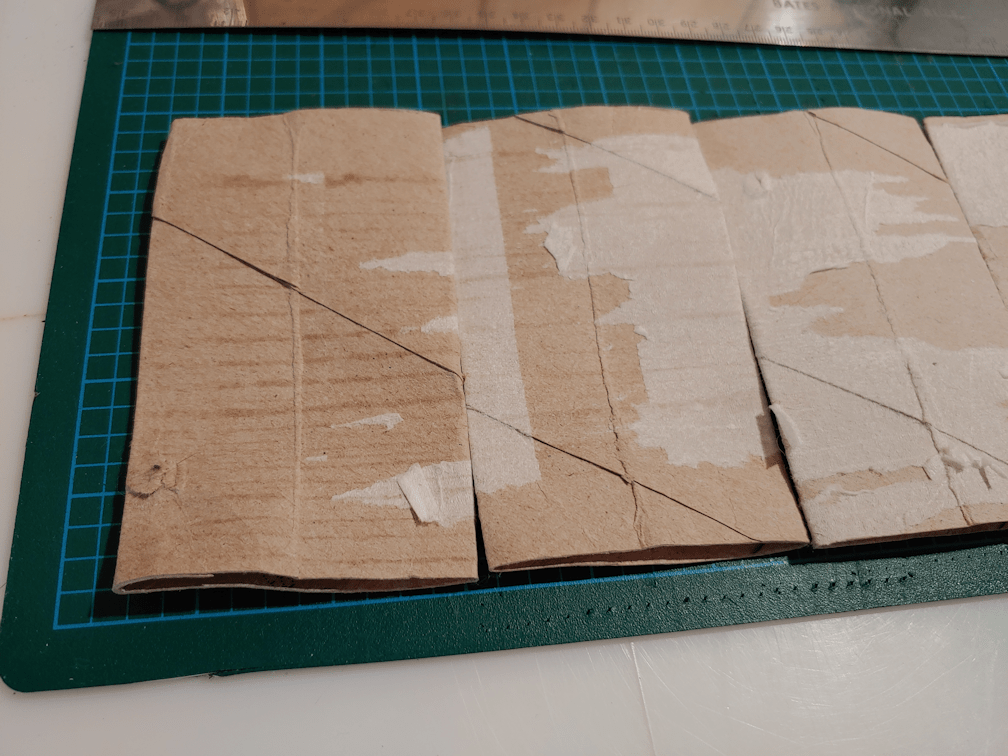
So for these ones, instead of cutting flaps that were half the width of each side, I went for a quarter of the width.
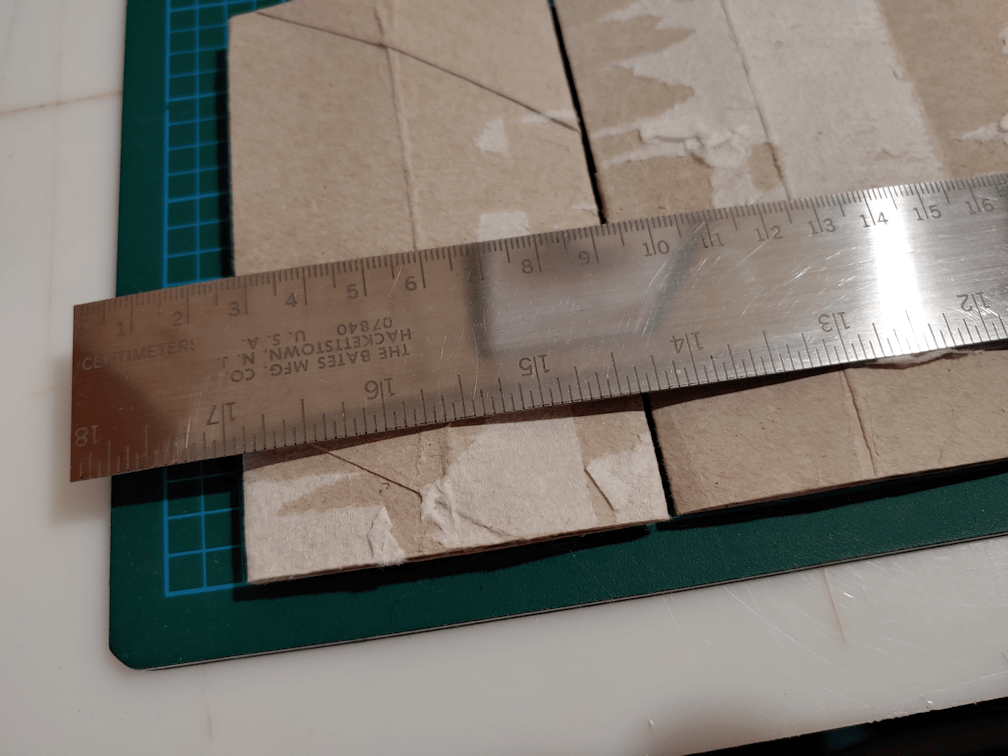
That worked out to be 3/4s of an inch. Each square in the grid on the cutting mat is 1/4 inch, so the tubes were all lined up to the base line of the grid…
…then the ruler was lined up with the 3/4 inch line, on each side of the row of tubes.
Which was a bit of a pain, when it came to using the ruler to hold the tubes in place while marking the line, since there was a space under the ruler.
It was much easier to do it from the middle instead of the ends. :-D
Then the tubes all got slits cut along the creases, up to the line.
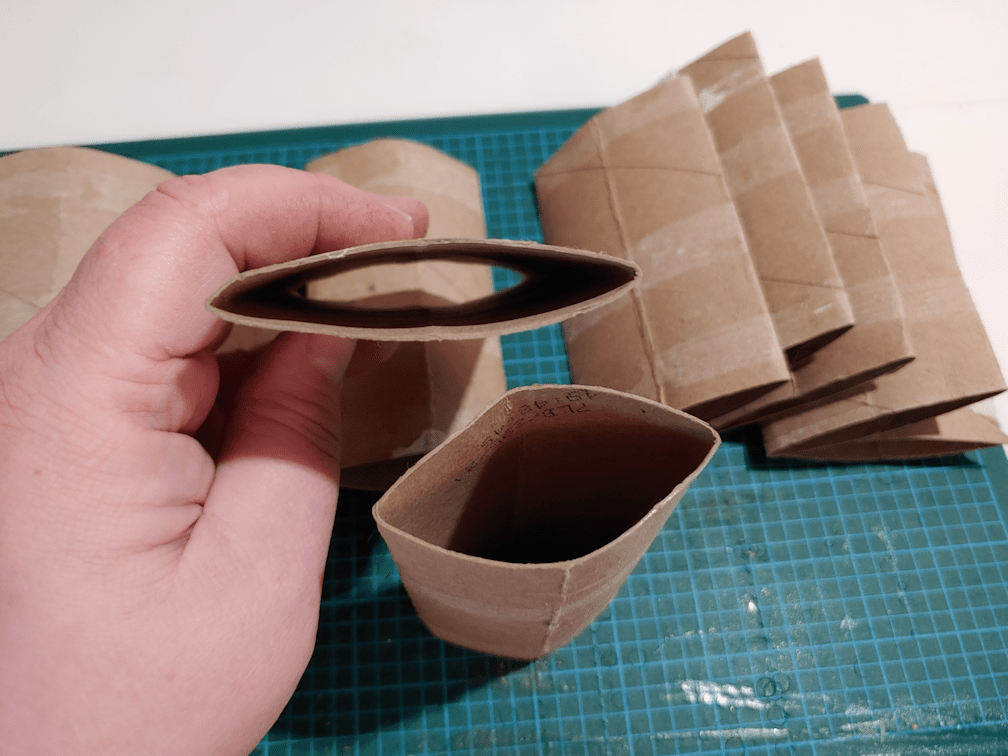
When folded in, this allowed for them to overlap and be locked into position.
These tubes were slightly shorter than the ones used in the previous batch, but by doing it this way, the pots ended up taller, as you can see in the comparison above.
Since the flaps could hold themselves in place, I could have skipped the water part if I wanted to, but I chose not to. They got dipped.
This brand’s tubes were not only a different length, but also a slightly different width. Just enough that they did not fit snugly across the short side. However, 8 tubes did fit snugly along the long side.
Tomorrow, these two sets of pots will be filled and planted with tree seeds. The tree seedlings will remain in pots for 2 years before being transplanted to their permanent locations outdoors. Starting them in these will allow us to “pot up” the seedlings into large pots as they get bigger, without disturbing the long tap roots they are expected to develop.
After these are done, we’ll start prepping tubes for the kulli corn. As with the tree seeds, it will be one seed per tube, so we will need 100 of these. I was able to find slightly larger versions of these bins, and one should be able to fit all 100 of these pots. The bins also have lids of the same transparency as the bins, which will allow us to use them as cat-proof greenhouses, if necessary.
I think I might have to pick up more of them. They’ll make moving seedlings outside to harden off much easier, too! They also happen to be pretty inexpensive, too. After much searching when doing shopping trips in the city, I found them at a local Red Apple store, which was just an added bonus. I’d actually found some at the local dollar store I was going to settle for, but the sides weren’t quite as straight, and the lids were opaque. I’m glad I decided at the last minute, to try another store.
The dollar store bins will instead be used to hold the little odd balls of yarn and small crochet projects on the go by my desktop, that the cats keep managing to steal away, so matter how diligently I bag them up!
I noticed some of my favourite gardening channels were posting videos showing first-day-of-spring tours of their gardens. This one in particular inspired me.
I was so inspired, I just had to get out there and take some video of our own first-day-of-spring garden.
It’s a quick and dirty video, but I had fun making it. I hope you like it, too!
As you’ll see, we’ve … uhm… got quite a bumper crop going right now… ;-)