Making Crab apple cider vinegar: airlock or cheese cloth?

Last night, I procrastinated cleaning the dining room by starting the apple cider vinegar! 😀

I slightly modified the recipe I used last year, which you can find here. (Link will open in a new tab.)

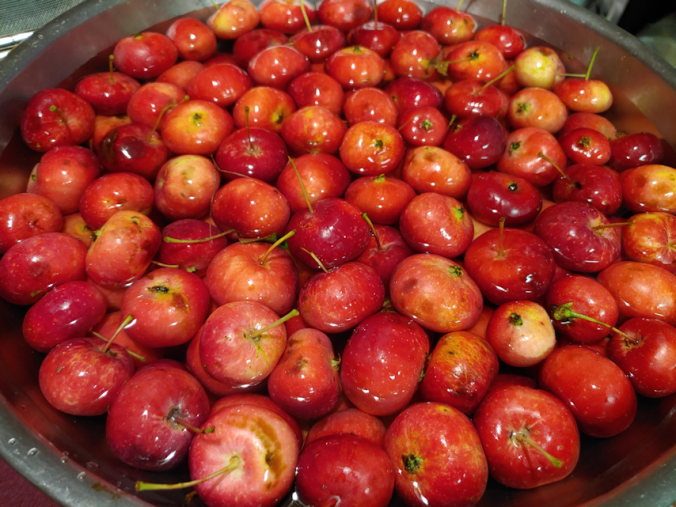
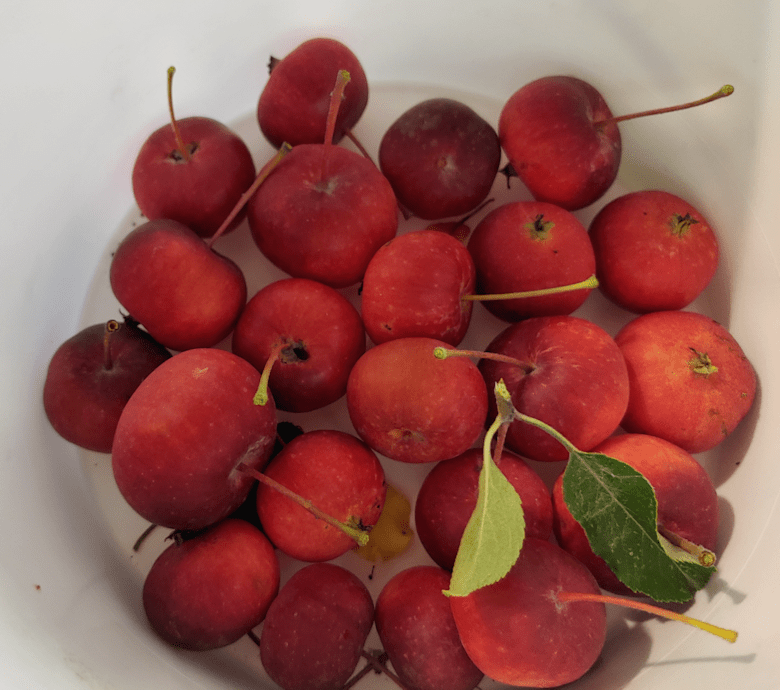
I started off by using one of my gallon jars to measure out apples from one of the 5 gallon buckets. As the apples would be cut into pieces that would fit more tightly, plus I would expect to cut away nasty bits, or even toss entire apples, I filled the jar to the top twice, then added a few extra. I have a large enough bowl to be able to give them a bit of a wash, then leave them to soak while I prepped other things.

Last year, I sterilized things with boiling hot water. Since then, we have started brewing, so along with extra airlocks, we also have sanitizing solution. So one of the changes this year is to use that to sanitize everything, instead of scalding them.

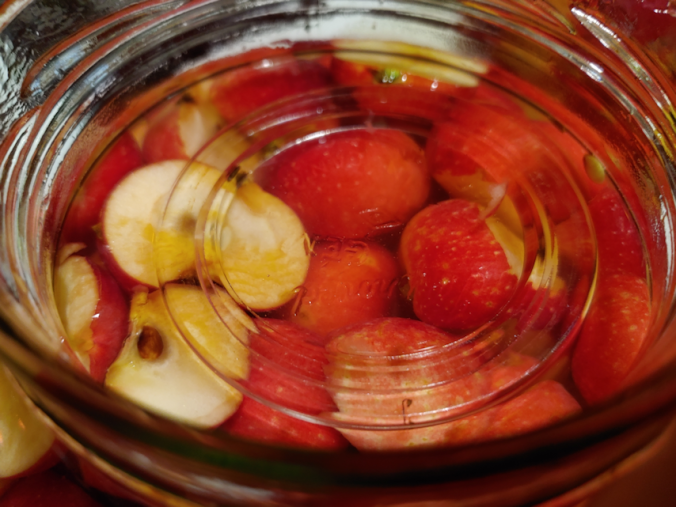
Since I was doing a lot more crab apples this year, I put the cut pieces into water with a bit of lemon juice as I worked. Last time, for the amount of apples I can, there was no need for anything to keep them from browning until I was done. I cut them all into halves or quarters, depending on the size of the apple – or used what was left after cutting off any nasty bits! As expected, there were some losses, but not all that much. In fact, I could have done with fewer apples for the jars!

The recipe said to fill the jar 3/4s full, and I ended up with almost full jars! Even after shaking down, they were still full to the shoulder.

The recipe called for 2 Tbsp of sugar for a 1 quart jar, so for these, I used 8 Tbsp of sugar per jar. The recipe calls for filtered water. Last year, I happened to have some water bottles I could use, instead of our very hard, iron rich, well water. We currently buy refills of water for drinking that is first filtered, then treated with UV light and reverse osmosis. That is what I used to dissolve the sugar in, first.

The next change from last year was the use of a “starter.”

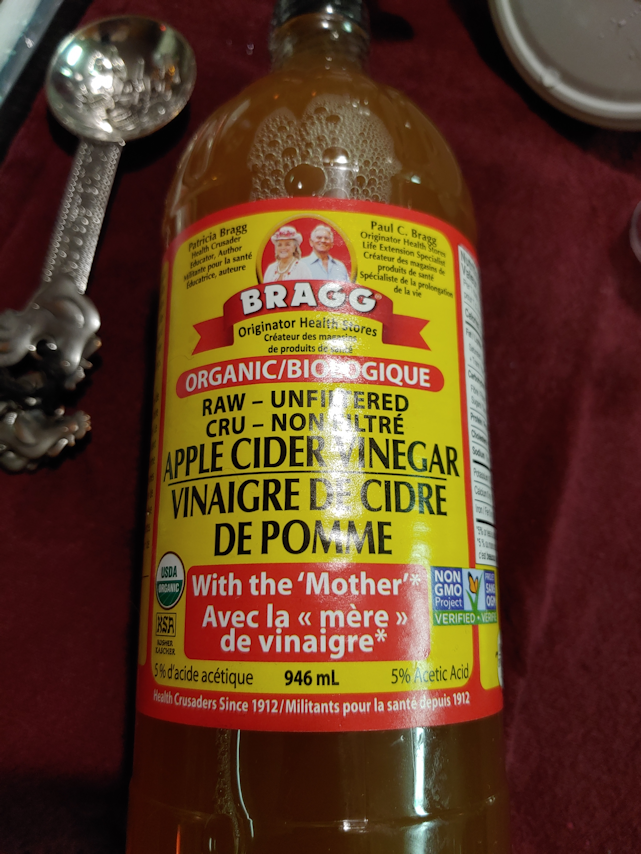
I’ll admit that when I normally buy apple cider vinegar, I buy whatever is cheapest. It gets used as an ingredient in cooking, so I don’t feel the need to anything fancy or expensive. When making the cider vinegar last year, it relied on the water, sugar, apples and whatever natural bacteria in the air “contaminated” it. Since I plan to use an airlock this year, and everything has been well sanitized, it’s not going to get that exposure. So I picked up a bottle of Bragg raw, organic, unpasteurized ACV, with the “mother”, to use as a starter and introduce the little critters needed for fermentation.

In doing my research, I found one person who used this same brand as a starter in his own ACV. He was using a large crock and just sloshed a bunch in, with no measuring, so I was left with no real idea of how much to use. I decided that 2 Tbsp per gallon out be enough. To make sure I got some of the “mother” that had settled on the bottom, I gently turned the bottle back and forth and upside down a few times first.

Once the starter was added, I filled the jars the rest of the way, with about an inch of headspace, with the filtered water.

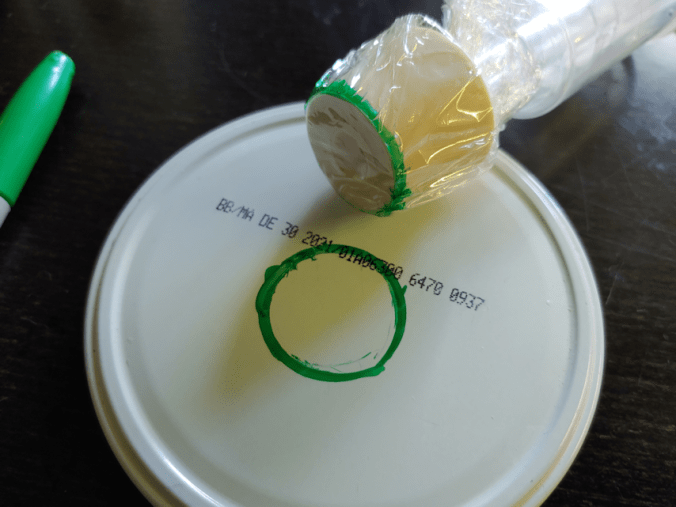
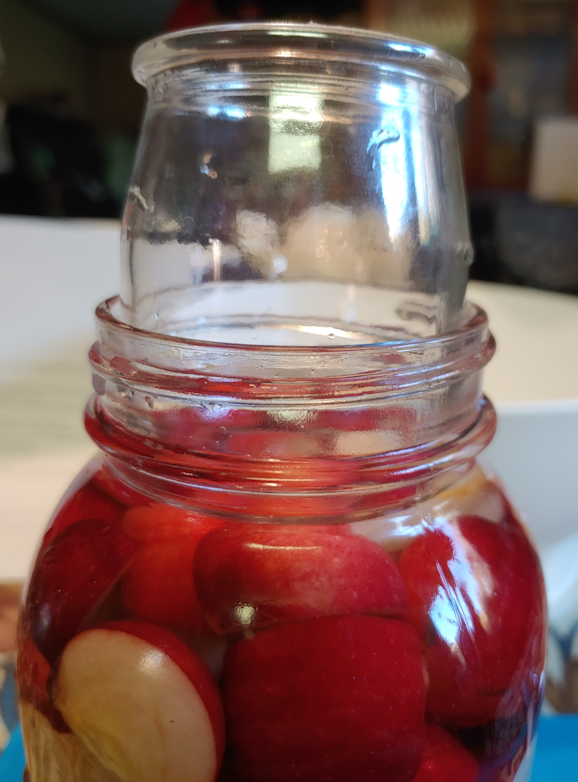
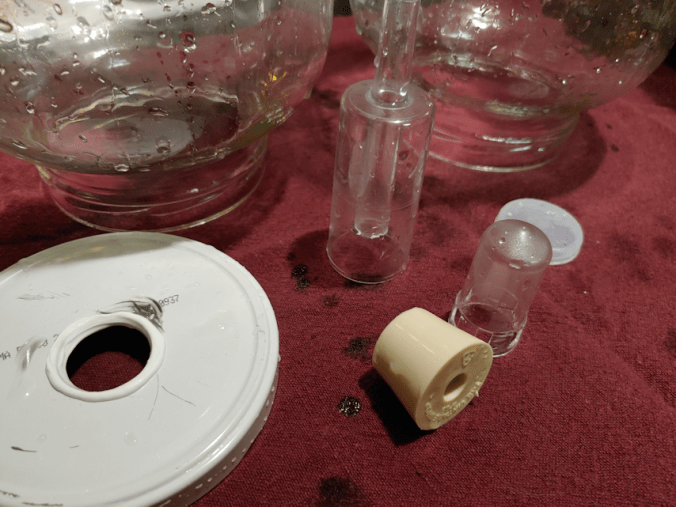
When doing this last year, I didn’t have any fermentation weights and made do with some small jars. I still don’t have fermentation weights, but with the nice, wide openings in these jars, I had something else I could use.

When I was a kid helping my mother with canning, snap lids wasn’t a thing, yet. She used either wax or glass lids with rubber rings to seal. In cleaning up the basements and the old kitchen, I’ve been finding lots of these glass lids. I cleaned and sanitized a couple of them, and they look like they’re just the right size to keep the apple pieces submerged! 🙂

Now comes the experimental part.

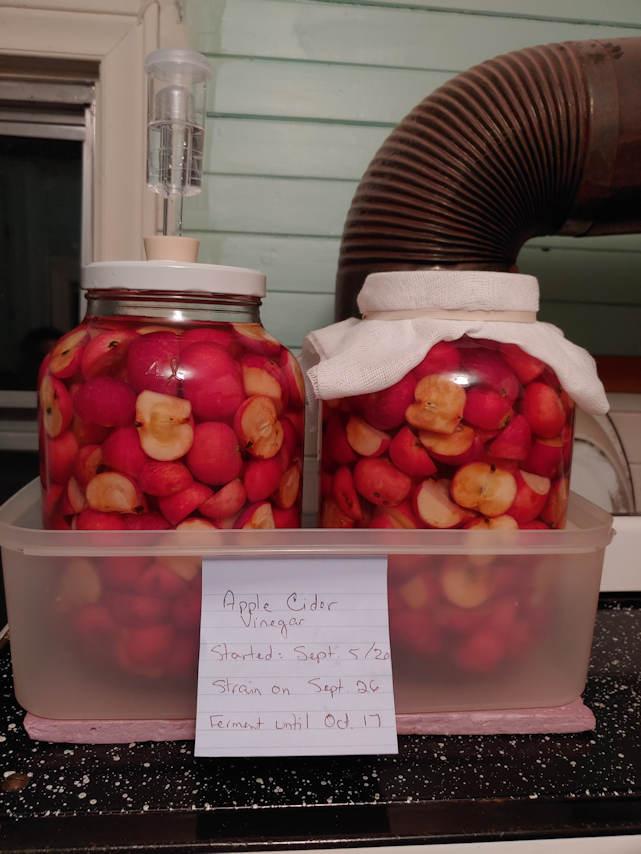
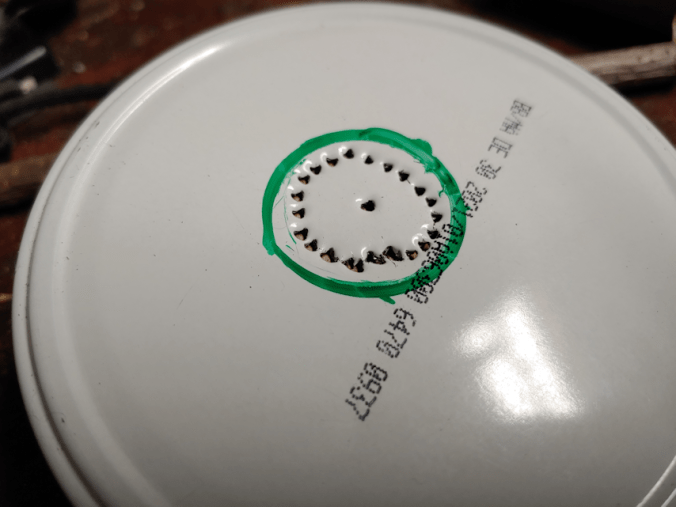
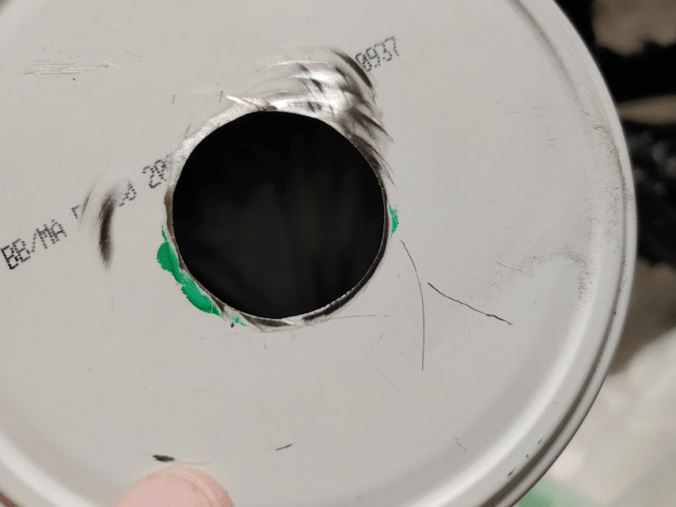
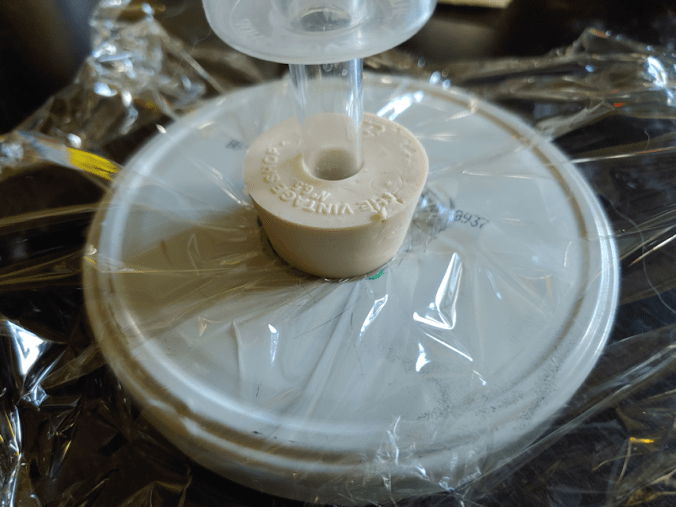
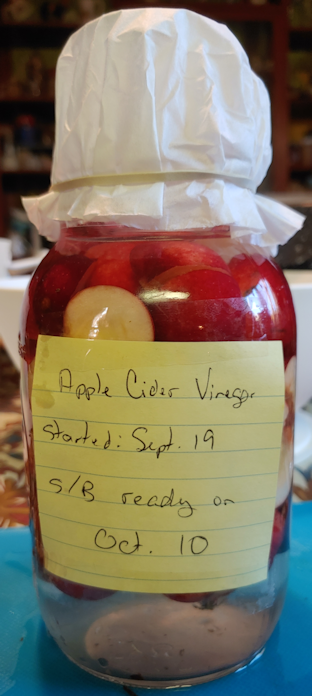
The two jars were made in exactly the same way. One of them now has the airlock cap, while the other is covered with layers of cheesecloth, held in place with an elastic band. They are not sitting on top of the warming shelf of the old wood cookstove in the old kitchen. I placed a small piece of foam insulation down, first. The old kitchen stays quite cool throughout the summer, and is even cooler now, so the metal would be quite cold. During fermentation, there will be bubbling and foaming, and a possibility that the liquid might reach the cheesecloth, or even overflow, so they are in the plastic container to protect the top of the stove from any drips.

Now, it sits for three weeks. During this time, we’ll be checking them daily. I look forward to seeing what differences there might be, between the two methods, as well as comparing to how it turned out last year.

Hopefully, no fruit flies will be attracted to the one with the cheesecloth! We have a fruit fly problem in the kitchen right now, but so far, they haven’t been found in the old kitchen.

I still have about 7 or 8 gallons of apples left, even after my mother took some home. Tomorrow, I plan to juice them and start making some hard crab apple cider! The traditional way to do it is to use a press to smush the whole apples, then leave the juice to ferment on its own. We don’t have a press, but we do have a juicer, so I’ll be using that, plus some of the yeast we picked up to use for mead making. We have four 1 gallon jugs, plus a half gallon jug, to use for fermentation, so there’s plenty to be able to do both. 🙂

This should be fun!! 🙂

The Re-Farmer

Update: Sept 7, 2020 – I goofed! But you won’t spot my mistake here. Visit this follow up post to see what I did wrong, and how I fixed it.

Prepping a cap for an airlock – using the tools at hand

Last year, we made apple cider vinegar using the bright red apples from just one tree. The result was a delicious, delicately pink cider vinegar, and we were looking forward to making it again.

There was just one problem.

The instructions we followed said to put the jar in a dark place, so we tucked it into a cupboard. Unfortunately, it attracted fruit flies. The jar was covered with a coffee filter and they couldn’t get in but, as it fermented, some had bubbled up enough to dampen the paper. Which meant any time we opened the cupboard, we’d find a cloud of fruit flies inside!

Not good.

Since then, we’ve bought the things necessary to make mead. This includes smaller bungs to fit airlocks into gallon jars. We will be using some to make hard apple cider out of our crab apple juice, later. With airlocks being so cheap, I’ve picked up extra, so we could have all our gallon jugs, plus the 5 gallon carboy, all going at once, and still have extras.

This year, I will be taking advantage of our mead making supplies.

Since making the ACV requires using apple pieces, I need to use a wide mouth jar. I also want to make more than last year, so I wanted to use something bigger than a quart jar.

Every now and then, we picked up the big gallon jars of pickles at Costco, and I’ve been keeping the jars. That’s what I’ll be using to make the vinegar this year.

The question then becomes, how do I use an airlock on one of these?

Now, if I had some silicon grommets (which I learned the name of only yesterday), I could drill an appropriately sized hold in a cap, pop on a grommet, and insert an airlock.

I don’t have those. I do have extra bungs, though.

I don’t have anything I can use to simply drill a hole that big into a cap, though, so I had to do it the use-watcha-got way.

The first thing to do was mark the size of hole I needed. After protecting the bung with plastic wrap, I traced around it with permanent marker. As the bung is tapered, the actual size of the hole needs to be slightly larger than the inside of the circle.

With a scrap of wood underneath, I punched a series of holes well within the marked circle, then used pliers to break off the middle.

Working directly over a garbage bag, I used a series of metal files to grind away at the opening to smooth it out, then make it larger.

Once I’d reached the inside of the marked circle, I switched to the Dremel to grind and smooth the metal.

Then it was time to test the size of the opening. A perfect fit!

We’re not done yet!

Though the metal was ground smooth, it still is sharp enough to potentially damage the bung, if I were to push it in tight enough to great a proper seal.

Silicon sealant to the rescue!

I used the same stuff we got to fill screw holes when our satellite dishes got moved, then again, for a final seal in the cracks on the rain barrel we set up by the garden. It’s a multipurpose, indoor/outdoor product that is coming in very handy.

The tube it comes in is also very easy to control, even for a job as small as this. After giving the cap a very through cleaning, I lay a bead down on both sides of the cap, right on the edge of the hole, so that top and bottom would touch and completely cover the metal edge. Basically, I imitated a silicon grommet. This should both protect the bung, and ensure an air-tight seal is created.

Now it just needs time to cure before I can test it again with the bung.

Since we have so many apples, I might make two; one with the airlock, and one without, to see which works better. I’ve also picked up some fancy-schmancy ACV “with mother” to use as a starter (last time, we just used water and sugar). Using just a coffee filter, it relies on exposure to the air to get the bacteria needed for fermentation. So it’s touch and go, whether you get a good bacteria or not. With an airlock, it won’t get that exposure, so using a vinegar with the mother in it will ensure the right kind of bacteria is already in there.

We shall see how it turns out!

The Re-Farmer

Things with crab apples: apple cider vinegar

Things have been a bit crazy lately, weather wise. Some severe storms have blown across our area and, while we have pretty much just caught the edges of them, they still resulted in internet outages and our power flickering in and out.

Perfect weather to stay indoors and to things with our crab apples!

I decided to use the small amount of apples from one tree to make apple cider vinegar.

A recipe I found called for filling a quart jar 3/4’s full, and it seemed I had enough to do that with just these.

I washed all the apples in cold water with a splash of vinegar, leaving them to sit overnight. The recipe I found called for the scraps of apples – skin and cores – adding that if whole apples were used, to chop them coarsely. Since the crab apples are so small to begin with, after removing the stems, I cut them all in quarters. Some also needed to have bruises or damage cut out, and a few turned out to be bad on the inside and could not be used.

In the end, I had just the amount I needed to fill the jar 3/4’s full, perhaps a touch extra.

The next step was to dissolve a couple of tablespoons of sugar into a cup of water and adding that to the jar, then adding enough water to completely cover the apple pieces. Filtered water was suggested. As we have well water, we could have just used that, but our water is very hard and iron rich, so I used bottled water I happened to have.

The apples need to be kept submerged, and there are fermentation weights available for this. I have none, and had never seen one before looking it up on the internet. The alternative was to put a small jar in to weigh it down.

I have a collection if tiny jars that I have hung on to, and one of them fit perfectly into the quart jar! This is from a package of yogurt that came in 4 little jars to a package. I admit, I bought it just for the jars because they were so adorable. Handy, too!

The next step was to cover the jar with something that would keep dust or whatever out, but allow air in. It could be a piece of cheese cloth, some thin cloth or a coffee filter, fastened in place.

I stole one of my daughter’s coffee filters.

Now it needs to just sit in a dark place at room temperature to ferment into vinegar. This should take about 3 weeks. I’ve tucked it into the top of a cupboard we used fairly frequently, so it will be easy to check if there is any mold happening.

After 3 weeks or so, it will be strained, then left at room temperature to continue to ferment for another 3 or 4 weeks.

Once it’s at the desires taste/strength, it just needs to be strained and re-bottled. We’ll see how it turns out!

The Re-Farmer

Apple Cider Vinegar

Items needed:

  • quart size jar (an air and liquid tight lid will be needed after fermentation is complete)
  • fermentation weight or another jar small enough to fit into the mouth of the quart jar
  • cheese cloth, clean cloth or coffee filter to cover the jar
  • cord or elastic to fasten cover in place

Ingredients:

  • apple scraps or whole apples, coarsely chopped; enough to fill a quart jar 3/4 full
  • 2 Tbsp sugar
  • about 2 cups filtered water
  1. Sanitize a quart jar and let air dry.
  2. Fill the jar 3/4 full with apple pieces.
  3. Dissolve sugar in 1 cup water and pour over the apples.
  4. Top up with more water until apples are covered.
  5. Add weight or small jar to keep apples submerged. Exposed apples may start to mold.
  6. Cover the jar with a cheese cloth or coffee filter and use a cord or elastic to hold it in place.
  7. Place in a dark location at room temperature and leave for about 3 weeks. Check regularly to ensure the apples remain submerged and no mold is growing.
  8. After 3 weeks, strain the apple pieces out, return liquid to the jar and cover again with cheese cloth or coffee filter.
  9. Return jar to a dark location at room temperature for another 3 or 4 weeks, stirring every few days.
  10. Taste after 3 weeks to see if it has reached desired tartness. If not, leave to ferment longer until it reaches the desired flavour.
  11. Cover with a lid and use as desired. The vinegar can also be transferred to a different jar or bottle, if preferred.

If you notice a film has formed at the top of your vinegar, congratulations! You have developed a “mother.” It can be used as a starter for future batches of vinegar – or a small amount of a previous batch can be used.