Our 2024 Garden: hardening off begins, and new growth

We had rain all night, with a foggy morning. We’re supposed to get possible showers this afternoon, with thunderstorm warnings for the night, and roughly the same tomorrow. Hopefully, this rain is reaching the fires to the north of us in adequate amounts. Currently, we’ve got 5 forest fires burning, with 2 still listed as out of control. That’s actually down two fires from when I checked, yesterday.

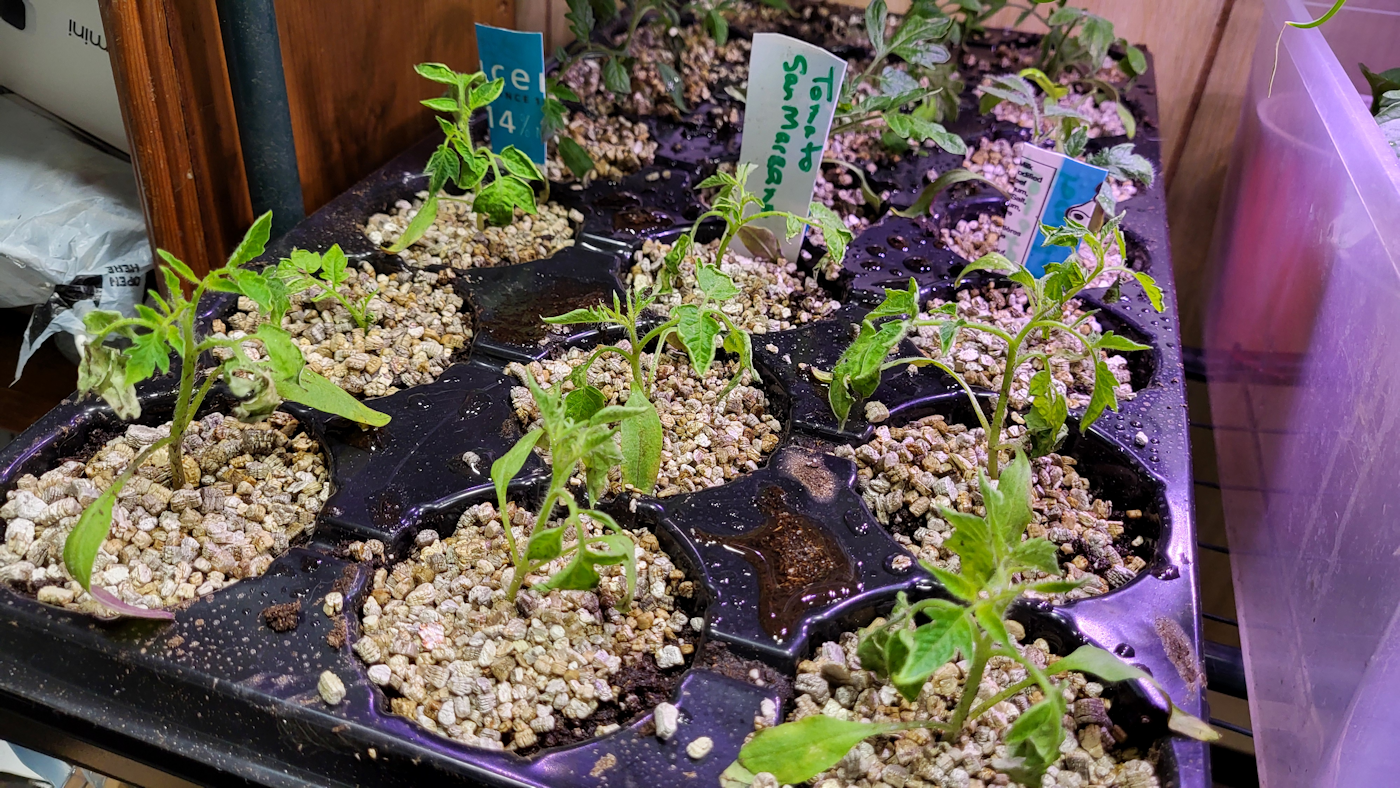
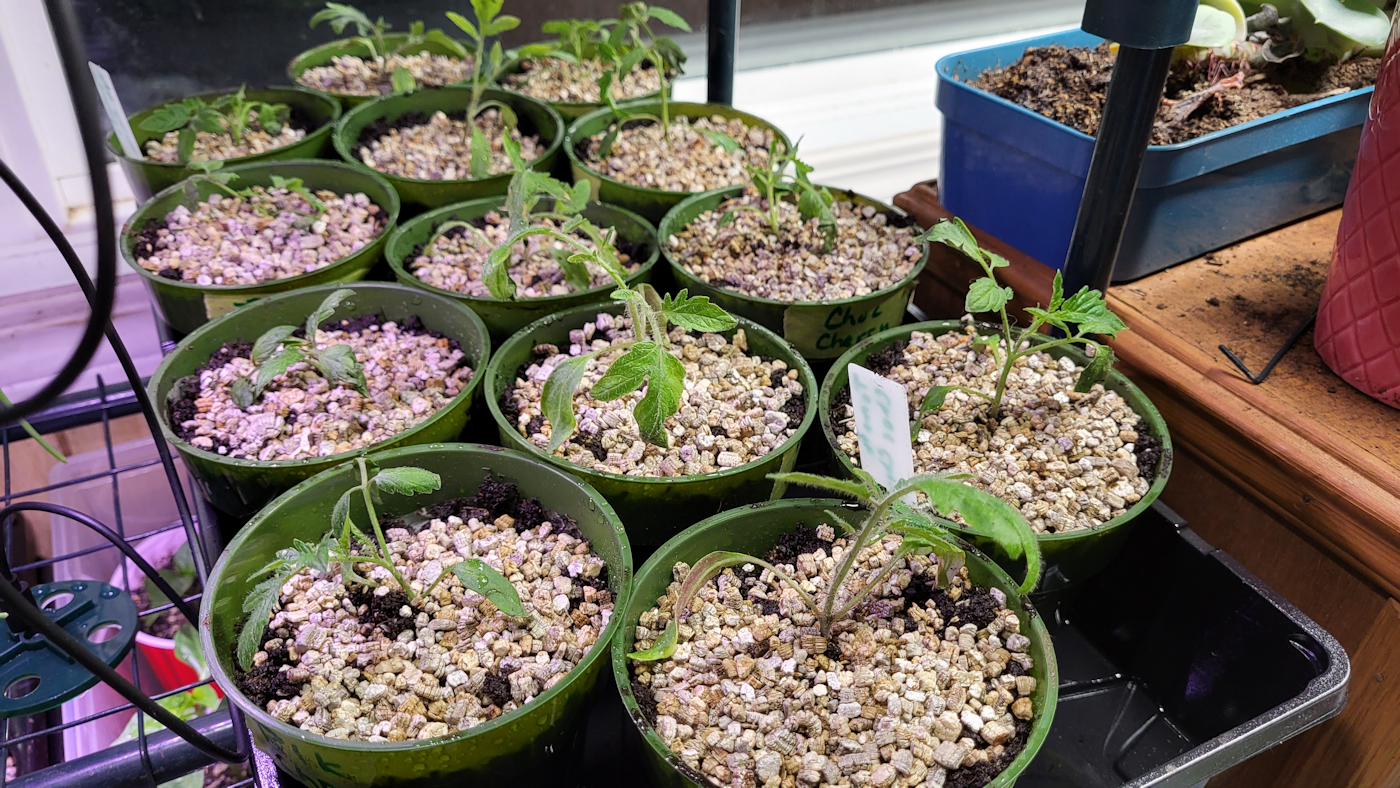
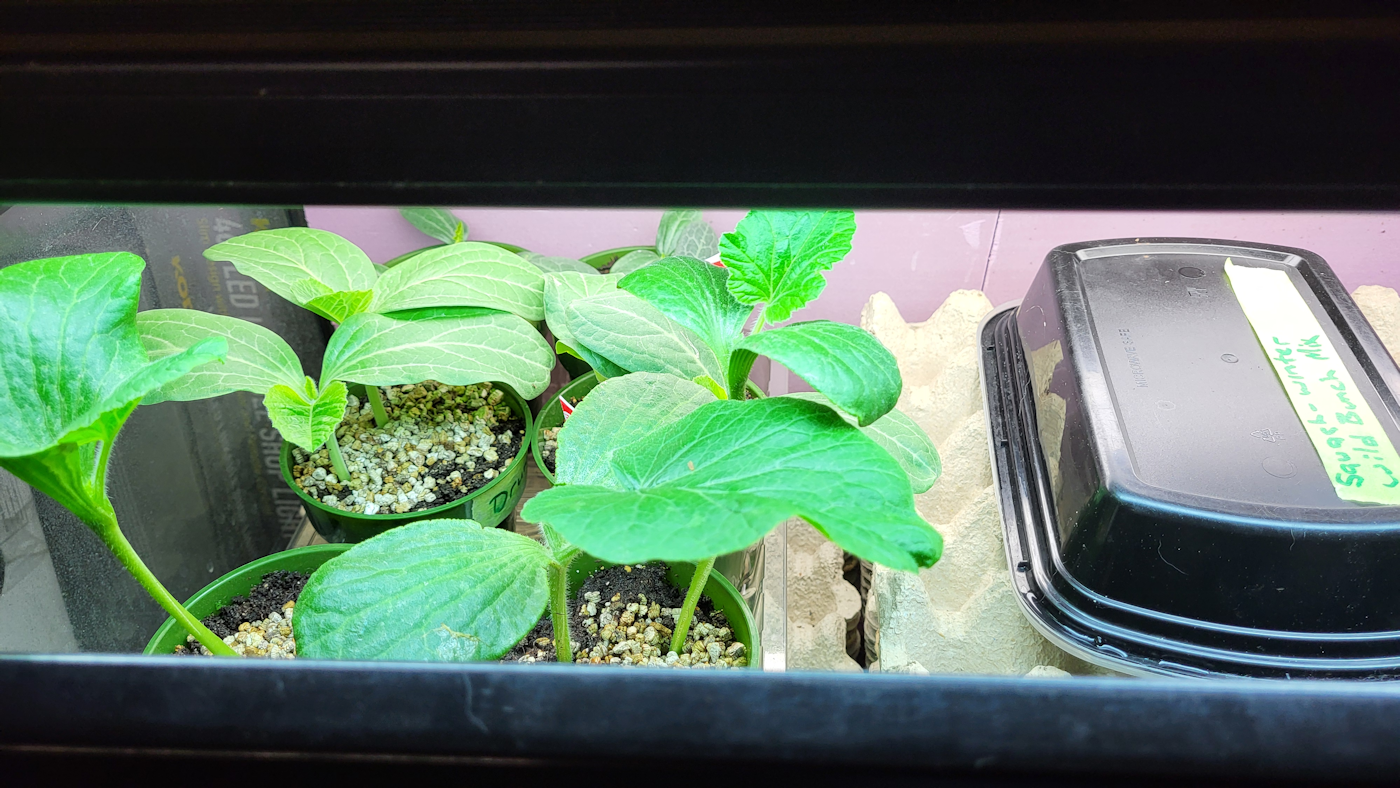
With the overcast morning, it was a perfect day to set the transplants outside to begin hardening off. Just a couple more weeks, and we can start transplanting them into the garden.

Oh, my sad, sad San Marzano tomatoes!

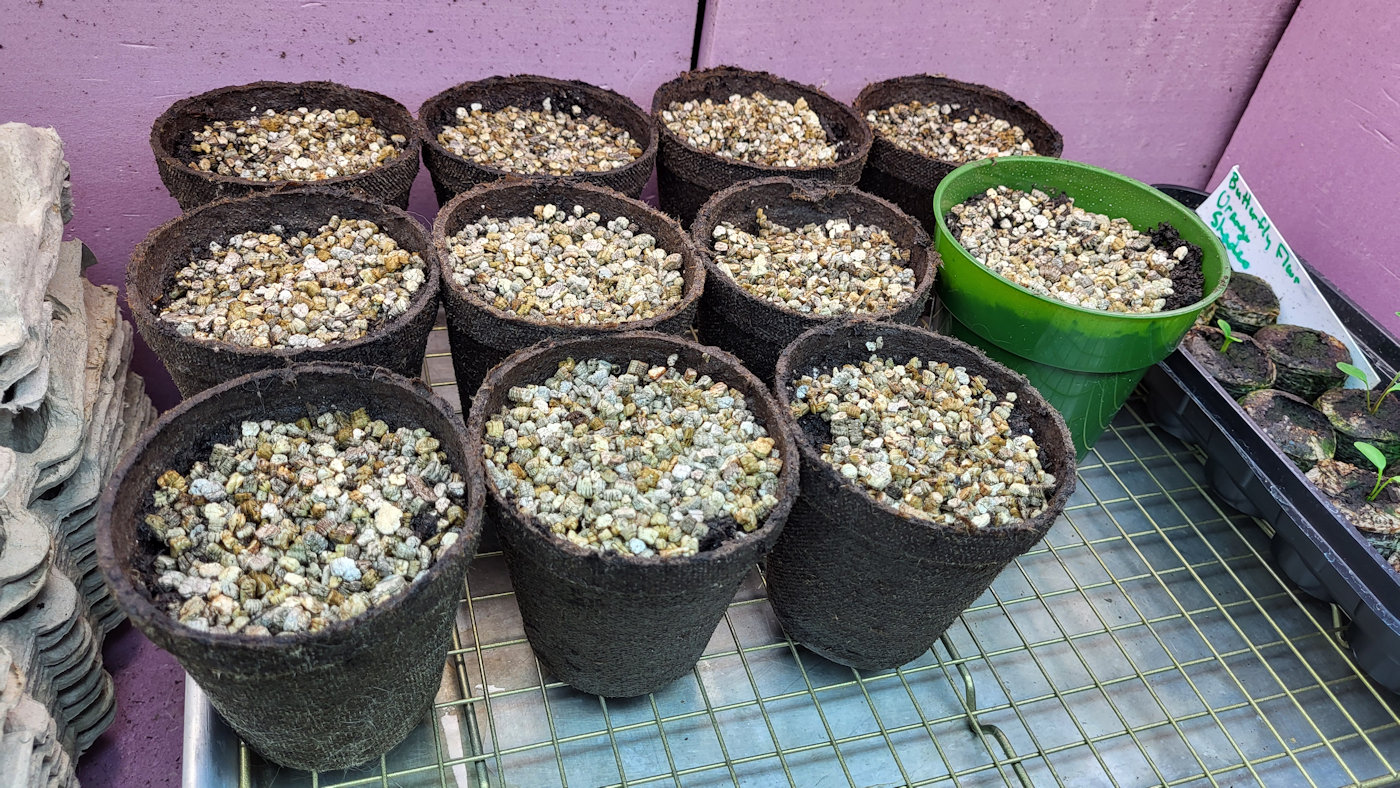
While I took out the trays in the sun room, my daughter brought the last of the trays that were in the mini greenhouse frame in the living room. As of now, the only things left in the house are three pots in the aquarium greenhouse; one Zucca melon that’s finally breaking the surface and one Pixie melon. There’s a second Pixie melon that has yet to emerge. The seeds that were left for pre-germination, however, have shown no progress. The Zucca seeds will be going into the compost, as they are starting to show signs of mold, but the three remaining Pixie melons look completely unchanged.

Most of our trays of transplants fit on the folding table we made, while a few went onto the set up we made above the seat of the laundry platform. A handy spot, though I always feel nervous going up those steps while carrying trays of plants. I’m never quite sure my knees won’t just give out at some point. Stairs and I do not get along, at all! 😄😄

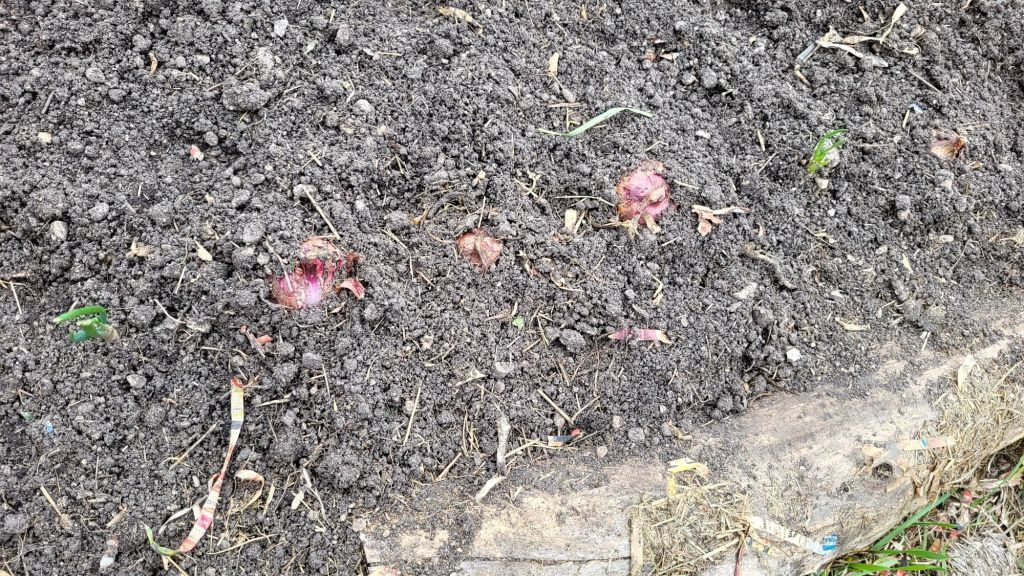
While continuing my rounds, I checked on the bed with the peas, carrots and spinach planted in it. Of the first peas that were planted, there is one sprouting. I did see what might possibly be a second one, but it’s so tiny, I’m not sure yet. The second planting doesn’t have anything showing yet.

I checked the Royalty raspberries, as usual, and we are finally seeing new growth at the bottom of one of last year’s canes. These were supposed to be first year canes, which should have fruited for the first time this year, but they ended up producing berries last year, then dying back. I contacted Veseys about it and they assured me they would come back this year. So far, they are right about one of them! However, this does mean that any growth we get this year should not produce any berries until next year.

In other things…

I counted 25 yard cats this morning, though at least one or two more showed up later on. When I saw Broccoli while I was still setting the food out, I went around to the garden shed and left some food in a dry spot, then checked on the babies. They seem a bit more active. I ended up leaving some food for Broccoli not far from her baby nest.

With everything being so wet, and more rain and possible storms to come, I decided this was a good day to make a run to the nearest Walmart to get a few things. That took enough time that the transplants were brought back inside when I got back. We’re actually seeing a bit of sunshine, peeking through the clouds right now, too.

As I write this, it’s just past 2pm, and we’ve reached 16C/61F, with the humidex making it feel like 20C/68F. We’re supposed to get just a bit warmer before the end of the day. With how muddy things are, a lot of what we need to do outside has to wait. Very frustrating!

Ah, well. It is what it is! We just shift gears and do other stuff, like going into town for some errands, a bit earlier than planned – which I will cover in my next post. 😊

The Re-Farmer

Our 2024 Garden: planting everbearing strawberries

Much to my surprise, I’m feeling pretty good today, after the unexpectedly difficult work I did yesterday afternoon.

With the bed prepared, the Albion Everbearing strawberries we got from Veseys needed to get into the ground.

There are 10 photos in the Instagram embed, below.

I got the strawberries through one of their $20 specials. This was supposed to be a package of eight, but there turned out to be nine in the package. Bonus! Thanks, Veseys!

I’d gone to their website yesterday, to get the planting instructions. The first step was to set the roots to soak, while I continued working on the bed I prepared yesterday – which I found covered with kitty footprints, this morning!

I decided to add more soil, so I brought over the last of the amended soil left from when we redid the bed against the chain link fence. The extra soil from making the bed narrower has come in very handy!

After leveling off the new soil, I made holes to plant in and filled them with water. The instructions said to spread the bare roots over a small hill of soil, so I added soil back to make one in each hole, while the water was being absorbed. Next, the bare roots were spread over each hill, and soil pulled back around them, making sure the growing tops were above soil and supported.

After that, I brought over some straw that has been in the potato grow bags last year, and carefully mulched around each plant. I wanted to make sure the hills of soil were well covered so it wouldn’t erode when watered, as well as packing extra around the outside, to make it less likely for water to wash the soil out under the frame. Once that was all in place, it got a deep watering. Yes, we’re expecting rain this afternoon, but with our weird little climate bubble in our area, it could pass us by completely and we might not get more than a few drops.

From the information on the Veseys website, they recommend pruning away the flowers in the first year, to have stronger and more productive plants the next year – except for everbearing varieties. These are everbearing, so there will be no need to prune them.

Which means we should have strawberries to harvest this year – if they survive being transplanted!

I don’t assume anything will make it, anymore! 😄😄

The Re-Farmer

Our 2024… er… 2023 garden: We have survivors!

I just finished doing my evening rounds – it is so gorgeous out there right now! – which gave me a chance to see how far my daughter got on the garden bed she was weeding.

Before I left this morning, she asked me which beds needed to be worked on, and if there were any surprised to watch out for, like fall plantings of some kind. I said no, we did the fall garlic in the old kitchen garden beds this year, and those were the only fall plantings we had.

The bed she started on is where we planted the Roma VF and Red Wethersfield onions, last year. The tomatoes ended up not very healthy, and seemed to get blight near the end, but the onions… they just disappeared. The seedlings I transplanted around the perimeter seemed to be doing well at first, and then they were gone. Not dug up. Just died away. So I definitely had plans for amending this bed, and we were most definitely not going to be planting tomatoes in it, again.

Imagine my surprise – and probably hers! – when I looked today and saw this.

All along the perimeter, Red Wethersfield onions are growing! There are so many crab grass rhizomes in there, my daughter has basically been digging them up and transplanting them.

I am totally amazed. Onions I thought had died off, with no evidence of them to be seen when that bed was harvested and the diseased looking tomato plants pulled for burning, had been there, all along, and survived the winter!

We started more Red Wethersfield onion seeds this year, too. I was going to give them one more try before giving up on them, at least for a few years. Now, it looks like we’re going to have plenty!

The bed is only about a quarter finished; it took my daughter a lot longer then usual, since she was both weeding and transplanting all the onions she was finding. Even through the crab grass growing around the edges, I can see more little onion bulbs pushing their way through!

Onions are biannual. Which means that these onions, if left alone, will go to seed, which we should be able to save.

What an awesome surprise!

The Re-Farmer

Our 2024 Garden: potting melons

We had pre-germinated seeds ready to put into pots, but I was almost out of seed starting mix, so it’s a good thing I ended up doing a shop today.

Of the four Zucca melon seeds in the container, two were starting to germinate. With the Cream of Saskatchewan Watermelon, four out of five seeds germinated – and two were getting almost overdue for planting!

At first, I thought four of five Sarah’s Choice seeds had germinated, but it turned out the one of the seedlings had gotten big enough that it dropped its shell completely! So we’re five out of five on those.

As for the Pixie melons, I could see a couple of seeds starting to open up, but they are not at all ready yet. They, and the two remaining Zucca melon seeds are set aside now, to give them more time.

I was originally going to use one of the large celled trays for these but, at the last moment, I decided to use individual 4″ cardboard pots. I don’t know how long it’ll last, but I used a marker to label the pots directly, before filling them with pre-moistened seed starting mix. With some of the Sarah’s Choice seeds, the roots had grown between the layers of paper towel and spread quite a bit, so I tore the paper round them rather than risk damaging the roots by pulling them through. I now have all of the pots in a tray over the heat mat, with water on the bottom for the pots to absorb, rather than absorbing water from the premoistened growing medium.

As for the Summer of Melons blend, all the pre-germinated seeds but one have fully emerged.

We now have quite a lot of squash and melon seedlings going! Hopefully, they’ll all survive transplanting, but we have enough that we can afford a few losses. What was that poem again? Four seeds, all in a row; one for the blackbird, one for the crow; one to die and one to grow! Something like that.

I’m glad I got at least one gardening job done today, without making my messed up right arm any worse. 😁

The Re-Farmer

Our 2024 Garden: first direct sowing! (video)

Okay, so I’ve scattered seeds and such, but today is the first day for direct sowing. It was such a gorgeous day for it, too!

I planted all the edible pod peas from the package, minus the ones that split apart as they soaked between damp paper towels overnight. Not a lot of carrots were planted; I’ll include them between other things, over the next while. I’ll probably do the same with more spinach. Basically, they’ll be space fillers and ground covers until it’s too warm to plant them anymore.

The box frame cover got worked on first, then set aside, since I put in the old salvaged T posts to hold netting for the peas to climb. I couldn’t drive them in very far, so they will need to have support added to them before any trellis netting is added, so they don’t get pulled into the bed by the weigh of the peas – or the net, for that matter! I intended to add a third post in the middle, but hit something hard. Possibly one of the branches set at the base of the bed, when it was first built and filled. Or a rock that got missed.

I found my pH meter and did a reading. No surprise the pH is still at 8. I even stuck it into the compost heap nearby, and the needle barely moved. I had a bit of an ah-ha moment earlier today. Well, more like a “duh, of course” moment. Maritime Gardening did an April garden tour video and was taking about how acidic his soil is, and mentioned that liming the soil can make the soil more alkaline.

Liming.

Lime.

Garden lime.

Which is made out of limestone.

Which is what we are sitting on top of.

Our area has limestone quarries and commercial gravel pits – we even have our own little gravel pit – with limestone based sand and gravel below a very narrow band of topsoil.

Of course our soil alkalinity is maxing out the pH meter. How could it be any different? *smacks forehead over what should have been obvious*

Increasing the acidity is going to be a challenge, that’s for sure. The use of raised beds will make it easier, at least.

Our order of sulfur is supposed to arrive by Thursday. Once we’ve got that in, we’ll be able to start amending the various beds with it, to increase the acidity. My husband actually ordered 2 different bags. One bag is 90% sulfur, 10% betonite clay. The other is guaranteed 99.5% elemental sulfur, but both are supposed to be broadcast evenly, then worked into the top 6 inches of soil, at a rate of 250g/10m² (0.5lb/100ft²). These low raised beds are 27ft², so they shouldn’t need much but, from what I’m reading, the more alkaline the soil, the more sulfur is needed (which makes sense), plus our soil type would also need more, for it to make a difference. Even so, it won’t actually do much for us this year; if we were treating a field, we’d be adding it to the soil a year before planting a crop. Any amending we do this year will mostly benefit what we grow, next year. Once we’ve started incorporating it into our soil, though, we should test the soil every few months to see how much difference it has made. Still, every little bit will help.

While it will be slow going to increase our soil acidity, using sulfur is supposed to be one of the quickest ways to do it!

Anyhow…

In the early evening, the girls and I went around the yard, checking things out and enjoying the longer daylight hours and warmth. We blew past our predicted high and reached 16C/61F! Plenty of trees and bushes have leaf buds showing. It took some searching, but we were thrilled to find a few shoots of snow crocuses and grape hyacinth emerging through the leaf litter. We even spotted the leaves of two tulips that had emerged near the saffron crocuses! These were not there, this morning!

We are getting into that period when everything starts to just explode into new growth.

Before long, we’re probably going to be complaining over how hot it is! 😂😂

For now, I’m just really happy to get some progress done outside. We’re supposed to get some rain next week, but we should have plenty of lovely days like today, to get things done outside!

The Re-Farmer

Our 2024 Garden: potting progress

Well, I ended up doing a bit more than I expected to, yesterday evening!

The first thing I did as plant a few more pre-germinated Wild Bunch winter squash seeds. To make space, I changed out what the pots were sitting in.

They are now in a baking pan, over a cooling rack, to allow air to circulate under them. This is a recommendation from Gardening in Canada, as a way to keep the pots from getting moldy or starting to fall apart. The problem, though, is they can’t be bottom watered while on this, which means they’ll be watered mostly by misting.

I would love it if Costco got another shipment of these baking pans. They are basic, 9×13 pans and were very affordable. I didn’t realize just how good the price was, until they were gone and I tried finding more, elsewhere, only to find they cost 4 or 5 times more! Even the restaurant section of the wholesale store I checked out was ridiculously expensive.

Also, that’s the last of my 3″ biodegradable pots from last year. The new ones I got are 4″ pots, which is what the green plastic one is.

Speaking of “biodegradable” pots. The last thing I potted was the coffee tree I got for my daughters. I repurposed a pot that we’d planted thyme in, last year. The thyme had been started in one of these biodegradable pots and the whole thing was potted up. Unfortunately, the indoor thyme got forgotten about and died. It was set aside until tonight, when I finally went to remove the dead thyme – and pulled out a pot! It was completely whole; only brittle from being so dry. No degradation occurred while the plant was still alive, at all. That is not how these pots are supposed to be! When it comes time to plant these outdoors, I will most likely break the pot up so that at least the roots won’t be constrained. If I can remove them completely without damaging the roots, I will!

But I digress…

After potting the pre-germinated seeds and rearranging the aquarium greenhouse to fit them, it was time to work on the San Marzano tomatoes. I decided they needed to be done, even though they are still recovering from their accident, as they were just getting too crowded. I used another deep cell tray to transplant into, but instead of filling it with seed starting mix, I use a Pro Mix potting soil I picked up today. As usual, I premoistened the soil, first.

Good grief, there were a lot of sticks in it!

I can’t even say it’s a brand problem. My second bag of Miracle Grow seed starting mix was full of sticks, too. The first bag of Miracle Grow had them as well, though not as bad. The first bag of seed starting mix I got – Jiffy, I think, but I can’t remember for sure – was probably the best of the lot, with only a few sticks in it, but it was also a much smaller bag.

Once the new tray was full of potting soil, I went through the San Marzano seedlings. A couple were pretty much dead, so I just pulled them. After removing and potting up the “spares”, I top dressed the ones left behind with vermiculate, then set it back at the window.

They are definitely still in rough shape. I hope that, now that they have more room, a bit of fresh soil and the vermiculite, they will recover faster.

As for the spares I transplanted out, there were only 9 strong enough to transplant to the new tray, plus one that got transplanted into a cell in the original tray that lost its seedlings to the fall.

I’m honestly not sure these will all survive. 😞 We shall see!

That left 12 cells available. I had the small tray with 12 cells planted with three different types of tomatoes in them, so I decided to thin those by transplanting. With the Chocolate Cherry and the Black Cherry, there were 4 “spares” to transplant out, but with the Forme de Coeur, a couple of cells had 3 seeds sprouting when I thought I’d planted only two, giving me 6 “spares” to plant out.

Once I started working on them, though, I realized I would have to plant all of them out of the little tray, so once these were done, I planted the remainder into 4″ plastic pots.

The outside rows of 4 pots are the Black Cherry and Chocolate Cherry. I didn’t have room for all the Forme de Coeur, though…

… so the last one went into the bin with the peppers and thyme.

Hopefully, I didn’t want too long to transplant these from those little trays! This one’s looking particularly rough. 😞

I hadn’t planned to be filling an extra fourteen 4″ pots, so these ones were filled with a mix of seed starting mix and potting soil.

The other small tray with the peppers in it will need to be potted up, too. I’ll probably use Red Solo cups for those, since I only have 4 or 5 of the green pots left, and the new biodegradable ones I got, I’m saving for the winter squash. For the peppers in the small tray, I don’t think I’ll thin them by transplanting, though. Instead, I’ll just keep the 4 strongest seedlings of each variety.

Speaking of room, I need to make a decision on these guys.

These are getting large enough they’ll need to be moved out of the aquarium greenhouse. The question is, do I try to thin by transplanting, or do I just thin them?

Who am I kidding. I can’t bring myself to just yank and kill off so many strong, healthy seedlings! However, transplanting them means 7 more pots, on top of the 6 already here. I can fit them in the mini greenhouse frame at the window, if I can move out the onions and shallots.

Hmmm… onions are a cool weather crop. I could start hardening them off and transplant them outside.

Speaking of planting things outside, the last thing I did for the evening was set the snap pea seeds between wet paper towels for the night. Tomorrow, they go into the ground!

I love having cool weather crops that can be planted so early – earlier than usual, this year. I’m hoping the long range forecasts are at least close to accurate! Even if things end up cooler, this is stuff that should survive anything but an unseasonal deep freeze. Hopefully, we’ll soon be seeing our garlic coming up, as well as the snow crocuses.

Spring may finally have arrived!

The Re-Farmer

Our 2024 Garden: starting winter squash and chitting, on a chilly day (video)

We got quite a bit of rain overnight! Enough to completely fill the rain barrel I’d returned to the corner of the sun room. When I came out this morning, I had to put the diverter back on!

It was still raining ever so slightly while I was out (I counted 31, maybe 32 cats this morning). The only garden related stuff I did was to take the mulch off the sunchokes and asparagus beds – the last beds that needed to be uncovered – so they can thaw out faster.

The rain looks like it has stopped, but it’s too muddy and chilly to do the work I had intended to do outside today. I did end up setting out the Purple Caribe potatoes to chit in the old kitchen.

A couple of them were large enough that I cut them in half, and those ones are perched on the carton in such a way that they will have air flow under them, so the cut areas will dry out.

Looking at how many 1kg give us, I’m rethinking where we will put the 2kg of German Butterball potatoes. My thought had been to put them where the squash were planted last year, but that’s a huge space. I’d basically just have one row of potatoes. So now I’m thinking we might use one of the low raised beds, instead, where the soil should be softer.

We really need to think about increasing the acidity of our soil. It is very alkaline, and pretty much everything we are growing needs soil that is at least a little acidic. We should pick up a bale or two of peat, but that has a very minor and slow effect on acidification. A lot of the usual soil amendments, like adding compost, actually increases the alkalinity, which is the last thing we need. I ended up running errands in the small city yesterday and was looking for Sulphur, but saw nothing. We do have a box of fertilizer we found when cleaning out the old kitchen years ago that is for acidifying the soil; it’s meant for azaleas, but should work for other things, too. If it’s still good. Does water soluble Miracle Gro have an expiry date? I have no idea how old this stuff is. The box was opened but, based on how full it looks, it may only have been used once!

Since today was an indoor kind of day, I started pre-germinated some winter squash.

We’re at just under 7 weeks before last frost, which I hope is enough time for these. Not knowing what varieties are in this mix means we will have different days to maturity among them. I’m still hoping to be able to start some other varieties of winter squash as well – ones we actually know what they are! I’m just not planning to grow entire rows of each. With pre-germinating the seeds, I can start just a few of each and not have to be as concerned about germination rates like when they’re sown into pots or pellets.

I’ll need more pots, though.

Among the last seeds I want to start indoors, by about 3 weeks before last frost, are several types of melons.

Last year, we started so many squash and melon seeds, then had entire trays where nothing germinated. A real waste. I think we’re going to have a much better success rate using the pre-germination method. It should be interesting to see how much of a difference it makes, as time goes by.

The next few days are supposed to continue to be colder and wet, with possible snow, with Friday having a high at, or just below, freezing (it’s Tuesday as I write this). By Sunday, we’re supposed to be back up to the double digits (Celsius), but our overnight lows will be staying close to freezing through most of May. We don’t expect to be direct seeding anything until June, but there are quite a few cold tolerant things we’ll be able to direct sow once the current cold snap is done.

May will be our month for building more raised beds, and harvesting more dead trees to build with.

There is so much that needs to be done!

Weather willing, we’ll have more prepared garden spaces than we had last year, but I’m not sure we’ll reclaim enough to match what we were growing in – well, trying to! – the year before.

Little by little, it’ll get done.

The Re-Farmer

Our 2024 Garden: bed prep, and a comparison request

Well, it finally got done! At about 1am, the video I meant to post yesterday was finally uploaded to YouTube, which then was going to take another hour to process it, in three different quality options. I waited until the lowest quality one was done, so I could select a thumbnail, then went to bed!

The question is, was it worth it?

I’ve watched the video myself, selecting the highest quality option, but I really can’t see much of a different.

Here is the video in question.

Could I ask a huge favour?

Could you please watch this video on YouTube, selecting the highest quality option, then compare it to this one…

… also on highest quality option?

Then let me know in the comments how you watched it, and if you could see any difference in quality or play.

I’m using my new desktop to watch these, and the YouTube settings for both allow me to watch them at 2160p/4K.

When exporting the older video in my software, I used the default “good” quality setting. There is little difference in file size with either “good” or “high” options, so it should not have taken so very long to upload. I don’t know if it was an issue with our internet, or with YouTube itself. Or both. I’ve had this happen before where the upload took so long. it was basically stopped. I gave up and started over again. The problem with doing that is, no matter how far along the upload was, trying again starts at the beginning, not from where you left off. In that case, when I tried it again, it uploaded much faster and without any problems the second time around. I seriously considered doing that again with this one, and probably should have.

Please feel free to let me know what you think!

The Re-Farmer

Our 2024 Garden: solarizing

First, thank you for the kind words I received after my last post yesterday. I’m happy to say I did actually get sleep, and am in much less pain today. I’m going to take it easy for a day or two, so I don’t have a relapse, but I did take the last step in preparing the bed I’ve been working on.

I got a couple of hoses set up to give it a soak and grabbed the first nozzle I found.

It promptly broke. The threaded portion cracked right off!

I couldn’t find the new nozzle we got last year, but I did find another older one (these were nozzles we found when we moved here, and they outlived others I’d bought new!) and that one got the job done.

I took all the plastic off again. There was condensation built up under it, as we had a touch of rain last night, but the soil beneath was still dry. I spent about 20 minutes going back and forth, giving it a deep watering. With the melting snow and water actually being absorbed by the soil instead of washing away, I know there is moisture close to the surface, so the amount of watering I did should be enough.

I ran out of ground staples while putting the plastic back, so I had to find weights for the last section.

The bricks being used to retain the soil is temporary. We will be gathering materials for something more permanent. I’m thinking something about 3 times the current height with the bricks. When that’s done, we’ll take the extra time to make sure everything is in a nice, straight line. In the process, we’ll replace the boards that are holding the soil from falling through the chain link fence with something better. The path itself will eventually have bricks or something, so it’s not to muddy.

A path we will make sure doesn’t get buried like those sidewalk block chunks I’ve been finding!

Looking at the forecast, I’m thinking the earliest we can plant the Purple Caribe potatoes in here will probably be next weekend. We’ve got a couple of warm days, then the temperatures are supposed to drop to freezing, then take a few more days to warm back up to double digits (Celsius).

I’m already feeling time slip away from me. Half of April is almost gone already!

The Re-Farmer

Our 2024 Garden: I got work done!

I was able to get a few things done outside today, and I am so happy!

While waiting for the septic guy to arrive and replace the pill switch in our tank (yay! That’s done!), I took the time to remove the mulch in the old kitchen garden beds. At this point, the mulch is insulating the soil from the warmth instead of the cold, so it needs to come off.

I hope you can see the Instagram slideshow okay.

There is garlic planted in the tiny raised bed with its own cover, the long and narrow bed against the retaining wall, the short part of the L shaped wattle weave bed, and down the centre of the rectangular bed in the middle.

In front of the tiny raised bed is some walking onions. I’d planted bulbils for last year, but basically just left them be. They produced new bulbils and now both the onions from last year, and their bulbils, are starting to send out new shoots! I could plant the new bulbils somewhere, but the whole point of walking onions is that they plant themselves.

While uncovering the long section of the wattle weave bed, I found what looks like surviving thyme and strawberries! I wasn’t sure if they’d make it through the winter. It should be interesting to see if the chamomile self seeded or not.

These had a grass clipping mulch, which has just been set aside for now. We’ll use it again, after the ground is thawed an as we are able to plant things.

By the time this was done, it was coming up on 2pm, which is when the post office opens for the afternoon, so I headed out. Not only did I get the packages I was expecting, but the missing pieces from the shelf I got to make into a multilevel cat bed came in. A job for tonight will be to take care of that.

When I got home, the septic guy was here, so I stayed around the area as he went in and out from the tank to the basement, so make sure no cats got too curious about the open tank! That gave me the opportunity to move the mulch over the saffron crocuses we planted in the fall, and I got a real surprise, there!

They had already sprouted – and look how long those leaves are! This mulch should have been removed awhile ago. Hopefully, the shock of being exposed to sunlight won’t set them back too much. I’m really surprised they were already growing, considering the soil under the mulch is still quite frozen! These are supposed to be hardy only to zone 4, but our mild winter seems to have been excellent for them. So far, it looks like one corm didn’t make it, but now that it’s uncovered it might still show up.

After the septic guy was done and headed out, I was able to keep working on the bed by the chain link fence. I ended up finding another buried piece of sidewalk block! I was able to get the entire bed reworked and somewhat weeded, then replaced the brick border to make the narrower bed. I was able to pull out quite a few weed roots, but not everything, so when it was done, I covered the entire surface of the bed with clear plastic from bags we normally use for our recycling. Because the bed is now so narrow, I cut the bags along the sides to make long pieces. It took 4 of them to cover the bed, to solarize them. Something else I learned from Gardening in Canada that I want to try.

The idea is the direct contact plastic will basically cook those roots. Hopefully, this won’t take too long. Once I can remove the plastic, I want to plant some of these…

I’ve decided I will plant the Purple Caribe potatoes in this bed. I won’t be able to hill them, but if I plant them deep enough – something that can actually be done in this bed – I won’t need to.

Oh! I’m just watching that video again and she says the soil should be deep watered first. I haven’t got any hoses set up, since we still dip below freezing some nights. It’s too late in the day to do that now, so I’ll get the water turned on from the basement and set up a hose in the morning.

We’ve got a few more warm days, then in the middle of next week we are supposed to get a bit chilly with some rain and possibly some snow. By next Sunday, we should start getting highs in the double digits (Celsius) again, and stay there.

I wasn’t planning on chitting the potatoes but, after looking at the forecast, I think we can go ahead and do that, while waiting for better conditions to plant them in. That will give us time to prepare the area we want to plant the German Butterball potatoes, and even do some solarizing there, too.

Things are going to get busy!

The Re-Farmer