Morning in the garden, cute critters and finally got it done!

Today has, somewhat surprisingly, been a day of progress.

Surprisingly because I was dealing with the pains on and off today. I was fine when I went to bed, then got awakened by the pain in the wee hours of the night. I managed to finally fall asleep and it was gone by the time I got up, but was back again after I did my morning routine and was having breakfast. Then it went away.

There just doesn’t seem to be any rhyme or reason behind it. I really, really hope the surgery next week puts a stop to this!

This morning, I did a head count and there were 12 cats showing up for breakfast. When I counted again at the second feeding of the day, there were 14, plus the kitten showed up later.

I did contact the rescue about needing to adopt the cats. They recommended I contact other rescues as their resources are stretched really thin right now. I wasn’t asking for fostering. Just if we could post them on their website, but it doesn’t look like they can even do that right now. The problem is, I’ve tried contacting other rescues before and they don’t cover our area. The only one that did turned out to have… issues. The only good thing that came out of that is we connected with The Cat Lady, who helped us so much while she ran her own little rescue.

I already know none of the rescues are doing intakes right now. Everyone is full. So… we need to figure things out.

Anyhow…

As usual, after feeding the cats, I went through the garden. I am just so happy with how the Arikara squash is doing!

I’ve got my hand in the second picture as a size reference. We’ve got one squash that’s growing. A couple others have withered away, and there’s one that I’m not sure is going to make it. It’s bigger that the size of the others that withered, but it doesn’t seem to be growing. There are some female flower buds visible, too.

The winter squash at the chain link fence are looking good, with lots of male flowers blooming. There was one that had a single female flower that dropped before it ever opened. Currently, I see a different winter squash with a female flower that will hopefully blossom and at least have a chance to get pollinated.

The Super Sugar Snap peas that were planted later at the chain link fence bed are blooming and forming pods now.

I picked a small harvest this morning.

The yellow bush beans had matured faster but are winding down now, yet are still just as prolific as the green and purple beans that are pretty much at their peak right now. There are fewer green and purple bean plants, too.

Next year, I hope to remember to try using the wire tomato cages on the bush beans, like I do now for peppers and eggplant. They seem to need that extra support.

Bush beans do great in the high raised bed, but it isn’t big enough. We have enough beans for eating fresh, but not enough to freeze or can. We definitely need to grow more beans. Normally, I’d be starting to harvest pole beans as the bush beans are winding down, but the Red Noodle beans seems to be struggling. Not as much as last year, where they only reached 6-8 inches high then stagnated. The first year we tried growing them was a drought year and they barely grew at all. It wasn’t until I was cleaning up at the end of the season that I found a single, skinny bean pod that was about the size of a worm. This year, they are bigger but, again, they seem to have stalled. There’s next to nothing climbing the trellis, and the leaves are a yellowish green, like last year, instead of the darker green I see in pictures of mature plants. I don’t know if we’re going to get any pole beans at all this year. We do have the bush beans planted later, with the Arikara squash, and I’m seeing pods starting to form there, so we’ll have at least a bit more beans to harvest from there, soon.

I harvested a couple of green scallop squash, deciding to leave the golden zucchini to get a big bigger before picking them. There are still a couple of varieties of summer squash that barely have flower beds, even.

On coming back to the house through the sun room, I could hear noises through the door. As I came closer, a little raccoon ran out, but I could still hear noises.

I found two more raccoons, “hiding”.

Of the two you see in the first image above, the top one eventually ran by me and out the door. The one below it, however, ran to another corner, and just sat there. I even tried to persuade it to leave with an old broom handle I’ve got in the sun room for times like this. I was going to just sort of push it from its back, to convince it to move.

It didn’t move.

I ended up “petting” it with the broom handle while it just sat there, frozen, staring at me, which is what you see in the second picture.

I tried leaving for a bit and tapping on the other side of the window. Nothing. So I puttered around outside some more before coming back. It was still there. I moved in closer do to something else and all it did was turn around and stare at me some more, which you can see in the last picture.

The little thing looks so sad and adorable. The most tragic of expressions! 😄

It did eventually leave, some time after I was back in the house.

Once my morning routine was done and I was making breakfast, I used some of the fresh beans I picked this morning. I ended up making the fanciest breakfast I’ve ever made for myself, ever. 😄

My daughter had roasted the marinated pork belly last night, so I used some of that. I cooked up a couple of packages of ramen noodle soup, boiling the cut up beans in the stock for a few minutes before adding the noodles. Then, once the noodles were softened, I added a couple of eggs to poach for the last couple of minutes. We have some very ripe avocados that need to be eaten quickly, so I sliced one up.

The noodles and soup liquid didn’t all fit in the bowl, though, so the last of it went into a mug to be added to my bowl once there was room.

Since the meat was already cooked, the whole thing took hardly any time at all. I think waiting for the water to come to a boil was the longest part.

It was quite delicious, too!

Unfortunately, by the time I finished cooking, the pain was coming back. When I finished eating, it was bad enough that I had to take some pain killers and try lying down for a couple of hours. By the time the pain eased, it was long enough that I’m pretty sure it went away on its own, and the painkillers didn’t actually do anything.

Still, I was feeling well enough that I headed for the basement, sneaking past my daughter as she was mopping the floor before she got to that part. 😄 My brother is wanting to haul away the hot water tank collection, and I wanted to at least move them from the old basement to the bottom of the stairs in the new basement, as there is more room around them and they are stronger.

The modern tanks were pretty easy to move, though one of them turned out to still have a fair bit of water in it. I had it tilted over the little trench in the concrete floor that drains to the sump pump reservoir for a while. The water coming out was thick and deeply orange from rust!

With the tanks being round, it was quite easy to “walk” them across the old basement, though the space at the bottom of the old basement steps is so narrow, I had to drag them through there. Once in the new basement, I could mostly just roll them along a bottom edge.

Then there was the original tank. The one I thought I could make lighter by removing the outside of it. That inner tank is way heavier.

I tried rolling it back and forth at first, testing the weight, and could hear all sorts of things rattling around inside. There must be so much scale in there! I stood it up, and almost immediately, noticed some water leaking from the outflow valve. I started rocking it a bit and more water started spurting out. I ended up walking to over to the drainage trench in the concrete and held it there, at an angle, for a while.

The light isn’t good there, so I was using my phone’s flashlight to check the outflow pipe and could see it was threaded at the tank. There was an old pipe wrench handy in a nearby shelf so I used that, at the “tap” end of the outflow, to try and unscrew it. It was coming loose quite nicely when I realized it wasn’t coming loose from the tank. The “tap” was coming off – I couldn’t even see that it was threaded, earlier! After a while, a white pipe was visible and I was able to pull the whole thing out by hand. By then, most of the water had already drained and it was just a slow trickle. I ended up dragging something over to lean the tank against, so I didn’t have to sit there holding it at an angle the whole time.

Once it was down to a drip, I continued moving it to the other basement steps. Which was way easier than I expected. With the outer shell removed, it was narrower than the modern tanks, making it easier to get past the bottom of the old basement steps. Once it was on the smooth concrete of the new basement, I was able to just push and slide it most of the way!

So we now have three hot water tanks at the base of the new basement steps, waiting to be hauled out.

Then I went and got the old door from our last vehicle. It’s been leaning against a wall off to the side for years now. That turned out to be an easy move. The concrete floor in the new basement is nice and smooth, and it slide across quite nicely.

So that’s all ready to drag up the stairs and outside to the junk pile, which the girls and I were thinking of doing today.

It won’t be done today.

Once everything was moved, I cleaned up where the tanks had been, then grabbed the very handy old garden hose we keep for clearing the pipes to the septic tank to clear the drainage trench to the sump pump of all the thick, rusty sludge still sitting in it. Ew.

That done, it was about time to feed the outside cats, so I headed back outside. After feeding the cats, I broke out the push mower to FINALLY get a job done that I’ve been meaning to get to for weeks.

I cleared the two overgrown spaces in the main garden area, and around the fallen tree by the old squash tunnel we still haven’t taken down. These areas both needed to be mowed twice. The first time with the mower as high as it can go. The second time, a few notches lower. The old garden area is still so insanely rough from the botched plow job done before we moved here, I can’t really mow it as short as I’d like. I was able to mow in between the silver buffalo berry, though. Those need more wood chips mulched around them, eventually, too.

It looks so much better now!

After I put the mower away and headed back to take the above photos, I spotted little Bug in the north yard, behaving strangely. Like something in the grass had her full attention…

Our little Buglette is a might huntress!

That mouse is about half the size of her skull. Such a good little Bug, earning her keep! 😁

I had intended to water the garden after I finished with the mowing, but I was at my limit for the day. My older daughter was able to do it for me, while I was working on this blog post.

As I write, I can start to feel that I may have pushed myself a bit too far with moving those tanks, though. My shoulder and neck muscles are starting to stiffen up.

Time to be pro-active with the painkillers, I think. Maybe some Tei Fu lotion on my legs before bed, too, since I can’t take my magnesium supplements until after my surgery.

An early bed time is definitely in order, tonight.

For all that I ended up having to lie down due to pain for several hours, I glad I was able to get things done.

Hopefully, I won’t be paying for it, tomorrow!

The Re-Farmer

Open fire cooking

After all the digging yesterday, today we got to enjoy the fruit of my labour with a cookout.

March is a birthday month, but we never celebrate birthdays on the day, but the weekend before or after (unless the birthday happens to fall on a weekend, of course), plus like to do nice things for the birthday person spread out over a couple of weeks.

The other thing we normally used to do was take the birthday person out to the restaurant of their choice. Which isn’t really an option anymore. So instead, we would do the take out of their choice.

Now, in theory, we could have done that this time. My brother got his truck prepped and it’s available for us to drive, should we need it. He is also convinced something is going to go wrong with our own truck! It is a much older truck – I don’t know the year, but I think it’s either late 70’s or early ’80’s. With my luck, I’m afraid that if I drive it, it’ll break down, too! 😄

My older daughter that has a birthday this month, however, insisted we not spend any money on her for her birthday. When I told her, I budgeted for it, she said to put it towards the truck.

*sigh*

So, instead, I decided to do special meals. Today, it was a cookout.

The cooking was done outside, but the eating inside, because dang, it’s still cold out there!

My younger daughter headed out early to get the fire pit going and build up coals for cooking, while I brought out the stuff to cook. This was our first time using our square Dutch oven that I got on clearance at Canadian Tire, months ago.

I had eight baking potatoes, wrapped in foil with olive oil and course salt. They all fit quite nicely in the Dutch oven, as you can see in the second picture.

I got the pictures after she’d had it in the middle of the fire pit for more than an hour (we forgot to check the time), then moved it off to one side to start cooling it down a bit.

The nice things about this Dutch oven. The square shape made fitting the potatoes in much better than with a round shape, which made for more even cooking. As with the other Dutch oven, the lid can double as a separate cooking surface. It’s smaller, and lighter, perfect for if we want to cook smaller portions, and easier to carry when full.

The down sides with this design. It has no legs, so it rests directly in the coals. The lid isn’t recessed, so any coals set on top are not as secure. It’s handles are built in; larger areas on opposite corners, rather than a wire carrying handle that swings up and down, or can even be used to hang it over the fire. There is also no handle on the lid. Which means we can’t use a tool to lift the lid off, nor use a carrying handle to lift the entire thing in and out of the fire pit. Instead, we had to wait for things to cool down enough to handle in some way. My daughter was able to push the lid off to the side so I could remove the potatoes and take them into the house to stay warm in the oven. Eventually, my daughter was able to get the lid out so finish cooling off on the side, but it took quite a bit longer before the rest was cool enough to remove with oven mitts. Even then, it had to rest on top of some logs (so as not to come in directly contact with the snow) until it was cool enough to handle and bring inside.

Then my daughter reset the fire and built up more coals to cook the hot dog wieners. We have a moveable grill surface (you can see the shadow of it in the first picture above) and a cooking tray designed to go on a BBQ grill, for things that would otherwise fall through the grill. It fits a dozen wieners at once.

Wieners that had started to freeze by then!

With the temperatures, once those were on, we had to cover them with foil. I had a metal dish to bring them into the house with, later; with the wind, I ended up setting it on top to keep the foil from blowing off!

When it was time to turn them, though, I realized I forgot something important.

I forgot to oil the cooking surface. The wieners were stilling to it!

As soon as they were cooked through enough, my daughter transferred them into the (now warm) metal dish. They were pretty torn up, but she did the best she cook! I wrapped the dish in foil and went in to keep them warm with the potatoes. Originally, we were going to toast the hot dog buns, too, but quickly gave up on that idea. We would toast them in the oven, so I took the bag of buns in, too.

They were starting to freeze as well!

In the end, though, it all worked out well. The potatoes turned out to be perfectly cooked! I was more concerned about them. The last time we did foil wrapped potatoes in the fire pit, they were set directly into the hot ashes. They cooked way faster than expected, and were pretty burned in places. Cooking them in the Dutch oven protected them and let them cook more evenly. Definitely something worth doing again!

That was for today. Later on, we’ll be baking a cake, and I’ve got fish fillets thawing out for another special dinner – one only my daughters can eat, but that’s just fine! My husband and I don’t tolerate fish – or most seafood in general – well. The girls, on the other hand, love pretty much all seafood.

As for me, it’s back to spending time with the family! It’s been a good day.

I hope you are having a wonderful day, too!

The Re-Farmer

Rough night, rough day, so I’m testing out a flatbread recipe

Ooff.

You know those nights where to get into bed and suddenly, you’re just awake? Absolutely zero chance of falling asleep?

Well, I had one of those last night. Finally, at around 4am, I got up to find a food. I sat at my computer table to eat and, since I was there and the computer was off, I decided to clean out the crevices on my mouse. It wasn’t as bad as I expected, so I decided to do the same to my keyboard.

I cannot believe how much cat hair I pulled out from between the keys! How does it even get in there??? Today, however, it feels like I’m typing on a brand new keyboard. 😄

I finally tried going back to sleep at about 5am and managed to get a bit of highly interrupted (by cats) sleep before it was time to get up and do the morning routine and feed the outside cats. Then I tried to go back to bed, but found I wasn’t feeling well for some reason. I finally did doze off, only for the phone to ring and wake me up.

I gave up after that.

I still wasn’t feeling well in general. Part of it had me wondering what I might have eaten to trigger problems (nothing out of the ordinary), and part of it was my joints wanting to give out on me. That whole “shoulder wants to dislocate while reaching to flush the toilet” thing is decidedly inconvenient!

I ended up getting one of my daughters to do the evening outside cat feeding.

I was feeling particularly useless today, so I started looking up recipes. At some point, Pinterest started showing me some Pins for liquid dough flat bread, which caught my attention. We aren’t baking bread anywhere near as much as we should be. Our bread machine stopped working properly a while ago, though we could still have it mix up a batch of dough in the evening, ready to bake in the oven in the morning, but we weren’t always in a position to do baking in the morning. Plus, a single loaf doesn’t go very far with four adults in the household.

Meanwhile, with all of us breaking down, one way or another, we were focusing more on no-knead bread recipes, anyhow. Most of these still require rising time, but sometimes I want something faster. Baking powder pan bread works okay, but variety is always nice.

Today, I found a couple of “liquid dough” recipes that looked good and decided to try one of them out. The dough’s texture is thinner than a batter bread, but thicker than a pancake batter, though there seems to be quite a bit of variability between recipes.

This is the basic recipe I settled on to try today.

Liquid Dough Flatbread

Ingredients:
2 cups flour (AP or whole wheat)
2 cups water
1 egg (beaten)
1/4 tsp salt
1/4 tsp sugar
2-3 tsp dried parsley (or slightly less, if using chopped fresh parsley)
Oil or butter (melted) for cooking

Instructions:
1. Add all ingredients together in a medium bowl and whisk together until smooth.
2. Heat non-stick skillet over medium high heat. Brush lightly with oil or butter.
3. Pour 1/2 cup of batter into the hot skillet and spread evenly.
4. Cook until the bottom starts to change colour and is solid enough to flip.
5. Flip, then apply a light coating of oil or butter.
6. Press the edges with a spatula (they tend to curl up). Cook for 2-3 minutes, then flip again.
7. Apply another light layer of oil or butter. Continue to cook for another 2-3 minutes, or until both sides are golden brown. Note: a bubble of steam may form in the middle.

For this, I used olive oil in a handy little dispenser and a pastry brush to spread it, which made things easier. I also used a half cup measuring cup as my ladle, with a rubber spatula to scrape the outside to keep it from dripping all over and making a mess. With the half cup measuring cup, I was able to do 7 flatbreads that were about 8″ across this way, then for the last one, I just poured in what was left, which made for a flatbread about 10″ across.

This is what it looked like.

The original recipe said to put all the ingredients (the egg did not need to be beaten first), except the parsley, into a blender, blend it smooth, then transfer to a medium bowl and stir in the parsley. We don’t have a blender, but why would I want to dirty extra things when a wire whisk and one bowl will do the job? I didn’t even bother to beat the egg in a separate bowl, but just made sure to beat it before incorporating everything else in the bowl.

The finished flatbreads had a lightly crispy edge, and a softer, chewier middle.

We taste tested them plain.

My conclusion:

Very easy and quick to mix up, and not too bad when it came to how long they took to cook, for something that could be cooked only one at a time.

Adding the extra oil when flipping them did result in them being slightly oiler than I prefer – and I didn’t oil them as much as the original recipe called for!

For flavour, I think it would have been better if I’d used butter, ghee or even a flavoured olive oil, rather than a plain olive oil. I think butter would be best, as they rather needed the extra salt. Something to experiment with, if I make this recipe again, as it was a bit on the bland side.

I think I would also like to experiment with trying different additions instead of the parsley. Finely chopped garlic, for example, or a dry grated cheese, like Parmesan, or even some powdered, dehydrated tomato or spinach, for savoury options. I think it would also work well with a bit more sugar – maybe substituting brown sugar instead – and the addition of things like ground cinnamon or cloves, for a sweeter option.

While we were taste testing these plain as a snack, I think they would be a nice addition to go along with a hearty soup or stew, though for that, I really prefer our fluffy dumplings. More likely, we would use this as a wrap, like we use tortillas, with some sort of savoury filling. My daughter thought they would be nice dipped in some hummus or sour cream. Interestingly, she found the flavour quite “eggy”, which I didn’t get at all. Her taste buds can pick up a lot more than mine can, though.

I do think this is something that might work well for campfire or firepit cooking, too. Our well seasoned Dutch oven lid has legs and can double as a griddle that would be perfect for something like this.

In the end, I think this is something that would do well to quickly work up when feeling peckish but, as I mentioned before, it’s a bit on the bland side. I can see myself making a half recipe of this as a snack during the night.

A night like last night, were sleep just didn’t want to happen!!

The Re-Farmer

Our 2025 Garden: a nice harvest, and breakfast!

This morning I collected our largest harvest yet, for this year!

I had some help, too.

When I prepared to transplant the melons, I set up a trellis for them using Dollarama steel fence posts and welded wire mesh salvaged from the old squash tunnel from years ago. When the Spoon tomatoes were planted in the other half of the bed, I use bamboo stakes to make them their own trellis.

Well, with the melons barely growing at all, they’re not going to need the trellis. So, with my daughter’s help, we pulled the posts, with the wire still on them, and moved them over to the corn and Arikara squash bed. It’s loosely set up for now, but the 4′ square bed will get a wire fence around it – the mesh is just long enough! – to hopefully keep the raccoons from getting into the corn, when the cobs are ready. I’ll probably have to put some sort of cover over it, too, or they’ll just climb up and over.

The corn bed has plastic netting around it. Hopefully, they will be dissuaded from the corn rather than tearing their way through.

After moving the melon trellis away, the Spoon tomatoes can now be reached from both sides, so my daughter helped me pick tomatoes on one side, while I did the other.

There were lots of Spoon tomatoes to pick!

I’m glad I remembered to bring a separate container for the Spoon tomatoes!

There was also a whole two Royal Burgundy beans to pick, from the three surviving plants. I did pick a small handful of yellow bush beans last night, though, so there was enough to actually use. While checking last night, I noticed some ripening Sub Arctic Plenty tomatoes and this morning, one was ready to grab.

After that, I dug up some potatoes, then winter sown carrots from the high raised bed.

In the next image in the slide show above, you can see a very wonky potato!

That was from roots.

These potatoes were picked from about the middle of the bed, so at least twenty feet away from the trees. My garden fork was digging up more roots than potatoes.

Those trees have got to go.

Then I remembered we have herbs and stuff, so I went to the old kitchen garden, where I gathers some lemon thyme, lemon balm and oregano. In the winter sown bed, I grabbed a few Swiss Chard leaves. I even grabbed some bulbils from the walking onions, since we don’t want them to spread any further.

Once inside, the longest time was spent getting all those little green bits of stem off all those Spoon tomatoes! I also set aside some of the ripest looking ones to collect seeds from, later. Their seeds are so tiny, I’ll have to consider how best to do that!

In the last photo – which looked much better and in focus on my phone, I swear! – it what I made with it. There’s still potatoes and Spoon tomatoes left, plus the one Sub Arctic Plenty tomato, but I used up all the carrots, julienned, a handful of bush beans cut small, the onion bulbils and a whole head of garlic. We still have fresh garlic left of the ones that were too far along for curing and winter storage. Then there was the chard and herbs.

When I went into town to get kibble yesterday, I also picked up some chicken legs and thighs that were on sale, which my older daughter prepared last night, so breakfast (brunch?) was the vegetables gathered this morning, plus oven roasted chicken legs.

It was very good!

The Re-Farmer

Our 2025 Garden: first zucchini forming, a harvest for the day, and those trees have got to go!

First up, I spotted our first blooming female zucchini flower today!

There’s another one under it that bloomed and was done before I ever saw that it was a female flower.

There were no male flowers open at the time, so I grabbed a couple of older ones and tore off the petals so I could access the pollen and hand pollinate. The first one had water pour out when the petals were torn off, so I used a second one, too, just in case the first one didn’t have any viable pollen. At this point, it’s too early to tell if the one I missed had a chance to be pollinated before it was done blooming.

This afternoon, I decided to use up a whole bunch of odds and ends vegetables in the fridge, along with some fresh stuff, in the slow cooker. I’ve been leaving the potato bed for the past while but decided to dig some up for today’s use.

I had dug some up before under the potato plants that had died back the most, which was at the north end of the bed, closer to that row of self seeded trees my mother left to grow. The entire potato bed died back early, without ever developing flowers, but the north end of the bed had them dying back the fastest.

Well, I’ve pretty much confirmed why.

The potatoes in that basket are from under four potato plants that were at the end of that bed. That mass beside the basket is capillary roots from the elm trees nearby that came up while I was digging around for the potatoes. I was hitting more, larger roots as well. I’ve de-rooted these beds several times, and they come back so fast!!

Those trees have GOT to go! They’re killing our garden!

I dug up more potatoes closer to the middle of the bed, and was still getting a lot of capillary roots like that, but found more potatoes under two plants, than under the four I’d dug up first.

Since I finally had a container on hand, I harvested Spoon tomatoes. It’s been a while since I picked any, so there were plenty to gather. Thankfully, the mesh on this basket is fine enough to hold the tomatoes! Some of them were so small, they would have fallen through if they weren’t being held in place by the larger ones. I had to be careful to keep the potatoes from rolling over and squishing them.

Then I grabbed a few more carrots to add to what we already had inside, and the only ripe bush beans I could find.

In the last photo of the slide show above, it shows all the vegetables I prepared for the slow cooker, seasoned and tossed with avocado oil. All from our garden!

There are the potatoes, carrots and Spoon tomatoes, of course. Plus I finally used that one big turnip that I’d left to get big and go to seed, but the deer ate most of the greens. There’s kohlrabi in there, and more beans that we had in the fridge. It took three “harvests” of bush beans to have enough to make it worth using them in anything! Oh, and there is Swiss Chard and a whole bulb of fresh garlic in there, too.

We have a large Crockpot, and the vegetables almost filled it completely. They will shrink as they cook down, though. After I left for my mother’s, my daughter browned some ground turkey, along with some of the yellow onions we still have left from last year’s garden (they have lasted a really long time!!!) and mixed that in later on.

The slow cooker was set to high for 3 hours. Since I’ve come back from my mother’s, I’ve checked on it a few times and added more time. All those potatoes need extra time to cook through, as I deliberately left them in big chunks. For I still don’t know how it turned out!

The house is smelling amazing, though, and I’m getting hungry! 😄

The Re-Farmer

Happy New Year!

Wishing you all a blessed and peaceful year in 2024.

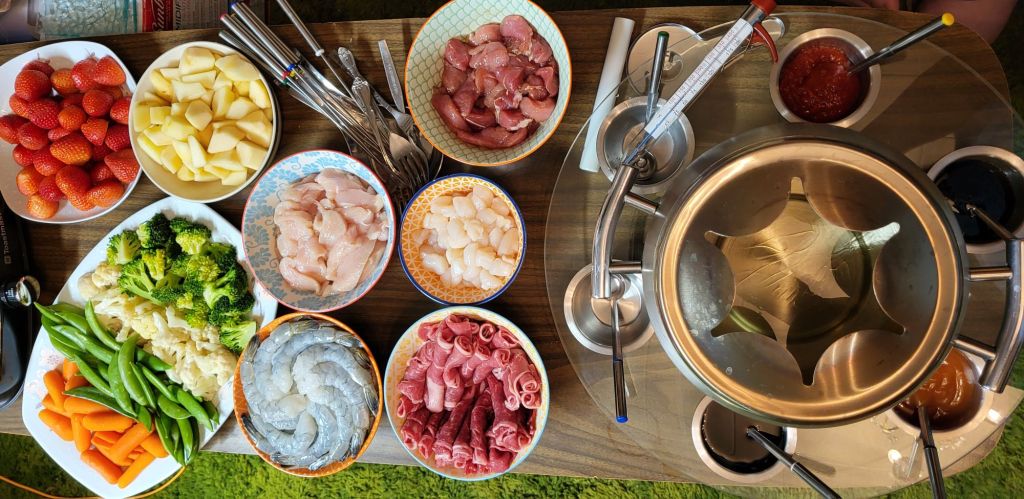
The family and I have successfully managed to get our fondue going!

I am glad I got the extra burner, because we emptied one almost before the oil was hot enough!

The cheese fondue mixed up nicely, but the hot plate was too hot, even on its lowest setting. Still, it was enough to get started while the oil heated.

Not pictured is the tempura batter, which got mixed up at the last minute. We still can’t do more than two items in the oil at once, as the food cools the oil down too much – which makes for a very slow meal. Perfect, as we watch Columbo and wait for midnight.

If we can hold out that long before just going to bed!

😁😁

The Re-Farmer

17th Century onion soup – not a recipe

Recently, I saw this video from Townsends.

We have quite a lot of fresh onions, on top of the ones we dehydrated (half of which I powdered) and froze. Mostly the Red of Florence onions.

Which have started to grow! Not all of them, but enough that we had to do something about it.

So I made a version of this historical onion soup using all red onions, to use up the ones that were sprouting.

I made a few other changes, too, of course.

This is how it turned out.

I sliced all the onions that were starting to sprout, saving the greens to use fresh, some of which I used to garnish my bowl. We’d done a pork roast yesterday, and there was just a bit left, along with the pot juices and rendered fat from the roast. I used the fat from the roast, as well as bacon drippings, to caramelize the onions, instead of butter. Part way through the caramelization process, I added the leftover bits of pork, finely chopped – there is no meat in the version in the video.

For the liquid, I use the juices from the pork roast, which had jelled quite nicely overnight, plus water. They used just water in the video. A vinegar I had on hand I chose to add to the beaten egg yolks was a fancy, barrel aged apple cider vinegar.

My daughters had made a loaf in the bread machine yesterday, and that was used for the bread portion. The video specifically stated to use the outside of a crusty loaf, not the soft insides (which would just turn to mush in the soup!), so I sliced off the crust on the bread machine bread. The bread machine makes a relatively dense bread, particularly around the edges, so I was able to cut quite thick slices off all sides for this, and cut them into fairly even cubes. They stood up well to being cooked in all that liquid!

The only other thing I did a differently was to add a splash of vinegar to the soup stock, even though there was vinegar in the beaten egg yolks. After tasting it, I just felt it needed that extra bit of bite.

The only down side to making this soup was the length of time it took to slice the onions, then caramelize them. By the time the soup was simmering and the cubed bread added, my back was giving out and I had to sit down in between doing the other stuff. Not an issue for people who aren’t broken, like me! 😁

As for the soup, it was quite tasty. Even my husband went for seconds, and he’s not a soup person! I think it would have tasted even better with yellow onions, but that’s just me. If all goes well, we’ll have a lot more of those in our garden next year!

This is definitely a soup I’d make again, with any type of onion.

I might be getting my daughters to do the chopping or caramelizing next time, though! 😄

The Re-Farmer

Tomato sauce is done!

It took a while, and I had to pause part way through to do other things, but it’s finally done!

Here are photos of the process. I didn’t really follow a recipe, but rather used a number of different recipes I found online to use as a guide.

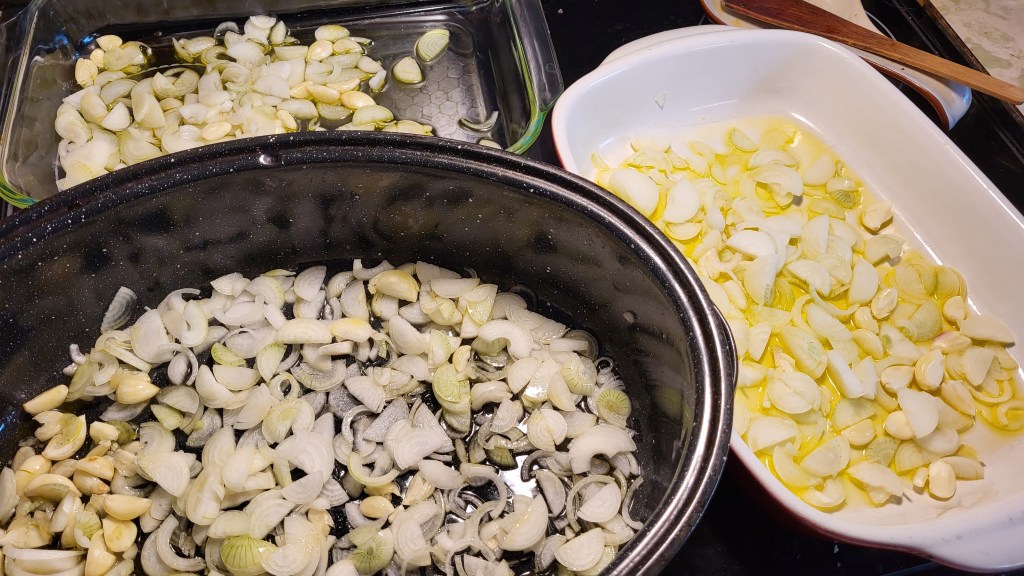
After selecting the ripest Roma VF tomatoes, I gave them a wash and left them in the water while working on the onions and garlic. I wanted those on the bottom of the roasting pans to make sure they would get completely immersed in any liquid released by the tomatoes. I wanted them to cook until they were so soft, they’d disappear into the sauce.

When it came time to process the tomatoes, things went a lot faster than fighting with those little onions and garlic! I was going to leave the skins on, so I only needed to cut the stem ends off (and any damaged bits), then give them a squeeze. With the shape of the Roma, it was easy to do it sort of assembly line style, cutting the ends off and lining them up on the cutting board, cut side down, until the board was mostly full, then squeezing the seeds out into a bucket for the compost.

A handy tip to make things easier: place a cutting board inside a baking pan with low sides. I have a whole bunch of 9×13 baking pans that are perfect for this. They are large enough to fit a cutting board with room to spare to catch liquids or keep items handy, and the sides are low enough to not get in the way of my hand or the knife as I cut.

All the recipes I found had the amount of tomatoes by weight – usually 4 lbs. I had no idea how many pounds of tomatoes I had, so I just winged the quantities for the other ingredients, and split everything between the three pans.

After all the tomatoes were cut and seeded, I added more olive oil and carefully turned the tomatoes to coat them, while trying not to move the onions and garlic on the bottom too much.

The recipes I found had oven temperatures ranging from 300F to 425F, and while some had cooking times, most were “until the skins start to blister”.

I decided to go lower and slower. I put the three roasting pans into a 325F oven. I checked them at about 40 minutes, then added another half an hour.

While they were roasting, I went and got some fresh oregano and thyme. I didn’t get a lot of oregano, because the plant is mostly blooming right now, and the bees were loving the flowers. So I just found a few smaller stems. I picked about the same amount of the thyme sharing a pot with the oregano. We have German Winter Thyme in the old kitchen garden, but the seed pack for these ones didn’t include a variety name.

This gave me a chance to try out the herb chopper I picked up at a Dollarama not long ago. It came with a cutting board with a recess matching the curve of the blades. It did a pretty good job, though with the slightly larger oregano leaves, they sort of got caught between the blades while just rocking it, so it needed to be lifted and shifted with each cut. That was not as much of an issue with the thyme leaves.

I like it.

When the timer went off on the oven, the kitchen needed to be used for other cooking, so I just shut it off and left the pans in the oven. Then, before I started on the final cooking, I made sure to do all my outside stuff and other little things, so they were in the oven for probably 2 or 3 hours. They were still quite warm when I took them out!

When transferring them into my big stock pot, I was very happy to see how softened the onions and garlic were! Exactly what I was after. All three roasting pans really filled that pot!

At this point, I added the chopped herbs and salt. Sea salt, because we happen to have some at the moment. After stirring that in, I turned on the heat, then used the immersion blender on it. Not for long, but that things is very efficient, so there were just a few larger pieces that got missed.

After that, I kept it at a simmer for about another couple of hours, stirring frequently. I tasted it a few times and ended up adding more salt (twice), some pepper, some dried sage, a bay leaf and a splash of lemon juice.

Towards the end, I removed the bay leaf and took the immersion blender to it again. This time I kept it going for longer, so make sure there weren’t any big pieces of tomato skins anywhere.

I like that this pot has a measurement scale inside it. After the first blending, the sauce reached just under the 7L mark. When it was done, it was at the 6L mark. I could have cooked it down further, but I think it’ll be good enough.

For now, the sauce is cooling down. I plan to put it into freezer bags and freeze them, though we will probably use some of it with a meal, first.

I think the next processing I will do is to dehydrate slices of the Black Beauty and Indigo Blue tomatoes. Those can be left in a warm oven, unattended, while I get other work done.

A dehydrator would be a useful gadget, but we really don’t have the space for one. At least not where we also have access to an outlet.

For now, the oven will do just fine, and tomorrow, I hope to get some work done outside at the same time!

The Re-Farmer

Taking a break

Finally, I am home for the day and can start the tomato sauce. We have tomatoes all over the place, and I gathered all the ripest Roma VF, leaving the Black Beauty and Indigo Blue, for now.

It was enough to fill a kitchen sink.

After going over numerous recipes for roasted tomato sauce, I decided on how I would make these.

I have 3 roasting pans and can fit them all in the oven together.

To start, the bottoms got a generous splash of olive oil. I then took advantage of this and used the smaller onions and garlic. I finished off an entire small braid of onions, which gave me the equivalent of maybe 2 large onions. 😁 I also smashed and peeled cloves from about a dozen small garlic bulbs. That gave me the equivalent of about 2 large bulbs.

I wasn’t too concerned about the proportions in each roasting pan. They will all go into one pot, later. That’s when I will be adding fresh herbs and seasonings.

The down side of using the smallest bulbs is that it took a really long time standing at the counter, prepping them.

My back is killing me, and I took painkillers before I started.

So I am taking a break now.

Next step is to trim and deseed the tomatoes. That’s going to be another long time, standing at the counter!

I plan on leaving the skins, though, as I will be using the immersion blender as a final step.

As for the black tomatoes, once the sauce is done in the oven, I think I will slice the ripest ones and dehydrate them. As much as I can fit on baking pans, at least. There are more Romas ripening, so there will likely be more sauce or paste to make, later.

The Re-Farmer

Rendering lard: second batch, first use

I was going to start the third and (hopefully!) last batch tonight, but it’s coming up on 5pm, and I just finished jarring up the second batch a little while ago. It can wait until tomorrow!

At times like this, I really appreciate the uninsulated old kitchen. This time of year, it’s basically a walk in freezer or refrigerator, depending on how cold things are outside. The remaining leaf lard is the thickest chunk we got and was still really frozen when I worked on the rest, yesterday, but as it sits in the old kitchen, it will soften more, yet still be frozen. That makes is a lot easier to chop, but also gives me a bit of flexibility in time for getting it processed. Yesterday evening, I had to get the girls to take over some stuff because my hips suddenly decided to go crunchy on me (they were fine by morning!), while my shoulders have started to really hurt from all the chopping. I’m doing it while sitting at the dining table, since there’s no way I can stand at a counter long enough to do it all, but the height while sitting isn’t very good, resulting in a lot of pain and stiffness right in the muscles where the neck and shoulder join. Which still hurts now, so I’m going to take an evening off from chopping.

I didn’t render the second batch in the slow cooker quite as long as the first batch; I’m curious to see if there is a noticeable difference in the colour of the lard. I might have had a touch less chopped fat in the second batch, but since I only have the depth in the slow cooker to go by, I can’t say for sure. Taking the solids out earlier did mean less liquid fat to jar up, and more volume to turn into cracklings later.

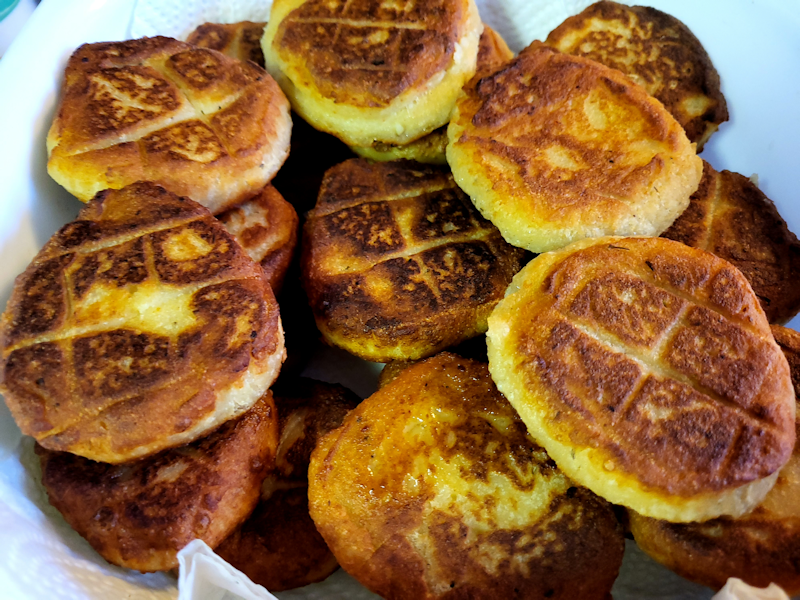
After removing the cracklings, I was able to fill six 500ml jars, with such a small amount left in the slow cooker, I just dumped the rest into the pan with the solids. After taking a break so the girls could use the kitchen, I started rendering the last of the fat out of the cracklings. While that was slowly heating up, I decided to take some leftover mashed potatoes and make them into potato patties. I just kneaded flour to the mashed potatoes until I got an dough somewhat thicker than bread dough, but not as dense as pasta dough. After breaking of sections and making them into rolls, I cut them into rounds, then pan fried them in some of the first batch cracklings lard. Enough to cover the bottom of the pan by about half an inch.

Lard has a high smoke point, so I could do these at almost deep fryer temperature. The higher the temperature, the less fat gets absorbed by the food. After cooking, they got laid out on a paper towel lined dish. They came out nice and crispy on the outside, with a smooth texture on the inside, and not at all greasy.

The lines that you see are because I set the cut rounds on a cooling rack until the pan was ready. If I’d laid them out on a plate, I would have had to flour the outsides to keep them from sticking, and I didn’t want to have burnt flour in the hot oil.

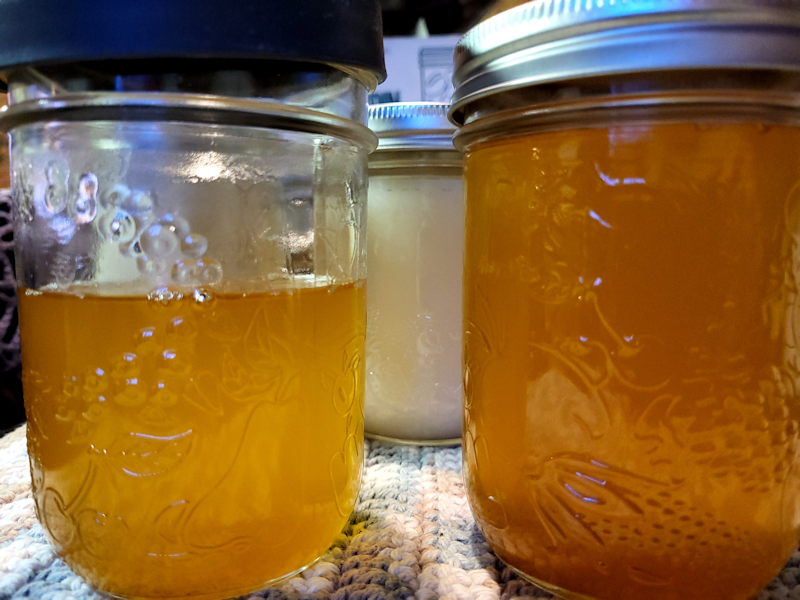
Here is the second batch of lard.

The first 6 jars were almost solid by the time the cracklings lard was done! I got another 1 1/2 pint size (500ml) jars out of the cracklings, making for a total of about 7 1/2 jars. The first batch was just under 8 jars total, so it came out very close.

The cracklings are once again laid out between paper towels, sandwiched between 9×13 baking trays and weighted down, so that cats can’t get at it!

One thing about handling all this fat for the past several days; even with constantly having to wash my hands with lots of soap, they haven’t been this soft in years!

The Re-Farmer