Today we picked up some fence wire to make a new gate for our second driveway.
The wire we got was 1 inch mesh, in a roll of 36″ x 25′ I was pleased to see the hardware store had 1 inch mesh in stock. When I price checked it a while back, the largest they had was 3/4 inch mesh. I would have preferred something like a 2 inch mesh, but this will do just fine.
My younger daughter and I then went out to the back gate to replace the old barbed wire gate.
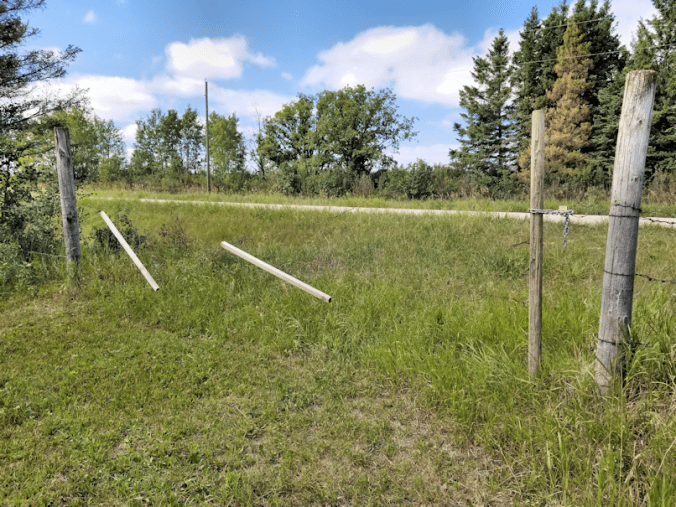
When we moved out here, the gate was open and we had no idea that it was in such bad condition. When the girls went over to close the gate, they had to replace the post at the end (the lock and chain around it is the only thing keeping it closed) and salvage the wire as much as they could with what was there.
We salvaged the posts for the new gate, cutting down the round one at the end so that it was the same length as the middle ones.
In the process of working on it, I made sure to gather up and set aside the old barbed wire from the gate.
It’s amazing how much rusty barbed wire just disappears in the grass. There were a couple of times when, even though I knew the wire was there, I still managed to catch it with a shoe, or almost step on it.
Keep that particular detail in mind for later…
On to the new gate!
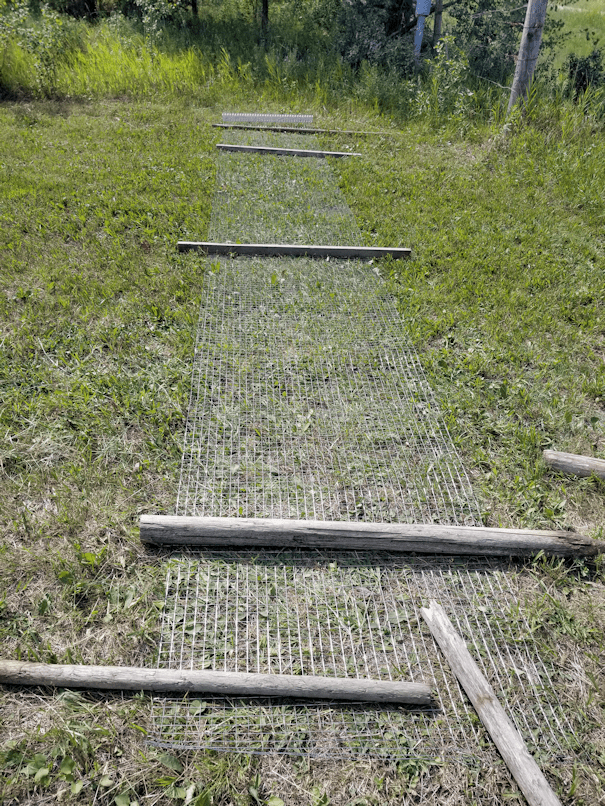
The first thing we did was lay out the wire and position the posts more or less where they needed to be, while using other posts I’d brought, just in case we couldn’t salvage the old ones, as weights to keep the wire from rolling itself back up again. :-D
For the end post, we first affixed the end of the mesh to the post with U nails, then wrapped the wire around the post and affixed it again, opposite the first U nails. Since this post will see the most movement, the wire needs to be secured the strongest here.

Once the first post was secured, we slid the next two posts under the wire, making sure their bottoms lined up with the bottom of the first post. Then, after making sure the wire mesh was pulled taut again, the wire was affixed with more U nails.
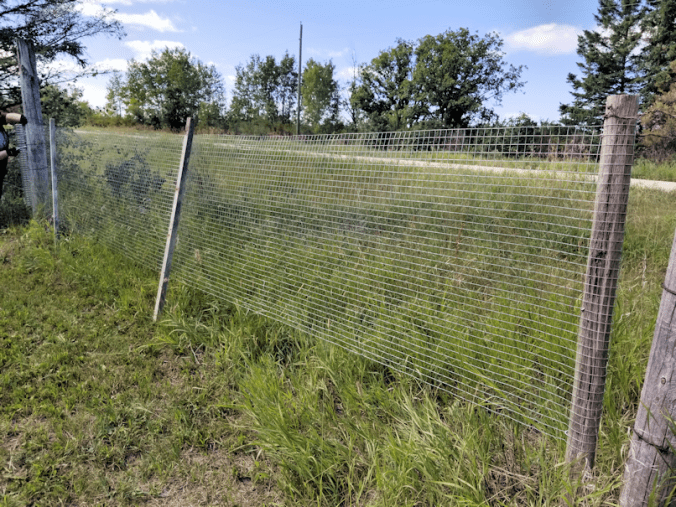
Next, the gate was put in position and the mesh affixed to the gate post.
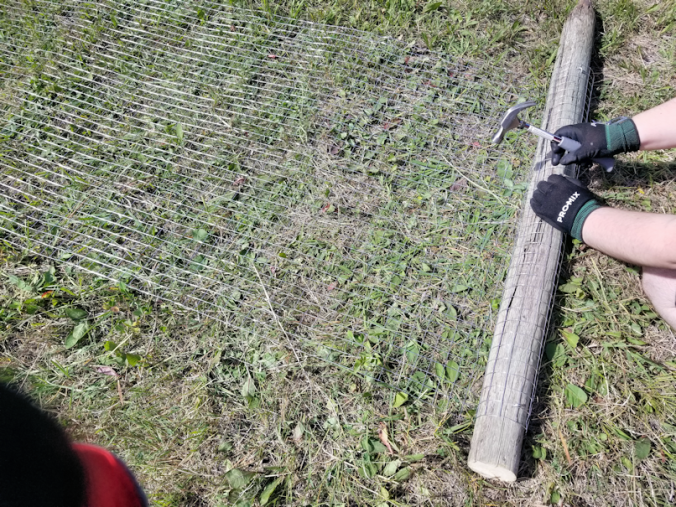
The main gate post on the right has a barbed wire loop at the bottom that the first post tucks into. A second barbed wire loop at the top was then tucked over the top of the post to hold it in place. You can’t see it, but the chain is hanging down from that wire loop, as it had been threaded through one of the links when the chain was added.
You can see my daughter at the other end, securing the wire mesh to the opposite gate post with more U nails. The posts in the gate itself each has 3 U nails securing them, but at the end, the mesh is secured with 5 U nails.

The space between gate posts is about 22 feet. Once the mesh was secured, wire cutters were used to remove the last 3 feet or so of mesh.

The chain fits through the mesh, which worked out perfectly.
The barbed wire loop at the top was replaced with the wire that was wrapped around the mesh roll, to keep it from unraveling. It is the same type of wire the mesh itself is made of, but was long enough that we could fold it in half, twist it around itself, fold it in half again, then twist it around itself again (something I do with string or yarn to make cord when crafting). The loop itself is secured to the gate post with a U nail as well.
Yay! The gate is finished, and it looks SO much better than barbed wire!
That done, my daughter headed back to the house to put away the tools and supplies, except for the hand saw and anvil shears I’d brought to clean up some of the self sown saplings that were starting to encroach.
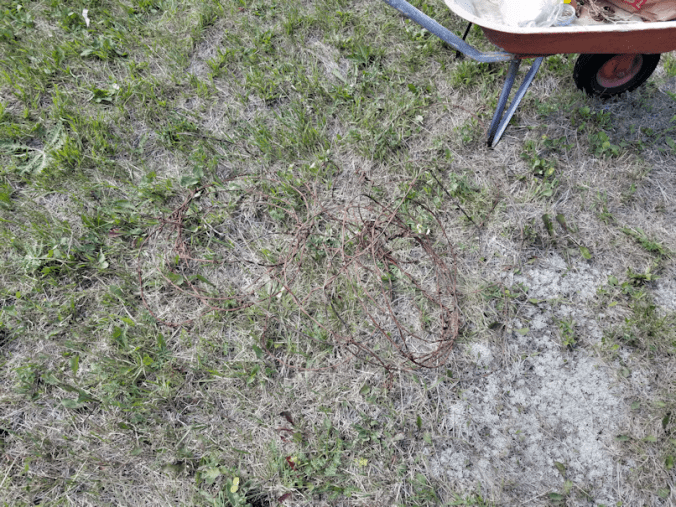
Remember what I said about barbed wire, disappearing in the grass?
Well, this was next to the gate.
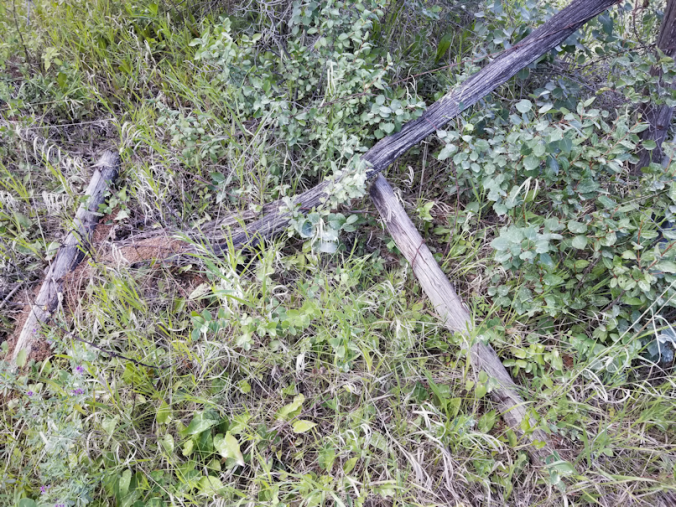
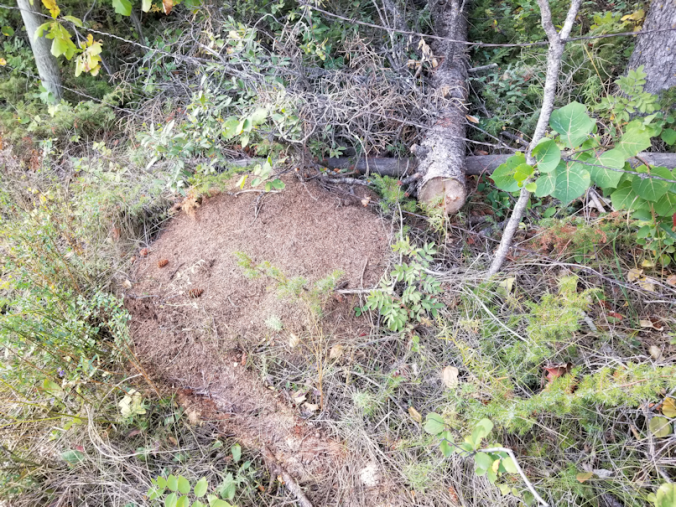
The old gate had been on top of this pile of posts and barbed wire (and an ant hill). My daughters referred to this as the barbed wire trap! We’ve already had the renter’s cows end up on this side of the fence once (and as bad as the old gate was, it was enough to keep them from ending up on the road, so it still did the job. :-) ), and it’s always possible it will happen again. I don’t want any cows getting hurt in barbed wired, so I figured I’d take some of the loose wire and pull it out to add to the pile of junk we plan to get hauled away later in the year.
I grabbed some of the wire and pulled…
… and pulled…
… and pulled…
Before I knew it, I was pulling up the wire from an old fence line, long since collapsed. Since I had already started pulling the wire up, I couldn’t even stop, since lifting it made it that much more of a hazard.
Every now and then, I’d reach a fence post and try to lift it up, only to have the wood disintegrate in my hands. On some of them, the bared wire was attached to the post with nothing but bail twine. ???
Now, the thing about barbed wire fences is, they never have just one line. There’s usually three. Which meant there were at least two more barbed wire lines, hidden in the grass.
About half way down the row of trees, I found myself pulling up two wires at once, because they were stuck to each other in places. Then one of them ended abruptly, while the first one continued…
… and continued.
When I finally reached the end of the row of trees, at a large willow, I saw the remains of what turned out to be the last post of the fence line (I hope!). I pulled it up, but the wires attached to were basically all broken off a couple of feet away. I tucked the post itself against the willow. I did find some ends and started pulling them up. Once they were clear of the tall grass and old thatch (that area needs a controlled burn, big time!), I started working my way back, rolling up the wire as I went along, eventually adding in the second line as I found it again.
When I got back to the area of posts in the picture above, it was all pretty tangled together, so I tried lifting the post that looked like it was the furthest out in the line and began pulling on it.
As near as I can make out, the pile of posts were the remains of another barbed wire gate. But why would there be two of them? I’m thinking maybe an old gate was replaced with a newer gate, and rather than getting rid of the old one, it was just tossed aside at the fence line. Then when the fence line collapsed, the old gate came down with it.
But that’s just a guess on my part.
I did, however, find the third wire of the fence!
So back I went down the row of trees, pulling up the third wire until it ended. Which was about 2/3rds of the way down the row of trees. Which means there’s probably more of it under the grass somewhere along the way.
Once I found the end, I worked my way back to the gate again, rolling it up as I went along.
This is where the fence line was.
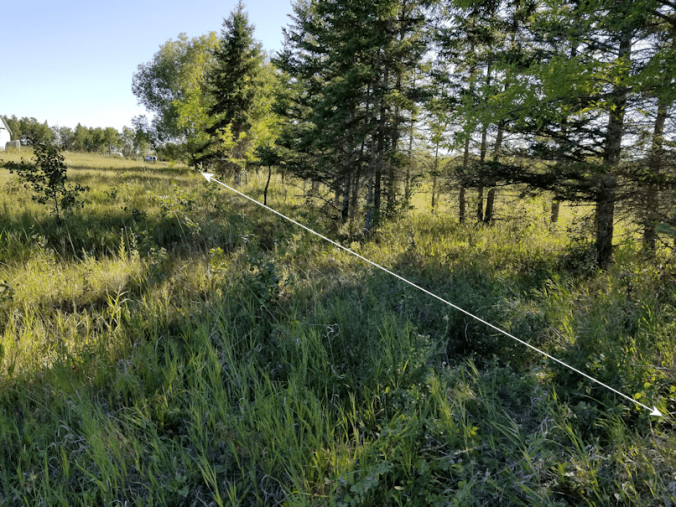
The tip of the arrow at the back is pointing to the willow the fence line stopped at.
My guess is that, when the row of trees was planted along the fence that’s still there, this fence line was added to protect the plantings from cattle. Since then, the current fence line was kept up, since the land is being rented out for grazing on the other side, but the inner fence was allowed to just rot away and collapse. [Update: I have since learned that I got this backwards. It turns out that the collapsed fence is the original one, and it has been there for an estimated 40 years!]
Leaving barbed wire hidden in the grass for anyone, or any cow or deer, to step on, trip over or otherwise hurt themselves on.
Which just blows me away.
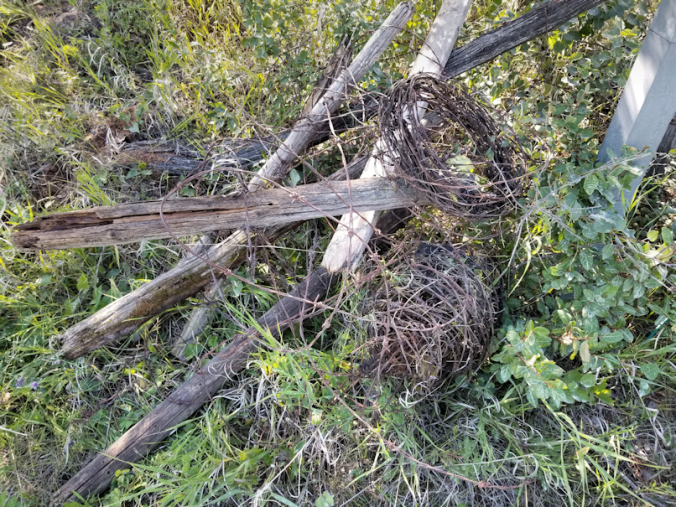
In the end, I couldn’t even get rid of the wire, because it’s all still attached to the main fence line. I just didn’t have the tools for it. So I moved the posts and the wire I rolled up into one, more obvious pile that I think even a cow will not bother getting into.
I hope!
After this, I cut away the spreading saplings on both sides of the area I’ve been mowing to the gate we just replaced, including clearing them away from the gate into the garden.

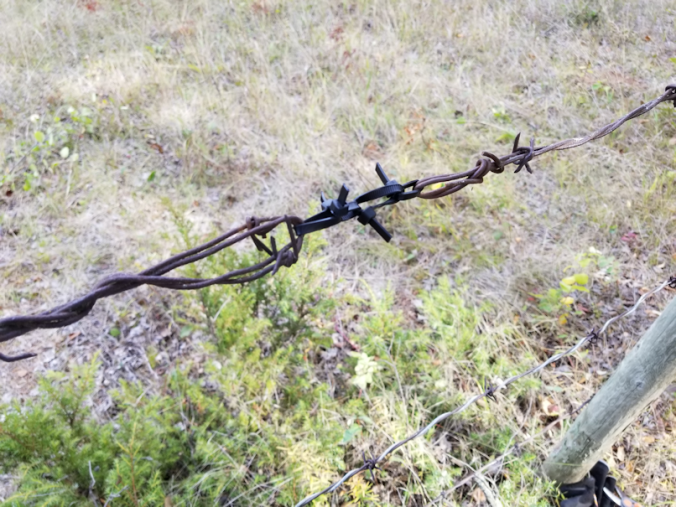
Notice that this gate has 5 lengths of barbed wire on it.
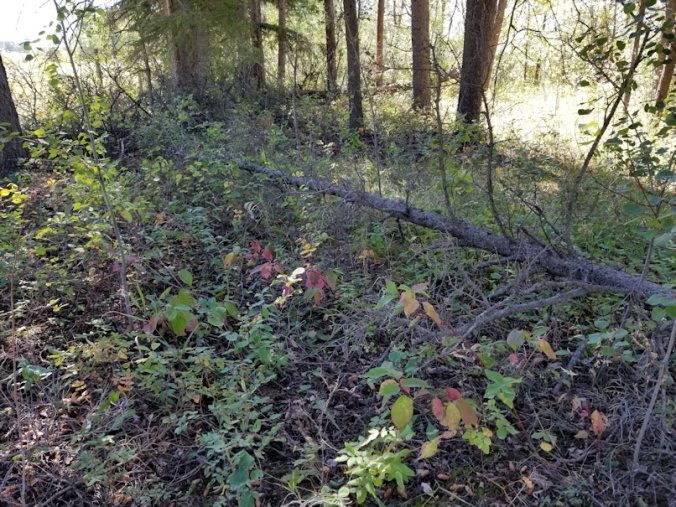
In the future, as I work my way around, clearing the yard’s fence line, I will eventually cut back that lilac to uncover the gate post it’s growing over. I checked the area over as I cut away the saplings and it’s clear, so the next time I mow down this way, I will probably mow a path to this gate, too. (I haven’t done that to the gate by the fire pit yet, as it seems to need some clearing, first; I’m not entirely sure what’s buried under the thatch and tall grass, but it’s very uneven.)
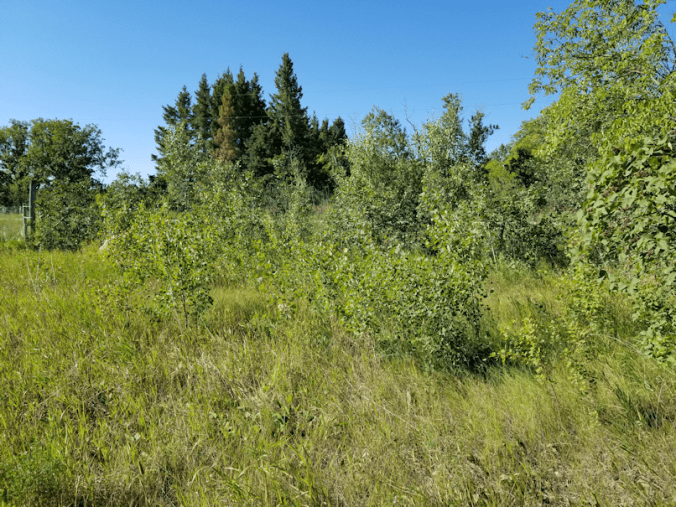
This is the corner created by the garden/yard fence line leading to the roadside fence line. Though I will be clearing the fence lines themselves, I have not yet decided if I will also clear away these self-sown saplings. It might be nice to just leave them be. They’re not blocking anything. I’ll leave them for now and decide what to do with them later, when we get to the point of working in the outer yard area.
It wasn’t until I was at the computer, uploading these photos, that I noticed this…
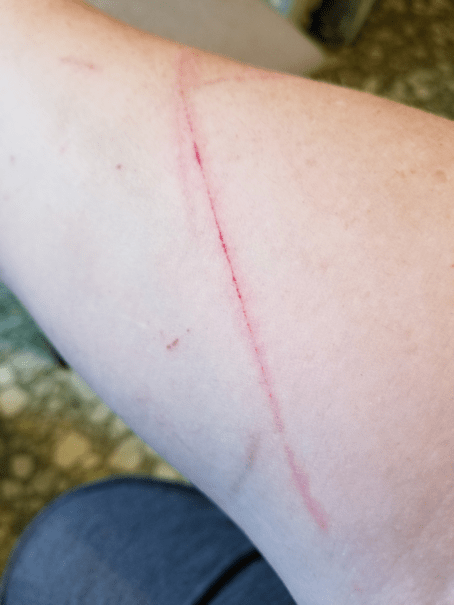
I honestly don’t know what that happened! I’ve got so many scratches from doing yard work, I don’t even notice them anymore. :-D
The back gate is finally done. One more thing to check off the list! :-D
The Re-Farmer