Our 2024 Garden: not-onions curing and bean seeds collected

Today is October 10, and yes, we have garden progress!

Last month, the 10 was our average first frost date, so I took garden tour video. I might do that again, later today, depending on how other things go. I might also leave it for the middle of the month. We shall see!

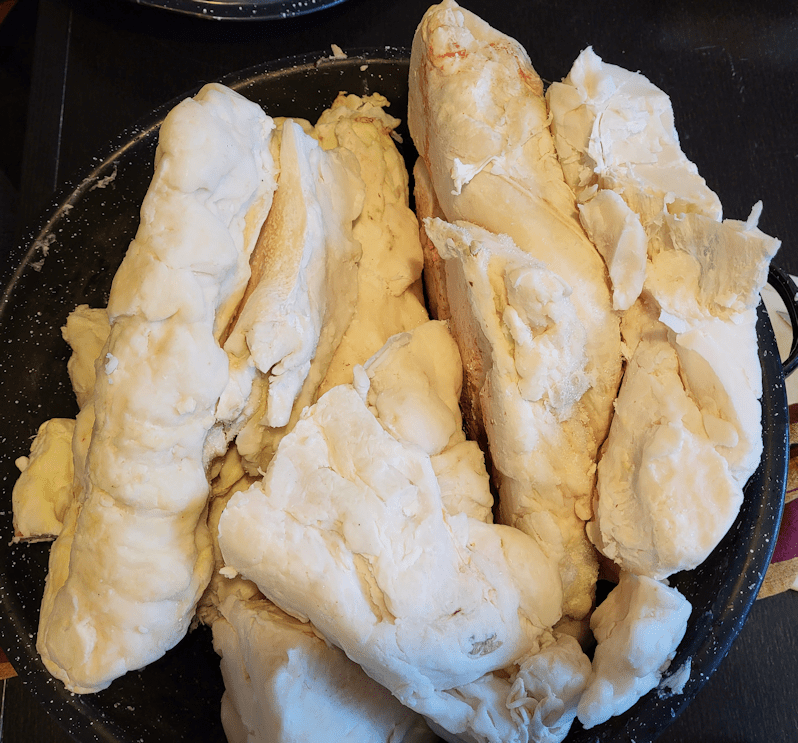
While doing my rounds this morning, I finally pulled the red onions in the high raised bed and set them to cure.

The strong fence wire on this cover was perfect to hang them on! Only a few didn’t have enough greens to hang them, so they got set out on the frame to cure.

After I took this photo, I also gathered the whole three shallots that were left by the summer squash, and hung them on the frame wire, too.

I am perplexed by these onions. As far as I can remember, these were supposed to be the Red Wethersfield onions, which have a round, flattish shape. These look more like the Tropeana Lunga or Red of Florence onions we grew before, but we didn’t have seeds for those this year.

So I decided to look at my old post about planting in this bed.

Well, that explains it.

These aren’t onions.

They are the Creme Brulé shallots.

I completely forgot that I planted shallots in this bed. I was sure I’d planted Red Wethersfield in here!

It’s a good thing I use this blog as a gardening journal!

So… those shallots are HUGE! Their size was another reason I didn’t think they could be shallots. Particularly since the ones planted in the bed with the yellow onions and summer squash were so much smaller.

Which had me wondering…

Where are all my Red Wethersfield?

Well… I did know where some of them were, but did they survive?

Not really.

I had planted some of them among the Forme De Couer tomatoes, but we weren’t able to keep the cats off of them. This was all I could find. A few got planted in the wattle weave bed, but I could see no sign of those.

I was sure I had more transplants than this, though!

Ah, well.

I will be keeping these. As we clean up and prepare the beds for the winter, I will find a place to transplant them, then mulch them over the winter. Hopefully, they will survive the winter and go to seed next year, and we can try again.

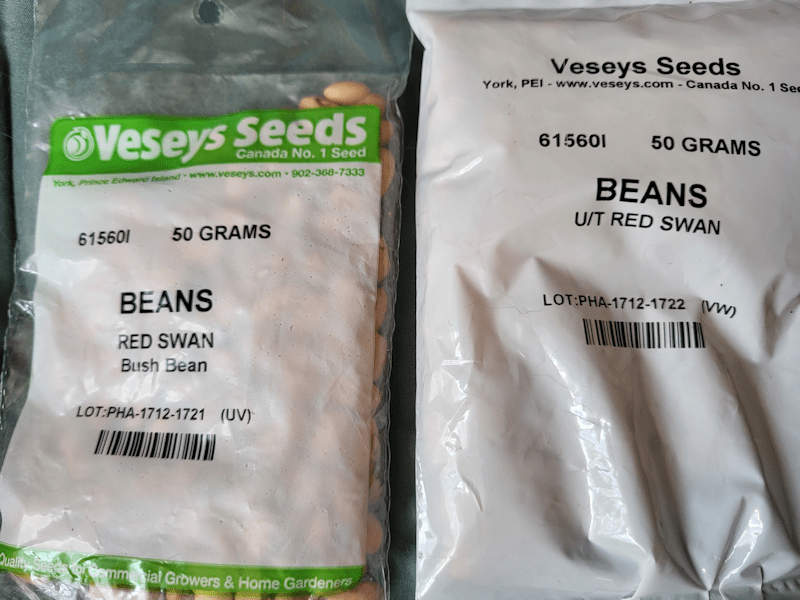
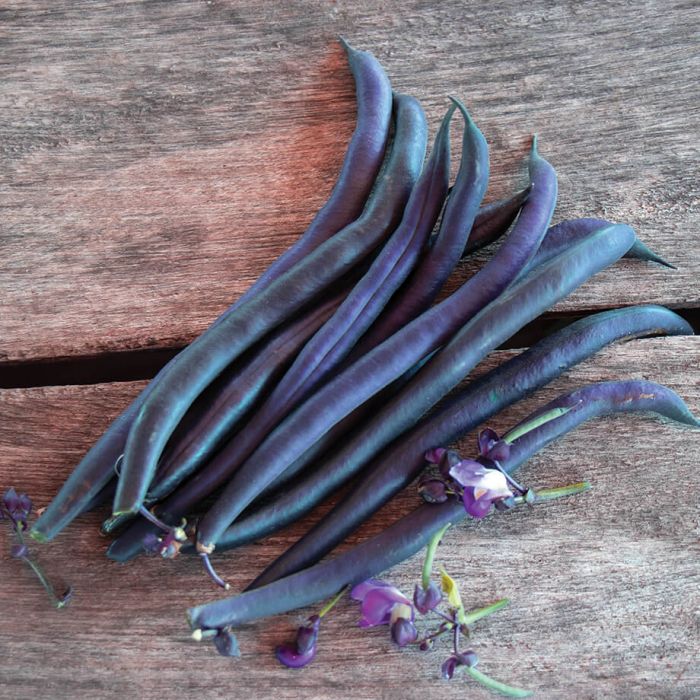
As for the bean pods with the onions, those are the Carminat purple pole beans I’d left to go to seed. There had been at least a couple more pods, but I couldn’t find them. With one, I did find the torn remains of the pod, so I’d say the racoons were at it again.

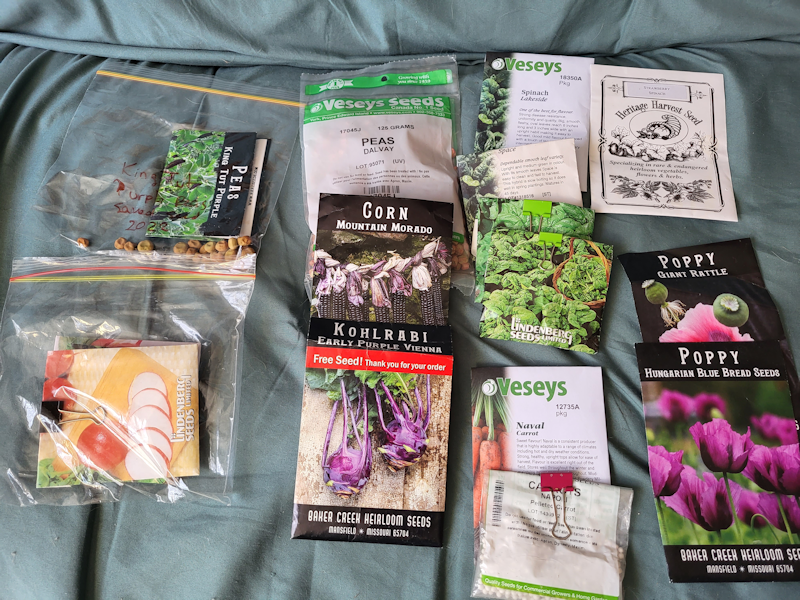
These are all the seeds that were in the bods. It looks like only one is damaged.

They will sit in the cat free zone to dry a bit more, now that they are out of their pods, then I’ll package them up for next year. These do grow very well here, so when we plant them again, I want to mark off one or two plants to specifically leave for growing more seed.

Meanwhile, it’s getting close to the time to plant garlic for next year. I will select our largest heads of garlic in the root cellar, rather than buying more.

Which means we will have onion seeds (with still more to collect from the garden), pole bean seeds, and garlic from our own garden for next year. I’ve also saved seed from that blue squash we had to harvest when it broke off its own stem, and we plan to save seed from that one big Crespo squash. There is the possibility of cross pollination with the Wild Bunch Mix winter squash we grew, though, so any seed we save there may not be true to the parent, even if I was able to hand pollinate from the same plant.

It doesn’t look like those Uzbek Golden carrots that bloomed are producing any seed. The flowers are died off, but there’s no seed. Perhaps because these are first year blooms? I don’t know.

We are slowly getting to the point where we will be able to save more and more of our own seed. I don’t expect to be 100% using our own seed, if only because I like to try new things, and we are still working out what varieties we like best in some things, but I do expect to be able to grow at least 90% of our garden from our own seed within a few years.

Just a little big closer to our goal of being as self sufficient as possible!

The Re-Farmer

Beefy!

Check this out!

This year’s quarter beef filled 5 boxes this time. The finished weight for our share came out to 210 pounds (just over 95kg). They did have to increase their price per pound this year, so it was $6.25 per pound, instead of $6, making for a total of $1312.50 Our first order of a quarter beef was under $800, at $6/lb. 

I’m going to have to go over the budget and see if we can still make the $100 a month payments for another quarter beef at the end of this year, but with the new truck payment, and various things that need to be repaired or replaced, I’m not sure we’ll be able to do it. We can still get their freezer packs out of the regular budget, but would be paying more per pound that way. It’s only by getting at least a quarter beef share that we can get things like prime rib and big T-bone steaks at only $6.25 a pound. 

When letting them know more of less what kinds of cuts we wanted (we’re more interested in a nice variety, so I really don’t care that much), I mentioned we are a household of 4 adults, asking if it was at all possible to get items in groups of four. So, if one type of steak is normally packaged two together, to get two packages of that steak. They don’t do the butchering themselves, but send the beef to a provincially certified butcher, so I knew it wasn’t really up to them, and would depend on just how much our share worked out to be as it was being cut. The closest they could get would be satisfactory. I didn’t count the packages, but from the looks of things as I put them in the freezer, the butcher did try to do that! The minute steaks used to be smaller packages of two. This time, they were in larger packages of four. Some of the bigger steaks used to be one to a package, and we’d have two packages of one type, and two of another, so when we had a steak dinner for the four of us, we wouldn’t all have the same kind of steak. This time I saw them packed in pairs, and two packages of each type of steak. I’m quite pleased! 

The chest freezer is now quite full. I’ve got some minute steaks out for tonight, since they’ll thaw out more quickly, plus a 2 lb package of ground beef thawing out for tomorrow. I’ll be doing our Costco shopping tomorrow, and won’t need to buy any meat at all this time! My mother has been refusing to buy meat at the grocery store lately, because of the prices, and buying things like a ring of garlic sausage, instead. I think she’s still got a package of venison from my sister in her freezer, but I want to bring her some ground beef and something else that’s in a smaller package, since it’s just for one person. I think some stew meat might do well for her. I’ll try to remember to grab some and drop by her place on the way to the city to drop it off.

Oh, we got an extra little gift with our beef order this time, too – a pair of ball caps with their logo on it. I was quite happy to see them. I wear a cap all the time these days, and the one they gave us before with our very first order is starting to look a bit stained and beaten up! 😄 We got one black hat and one burgundy. My younger daughter loves the red one, and has been wearing it since they were brought inside!

I am so happy our beef is in – and that they were willing to delay our order, when the final weight turned out to be so much more than expected!

The Re-Farmer

Our 2023 garden: Oops! and getting ready to direct sow

Today, I went through my bin of seeds for direct sowing, pulling out the ones that can be sown “as soon as the ground can be worked” or before last frost.

I also made sure the back ordered bean seeds I picked up in the mail yesterday went in with the other beans.

Which is when I discovered something.

I already had some.

The Red Swan beans were not the back ordered beans I was waiting for! I checked my order confirmation emails and saw that I was supposed to get these.

These are the Improved Purple Queen that had been back ordered. From the website:

Spectacular colour! Purple Queen produces high yields and has amazing flavour. While also resistant to cool conditions, Purple Queen matures early and holds its colour in cool conditions making it the perfect bean for home gardeners. Be sure to watch the bean turn from royal purple to luscious dark green as it is being cooked. Resistant to Mosaic Virus. Maturity 52 days.

https://www.veseys.com/ca/purplequeenimprovedbean.html

The Royal Burgundy bush bean we’d grown two years ago was no longer available, so we got this one instead. I wanted a purple bean. So we now have yellow, green and red beans, with a purple on the way. Once I realized a mistake had been made, I emailed Veseys about it, and I already got an order confirmation for the right seeds! Veseys is great for responding to emails. We’ve had an error like this only once before, and they are very fast about fixing things. I’m quite happy with them, that’s for sure.

Interestingly, I just looked at their bush bean collection and found it says the Red Swan bean in the collection is a substitute for the Purple Queen, which is not available for 2023. Looks like they now have Improved Purple Queen, instead.

So that is taken area of.

Meanwhile, these are the seeds I have that can be planted before last frost.

Of these, the Mountain Morado corn can be planted 1-2 weeks before last frost. The peas can be planted in mid-April or May. Everything else can be planted as soon as the ground can be worked.

I won’t be doing the kohlrabi. Every year we’ve tried them, we’ve had nothing, and I don’t know why. I do want to grow them. Just not this year. The radishes probably won’t be planted, but if I do plant some, it will be just a few seeds for plants that will be grown for their pods. I’m still curious to try them. We are not big fans of radishes, but I want to see if we like the pods.

The rest, we shall see when and where we will be able to plant things. I still don’t know where to plant the two types of poppies or the strawberry spinach. They will be treated as perennials and allowed to self seed, so they need permanent locations, and the two types of poppies need to be well away from each other to avoid cross pollination. I’ll figure it out.

The main thing I want to plant as soon as possible are the Naval carrots. The Uzbek Golden carrots are described as a cool weather carrot, but there is nothing about planting before last frost, so I will wait on those. I still have the pelleted Napoli carrots, from two years ago. That summer, they were repeatedly eaten by groundhogs and I finally gave up on the bed, only to discover they still managed to produce. They were quite good. If I have the space, I do want to try them again. As for the Naval carrots, I decided to make seed tape with them. I’ll include that in a video I will be making tonight, along with how prepping the low raised beds went. Hopefully, I’ll have a relatively short video ready for tomorrow.

Things are supposed to cool down for the next little while, and we may actually get rain tomorrow or the day after! So I’m not in any rush to get seeds in the ground, but I do want to get as much space ready for them as I can.

It felt so good to be digging in the dirt again!

The Re-Farmer

Rendering lard: second batch, first use

I was going to start the third and (hopefully!) last batch tonight, but it’s coming up on 5pm, and I just finished jarring up the second batch a little while ago. It can wait until tomorrow!

At times like this, I really appreciate the uninsulated old kitchen. This time of year, it’s basically a walk in freezer or refrigerator, depending on how cold things are outside. The remaining leaf lard is the thickest chunk we got and was still really frozen when I worked on the rest, yesterday, but as it sits in the old kitchen, it will soften more, yet still be frozen. That makes is a lot easier to chop, but also gives me a bit of flexibility in time for getting it processed. Yesterday evening, I had to get the girls to take over some stuff because my hips suddenly decided to go crunchy on me (they were fine by morning!), while my shoulders have started to really hurt from all the chopping. I’m doing it while sitting at the dining table, since there’s no way I can stand at a counter long enough to do it all, but the height while sitting isn’t very good, resulting in a lot of pain and stiffness right in the muscles where the neck and shoulder join. Which still hurts now, so I’m going to take an evening off from chopping.

I didn’t render the second batch in the slow cooker quite as long as the first batch; I’m curious to see if there is a noticeable difference in the colour of the lard. I might have had a touch less chopped fat in the second batch, but since I only have the depth in the slow cooker to go by, I can’t say for sure. Taking the solids out earlier did mean less liquid fat to jar up, and more volume to turn into cracklings later.

After removing the cracklings, I was able to fill six 500ml jars, with such a small amount left in the slow cooker, I just dumped the rest into the pan with the solids. After taking a break so the girls could use the kitchen, I started rendering the last of the fat out of the cracklings. While that was slowly heating up, I decided to take some leftover mashed potatoes and make them into potato patties. I just kneaded flour to the mashed potatoes until I got an dough somewhat thicker than bread dough, but not as dense as pasta dough. After breaking of sections and making them into rolls, I cut them into rounds, then pan fried them in some of the first batch cracklings lard. Enough to cover the bottom of the pan by about half an inch.

Lard has a high smoke point, so I could do these at almost deep fryer temperature. The higher the temperature, the less fat gets absorbed by the food. After cooking, they got laid out on a paper towel lined dish. They came out nice and crispy on the outside, with a smooth texture on the inside, and not at all greasy.

The lines that you see are because I set the cut rounds on a cooling rack until the pan was ready. If I’d laid them out on a plate, I would have had to flour the outsides to keep them from sticking, and I didn’t want to have burnt flour in the hot oil.

Here is the second batch of lard.

The first 6 jars were almost solid by the time the cracklings lard was done! I got another 1 1/2 pint size (500ml) jars out of the cracklings, making for a total of about 7 1/2 jars. The first batch was just under 8 jars total, so it came out very close.

The cracklings are once again laid out between paper towels, sandwiched between 9×13 baking trays and weighted down, so that cats can’t get at it!

One thing about handling all this fat for the past several days; even with constantly having to wash my hands with lots of soap, they haven’t been this soft in years!

The Re-Farmer

Looking rough, Baby kisses, and the sweet fat of the hog

Before I headed out to do my rounds this morning, I checked on the sun room kitties though the bathroom window.

I saw this, looking back at me.

That’s Sad Face, aka Shop Towel, on the bottom.

His face is looking rough and even more beat up than usual!

I want to feel sympathy for him, but yesterday I had to chase him off from attacking Junk Pile, repeatedly. Even when I managed to come in between them enough that Junk Pile ran off towards the house, he actually ran past me to try and get at her, and attacked her again, near the kibble house!

He doesn’t seem to have a problem with the kittens. Does he recognise that many of them (there are more, outside the photo) are clearly his progeny?

I really want to love on this cat, but he can be so aggressive towards some of the other cats! He’s one of the reasons I was worried about Potato Beetle being outside after he got fixed. He’d be more of a target and less prone to defend himself.

I can’t say how Potato Beetle is doing inside right now. Once we let him out of the carrier, he explored the house… and then disappeared. He found some hidey hole to sleep in, and I’ve yet to see him. I’ll have to ask the girls if he came out when they did the evening feeding in the basement.

While I was doing my rounds and coming back from switching out the memory card in the driveway trail cam, Pointy Baby came running up the driveway towards me, as if he hasn’t seen me in ages and was excited by my return from beyond. 😂

Then he gave me nose kisses when I picked him up!

Such a sweet little baby he is!

Once back inside, I started putting the solidified lard into the jar box for storage, remembering to get a picture, first.

I find it interesting that the darker coloured cracklings lard became so much lighter as it solidified, while the pale yellow fat became darker. I think if I’d taken the fat off earlier, it would have been more white than yellow. The solidified fat on the spoon rest I used when stirring the crock pot was certainly much lighter in colour. It should still be pretty neutral in flavour, though, compared to the cracklings’ lard.

Or, as my daughters call it, the pure, sweet fat of the hog.

Which is apparently something that became quite the viral meme on reddit and Tumblr. You can even get T-shirts with it.

I don’t recommend looking it up, though. Some of the people who ran with it went a bit… creepy on the theme. One of the t-shirt designs is funny, though.

Anyhow…

While putting the jars with canning lids on them away, I took the rings off and tested the lids. All of them are sealed tightly. I’m still keeping the one with the plastic lid, and the not-quite-full one aside to use right away.

I made a cast iron skillet corn bread with breakfast this morning. I added some of the cracklings to the dry ingredients. They want to clump together, of course, but I broke up the clumps while stirring them into the dry ingredients. They tasted really good in the corn bread!

Later today, I’ll start cutting up more of the leaf lard so I can run the slow cooker overnight. It should be interesting to see what the final tally is, when all the fat has been rendered.

The Re-Farmer

Rendering lard: first batch finished

Well, this is certainly a long process!

Here is what the slow cooker looked like this morning.

I stirred it, breaking up the clumps of fat, several times, adding a bit of time to make up for the heat lost while the lid was off, each time. In total, this picture was taken after about 10 or 11 hours.

I added more time.

By the time I was ready for the next step, it was at about 13 hours on low, plus whatever length of time it ended up being on warm, because I couldn’t get back to it right away, and needed time to sanitize the canning supplies.

It’s hard to tell in the photos, but those extra hours did render out and clarify the liquid fat more.

The next step was to scoop out the solids.

Those went straight into a wok-style frying pan.

Not all of the solid bits can be scooped out, with some being small enough to go through the holes. Various sites I’d looked up suggested straining the fat through a coffee filter while pouring it into the jars.

Tip: if you use a coffee filter over your canning funnel, make sure there is a small sieve under it, or the weight of the fat will pull it right into the jar.

Ask me how I know that? Go ahead! 😂

Seriously, though, don’t use a coffee filter. It takes forever for the fat to drain through. Things would start cooling down too much, and the fat needs to still be hot or it’ll all clog up.

Use a small sieve with a very fine mesh. That will work much better!

I had sanitized a full dozen 500ml/pint jars, just in case. Once all the solids were filtered out, though, I filled almost 7 jars.

While these will not be processed in a canner, I still did all the things I normally would if I were going to process them, including wiping the edges with vinegar, and finger tightening the rings.

Once those were done and set aside to cool, it was time to work on the cracklings. These were cooked at medium low heat for several hours.

As more fat was rendered out, it would start to foam up like this.

This picture was taken about about half way through the cooking process. I set up a chair in the kitchen while doing this, since it needed to be watched over and stirred so often.

I cooked it down until it looked like this. Deciding when to stop was pretty much based on scent. Once things started to smell like things were starting to char a bit (the tiniest pieces could potentially start burning), I figured it was good enough!

The cracklings were then scooped out, as much as possible, onto a baking tray lined with paper towels. Then the last of it was strained into another 500ml jar.

Look at that difference in colour!

The last jar was filled more than I normally would, but I didn’t want to leave such a small amount in the pan. It didn’t need as much of a head space, as it got a twist lid, instead of a canning lid and ring. While it’s cooling down, the lid is simply resting on top, to keep the dust (and cat hair!) out. As the other jars cooled, I even heard some of them pinging, but I didn’t want that with the plastic twist off lid.

The jar from the cracklings will be used first, and then the one that has the least in it – which you can see in the photo is cooling down quite a bit faster than the others! Lard is a neutral flavoured fat, but that last jar will likely have more of a flavour to it. It should be interesting to try it out and compare.

Here are the cracklings – after being flipped. It was too messy to try and take photos of the process. I have several of these 9×13 baking trays, so to flip it, I covered the top of the cracklings with more paper towel, put another baking tray on top, upside down, then carefully flipped the whole thing. Once flipped, the grease soaked paper towel was removed, scraping off as much of the stuck cracklings as I could, and thrown away.

More paper towel was added over the top.

Then, because we have cats, I added another layer of paper towel, set a clean baking tray on top, then weighted that down with the slow cooker (cleaned and washed, of course, ready for the next batch!).

Tomorrow, I’ll salt the cracklings and put it in a jar, to be added to as the other batches are finished.

I will stick to doing just one slow cooker batch at a time. It’ll just be easier that way, even though it’ll take longer. Each batch is a 2 day process! I’m pretty sure I can do the rest of the fat in two more batches. We might start running out of pint jars that aren’t still sealed in their packages. I want to save those for when we’re actually processing things in a canner. We can move up to the 750ml jars if we have to, though.

This one batch, which started with enough cubed fat to fill the slow cooker, gave us 7 pint jars of white lard, plus one pint of golden crackling lard. If the other two batches end up similar in size, we could have the equivalent of 21 pints of white lard, and 3 of the crackling lard.

We don’t normally buy lard. It really came down to the budget. Now that we’ve got it, it should be interesting to see how much we actually use it. That will help us decide if it’s worth doing this again, in the future!

The Re-Farmer

Rendering lard, first batch

I started working on the pork fat well before it was thawed out, as it’s much easier to cut it while it’s partially frozen. I have two large slow cookers, and I was planning to use both of them to render the fat out. It should be done over low heat for a long time, and I wasn’t about to monitor a pot on the stove all night.

Thinking back, my mother never rendered lard on low heat. She didn’t have the time for that. I remember it being quite hot by the time she scooped the crispy cracklings out. I’m pretty sure I’m remembering burned bits, too! 😄

Having a large slow cooker or two would have made the job much easier for her!

Part way through cutting the fat up, I changed my mind.

I wasn’t going to do two slow cooker’s worth!

To fill this bowl, I finished off all the smaller pieces I could find. All three of them. 😄 I started cutting into the larger pieces, but they were still too frozen. Plus, I didn’t want to push my hands too far. They’ve been relatively pain free of late, and I would rather they stayed that way!

The small bowl on the side is the janky bits, with blood vessels or meat and the sliver skin. That was saved as a treat for the outside cats, which they were very happy to get!

There was enough pork fat left in the giant bowl that the lid still didn’t quite fit all the way closed, and I had to use the foil to cover it completely again. It’s now sitting on top of the freezer in the old kitchen. It’s going to be a very slow thaw in there! Which is okay. While I was cutting, the outside of the fat would be getting too soft to cut easily, while the inside of the bigger pieces were still too hard. A slow thaw won’t have the two extremes, and it should be easier to continue cutting up tomorrow.

They kinda look like cheese curds in there! 😄🧀

For a moment, while filling the slow cooker, I thought I’d have to dig out the second one, after all! I squished it just flat enough to make sure nothing would touch the underside of the lid. As it renders, it’ll get lower.

The slow cooker is now set on low for 8 hours, and then it’ll automatically switch to warm. It might need more time, so I’ll be checking it off an on throughout the night. I did add a small amount of water to get it going, and make sure it the bits don’t start burning before the fat starts rendering out.

Once it’s getting close to done, we’ll sterilize some jars – probably in 500ml sizes (pints) – to store the lard in. If we do decide to go with a larger size, I’d go with the 750ml jars, rather than the 1L/quart jars. I don’t see us using it fast enough to warrant that large of a jar.

Based on how much is left that needs to be cut up, we might actually be doing two more batches! It’s a shame the meat grinder I found while cleaning out the old kitchen has parts missing. A grinder would make the job much easier, and more fat would render out of the smaller pieces, too.

No matter! The job is getting done, and we’ll have a good supply of shelf stable, high smoke point, flavour neutral fat for our pantry.

The Re-Farmer

For the freezer

I just got back from picking up a whole bunch of meat for the freezer, from one of our homesteading neighbours!

The box on the right is almost all pork, with four HUGE chickens buried under them, for $200. The box on the left is leaf lard, plus some soup bones, that they added in for free.

The fat has been set aside in a giant bowl to thaw out. I had to cut some of it up to fit it in so I could cover it and protect it from the cats. Thankfully, even when frozen, fat is pretty easy to cut through. Once it’s thawed a bit more, I’ll cut it into small pieces, and we’ll render it into lard, leaving behind what my mother used to call “skvarki“. I’ve spelled that phonetically, because I have no idea how it was spelled in Polish, and when I try looking up “cracklings”, I get a different word! The cracklings, with a bit of salt, make a great protein snack. Lard is a shelf stable fat. Properly rendered and stored, it can stay at room temperature for months, or as much as a year in the fridge. Even longer, if it’s frozen.

We also will be getting a shed in the spring, that could be used as a chicken coop!

Sadly, our neighbour won’t be our neighbour for much longer. They’ll be putting the property up for sale and escaping Canada, going to where there is no snow, and they can grow food all year long! As we were chatting, I mentioned the shed roof that collapse under the weight of snow almost a year ago, that I was planning to dismantle it to use the wood, and hopefully build a chicken coop.

He pointed to a nearby shed and asked if I wanted it! He needs to get rid of it and, in the spring, he can load it onto a trailer and deliver it to us.

Of course, I said yes!

It will need some work done on it. It has a flat roof, so it started leaking. We’ll need to make an angled roof for it. The leaking rotted away the floor boards, but the joists are still good, so we could easily put a new floor down. It’s roughly 8′ x 10′ in size, so we’ll need to prepare a base for it that’s larger than that. It’s got some pretty large windows on the sides, and there is a screened window by the door.

The question is, where do we want to set it up? We could use it as a chicken coop, but I do still want to have a mobile coop. Or we can set it up nearer the house and use it as a much needed garden shed.

We’ve got a few months to decide on that.

Meanwhile, we now have a greater variety of meats stocked up in the freezer that should last us a good long time!

There is something very comforting about that.

The Re-Farmer