My daughters and I have spent quite a bit of time, working out where to plant what, so we know where to build beds to plant in. Then I realized we completely forgot about the purple asparagus crowns that will be shipped later, to arrive at time of planting in our zone 3 region.
We’d talked about them before, but hadn’t made any decisions. Where my mother had asparagus was ruled out. She’d planted trees and bushes in that garden, so that area no longer gets enough hours of sun in a day. Asparagus will produce for up to 20 years, so we couldn’t include them in most of the areas we will be planting in this year.
After talking about it, we settled on a spot where we had not originally planned to have any garden beds at all this year.
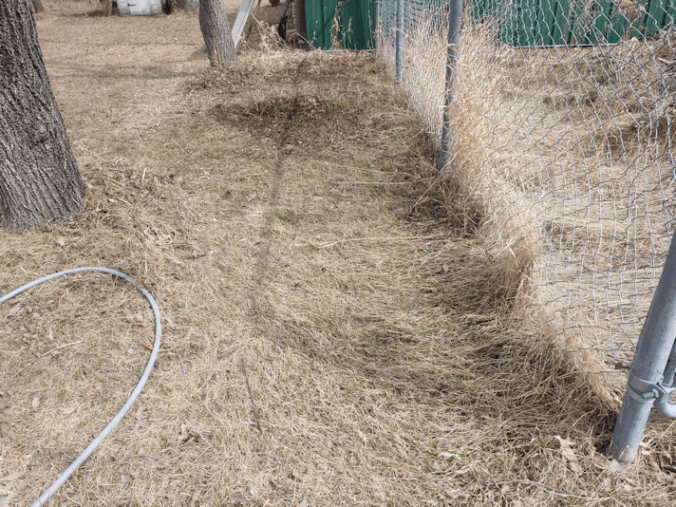
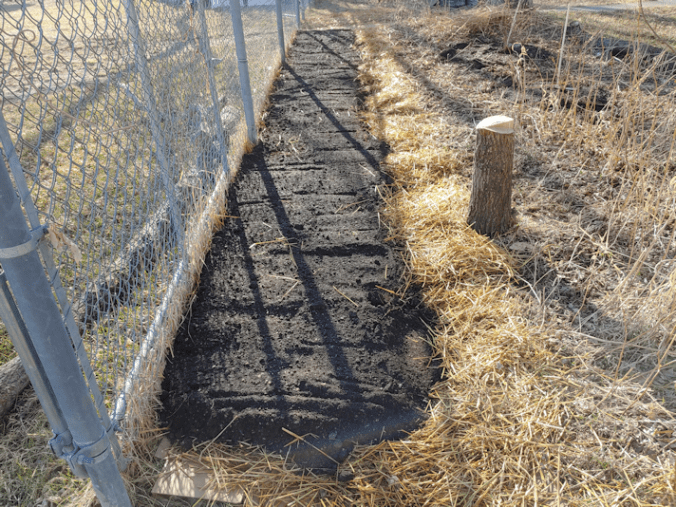
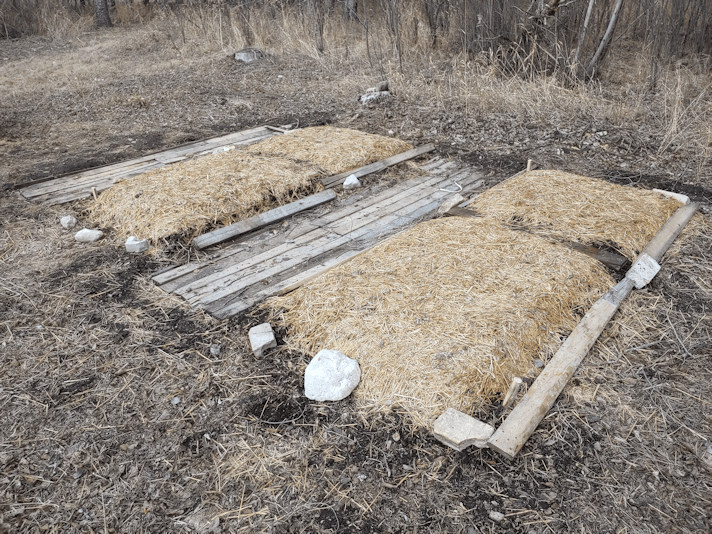
This is the spot we settled on, after I’d raked it out.
Part way down is where there used to be one of my mother’s tire planters that I’d taken out. I’d dumped the soil out to remove it, and found it was on top of the remains of an old maple.
I know it was an old maple, because it immediately began sending up suckers.
I had covered it with the soil inside the planter as much as I could. The flowers that were in that planter have been showing up, which was nice to see at least. :-) Much of this area is difficult to maintain, though. So now we will be planting two things here. At the far end, on the other side of the remains of maple, is where we will be planting the Strawberry Spinach. In reviews on the Baker Creek website, where I bought the seeds, it was mentioned that these self seed easily, and it was recommended to plant them in a permanent location because of this. That was kept in mind when we chose this location.
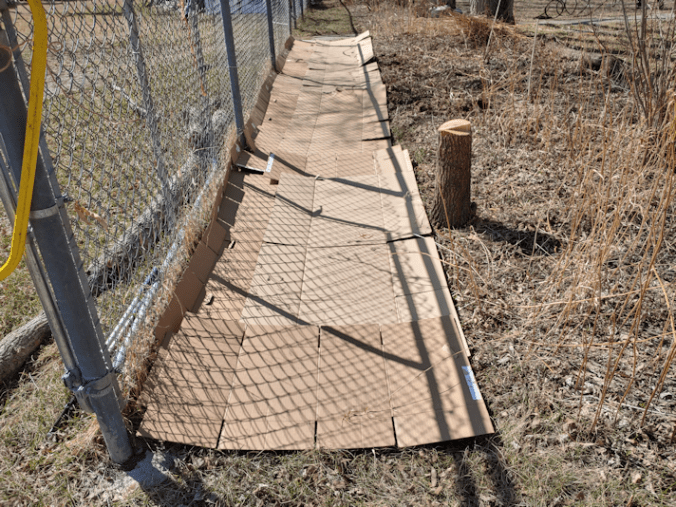
In the foreground is where the asparagus will go. For that, we will need to dig a trench long enough for the 6 crowns we will be getting.
Digging a trench here is going to be a challenge.
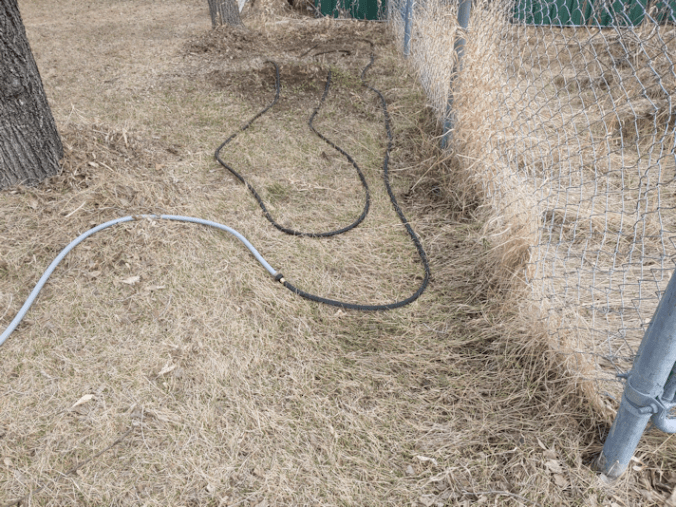
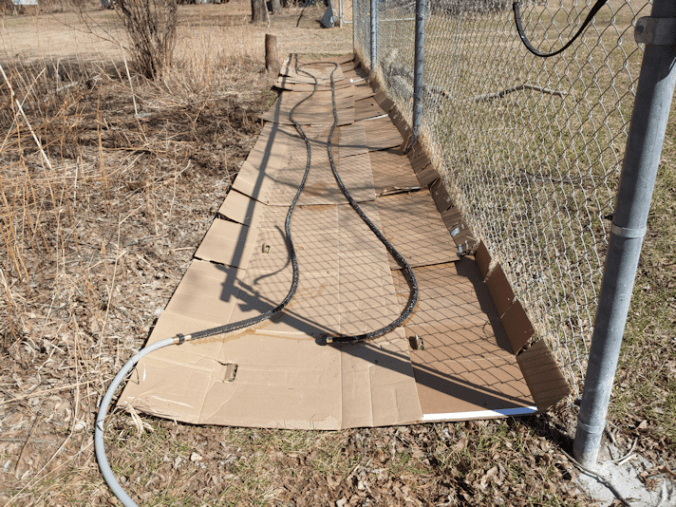
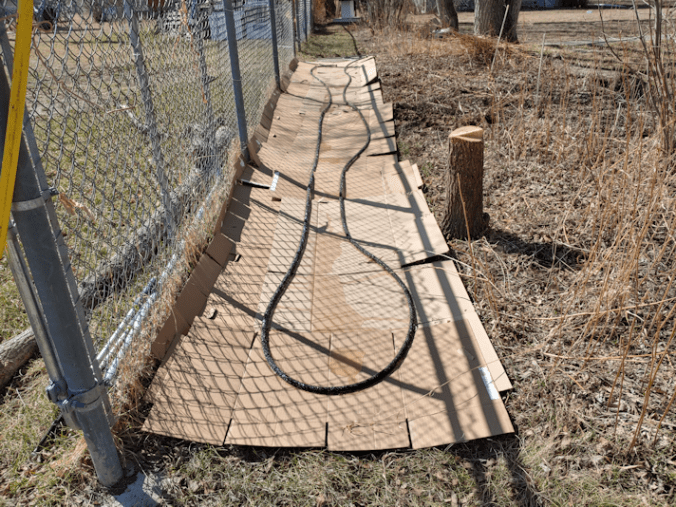
So today, I set up the soaker hose directly on the ground to start. Saturating the soil will make it easier to dig the trench.
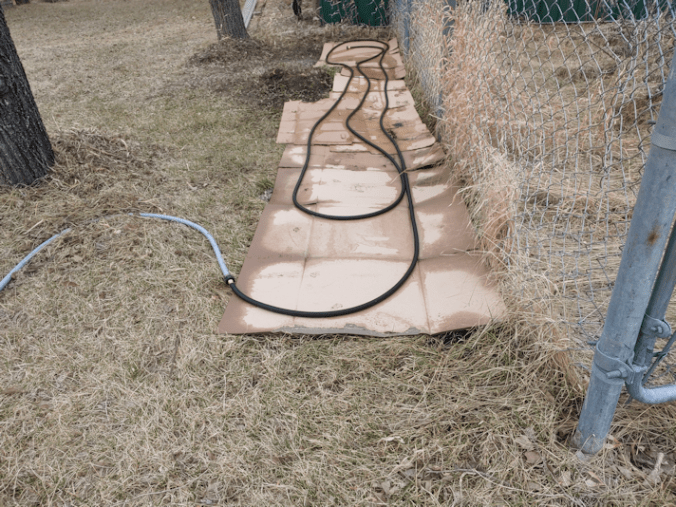
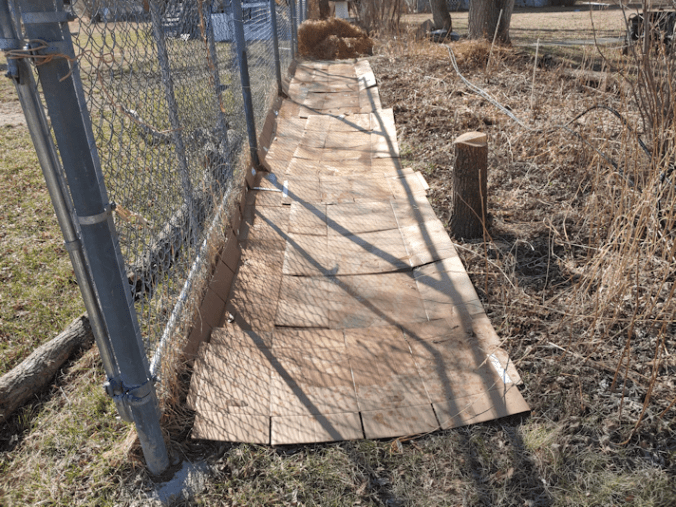
While that was soaking, I prepped as many cardboard boxes as I could find, removing any tape or stickers on them.
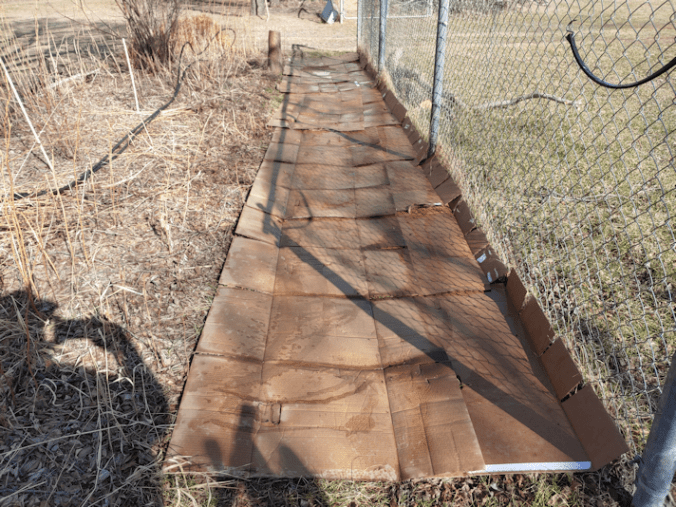
My daughters helped me to lay the cardboard under the soaker hose, and we left it running for a while as we checked other areas. The rain barrel was full, so we used it to fill our watering cans and wet down the cardboard more, and finally just left the soaker hose going for about an hour. The above photo is what it looked like when I turned off the water.
(We are now out of cardboard. :-/ We do still have some moving boxes left, but they’re in really good shape, so we’re saving them for something else.)
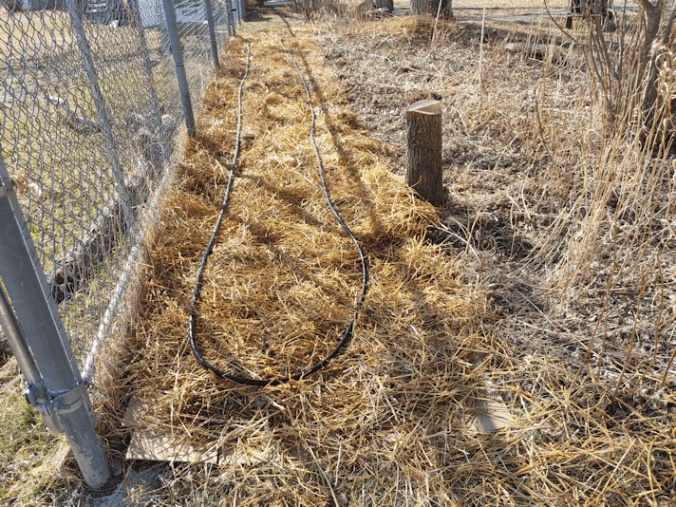
We were planning to put straw over the cardboard, too, but it was way too windy today. We have several weeks before the asparagus crowns will arrive, so covering the area now will help kill off the grass, as well as make it easier to dig a trench, later. We’ll just have to keep soaking it. Where the Strawberry Spinach will be planted can have mulch and soil added to it at any time.
I’ve been looking at instructions for planting asparagus, and some places say to dig a trench 15 inches/38cm.
That’s not going to happen!
Those articles, however, also say to fill the bottom third of the trench with compost. We don’t have compost left.
Other articles say to soak the crowns in compost tea for 30 minutes before planting.
Since we don’t have compost to make compost tea with, that’s not happening, either. Our new garden soil, however, has plenty of compost in it.
I’m reading that the crowns should be planted 1 1/2 – 2 ft/46-61cm apart. We will be getting 6 crowns. That space isn’t long enough to plant them in one long row, but it’s wide enough to plant them in 2 rows, so we’ll need to made a double wide trench – about 24-30 in/61-76cm wide. A depth of 8 inches/20cm should be good, but we will be building the area up, so we won’t need to go quite that deep. I don’t know if we even could go any deeper, with the trees being so close. I expect to find a lot of roots under there. By the time we’re done, this area should be about 4-6 inches/10-15cm higher than it is now, so all we really need to do is get rid of the top layer of grass roots.
Hopefully, we will be able to remove more of that tree stump and cover the remains over, in the process.
Once it’s done, we should be able to leave things here and just keep them maintained, for the next couple of decades.
My younger daughter and I took advantage of it and built a new garden bed in the area we plan to plant tomatoes.
The tomato seedlings are doing well, as are the luffa.
They have roots starting to show out the bottoms of the pots already!
The onions in the sun room are doing well, but not to much the ones planted more recently.
As for the gourds, none have sprouted yet but, from what I’ve read, they do take a long time to germinate.
Here is where the tomatoes will be going.
We did absolutely nothing to the ground before we started. There really wasn’t any point of even trying.
The first step was to cover the grass.
Actually, the first step was to cut down that maple. I’d already noted that it was creating so much shade when in full leaf, that a unique lilac in the flower bed beside it was being killed off. The stump was left high and will become the support for a seat. The main trunk and some of the larger branches are being kept for future projects.
We’ve been saving the cardboard boxes from cat litter, and their flaps were placed against the fence as a short barrier to hold in the soil.
Well… after spending some time removing all the tape. It took more time to get all the tape off than to lay out the cardboard!
Those and some moving boxes were enough to cover the entire space between the flower bed and the fence. :-)
Then, we broke out the new soaker hose! :-)
We will likely be going below freezing tonight, so the water will still need to be shut off from the basement when we’re done, but for a warm day like today, we could use the hoses for a while.
The soaker hose is 50 ft/15m, so we’re looking at approximately 25 ft/7 1/2m for the new bed.
While letting that soak, my daughter and I began bringing loads of straw over from the bale in the big garden area.
We probably could have left the water running all day to soak it thoroughly, but we didn’t bother. We did move the soaker hose over by the haskap berry bushes, though, and left the water running while we moved on to the next step: spreading the straw.
Actually, I spread the straw while my daughter filled a couple of wheelbarrows of soil and brought them over. Once the cardboard was covered, we tromped back and forth on it, stamping it down, then lay the soaker hose back over it.
We left that to soak and took a walk around the big garden area and talked about changing a few things.
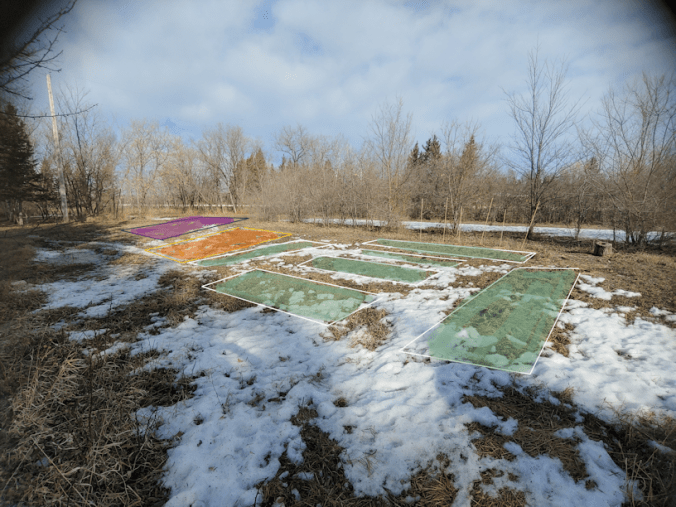
The above image shows the existing beds from last year’s garden, in green. The three smaller beds in the middle were going to be where our three varieties of spinach would be planted. I was thinking we might change those up completely. Instead of three short beds oriented East-West, it would probably be better to have two longer beds oriented North-South, like the two we already have. One of the North-South beds was supposed to have shallots planted in it, but the shallot seedlings failed, so we’ll still have three beds available to plant spinach (and whatever else we interplant with them).
Eventually, we will be building accessible raised beds here, so nothing is permanent at this point, anyhow.
There’s also the two small beds – the shorter green rectangles in the above pictures – where we’d planted potatoes last year. There’s nothing stopping us from making those longer, stretching into the skinny bit that’s marked in orange.
So that’s what we’ll do with those areas.
By the time we went back to the new bed, my older daughter was done work for the day and was able to join us.
The first thing they did was stop using the larger wheelbarrow, because it sucks. :-/ Actually, they both do. We need to get a new wheelbarrow! Just one good one is enough. :-)
So one daughter had shovel duty, filling the smaller wheelbarrow, while the other brought it over and dumped it, then I spread the soil until a new load was brought. The job was done very quickly!
The area of straw left uncovered will be a pathway. At some point, we’ll put in some pavers or something, but for now, the straw and cardboard will keep the weeds and grass down. That and lots of tromping it down with our feet. :-)
Each of the haskaps got a load of soil around them, too.
Then, because the hose was handy, the soil got a brief watering, more to keep it from blowing away than anything else.
Our last frost date is June 2, so this will have more than a month for the straw to settle. We’ve got one more warm day, then we’re supposed to get snow. Long range forecast sees more snow and rain into the first few days of May. Any precipitation we get will help settle it more, and we’ll be able to see if we need to add more soil or not.
If all goes well, I will use tomorrow to dig a new bed next to the garlic beds, before things cool down again. That one will be a lot more physical labour than this one was!
My older daughter and I headed out for a walk, and we decided to go ahead and remove the plastic covering our garlic beds.
When looking up how to plant winter garlic, all the resources said to cover the garlic with a heavy layer of mulch.
What none of them did was mention when to take off the mulch in the spring. I knew the mulch was removed, because all the videos and photos I saw that were taken later in the growing season showed the garlic growing out of bare soil. No mulch in sight. It took some dedicated searching, but I finally found resources that said to remove the mulch after overnight temperatures were consistently above -6C/21F. Looking at our long range forecasts, we seem to be at that point, as overnight temperatures are generally supposed to stay above freezing. We’ve started by just removing the plastic for now, though. We’re supposed to get some much needed rain tomorrow, and have decided to leave the mulch a bit longer. Right now, it’s keeping the beds from drying out, like everything else has done this spring. With so little snow over the winter, and very little precipitation so far this spring, every little bit of moisture is precious.
When I dug these beds out, I moved the soil to one side, put the contents of our compost heap on the bottom, added straw on top, then put the soil back, including the soil that was in what are now paths. I dug those areas down to the gravel, using it to raise the garlic beds higher, then filled the space with scrap wood to create the paths.
I won’t be adding another path on the other side of the third bed, which means I’ll only have what soil I take off the top. I’ll be emptying out our compost heap into the bottom, then add in the mulch from the garlic beds, before putting the soil back. I don’t think it’ll be as high as the other beds, but hopefully we’ll have our loads of garden soil delivered soon, so I’ll be able to top it off with that. The mulch will probably be removed before then, and I’ll just move it onto the paths at first.
We’ve had quite a few warm days. I think I’ll call the company up in the next day or two and see if their soil is thawed out enough to load into their trucks or not.
I might be just a little bit excited about getting that soil! :-D
We had such a lovely day today, even with fairly high winds, that I couldn’t resist going outside and doing a bit of clean up. This time, I decided to work in the old garden area.
As we clean up around the property, there is one thing I find myself struggling with that I did not expect.
Trees.
In the decades I was away, my parents slowly reduced the size of their gardening, which made perfect sense. Unfortunately, at the same time, they planted trees. Poorly placed trees, many of which I am now having to cut down for various reasons, while trying to save as many as I can. At the same time, they also allowed self sown trees to grow where they really shouldn’t have. Some of them now need to be removed because they are causing damage. Others… well. Let me show you.
This is the before picture.
My mother had a row of raspberry bushes here. Elms and maples had self-sown among them. When my mother transplanted the raspberries (into an area that’s full shade!), she left the self-sown saplings. For a “wind break” she told me. The garden used to extend another 6 feet or so to the north. As they are now, the trees take up a space about 10-12 ft (3-3.6m) wide, and about 100 ft (30.5m) long.
That’s a lot of square feet of full sun garden space that can no longer be used.
Between these and the shade created by the trees they’d planted into the garden area on the south side, huge amounts of garden space have been taken out of production. Space that’s the closest to the house and water.
When I brought up taking them out and reclaiming the garden space, my mother was adamant that they not be touched. Apparently, if we take them out, we won’t have any wind break anymore or something, even though there are plenty of other trees and the lilac hedge to shelter us from Northern winds. :-/
Well, we’re not in a position to actively remove the trees quite yet, though the arborists recommended taking them out while they’re still small enough to be pulled out by the roots with a tractor. While trying to garden near these on one side, and tend the lawn on the other, I figured the least that should be done is to trim and clear them.
Yes, I know. This is probably the worst time of year to be trimming trees, but these are not trees we plan to save. They’ll do just fine, though. In fact, they’ll probably thrive. :-/
Starting at the end I took the photo at, I worked at it using both the baby chainsaw (aka: cordless pruner) and the long handled pruners. Loppers, I think they’re actually called. I used those quite a bit, because the branches and suckers were so dense, I couldn’t get in with the baby chainsaw to cut where I needed to. Which is fine. It reserved battery power for the pieces too large for the loppers. I got about 1 1/2 hours in before the battery died, then I continued for another half hour or so with the loppers.
Here is how it looks now.
That log that is now visible marks the corner of the mulched area we gardened in last year. I cleared until just past that log.
This is my branch pile.
I at first tried to trim the larger pieces and set them aside for potential use later, but that was taking up too much time, so I just added to the pile. When it’s time to deal with the pile, it will be easier to use hand pruners to trim any larger branches that might be usable for other things. The smallest pieces will go onto a chipping pile.
I did use pruning paint on the cut ends of the trees, though the maples were pouring so much sap, a lot of it was washed away! The elm sap isn’t running yet.
For all my mother’s admonitions to leave the trees alone, I found evidence that I was not the first to try cutting these away. In fact, some of what I found were growing out of stumps. Someone had tried cutting them down, and they grew back.
I also found this little group.
Three elms growing into each other! We couldn’t see this until I cleared things away. In fact, I couldn’t stand in the spots I was in to take the photos, either.
I worked on a maple just past this group of elms and found myself pulling out large strands of vines as well. The rest of the section has more of these vines. My mother had planted them (not here!) years ago, not realizing they were invasive. Now they’re spreading all over, and I’ve found at least a couple of trees that have been killed by them. So I stopped to continue another day, since more time will need to be spent pulling up these vines, which will need to be burned.
The irony of pulling up vines that are killing trees we plan to get eventually get rid of is not lost on me!
By the time I’m done with these, we should be able to walk through and around the trees without having to fight branches. I’ll even be able to mow past them without branches pulling off my hat!
Hopefully, their roots won’t make gardening near them too much of an issue. Eventually, we do plan to build some permanent, high raised beds in this area closer to the house, so it won’t be an issue for long. When we build the permanent garden beds to the south of the house, that will be where we will focus more on things that take longer to mature and get harvested in the fall, while areas closer to the house will be more kitchen garden type things that mature quickly, or have a continuous harvest.
Today was a day of moving forward on a few things, and even accomplishing some! :-D
First, the most important thing.
Potato Beetle status.
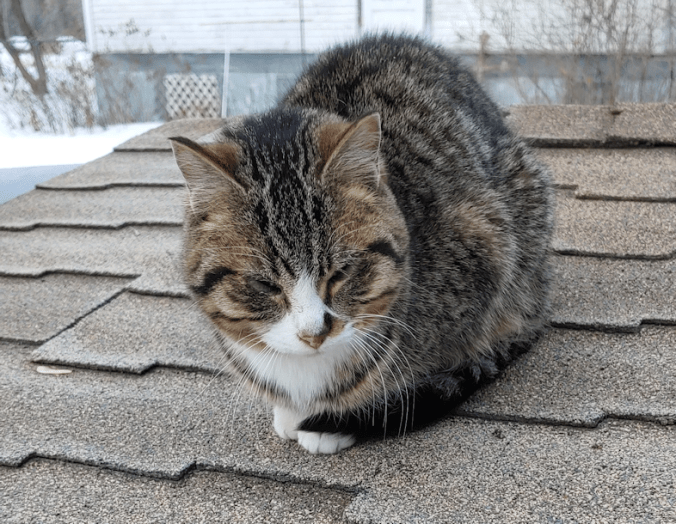
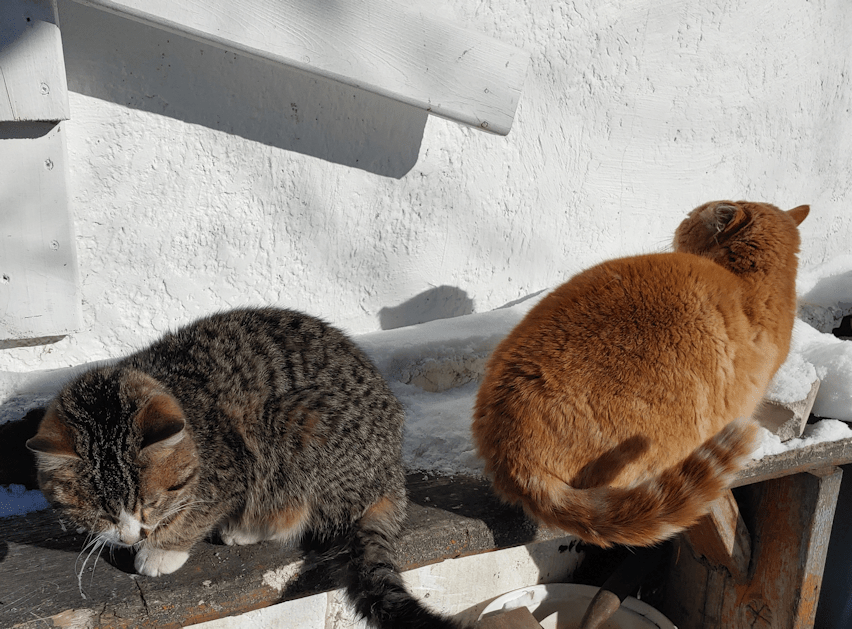
No, this is not Potato Beetle. Nostrildamus was posing so sweetly for me, I just had to take a photo.
Also, his eyes are quite clear. He’s just got them comfortably half shut as he enjoys the relative warmth of the cat house roof under his paws!
The Potato was not up to letting me take his picture, but he was very much up to showing up for warm water, following me as I did my rounds, and letting me carry him back to the house! :-)
I tucked him into the sun room with food and water, which I put on a scrap of rigid insulation, so he wouldn’t have to be on cold concrete while eating and drinking. He had quite the appetite!
Once back inside, I called the vet. I mentioned the photos I sent, and she went looking for them. Someone else had checked the email yesterday, so she didn’t know where it was at first. The only opening they had was for Friday, at which point, should we even bother bringing him in at all? It’s not like he’s going to get any stitches with the wound having had this long to heal on its own. She said she would get a doctor to look at the photos and would call me back.
When she did, she told me the doctor thinks it looks pretty good, from what he could see (which, admittedly, isn’t much!), but since this is an outdoor cat… well, they get pretty dirty, and that increases the risks of infection. We decided to book Potato Beetle for Friday, early afternoon, for a check up. They will likely not have to do anything, though I would not be averse to some slow release antibiotics, like they gave Butterscotch. One thing they will be able to do is examine Potato for other wounds. While carrying him, I tried to feel around as I pet him. I think I was feeling scabs through his fur in a few places.
So, that appointment is made. Since he would not be going in until Friday, I went into the sun room and opened the doors to let him out.
He had no interest in leaving, and just started eating some more.
I noticed the water bowl was starting to ice over, so I warmed up some water in the kettle and brought it over. He was still eating when I came in, but as soon as I added the warm water, he switched right over. Because the water in our hot water tank develops a smell after a while, we don’t use warm tap water for the cats. I had tried that, and they didn’t seem to like it, but they LOVE the water that’s been warmed in the kettle! When I come out with the container and set it on the ground so I can knock the ice out of the metal bowls and clean out the heated bowl, Ginger used to be the one I’d find drinking out of the container. He’d stop as I came over to take it and fill the water bowls. Now, it’s Potato Beetle that goes straight for the container, and he even keeps trying to drink while I pick it up to fill the bowls! He seemed to really, really like having food and water bowls all to himself.
Seeing how quickly ice formed on the water bowl – and that Potato wasn’t interested in going outside – I grabbed a box and made a little house for him, with an old pillow for a bed. We already have an old pillow on the floor under the swing bench that he has claimed, but the box would get warmer, just from his body heat. I set it up right next to the food and water bowls, so he could go from being on a pillow to walking on the piece of rigid insulation, and never have to walk on cold concrete, if he didn’t want to.
Then I headed out to do our shopping, along with my younger daughter. While we were gone, Potato’s water bowl got topped up with warm water a few times, and he still had zero interest in leaving the sun room!
Since we were using my mother’s car for our shopping, I didn’t get as much of the heavy stuff as we normally would, but I did get some kibble to top of the bin in the sun room. I added some of the new kibble to Potato’s food bowl, just to give him something different. He ate with gusto!
And wouldn’t leave the sun room.
So… he’s still there.
I wasn’t planning on keeping him locked up until his appointment, but he’s very content where he is now. We can look out the bathroom window and see him sitting on the swing bench, napping. Or looking back at us!
This wasn’t exactly the plan, but we’ll take it, I guess!
I also called up the garage about or van. Sure enough, he’d tried to return my call while I was with the tech service call for so long, trying to figure out what was going on with the software I’d just bought.
The van will be dropped off on Monday morning for him to check out. The only thing he suggested was topping up the power steering fluid. He seemed pleased when I told him it was full. At least we know there’s no leak! Once the van has been checked over and any repairs get done, I’ll finally be able to do a real monthly stock up trip. We haven’t been able to do one since the end of November!
As for the shopping, we only went to the Walmart in the nearer small city. My daughters had made their own shopping list, too. Aside from the stuff we usually get, I was able to pick up some Jiffy Pellet refills for our second tray, which is one of those self-watering pellet trays with a domed lid. I also picked up a plain tray, that will work well for when I use the repurposed K-cups to start seeds. They will all have drainage holes, and the tray will allow them to be watered from below.
I also picked up a case of 750ml, wide mouth canning jars. We currently have 250ml and 500ml jars with regular size mouths, plus more 500ml wide mouth jars. Little by little, as we are able, we will add to our stock of jars, plus get more snap lids. There was a water bath canner in stock, but I ended up just getting the metal rack for holding jars that will allow me to use one of our stock pots. It’s designed so that, if we were canning small, short jars, a second one can be placed on top of the jars and we could can two layers of small jars. I don’t expect to do that, but it’s an option. My daughters got me a set of canning tools for Christmas, so with the purchase of this rack, I now have all the tools needed to do water bath canning.
So, another area of progress!
I was unable to find a pressure canner, though. They didn’t seem to have any in stock anywhere. We have time to find one, though.
I have no idea what kind of harvest we will end up with at the end of the season, but I hope to be fully prepared to can plenty! We also intend to freeze some things, and dehydrate others, so we will have a variety of options, even if we don’t get a pressure canner. I did find myself ogling a dehydrator, but decided against it. For the amount I expect to be dehydrating this year, we can use our oven well enough. It’s not worth spending the money on, at this point, and we don’t have the space to store it right now. That is a purchase that has no urgency to it.
After we got home, I had one more thing that we can finally move forward on, though it’s far less pleasant to think about. I called the court office.
We finally have a court date for the restraining order we filed against our vandal.
It’s just a general session date, and there is a lot of backlog. Chances are, it’ll probably end up booked for a future hearing, but… I don’t know. This is for a restraining order, not a civil suit. Will the court just fly through the docket, like they did for the teleconference call for his vexatious litigation against me, that he clearly filed in retaliation for my applying for a restraining order? After all, my application is a criminal matter, not a civil matter.
Our vandal would have to call the court office to see if court dates were started up again or not. If he had called yesterday, that may have been the triggering event for him calling my mother three times, yesterday. One of his “usual” things that he rants about now is that my mother is trying to put him in jail. She has nothing to do with my application for a restraining order, though, so he’s just lashing out at her because he can’t lash out at me. I’ve had no direct communication from him for something like 2 years. He can’t intimidate me, but he can try and intimidate my mother. Thankfully, he doesn’t call her anywhere near as often as he used to. My siblings and I have been working to put a stop to that, which includes helping my mother understand some of her self-sabotaging behaviour. This is someone who was so very close to us, and she still feels she needs to treat him like family. She owes him nothing. He owes her (and my late father) everything.
Anyhow. The court date is in March, so that’s another step forward.
And now it’s time to check on Potato Beetle and make sure he’s settled in for the night. Something far more pleasant to think about than court dates!
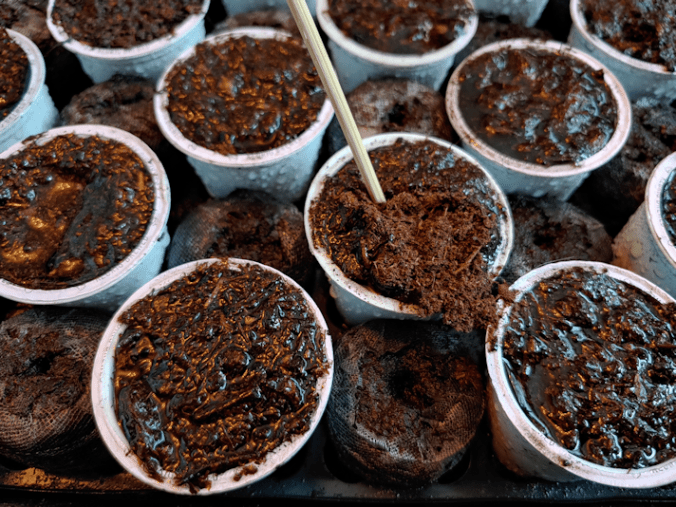
With our bulb onions already starting to show sprouts (so quickly!) I’ve got a bee in my bonnet about getting the shallot seed started, too. With how dry the loose peat in the K-cups are in the middles, this time I wanted to make sure the peat was thoroughly saturated before putting them into the planting trays.
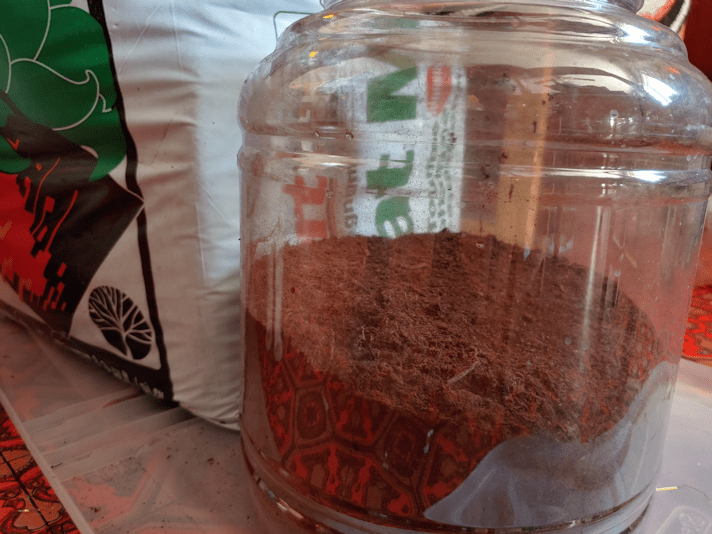
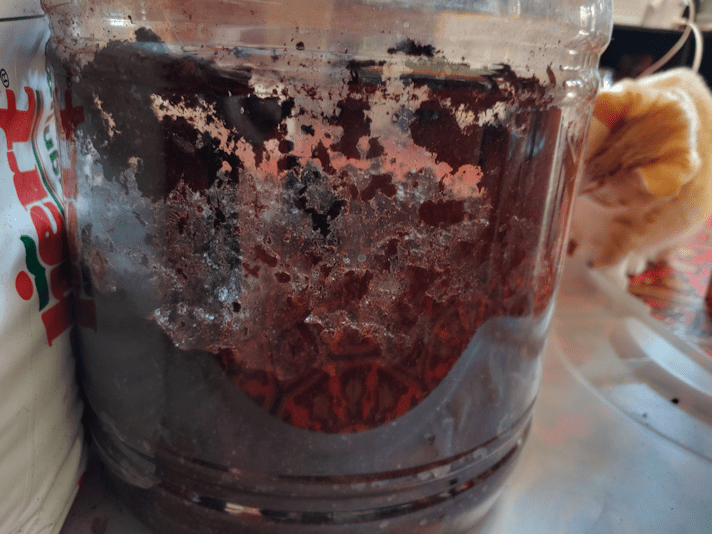
After looking at what we had available that is cat proof, I settled on reusing a container from cheese balls that we would sometimes get at Costco. I’ve been keeping the containers like these, in various sizes, to cut open and use as cloche in the garden in the spring, but they are coming in very handy in other ways! We don’t actually buy these treats very often, which means that at this rate, I’m using them up pretty fast!
At least for this, I don’t have to cut it apart, so it will still be usable when it’s done. Because the peat is so very dry and fluffy, I made sure to scoop quite a bit into the container, filling it to just under half full.
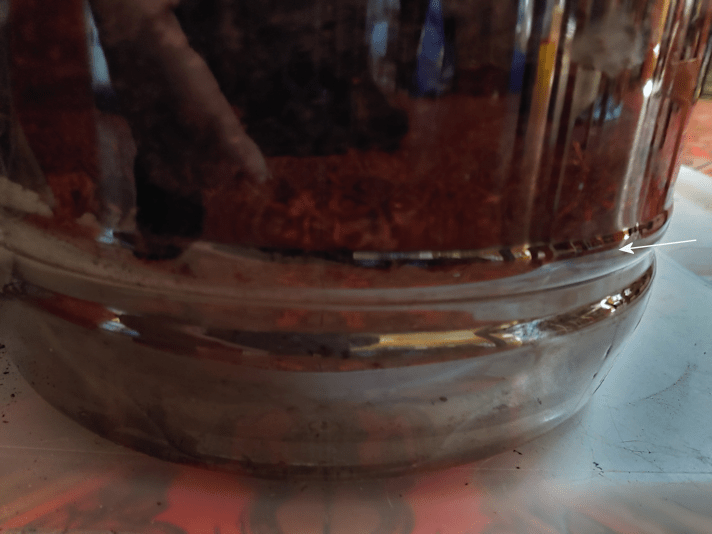
Then it was time to add water. The arrow in the above image is the water line! The peat just floated on top.
It took a while to mix the water into the peat. Even when I thought I was done I’d uncover another dry clump of peat!
Then it was time to cover it, to keep the cats out.
They were very interested in the process. It the few seconds it took me to put the mixing spoon down and pop the lid on the containers, Saffron was pulling at the spoon, trying to drag it away!
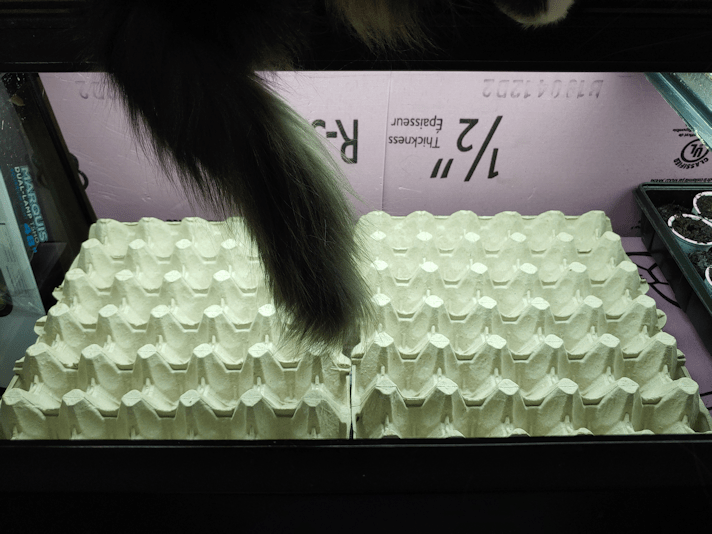
Once it was set aside to sit for a while, before we can see if it needs more water or not, I checked the space I had in the big aquarium. How many egg flats would I be able to fit inside? One, for sure, but would I be able to fit two?
Yes!!! Each tray holds 30 eggs, so I’ll have close to the same number of potential seedlings as the seed tray the bulb onion seeds are in.
The next question was, what to put under them to support them when they need to be moved?
Handily, I had a piece of leftover rigid insulation that was large enough to fit both trays. So I cut it in half, and we’ll be able to move them around independently, even after the cardboard has started to get soft.
I don’t have anything I can use as a drain tray that will fit, unfortunately. If I did, I would be keeping them watered from below. Ah, well. We’ll manage!
Since I was checking sizes, anyhow, I checked to see if these would fit in the 20 gallon, for when we start the bunching onions. One tray does fit, but it’s a bit too snug. We would not be able to lift it out again later, without problems.
But that’s okay. When my brother and his wife picked up groceries for us, there were no flats of eggs available, so they got us 2 packs of 18 eggs. Those will fit, plus I have long, narrow scraps of the rigid insulation I can put under them, to support the bottoms when it’s time to lift them out of the aquarium.
This is going to work out rather well!
Also, that magnificent tail in the above photo is Fenrir, sitting on the light fixture. She did not approve of my activities! :-D
For now, it looks like I’ll need to add more water to the peat, so I will probably leave it to continue soaking overnight, and plant the shallots tomorrow.
What a fun and cheerful thing to do, to keep us thinking of summer on a cold, cold day! :-)
Yesterday, we never reached the predicted high of the day, though we did come close. Today, it looks to be much the same.
So much for starting to warm up!
It was -33C, with a wind chill of -39C (-27F and -38F) when I headed out. That didn’t stop the cats from being out and about! Even before I headed out, I saw Rolando Moon in a tree branch outside my window. It was good to see her today. She hasn’t been around for a while, so I was a bit concerned. When she joined me and the other cats, her only interest was in the fresh, warm water! She did, however, allow me to pet her briefly. She is such a snob! :-D
Poor Nosy is just miserable! After I finished with the food and water – which he had no interest in – he let me pick him up and snuggle him for a bit, then I put him on the warm(ish) wooden bench in a sun spot before going back inside.
Just as I started writing this (after many failed attempts, due to our internet still flicking out repeatedly), the weather icon on my task bar refreshed to -29C with a wind chill of -36C (-20F and -33F). The high forecast for this afternoon is now a couple of degrees lower than had been forecast yesterday.
Even the long range forecast has been modified overnight. They’re still saying we’ll reach 0C (32F) by the 22nd, but the rise to that temperature is no longer expected to be as quick and smooth. We’ll be chilly for a little bit longer.
This polar vortex just does NOT want to move or dissipate!
While I will probably go out later this afternoon to run the vehicles for a while, I no longer expect to go into town at all. It isn’t a necessity, but was more about running at least my mother’s car for a while.
I am glad we will be getting my husband’s prescriptions delivered, though it will be on Tuesday instead of tomorrow, because of the holiday (February’s statutory has different names in different provinces). My husband is trying to stretch his painkillers out to last until it comes in. The refills will have his updated and changed prescriptions. Hopefully, that will help him manage the pain better. He’s really struggling right now, and the cold – even though he is set up in the warmest room of the house – is making it much harder to cope. :-(
On the plus side – and I’ll take any positives I can get right now – I have an announcement to make.
Drumroll, please!
We have onion sprouts!
Little bitty sprrrroooooooots!!
I found 2, yesterday afternoon, and a third one showed up by evening. They are so tiny, I didn’t even try to take a photo. They are all in the peat pellets, not the K-cups, which we have had to spray daily, because they’re drying out on the tops. I will be working on the shallots today, starting by saturating the peat completely, before I put it into the starter trays. Which will be the cardboard trays from flats of eggs. I just have to make sure they are on something that will allow me to lift them later on, when the cardboard will be soft and damp. Depending on how long it takes the peat to get saturated, the actual planting of seeds might not happen until tomorrow.
Meanwhile.
We have sprrrrrooooooootttsss!!!
Yes. I am a silly child at times! :-D
So that’s a bit of cheer on another bitterly cold day.
For our Zone 3 area, quite a lot of things will need to be started indoors. While most things won’t need to be started until April, onion seeds are supposed to be started up to 10 weeks before the last frost date. For us, that means late March.
However, all the experienced Zone 3 gardeners that grow onion from seed have been saying onion seeds MUST be started much earlier. They started theirs in January!
Do I go by the seed packet, or by these gardeners?
I have decided to listen to the gardeners, at least as much as I can.
The problem is we don’t really have supplies, and with the polar vortex we’re under right now, I do not consider it safe to drive. I just don’t trust that our van, or even my mother’s car, can handle it. In these temperatures, breaking down on the road is life threatening.
So, I can only start with what I have.
We have two seed starting trays that fit the Jiffy Pellets. We found a box of Jiffy Pellets while cleaning up the house. Unfortunately, there were enough pellets to fill only half of one tray.
K-cups to the rescue!
We used to have a Keurig, but when it finally died, we found ourselves left with boxes of product that expired. Rather than throw them all out, I emptied the contents into the compost and kept the cups, specifically to use them for starting seeds. :-)
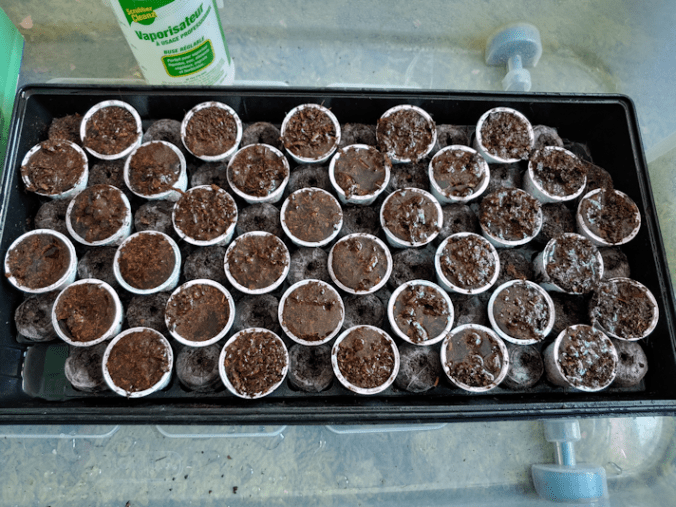
Their bottoms fit in the trays, but the flared tops needed more space, so I put the pellets in alternating spaces, then punched drainage holes in all the K-cups with an awl.
We’ve still got peat from last year, so that was used to fill the cups.
They fit rather well, this way.
I have enough K-cups to fill another half tray, with a few left over, but no more peat pellets to fill the spaces in between.
We’ll figure it out.
The tray went into a shallow storage bin, where I filled the bottom of the tray with water. Then, to keep it safe from cats, I put both the dome and the other tray, upside down, over it, then put more stuff on and around it. The cats really wanted to get at that peat!
Remembering how difficult it was to fully dampen loose peat last year, I added more water to the top, the left it sit for a while. I used that time to cut label markers out of a 500g size plastic container.
We have three different types of seeds; bulb and bunching onions, and shallots. I can only start one variety right now, so I decided on the bulb onions. The shallots will be next, and I figure the bunching onions can wait until we can figure things out and maybe get more supplies.
The tray got checked several times, more water was sprayed onto the top, and I finally ended up leaving it overnight. The above photo was after soaking for several hours, and I’d just sprayed more water to the top.
This morning, I took a skewer and checked the status.
The centres of the K-Cups were still dry!
I ended up using the skewer to make holes in the peat of each cup, then used the stream setting on my spray bottle to direct water directly into each hole.
Before anyone suggests that I should be using a potting mix, or a seed starter mix, there are two reason why I’m using straight peat. One: one of my information sources is a soil scientist living in the same zone was we are, and she recently did a video on exactly this. Since every seed has all the nutrition it needs to support itself until the true leaf stage, sterile peat and water are all they need. I would have preferred coconut coir over peat, but we don’t have any. Two: we don’t have any seed starter mixes, nor the supplies to make our own. Some stores are starting to have them in stock, however many of these places do not accept medical exemptions to mask wearing, so I am essentially banned from them. Of those that don’t discriminate against people with medical mask exemptions, they’re a long drive away and I won’t be going to any of them until this polar vortex passes and it isn’t so dangerous to go out. Even curbside pickup is not an option; I’ve already heard from many people who can’t wear masks and have tried to do curbside pick up, only to be refused service because the staff refused to bring their orders to them, outside, unless they wore a mask. Not even shields are being accepted. As for ordering online, shipping costs rule out that option, as well as the current delays in shipping. They’d never get to us in time to use them, assuming they even find us. Which reminds me. We never did get my husband’s FedEx delivery (for something he ordered online in November). As far as we know, the package is still somewhere in the city. We can’t get it ourselves, and they won’t deliver it to us, even with detailed instructions on how to find us. So… yeah. Ordering online is not an option, either.
So we make do with what we have. It will work out.
At this point, I’m just hoping to be able to get the one variety of seeds in today!
Before I get into various things, I want to share some cute stuff with you, first!
Our collection of baskets that had been stored in the big fish tank ended up on top of the piano for now. The cats love to go up there, so I fully expected them to take advantage of the situation.
It wasn’t long before I found Tissue and Leyendecker among them!
Tissue is in three baskets at once! :-D
The largest baskets, with decorations on them, are the ones we use for our family Easter basket. There are some smaller ones in the collection that we found while cleaning up the house, including a basket that used to be my very own basket to take to church for blessing on Holy Saturday, along with the family basket, when I was a child!
Here is some more cuteness for you to enjoy…
This piece of foam is what was inside the new washing machine when we bought it. Our old mama cat, who moved out here with us, immediately adopted it as her favourite bed, and now Cabbages loves to join “grandma” for cuddles!
The cats also like to bite off pieces along the edges and spit them out.
Our living room carpet is continually covered in cat fur, foam from this thing, cardboard from their scratch pad, and the dirt they’re still managing to dig out of some of our plant pots! The cats leave trails of detritus, everywhere they go. :-D
Our old mama cat has been quick to adopt any new cats introduced to the house, and is STILL allowing several of the kittens – now almost adults – to try and nurse on her, including Cabbages. Cabbages has been taking a long time to socialize but, thankfully, she is getting along quite well with the other cats. Grandma and Keith are her favourites!
Cabbages and Keith will spend hours like this, all snuggled together and napping on my bed.
Cabbages has finally reached a point where we can pet her regularly, and she doesn’t immediately run off. She seems torn between not wanting those big, clumsy humans clomping about near her, and wanting those scritches and pets. She will even tolerate being picked up and held, if only briefly. That is significant progress!
In other things, we warmed up enough today that I finally switched out the memory cards on the trail cams. That micro SD card I put in the new camera this morning, which had been used only once and did not require formatting in the camera when I put it in the first time, needed to be formatted this morning. *sigh* Why would it work fine the first time, after I’d formatted it in the computer, but need to be formatted in the camera, the next time it was used? The other micro SD cards I’d bought at the same time had done the same thing. I had assumed it was because they were not as high end, but that doesn’t seem to be the problem, after all.
Ah, well. I’ll figure it out.
With the bitter cold we’ve had for the past few days, I was not expecting to find much on the cards. Especially from the new camera, which has been just dying with the colder temperatures.
I was surprised.
The older camera was shut down when I switched out the memory card. When it gets cold and the batteries can’t handle it anymore, it shuts itself off. When I turned it back on, the batteries were still at half power, so it was just from the cold. There were still a few files on the card, though, all from one day.
The new camera had files recorded on each day of the deep freeze! This camera displays the temperature, and it actually kept on recording with an internal temperature of -25C/-13F !! Previously, this camera would die before reaching -20C/-4F! It did shut itself down during the nights; the only night files we did get, had a warning displayed in large red letters, saying it was low power. This camera will actually turn itself back on again when the temperatures warm up. I am totally shocked – in a happy way – that it kept working through the deep freeze. I have no idea why it would stop working before, but is working now, at these temperatures. I’m not complaining, that’s for sure! I did still have to warm up the camera with my hands, so I could see the screen, but that would only be a real problem if I had to do it during the deep freeze, because of the frost bite risk. Since I don’t even bother switching out the cards in temperatures like that, it’s a moot point.
This afternoon, we warmed up to -14C/7F, which made me a lot more comfortable about heading out to help my mother with her grocery shopping. She didn’t need much, but took advantage of having access to her car and stocked up on other things. I gave her some of my extra Mingle Masks, hoping she would use one instead of struggling with the surgical mask she normally uses, but she wasn’t up to it. Still, she has them, and saw on me how to use them, so I hope she gives them a try. She will actually be able to breathe in those. She still would have to use the type she struggles with at the pharmacy, though, so she might not bother. Frustrating.
After helping my mother with her shopping, I went back to the grocery store to pick up a few things to tide us over until we can do our big shop, whenever that will be. I had to pick up some bigger stuff, like cat litter and cat food, so there wasn’t enough room in her car for her shopping, her walker, and my shopping, all at once. Which is fine by me. The final bill was a shocker, though. I didn’t get very much, but it cost almost $270. Considerably more than if I’d been able to go to the city to buy the same things.
Bird tracks in the snow, found when I came home. This is nowhere near the bird feeders, but those are sunflower seed shells on the snow. Which shows just how windy things go!
There’s a reason we try to do monthly shops in the city. We save at least several hundred dollars every month by doing that, which means we have more budget left over to buy fresh foods locally. The more we’re forced to make smaller, local shopping trips, the more gets eaten out of our budget, and the less we can get overall, either locally, or in the city.
I did splurge on one thing, though.
I bought a 240 count bag of those red plastic beer cups.
I’m on several cold climate gardening groups, which are all busily talking about starting seeds indoors right now. I’ve seen people recommend using these as pots to start seeds in. They just need to have drainage holes punched into their bottoms. While I will be starting some seeds (like onions) in Jiffy pellets, and others (like corn) in toilet paper tubes, I learned from last year, that I need something bigger to start squash in. I did transplants outdoors too soon because they had gotten too big in their starter trays, only to lose most of them to one last late frost. By starting them in something bigger, even if the weather is not cooperative and they get in the ground later, they will have enough room to keep growing in their pots.
Ideally, I would be using biodegradable pots that can be put straight into the ground, with no disruption of the roots. That’s what I will be doing with the toilet paper tubes and corn. I’ve been looking at pots like that. The Jiffy peat pots are relatively inexpensive, and come in larger count packages. I would have ordered some last night, along with the seeds and plants I got for my daughters, but they were sold out. The alternatives were “cow pots” – the same idea, but made with cow manure instead of peat. They are way too expensive, though.
So when I saw the beer cups in the store, I went for it. They are the size I need, and can be reused. With 240 of them, I have more than enough to plant everything we have that need to be started indoors, and need the extra space.
Now I just have to figure out what to put under the the drainage holes. I can think of all sorts of possibilities, but they all require buying something, and that’s just not an option right now. Even if I could find them, they are “non essential” and stores still wouldn’t be able to sell them. (Like with clothes.) Maybe I’ll find something later in the month that I’ll be allowed to buy. The first seeds need to be started the second half of March, so I have a bit of time to find, or even build, something.
One more little step of progress towards our gardening. :-)
Tomorrow, we take the van in to the garage and hopefully find out why it’s been stalling. What we find out then will determine what we do and when, in regards to getting the monthly shopping done, and picking up the new hot water tank on warranty.
Ah, that reminds me. I asked around about how this location has been about medical mask exemptions and things like shields and Mingle Masks. It turns out they’ve gone full mask nazi, even to the point of staff following people around, harassing them and kicking them out.
That is going to be a problem. At the very least, I need to go to the customer service desk with the sticker from the hot water tank, and warranty authorization number.
I did find out another location has been safe to go to. As far as I have been told, I need to go back to where the tank was purchased, but that may mean only the franchise, not the specific store. The first tank we got was from a location in town that told me they don’t do warranties, so I had to go to this other location. The one that was recommended to me is actually a bit closer; just in a town to the north of us, that we almost never go to.
I’ll have to make some phone calls.
What a hassle even the simplest things have become.
Yesterday, I got started on making covers for our big fish tank, to keep the cats out. Today, I assembled the first one.
Of course, things did not go to plan.
Does anything ever? :-D
One of the things I needed to figure out was how to secure the hardware cloth to the frame pieces, for those inevitable times when a cat jumps on them. All I’ve got for materials is whatever we can find lying around the farm. While doing my rounds this morning, I went digging in the side of the garage where we store the lawnmowers and snow blowers. I knew there were some roofing nails in there, so I grabbed a while bunch and brought them inside.
Here is the first problem.
All of the nails were huge. There was only a single smaller size, and it was still too large. What I wanted to do was secure the mesh to the tops/bottoms of the boards making up the frame. Previously, we’ve used a staple gun to do that, but these were not for things where the wire mesh was expected to hold weight. Particularly not the sudden weight of a cat leaping onto it from above.
The mesh was going to have to be secured along the sides.
That meant cutting it with a half inch overlap on all sides.
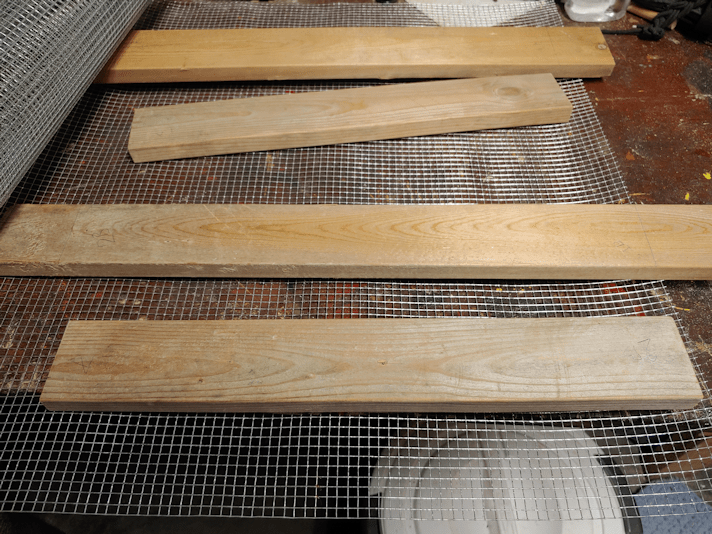
I’m getting closer to the end of my roll of 1/8 inch mesh, and it really does not want to unroll at this stage! :-D I had all the boards on there to hold it down, and it still kept rolling itself back up again!
Once the mesh was cut to side and flattened, I affixed it to one side.
Normally, I would have used the staple gun to tack it in place, but I couldn’t find it anywhere. Which is really weird, because I’m the only person who uses it!
So it had to be tacked in place by screwing in the cross piece, holding the wire as taught as I could in the process.
Then I took out one of the screws in each corner.
I had placed the wood in place on the tank and marked each one with pencil, but once the hardware cloth was in place, I couldn’t really see my marks anymore. Plus, with the cross pieces a fraction too long, I had to make sure I didn’t line the side pieces up to the other end, or the while thing would be to big.
So I quickly drilled a pilot hole in each of the other corners of the cross pieces, then went back to the tank.
This way, I could place the long pieces where they were meant to sit, line everything up, then add a couple of screws through the pilot holes to hold them in place.
Then it was back to the basement to continue.
Once each corner was secured with a pair of screws, it was time to bend the wire mesh. Since the sides would be bent in one direction, and the ends in the other direction, I first cut out the corners.
The wood pieces may have been lined up to the tank, but no matter how careful I tried to be, the wire mesh ended up uneven.
Ah, well.
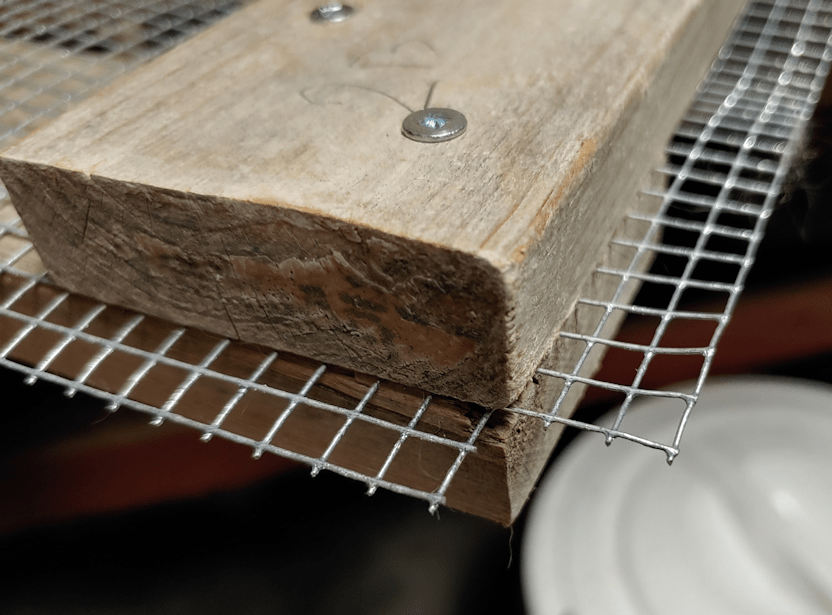
Once the mesh was bent, I drilled pilot holes for each nail (to prevent the wood from splitting) and hammered them in. The flat tops of the roofing nails were perfect for securing the mesh. Very different from how I had to do it with the larger mesh on the screen “door” we made to keep the cats out of the old basement.
Time to test it out again!
Oh, dear.
The addition of mesh and nails – especially the nails – made it wider. It wasn’t so much that it no longer fit. I could have let it just rest on the nail heads, I suppose. They would, however, damage the tank’s frame.
There was a very easy solution to this problem.
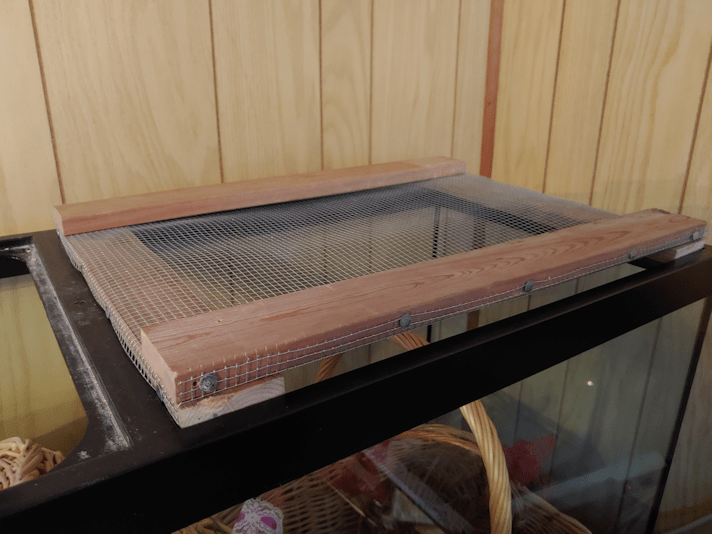
Flip it upside down.
With the cross pieces being every so slight too long, I used my Dremel to take off the corners at roughly a 45 degree angle.
It now fits!
Unfortunately, the wood is a bit warped, so it doesn’t sit flat, but it should still do the job.
There are still a couple of things I need to do. One is to find some way to cover the edges of the hardware cloth, for safety reasons. I’ll probably just use Gorilla Tape, if we still have some.
The other is to find my self-adhesive felt pads. The kind that’s meant to go on the bottoms of chair legs or the like, to protect floors. Since the bottom is now the top, the screw heads are facing down, and each corner screw is sitting on the plastic ledge in the corners of the tank. It wouldn’t be an issue, if I weren’t expecting cats to jump on it, so a bit of padding would be a good thing. I haven’t seen them since we packed for the move, though. :-/
Aside from those 2 things, this cover is done.
The other one will wait for another day! :-D The earliest we should be starting any seeds is in late March, so we have time! :-)