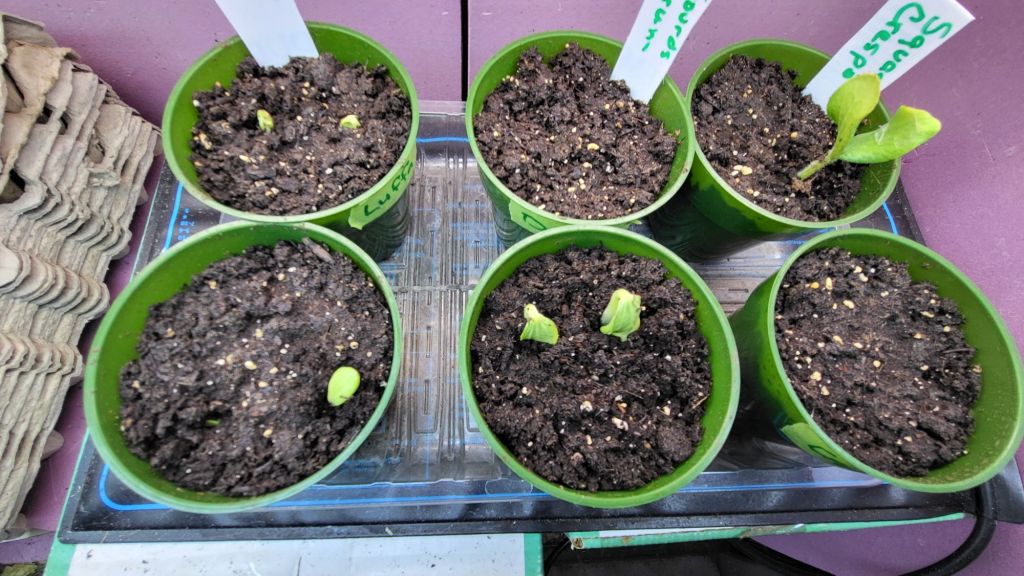
This morning, when checking on the Wild Bunch winter squash seeds, I spotted one seed with a root showing.
By this afternoon, there were several more.
So I potted them up.
So far, it’s 6 out of 25 seeds, but I can see that the rest will start germinating very quickly.
Outside, the rain finally settled into snow, and we’ve got a light dusting of it out there right now. We’re just getting the tail end of a system that dropped a foot of snow, elsewhere in the country! The only thing I’m really concerned about outside is the saffron crocuses. I took their mulch off and the ground they were growing through was still frozen, but I’m not sure how the newly exposed leaves will handle these temperatures.
They are now saying tomorrow will have a high of -1C/30F, but the day after is supposed to reach a high of 10C/50F!
Until then, it’s a good time for inside stuff – like getting the germinated seeds planted in pots!
We got quite a bit of rain overnight! Enough to completely fill the rain barrel I’d returned to the corner of the sun room. When I came out this morning, I had to put the diverter back on!
It was still raining ever so slightly while I was out (I counted 31, maybe 32 cats this morning). The only garden related stuff I did was to take the mulch off the sunchokes and asparagus beds – the last beds that needed to be uncovered – so they can thaw out faster.
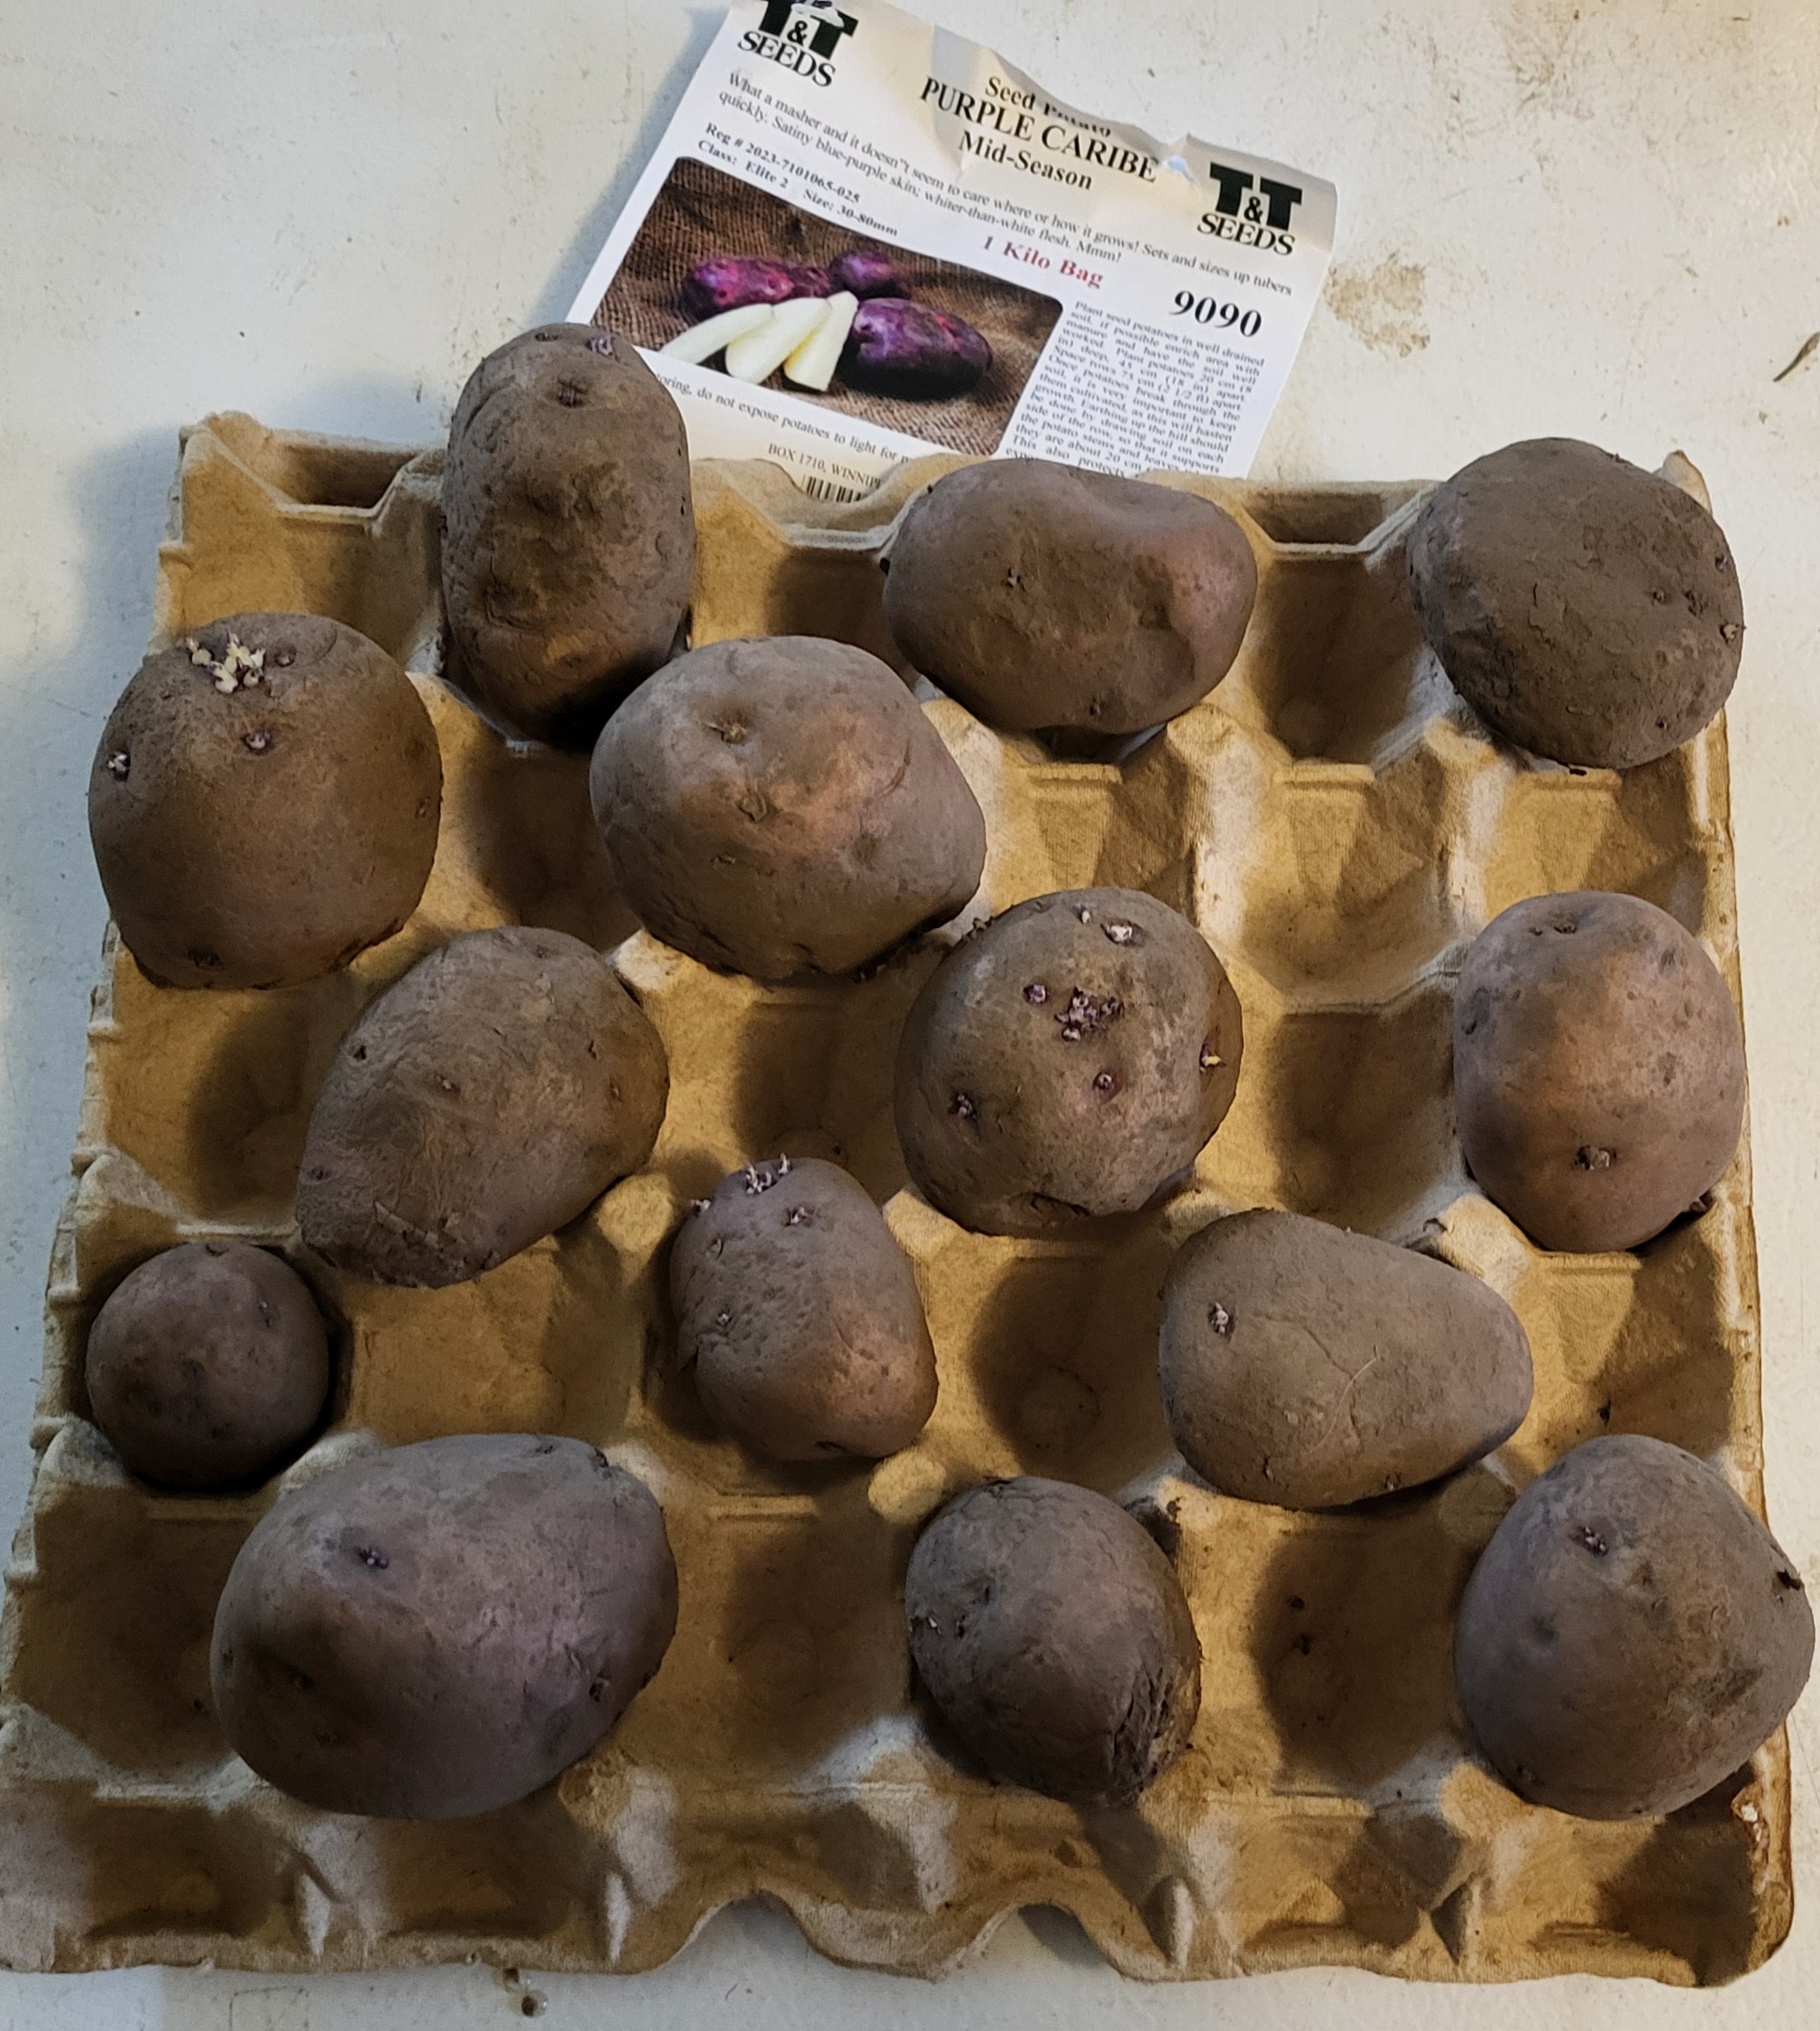
The rain looks like it has stopped, but it’s too muddy and chilly to do the work I had intended to do outside today. I did end up setting out the Purple Caribe potatoes to chit in the old kitchen.
A couple of them were large enough that I cut them in half, and those ones are perched on the carton in such a way that they will have air flow under them, so the cut areas will dry out.
Looking at how many 1kg give us, I’m rethinking where we will put the 2kg of German Butterball potatoes. My thought had been to put them where the squash were planted last year, but that’s a huge space. I’d basically just have one row of potatoes. So now I’m thinking we might use one of the low raised beds, instead, where the soil should be softer.
We really need to think about increasing the acidity of our soil. It is very alkaline, and pretty much everything we are growing needs soil that is at least a little acidic. We should pick up a bale or two of peat, but that has a very minor and slow effect on acidification. A lot of the usual soil amendments, like adding compost, actually increases the alkalinity, which is the last thing we need. I ended up running errands in the small city yesterday and was looking for Sulphur, but saw nothing. We do have a box of fertilizer we found when cleaning out the old kitchen years ago that is for acidifying the soil; it’s meant for azaleas, but should work for other things, too. If it’s still good. Does water soluble Miracle Gro have an expiry date? I have no idea how old this stuff is. The box was opened but, based on how full it looks, it may only have been used once!
Since today was an indoor kind of day, I started pre-germinated some winter squash.
We’re at just under 7 weeks before last frost, which I hope is enough time for these. Not knowing what varieties are in this mix means we will have different days to maturity among them. I’m still hoping to be able to start some other varieties of winter squash as well – ones we actually know what they are! I’m just not planning to grow entire rows of each. With pre-germinating the seeds, I can start just a few of each and not have to be as concerned about germination rates like when they’re sown into pots or pellets.
I’ll need more pots, though.
Among the last seeds I want to start indoors, by about 3 weeks before last frost, are several types of melons.
Last year, we started so many squash and melon seeds, then had entire trays where nothing germinated. A real waste. I think we’re going to have a much better success rate using the pre-germination method. It should be interesting to see how much of a difference it makes, as time goes by.
The next few days are supposed to continue to be colder and wet, with possible snow, with Friday having a high at, or just below, freezing (it’s Tuesday as I write this). By Sunday, we’re supposed to be back up to the double digits (Celsius), but our overnight lows will be staying close to freezing through most of May. We don’t expect to be direct seeding anything until June, but there are quite a few cold tolerant things we’ll be able to direct sow once the current cold snap is done.
May will be our month for building more raised beds, and harvesting more dead trees to build with.
There is so much that needs to be done!
Weather willing, we’ll have more prepared garden spaces than we had last year, but I’m not sure we’ll reclaim enough to match what we were growing in – well, trying to! – the year before.
I was able to get a few things done outside today, and I am so happy!
While waiting for the septic guy to arrive and replace the pill switch in our tank (yay! That’s done!), I took the time to remove the mulch in the old kitchen garden beds. At this point, the mulch is insulating the soil from the warmth instead of the cold, so it needs to come off.
There is garlic planted in the tiny raised bed with its own cover, the long and narrow bed against the retaining wall, the short part of the L shaped wattle weave bed, and down the centre of the rectangular bed in the middle.
In front of the tiny raised bed is some walking onions. I’d planted bulbils for last year, but basically just left them be. They produced new bulbils and now both the onions from last year, and their bulbils, are starting to send out new shoots! I could plant the new bulbils somewhere, but the whole point of walking onions is that they plant themselves.
While uncovering the long section of the wattle weave bed, I found what looks like surviving thyme and strawberries! I wasn’t sure if they’d make it through the winter. It should be interesting to see if the chamomile self seeded or not.
These had a grass clipping mulch, which has just been set aside for now. We’ll use it again, after the ground is thawed an as we are able to plant things.
By the time this was done, it was coming up on 2pm, which is when the post office opens for the afternoon, so I headed out. Not only did I get the packages I was expecting, but the missing pieces from the shelf I got to make into a multilevel cat bed came in. A job for tonight will be to take care of that.
When I got home, the septic guy was here, so I stayed around the area as he went in and out from the tank to the basement, so make sure no cats got too curious about the open tank! That gave me the opportunity to move the mulch over the saffron crocuses we planted in the fall, and I got a real surprise, there!
They had already sprouted – and look how long those leaves are! This mulch should have been removed awhile ago. Hopefully, the shock of being exposed to sunlight won’t set them back too much. I’m really surprised they were already growing, considering the soil under the mulch is still quite frozen! These are supposed to be hardy only to zone 4, but our mild winter seems to have been excellent for them. So far, it looks like one corm didn’t make it, but now that it’s uncovered it might still show up.
After the septic guy was done and headed out, I was able to keep working on the bed by the chain link fence. I ended up finding another buried piece of sidewalk block! I was able to get the entire bed reworked and somewhat weeded, then replaced the brick border to make the narrower bed. I was able to pull out quite a few weed roots, but not everything, so when it was done, I covered the entire surface of the bed with clear plastic from bags we normally use for our recycling. Because the bed is now so narrow, I cut the bags along the sides to make long pieces. It took 4 of them to cover the bed, to solarize them. Something else I learned from Gardening in Canada that I want to try.
The idea is the direct contact plastic will basically cook those roots. Hopefully, this won’t take too long. Once I can remove the plastic, I want to plant some of these…
I’ve decided I will plant the Purple Caribe potatoes in this bed. I won’t be able to hill them, but if I plant them deep enough – something that can actually be done in this bed – I won’t need to.
Oh! I’m just watching that video again and she says the soil should be deep watered first. I haven’t got any hoses set up, since we still dip below freezing some nights. It’s too late in the day to do that now, so I’ll get the water turned on from the basement and set up a hose in the morning.
We’ve got a few more warm days, then in the middle of next week we are supposed to get a bit chilly with some rain and possibly some snow. By next Sunday, we should start getting highs in the double digits (Celsius) again, and stay there.
I wasn’t planning on chitting the potatoes but, after looking at the forecast, I think we can go ahead and do that, while waiting for better conditions to plant them in. That will give us time to prepare the area we want to plant the German Butterball potatoes, and even do some solarizing there, too.
The first seedling to break soil surface was a drum gourd – one of the two in the middle pot – but then a Crespo Squash, on the right, burst through and exploded out of the soil. It seems like every time I look at the pots, there’s more visible growth.
What I’m really happy about is that not one of the seedlings emerged with the outer shell of the seed stuck on the leaves. Last year, there was more than a few times that I had to very carefully remove the shell, because the seed leaves were being killed off. As careful as I was, sometimes pieces of the leaves would break off, because the shells were so tightly encasing them.
I really like this pre-germinating technique!
The heat mat will need to be unplugged very soon. I won’t move them off right away, as I need to arrange space. I won’t need it until I start more seeds.
This weekend will be 7 weeks before our last average frost date. I will go through some of my seeds to see what I want to start first. The seeds we have left are pretty much all supposed to be started 3-4 weeks before last frost, but if I started all the ones I want to, I’ll run out of space in no time at all – and I will have way too many things that need to be transplanted, all at once. So I plan to stagger them.
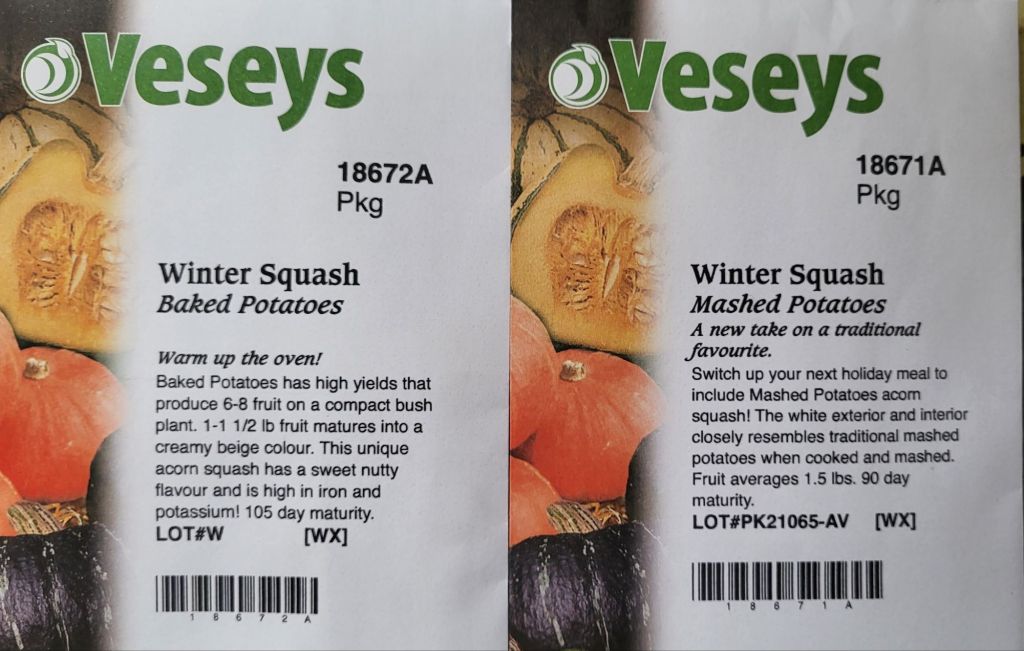
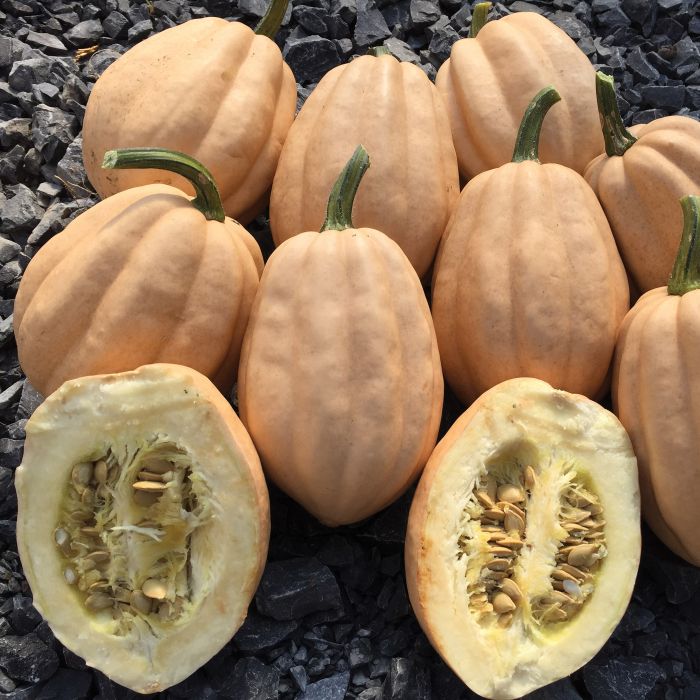
I might even start some of these.
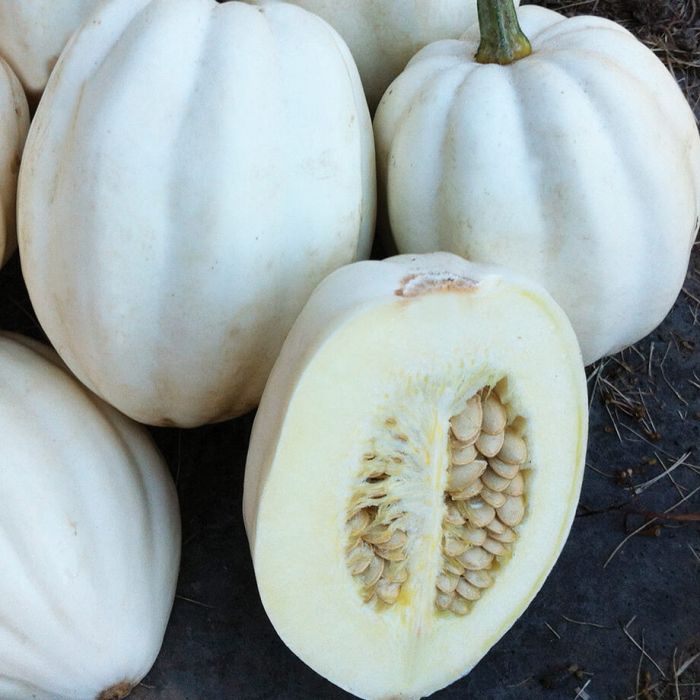
Baked Potato SquashMashed Potato squash
I had to go to town today and finally picked up the mail. There were probably in and waiting for a while. Since we have so many varieties of winter squash seeds, we will probably start just a couple of seeds of each. At this point, we’re still after trying out different types to see what we like the most, and will then probably drop it down to one or two varieties.
Who am I kidding. We’ll probably be constantly trying new ones! Just maybe not quite so many different types, all at the same time.
That’s one thing about having the luxury of space like we do. We can spare some to try growing new things we don’t even know if we’ll like, yet.
Recently, I was going to start some new seeds in pots, but at the last moment, changed my mind. We had such trouble with these last year, and these seeds were anywhere from 2 to 4 years old. I decided to try pre-germinating them, and if some of the seeds turned out to be dead, I’d know right away. Plus, I could avoid our situation last year, where so many seeds didn’t germinate, or died soon after.
Here is a video from Maritime Gardening about the planting process.
Typically, pre-germinating seeds is done in slide lock baggies, but he does it in reusable plastic containers, and I liked that idea better. The take-out container I used was big enough to hold all the seeds I wanted to start, and they are all so different there was no concern about getting them mixed up.
Today – after only 4 days, with only a couple of those on the heat mat (I had the container elevated, so the wouldn’t get too hot) – they germinated! When I turned the lights on this morning and checked them, I saw a few little roots poking out. By the time I was ready to put them in pots this afternoon, every seed either had a root emerging, or just visible.
Before I got to that, though, I saw this new video from Gardening in Canada. Excellent timing.
Almost all plastic containers have that triple arrow reduce-reuse-recycle symbol, with a number in it. She goes through all of them, from 1 through 6. All the plastic containers she looked at are considered food safe, but some are better than others, though the green tray sets with the LED lights, which I now have, too, have no number on them at all.
When it was time to plant, I made sure to check the bottoms of the pots I’d bought for these, and was happy to see a number 5. Discovering that the Red Solo cups (which have a 6 on them) are made of a plastic that is among the worse for shedding was a bit of a surprise. I still have a lot of those!
Honestly, though, I’m not too worried about it. If I worried about all it all, I’d never do anything. Still, if I am in a position to choose one over the other, I now have the information to made an educated decision.
Thanks, Ashley!
So here is my little video of today’s progress!
The seeds had already been soaking for a while when I decided to take clippers to them and scarify the outer shells. Normally, I’d have used sandpaper. All the emerging radicles found their way through the clipped openings. It likely would have taken several more days for them to break through, otherwise, and even longer if they’d gone straight into pots.
I’m quite impressed that every single seed sprouted. The luffa are the oldest seeds of them all, so I was really expecting to have at least a couple of duds.
So now they are on the heat mat, and I expect to see them emerge from the soil in a few days. Theoretically, I should have given each seed its own pot, but we’ll see how they do, first.
Before I was able to get started on this, though, I had to finish cleaning up after my near disaster with the San Marzano tomato tray, yesterday. The remaining soil spilled onto the floor had finally dried enough to vacuum, though I was actually able to salvage some of it, first. As everything was put back in front of the window, I made sure to top up the soil on the onion tray that got knocked over. Mostly, it was filling in around the edges, since the roots held the soil together in the middle.
I’m really at a loss as to how I’m going to set up more seed trays as they get moved out of the big aquarium greenhouse. We won’t be able to do the same set up as we did last year. Hopefully, things will stay mild enough that I can start using the sun room, early. The outside cats won’t be happy, though. They’ll be losing their lounging spaces! We’ll probably have to start closing the sun room door completely. At least for the night.
If the door can close all the way. Things are still shifting, and I recall having trouble getting the outer door to fully close because of it.
The sun room certainly gets warm enough during the day – today, I saw the thermometer at about 25C/77F – but it loses pretty much all that heat, overnight, and that would be cold enough to kill seedlings. It’ll be a few weeks before we’re going to need the space, though, so it might be warm enough overnight, by then. We shall see.
For now, I’m really happy with how pre-germinating these seeds worked out. When it comes time to start things like the melons and winter squash indoors, I think it would be worthwhile to do it again!
It’s been a while since we could get to the bed with the carrots in it. Previously, we had no issues harvesting them, and the bed did have a nice thick layer of mulch.
One of the first things I did was detach the arched cover from the box cover in the centre, and switch it to the bed on the left. This way, we could put the cover on the carrot bed onto the box frame, making it much easier to attach the plastic.
The painter’s cover sheets I got are 12’x8′. My daughter and I folded them in half to make them 12’x4′. Once we had the plastic over the arched cover, she went to start removing the mulch for me while I attached the plastic to the frame. This is temporary, so I just stapled it down. The staples didn’t want to go in all the way, though, so I had to go around and hammer them in.
I can see wind is going to be a problem with the plastic.
As for the carrots, I had a bin all ready to collect the last of them, but it was not to be. Not only was the soil frozen solid, so was a lot of the mulch! My daughter got off as much as she could, then we put the cover, now with plastic over it, back on the bed.
We then took the other arched cover and set it back on the box cover. The mesh on this one is temporary. The chicken wire I used is too bendy and easily misshapen, so it will be replaced with stronger welded wire or something, later on. For now, though, it’s enough to hold some plastic. It went faster this time, as I went around stapling the plastic down, and my daughter followed with a hammer, tacking the staples down so the were actually holding the plastic in place. Very frustrating.
The second arched cover’s wire is a bit smaller than the first one we did, so there was more excess plastic to tuck under at the ends, and a bit more on the sides. This one went onto the bed next to the compost ring, which still has quite a bit of snow on it. It also did not get weeded or reworked as thoroughly as the one in the middle, before things got too cold.
So now we have two beds with plastic “greenhouse” covers on them. We’ll need to check on the carrot bed regularly over the next few days. As the ice in the mulch thaws, we’ll remove more of it, until the soil itself can finally start thawing out – and we can finally harvest those carrots!
Note for future reference. If we use this method to store carrots again, we need to either use a lot more mulch, or have it covered in plastic like this – or both!
It’s 10C/50F right now, making for a gorgeous day to work outside.
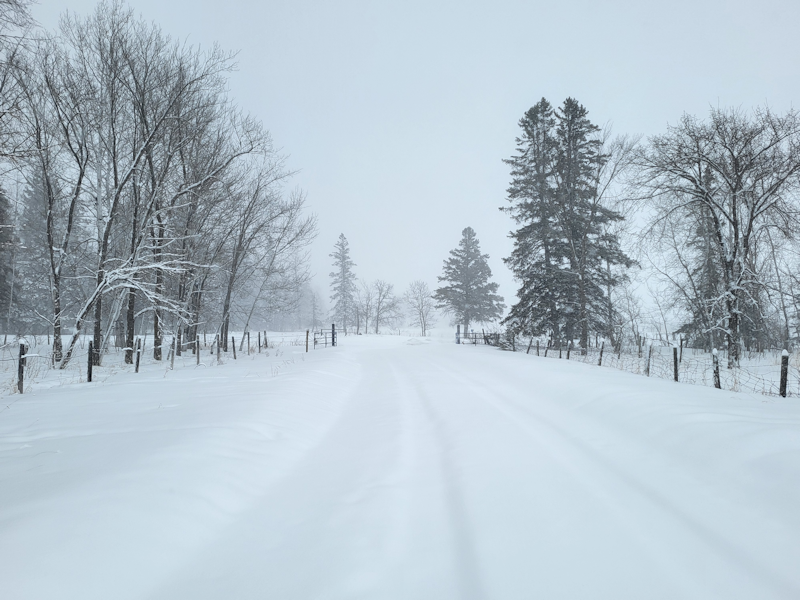
This is what it was like, a year ago today!
We were having to dig ourselves out and were still expecting a blizzard.
It’s not at all unusual to have at least one last blizzard in April. We aren’t expecting anything but warm days and mostly sunny skies for the rest of April, this year. In fact, if the long range forecast is at all accurate (ha!), May will be chillier than April.
Gosh is feels good to be able to work outside right now! Yes, I know, we need more snow, and we’re expected to have drought again this summer, but I will enjoy what I can, when I can!
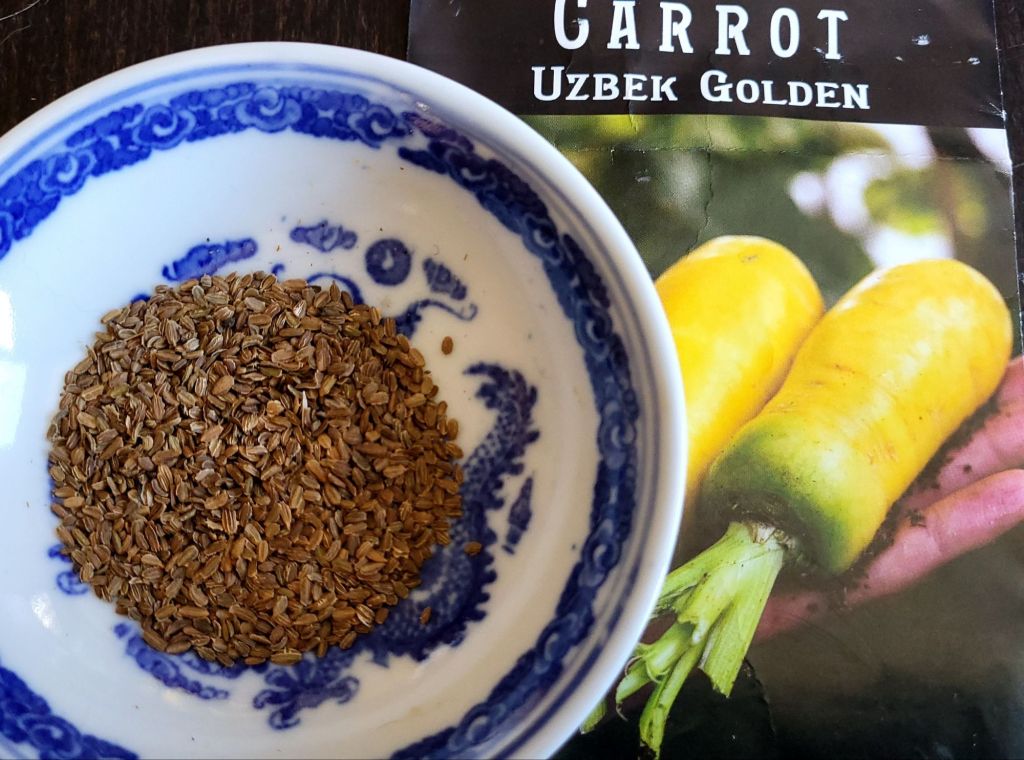
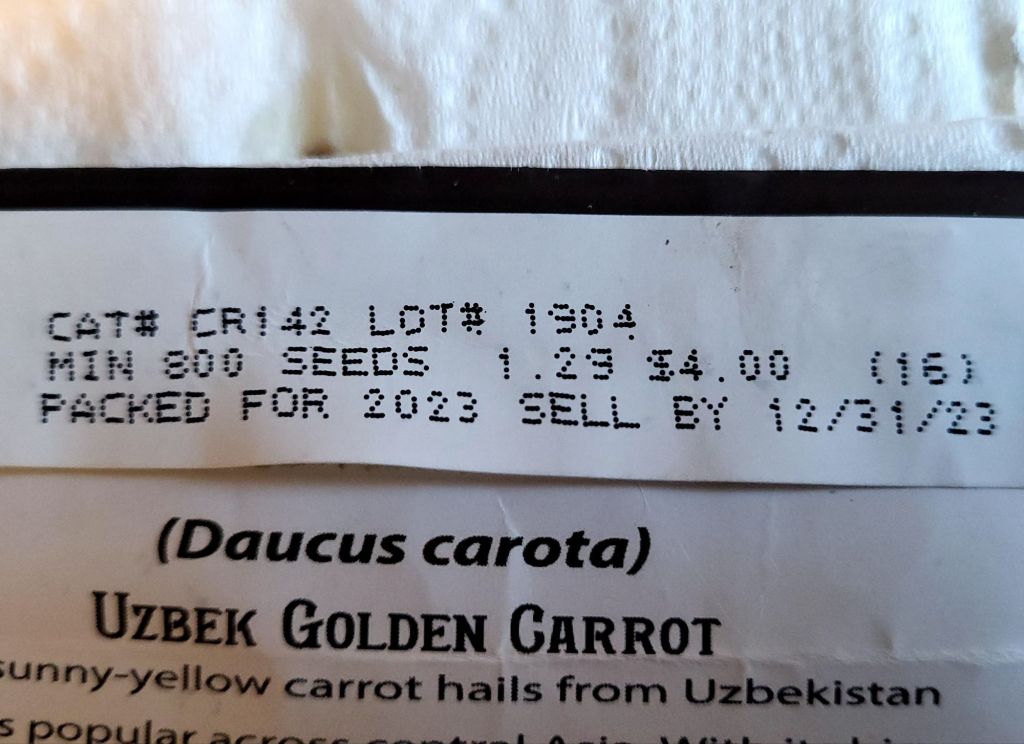
So I went through my seed bin again – main bin, not just the smaller bins organized by “direct sow” or “start indoors” – and found my package of Uzbek Golden Carrots from last year. I really liked these carrots, so I want to plant more this year. I also found my leftover Napoli carrots. Those are pelleted seeds, so no need to do anything with those, but after how well it worked out with our Naval carrots last year, I wanted to make seed tape with the Uzbek Golden Carrots. I also found some other things, but more on that later.
The package still had quite a lot of seeds in it. We planted only one row, about 14′-15′ long, last year, so we didn’t use much.
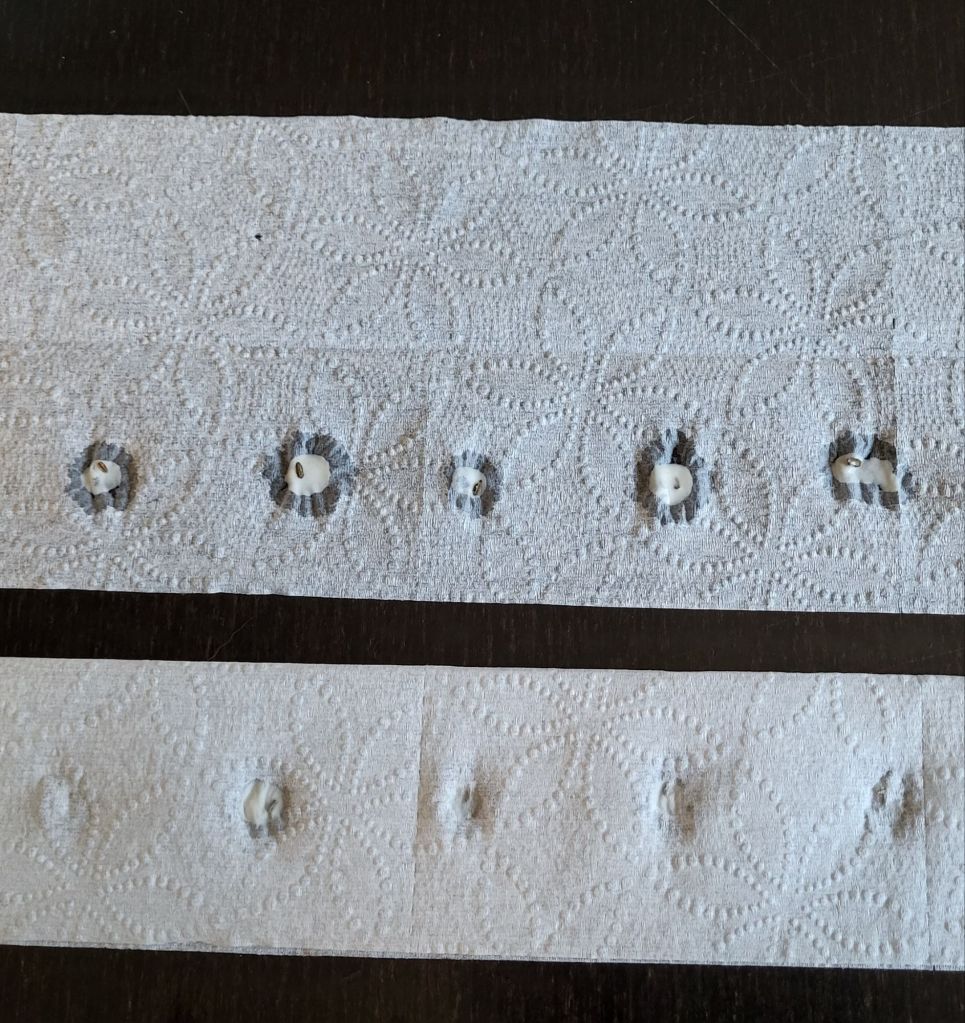
Like last year, I used strips of toilet paper the length of the end of our dining table, split into single ply. I pre folded the toilet paper, lengthwise, to make it easier later on. A flour and water paste was used as the “glue”, and I used a bamboo chopstick to apply the paste with the thick end, and to pick up the seeds with the narrow end. Once the seeds were in place, the toilet paper strip was folded over, pressed into the flour paste, then set aside to start drying while the next batch was done.
After a while, the stack of drying strips was getting rather thick. There were still plenty of seeds when I stopped, so I took another look at the package.
A minimum of 800 seeds! Wow!
Each strip has 20 seeds in it (a few got pairs of seeds stuck together, but I’m counting those as one). I counted the strips, and had another 20.
I think 400 seeds will be enough! I’d estimate there’s still close to 300 seeds left in the package.
The seed tape is now draped around the cat free zone in the living room to finish drying, before they get rolled up and stored until it’s time to plant.
As for the other stuff I found…
I confirmed that I do have a few Crespo squash seeds left. I really want to grow those, as they are supposed to be quite delicious. I got the seeds from Baker Creek, but they don’t seem to carry them anymore, so I want to be able to save my own seeds. I also am thinking of trying the African Drum gourds again. Last year, I had issues with the gourd seedlings and replanted a few times, to the point I started getting the pots mixed up. By the time the survivors were transplanted and started producing fruit, we discovered none of them were drum gourds! Hopefully, I’ll have better luck this year.
I also was surprised to find I still had luffa seeds! Last year, they also had issues and got replanted a couple of times, but it’s also the first year we actually had a luffa develop. So I think I will try those again, this year. Being in the old kitchen garden was so much better for it compared to our previous attempts, so I will take that into consideration when it comes time to transplant them. It’ll be the same thing with the Drum gourds and Crespo squash. I’ll need to really think about where they need to be planted, as much to protect them from the deer as anything else. The first year we grew Crespo squash, they did fantastic, until then got eaten by deer and groundhogs three times before we could get them sufficiently protected! They recovered very well and started developing fruit like crazy, but there just wasn’t enough growing season left for them. Last year, we had one develop to about the size of a smallish pumpkin, but I think their location got too much sun, and the plants got baked.
Anyhow.
I will try starting the three of them within the next couple of weeks. I still have some larger peat pots left from last year, so they’ll go straight into there. Hopefully, that will mean there will be no potting up needed. The pots didn’t break down after transplanting the Crespo squash, like they were supposed to, but they can be broken up without disturbing the roots at transplant time. The main thing will be to keep the pots moist until then. Otherwise, they dry out and suck the moisture out of the seed starting mix!
I’m still waffling about whether or not I will try growing corn again this year. We have some short season varieties, but I don’t know that we’ll have enough space prepared for them. They are not a priority, compared to some of the other things we want to grow this year. A lot will hinge on being able to get those new beds built in time for planting. We’ll be growing potatoes where we grew winter squash last year, so we’ll be needing space for the squash we want to grow this year, and I hope to grow quite a bit of both winter and summer squash. We’ve got a melon mix this year, too.
Well, we’ll see how it works out when the time comes. For all the plans we’ve made, I’ve found it’s awfully easy for things to side swipe them!
Still, I’m happy to at least have the seed tape done and ready for planting, once the ground is thawed out enough. Carrots, at least, can be planted before last frost, and I can hardly wait!
Shuffling the trays around has certainly helped! Check this out.
When I turned the lights on yesterday morning, there was nothing in the tray. When I turned them off in the evening, all the cells on the far right of the photo had seedlings breaking ground. By morning, they were opening their seed leaves, and I could even see one starting to break the surface in the middle row, though it’s not visible in the photo.
That row of seedlings on the right are the Black Cherry, which are new seeds for this year. The middle row are the Chocolate cherry, which are seeds from previous years. The ones on the left, which we got this year as a freebie with our order, are a completely different type of tomato, so I expect those to take longer to germinate, compared to the cherries.
I will wait until there’s more sprouts before I raise the tray off the heat mat. I’ll just put one of the dome lids under it, which will raise the tray about 5 or 6 inches off the mat and closer to the light. I don’t want to unplug the mat until the peppers start germinating, which will take longer.
The tray with the San Marzano seeds has been a bit of a surprise. There weren’t many seeds in the packet, but it turns out that there were more than I thought. There are seedlings in all the cells in the tray, but in the row where I had enough to plant only one seed per cell, there’s extra, and in some of the cells where two seeds had been planted, there are three seedlings! These would have been seeds that had stuck together in the package. Some are so close together, I’ll just cut away one, rather than thin by transplanting, as removing one would damage the other.
Okay, so I’m really a week early for this, but I decided to start more seeds, anyhow!
It was also an excuse to finally get my video making software up and running on the new computer. That was far more complicated than it should have been, but once it was all set up, everything went well.
Plus, PBC makes a cameo appearance.
This time, I started the three varieties of short season bell peppers left over from last year; Early Sunsation, Dragonfly and Early Summer. When it comes time to transplanting them outdoors, we need to try a completely different location. Definitely well away from those trees along the north side of the low raised garden beds! Hopefully, by starting them indoors this early, as well as planting them in a better location, we will actually get ripe peppers to try. With the peppers we started last month, this will make for 6 varieties, only one of which was able to ripen outdoors last year. None of the seeds are new.
I ended up starting 4 varieties of tomatoes. We were intending to only plant a couple varieties, originally; one paste tomato variety and one cherry tomato variety for fresh eating. Then we got some free seeds I wanted to try, too. When going through the tomato seeds we had, I decided to grow the Chocolate Cherry tomatoes again. I used the new seed starting trays for the tomatoes, which have only 12 cells, so I’m going for more variety over quantity of plants. I know the cherry tomatoes should be prolific (if they do well this year), but the free Forme de Coeur we got are also supposed to be quite prolific. I planted only 2 seeds per cell. If we end up with only a few plants of each variety, all together should be adequate to our needs. If we do end up with a high germination rate, I’ll might thin by transplanting, but we’ll see when the time comes.
The San Marzano tomatoes went into my remaining new style of tray I got this year, with the larger, deeper cells. There weren’t a lot of seeds in the package, though, and I used them all up. I filled the cells only half way for now, and will top them up as the seedlings get bigger. With this, if we do have a high enough germination rate that they’ll need thinning, I will definitely thin by transplanting. As it is, I only had enough seeds to plant a pair of seeds in two rows, and the last row got only one seed each. It’s entirely possible that thinning won’t even be an issue.
Last of all, I started some Butterfly Flower, which is an orange variety of milkweed. That one had plenty of seeds, so I might also try direct sowing in the spring, too. I had a small tray with Jiffy Pellets left over from last year, so I used that. The seeds are pretty big, compared to all the others I started today, and each pellet got only one seed each. That’s still a dozen seeds, so not bad. Since these are perennials, we will need to be selective on where we transplant these.
Starting these seeds meant a bit of rearranging needed to happen. The seeds starting in the Red Solo cups were still in the big aquarium greenhouse, and that was going to be needed for the large tray of tomatoes.
Zero oregano seeds germinated, so I took those cups out completely. With the Purple Beauty bell peppers, one cup had all 4 seeds germinate, while the other had none, so I transplanted two of them into the empty cup. The German Winter Thyme doesn’t seem to be growing much bigger. I’m not sure what to make of that. The bin with these went into the mini greenhouse in front of the window. The two trays with the LED grow lights on them went into the mini greenhouse as well, and are now plugged into their USB cables. For now, I can still use the remaining three lights to supplement the tray with the eggplants and hot peppers.
The trays with the tomatoes and peppers are set up above the heat vent. Hopefully, that will be enough, because we’ve only got one heat mat, and that’s now being used with the San Marzano tomatoes. The milkweed is in the big aquarium greenhouse, too, but off on the side. These shouldn’t need the extra heat, anyhow, but the warmth from the lights themselves should be adequate for them.
Now I’m really going to be getting antsy. We are at 11 weeks before last frost and with these seeds started, the seeds I have left don’t need to be started until 2-4 weeks before our last frost date. Unless I decide to start some gourds, but even they all are recommended for starting at 2-4 weeks. That means having to wait until the start of May, at the earliest!
Well, before then, I’m sure some things will need to be potted up or something, so I should still be able to get my gardening fix! 😂😂
Gardening in Canada put out another really useful video today that I just had to share.
Of course, we still need to take into account our individual situations.
Some of these I would have thought were obvious. Root vegetables, for example. I’ve heard you can actually buy root vegetables as transplants in greenhouses (I don’t recall seeing them, myself, but I might just have missed them), and to me, that seems downright unethical.
Only recently have I seen people starting things like peas, beans and spinach indoors, which I found perplexing. Peas and spinach are among those things that need cool temperatures to germinate, and can be planted before last frost. It’s just too warm to start them indoors, isn’t it? Beans germinate and grow so quickly, it seems like extra work to start them indoors. As for lettuces, I do know of people who grow them indoors, not for transplant, but for winter greens, so that’s an option. I do recall seeing lettuces and leafy green transplants in the stores.
With things like melons, cucumbers and squash, winter or summer, I’ve been starting some of them indoors because I only have a 100 day growing season. Last year was the first time I direct sowed summer squash, and they were a magnet for slugs. Some of the ones that survived did well – the G Star patty pans in particular – but I had to resow most of them several times, and still ended up with just a few plants that didn’t produce very well, compared to past years where they were transplanted. This year, I will be direct sowing again, but need to find a better way to protect them from slugs. I just won’t have the space to start them indoors.
As for the winter squash and melons that we transplanted; the melons did well in the kiddie pool raised bed, but needed more time than we had, even though they were supposed to be short season varieties. With the winter squash, the mounds that got full sun suffered more than those that got partial shade. Basically, the full sun ones got baked. The transplants also survived the slugs better than the direct sown summer squash. Because of the growing season, I will probably start winter squash indoors, but this year, we have some shorter season winter squash, so we might be able to get away with direct sowing.
Her comments about luffa is in line with what I had been considering doing myself. I don’t have the seeds to try them again this year, but when I get more seeds, I want to try starting them in a larger pot, and simply taking the pot outside when the time comes. Last year’s transplanted luffa, we got one plant that did remarkably well in the wattle weave bed, so I know it can be done!
As for cucumbers, those were something we tried starting indoors two years in a row. The first year worked fine. The second year, not at all, so we’ve got something else going on there. It could simply be the different varieties.
I have never heard of anyone starting potatoes indoors before! Same with garlic, other than in those silly 5 Minute Craft type content mill videos.
As for corn, we did try starting corn indoors, because we were trying to grow kulli (Maize Morado) corn. We could get away with direct sowing the Montana Morado corn, as it’s a shorter season black corn, but kulli needs 120 days to maturity. Transplanting the kulli corn did result in transplant shock that set them back. Once they started growing, they got huge – but didn’t start developing tassels or cobs before the season ran out. Since we are building covers for our beds, I am thinking that when we try them again in the future, I will make use of those. First, to create a greenhouse situation to warm the soil of a bed earlier, then keeping it warm after sowing. While our last frost date is June 2, we do tend to get nice warm weather before then, so we should be able to get that extra 27-30 days (days to maturity, plus days for germination). Basically, we’d have to find a way to plant them at the beginning of May to give them enough time to fully mature.
Hmmm… I should check the calendar. I’m sure there’s something I can start indoors about now…
The gardening itch is hitting me hard right now!! 😄