Okay, I wasn’t really planning to buy more seeds this year. Not exactly.
With our winter sown beds, which are detailed in the video below, we actually have a lot already planted for this year’s garden…
… that’s IF they survived the winter.
If they didn’t, then we’re not going to have a whole heckuva lot at all, because I finished off seed packets in doing this method.
There are a few things that I am thinking to start indoors – especially now that we have the portable greenhouse – but other things I will likely buy as transplants in the spring. Decisions will be made in the spring for that.
In the end, though, I broke down and made an order with MI Gardener. I’ve been looking at Canadian seed sources but, in the end, it came down to price. I’ve been really shocked by how expensive some seeds have gotten, even with very low seed counts in the packages, at a number of the sites I’ve bought from in the past. Plus, some of the things that interested me were either sold out or no longer available.
I didn’t even make a large order. Just a few things, some of which I probably won’t even plant this year.
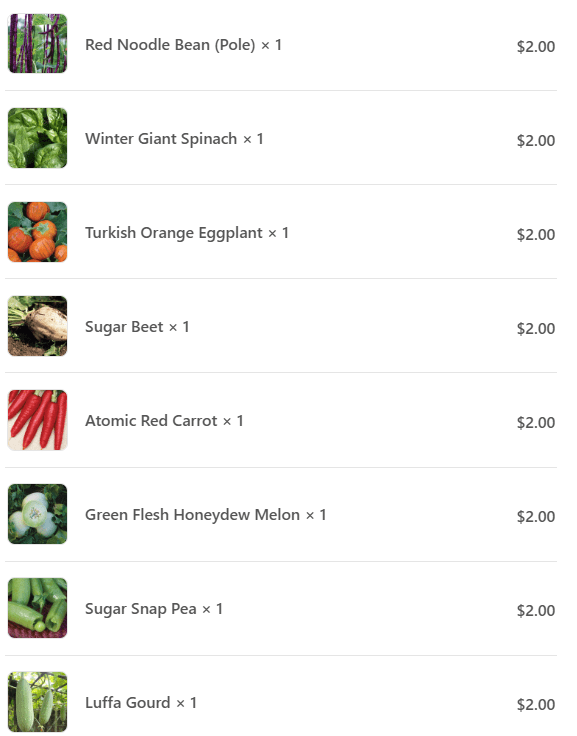
The first item in the list is red noodle beans. We tried growing these a few years back and ended up having a drought and heat waves that year. They grew, but I only found a single pod when I was cleaning up for the end of the season, and it was the saddest, skinniest little thing! Along with the bush beans I have winter sown, I want a pole bean and a shelling bean. We have plenty of bean seeds, but no red noodle beans, and I’d really like to try those out.
Next is Winter Giant Spinach. I winter sowed all our spinach seeds so, if they don’t take, this will be our fallback planting.
Next is Turkish Orange Eggplant. We grew Classic and Little Finger eggplant last year. This year, I want to try a different variety. I’m not sure we’ll grow them this year – we’ll see if the order comes in early enough to start them indoors – but it will be an option. If nothing else, we can try the portable greenhouse to extend the season.
I got a package of sugar beet, but don’t expect to plant them this year. I want to actually try and make sugar with them, so this is going to be one of those “fun” things I like to include in my garden every year.
We have more than one variety of carrots winter sown. We still have more Uzbek Golden carrot seeds, if the winter sown ones don’t take, but it would be nice to have another variety as a back up seed.
We did the Summer of Melons mix last year. This year, we still want to grow at least one variety of melon. My younger daughter prefers honeydew types over cantaloupe types, and this Green Flesh Honeydew variety seems to have a short enough growing season to make it worth trying. We have other melon and watermelon seeds already on hand we can try this year, but we will definitely be scaling back from the number we grew last year!
Next are some basic sugar snap peas. I have shelling peas already, and want to have both types.
Last of all…
Yup.
I’m going to keep trying!
I ordered some luffa seeds.
If they come in early enough, I might try them this year. I’m not completely decided on where we will set up the portable greenhouse but, once we do, I will try growing the luffa there in pots, rather than transplanting them into a garden bed.
That’s it, that’s all. A whole 8 items.
All of these together came to a grand total of US$23.50, including shipping. Granted, with our Canadian dollar tanking so much right now, it will probably be closer to Cdn$50, but that would still be less than if I’d try to order these, or similar varieties, anywhere else.
[update: the order was processed, and it came out to Cdn$34.82]
The other things we will need to order or buy for this year’s garden will be things like potatoes and fruit trees. They wouldn’t be shipped until closer to our local last frost date of June 2, so we have time. We just have to settle on what we will be getting this year, first.
I have never ordered from MI Gardener before, but have heard nothing but excellent things about them, so I look forward to getting and trying out these seeds this year!
It’s cold AF out there, which means I’m thinking of the garden!
We are doing things very different this year, though.
The first major change is that I winter sowed a number of garden beds in the fall. You can see what and where, in this last garden tour video of 2024.
In previous years, I would have already at least started onions and shallots by now, and possibly some peppers. With the winter sowing, however, I have – hopefully – a head start on all these. I combined old and new seeds in various combinations into shakers before scattering them onto prepared beds and deep mulching them.
This is what I’ve got already sown.
Garlic – saved cloves
Seed combo 1: root vegetables Carrots: Uzbek Golden and Napoli Beets: Bresko, Merlin, Cylindra and Albino Turnip: Purple Prince Radishes: French Breakfast, Champion, Cherry Belle and Zlata Onions: saved seed (mix of red and yellow bulb unions) Note: left over seeds from this mix were planted in a final bed with saved Jebousek lettuce seeds added in
Seed combo 2: Summer squash mix Sunburst pattypan White Scallop pattypan Magda Green zucchini: Endeavor Yellow zucchini: Goldy
Seed combo 3: Kitchen Garden mix Swiss Chard: Bright Lights and Fordhook Giant Spinach: Space, Lakeside, Bloomsdale and Hybrid Olympia Kohlrabi: Early White Vienna and Early Purple Vienna Bok Choi: Hinou Tiny (saved seed) Shallots: saved seed Onions: saved seed
Seed Combo 4: tall and climbing (mostly) Sunflowers: Mongolian Giant and Hopi Black Dye Peas: Dalvay shelling peas (not saved seed) and King Tut purple peas (saved seed) Bush beans: Royal Burgundy Corn: Montana Morado (saved seed) Onions: saved seed
Flower Combo 1 Nasturtium: Dwarf Jewel Mix Butterfly flower: Orange Shades (milkweed) Forget Me Not
Flower Combo 2 Western Wildflower Mix
Perennials: Strawberries: Albion Everbearing and an unknown variety of small strawberries, plus whatever survives in the asparagus bed Purple Asparagus Sunchokes Onions for seed
So that is quite a lot of stuff that’s already been sown!
In theory, because they were heavily mulched, plus have an added layer of snow to insulated them, these seeds should start germinated as soon as the soil warms up enough.
In theory.
There are two things that I expect will reduce the germination rates.
First, I used this as an opportunity to use up some older seeds. Most of the summer squash, for example, is seed that’s 3 or 4 years old. The white scallop squash were new for last summer, so those should have a higher germination rate. Considering how many seeds were scattered in one bed, having a lower germination rate is not a bad thing. It would have me from having to thin them.
Second, these polar vortexes we’ve been hit with. While all the beds were mulched, the temperatures got so cold, it’s entirely possible a lot of these seeds have been killed off. I still expect some to come up – the onion and shallots, beans and peas are, I think, most likely to survive the cold. At this point, however, I will be amazed if we get anything. In fact, I’ll even be surprised if our Liberty apple tree survived, for all that we made sure it was planted in a well sheltered microclimate.
In the spring, once the snow starts melting away, I will need to remove the mulch so that the soil can warm up faster. With some beds, like the one in the old kitchen garden, I am hoping to be able to put one of the covers over them with plastic to warm them up faster. With the summer squash bed in particular, I’m hoping to arrange enough hoops or something so that it can be covered for its entire 18′ length. That bed will also need extra protection from slugs.
Aside from these winter sown beds, this is the space we still have available.
In the main garden area.
There is the low raised bed that will eventually be paired with another bed, yet to be built, to form a trellis tunnel. Right now, one half of that bed was cleaned up and replanted with onions that we gathered seed from, last year. I was able to do all red onions along one half, and all yellow onions along the other. The other side of the bed is where we had melons last year, and that half is still open for planting.
That leaves three other 18′ beds that are available. One has the logs to frame it, and those will be permanently joined once things thaw out in the spring. The other two have no log frames, yet. We have some dead spruces that are either cut down or have fallen down that we can use for that, but that will be worked on throughout the summer, or until whatever we plant in the beds are too big to work around.
There is also the bed with the Albion Everbearing strawberries in it. Those should survive the winter. Given the trouble we had with deer eating them, what I will probably do, once the ground is thawed out enough, is transplant them into the old kitchen garden – more on that later. Once that’s done, the bed will be available for something else.
As we are able, we intend to add many more beds to this area, focusing first on the trellis beds to the East, then reclaiming what has been a squash bed for the past few years to the West. This will require harvesting more dead spruces for materials, so it may be slow going. Last year, we got very little progress done, largely because of the weather!
In the Old Kitchen Garden
There is just one rectangular bed in the old kitchen garden that is winter sown. That leaves the tiny raised bed, the retaining wall blocks and the long, narrow bed against it, and the L shaped wattle weave bed.
For the long bed at the retaining wall, I will be doing some changes. Along the inside of the bed, it is bordered with a couple of logs to make it a lower raised bed. The top log is too crooked, so we can’t raise the soil level any higher, as it ends up falling through the gaps. I’ve decided I will remove that crooked long, but keep the straight bottom log, and then harvest willow branched and coppiced maple to wattle weave on top of it. This bed also has some short logs on the ends of the retaining wall blocks. The vertical sticks we used to hold those in place have started to break up, so I will probably replace those with a wattle woven wall, as well. Once this is done, we can add more soil to make it a slightly higher raised bed and not have soil falling into the path anymore.
The short side of the L shaped bed is where I am thinking of transplanting the Albion Everbearing strawberries. Considering how well the strawberries we grew from seed are doing there, I think that will work out.
As for the strawberries that we grew from seed, in the long side of the L shaped bed, while they are doing very well and are very prolific, they aren’t that good of a strawberry. Those will be transplanted out, but I haven’t decided where, yet. It will be somewhere that they can be left to grow wild and spread naturally.
That bed also had thyme we transplanted in, and chamomile that self seeded, in it. It’s unlikely the thyme survived the winter, but it’s possible the chamomile self seeded again. We shall see in the spring.
The tiny raised bed needs no work on it. Just the cover needs some maintenance from the cats using it as a hammock.
Then there are the retaining wall blocks. A lot of them have mint in them that we expect will come back. The ones with chives in them will come back, for sure. As for the remaining empty ones, they don’t get a lot of light and the growing space gets overtaken by an invasive flower that comes in from below, very quickly, so we will need to give a lot of consideration over what can be planted in there.
Chain link fence
We have a similar issue with the chimney block planters at the chain link fence, except it’s elm tree roots, not flowers, that have invaded those blocks! These need to be treated as a container garden, when it comes to what gets planted in them. Nothing really seems to do well there. Partly because of the invading roots, but also the blocks themselves would also be making the relatively small amount of soil they hold more alkaline. We will need to make sure to continue to amend the soil with sulfur granules or other acidifiers, more than other areas (our soil is already quite alkaline).
The other chain link fence bed is winter sown, but in the fall, I’m hoping we can finally redo the bed with permanent walls. Right now, we have scrap boards against the chain link fence to hold the soil in, and bricks around the other side and the end that are simply resting on the soil. I want to make this bed higher – to make it easier on my back, if nothing else! I need to come up with something better to go along the chain link fence; the old boards I found were already starting to rot, so they won’t last much longer. For the rest of it, I wouldn’t mind doing more wattle weaving, but that needs a LOT of long, straight, narrow, flexible branches, and we just don’t have that. What we do have will probably be used up this spring when I add wattle weaving to the narrow bed in the old kitchen garden.
The next area at the chain link fence is the asparagus bed and the sunchokes. The sunchokes should be fine, and need almost no maintenance. The purple asparagus is likely a lost cause. We should have been harvesting asparagus for the past two years and, while some are coming up, spring flooding has really set them back. The strawberries interplanted with them try to do well, only to get eaten by deer, in spite of protective measures. There is nothing we can do about the spring flooding, even though it doesn’t flood there every years. We could try making a higher raised bed but I really don’t think it’s worth the effort to dig up the asparagus, build a higher bed, and replant them, in this location. Especially with elm trees so close, as their roots are so invasive. I still want to grow asparagus. We’ll just have to find a better place to do it.
The East garden beds
We currently have one winter sown bed in the East yard. That leaves two more 9’x3′ beds, plus a new 4′ square bed, available.
The compost ring is in this area, and I fully expect lots of things to start growing out of there this year! One year, we had lots of mystery hybrid squash show up. Last year, it was almost all tomatoes, though some potatoes (which never got harvested) also showed up. With what we’ve been tossing in there after preserving the harvest, I wouldn’t be surprised if more tomatoes, squash, melons and even bell peppers started to grow in there.
Those are the areas we will have available to plant in this year, right from the start.
There are a few things that I will want to start indoors for spring transplanting. Others, I will probably buy transplants, instead. Here are some things I’m considering.
Tomatoes: We ended up growing a lot more tomatoes than intended, and way more than we use. For this year, I’m thinking we will just grow a cherry or grape tomato for the family to snack on. We don’t need to do paste or sauce tomatoes again this year. If we do grow a slicing tomato, it will be just a couple of plants. We do have tomato seeds we can start, but are severely limited in space for starts this year, so I might just buy transplants. We shall see.
Peppers: we’ve been experimenting with short season varieties to figure out what the family likes, which had us growing away more than needed. We’ve saved some seed but, again, we don’t have a lot of space to do starts. If we grow peppers again this year, I will probably buy two, maybe three, transplants and that’s it.
Corn: last year, I tried a super short season variety. This year, I have seeds for another short season variety to try. Just enough to see if we like them. This year, I will see what I can to do set up supports around the corn before they get big, as we have a real problem with the stalks being blown over by high winds. We also need to find a way to keep the raccoons from eating them!
As for the Montana Morado corn that was winter sown, there were very few seeds. I’d collected the kernels from what plants survived when we grew them a couple of years ago, and we were intending to test them out as a corn flour. Before we could do that, the cats knocked the container over during the night, spilling it all over the floor. I’d swept them up and threw them away, not thinking that they could still be used as seed. Over time, I would find a few kernels here and there that got missed and saved those. If any of these winter sown seeds survive, I am hoping to use them to collect more seed. We shall see.
Peas: we have the shelling peas winter sown, but I would like to grow some edible pod peas, too. The family likes those better.
Beans: we have bush beans that are winter sown. I would like to grow at least one variety of pole bean, and one variety of shelling bean. We have lots of bean seeds to choose from.
Melons: we do love our melons, but this year, I think we will plant only one variety of melons, and one variety of watermelons. These would need to be started indoors, in late April.
Winter squash: last year, we tried the Wild Bunch mix and had such a high germination rate, we didn’t have the space to grow any others! Two 18′ beds were filled with winter squash. Last year, we also bought two varieties of winter squash my daughters wanted to try, so I want to try those this year. They will need to be started indoors around the end of March or mid-April. I’ll have to check the seed packets again to be sure.
Potatoes: normally, I would have ordered my potatoes by now, for spring delivery, but just haven’t done it. We do want to grow potatoes – and a lot more of them. I’m just not yet sure where we could plant them right now. If worse comes to worse, we can buy our potatoes from stores in the spring, instead of ordering them online.
Salsify: we got seeds for these a few years ago, but never got around to actually growing them. This year, I’d like to finally do that! I’ll have to double check the packages to see about starting them indoors or not.
Herbs: I have quite a few varieties of herbs. I need to check which ones need to be started indoors. The long term plan is for things like herbs, greens and other things we use in the kitchen frequently, to be grown in the old kitchen garden, since it is closest to the house. The problem is, we keep forgetting to actually use them!
Flowers: my daughter particularly want to grow flowers but, in my seed cache, I have a packet of Crego Mixed Colour Aster seeds. These were given out in the memorial cards of an old friend that passed away suddenly, last year. I would like to find someplace to plant them in her memory, this year.
Wheat: a few years back, I got a rare, heritage variety of Marquis wheat seeds. If we have a free bed, I would like to finally plant them. I only have a couple of packages, so we won’t have enough to use them for anything. I will be growing them solely to save more seed for future planting. At some point, we hope to reclaim enough growing area to plant a small field of wheat and have enough to actually use to make flour, and still save seed. Mostly, though, I want to keep a heritage variety alive.
So that’s the general plan for now. Very little is going to be started indoors this spring.
If the winter sowing doesn’t pan out, we’re going to have a much smaller garden!
It will be a few months before we will know of they survived these cold snaps. Hopefully, we’ll be able to tell early enough to know what seeds or transplants we’d need to buy to replace them, before it’s too late in the season.
For now, we have reached our high of the day; -20C/-4F, with no wind chill.
Time to warm up the truck and go to the post office!
For the next while, I’ll be going through my old posts and videos about our 2024 garden, looking at how things worked out, and use that information to decide what we will do in our 2025 garden.
Okay, here is where we talk about everything else. The perennials, the food forest and so on.
Sunchokes, asparagus, grapes, zucca melon and walking onions
Sunchokes: last year, I didn’t harvest any at all so that we would have more growth and a larger harvest this year.
That plan worked out rather well! We got quite a lot of sunchokes, and the largest ones were replanted for next year. We’re still learning what to do with them, but this is something we know grows here and will come back every year.
The only downside is that I found quite a few tubers with chonky caterpillars burrowed into them. Some burrowed all the way in, where they died. Some, with half their bodies still sticking out of the tubers! I have no idea what these are, and need to figure out how to get rid of them.
Asparagus: We planted these purple years ago, and should be harvesting them by now.
We are not.
In planting the crowns, a trench was dug about a foot deep, then the bed itself was hilled to give them depth they are supposed to have.
Then we discovered that, in wet springs, a moat forms around our garage, including through the vehicle gate into the yard.
Which is where the asparagus is planted.
At that depth, even though the bed itself is above water, the crowns would be saturated.
We need to find another place to grow asparagus. I don’t know that we’d be able to salvage this purple variety. The challenge is finding a place where they can be left to grow for the next 20 years – and not get flooded out!
Grapes: In cleaning up around the storage house, we found two grape vines my mother had planted. We made a trellis for them and have been trying to keep the spirea from invading them, every since. Last year was the first year we looked to be getting a really good harvest.
The very morning I was planning to harvest them, I came out to find the trellis knocked down on one side, and all the grapes gone.
Then one morning – while taking recordings for a garden tour video! – I discovered all the grapes gone, again. They had disappeared overnight.
Racoons.
I want to transplant these, perhaps on either side of an arbour they can climb on. Maybe closer to the house, where we can better protect them from racoons!!!
Zucca melon: This is one of those things I’ve been trying to grow for years. They are supposed to get huge – up to 60 pounds – and actually grow in our climate. They never seemed to do well.
This year, I thought we’d finally get some. We had strong and healthy transplants, and they went into the kiddie pool raised bed, so they wouldn’t get the elm tree roots invading them.
The slugs got them.
*sigh*
Next year, I want to try them again, but this time in the new bed the Crespo squash did so well in.
I just have to find a way to keep the slugs off!
Walking onions: When we first moved here, every spring, a single walking onion would appear along the edge of the old kitchen garden. There used to be a fence and a tire rim planter, with a tire cut in half and flipped inside out as the “pot” near that spot.
Every year, this one onion would grow, then something would smash it flat.
One year, I managed to keep it from getting broken long enough that it formed bulbils. I took some of those and planted them along the south side of the tiny raised bed nearby, where they would get full sun while being protected by the logs making up the raised bed wall.
At the same time, that side of the old kitchen garden was cleared as best we could, and my daughter planted flower bulbs as a border. We eventually added logs on the outer edge as a protective border, with a couple of openings line with rocks or bricks to walk through. In placing the logs, I was very careful to place one log outside of where I knew that one onion was.
It never came up after that.
The bulbils we planted, however, grew and thrived. When they formed bulbils, those were harvested to cook with, rather than allowing them to reach the ground and spread. We don’t want them to take over! These should continue to come back, year after year.
Milkweed, saffron, tulips and other flowering bulbs, wildflowers and … salsify?
Milkweed: When starting seeds indoors, I started some Shades of Orange Butterfly flower – a type of milkweed. Very few seeds germinated, and the ones that did, did not do well. When we were finally able to start transplanting outside, I was at a loss on where to put these sad little seedlings, as these were something I wanted to reseed itself, year after year.
Then I found one of our yard cats, passed away. He was buried in a bed that was supposed to get poppies in it, but we completely lost control of the weeds in it. After he was buried, I transplanted the milkweed on his grave, in hopes they would survive. They did not.
Tulips: My daughters planted tulip bulbs in an area of the west yard, not far from the old kitchen garden, several years ago. We had gotten rid of some dead crab apple and other trees around there, and there is a lilac hedge behind it – lilacs that are doing much better, now that they are not overshadowed by dead and dying trees! It’s a well sheltered and protected area – from the weather, at least!
Deer love to eat tulips.
After several disappointing years of tulips being eaten just before they started to bloom, we were starting to think the poor bulbs weren’t doing well enough to store energy to survive the winter.
After having to remove one last diseased crap apple tree, and the remaining stump of one that died long ago, we put in some fence posts and surrounded the entire area with bits and pieces of salvaged wire fending and chicken wire, with one side tied in place to serve as a gate for accees.
This year, much to our surprise, we had the most tulips blooming, ever! We even had some coming up in areas they hadn’t been in ages, and we thought for sure they had died.
Best of all – no deer damage!
I look forward to the tulips finally being able to spread through the area, as we originally planned for them.
Grape Hyacinth and snow crocuses: On the other side of the lilac hedge where the tulips are, is part of our maple grove. A few years ago, in one section, we planted 200 grape hyacinth bulbs. In another section, we planted snow crocuses. The hope was that they would spread and grow and eventually take over those areas, so we wouldn’t need to mow or weed trim it anymore.
This year, we did get both, but neither did as well as the year before. I think our late spring, with heavy rains and flooded out areas, was too much for them. They should continue to come back, year after year, though, and hopefully continue to spread and fill the areas they were planted in.
Wildflowers: I had picked up Western Wildflower and Alternative Lawn mixes of seeds. After we had a couple of branch piles chipped, we were left with bare patches of soil in the maple grove, and we tried planting them there. If any of them survived, though, I don’t know. We did have some things come up this year that might have been from these mixes, but I can’t say for sure. There was one that came up that I was very diligent about pulling and destroying, though. I don’t know if it was part of the mix, but we have them all over in the spruce grove. They have beautiful sprays of tiny flowers that turn into tiny little burs. If you walk anywhere near them, you’ll find your pant legs and sleeves covered, and they do NOT want to come out! Worse than burdock! They are almost as invasive as creeping bellflower or creeping Charlie.
We have an insulated tarp that we put over our septic tank. It’s large enough that we fold it in half to use it. When the tank was uncovered in the spring, I laid it out in the maple grove nearby and weighted it down. It stayed there all summer, in hopes of killing off anything growing under it, which was mostly creeping bellflower.
When it was pulled off, I found some things were still growing along the edges, but most of the weeds under there did seem to have died. I put the Western Wildflower mix into a shaker with some seed starting mix I still had and, after clearing and loosening the soil first, scattered the seeds over the area, raked it again to cover the seeds, then mulched it, as was done with the winter sown garden beds.
Hopefully, it will work this time, and we will have native wildflowers growing in this patch. If all goes well, I would want to harvest seed heads from it to scatter throughout other areas of the maple grove. There are just a few areas where we want to maintain clear paths of grass. The rest, we want to be taken over with flowers of all kinds.
I have not yet decided were to try the alternative lawn mix, again.
Salsify?: In preparing garden beds, I found a plant growing in an area I needed to dig up. I recognized the leaves as something that has been growing and blooming pretty wild. They are quite pretty, so I dug it up and transplanted it into one end of the low raised bed with the seed onions and Summer of Melons mix.
It grew very well, bloomed beautifully, and developed huge seed clusters.
Any time a seed cluster looked like it was ready to be blown away with the wind, I plucked the seeds and scattered them in the same area at the far end of the bed, where they could sprout next year.
As for what they are, it was suggested they might be salsify, which is something we actually have seeds for that we wanted to try growing. The roots apparently taste like seafood. The seed catalogs only had photos of the roots, not the flowers, but in looking online, the flowers did look like they could be salsify. When cleaning up the bed in the fall, however, the roots were completely different. Certainly not a tap root that one could use like a carrot or parsnip! It’s possible that just means they are a different variety of salsify, but I don’t know. Whatever they are, though, we might have ourselves quite a lot of them in that one spot where I was dropping the seeds!
The Food Forest: apple, haskap, mulberry, raspberries, sea buckthorn, silver buffaloberry, highbush cranberry and Korean Pine
Liberty Apple: this is the first variety of eating apple we’ve planted. It is a zone 4 apple, but we planted it near the lilac hedge by the old kitchen garden, where it should be more protected. It survived its first winter. Hopefully, it will survive this winter, too. It will be a few years before it starts producing fruit, though. We just need to keep it alive! As it grows, I’m hoping to be able to esplanade the branches, too.
Haskap: We planted these years ago, and we should have been getting lots of fruit by now. Unfortunately, they are not doing well where they are planted. I suspect it is because they are between an elm tree and a lilac bush, and there is too much competition for resources. There are also flowers that come up around them every year, but their root systems are very different, so I don’t think they could be a problem. I am thinking we should transplant them where we will be having the bulk of our food forest, but my daughters are concerned that transplanting them will kill them off.
The main problem, though, is that the “Mr. Haskap” variety, which is meant to cross pollinated with the “Mrs. Haskap” variety, blooms earlier. At most, we’d find a couple of berries, here and there, and that’s it. This year, we actually had the most berries yet.
A small handful of them. Which meant we at least had a chance to taste them!
They are very tasty.
I still think we need to transplant them.
Mulberry: last year, we ordered a Trader mulberry – a zone 3 variety. This is the second time we’d tried mulberry, and the first was killed off by a late and severe spring frost.
They were out of the 2 year size, though, and were instead sending out two 1 year seedlings, instead. They were so tiny, we didn’t transplant them at all. Instead, we potted them up and kept them indoors through the winter.
This spring, they were planted along the north edge of the property, in our main food forest area. Because these can get quite big, I wanted to make sure they were positioned where they would not overshadow other fruit trees. There is a lilac hedge along the fence line, and one of them was strategically planted in front of a gap in the hedge, where the deer have been getting through. This allowed me to plant it slightly tucked in among the lilacs for extra protection from the elements, until they get bigger. The other one was planted the distance recommended for the size they can get. There, I pruned back the lilacs to tuck it further in, in line with the first one. Both got well mulched, and have some salvaged wire fence around them, to protect them from critters.
This is their first winter. Hopefully, they will survive, and in a couple of years, we will get to find out what mulberries taste like!
Raspberries: My mother has grown raspberries here for as long as I can remember. They also pretty much grow wild. She had last transplanted raspberries in an area on the south side of the main garden area, under a crab apple tree and a chokecherry tree.
Not a good place for them.
There are also other trees planted between the house and the main garden area; my parents added more of the years, encroaching on what used to be part of their garden, rather than on the north side of the property. As a result, they create a lot of shade in places that used to be able to grow lots of vegetables.
We did get small amounts of raspberries to enjoy, though and raspberries, being raspberries, spread. In this case, near the crab apple tree, there had been a compost ring. When it was full, I moved the ring to another location and started to dig into the old compost pile, expecting to be able to use it.
That’s when I found out someone had been using it for garbage. I also found lots of larger branches in it.
After cleaning out as much garbage as I could find, we left the pile to break down more.
Then the crab apple tree got the fungal disease that’s killing off so many of them and died. I cleared that away, which has actually improved things, as the raspberries on that end now get more light.
The raspberries have taken over the old compost pile and are thriving in it, so this past summer, we had quite a lot of raspberries.
Which is good, because the purple variety of raspberries we got for the food forest area did not do well.
They actually produced fruit last year, which was their first year. I was expecting to get berries in their second year; most raspberries produce on second year canes. This year, only one of them survived the winter, and being a first year cane, did not produce. It also didn’t grow well.
We also have a couple of raspberries I bought for my daughter. They were planted in the main garden area, near the trees that are causing us so much trouble.
It turns out, deer like raspberry leaves, too.
They are now protected, but we’ll have to transplant them somewhere away from those trees!
Raspberries are something we want to grow lots of. We are working towards having early, mid and late season varieties. Along with the purple and red varieties, we want to add in a golden variety.
We were supposed to get more for this year, but the budget did not allow for it.
What we might end up doing is transplanting some of the ones in the old compost pile into the food forest area, too.
Sea Buckthorn: We bought a 5 pack of sea buckthorn, which were planted in the north east corner of what is now our main food forest area. The lilac hedge sort of peters out by this point, creating another gap the deer were taking advantage of. After planting them, they got a buck and pole fence put over them to protect them and keep the deer from running through the space.
They didn’t all make it. I suddenly can’t remember if we have two or three left. Sea buckthorn, however, needs one male for every 4 females for pollination. No male, no berries. It’s unlikely we have one of each, so we need to replace the ones that died. Which we intended to do this year, but the budget did not allow for it. The ones that did survive, though, do seem to be doing okay.
Silver Buffaloberry: These were purchased as a bundle of 30. Their placement was deliberate to double as a privacy fence as they reached full size. So far, we have lost maybe 3 in total, which is pretty darn good. It will be a few years before they reach full size and start producing berries. The berries are edible, but if it turns out we don’t like them, they will be good for the birds.
Highbush Cranberry: At the start of the two rows of silver buffaloberry, we had a pair of highbush cranberry. For some reason, the deer kept eating one of them. It is currently protected by and old saw horse, directly over it. It has survived! Both will also need several more years before they start producing fruit.
Korean Pine: I keep forgetting about the Korean pine, because they are the only things planted in the outer yard. We started off with 6 seedlings. We are down to three. They are supposed to be slow growing for their first few years, then start shooting up. This year should have been that first year of increased growth. They’re still quite small, protected under their chicken wire cloche. Unfortunately, we haven’t been able to give them the care they should be getting. If only one survives, though, I’ll be happy. It’ll be years before we’ll have pine nuts to harvest, but one mature enough tree would be able to provide more than we need.
Conclusion and planning ahead
It was certainly a mixed bag with how these things went this year.
When it comes to these more permanent things, both food and flowers, we are in for the long haul. These are things that can take years to get where we want them to be.
We had intended to expand this year but our biggest struggle has been with the budget. Aside from everything becoming more expensive, we had so many things that needed to be replaced or repaired this year.
Oh, I just realized, I forgot one more thing: our rhubarb!
We have two patches on opposite corners of the old kitchen garden. The one in the south corner has given us rhubarb to harvest every year, but the one in the north corner has struggled. They both have ornamental crab apple trees growing over them, but the south one manages to get more light. The north one had some dead branches that got cleaned away this year, though. Between that and, I believe, the heavy rain we got this spring, the rhubarb in the north corner was the best we’ve ever seen!
At some point, though, they will need to be transplanted to a better, more open, location. That can wait a few years, though.
Which is pretty much the thing with all our plans for growing food. The ultimate goal is to be as self sufficient as possible. Part of that goal is to have as many things that are either perennial, or will seed themselves, year after year. I’m no spring chicken, and I know my years of mobility are limited. I’m already pretty broken.
Along with planning what we will be growing year after year, we are also thinking 2 years, 5 years, 10 years ahead. We want to add more fruit trees, and even nut trees, though there are few that will grow and produce in our zone 3 climate. As we add animals to our mix, growing food for them will also be part of the planning.
We’re in it for the long haul, though.
It’s a bit different in our situation, in that we don’t own this property, but have the freedom to do this. In the long term, this property could end up belonging to my brother’s grandsons. So all these things that we are doing could ultimately be there to benefit two little boys currently living in another province!
Who knows?
We just do what we can for now. I’m just thankful that we are here, and that we have such a good working relationship with my brother. Everything we do here is a benefit for him, too.
For the next while, I’ll be going through my old posts and videos about our 2024 garden, looking at how things worked out, and use that information to decide what we will do in our 2025 garden.
Some things managed to work out pretty well, even with our rough start in the garden!
The Original Plan
Corn
Corn is something we’ve tried to grow a few times. The first year, we grew several varieties with some being grown more as part of our long term plan to break up soil that had never been gardened before, and prepare the area for a future food forest. I’ve also been trying to grow kulli corn – a deep purple Peruvian variety – for a number of reasons, though we’ve found ourselves growing Montana Morado, instead. Some worked well, some didn’t.
With our garden size actually being reduced after a flood year, instead of expanding, this year we weren’t necessarily going to grow corn at all. We just didn’t have the space prepared for such a nitrogen hungry plant.
However, I had a couple of short season sweet corn varieties I wanted to try somewhere, so when I found myself with larger spaces between winter squash transplants in the second bed, I chose Yukon Chief, which had the shorter growing season: a mere 55 days!
Peppers
We have been trying different varieties of peppers to find the ones the family likes most. Personally, I can’t eat peppers, so I have to rely on their feedback for this. Last year, we had a mix of success and fail with peppers. This year, my older daughter requested one type of hot pepper, and we figured we should probably cut back on the number of varieties to try out this year. So far, no one has really found enough difference between the varieties of sweet peppers to really choose any one type over the other.
Eggplant
We’ve tried two varieties of eggplant before. The first we tried was Little Finger, which was grown in grow bags. They didn’t thrive, but we did have a few little ones we could harvest that we did enjoy. We later learned that nearby elm trees had roots invading the grow bags – a whole row of them all along the north end of the garden, near the self seeded elm and maple trees my mother allowed to grow after she transplanted the raspberries they’d started growing through.
We tried them again another year, but they fared even worse, growing in one of the concrete chimney block planters by the chain link fence. It wasn’t until this spring that I found the blocks were completely choked out by elm tree roots.
So this year, I wanted to try them again, in a completely different area!
The Classic eggplant was new to use last year. Only one seedling started indoors survived. It went into the wattle weave bed and the plant grew strong and healthy, though it was late in producing. In the end, we had one roughly palm sized eggplant to try, plus a couple smaller ones.
I wanted to try both again, this year. I was rather liking the idea of being able to grow enough eggplant to make baba ganoush, or cook nice big slices of them over an open fire.
How it went
Corn
I was really, really happy with this variety! Having something that matured so quickly was amazing!
Sure, I probably planted them too close together, but that didn’t seem to bother them too much.
They do not grow very large cobs, but the corn was so tasty, I could eat them raw!
There were two problems, though.
One was, high winds. After they got mostly flattened after a day of high winds, I did what I could to straighten them and support them, only for them to get flattened again from another direction.
The other was, racoons. I’d actually harvested all the corn – or thought I did – when I found I’d missed a few cobs. I decided to leave them to dry on the cob, so harvest seed at the end of the year. That never happened, because the racoons tore them apart and ate them.
*sigh*
Peppers
Wow, did we get peppers!
The hot peppers – Cheyenne – were started much earlier indoors. For the sweet peppers, I still had seeds for a collection of early varieties, plus a variety that did very well last year, and even a few seeds left from one I’d tried to grow a previous year.
I ended up planting a few of each, thinking the older seeds would have a lower germination rate.
Which was sort of true.
We ended up with quite a lot of the hot peppers. They went into a raised bed in the East yard, in between the two varieties of eggplant.
The sweet peppers all went into the high raised bed, later to be interplanted with shallots.
They all did really well! Especially the ones in the high raised bed. They got so full of peppers that got so big and heavy, I found myself having to add supports to some of them – and others actually broke their stems from the weight!
What they didn’t do was ripen much.
As with everything else this year, they were well behind. I did have some I could harvest, with the purple Dragonfly and Purple Beauty peppers ripening fastest, then some Sweet Chocolate but I ended up harvesting a whole lot of unripe peppers before they could be killed off by frost.
The good thing about peppers is, they keep ripening after they’ve been harvested.
I did end up with enough peppers ripening indoors that some could be cut up and frozen, while others got dehydrated. The family actually got tired of eating peppers, like they did with tomatoes!
The exception being the hot peppers.
My oldest daughter is the only one that can eat them, and even then, just small amounts. These aren’t even an exceptionally hot variety of pepper, either!
We did try dehydrating a bunch. We don’t have a dehydrator, and use the oven for that. Unfortunately, the peppers made it so that we could barely stay in the kitchen while they were dehydrating, because breathing the fumes caused our lungs to start burning!
Once they were dry, though, they went into a jar. They should be processed into a powder, but no one wants to do it and accidentally end up breaking powdered hot pepper.
There was a LOT of green hot peppers, though, and they ripened very well indoors.
What I ended up doing was stringing them, and they are now hanging in the cat free zone (the living room) above where the heat vent is, to dry. It’s a lot slower, but it doesn’t create fumes.
Eggplant
We ended up with quite a few surviving transplants this year, which was really nice. They went into a low raised bed with the hot peppers. For this bed, I covered it with cardboard and thick paper as a mulch, then cut openings to transplant through. I moved the box frame cover onto it, and set up sheets of plastic around it to create a sort of open greenhouse situation, since the eggplants and peppers are all heat loving plants.
The plastic ended up being torn off by high winds.
Later in the season, I was able to try again, using stronger plastic and running paracord both inside and outside the plastic to keep it in place, which you can see in the last photo in the slideshow below.
The plants themselves stagnated in growth for a while, until things dried up enough that I could mow some lawn. Once they got a nice grass clipping mulch on top of the cardboard and paper, they really started to grow and bloom.
Eggplants have such lovely flowers.
We were able to harvest some small eggplant towards the end of the season, before they all got harvested ahead of a killing frost.
The setbacks means they never got particularly big, but they were big enough to get a taste of them!
My conclusion, and thoughts for next year.
For the corn, I most definitely want to grow them again. While I am happy with the Yukon Chief, I want to try the other variety, next year. I can’t remember the name of it right now, but it matures in 65 days, I believe. Wherever we end up planting them, I want to make sure to have something set up to support the plants so they don’t get knocked over by high winds as they get bigger. I have a few ideas that would involve fence wire or something like that, set up horizontally, for the stalks to grow through.
I also want to find more kulli corn seeds to try again, but maybe not next year. We shall see. I might buy some seeds (if they’re not sold out again), just in case we end up with enough garden real estate available. If it doesn’t happen, though, I’m hoping the few Montana Morado seeds that got included in the mix along the chain link fence will survive the winter and grow. For the number of seeds in there, if they do survive, I expect to have to hand pollinate them. Then I will leave them on their stalks to dry, and save more seed for next year.
We’re still trying out different varieties of sweet corn. Once we figure out what we like that grows well here, we will want to dedicate a larger area of garden space to be able to grow enough that we can can or freeze some. For now, my single packet of I think only 50 seeds will be enough.
As long as we can keep the racoons out of them!
For the peppers, we won’t need to grow hot peppers again for a very long time! I don’t think we want to grow so many sweet peppers again, either. I’m debating, for next year, picking up a variety that grows smaller “snack size” peppers, instead, but I haven’t decided yet.
As for the eggplant, I’m happy with how they did, under the circumstances. I do want to grow them again. I probably won’t grow them next year, though. I want to save the garden real estate for staples, instead.
Given what a rough start we had this spring, all of these did way better than expected, so I am very happy.
For the next while, I’ll be going through my old posts and videos about our 2024 garden, looking at how things worked out, and use that information to decide what we will do in our 2025 garden.
Our plans for herbs and strawberries have had some rough times!
The Original Plans
Strawberries and herbs are among those things we intend to have as our more perennial food garden items. Most herbs can’t survive as perennials where we lived, but some might, and others will reseed themselves, if left to their own devices. Over time, we plan to use the old kitchen garden as… well… a kitchen garden, since it’s right against the house, so it will eventually have a lot of herbs in it. As for strawberries, these are something we expected to interplant in various areas, as well has having dedicated beds of them.
How it started
Herbs
Last year, we started tried a few herbs, in pots and in the wattle weave bed. We had a single oregano seedling survive, some spearmint, a non-specific thyme variety and lemongrass in pots. In the wattle weave bed, we had chamomile and German Winter thyme.
This year, we started only oregano and German Winter thyme indoors.
None of the oregano germinated.
On removing the mulch in the spring, I had some hope that the thyme in the wattle weave bed had survived, but they did not. So that’s where the new thyme got transplanted.
The chamomile, however, had reseeded itself!
We also have mint in the chimney block retaining wall, which trace back to my late grandmother’s garden, plus chives in one corner of the retaining wall, that come back every year.
Strawberries
We had four strawberry plants in the asparagus bed. They should have spread their runners and expanded by now, but the deer kept eating them. They did, however, survive the winter, and started growing again as soon as the soil warmed up.
The real surprise were the tiny strawberries we grew from seed last and transplanted into the wattle weave bed. As they were planted near the outside edge of the bed, I had some doubt that they would survive the winter, even under the mulch. They not only survived, but they thrived!
This year, I did buy some bare root strawberries, and they got their own bed. You can see how that worked out in this video I made.
Thanks to those elm trees, what started out as a very productive squash hill (the first place we tried growing Crespo squash) was barely recoverable. I could only hope that those layers of cardboard would keep the capillary roots from spreading upwards.
The main thing, though, is that we had some new, everbearing strawberries planted that I hoped would do better here, than the ones by the asparagus did!
How it went
Not too bad, for the most part.
Herbs
The German Winter Thyme did well again, in the same spot we grew them last year. We had the Black Cherry tomatoes growing behind them, and filled in empty spots with Red Wethersfield onion around them. The cats rolled all over the onions, but didn’t roll on the bushier thyme.
The chamomile grew and bloomed, but there wasn’t as many as last year. The Red Wethersfield onion was also planted around them and got rolled on, but the chamomile survived the cats.
The mint did okay but actually had to fight off an invasive flower (possibly creeping bellflower, but we never let them grow big enough to confirm) that keeps trying to choke them out, even in the chimney blocks! Which is saying a lot, since mint us usually the invader. I was able to do limited weeding, but these are growing in from below and it’s pretty much impossible to get them out completely. Basically, I just had to weed them enough for the mint to be able to get bigger, then they could crowd out the weed.
The chives, on the other hand, were their usual enthusiastically growing selves.
Strawberries
I was surprised at how well the ones by the asparagus did. They’re a few years old and normally past their prime, but we did get a few ripe berries out of them.
Then the deer ate them.
Deer really seem to love strawberry leaves!
Even putting a makeshift fence around them was not enough to deter the deer.
*sigh*
The new Albion Everbearing strawberries did really well. They grew and spread runners, which I spread around and set the leaf clusters against the soil to root, so we could expand them to other areas in the future. I had thoughts to use them as a ground cover in our budding food forest, for example. They bloomed and developed berries, and we even had a few ripe ones to taste.
Then the deer got them.
I didn’t have a fence around the bed, but I did have poles with flashy pinwheels to startle them away, but it wasn’t enough. I put a net around the bed and they started to recover, only for a deer to actually tear through the netting and get at about half of them. I had a short length of chicken wire I could put around the side with the hole, but by that time, there just wasn’t much season left for them to recover in. There was new growth, though, so I’m hoping they survived.
*sigh*
The runaway success story, though, is the tiny variety of strawberries we grew from seed. Being in the old kitchen garden, the deer don’t get to them, I guess. Too close to the house? I don’t know. They got big and bushy, strong and healthy, and were very prolific! I was really impressed with how they did.
Conclusion and plans for next year
Herbs
I had visions of having fresh culinary herbs to use with our cooking as needed throughout the summer, and gathering blossoms and leaves for herbal teas.
The problem is, we keep forgetting we have herbs in the garden.
With the chamomile, I didn’t want to harvest any blossoms as there weren’t that many this year, and I wanted them to go to seed, instead.
I did remember to use the thyme a couple of times, but that was it. I didn’t even harvest any to dehydrate.
In past years, we gathered fresh mint leaves to make fresh mint tea, but just never got around to it this year. In past years, we used chive blossoms to make infused oils and vinegars, but that didn’t happen this year, and I ended up deadheading them so they wouldn’t spread seeds all over the grass outside the chimney blocks.
Basically, we had so many things happening this year, including lots of things breaking down, that we just didn’t have the spoons left to do this stuff this year. We also went from a very wet late spring to a very hot summer that made doing anything outdoors more difficult.
As for the strawberries, those wonderfully prolific little strawberries – I don’t know if they are a while strawberry, or an alpine variety – the seed kit didn’t name them – that did so well…
The berries themselves just aren’t that big a deal. We have native wild strawberries in the maple grove that manage to produce berries even while choked out by creeping bellflower, and those have an intense strawberry taste. They’re just really tiny. These ones are larger, but they don’t have that intense wild strawberry taste. If they’re not perfectly ripe, they’re actually rather bitter. For that brief time of perfect ripeness, they’re good, but not as good as, say, the Albion Everbearing strawberries.
So while they are a success, they are essentially taking up space that we can grow something more suitable for a kitchen garden.
Which means that, in the spring, I will try and find a good place to transplant them, where they can grow wild.
I might actually transplant the Albion Everbearing strawberries into the old kitchen garden, where they will have better protection from the deer! I really want to expand our strawberries, because we love them so much. The ones with the asparagus, I’m considering a lost cause at this point, but if we can keep the Albion everbearing ones going and spreading, that would be fantastic.
We currently have the larger rectangular bed in the old kitchen garden winter sown with the “greens” mix – spinach, chard, kohlrabi and tiny bok choi, and if the strawberries get transplanted, they will likely go into the long, narrow bed along the retaining wall. So that leaves most of the wattle weave bed (assuming the chamomile reseeds itself successfully again) and the tiny raised bed potentially for herbs.
I’ve picked up seeds for basil and fern leaf dill, though I have seeds for other dill and herbs as well. I don’t know that I will try growing thyme again this year, and oregano just doesn’t seem to want to germinate for us, so I think I will try different varieties this year. If the winter sown greens actually survive and grow, and we have things to harvest, I think we will be more likely to remember to harvest herbs, too.
We will definitely have to find ways to keep the cats off the garden beds, though. I’ll need to build a cover to fit over the larger rectangular bed. The wattle weave will probably get hoops and netting.
The problem with all these barriers to protect our garden from cats and wildlife is, it makes it hard to weed and water them, too!
Next year, however, the old kitchen garden will be a lot further along in being a kitchen garden, too, so that would be another step towards long term goals. It’s slow going, but we are managing to eek our way towards them!
For the next while, I’ll be going through my old posts and videos about our 2024 garden, looking at how things worked out, and use that information to decide what we will do in our 2025 garden.
As with so many other things in our garden this year, things did not go as planned or expected!
Tomatoes – how it started
This year, we were planning to cut down on how many tomatoes we were going to plant. I wanted a paste tomato for making sauces and, by request, we were going to have a few cherry type tomatoes for fresh eating. Two, maybe three, varieties.
For the cherry tomatoes, we had Chocolate Cherry and Black Cherry. For the paste tomato, I tried San Marzano this year, so see what the hype was all about.
Then we got free seeds with one of our orders, for Forme de Ceour tomatoes, a slicing tomato, so we had to try those!
Then there were the mystery compost ring tomatoes!
Oh, and a couple of mystery self seeded tomatoes. 😄
When starting them from seed indoors, I planted just a few seeds of of the cherry and slicing tomatoes, but a lot more of the paste tomatoes, with the expectation of processing and canning them.
The problem was, we had a very high germination rate, and I just can’t bear to toss away strong, healthy seedlings. Which means we ended up with considerably more transplants than intended.
And almost all of them survived transplanting!
How it went
Let’s start with
The Black Cherry tomatoes.
Those got transplanted into the wattle weave bed, along the back of the long side if the L shape. Each transplant had a protective collar round them, held in place with a pair of bamboo stakes that would later be used to support them as they grew.
The collars are something I will continue to do in the future. My husband goes through a lot of gallon jugs of distilled water for his CPAP humidifier, so we’ve got lots of them available. The tops and bottoms are removed, and they get placed over the transplant. This protects them from wind and, in the early parts of the season, from cold spring nights.
It also protected the transplants from rolling cats.
Bonus, the collars came it handy for spot watering. Fill the collars with water, and it slowly absorbed right at the base of the plants, rather than spreading across the garden bed.
The Black Cherry tomatoes – there were 7 of them – THRIVED!!! They got incredibly tall, growing up the stakes, then into the lilac branches above. They produced so many clusters of tomatoes, the branches couldn’t really hold the weight. We ended up having to find ways to add more support as they got bigger. It did take a long time for them to start ripening, though – again, due to our unfortunate spring weather.
We ended up with 9 or 10 transplants. They went into the larger rectangular bed in the old kitchen garden, near the wattle weave bed, with the garlic down the middle, and Red Wethersfield onions interplanted with them.
They, too, absolutely thrived! I’m sure it helped that the sump pump hose was set to drain against the base of the bed, at the high end of the garden. With so much rain this spring, the pump was going off many times a day until well into late summer. Which means this bed got watered from below, frequently, and with our soil drainage, they would never had gotten over watered.
They were also quite prolific, and were among the first to start giving us ripe tomatoes, which my family assures me were quite delicious. They got so heavy with tomatoes that the weight actually broke some of the stakes supporting them!
The Chocolate Cherry tomatoes
There were 7 of these that got transplanted into the chimney block planters at the chain link fence, leaving one empty block for the Goldy zucchini to be planted in.
They grew pretty well, but did not thrive, like the others did. They produces lots of tomatoes, but they were slow to ripen, and few ripened at a time. I now think the chimney block planters themselves may be part of the problem.
The San Marzano tomatoes.
While we started the most of these from seed, an unfortunate falling tray accident did quite a bit of damage.
With the spring weather and inability to work on the main garden beds, I ended up planting the largest and strongest plants into the retaining wall chimney blocks. These blocks have mint in alternative blocks, with chives at one end, so they went into the open alternating blocks.
These did not do well. The plants never got particularly strong or healthy, and they produced few tomatoes.
When a bed was finally ready in the main garden area, the last transplants – the weakest ones – finally got into the ground.
They did fantastic. Even the one that was so spindly, I debated just tossing it rather than transplanting it, recovered and thrive!
I was never able to keep up with pruning these ones, so the side branches soon splayed out in all directions, so the point I was sure they had crushed most of the onions growing in between them. We ended up winding jute twine around the stems until we could lift them up and tie them off to their bamboo supports.
They did not, however start to ripen until very late, and when they did, we never got a lot of them. As a determinate variety, they should have all ripened pretty much at the same time, but they did not.
The Mystery Tomatoes
When harvesting potatoes from the bed along the other section of chain link fence, I uncovered a volunteer tomato. I ended up transplanting it to one end of the bed, so I could harvest the potatoes. It grew quite well, considering how late in the season it showed up. It produce large amounts of small tomatoes. Small enough that I don’t think they were survivors from when we planted a Mosaic Mix of cherry and grape tomatoes, but too big to be the Spoon tomatoes we’ve grown there in another year.
None of them ripened before frost.
Then there were the compost ring tomatoes!
These were from the seeds we dumped into the compost after processing last year’s harvest. The plants got massive. Eventually, I could see some that I could recognize as most likely from the Indigo Blue we grew last year. Others were clearly Roma VF.
But then there were the round ones. We never grew red tomatoes like that. I have no idea where they came from!
How it Ended
So.
Many.
Tomatoes.
With first frost approaching, my daughter and I harvested all the green tomatoes in one evening, along with the last of the winter squash.
Two of those bins are almost all San Marzano. One has Forme de Ceour on the bottom. Two are all the cherry tomatoes, plus a few Forme de Ceour as well – and the last of the patty pans, which you can see beside the cat.
The real surprise was the compost ring.
The plants were so strong and dense, I had to cut them away to reach the tomatoes – and there were so many tomatoes hidden under the foliage! The foliage was so dense, the tomatoes were actually looking blanched.
This bin is just from the compost ring. In one corner, you can see the dark Indigo Blues (most likely). The rest would be the Roma VV.
Those round tomatoes, though, with one looking quite red. I have no idea what they are. We never grew tomatoes like this. We haven’t even bought tomatoes like this in the store!
It’s been months since they were harvested, and we still have a box with ripening tomatoes in it, in the kitchen.
My tomato Conclusion
This was a successful year for most of the tomatoes. As with everything else, they were about a month behind, but most were very prolific.
I don’t know that we’ll be growing tomatoes next year, though.
I don’t eat fresh tomatoes. They make me gag. I can eat them after they’ve been processes, as long as they are a sauce or a paste. My family likes fresh tomatoes.
They are getting sick of tomatoes! 😄
When we weren’t able to process them fast enough, we put whole tomatoes into the freezer to be processed later.
We still have some from last year.
The problem is, they end up buried in the freezer and we don’t get to them.
Hopefully, this winter, we can make a project of processing them, if only to free up space in the freezer!
If we do grow any tomatoes next year, they will likely be another cherry type tomato, and not many of them. Or, we will get more volunteers!
The Potatoes
We bought two new varieties of tomatoes for this year. We got a couple of 3 pound bags of German Butterball, a later season variety, and Purple Caribe, and earlier season variety.
We ended up planting a third variety.
But first, we had to amend soil, to try and increase the acidity.
Once the soil was amended, there were only enough Purple Caribe to plant in 2/3rds of the bed. We still had some Red Thumb fingerlings from last year left – they were looking pretty wizened and sprouty by then! I planted the largest, healthiest looking ones, and the rest went into the compost ring.
It was a while before we were able to plant the German Butterball variety, in one of the low raised beds in the East yard.
How it went
With the Purple Caribe not well at all. About half of them never grew. We had a few plants that we could harvest, leaving two late bloomers to grow as long as possible. There were very few potatoes to harvest.
They were good potatoes, though.
The Red Thumb did much better, which was a real surprise. We got a decent harvest out of them, considering how few were planted.
The German Butterballs were left in the ground for as long as I felt we could get away with. I’m quite happy with the harvest I got out of them, too. We didn’t plant enough to keep for the winter, but we do still have some left now. We’re saving the last of them to have with our Christmas dinner.
Potato Conclusion and thoughts for next year
We are still in the “finding what kind we like” phase with potatoes. I would definitely be okay recommending the German Butterball potatoes. I wish I knew what happened with the Purple Caribe potatoes. This is the second time we’ve tried to grow a caribe type. The first time, the area we planted in got flooded. We had flooding this spring, but where the Purple Caribe failed would not have been affected by it. The Red Thumb fingerlings were a pleasant surprise. These are good potatoes and, clearly, do well when kept and used as a see potato. The only problem is, as a fingerling potato, they are harder to clean and peel for cooking, and just take so much longer to prepare because of that. So while they are good, I think we will move away from fingerling types completely.
Next year, I do want to grow potatoes again. I have just not decided on a variety yet, and am not even sure where I would grow them at this point.
All in all, though, I would consider the potatoes as successful this year, and am happy with what we got.
For the next while, I’ll be going through my old posts and videos about our 2024 garden, looking at how things worked out, and use that information to decide what we will do in our 2025 garden.
These are some things that turned out pretty different from our plans. Especially the tomatoes!
I’ll start, however, with the alliums.
Garlic, onions and shallots – how it started
The garlic, of course, was planted in the fall. They went where I had the space prepared and available, which was the old kitchen garden. The long, narrow bed along the chimney block retaining wall was filled, as well as the tiny raised bed along the south side. The short section of the L shaped wattle weave bed was filled, and the last cloved were planted down the centre of the larger rectangular bed, which still had tomatoes growing in it.
With all of these, I tried to plant the cloves a fair distance away from the walls of the beds. In planting garlic in raised beds previously, most of them disappeared, while the ones planted in ground in the main garden area did really well. My conclusion is that the ones in the raised beds simply froze. Even though they were well mulched on top, there was nothing extra insulating them around the sides.
The onions and shallots were started early, indoors. The yellow bulb onions were a variety called Frontier, which was new to us, along with a new variety of shallots called Creme Brulee. For red onions, we were going to try Red Wethersfield again.
With the seedlings, the onions and shallots did well, though the Red Wethersfield onions had a rougher time of it. In the end, though, we did have quite a few seedlings to transplant.
How it went
Hit and miss.
As with everything else, the garlic was delayed. In fact, it was so long before they broke ground that I started to fear we’d lost them all. As the season progressed, however, they did very well, and we got to enjoy plenty of garlic scapes when they finally appeared!
For the onions, I try to interplant them with other things in hopes that they will deter deer and other critters from eating the things they are planted with, or in some cases, just to fill in gaps.
With fewer Red Wethersfield seedlings, I tried transplanting them among the tomatoes in the old kitchen garden, then spread the last of the seedlings in the wattle weave bed.
The yellow onions were interplanted with tomatoes in the main garden area, before the last of them went into one of the newly shifted beds, filling a little more than half of it.
For some reason, I got it in my head that the Red Wethersfield were interplanted with the sweet peppers in the high raised bed. Those were the shallots. The last few shallots went into the same bed as the last of the yellow onions. I planted them at the far end of the bed, with a space in between, so there would be no confusions over what was where, with the space in between getting direct sown with summer squash.
The unexpected surprise, however, was all the onions we found while shifting and cleaning up various beds.
While reworking the long bed at the chain link fence, I found a number of onions that survived the winter. Those got transplanted to one of the low raised beds in the East yard.
As we were weeding and eventually shifting the beds in the main garden area, we ended up finding a lot of Red Wethersfield onions we’d planted the previous year, around the Roma VF tomatoes, that just disappeared. We assumed they all died.
In weeding and shifting the other beds, more surviving onions were found, and even a couple of shallots. All of these got transplanted into the newest low raised bed, where most of the Summer of Melons were transplanted. As onions are biannual, I was very excited by this, as it meant they would be going to seed, which we could collect for next year, instead of buying more.
All of these transplanted onions took and most of them did very well. We found ourselves with many onions blooming.
How the harvest went
More hit and miss!
With the onions that were allowed to go to seed, we found ourselves with many, many flower clusters. They bloomed and bloomed and bloomed!
They bloomed for so long, I wasn’t sure we’d get any finishing their cycle so we could have seed to collect! I did end up being able to collect quite a few flower clusters that had dried on their stems and set them to continue drying out in the cat free zone. I collected the last of them, some of which were still rather green, and set them to dry in the cat free zone, after we had our first frost, which onions can handle.
Every flower in those seeds heads have three seeds in them.
We got quite a lot of seeds, just from the first batch harvested. The second batch took longer to dry out, but they eventually did, and I was able to separate out the seeds. Which meant I have seeds from yellow bulb onions from previous years (Oneida, I believe), Red Wethersfield onions, plus some shallots from previous years (I can’t remember the names of the varieties we tried before, just now), all mixed together!
The Red Wethersfield onions we planted this year, though, were a complete loss.
The cats killed them.
The yard cats just love the garden beds in the old kitchen. They loved to go in between the tomatoes in the larger rectangular bed and just chill, or they would roll around luxuriously – all over the onions! Even when I tried sticking plastic forks into the soil beside them, hoping the tines would deter the cats, they just squeezed in between them and rolled around, anyhow. When I finally cleaned up that bed at the end of the season, I did find a few tiny survivors, though. I saved them, and they can be transplanted in the spring.
The yellow bulb onions and the shallots that shared the bed with them also had cat issues! They actually grew quite well, and we did get a couple of decent sized bulbs out of them. Those where the ones that didn’t get rolled on by cats! At least, not right away. We simply could not keep the cats off that bed, and they really, really liked to lie on the onions or roll in the soil. They didn’t kill the onions, but broke the stems, which meant the bulbs could not grow any bigger.
The shallots had cats rolling on them, too, but they had the extra problem of fighting for resources. While I tried to remove as many of the elm roots that invaded the soil, it doesn’t take them long to grow back, and they send their capillary roots up into the softer, moister soil. They will even force their way through the bottoms of grow bags, as we discovered last year.
The yellow onions that were interplanted with the tomatoes fared better, even though the tomato plants ended up completely overshadowing them. More on that when I talk about how the tomatoes did, in another post.
Still, we managed to get a decent harvest, which was cured and braided, and we now have plenty in the root cellar.
The real success, though, where the shallots that were planted with the peppers. I did not really expect to have a good harvest from them, but when I started reaching around the pepper plants to pull them, I found a lot of nice, big shallots!
These, too, we left to cure, then braided, and are now in the cat free zone, where we can access them more easily to use in our cooking.
Oh, and then there was the garlic.
Usually, they would have been ready to harvest in June or maybe July.
They weren’t ready to harvest until the fall!
We did have really good bulbs, though. Not the biggest, perhaps, but certainly not small. In fact, there were enough good sized bulbs to make them worth planting!
Conclusion, and plans for next year.
Things are going to be pretty different, next year!
One thing will stay the same, and that is the garlic. Those are already planted in the bed where most of the yellow onions were. After spacing them out, I changed my mind and started them at the north end of the bed, where the shallots were, instead of the south. The south end of the bed gets shade for longer periods of the day, because of the trees closer to the house. Starting from the north end means the soil will warm up faster, in the spring.
I was really, really happy with how the shallots turned out this year. We’ve struggled to grow shallots every year, but this year they did fantastic in the high raised bed, in between the sweet peppers. As for the red and yellow onions, it was disappointing that the cats did so much damage – especially for the Red Wethersfield onions. At least we got a harvest with the yellow onions!
BUT…
We have seeds.
Lots of seeds.
This year, we are trying the winter direct sowing. I ended up making a couple of different mixes of seeds, and included onion seeds in the shakers. In the last bed that got winter sown, it got shallot seeds added in, too. So we now have several beds already sown with onions and shallots. Being cold hardy plants, they should start germinating before the other seeds in the mixes do which, hopefully, will go a long way in keeping critters away when the other seeds start to sprout.
If they sprout.
We’ll find out in the spring!
There are still plenty of seeds left, so we have the option of starting some indoors as well, if we want, but I don’t think so. We do want to keep growing onions and shallots, and if the winter sown seeds don’t survive, not starting any indoors means none to be had at all. Their growing season is just too long. I will take that change this year, though.
Onion seeds are only good for about a year. I might end up giving the rest of the seeds away or something, so they don’t go to waste.
Once onions go to seed in their second year, however, they go to seed every year.
In getting the bed ready to plant the garlic, however, I found more onions and shallots that got missed. The bed that had onions interplanted with tomatoes now has summer squash winter sown in it, and I found more missed onions while preparing that bed, too.
The Summer of Melon’s bed that had the transplanted onions in it got half-prepped for the winter. Just the side that had the onions and bush beans. (The other half will wait until spring)
All of the onions that were in there, plus the others I found in preparing other beds, were replanted in the cleaned up half of the bed. I was even able to separate them out by colour, and found myself with half the bed now planted with Red Wethersfield, and the other half with yellow onions, plus a few shallots in the very middle, as a divider.
We should have plenty more onions going to seed for us next year, too!
In the end, for all the issues we had, I would say this was one of the best years for garlic, onions and shallots we’ve had yet.
I hold out home that, with the winter sowing, next year will be even better.
For the next while, I’ll be going through my old posts and videos about our 2024 garden, looking at how things worked out, and use that information to decide what we will do in our 2025 garden.
I first looked over our plans for perennials, our food forest and the fall garlic, which had already been planted by then.
The garlic hasn’t really changed. We’ve got next year’s garlic already planted – this time using garlic we harvested, rather than buying more.
The crocuses… that was an experiment that I’ll talk about more, later.
For fruit and berry trees, we just didn’t have the budget to buy more, but we did at least get the two Trader mulberry saplings transplanted. Of the other things we hoped to be able to do, getting everbearing strawberries were the only thing we managed.
For root vegetables and tubers, we did have the potatoes, which turned out different than planned. While we intended to skip things like beets, radishes and turnips this year, I had intended to plant a lot of carrots. Instead, we planted very few, simply because we never got the space to plant more.
The plans for onions and shallots were hit and miss, but we did get them in, with some bonus onions that I will talk about later.
We intended to scale back on tomatoes, but ended up with way more than planned! There were some distinct differences among them that I will have to note for the future.
With corn, peas and beans, that changed a lot. I had intended to plant many different varieties of beans, including shelling beans, but that just didn’t happen. Among the ones that did get planted, much went wrong. It was similar with the peas. As for the corn, we did plant one short season variety that actually did pretty well, under the circumstances. There are things I would want to change with growing corn that way, though, and while I’d like to plant another short season variety next year, we’ve already jumped the gun in other areas – more on that when I write about our winter sowing!
With peppers, herbs and greens, that was all over the place. We ended up planting more peppers than intended, and they did quite well, even if they were behind in maturity, like just about everything else was this year. We ended up planting very few herbs and had issues with the greens.
It was our melons and winter squash that really changed how our garden went this year, as we ended up with so many! Way more than expected, even though we ended up not planting some varieties at all. The summer squash, however, was a very different story. We did try a couple of gourds. One of my regular experiments that our spring weather did not give a chance to succeed.
We did manage two types of eggplant, with moderate success. We wanted to try salsify, sunflowers and possibly cucumbers for fresh eating, not pickling, but that didn’t pan out.
So many other garden related things ended up not happening. More raised beds, rebuilding the garden tap, starting a new garden shed build… none of that happened.
I’d hoped to start reclaiming garden beds in the main garden area from the previous year and continuing on the trellis tunnel builds. Instead, a priority was put on shifting the existing beds to what will be their permanent positions. That gave us longer, narrower beds, as they await the logs we need to harvest to frame them. We still managed to fit quite a bit into them, and the narrowing of these low raised beds made them easier for me to reach into.
All in all, this turned out to be a very different year than expected, with spring weather playing a major part in slowing down growth. Every year, we learn a little bit more about what we need to do to better protect our garden from the elements, with even the low raised beds turning out to be a major element that saved our garden.
And so, to start, here is our spring garden tour video for 2024, taken on what turned out to be a rather cold day!
I hope you enjoy this series of garden posts. Do feel free to leave feedback in the comments, too!
While winding down for the night, I’ve been watching some videos, including this new one from MI Gardener; a resource I have recommended before.
This is an interesting video, since I fairly regularly see these concrete blocks being recommended to make raised beds. He lists the reasons he believes they should not be used.
I found it really interesting, and wanted to talk about some of them.
One of the first things he brought up was the weight. The ones he uses in the video are 8″x8″x16″ This is the size of most of the blocks we’ve been finding all over the place, though I think I’ve found some that are 10″x8″x16″
He also adds that they are cheap, and says they cost about $2 each.
So, of course, I had to look it up!
It turns out, one of these concrete blocks weighs about 30-35 pounds. The ones he’s using has flat ends. Some have shaped ends, and from what I found on the Canadian Home Depot page, they weight 42 pounds (19kg). The 10″ ones weigh 45 pounds (20.4kg).
I’d never really thought about how much they weighed. I found them heavy to carry around, but not that bad, really.
As for being cheap, interestingly, the 8″ ones are listed as just under $5 each – and are more expensive than the 10″ ones, which are just over $4 each. The last time I looked at their prices, at an actual store, not online, was a few years ago, and one 8″ block was priced at over $8 each, which shocked me. This was before inflation went nuts, too. Very odd.
This got me wondering, since we are using concrete chimney blocks as planters. So I had to look those up, too. I found plenty of links, but not one of them included a price. The closest I could find was an old image with a price on it, but the link was no longer active. Other than that, I found some on FB Marketplace were someone lists a whole bunch of things, not just chimney blocks, with a $4 each price listed. I don’t think that price was the same for all the wide variety of items listed, so I still don’t know how much they sell for here.
The chimney blocks we have are the standard square size of 16.75″x16.75″x7.62″
That measurement is so odd, I thought it would make more sense in metric, but not really. That works out to 42.5cmx42.5cmx19.35cm
What caught my attention was the weight.
Each one of those chimney blocks weighs 68 pounds (30.8kg)
So… I was lugging almost 70 pound blocks around the yard when I built the retaining wall and the chain link fence planters.
Okay, so weight was one of his reasons not to use them, but the other was height. They’re only 8″ high (slightly higher than our chimney blocks), making only 8″ of growing space.
I found that curious. His sample concrete block raised bed is on top of soil. Granted, it looks like the area was just leveled and has been driven over, so it might be compacted, but it’s still open soil, not a concrete pad or something. Any plants could send it’s roots lower. We have maybe 8″ of top soil – 10″ in a really good spot – before we hit gravel, clay and rocks. An 8″ high bed gives us about 16″ of growing space. We have been using modified hügelkultur, so the first couple of years would have sticks and branches at the bottom, so we don’t plant root vegetables in them right away.
I would find 8″ too low for accessibility reasons, and when I see people doing raised beds with concrete blocks, they are often two, three or even four blocks high. He talks about adding a second level, and demonstrates how easily the block spins around, since the base row is not perfectly level. He mentioned that people have suggested rebar to hold them in place.
I agree with him on the rebar. It seems almost counterproductive.
I’d just use concrete glue. AKA construction adhesive. It’s really cheap, one tube goes a long way, and can be applied using a caulking gun. Granted, that makes it permanent, but most raised beds don’t get moved around once they’re built, anyhow.
He makes a point about breakage being a problem, but not in the way he talks about. Where we are, we have temperature extremes. Pretty much all the concrete blocks we’ve been finding have been outdoors. Most of the chimney blocks we’ve used were stored outdoors since my parents bought this farm in 1964. Yeah, they have dings and chips, but they are still sound. The only blocks we’ve had actually crack and split where the two we put into the fire pit to hold old oven racks over the coals to cook on. It was exposure to high heat that lead to them cracking, not outdoor temperature fluctuations.
He mentioned that concrete is very porous, and that the edges of beds would need extra watering. True enough, though with our chimney blocks, there isn’t any centre space that would hold water longer than the edges. We still watered them as often as the other beds. We just have them more water. It’s been a few winters now for the retaining wall blocks long the old kitchen garden, and not one of them has cracked due to water absorption and the fresh thaw cycle. I’m not saying it can’t or won’t happen. Just that is hasn’t happened to us.
He then mentions that concrete absorbs a lot of heat. More so than even metal raised beds.
That may indeed be a problem in a lot of places.
Where we are, that’s a selling point! Even in the heat of our summers, it just makes them better for heat loving plants that might normally not grow well here.
There is another element to using concrete blocks he doesn’t mention, and that is the effect on soil pH. I’d read before that concrete can help lower the pH, which would be great for our alkaline soil.
As I was looking it up just now, though, I found one article that said concrete can lower the pH, but that was it. Other articles, however, said that concrete will increase the pH.
Which is the last thing we need!
Given the smallish growing space inside our chimney block planters, it wouldn’t take much to affect the pH in the soil there. Granted, I did amend the soil with sulphur this past year, as well as with peat, but with our pH already at 8 or higher, it’s going to take a long time to adjust the pH even slightly lower. Getting it to be slightly acidic, which most of the things we want to grow do better in, will take years. Looking up what vegetables grow well in alkaline soil, the list is pretty long, but most of them have an upper limit of 7.5. If we can get our soil at least down to that, it would be good, but it is harder to lower the pH than it is to increase it.
Well, the mint I transplanted into some of the retaining wall blocks seems to be handling the high pH quite well, as are the chives. Our biggest issue, however, is roots growing in from below. With the blocks at the chain link fence, it’s the nearby elms that took over the soil in the blocks. In the retaining wall, it’s some sort of invasive flower we haven’t been able to get rid of. It’s almost killing off the mint, in some blocks!
So when it comes down to it, whether using concrete blocks for raised beds is a good idea or not really depends on a lot of things. Stuff he saw as negatives, are positives for us, or non-issues.
Would I use concrete blocks for a raised bed?
Probably not.
We’ve got all those dead spruce trees that need to be cut down that can be used. For other raised beds, I’m liking the wattle weave idea and want to build more, though it’s surprisingly hard to gather enough suitable branches to use for the weaving. If we did happen to have enough concrete blocks to make raised beds, there are other things I’d much prefer to use them for.
When it comes to gardening, it is such an individual thing. We all just have to figure out what will work for our own gardens in our own regional area and microclimate, and use what materials we have access to.
Hearing what works or doesn’t work for others and why can still be a huge help. Which is why I like videos like this one. Not only did I find what he had to say very interesting, it got me checking things out and looking things up to learn more.
And now I know how much those chimney blocks weigh, too!
Today’s weather was pleasant enough that I was able to work on the low raised bed that will, eventually, be a trellis bed.
This is the bed that had the Summer of Melons mix along one side, onions that we found in other beds and transplanted for their seeds, and a few bush beans, on the other side.
Where the melons were did not need much done. The melon transplants were mulched with layers of cardboard, tree bark and grass clippings. Not much got through there, so all I did was pull the vines loose and spread them out on top of the mulch.
Where the onions were planted, however, was a different issue. There was quite a bit of grass growing among them – both crab grass and lawn grass! – along with the usual dandelions and other weeds.
I decided I would pull up the onions so I could weed more thoroughly, then transplant them back again.
In the first photo, I’d already started pulling up/digging out the first onions I’d found. Along the way, I found some of the seed stalks, and those got set on top of the melon vines. I even found a couple of seed heads that got missed.
Interestingly, there were even fresh, new onions starting to grow! Onions sure are hardy!
Once I pulled all the onions I could find (of course, I found others I’d missed, later on), I sorted them between red and yellow bulbs. The red would have been the Red Wethersfield onions that seemed to die off entirely last year, only for us to find them starting to grow again, when we prepared the bed this spring! The yellow are probably Oneida onions, and I think there may even have been a couple of shallots in there, too.
The seeds we collected are all mixed together, which means we’ll be getting both red and yellow onions growing in the winter sown beds.
The south end of the bed was the worst for grass and weeds. That was also where I transplanted a flower that might be a salsify. I was very curious to see what the root was like, as salsify is supposed to have a long tap root that tastes a bit like seafood. We got seeds specifically for that, which we never got to planting, but the seed company images only showed the roots, not the flowers.
Well, whatever this flower was – and it may well be a different variety of salsify – it didn’t have the long tap root at all. In fact, it had very shallow roots.
Curious.
I used a hand cultivator to weed most of the bed, stopping before I got to the end where I’d piled up the onion bulbs. Then I got out the garden fork and worked over things again, finding plenty more roots to pull out, while loosening the soil. All the grass clipping mulch was added to the melon vines on the other side.
When I got close to the other end, I paused to plant all the red bulbs, starting at the south end, in a double row. Some of the bulbs had divided into twos or threes, and those got split up for planting. These reached to about the middle of the bed.
Next, I moved the yellow bulbs aside, cleared the grass clipping mulch off the corner, and finished weeding and loosening the soil.
I uncovered a frog!
The poor thing was trying to hibernate in the soil. It barely moved when I so rudely uncovered it, and then just stayed there. I worked the soil at the end of the bed some more, dug a shallow hole for the frog where I knew I would not be planting the onions, then very gently set the frog in place and covered it with loosely with soil again.
Once the north end of the bed was ready, the yellow bulbs got planted in another double row, working my way to the middle – and there was just enough to reach the other onions! I marked the divide with a piece of broken bamboo stake.
This is way more seed onions than we will ever need, but that’s okay. These are being planted as protectors. Next spring, we might interplant around them; maybe with some greens or bush beans, or something like that. Whatever we plant, the onions should help protect them from the deer.
Once the onions were all transplanted, I raked up some leaves to mulch them for the winter, then raked the path around the bed clear. It’s not a priority for this fall, but eventually the path will be covered with cardboard, then a layer of wood chips.
Once that was done, I went into the overgrown area nearby to find the poplars I’d debarked to be used as vertical supports for the trellis and set them across the bed. They’re not the straightest, and need to have their branch nubs cut away, but … it’ll be rustic. Yeah. That’s it! Rustic. 😄
I’ve got eight of them that are debarked. They were to be lined up in pairs along two raised beds for the future trellis tunnel, but the other bed has yet to be constructed. If I use four on this bed, that means one at each end, two along the side, and they’ll all be six feet apart.
I think that might be too far apart.
If I add one more, that would have the posts at about four and a half feet apart. I think that will work out better. It’ll be easier to find straight (ish) horizontal cross pieces for that length, and the whole thing should be stronger This is expected to someday hold the weight of things like winter squash, so I don’t want to skimp on sturdiness.
Getting those up is not the priority right now, though. Before I work on that, I want to finish assembling the log frame around the low raised bed we put together this spring, and get that weeded. With the peas and beans on trellised on each side of that bed, I wasn’t able to weed around the winter squash, so it got very overgrown!
The next priority is clearing away the fallen spruce tree and the crab apple tree it fell on. That will require the chainsaw, though, which means waiting for a dry day. From the current forecast, that looks like the next two days, and then we get rain again for another two days. After that, I think it’ll just be too cold.
Which means the next two days is probably the last chance we’ll get to do some of the outside stuff. That will include moving the giant hose my brother lent us to use to divert the septic away from the house, if we had needed to, into the barn and covering the septic tank for the winter. I was still hoping to hose off the insulated tarp again, but it’s still damp. It would have been good if we could hang it on the clothes line, but it’s just too big and too heavy for that. Ah, well. It’ll still do the job. Technically, the tank doesn’t actually need to be covered, given how deep it’s buried, but I’d rather be safe than sorry! We’ve had another septic problems without potentially adding more.
At least now we don’t have to worry about the leak at the expeller anymore! My brother has also expressed great relief that it is finally done.
We’re managing to get quite a few things done this year, that will make next year easier!
Including planting one more garden bed with seed onions. 😊😊