Our 2023 garden: spinach, beets and radishes

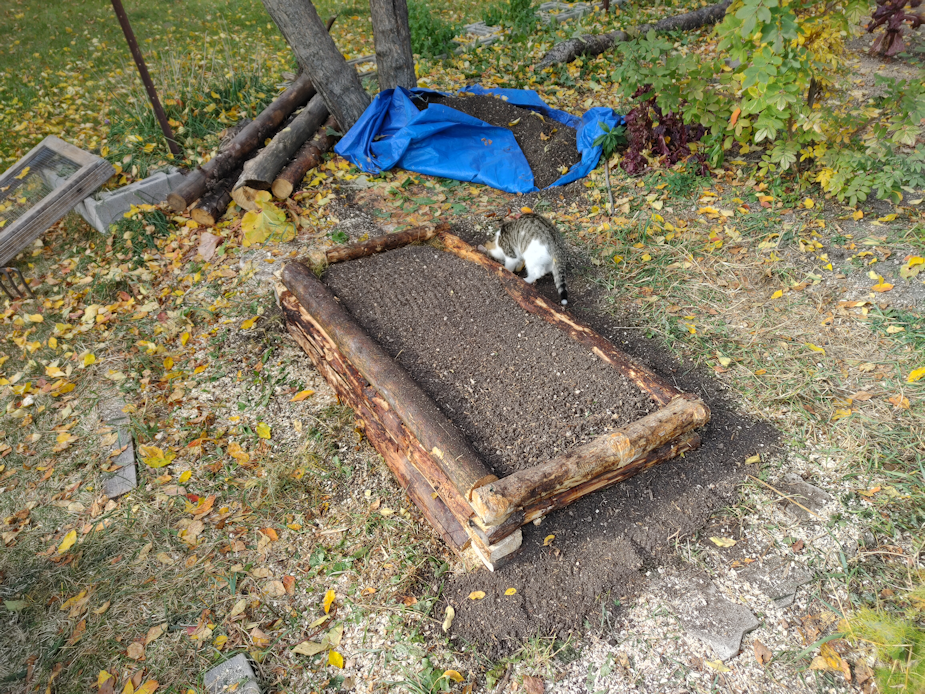
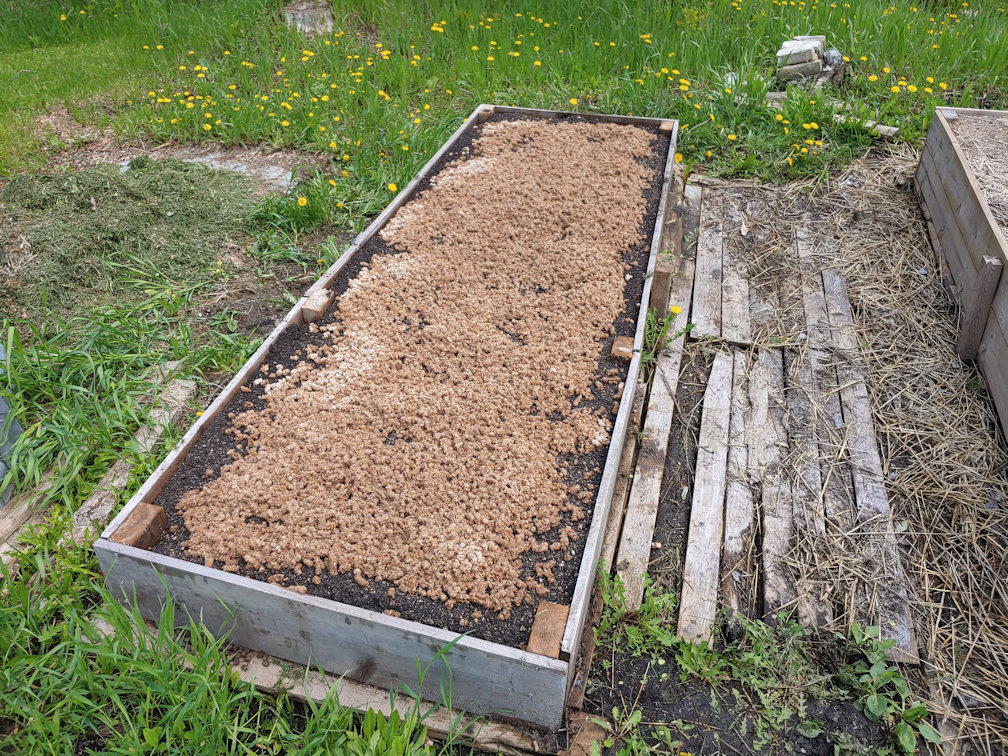
I finished preparing the bed we harvested the garlic from, and sowed for a fall harvest.

I chose Cherry Belle radishes and Bresko beets. I wasn’t sure how many seeds I had left, so I brought two different varieties of spinach. I was able to sow the Lakeside variety, which is what we planted in the spring. I was so impressed with how they didn’t go bitter, even when they started to bolt, I definitely wanted to sow those again.

I used the boards I’d brought out to shelter the tomatoes from the wind in the spring and laid them out around the edges, where weeds are such a problem, as well as across the middle to divide the bed into three sections. I ended up adding a couple more boards at the ends, too. Aside from hopefully keeping the crab grass at bay and dividing the bed, they also give me something to step on while tending the middle rows.

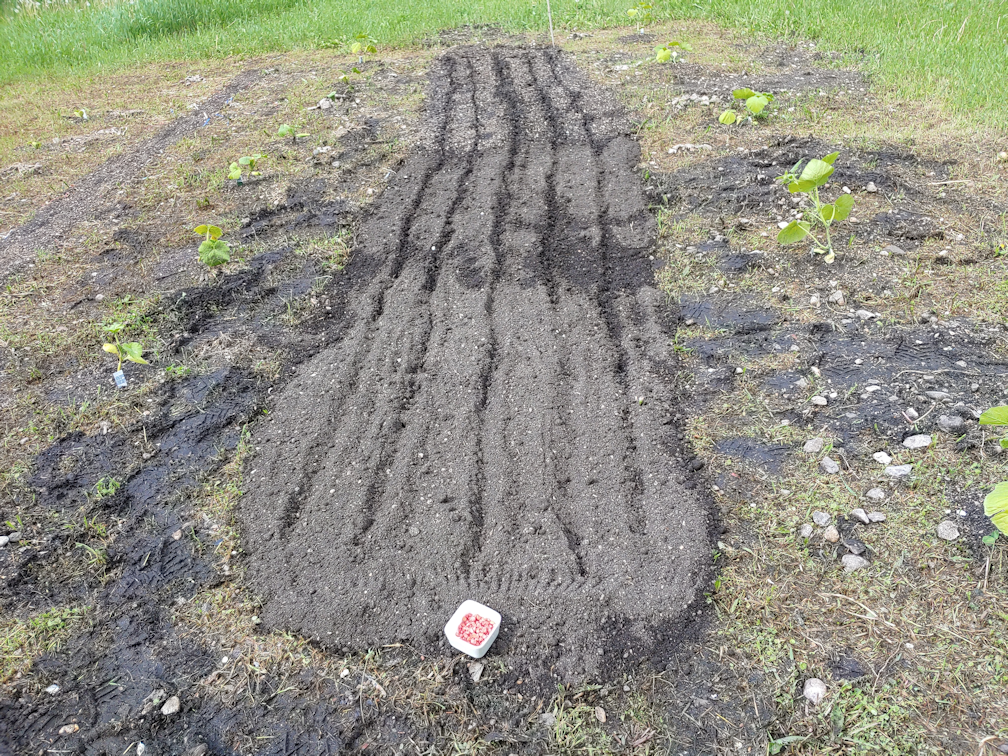
The first thing I did was give the entire bed a watering, using the cone setting on my sprayer for more even coverage. Then I used a hoe to trench out three rows in each section. Those got a watering on the jet setting, because I wanted to drive the water deep. Even though I’d already watered the bed, the moisture didn’t get very far, and the trenches were quite dry. The water also leveled out the soil in the trenches, so they weren’t so deep.

Next, I used grass clippings to mulch along the boards and in between the rows. Once the mulch was down, I used a broken piece of bamboo stake to make the rows the seeds would be planted in.

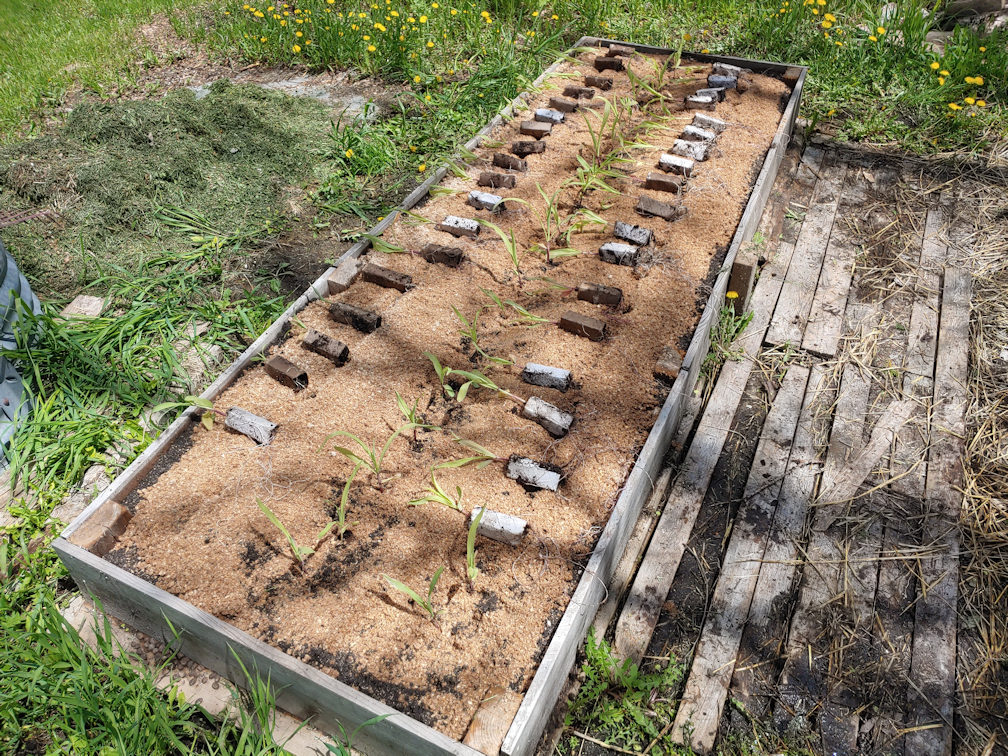
I picked up a seeder at Dollar Tree, and this is the first time I used it. It worked rather well. In the photo are the beet seeds, which were easiest. The rounder radish and spinach seeds did sometimes get a bit out of control, though! 😄

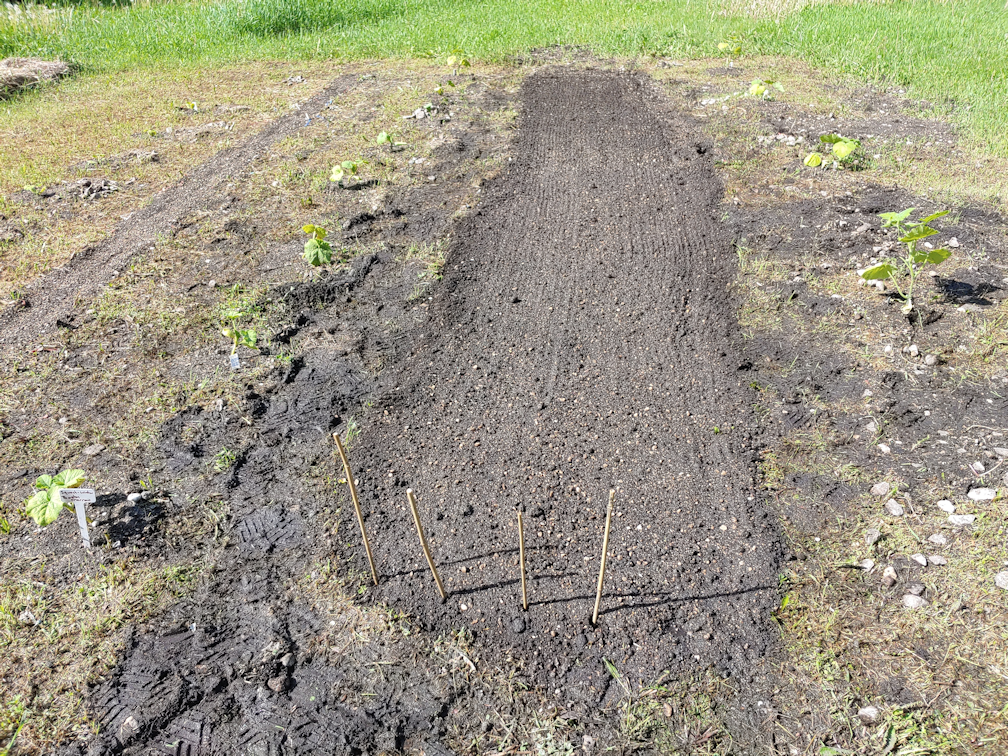
The beets went into the middle sections, the spinach at the end closer to the house, and the radishes at the far end.

Once the seeds were in and lightly covered, I used the flat setting on the hose to water each row and settle the soil further around the seeds. The grass clippings were toasted dry in the sun, so I used the cone and shower settings to soak the mulch. Last of all, I used the jet setting to clean the loose grass clippings off the boards.

What I will probably do later is put some kind of cover over the whole thing. I think we have some mosquito netting long enough for it. I mostly want to keep the insects from eating the greens. Last year, the radishes seemed particularly vulnerable. As they get bigger, they will definitely be tempted for the deer, too!

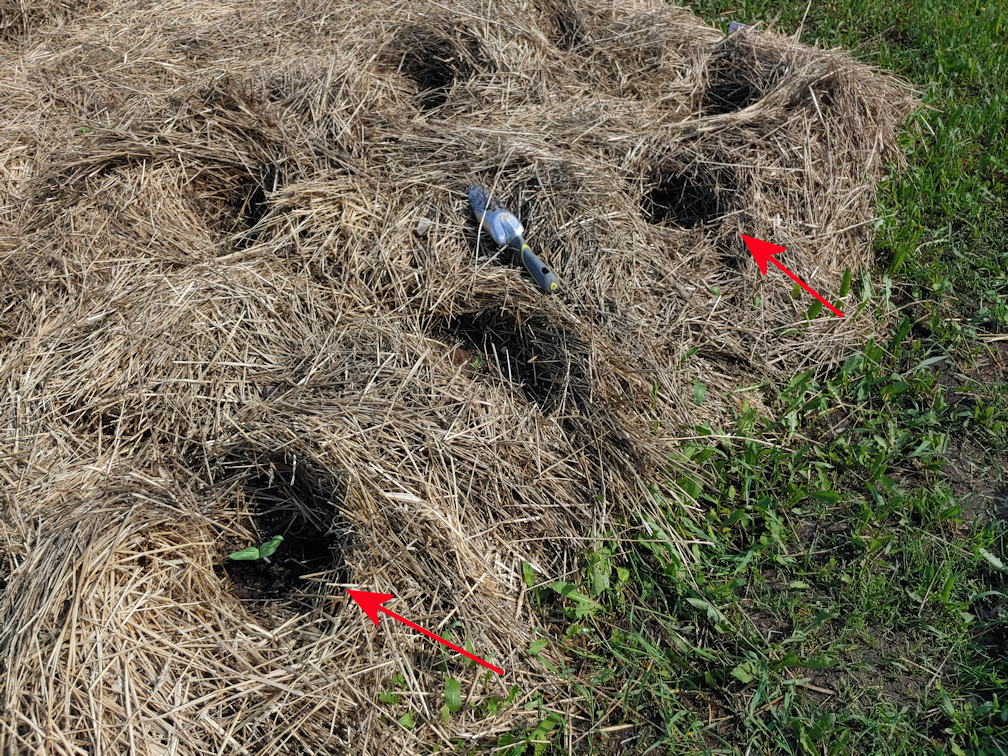
We were at 26C/79F while I was out there. Another reason to make sure the bed got extra watering! The two northernmost rows of squash were wilting in the heat again, so I’ve got the sprinkler going on those. Squash need a lot of water, anyhow! I had been concerned that the two southern rows would have trouble because they get so much more shade, while the two northern rows basically get zero shade from sunrise to sunset. With this year’s heat, that shade it turning out to be helpful! Last year, with the flooding, it was the other way around. The squash that were in full sun strove mightily to recover from the flooding, while those in shade basically had no chance at all.

For the next week to ten days, we’re going to see increased heat. Depending on which app I look at, we’ll either have no rain at all, have several days or rain, or several days of thunderstorms! It’s awfully hard to plan things with such conflicting information!

The Re-Farmer

Some progress outside

I didn’t get back to the trench with anything to cut the roots, yet. I wanted to wash away as much of the soil as I could. First, to uncover the roots to better see them, but also to get a better look at the pipe itself.

I just don’t know what to make of this!

There are sections of the wider pipe, all along the main pipe (I agree with 53old; it looks like irrigation pipe). Once I get the roots cut away, I will take off one of the couplings I put on in my attempt to repair the pipe, and I should be able to take this length of the pipe out, all the way to the tap. Then I’ll be able to take a good look at what is under those wider sections of pipe.

The only thing is, I have yet to find the end of the pipe. I’ve been digging around at the bottom of the tap but keep hitting roots and rocks, and that end of the pipe is quite a bit lower than the rest of it. My brother will be here tomorrow morning, and I hope he’ll have time to see this!

I also managed to get the bed the garlic was harvested from almost completely ready for planting.

The first photo in the series is the “before” picture.

After clearing away the grass clipping mulch, you can see that there is a fair bit of weeding to do, mostly along the edge. That crab grass comes up from under the log border. I broke up the entire bed to weed it, and was finding plenty of rhizomes making their way into the middle! Then I added a bag of manure to work into the soil.

Because the edges are where the most trouble is for weeds, once the manure was worked in, I raked the soil away from the log edges and into the middle. Then I took some of the grass clipping mulch and packed a thick layer tight against the logs. They won’t be enough to choke out the weeds, but they will at least make it harder for them to get through. Plus, it’ll make sure we don’t accidentally plant too close to the edge.

Last of all, I raked the soil back towards the grass clippings and leveled it off a bit. There are a lot of hard clumps, though, so I’ll have to come back to it with the cultivator tool and break those up. Once that is done, it’ll be ready for planting.

What we’ll most likely do is plant in three blocks, square food gardening style, with the beets in the middle. The radishes are a fast crop, so having them near an end makes sense. The spinach is a cut and come again crop, so having them near and end also makes sense. While the beet greens can be eaten, we’ve don’t tend to eat them a lot, their roots will take the longest to reach a harvestable size. We will likely harvest them all at once at the end of the year, so they can stay in the harder to reach middle zone.

Once these beds get converted to high raised beds, reach won’t be as much of a problem. The lower the bed, the harder it is to reach the middle of it. If you’re short like me and thinking of growing in low raised beds, I would recommend not going more than 3 feet wide for that reason. Ours are 4 feet wide, which is great for a high bed, but gets pretty painful on a low one! Even the box beds, two of which are about a foot high, it’s still uncomfortable to reach into the middle and actually do anything of substance.

That’s where we’re at now! Once the bed prep is finished, we just have to choose which varieties we will be planting. 😊

The Re-Farmer

Our 2023 garden: Irish Cobbler potatoes planted

The girls and I are still trying to figure out the best place to set up grow bags for the potatoes, where they would get full sun, but also be closer to the house for watering. We don’t have a lot of the old feed bags left to use as grow bags, so we decided to use one of the Old Kitchen Garden beds that was recently fixed up.

The bed still needed topping up, so I started by adding some of the sheep manure I recently purchased. I didn’t add a lot, as this bed was filled with purchased garden soil, and it should still be pretty rich in nutrients. What’s missing is organic matter. This is a blend of compost and composted manure, so that will help a bit. This got worked in with a rake.

Also… do you see that bit of green poking out of the wattle weave bed?

It’s a stray onion!

I have no idea where that onion came from. This bed had never had onions planted in it.

I’m not going to complain, though!

Next, it was time to raid the garden soil pile and do some soil sifting.

Three wheelbarrow loads of the garden soil was brought over. The weeds are already starting to grow under the cover on that pile!

Some of the Irish Cobbler seed potatoes were very small, so to fit them all in the bed, I put some of the smaller ones together. Then they got buried as deep as I could, so they don’t need to be hilled.

As this area slopes away from the house, the far end of the bed is somewhat deeper than the end closer to the house, to level it off. Still, with this bed being newly rebuilt, and the layers of organic matter below, the top layer of soil still isn’t very deep.

Once the potatoes were planted, I scattered some stove pellets over the top, then began watering. Once the pellets had expanded into sawdust, I used a rake to spread it out evenly. This is not at all for the potatoes, but to protect the soil and help reduce soil compaction. Over time, we will continue to add grass clippings and wood chips as mulch. The potatoes will easily be able to grow through a mulch. With this bed being higher now, and not using straw for a mulch, hopefully, that will reduce the slug problems!

After spreading out the sawdust, I gave it a deep watering, and plan to water it again a couple more times, today. I want the water to go through all those bottom layers that were added, which will speed up their anaerobic breakdown, while also acting as a sponge to retain moisture. Once those bottom layers are good and moist, this bed should not need much watering at all.

Now comes the hard part.

Keeping the cats from digging in the bed!

The Re-Farmer

Our 2023 Garden: planting carrots! (video)

Okay, this is a first. Planting something in April!

We had a bed prepared and covered with plastic over hoops for the soil to warm up more, so that is where I started. All of the carrot seed tape we made fit into the bed, with even a bit of room to spare. After that, another bed was finally prepared and covered with more plastic, and in a couple of days, it will get spinach planted in it.

I tried an experiment this time, setting up an old phone to take a time lapse video of both jobs.

Plus some random cat appearances.

The time lapse made for a short video. I hope you enjoy it!

The Re-Farmer

Our 2023 garden: early outdoor prep, and making seed tape

Yesterday, we made some seed tape, and – best of all! – were able to do some outdoor garden prep. While the main garden area is still buried in snow, the south yard’s garden beds are almost completely clear of snow, and even thawing out a bit.

Here is our progress, so far.

Hope you like it!

The Re-Farmer

Progress on the old kitchen garden bed and water bowl shelter

To continue working on the low raised bed in the old kitchen garden, I couldn’t use the mini chainsaw any more – the batteries just don’t last long enough for a job like this.

It was time to break out the electric chain saw. It’s very handy. The only problem is that I was moving around so much to reach the corners, the extension cord was in the way.

It still made the job much easier and faster. There was one log that was so bumpy, I spent more time trying to smooth it out than all the rest of the work put together!

You can see in the background that the kittens had been playing in the soil on the tarp, spreading it out quite a bit!

The whole thing wasn’t very stable, though. Something needed to be done to stabilize it, so it wouldn’t fall apart when the soil was added.

I decided to sacrifice some of the plastic coated metal stakes that I’d used to hold hoops supporting netting over the spinach bed.

I used an auger bit to drill holes into each corner of the bed, then hammered in a length. A couple had to have excess length broken off, but I think the other two actually went all the way through and into the ground below.

This made the whole thing quite sturdy. Now I could start filling.

On top of the wood chips I’d added earlier, I added some of the contents of our compost pile. Vegetation, apple pieces from straining the apple cider vinegar, coffee grounds, and even a few eggshells went in.

Next was a layer of dry grass clippings. One of the logs at the end had a fair bit of space under it, so I stuffed it with some grass clippings, too. Then it all got a thorough soaking before the soil was returned.

Once the bed was full, soil was added around three side of it, to fill in the gaps left from digging out a larger hole than the bed itself.

Which, of course, a kitten promptly tried to use as a litter box!

Finally, some grass clippings were added to mulch the top, and it got another thorough watering. I was also able to clear off the stepping stones at each end.

This bed is now done, and ready for planting next year.

My next job will be to try and weed along the whole side of this garden, before we start figuring out the low wall we want to edge it with (my daughter wants to use rocks – we have lots of those!) and top it up with some of the leftover sifted soil. The next bed I want to work on, though, is the L shaped bed that goes around the double lilac. Even if it only gets a supporting wall on the inside of the L shape, that will help. Trying to work about that lilac bush is a pain, and there are so things trying to grow into the space from there. We’d already tried to remove so many roots over the past couple of years, but it’s just getting worse! As with this bed, the L shaped bed will be only 2 feet wide, except possibly the tip of the short part of the L shape, where it can be accessed from three sides and is already wider than the rest of the bed.

Little by little, this garden will eventually have all walled, low to middle height raised beds. I was wanting to make this our kitchen garden, with things like herbs and salad vegetables that get used the most often over the summer, in here. My younger daughter wants to make it into a flower garden. Considering most herbs have lovely flowers, I’m sure we can come up with a compromise. 😊

Speaking of my younger daughter, when I was done working here, I helped my daughter out with her project.

By stealing kittens.

You’ll notice one of them has yellow paws. My daughter was painting the water bowl shelter, and that kitten would NOT leave her alone! The only way to keep him out of the paint was to put him on her shoulders – which means her skin and the tank top she was wearing got paint, too!

The first coat is done. The underside won’t need another coat, except for the legs. She was able to crawl inside and paint there, too. Carefully, as the roof is resting on bricks to hold it off the ground, and it’s not particularly strong. I think she even got the floor done, as well as the underside of the roof. After the legs and walls get a couple of coats, we’ll flip it right side up again to do the roof and whatever else can be reached at that point.

I’m surprised more kittens didn’t end up with paint all over them. They really, really love playing in this thing! Once it’s done and set up with the water bowls, they’ll have three roofs they play on. 😁

When I picked the colour, I tried to get a yellow as close as I could to the colour used on the kibble house. I couldn’t remember where we’d bought the original paint from, so I figured it was a different brand’s colour and would be slightly different. My daughter remembered that we bought it at Canadian Tire, too. It turns out I really did pick the exact same colour! We used up an entire gallon on the kibble house, but the water shelter is smaller, so we should have enough left over to do the tree stump bench out by the main garden area, too.

It feels good to have visible, tangible progress done! A lot of the fall clean up work doesn’t look like a lot got accomplished, because things get taken away, rather than added.

Little by little, it’s getting done!

The Re-Farmer

Our 2022/2023 garden: finishing the garlic bed

Once I got home from the city and grabbed a meal, it was right back out to work on the bed our fall garlic will be planted in.

This is how it was left, the night before.

Because I had been tromping across it with the wheelbarrow, the first thing I wanted to do – after putting the new handle on our garden fork! – was loosen up the soil at the bottom.

It was not easy. At this point, not only was I hitting a lot of rocks, but at the north end of it, a lot of tree roots, too!

I also had a kitten on my back, most of the time. The little grey and white tabby that is the most socialized of the bunch. At one point, he simply draped himself across the back of my neck and stayed there as I moved around!

I was also picking up and tossing quite a few larger rocks into the trees, too.

Something this guy really loved! He kept chasing after the rocks as they bounced on the ground, then came back to watch me, waiting for the next throw! He even made it a challenge not to bean him with a rock, the way he was running after them!

Silly thing.

After the base was loosened, I gave the whole thing a thorough watering.

Then I got a wheelbarrow load of wood chips. Just one, for a think layer all across. This is on the same principal as using logs in a hügelkultur mound. As the anaerobic bacteria slowly breaks down the wood, the wood acts as a sponge to hold water for the roots above. Since these are wood chips rather than logs or branches, as we used in the high raised bed, they will break down faster. With garlic having shallow roots, the breakdown of the wood chips won’t affect their nitrogen needs.

The wood chips got a thorough soaking before the next step.

I pulled up the frost-killed summer squash, the remaining dead tomato, eggplant and pepper plants from the other two beds, and quite a bit of dead winter squash plants, too.

Then, because they were so bushy, I tromped them flat, being careful to just step on the dead plants. I just loosened the soil on the entire bed. I didn’t want to compact it all again!

Once they were flattened,, then given a soak, I could start adding soil back.

The soil was raked out evenly, though I tried not to get too close to the logs. That’s where the crab grass will inevitably grow in from the path.

With so many rhizomes catching on my rake as I was working, I finally went ahead and raked the weeds and roots I’d tossed into the paths.

There was a lot more than it seems, while all spread out! It all got dumped among the nearby trees.

With all that soil getting sifted, plus what was added to the bed, this is what I was left with.

Almost half the soil I took out is still there! The logs framing the bed are so low, if I add more back, I’ll have a problem with the sides washing down into the path – something that was an issue when watering the tomatoes.

Which is fine. The high raised bed’s soil level dropped over the summer, as expected, so I can use it to top that up, and still have some left over.

I did not, however, soak the freshly laid down soil. That would have just compacted it. We got a frost advisory for tonight, but things are supposed to warm up after that. We might even hit 21C/70F in a couple of days! So the grass clipping mulch went back right away.

Then it got a thorough soaking!

When it comes time to plant the garlic, we can make holes through the mulch. After tonight’s frost, we’re supposed to have some very pleasant evenings, which will be prefect for the cloves to start rooting themselves before the overnight temperatures start to be consistently too low for growth.

Thankfully, none of the other low raised beds need this much work put into them. They just need to be weeded and mulched for the winter. Except for the bed with the carrots and turnips in it. That will stay as it is for a while longer, as they won’t be bothered by frost.

Lots of clean up to prepare for next year, still! But this bed, at least, is all done and ready for garlic.

The Re-Farmer

My morning buddy, and our 2022 garden: eggplants and slow going

I had such a slow start to the day today. Not a lot of sleep, and when I tried getting up this morning, I lost my balance and almost fell. My husband was up and I ended up asking him to take care of feeding the cats this morning so I could lie down again. Considering it’s because of his own pain levels that he’s up (or not) at odd hours, it takes a lot before I ask him to take over like that. I have a theory on what’s going on and will be testing it over the next few nights. If I don’t follow up on that later, it will be because nothing changed.

When I finally did get out, the kitties had full bellies, which means I had company during my rounds!

Especially as I went up the driveway to check the gate and switch out the memory card on the gate cam. The new camera, with its direct solar power and battery backup, has the batteries still at 100%! The other two trail cameras are at about half, and both have had their batteries changed at least once, since we got the new camera.

I’m not actually all that happy that the kittens follow me to the gate. I don’t want them wandering to the road, so I try to pick them up if I can. At one point, I was carrying the three amigos, all at the same time. Interesting that the three most socialized kittens like to stay together the most, too. I can’t say it’s because they are all from the same litter, because the fourth one of that litter is more or less indifferent to its siblings, while the muted calico, from an older litter, still likes to hang out with these three the most. That one is a lot more socialized now, too. It still runs off at time, but more often than not, we can pet it and even pick it up for cuddles.

I worked on the garden bed I intend to plant the garlic in last night, but didn’t get very far.

This is where I left off when my back started to give out.

I really look forward to when we have more high raised beds!!!

I removed the grass clippings mulch and loosened the entire bed with a garden fork first, then started working my way around, pulling out as many crab grass rhizomes and other weeds as I could. The job was made much more challenging, because the kitten in the earlier photo decided it absolutely had to be on my back while I worked! When I straightened up, she would climb up to perch on my shoulder until bent down again.

I managed just over half the bed. I found the soil to be much improved, easy to work into with the garden hoe – though I’m still hitting rocks – and filled with worms. Compaction, however, is still a problem.

Once I’ve got more of the roots and weeds removed, I’ll use the soil sifter to get more out. I plan to dig a trench down the middle. The summer squash bed is right next to it. I’ll be pulling those up and burying them in this bed as a soil amendment. After the garlic is planted, the grass clipping mulch will be returned. The summer squash bed will be ready to work on next.

Things are going much more slowly than I expected, and it’s basically because of pain. Yes, I pain killer up before I start, I’m just taking your basic painkillers. They’re not particularly strong. I’m the sort of person where pharmaceuticals tend not to work as expected to begin with, and typically need double the dose to maybe get the same effect as a regular dose on someone else. It’s the same thing with the painkillers dentists inject before working on a tooth – something I discovered the hard way when I was in 5th grade. I still remember the dentist working on a cavity. I had my eyes squeezed shut in pain and was clutching the arm rests when the dentist made a snarky comment about opening my eyes, it’s not that bad. I did open my eyes, glared at him – and broke one of the arm rests. I was an adult before I dared go to a dentist again. As an adult, the dentists would actually listen to me when I told them there was still pain.

So… yeah. I do have an extremely high pain tolerance because of this, and can typically just keep working through all sorts of pain. That’s getting harder and harder to do as I get older. The problem is, there’s really no one else to take over. My older daughter has joint problems that has lead to injuries that just won’t heal, so there’s only so much she can do, and both of them have back problems that won’t go away unless they both get reduction surgery (as I did, more than 20 years ago: best thing I ever did!!!), but neither of them trust doctors. At all. They’ve seen the BS my husband and I have put up with over the years. Since we’ve moved back to this province, we’ve found health care has gotten even worse during the almost 15 years we were away. So while they can help, all four of us are just really gimpy. Plus, my older daughter has her commissions to work on, so she gets paid, and isn’t available as much. They both also take care of the inside stuff for me, so I’m free to work on the outside stuff – an arrangement I am quite happy with. Still, the way things are going, I’m going to have to ask them to help me with the outside stuff more. It’s frustrating. When we first moved here, I was able to get much more work done in much less time. I did not expect my body to give out that much in so few years!

Ah, well. It is what it is.

I’ll be taking pain killers and heading back out soon.

On another note, we had another small harvest this morning.

I decided it was time to pick the Little Finger eggplant. I actually found one more little one, after I took this picture. These are all from just one plant. None of the others matured enough to produce anything. I had intended to leave them for longer, but last night we dropped to 2C/36F. We were only supposed to drop to 6C/43F, so I didn’t try to cover them for the night. They don’t look frost damaged, but with how messed up the forecast has been, I figured it was time. This variety is meant to be picked while still relatively small and glossy – maybe a bit bigger than the largest one I’m holding.

In talking with the girls about what to plant next year, we are thinking of trying 3 varieties of peppers, and I’d like to try this variety of eggplant again. However, we will need to work out better protection for them. My older daughter is wanting to save up for a type of greenhouse that is specifically designed for our extreme temperatures. Something like the polycrub that Stone Croft Skye has. Before then, I hope to pick up a decent sized portable greenhouse, or maybe a smaller one to use for our seedlings. We have GOT to come up with something better for starting seeds. We had to spend way too much effort to protect them from cats, making for less than ideal growing conditions.

That is something to think about later, though. For now, we need to clean things up and get beds prepared for next year, first.

The Re-Farmer

Our 2022 garden: Latte corn, green bush beans, Yakteen gourds – and we’re officially done!

Yes!! It’s done! I can now officially say, we have finished spring planting and transplanting everything! Whether we do a fall planting or not, we’ll decide on later, but right now, everything that will be growing this year is in.

Not that the work is done, but the focus gets to change, and the pressure to get it all in, in time, is gone.

The first thing to get done was finish the bed for the last of the corn and beans.

It took another 3 1/2 wheelbarrow loads of soil to top of the rest of the bed. You can really see the difference between what we laid down earlier, and got rained on. I’d taken out the rest of the sod divots, but we still need to gather the rocks.

The bowl in the photo is holding some of the inoculated Latte bi-colour corn seeds. It came as a pack of 200, but that’s less than half the pack, and some went back into the bag. The corn was planted in the three rows in the middle, that are marked off. The plan was to have bush beans on either side, but we only had enough of the Lewis green beans from last year to fill the one side.

The only other beans we had were pole beans, so we left the last row.

Also, I’ve run out of labels that won’t fade in the sun. It’s a good thing I’m using this blog as a gardening journal! :-D

Now, all that’s left here is to mulch the area with straw.

I then decided to go ahead and transplant the Yakteen gourd. The were 4 sprouts in one pot, while the other two pots still had nothing!

The largest plant went into an empty spot in a row of cantaloupe type melons (one of the grocery store melons we saved seeds from), because one of the seedlings withered and died before we could transplant them.

The two smallest seedlings were planted together. Here, they are in a pair of empty spots in one of the rows of Kaho watermelon. The seeds in those spots never germinated, so the space is being used for the gourds.

It feels so good to be all done planting!

Which meant it was time to work on other things…

One of the low raised beds did not have supports of netting yet, so I dug out the rest of the bamboo stakes in the garden shed and use the unbroken ones. This bed has all summer squash, and it not something I expect we’ll need to cover for any reason, so we just need supports to put netting around it, if we need to. Last year, the groundhogs were enjoying themselves some squash, but nothing was bothering the plants, so if we need to put netting around them, it wont be until they are quite a bit larger.

In the low raised beds with the upright supports, it didn’t have the twine strung around yet. Because of the logs, the spacing was really off. I ended up grabbing a couple of sticks, which the arrows are pointing to, to fill in the gaps.

The hoops in the background got a couple of bamboo stakes tied across the tops.

Now, all of these beds have supports on them, whether for netting or shade cloth or whatever we need.

I think we’ll take a bit of a break and let things dry up a bit. I’d still like to take the weed washer into the larger squash bed before we lay the straw mulch down.

Then we need to put the A frame supports at the two trellises beyond the bean tunnel, for the cucumbers, peas and more pole beans, as well as mulch the hulless pumpkins that got planted out there, too.

I’d be excited for the progress, but I’m just too tired. I’ve been pushing my limits a lot, lately, and it’s catching up with me. A bit of a breather, and I should be back up to snuff in no time.

She says, optimistically… ;-)

On top of this, it’s been a busy phone day. My husband had a phone appointment with the doctor to talk about his lab results, and a slight change to one of his medications because of it. Then my husband made another phone appointment… for me! I was outside, weeding, when the call came, so he sent me messages to let me know, but with muddy hands, even if I get the notifications, I can’t check my phone until I’ve washed my hands. It’s a good thing I came in when I did! The appointment was to talk about my own lab results, but first I got a call from home care to talk about my mother. The guy then called my mother and booked an appointment for and assessment next week, which he has asked me to be at. Then he called me back with the appointment time – and a concern. Because of her bed bugs, he’s going to have to be wearing the appropriate PPE, but they wouldn’t consider even doing an assessment if the potential client wasn’t going to do anything about their bed bugs. My mother told him she didn’t have an appointment, because when they asked (who? when?) in her building, who had noticed bed bugs in their units, she didn’t say anything – because she didn’t want to bother anybody!

*sigh*

I explained to him what my brother had done, and that it’s being arranged by schedule. I ended up getting the name of the site manager for her town, which I was able to pass on to my brother.

Then I had my telephone appointment with the clinic, which was basically to tell me nothing has changed. I consistently have one reading that is “on the high side”, but still within normal, so they want to keep an eye on it. All because, back in 2005 or 2006, I took a short term medication with a side effect the doctor wanted to monitor for the duration. Ever since then, everyone’s misunderstood why that was on my file.

One of the other things I did was send an email to the company I ordered the shed from. I asked a couple of questions about the amount charges and what shipping company would be used. Mostly, I’m feeling the waters to see what kind of response I get. Given the time frame for when we’re supposed to receive the boxes, if I don’t get a response soon, I will assume they are not legit and cancel the order and ask for my money back. The problem is that, in looking them up, I’ve found both that they are a scam site, and that they are not the best, but not fake, either.

Ah, well. We’ll find out soon enough.

The Re-Farmer

Our 2022 garden: kulli corn, yellow beans and garlic

Yes! Finally! Major transplanting was started today. :-)

The first thing I needed to finish was topping up the low raised bed they were going into.

Since the snow melted away, we’ve been adding our kitchen compost in the trench, which already had some straw in it, and I even tossed in the soil from various pots we had, from house plants that died, to seed starts from last year that didn’t germinate. The last layer before adding the soil was some fresh grass clippings.

This is the first time this pile of garden soil has been uncovered since last year.

So. Many. Thistles!

And those roots go all the way though the pile.

Which meant I had to bring the makeshift soil sifter into service, so get as many of the roots as possible out. It was long and tedious, but at least it was made a bit easier by scavenging a couple of scrap boards out of a pile to support the steel mesh, rather than the found branches I was using before. Sifting the soil had to be a gentle process, because there were SO many worms.

I kept the worms for the new bed. :-D

After the soil was added, stove pellets were scattered across the top and hydrated so act as a thin mulch. It won’t stop any weeds, but it will help keep the soil surface from compacting. After several soakings, the sawdust was spread evenly with the back of a fan rake.

It took a couple of hours, but I could finally transplant the kulli corn!

They had a major root system going! It made it difficult to get them out of the bins, then pull apart the tubes. The toilet paper really wanted to come apart!

With the larger bin, it was even more difficult to get them out, and the whole thing ended up falling out and apart. I think only one corn plant actually got broken, though. We’ll see if it makes it.

I counted the seedlings, then marked three rows of 20 evenly spaced spots for the corn. The actual total was 58, including some smaller ones that may or may not make it. We ordered 100 seeds, and there were extras, so we’re looking at roughly 50% germination rate. Which I don’t mind. We would have had trouble finding space for more. They are quite closely planted, as it is. Which should be good for improving pollination.

Of the remaining rolls, I broke apart the cardboard and rifled through it. No sign of the remaining seeds that did not germinate. The carboard went into the compost pile, while the remaining soil was used to top dress any seedlings that looked like they could use it.

I had also grabbed a bag of bush beans from last year, picking the one that looked like it had fewer seeds. That was the yellow “Golden Rod” variety. We still have some green bush beans left, too.

I counted the bean seeds and there was 38 – which was perfect! I could plant two rows of 19 beans, in between the corn.

As they are “old” seeds, I don’t expect 100% germination. This bed is very densely planted, but they should be complimentary.

The corn, however, needed to be protected. The question was, how?

I made a trip to the barn and dug out the T posts I spotted in one corner, a while back. There turned out to be 6 of them, all different lengths. :-/

I had to dig holes to be able to set them, using a garden trowel, since a spade would have been just too big. Within inches, I was hitting water, then rocks and gravel. After placing the posts and trying to push the soil back against them, there was literally water, shooting out from the ground, as I stomped on the soil!

We have no post pounder, so I found a heavy hammer to try and drive them deeper. Especially the longest one, but I think that one ended up hitting a rock. Being the short person that I am, for the taller once, I had to stand on the corners of the bed to reach. Even with a board across the corner to stand on, I was wobbling all over the place! LOL

Once they were in, I strung some twine around to further support the net, once it was added. That was a job that had to wait for when the girls were available.

In the two garlic beds, the nearer one had only 6 remaining garlic coming up – and one of those was barely there. I could find no sign of the few others that had emerged, as well.

I decided to transplant those 6 garlic into the other bed. That one has a lot more garlic trying to grow, but there was still plenty of space at one end to transplant the remaining 6 of the other variety.

The left a bed available for planting into, which we did end up doing.

The main challenge was, how do we cover the bed with netting, yet still be able to access the plants, easily, for weeding and eventual harvesting of yellow beans.

Piece of pool noodles were added to the tops of the posts, so they wouldn’t tear apart the net. When the one on the tallest post fell off, I left it. If it tears, it’ll only go down to the twine, and will actually line up better with the rest.

When I brought the T posts out of the barn, I also grabbed a stack of narrow pipes. I have no idea what they were for, or why they were stored there, but I figured the might make good supports. The short ends of the net are wrapped around those pipes and zip tied into place. For the long sides, we zip tied narrow fence posts we found… somewhere, to weigh down the netting. Any gaps were further secured with ground staples. If we want to tend the bed, we can remove the ground staples and lift the poles to get under the netting.

Hopefully, that will work out.

The corn can potentially grow to 8 ft tall, which is higher than the netting, but if they do get that tall, we’ll deal with it, then.

That was my big job for today, but it wasn’t the only one we got accomplished! I’ll write about that, in my next post. :-)

The Re-Farmer