Since transplanting the Korean Pine in the outer yard – and promptly losing one that got dug up by a critter – I’ve been wanting to find a more secure way to protect them, but also to make them more visible. With the possibility of cows being allowed into the outer yard, that become more of a priority.
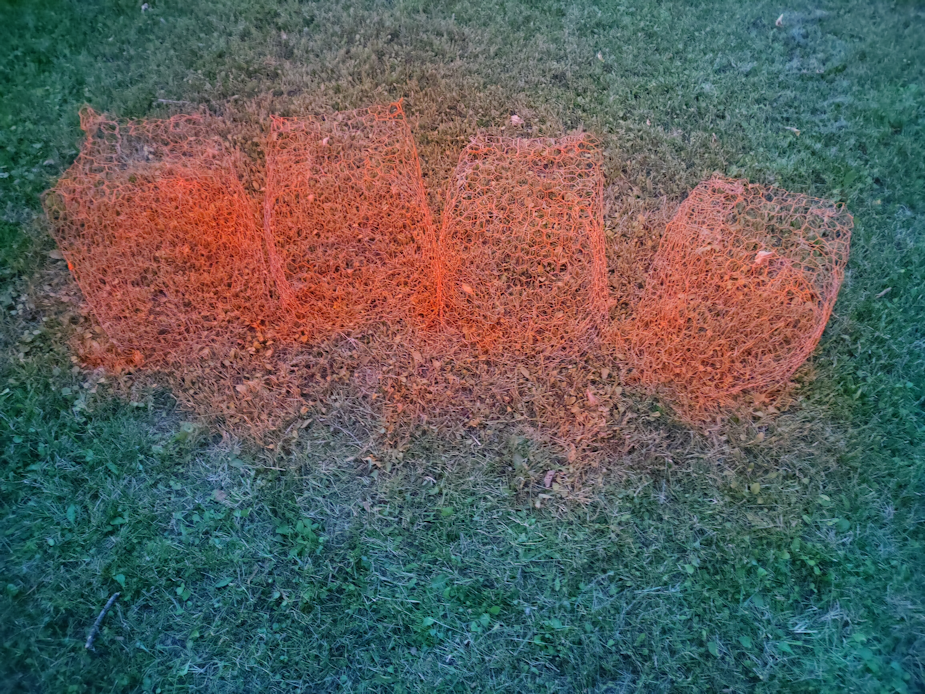
This is what I put together while doing my evening rounds.
I used chicken wire salvaged from the garden row covers we made last year. We’ve got some square buckets, and I used one to work out where to cut the wire. After the cut wire was made into a ring, I used the bucket as a sort of form to square off one end, then fold the edge inwards to make a sort of top with an opening in the middle.
We’ve got some high visibility paint that I use to mark rocks in the yard, so I can see them through the tall grass when mowing. Just the thing to make the chicken wire visible – on its own, it pretty much disappears against the grass!
They will dry overnight, and in the morning the girls will place them around the Korean pine. Along with the one that got dug up by a critter, another on just up and died for some reason, so we are down to 4 of the 6 we planted. I’d like to not loose any more of them, if possible! Hopefully, these cages will help protect them from critters, at least. Tomorrow morning, the girls will take them out and put them over the saplings, in place of the plastic cloche they used this morning, when the calves got into the outer yard. Some ground staples to hold them in place and, hopefully, they should work out.
This afternoon, I got the fermentation bucket from our wine making kit sanitized and set up to make more crab apple cider vinegar. I brought two of the three bins of crab apples in from the old kitchen. The apples got cut in half, de-stemmed and any damage I found was cut off. Since I picked the apples by shaking the tree, then picking them up off the ground, there was bound to be bruising to get rid of. All the pieces went into the giant enameled bowl that was ready with water and lemon juice, to keep them from browning.
Each bin held the equivalent of a 5 gallon bucket, full to overflowing. Once the apples were cut and trimmed, however, they took a lot less space. The line that you can see in the bucket is the 5 gallon mark, which is what I was shooting for. The basic instructions for making ACV in jars was to fill them 3/4 full with apple pieces, so that’s what I what I did with the bucket. After finishing off a bin and transfering the pieces from the water to the bucket, so I could see how much more I needed to cut up, I added sugar and commercial ACV with “mother” as a starter, using the same ratios that were used when we did them in 1 gallon jars. Then I cut more apples from the second bin until I reached about 3/4 full.
We buy filtered drinking water in refillable 5 gallon jugs, as our well water has developed a taste to it. I used one of those to fill the bucket to the 5 gallon line, which used up about 3 gallons from the water jug. It all got a gentle stir to dissolve the sugar and mix in the ACV mother.
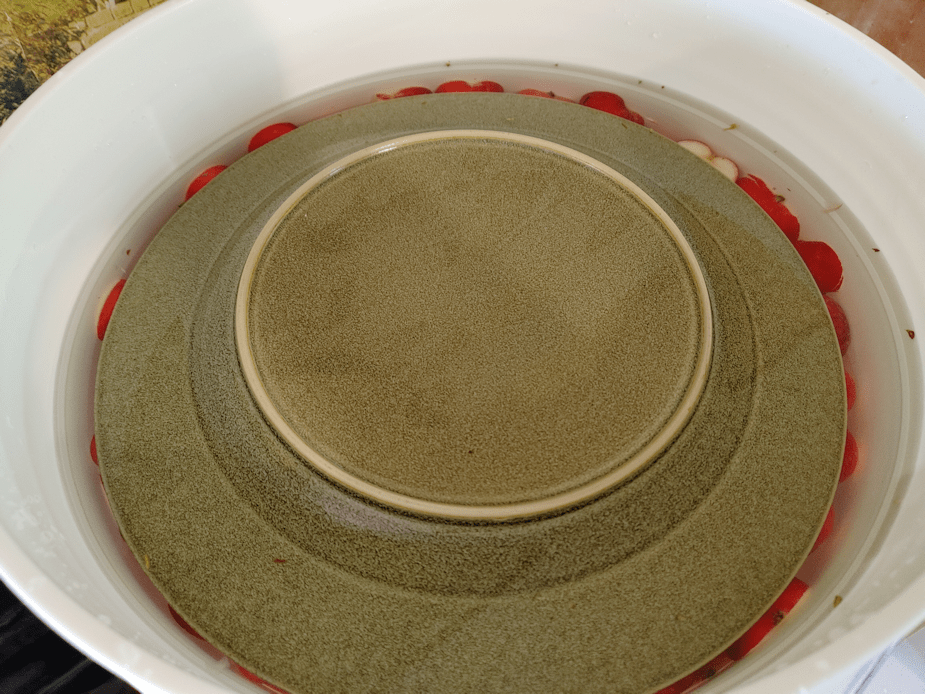
The apple pieces now needed to be weighted down.
I just happen to have a large serving dish I found in a Goodwill store, years before we moved out here. It was the perfect size, and heavy enough that no other weight was need once the air pocket under the (sanitized) dish was removed.
Finally, the whole thing was covered with cheese cloth that was snuggly tied in place. Then, because we have cats, the lid was put loosely on top. It now sits next to the carboy of fermenting hard apple cider.
This now needs to ferment for 3 weeks before it gets strained off, then left to ferment another 3 weeks.
The down side of fermenting crab apples is, it attracts fruit flies. It turns out they love apple cider vinegar! So I made a couple of fruit fly traps using some of the commercial ACV in small jars topped with plastic wrap with holes pokes in them. One went into the big aquarium, where the three 1 gallon jars of ACV are fermenting. The other is now in between the fermentation bucket and the carboy.
Even after removing a small bucket of apples for my mother, we still have about a bin and a half of apples! We need to do something with them quickly, before they really start bruising.
I’m considering cooking them up and straining them for their juice. I think we’ll get a lot more juice of them that way, compared to using the juicing machine! Or maybe make some jelly? We’ve made apple jelly before, but the jars had to be kept in the fridge because we didn’t have everything we needed to water bath can them.
There are SO many apples, though, we couple probably make a few different things!
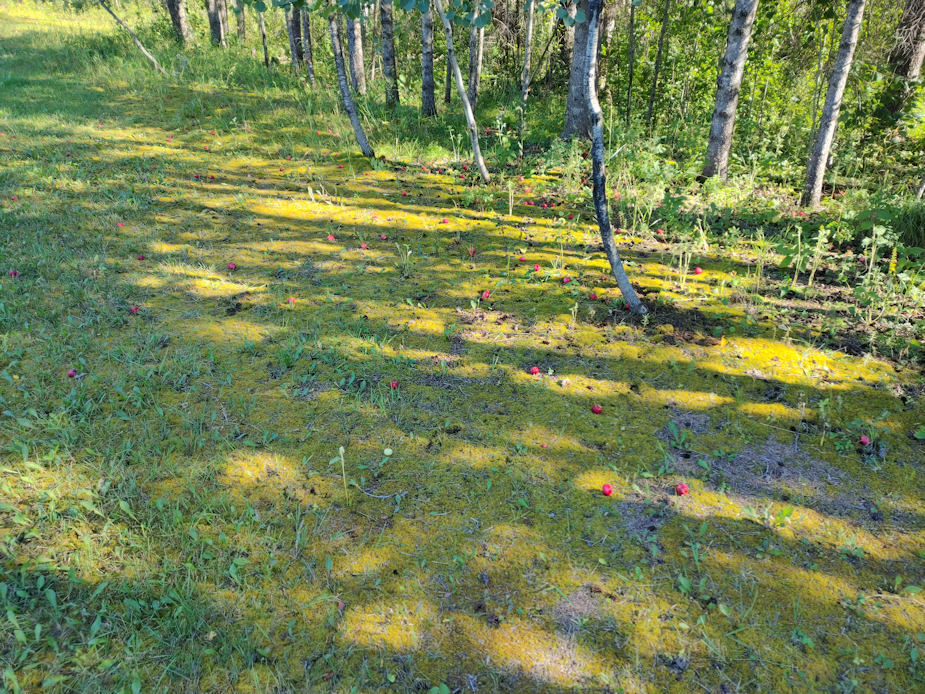
This afternoon, I headed out to see what I could get from the one crab apple tree that has tasty apples. Most of the apples were well out of reach, but after trying a couple of things, I found I could use the hook at the end of the extended pole pruning saw, at its longest, to grab branches and give them a shake.
Then ducking, so I wouldn’t get beaned in the head. Those things are hard!
Then it was just a matter of gathering them off the ground. The damaged ones got tossed towards the spruce grove, so I wouldn’t have to pick through them again when I had to shake the tree again. With so many apples, I could afford to be picky.
The deer and any other apple eating critters will be in for a treat, tonight!
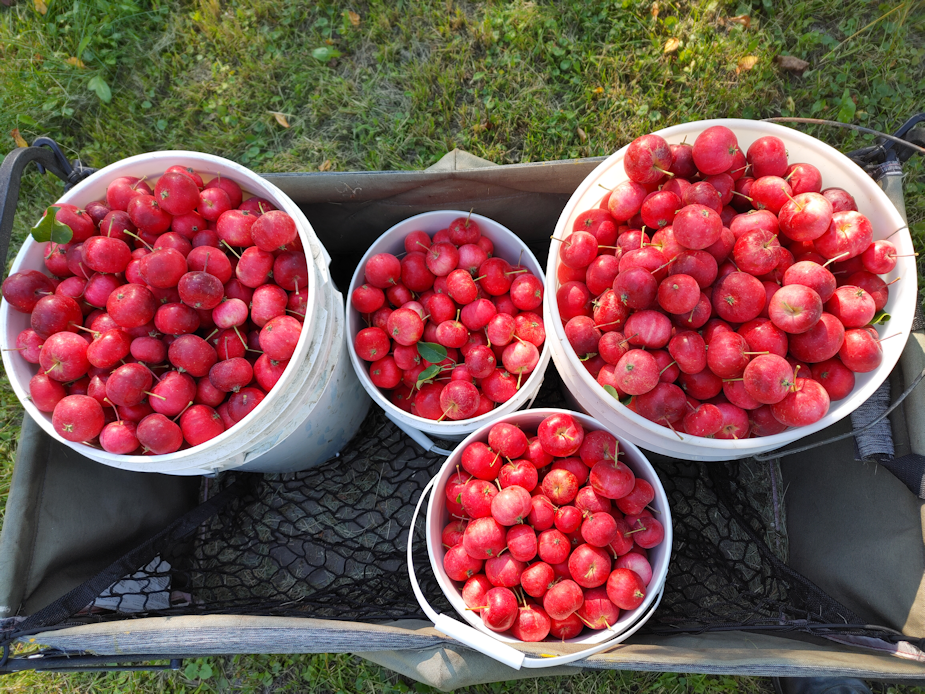
I got somewhere between 15-20 gallons of apples, and I only shook the tree twice. There are still lots on the tree, but I was out of buckets.
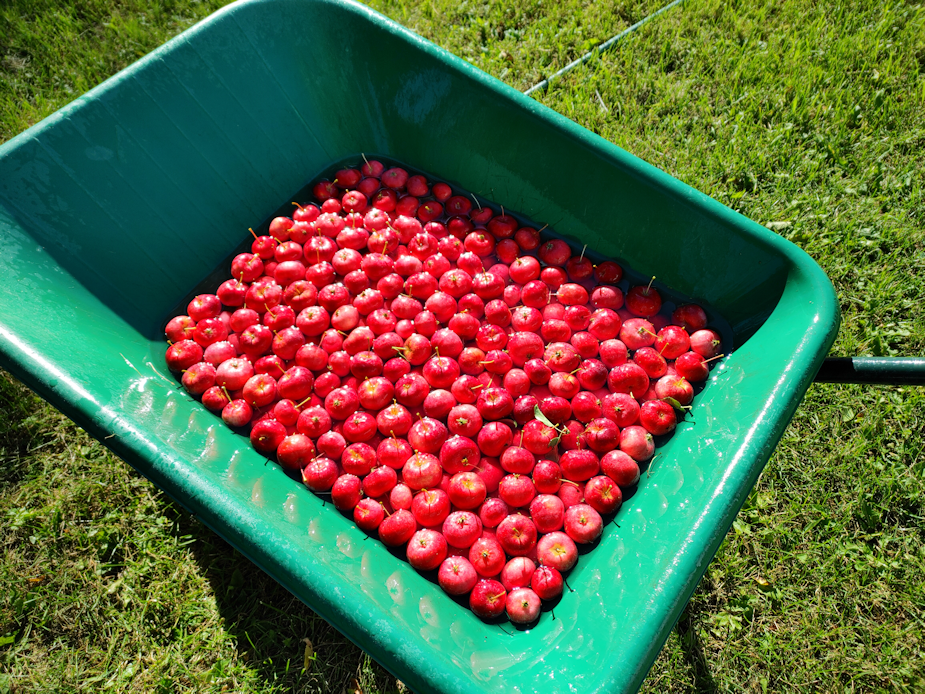
With so many apples, I scrubbed out the wheelbarrow, then used it to give the apples a cursory wash with the hose. The amount in the photo is from the two smaller buckets.
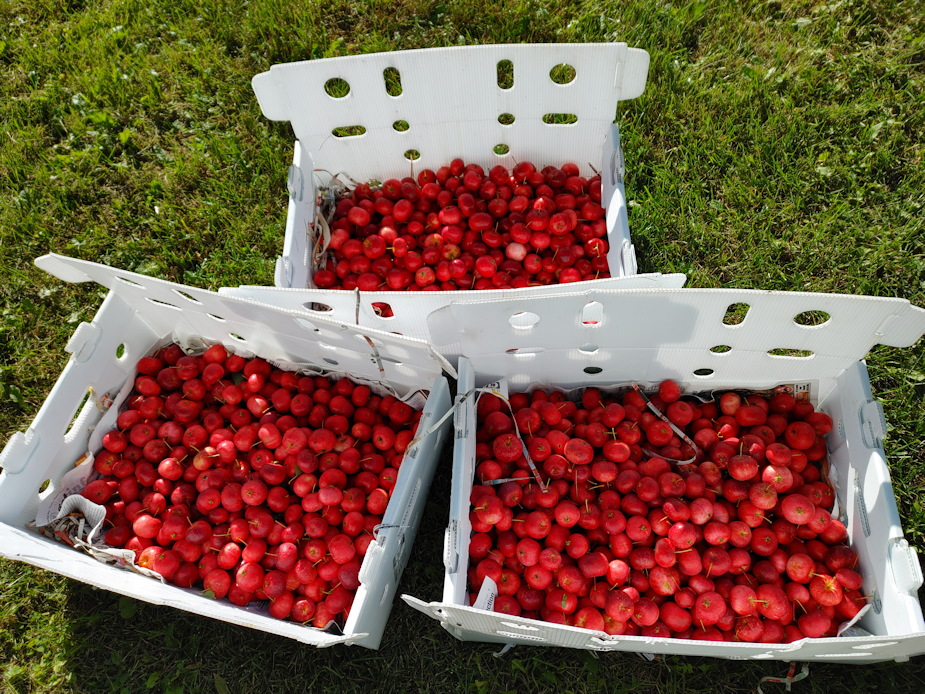
I had to prep a third bin to hold them all.
I love these bins! They interlock to hold together, and even when stacked one on top of the other. They are still just corrugated plastic, though, and can only hold so much before they start bending under the weight while being carried.
For now, the bins are sitting in the dark and relatively cool of the old kitchen. I’ll set aside a bucket for my mother. When she was last here, she insisted in picking apples into her walker, but they were nowhere near ready for picking. They are in their prime right now, and taste so much better. We do have crab apples on some of the other remaining trees, and I do try them every now and then (except the one tree with apples so small, it’s basically an ornamental tree). They don’t taste very good when ripe. When not quite ripe yet, they’re pretty awful. There was one tree that tasted pretty bad right up until the ripened, when they suddenly became tasty and sweet, but that part of the tree died over the winter, leaving only the suckers that had been allowed to grow, so only the not-tasty parts of that tree are still alive. 😕
Tomorrow, I will start de-stemming the apples and cutting them up, and will be using the fermentation bucket from our wine making kit to make a large batch of apple cider vinegar. There will be apples left over, even after taking some out for my mother. We haven’t decided what to do with them. In the past, we’ve made apple jelly, but our Bernardin canning book with the recipes we used is still missing.
I wonder if I lent it out to someone? I can’t remember. I do remember offering to lend it to my SIL, but she just took photos of the recipe she wanted and left the book. I do have other cookbooks with canning recipes, but I’m less sure of their safety.
I suppose I could just go look at their website, but having the book is really handy.
Anyhow, we’ll figure out what to do with the surplus. Then also decide if we want to harvest more, or leave the rest for the birds.
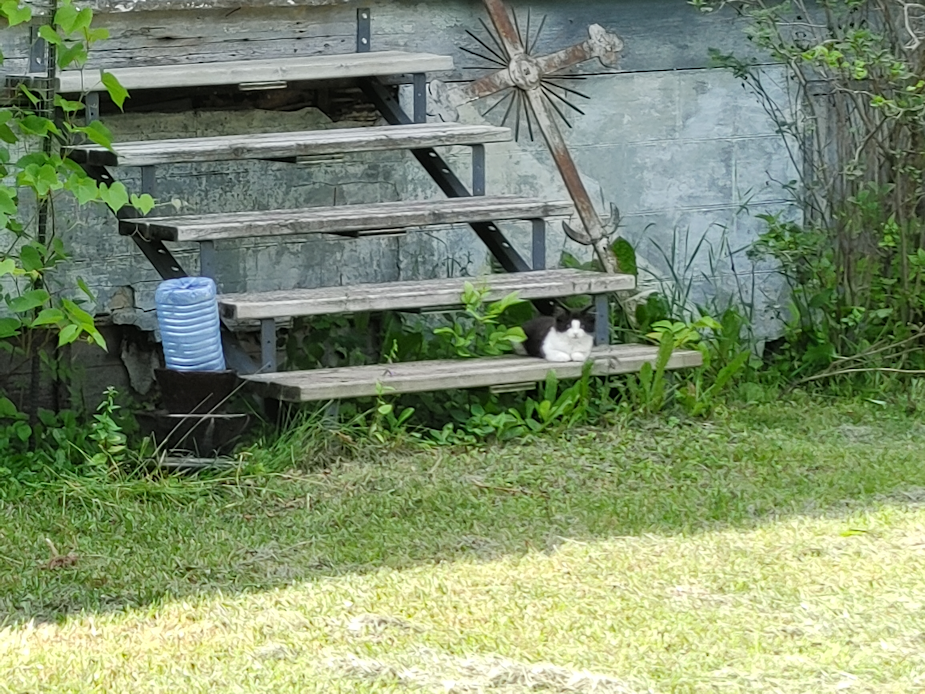
This morning, I moved the painted scrap wood bench back to it’s spot under the white lilacs.
For all that the salvaged wood had damage to it, this is a VERY solid bench.
And heavy. Much heavier than it looks. I don’t know what kind of wood they are, but the true-to-size 2×4 board I used for the legs, plus the seat board, are dense and have a lot of weight to them. With care, this thing should last many years.
Once I set it in place and sat down on it, I gave the seat a good look. I think it could use one more coat of paint. There are cracks and old nail holes that I’d filled with paint, but once the paint dried, they’re not quite filled anymore. Especially that big crack you can see on the left. When I give the stairs a second coat of paint, I’ll go ahead and add another coat to the bench seat, too. There’s no reason not to.
This is an ideal spot for a bench. Nice and shady, but also open and airy. There have been many times since we’ve moved here, where I’ve been working in the heat of the day and wished for a nice cool place to sit for just a few minutes. We do have a few places to sit down, but they are all in full sun.
Over time, I hope to have seats and benches scattered all over the place. Nice little spots where one can take a break and enjoy a bit of shade on a hot day. 😊
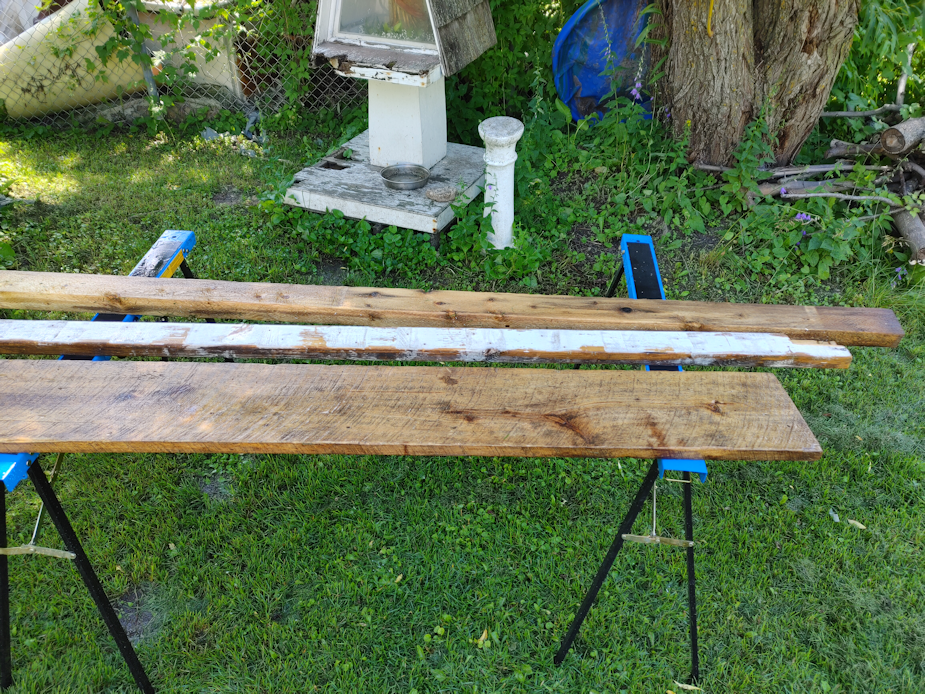
After giving the leg ends a second coat, and filling in any spots that looked like they got missed, this morning, I finally flipped the bench to pain the top this evening.
Once it was right side up, I could also see spots on the legs and cross pieces that got missed, simply because it was more difficult to see and reach while upside down. I also took the time to make sure paint got well into any holes or cracks in the wood, so no water can come in contact with unprotected wood.
I thought it might need three coats of paint on the top, but now I think one more coat on the top, and it’ll be done. The paint filled things in better than I expected. I don’t know what this seat board was salvaged from, but it’s got saw cut markings on it, nail holes, and even several small nails and some kind of heavy duty staple stuck in it that I couldn’t get out without damaging the wood. Nothing the paint can’t smooth over.
For something thrown together in an afternoon, using scraps dug out of the barn, I’m really happy with how this bench has turned out.
This afternoon I worked on pruning away some low hanging branches on the Chinese elm by the chain link fence. We’ve pruned these a few times over the past few years, but they fill in again so quickly! It had gotten to the point that some branches were overhanging our “parking lot” – which meant they were also starting to shade the tomatoes we have planted against the chain link fence too much.
Thankfully, we have a really good, really long, extended pruning saw! Once I got the biggest branch down, it uncovered a bunch of dead branches that I took down as well. The branches were big enough that I had to break them down before I could haul them to the branch pile for chipping. I also used the loppers to cut away a whole lot of new little branches that were low enough to snag on my hat every time I walked by!
While it wasn’t an exceptionally hot day today, it was still hot enough to make the job less than pleasant. What I found myself really wanting to do was be able to just sit down in the shade every now and then. There’s nowhere to sit in that side of the yard. So, when I was done cleaning up the branches, I decided to go into the barn and see what I could find to build something.
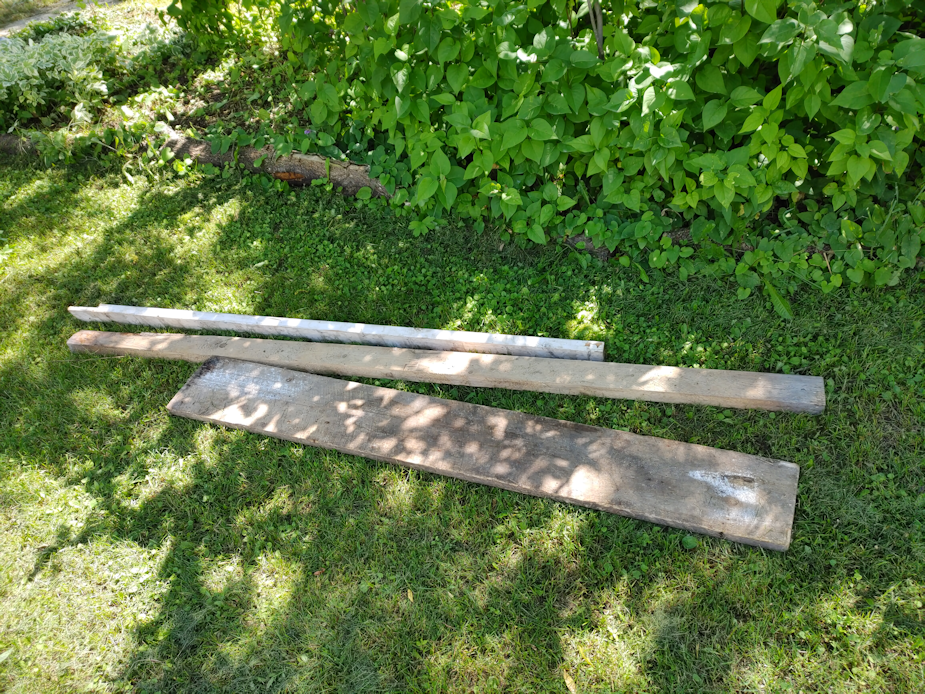
This is what I came out with. Three pieces of scrap wood.
They’ve been in the barn for a long time, so I hosed them down and gave them a scrubbing to get the worst of the dust and dirt off.
I had only a general idea in mind of how I wanted to build this. There’s one 10 inch wide board for the seat, and a 2×4 for the legs – and it’s actually a true 2×4; I was wondering why these boards seemed bigger than the usual 2x4s you get from the lumber yard. Those are cut to 2×4, then shrink while curing, so they’re actually 1 1/2 x 3 1/2. The third board, with the white paint on it, is that kind of 2×4, and you can see the difference in size in the picture. I added that board for structural support.
For the legs, after cutting off the rotten end of the board, I was able to cut four pieces at 20 inches long. That left a slightly shorter piece that I used for a centre support. I then cut six 9 inch pieces for cross pieces and structural support. The legs for the ends were joined with the cross pieces at what will be the top of the legs. For the slightly shorter centre leg, I lined it up with the others and added the cross piece so that they all matched in height.
Normally, I would have used screws for this, but I didn’t want to fight with our drill, so I dug up a bucket of nails we found while cleaning out the house that were long enough.
Then I flipped them around and added more cross pieces to the pairs of legs, to make sure they wouldn’t wiggle out of place. For the support leg in the middle, I added another cross piece to support the seat. The board had a section of tree bark on it and was rounded, so I could only manage two nails on one side. Not as strong as I would have liked, but it should hold.
Then it was time to add the seat. Which was a pain in the butt. I don’t have any clamps. The bench pieces were laid out on its side, and I had to support the leg pieces with my legs while I nailed the seat in place. Since the legs are an inch narrower than the seat itself, I also had to hold the leg pieces up half an inch at the same time. It actually worked far better than I expected! 😄
Once I had a single nail in each leg, I could lift the bench up off its side, and do the rest of the nailing.
I had company.
The big black and white kitten came back to see what I was doing!
It is so very cute!
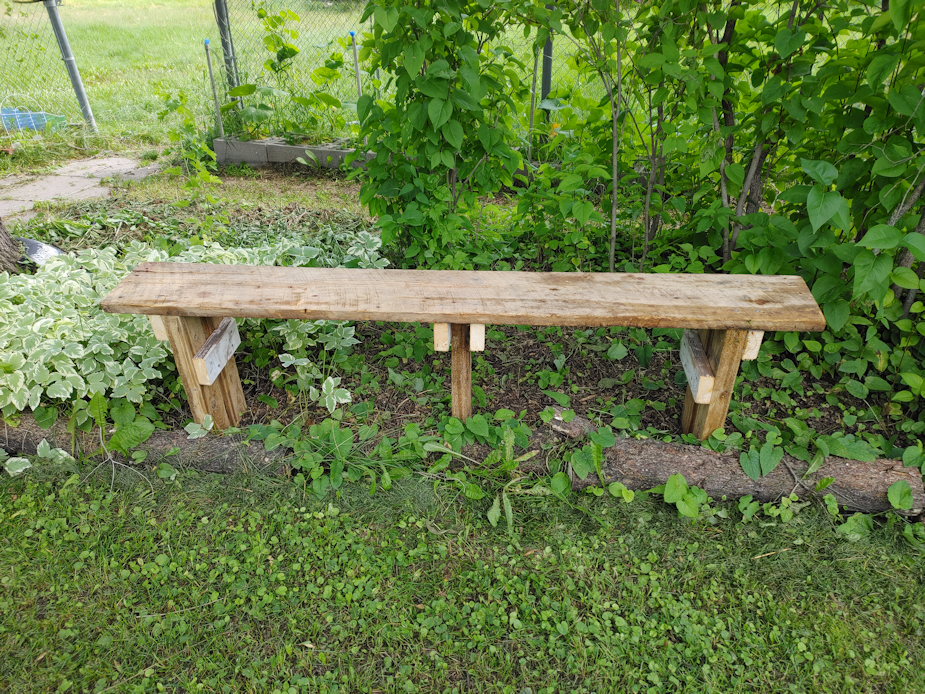
There we have it! The bench is done!
It’s actually a bit of a mess. I was using a hand saw or the mini-chainsaw to make my cuts, and they are far from straight or tidy. I’m sure the lengths aren’t exact, either. But then, it’s also going to be sitting on uneven ground, so it really doesn’t make much of a difference. Once the legs are settled into the softer ground, it’ll work itself out. In fact, it seemed just fine when I tested it out and sat in the shade for a while.
The seat hadn’t completely dried out from being washed, though! 😂
I should probably add some angled pieces under the seat to prevent any wobble, but between the cross pieces under the seat and the centre support, it’s pretty sturdy. With the legs at 20 inches, plus the thickness of the seat, the bench is slightly higher than typical, which makes it much better on my wrecked knees. Setting it up against the log border of this bed means that I can use the log as a foot rest, too.
All we need to do now is pick up some more paint. We’ve got the tree stump bench near the garden that needs to be painted, too.
So far, we’ve got the picnic table in a bright, almost peacock blue, and the kibble house is a bright yellow. The inside of the outhouse is a pale mint.
What colour do you think I should paint the benches? Should we go with something bright again? Or more subtle? I find myself thinking a deep red would be nice. Or maybe a green similar to the lilac bushes beside it?
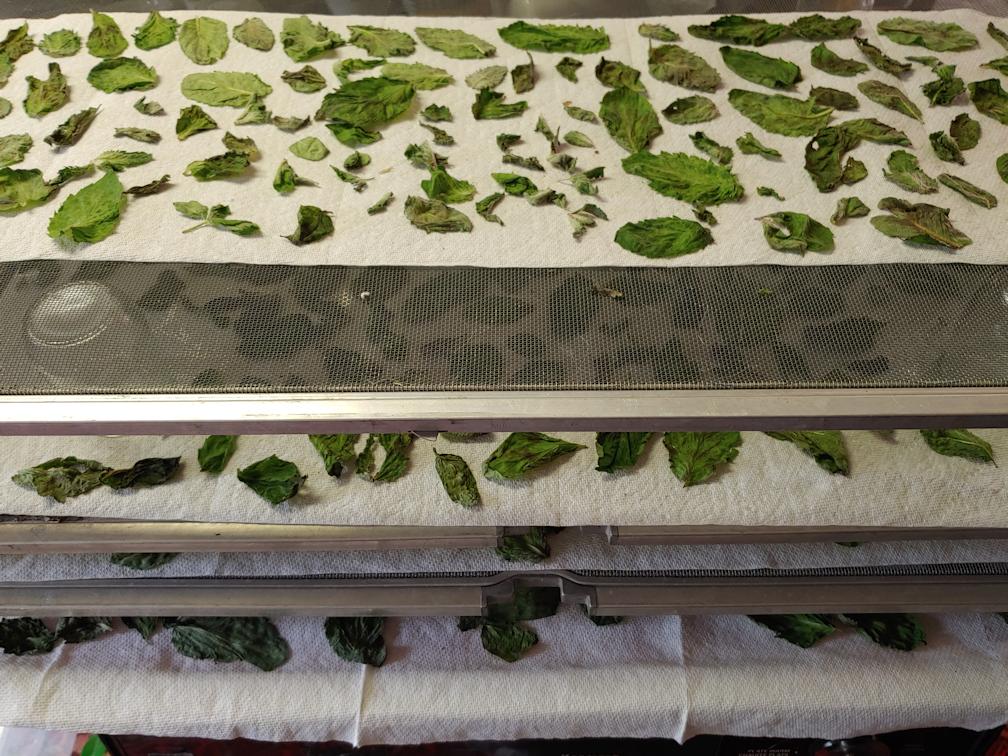
Yesterday, I weeded mint out of the beet bed – one entire end was completely stunted because they were shaded out – then kept on going, harvesting mint from the path as well. The sump pump drains into here, and the growth is absolutely lush! By the time I was done, I had a huge arm full! This is all mint that was here before we moved in, so we have no idea what variety it is. I know it’s not spearmint. I don’t think it’s peppermint, either, but I really can’t say for sure.
Once inside, I took the best leaves off the stems and gave them a wash. Then I cleaned up and dragged in the old window screens we used last year for curing onions, drying spinach, etc. I covered the mesh with paper towels, then set out as many leaves as I could fit onto them to dry.
I didn’t even use half of what I’d gathered!
Yes, this is the drying mint!
I used small glasses and jars as spacers so we could stack the screens on top of each other, but the cats were incredibly interested in what was going on. So we put more little jars as spacers on the top and covered the whole thing with a cloth. We still caught them on top of the stack, but at least the cloth kept the leaves clean.
Then, some time later, my daughter got Cheddar out from under the cloth at one end. *sigh* We tucked the ends under the bottom screen as best we could.
When I lifted the cloth on one side this morning, however, I found the cats had still managed to get under it!
I salvaged what I could and set it up again on the old dishwasher that’s still waiting to be taken out to the junk pile. Since the leaves have shrunk, I was able to fit them closer together on the screens that needed to be redone. For now, we’re keeping the sheet off, so they can get more air circulation.
Drying things on screens like this can work quite well, but protecting it from the cats is a problem!
Meanwhile, I used fresh mint to make a big pot of strong mint tea this morning, and there is still lots left in the fridge. There is much more to harvest in the garden, as we want, too.
The chives are blooming right now and ready to harvest if we want to make infused chive blossom oil or vinegar again. We have the olive oil to do that now, but I won’t be picking up more of the white wine vinegar I like to use until we do our next city trip. I might just harvest the chives, anyway, and freeze the extra until we are ready to make the infusion.
I love that we can already start harvesting things and preserving them!
One of my favourite crafts to do is to crochet. I am even a teacher, certified with the Crochet Guild of America, and quite enjoyed doing classes, back in the day.
These days, I don’t crochet very much, partly because my hands have become so rough, most yarns catch on my fingers, even pulling the loop off my hook at times. I don’t like the idea of working with high end, $30 skeins of yarn, only to have my hands catch on the strands and tear them apart. And no; working with gloves on is not an option!
Also, hand lotion does butkiss.
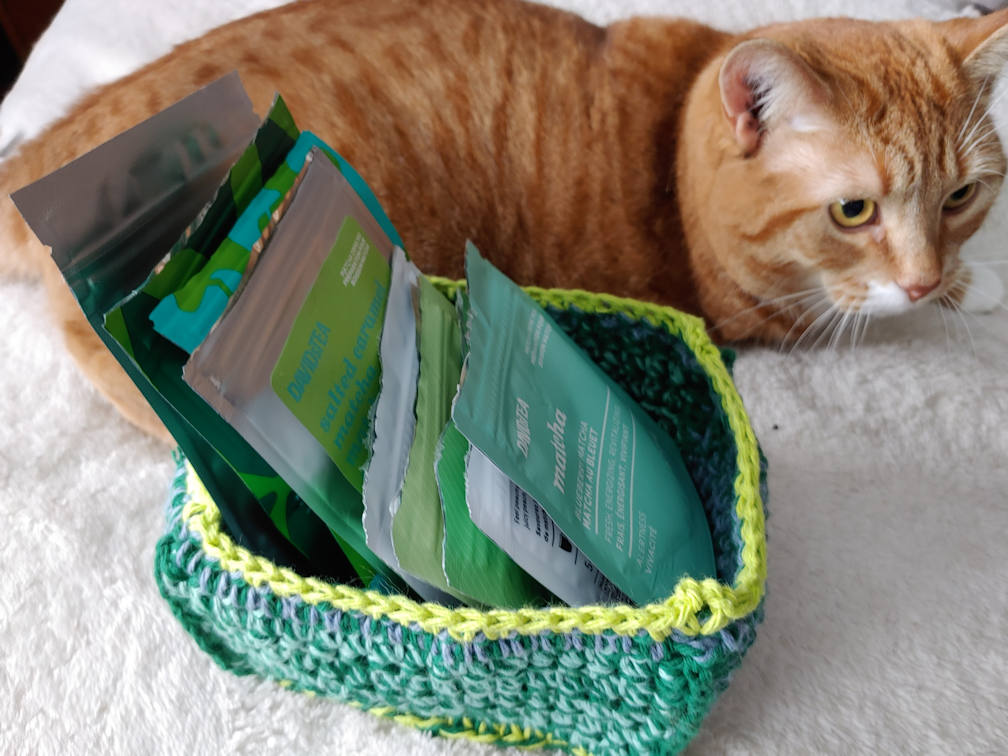
One kind of yarn that doesn’t do that is cotton. So when my daughter came to me with a request for a basket cozy for her teas, it was the perfect project for some nice, sturdy cotton!
With a special appearance from Ginger!
For her birthday, we got her a set for making matcha, so of course she had to get a nice selection of matcha blends to use it with. Taking advantage of a sale at David’s Tea, she was able to get a whole bunch of mixes, plus some straight up matcha. I didn’t realize the basket was for just her matcha teas, and used what colours I had. They just happened to suit the intended contents!
This was done with two strands on the hook, with the main colour a darker green, because I had enough of that yarn for the entire project. The other colours I had were in much smaller amounts.
To make this box, I started by making a flat rectangle for the base, a couple of rows smaller than the size I wanted, in single crochet. Then the base got a round of single crochet on all sides, which brought it to the desired finished size. Then, a loose round of slip stitch was worked into that last round. The slip stitches formed the base the sides were worked from. Each side was worked individually. I did the long sides, first, using a mint green I had just barely enough of, then switched to a sort of periwinkle blue for the short sides. I used just the main colour, in a single strand, to stitch the corners together with a modified single crochet. Then I went back to the blue and green combination to go all around the top to tidy it up. Finally, I used a single strand of bright green and a smaller hook, to tighten up that top, so it won’t flop around as much. To keep the corners from becoming rounded, I just added a little picot that doubled as decoration.
As the sides were worked from the slip stitched loops on the base, that left open loops facing outwards. Switching back to the larger hook and using the bright green with the main grain, I did one last round of single crochet into those loops, to make the base a bit more stable, and balance out that bright green at the top.
My daughter was very happy with it!
It was so much fun, today I made another tea cozy. This time, for one of my tea cups.
I think these were actually sold as soup cups. It’s about twice the size of your basic coffee mug.
Normally, when I make cup cozies, I make them with a strap that goes through the handle and buttons into place on the other side. It not only holds the cozy in place, but it protects your fingers from coming in contact with a scalding hot cup. Which is a big deal for people with nerve damage in their hands that prevents them from feeling heat!
That design works great with regular mugs, but with a cup that’s short and fat (like me!), they would slide off on the side opposite the handle.
So for this one, I made an over-the-handle loop. I started with a round, flat base that was just barely the same size as the bottom of the cup, then worked a couple of rounds without increasing, to start building up the sides. After that, I worked in rows, leaving a 5 stitch gap for the handle. I had very little of this yarn, and Nosencrantz had gotten to the purple, chewing through in several places, so I used the little bits for the stripes. Between the two colours, I managed to finish it. :-D
After finishing with the last two rows in blue, I joined the purple at the handle gap, working down from the right hand side, then around to the top of the other side. This closed up the handle gap from a 5 stitch opening to a 3 stitch opening. After making a little 3 chain loop at the corner, I then slip stitched into the last row of blue, all the way around, with the last slip stitch worked into the first stitch in purple. Next, I made a chain 3 to close the gap, slip stitching into the 3 chain loop at the opposite corner, then finishing off the yarn.
The slip stitches keep the top edge from being too stretchy, and the loop stretched over the handle pulls it all in. There is no way this cozy is going to slide off the other side!
I’m using it right now and, in retrospect, I would change one thing. I would make it one row shorter. That would require making the handle loop a chain or two longer to reach over the handle, without too much strain on the strands. When drinking from the cup, the cozy is juuuust tall enough that it gets in the way of my lips a bit.
We have three more cups like this (alas, our fourth one broke). I think I have enough cotton yarn to tweak it a bit and make a couple more. :-)
I really love doing structural crochet. I also love making useful, rather than decorative, things. I’m glad I can still work with cotton, because it’s perfect for both.
While I have purchased pots that can be planted directly into the soil when it’s time to transplant seedlings, the sheer number of such pots we will need makes buying enough for all of them bad for the budget. In particular, I want to start the kulli corn in biodegradable pots, for as little root disturbance as possible.
After last year’s attempt to use toilet paper tubes failed dramatically, largely due to using peat as a growing medium (it simply would not absorb moisture all the way through!), we’re going to try things a bit different this time.
There are a lot of web pages and videos on how to make pots from toilet paper tubes. This one is the best one I’ve seen so far. There’s the added bonus of it showing the pots made into squares, which was what I was thinking of doing already.
It’s pretty basic, really.
We knew we’d need a lot of tubes, so we’ve been saving them for many months. Last year, I had a fairly large box that we would drop the tubes in, and when we ran out of room I’d transfer them to a storage bin, to make more space.
Which was really silly, now that I think about it. It only matters if you want to keep the tubes round, and there is no need for that at all.
This little box has two layers of tubes in it. After flattening a tube, I’d drag it across the edge of the bathroom counter, to crease the fold even more.
It’s amazing how many tubes can be fit into such a small box this way!
Today, I snagged some of them to make pots for the tree seeds. I don’t know if there are any roots starting to show in the little baggies of soil. I am thinking it would be much less disruptive on the roots to “transplant” them now – when there may not even be any roots yet – into little pots, compared to trying to move them out of the baggies when the roots are actually visible.
So I grabbed a dozen tubes for the paw paw seeds, first. The different brands all have different tubes. The ones I grabbed were the tallest, with the thickest carboard.
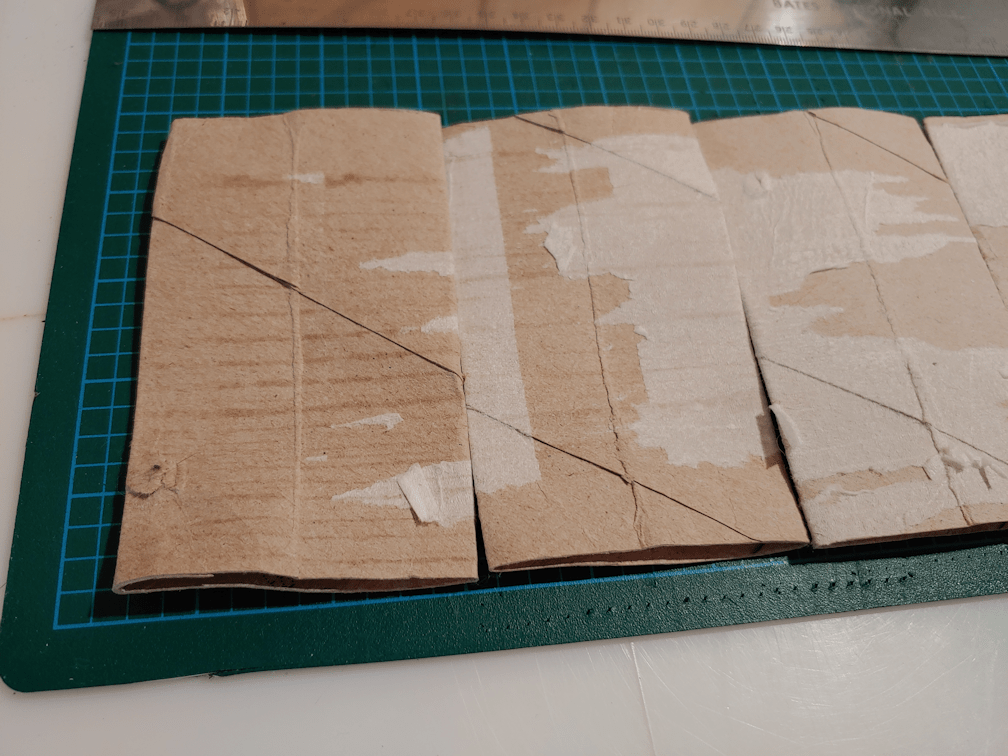
This first batch was done like in the video.
The first thing that needed to be done was give them all a second crease for the square, keeping the sides even by lining up the first creases with each other. The carboard was way too thick to fold them like he does in the video.
Then, just because I prefer sharp creases, I ran the tubes over the edge of the desk I was working on. You can tell the difference it made in the photo above. The tube I am holding is not being squeezed in any way. For the other one, I’d laid the tube flat on the desk and pulled my metal ruler over it to sharpen the crease. Which it did, but not as much as using the edge of the desk.
The creases were about 1 1/2 inches apart, so that is the distance than needed to be marked from the edge.
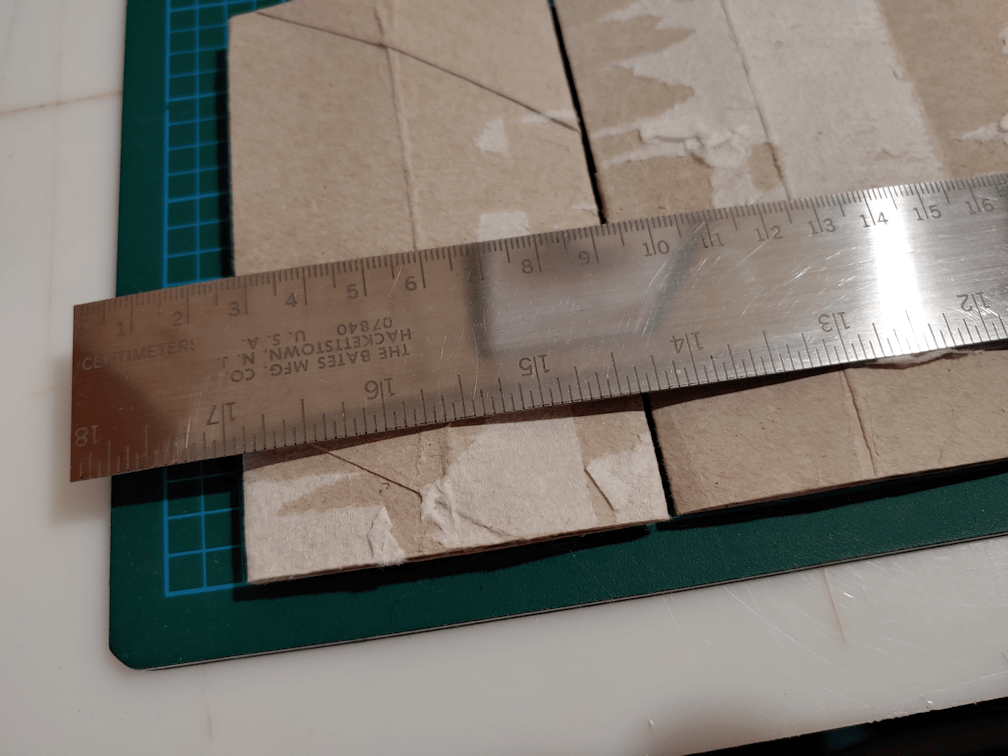
Since I had the cutting mat and a metal ruler, I only needed to mark one tube out of six. After lining them up along the bottom edge of the cutting mat, I could line the end of the ruler up to the side edge and the long edge with the mark on the first tube, across all the tubes.
Using the ruler to hold the tubes in place, I could mark them all at once, then repeat for the next batch. This way, it only took two lines to mark all 12 tubes.
The next step was to cut slits at the creases, up to the marked line, to create flaps.
Then the flaps were all folded inwards to create a bottom.
Once they were all folded under, I set up the storage container I got for them, and some water.
All the bottoms got dipped in water, then tucked into the storage box.
With these tubes, four of them fit snugly across a short side, so they’re not going to flop around. This was an important consideration when I went looking for bins to use for this. When we used the toilet paper tubes last year, the tubes came apart completely once they got wet, even as the peat in the middles remained bone dry. I wanted straight sided bins that were fairly small, to hold them all tightly. If the tubes were still round, they would have taken up more space, but there would be gaps between them, and I didn’t want those gaps, either.
These now will be left to dry, and we’ll fill them tomorrow.
For the next batch, more tubes were needed. We have 26 tulip tree seeds to transfer.
After grabbing a bunch of tubes, I found a couple of shorter ones. There is a surprising amount of variance between brands! I switched out the shorter ones for taller ones.
Height is why I wanted to change how the bottoms were done for this batch. With how the first ones were done, each flap completely covers the bottom, making a 4 layer thick base. There’s no need for that.
So for these ones, instead of cutting flaps that were half the width of each side, I went for a quarter of the width.
That worked out to be 3/4s of an inch. Each square in the grid on the cutting mat is 1/4 inch, so the tubes were all lined up to the base line of the grid…
…then the ruler was lined up with the 3/4 inch line, on each side of the row of tubes.
Which was a bit of a pain, when it came to using the ruler to hold the tubes in place while marking the line, since there was a space under the ruler.
It was much easier to do it from the middle instead of the ends. :-D
Then the tubes all got slits cut along the creases, up to the line.
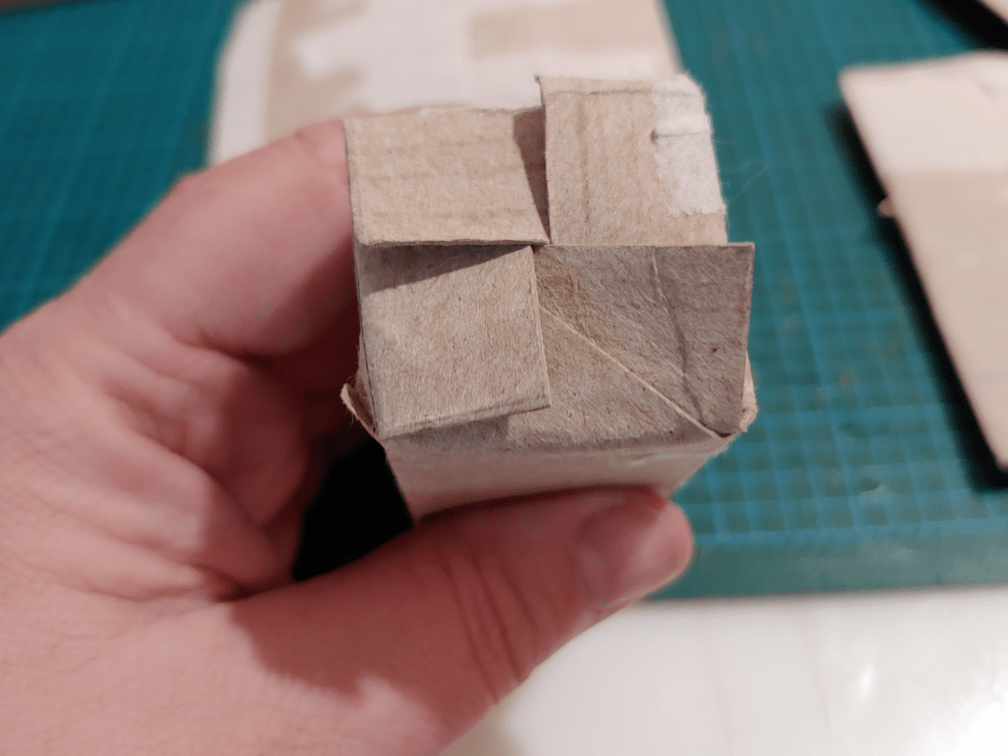
When folded in, this allowed for them to overlap and be locked into position.
These tubes were slightly shorter than the ones used in the previous batch, but by doing it this way, the pots ended up taller, as you can see in the comparison above.
Since the flaps could hold themselves in place, I could have skipped the water part if I wanted to, but I chose not to. They got dipped.
This brand’s tubes were not only a different length, but also a slightly different width. Just enough that they did not fit snugly across the short side. However, 8 tubes did fit snugly along the long side.
Tomorrow, these two sets of pots will be filled and planted with tree seeds. The tree seedlings will remain in pots for 2 years before being transplanted to their permanent locations outdoors. Starting them in these will allow us to “pot up” the seedlings into large pots as they get bigger, without disturbing the long tap roots they are expected to develop.
After these are done, we’ll start prepping tubes for the kulli corn. As with the tree seeds, it will be one seed per tube, so we will need 100 of these. I was able to find slightly larger versions of these bins, and one should be able to fit all 100 of these pots. The bins also have lids of the same transparency as the bins, which will allow us to use them as cat-proof greenhouses, if necessary.
I think I might have to pick up more of them. They’ll make moving seedlings outside to harden off much easier, too! They also happen to be pretty inexpensive, too. After much searching when doing shopping trips in the city, I found them at a local Red Apple store, which was just an added bonus. I’d actually found some at the local dollar store I was going to settle for, but the sides weren’t quite as straight, and the lids were opaque. I’m glad I decided at the last minute, to try another store.
The dollar store bins will instead be used to hold the little odd balls of yarn and small crochet projects on the go by my desktop, that the cats keep managing to steal away, so matter how diligently I bag them up!
We’ve had a busy day outside our living room window!
We’ve had quite a few deer visiting the feeding station, and just plain hanging out. The piebald has been standing around the old junk pile (maybe we should start calling it something else, since we cleared out the junk and there’s just old stacked boards now), chillin’ for at least a couple of hours. Others have just been wandering around the area, sometimes at the feeding station, sometimes nibbling lilac twigs, sometimes among the spruces, nibbling whatever underbrush they happen to be next to.
Keith had front row seating to watch them all, with his ever tragic expression!
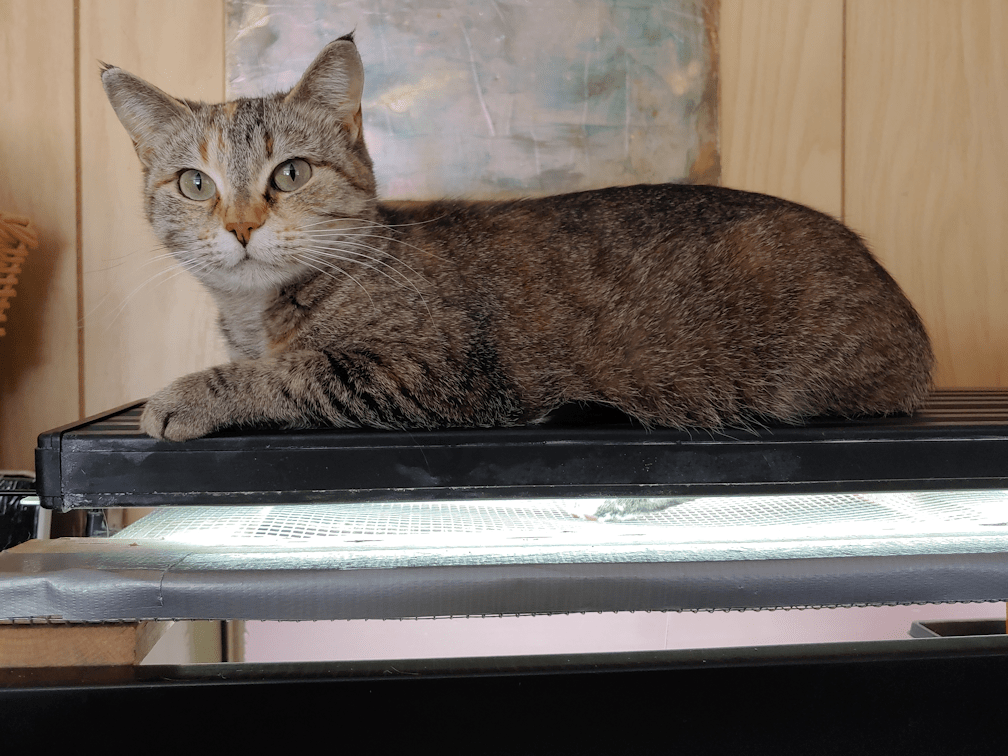
Now that Saffron is gone, other cats have been sitting on the warm light fixture over the seedlings. Especially Fenrir and, pictured above, Beep Beep.
It must feel nice on their still nekkid bellies!
Today, I finally got around to sterilizing bottles and equipment, and bottling the second carboy of hard crab apple sider.
The one I meant to bottle months ago!
The other other we had fermenting was bottled back in August. If you follow that link, the post has links to the whole process of making it, starting from when we picked the apples back in September, of 2020. We had no apples in 2021, so no new crab apple brews of any kind, sadly.
So… yeah. This carboy has been fermenting since September of 2020.
When the other carboy was bottled, we didn’t do a hydrometer reading, so I did that from the last bottle we’ve got of it, while preparing to bottle the second batch.
I really hate doing hydrometer readings. I can’t read the tiny numbers and have to take pictures to be able to see them – but the camera does NOT want to focus on the hydrometer.
Anyhow.
After – hopefully – reading the hydrometer right, the ABV calculator I’ve got came to 10.5% Alcohol By Volume.
For the second carboy, I did a reading before starting to bottle, and the calculation came to 11.8% Alcohol By Volume.
Not too shabby!
The jug we’re using as the carboy after racking the initial brew was repurposed from a 3L wine bottle. I was able to fill three 750L bottles, plus a 250ml bottle, before it was down to the dregs.
Of course, we had to do a taste test to compare the two.
The first thing you’ll notice in the pictures, is that the cider I was about to bottle is a darker colour compared to the one already bottled.
The previously bottled cider had a strong, almost bitter, taste to it. It tasted stronger of alcohol, too, though it had a lower percentage.
The newly bottled cider had a fruitier, smoother taste.
Both tasted good, but I prefer the one that stayed in the carboy for 1 1/2 years. That extra 7 months seems to have made a positive difference.
I do hope we have crab apples this year. I look forward to making this again!