While doing my evening rounds today, I decided to take a look at the building that we had used as a chicken coop, when I was a kid.

Since we first moved here, the roof/attic has been slowly settling downwards by noticeable amounts. The board you see me puling away from the wall used to be directly above the door. As things settled downwards, this board ended up over the top of the door, making it impossible to open. Now, it has dropped further but has weakened to the point I could just pull it away from the wall and the door.
That meant I could pull the door open.
Sort of.
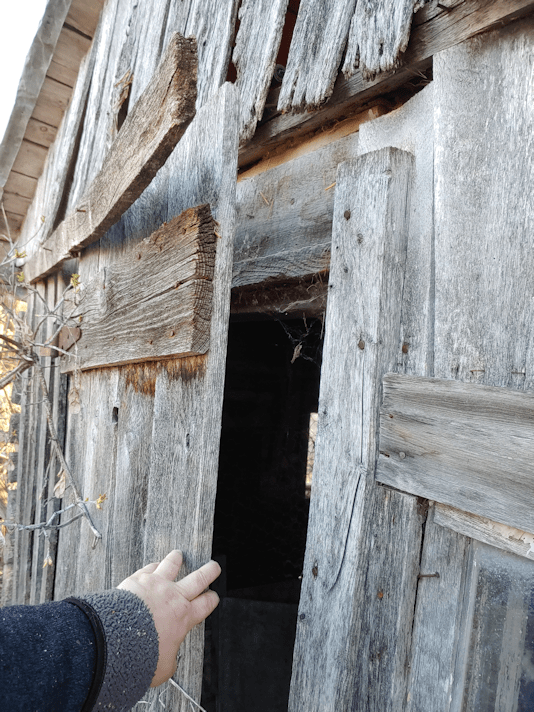
When I pulled on it, that top hinge came loose (the bottom one was already loose). I ended up just lifting the door out of the ground it was being pushed into, and sliding it to the side.
Previously, the only way I could get a look inside had been to shove my phone through the gap in the door and use voice commands to take pictures, hoping it was angled half-way decent. Today is the first time I could actually go in and see what’s in there since… well, since we still had chickens, when I was a kid.
I didn’t go far.

Why are there so many old tires, all over the place? And so many of them still on rims!
At the far end you can see the nesting boxes, and to the right is the roost.
It was so strange to look at it. In my childhood memory, that roost was much, much higher. In my mind’s eye, I was expecting it to be a couple of feet from the ceiling. I actually remember looking UP to the roost, when I went in to tend to the chickens!
I’m pretty sure this old cabin did NOT have a dirt floor, but it was always covered with straw, except for the part under the roost, which was covered in chicken poop, so I can’t quite be sure.
I’m kinda hoping I am remembering that wrong, and this really is a dirt floor. I remember helping clean out the old straw, but not well enough to remember if there was a floor under there.
Whatever it is, I did not go any further in than I could while stepping on some boards near the door.
I don’t know what that material is that’s covering the walls. It’s almost like asphalt shingles, except much thicker.

You can see where the clay between the logs crumbling out in places, such as right by the door in the above photo.

This little side area is where we would keep new chicks. There is another little space at the far end with a door that was basically a frame with a screen finer than the chicken wire I’m taking this photo through. New chicks would have been small enough to squeeze through chicken wire. I can’t quite remember, but I think that’s where the feed was stored.
You can also see the outlet where we plugged in the heat lamp for the chicks. Below the window is an opening for the chickens to go outside. There was chicken yard enclosed around 2 sides of the cabin, with the area on the other side of this wall sectioned off, and another door to access it from outside. This way, the new chicks could be kept away from the older ones, even when they were big enough to venture outside. When they were fully grown, the doors into the chick enclosures would just be left open. In the summer, we would leave the main door into the enclosure open during the day, so the chickens could wander around the barn yard as they pleased, then closed them up in the coop for the night, making sure to close up little opening in the wall, too. Skunks, foxes and weasels were the most common predators we had to keep them safe from. Especially skunks.
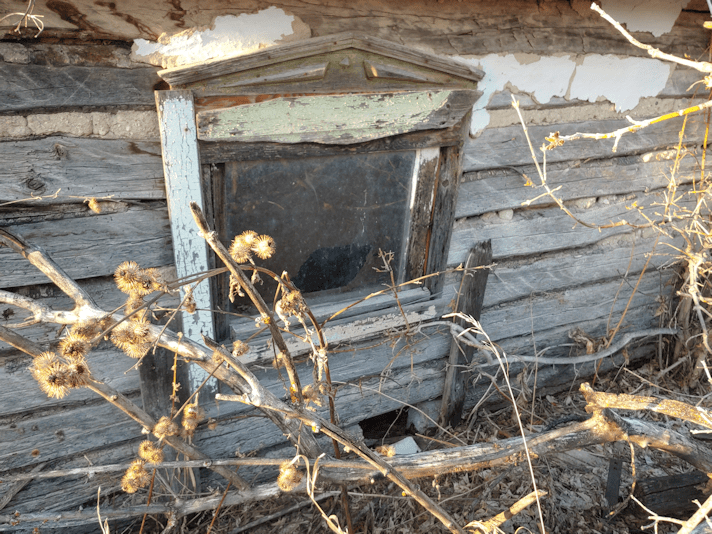
To take the above photo, I am standing in what used to be part of the smaller chicken yard. You can see the piece of electrical cord coming out from under the right side of window frame. The cut end is hidden behind a dried up leaf. The outlet itself is in a different location than where that wire is, so I don’t know what it’s actually for. You can also see signs that the outer wall used to be covered in plaster and painted white.
It’s in rough shape and kinda gross, but of the 3 log buildings we’ve got, this is the one that’s the most solid and least damaged. If there is any chance of salvaging it, we’ve got to take care of some things.

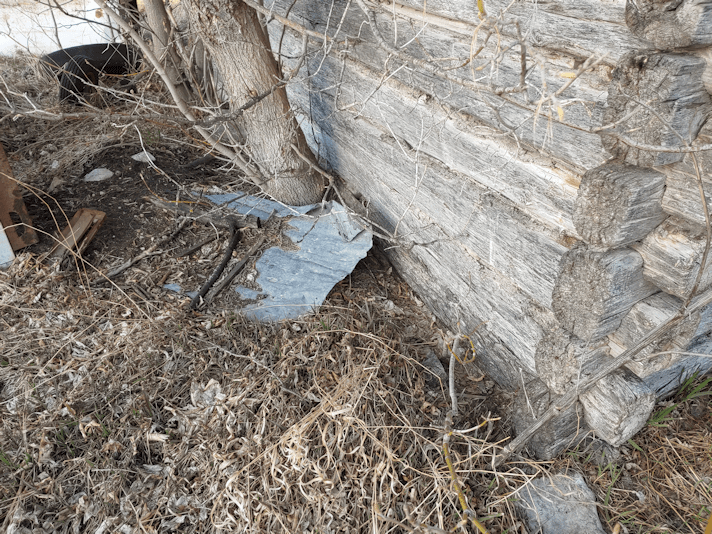
One of those things is to cut away the trees that have been growing against it. This one here is growing partially out from under the back wall. Though efforts had been made to protect the roof by adding what looks like a corrugated tin over the original wood shingles, the branches of this tree has torn off a whole section of it, and is tearing more pieces off with every strong wind. You can even see one of the pieces of tin from the roof half buried under debris at the bottom of the tree. Which gives an idea of just how long ago it was torn off and has been sitting there.
Quite a few sheds and outbuildings have trees growing right up against them. They are almost all maples. One near the pump shack had been cut down; there is a rather large stump there. Maple stumps throw out new growth, though, which might be great if you actually want to coppice them, but not so good if you’re trying to protect buildings.
When we moved here, my original timeline has been to work on the inner yard for the first 2 years, then start on the outer yard in the third summer. Last summer was a bit of a write off in some ways, so it’s going to take another year to finish that, but there are things that need to be done in the outer yard that really shouldn’t wait.
Cutting away the self-sown trees that are causing damage is one of those things!
The Re-Farmer

