I am so glad my brother said he would take care of my mother’s morning meds today, after we got the call from home care saying they didn’t have anyone to do it!
After feeding the outside cats and doing my morning rounds, I grabbed breakfast, then backed the truck closer to the inner yard. I didn’t want to go too close to the house while loading the back, because of all the very curious cats and kittens!
Speaking of which, I did a head count of all the cats and kittens I could see this morning. I counted several times and got a different number each time, but the highest count was 42. Mostly kittens. I’ve been messaging with the rescue group and mentioned this, commenting on how I can now see why we’re going through kibble so fast. I told them I got four 40 pound bags when disability came in at the end of Septembers. Sixteen days, and we’ve gone through three of them. I had to start the fourth one, today. They asked if I could last a week. I think we might be able to. They also asked about the prices for 40 pounds bags, and I was later able to send them pictures of a couple of receipts from the two different feed stores I go to, and the two different brands I get from them. A rescue would certainly be on the look out for better prices on kibble!
Anyhow…
I am so happy we have that new cover installed on the truck!
We were finally able to take the garbage from cleaning out the sun room to the dump. After I loaded those much bigger bags from the sun room clean up, with my older daughter distracting kittens away from me and the truck as best she could, she helped me get the household garbage out of the old kitchen, where the bags go until we can do a dump run. With all the kittens running around, it’s easier to have one person pass these smaller bags through the screenless window in the storm door to a second person. That way, only one person has to dodge kittens! 😄
This is the first dump run we’ve been able to make since we took the truck in for repair and getting the new cover installed. With the extra garbage from the sun room clean up, it filled the entire space under the cover – and no worries that something would blow away on the highway!
Once the truck was loaded, I was off to the dump. I got there right at 10. There was already a truck parked on the road, waiting for the gate to be unlocked. It turned out that the car in front of me was the attendant! I had it in my head that they opened at nine, forgetting that winter hours starts at the end of October, not the beginning. Glad I didn’t leave for a 9am opening!
By the time I unloaded the truck, there was a whole crowd of vehicles that had come in behind me, including a dump truck with two huge crushed cubes of garbage. !!! I’m happy to say that the area in front of the pit was relatively clear of huge piles of garbage. I’m still nervous about getting a flat tire every time I got in there, though.
That done, it was off to the pharmacy in town. I wanted to get refills before I ran out. I’m glad I didn’t wait. I have my anti-inflammatories, and my stomach meds to protect from the anti-inflammatories. I take the stomach meds only once a day, but can take up one or two anti-inflammatories, up to three times a day. If I were to take the max dose of the anti-inflammatories, I would finish both at the same time. I only need to take a couple of anti-inflammatories once a day, though, so those last a lot longer. I’d actually picked up a refill a while back, but it has disappeared, and I never used any of it. I’m still finishing my first bottle. I suspect a cat knocked the second bottle of the shelf, but I haven’t been able to find it, anywhere! So I had to get another refill.
The stomach meds, though, have already been refilled twice before, and my prescription was done for refills. The pharmacy would have to fax my doctor to get an extension. Unfortunately, today is a Saturday on Thanksgiving weekend, which means the earliest the doctor will get the fax is on Tuesday.
Once again, glad I started this now, and not later! I’ll have enough to last until the updated prescription is in. If I’d waited, I would have run out, and I really don’t want to do that. These have saved me from so much pain and stiffness, it still amazes me.
Meanwhile, I was able to get the other refills. While the pharmacy was taking care of that, I headed over to the grocery store to pick up a few things before Thanksgiving.
I didn’t have much on my list, but I did spend time going through the store, looking for something I might want to add to our Thanksgiving dinner. I should have picked something up while in my mother’s town, yesterday! They had much better sales on pies. This store had sales, too, but they were not only more expensive even with the sale price, you had to buy two of them to get the sale price, Otherwise, they were regular price – and there was no way I was paying that much for a small pie!
Taking my time at the grocery store gave the pharmacy the time then needed to fill my prescriptions. They were just bagging it up when I got there. Hopefully, I’ll be able to get the missing one on Tuesday.
Meanwhile, my brother had surprised my mother by showing up to do her morning med assist instead of the home care worker. He also had a couple of Thanksgiving dinners my SIL had packed for her. She was very happy about that and said they would be her lunch and supper! 😊 He stayed long enough to take care of her portable air conditioner and the window set up for the winter. He was done and already here at the farm before I got back from my own errands, so I went over to see how things went. She can be particularly cruel to him.
She turned out to be having a good day today, and was actually mostly kind to him. As we were catching up, he remembered to tell me my mother brought up about me and the farm. I immediately became suspicious, but he told me it was good. She had brought up about how we are paying for the utilities here, and he said yes, plus things like the internet, and fixing things, and so on. She started to say how she wanted to help. I told him, she has teased about helping with the door replacement a couple of times, but I don’t expect her to. He assured me, she’ll help with the door replacement. As her PoA, he could even make it easier for her and do an etransfer, or she can write me a check, if she prefers, but he says she intends to help with the door. She wants this place to be in good shape.
I don’t trust her. She’s burned all of us, at one time or another, by making promised and then backing out at the last minute. She has cost my brother many thousands of dollars by doing that. Even the times she has helped, like with the new roof and replacing the septic ejector, it was because my brother made sure she followed through. She actually tried to back out of paying for the roof like she promised, after the work was done, because she refused to believe it should cost more than a thousand dollars (it was around $15,000, I think), even though we got estimates and showed them to her.
I trust my brother, but there’s only so much he can do, and I don’t trust her.
We shall see. Lord knows, we could use the help after this past very rough couple of years, and my brother knows it.
Meanwhile, as I got caught up with my brother, I came into the house to find my purchases had all magically put themselves away. 😄 That allowed me to go back outside and try and get some work done.
Painting the isolation shelter and a few other things, were priority. It was supposed to be a much warmer day today, but it has been insanely windy.
I did get the painting done, though. The new paint is very noticeably lighter! I don’t care, though. I made no effort to try and keep the new colour off the painted parts. When I find something better to bring in for colour matching, we’ll get another can of paint in the right shade, and give what I got painted today a second coat, after winter.
The sliding windows had to be removed, of course. I was careful when painting the tracks, as I didn’t want them to get filled with pools of paint by accident.
In the first picture, you can see the box to shelter the ramp opening. Later on, I want to flip it upside down to paint the inside, but that’s not a priority. I got the old plant stand painted, and it’s sitting on a couple of broken sidewalk block pieces to keep it above ground.
The second picture is the side where the sliding window can only side towards the front, not over the insulated side wall. There was a bit to do in the front, and a single piece on the back that needed to be done, but most of the painting needed was on the sides.
I did not do the wire mesh door. It was so windy, I was starting to get an ear ache and had to head inside for a while.
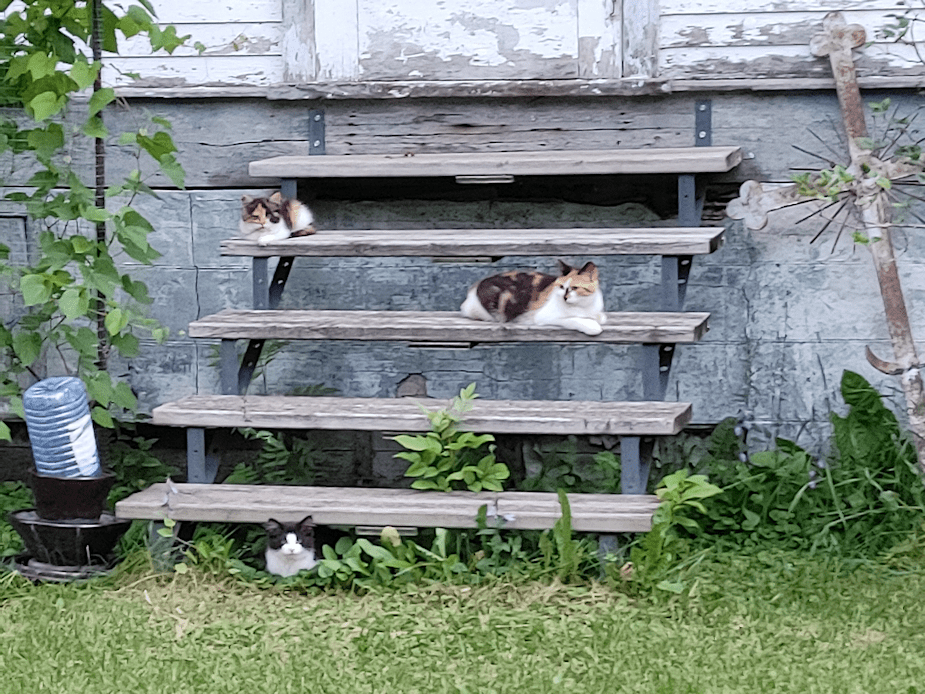
After a break, I headed out again. By then, the paint was no longer wet to the touch, so I put the sliding windows back, which you can see in the third picture. Everything was sliding just the way they should!
That cats could now use it, too. Without those windows, the wind was blowing through so much, it actually blew a corner of the hammock loose!
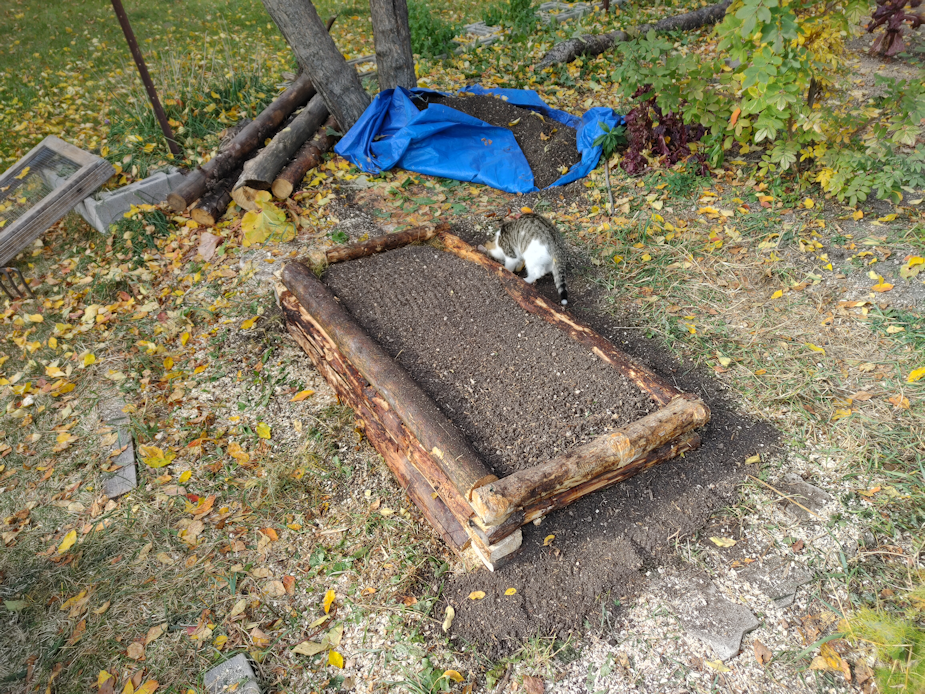
My next project was to continue that garden bed I’d done half of.
Just in time for it to start raining!
I stayed out as a light rain came and went, while thunder rumbled in the distance, until it finally started coming down too hard to stay outside.
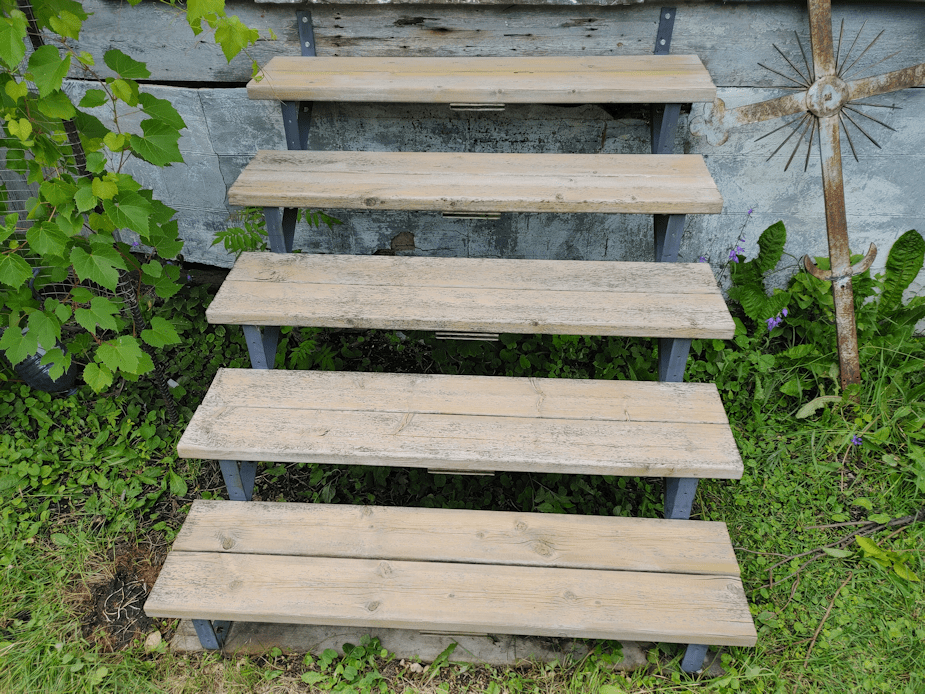
The first picture is the “before” shot. The second is how far I got before it started raining too hard.
So. Many. Tree roots. I think I got about half way down that side. Maybe a bit less. The rock bucket is a little over half full.
Once the roots and rocks were cleared, the soil was wonderfully light and fluffy. Perfect to grow in – if we didn’t have to worry about those roots coming back!
I’m glad I got as much done as I did. I’m not sure when I’ll be able to get back at it. Tomorrow is supposed to be warmer, but rainy. We’ll be having our Thanksgiving dinner tomorrow, anyhow. I plan to pack up a care package for my mother and visit her on Thanksgiving day. She will be getting her Meals on Wheels, though, so it will be for later in the day. Monday and Tuesday are supposed to be quite chilly, with overnight lows reaching below freezing, but then it’s supposed to warm up again. That will be my time to get the beds finished, then start some winter sowing! I’ll have to go through my seed packs and work out where I want to plant things. Some things will be more appropriate for the old kitchen garden, right against the house. Others can be planted well away from the house, as they would get harvested in the fall. Some beds will get the winter sowing marked clearly, so that I can sow other things among them in the spring.
I’m really looking forward to having a better gardening year than this one was!
The Re-Farmer