Fire pit mods, done!

We have been talking about using the fire pit to do an actual cookout tomorrow (weather willing!). That will require a trip into town to pick up things we want to cook over a fire, so I cleaned out and modified the fire pit today.

The first thing to do was empty out the ashes. I have done that once before, in our first year here, but not as thoroughly as I wanted before adding modifications to the pit.

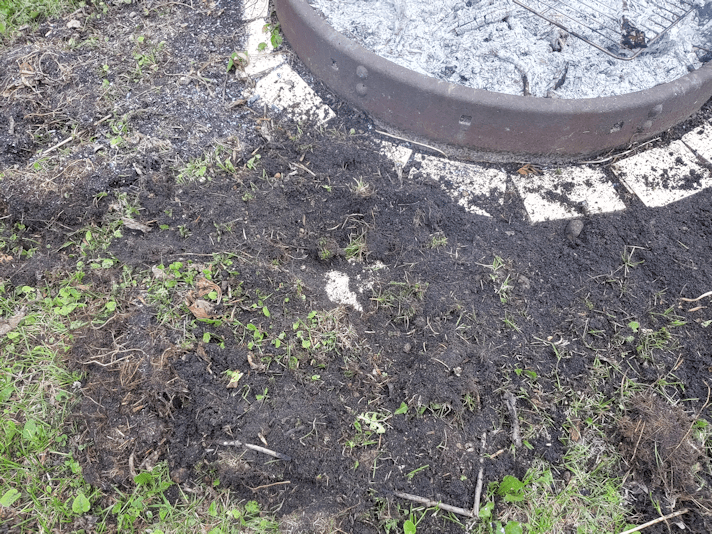
I filled our large wheelbarrow twice! The first load was pretty much all ashes, while the second was a mix of soil and composted ashes.

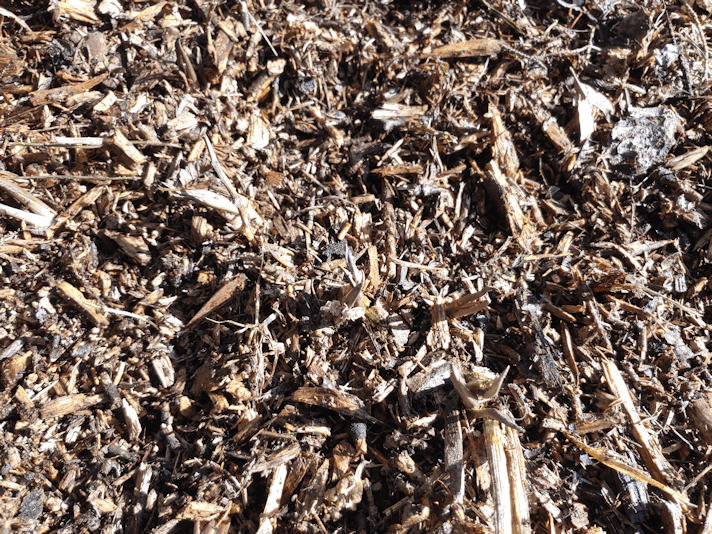
I dug down far enough that I was starting to fight with root mats. Then I started hitting a… mat?

I pulled out the buried remains of… whatever this is.

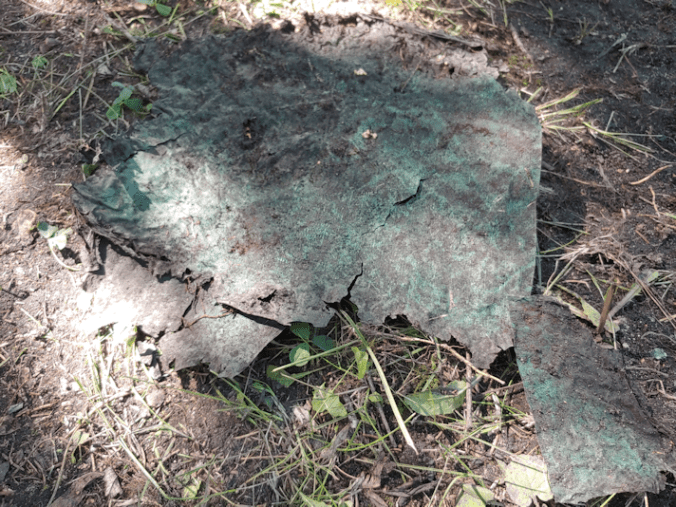
It’s some sort of woven material that looks similar to a tarp, but… not.

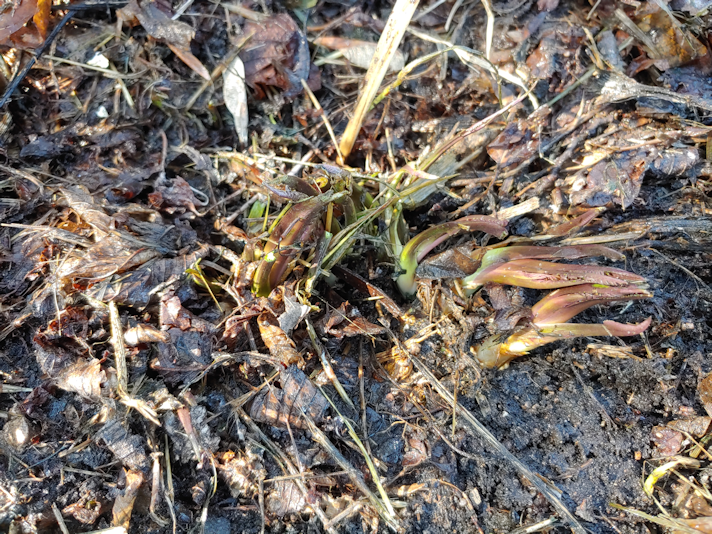
When I pulled it away, I had another surprise under it.

Do you see those whitish specks among the roots?

Those are ants eggs!

Ants have somehow managed to survive in the fire pit! Considering how hot it would have gotten, just last night, I’m amazed. They weren’t just under the sheet, either. I found more around the edges, elsewhere.

Well, I hope they move on to someplace else because, now that the ashes and dirt are gone, they’ve lost what protection from the heat they had!

Clearly, this fire pit has been used to burn garbage, too. Along with the green mat I pulled out, I found broken glass and old nails, along with more expected things, like chunks of wood and rocks.

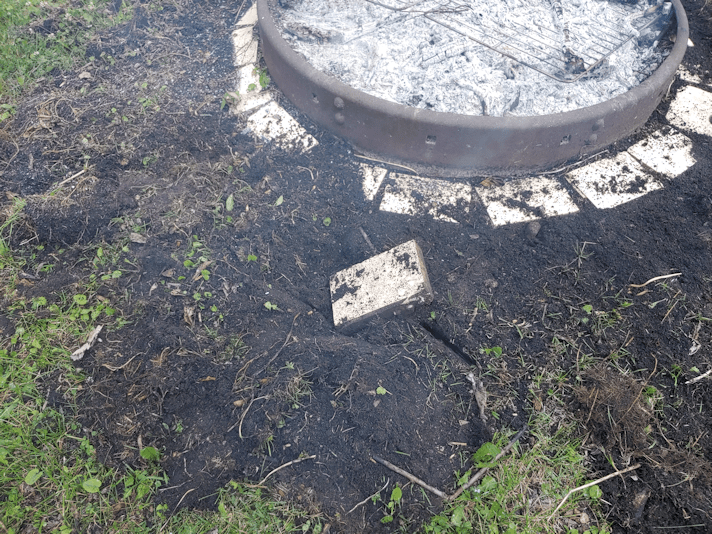
Once the pit was cleaned out and raked even, it was time for the concrete blocks.

We have a few of them around, but most of them are where they are, for a purpose. Like the ones around the storage house, that are holding various panels to cover what used to be the top of the basement. I haven’t moved them to try and see what they are covering yet, so I’m leaving them be for now.

I did have one available that wasn’t being used, and there was another in the middle of the tire planter, that had been buried in the middle to support the bird bath, which is now set up in a different location. So I dug that out and hosed out the dirt that had filled the openings.

I then had to decide how to orient things.

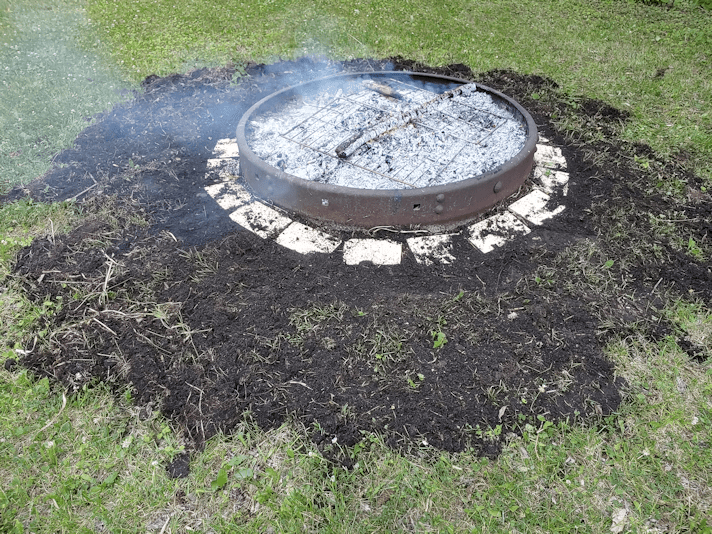
I decided to orient it with the nearby gate. That gap where the wind usually comes from, and I wanted some air flow over the fire. The openings in the blocks will allow for some air flow from the sides, too. I used one of the oven racks to determine how far apart to put the blocks.

I wanted to have the option of using both racks, so I also brought over the 1 half-block we have.

It’s shorter than the full blocks, so I added a couple of bricks under it, to make it level with the others.

Then I hosed everything down.

We now have several options.

If we want to do a simple wiener roast, we can leave the racks off, and the blocks can be used to support our roasting sticks.

Once we’ve built up the coals, we can place both racks on, like in the picture, for a large cooking area. If we need to, we can still easily feed the fire from one end.

Or we can use one rack across the middle, supported by the two large blocks.

Or, we can have one rack towards the end, supported by all three blocks. We’d be able to keep a fire going at the open end, and push hot coals under the cooking area as needed.

We can also fill the half block with coals for anything that needs high heat, like setting a pot or kettle of water to boil, and have the one rack covering it as it is in the photo, for air flow. To do this, though, we’ll need to get a long handled, metal scoop, like are used to clean fireplaces. Mind you, it’s entirely possible we already have one, hiding in one of the sheds. LOL

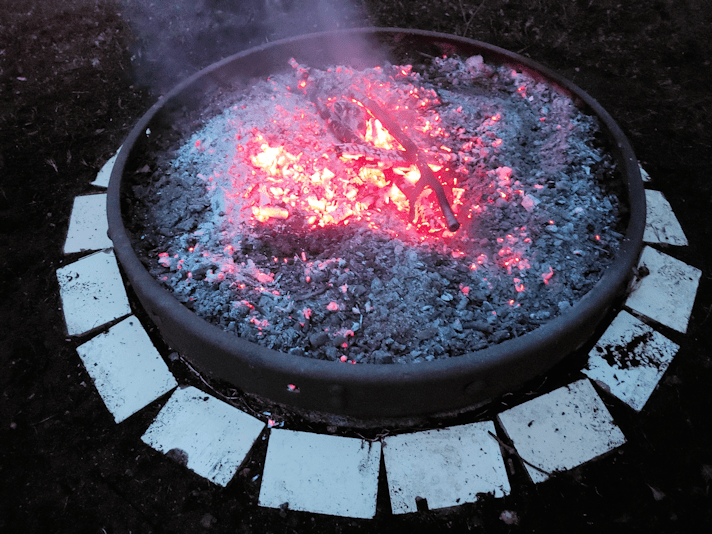
Now that the set up is complete, we can keep it in mind when we go into town tomorrow. We still might go for an ordinary wiener roast, but who knows what we might find to inspire us, instead. :-)

I’m really looking forward to it! I hope the weather co-operates. :-)

The Re-Farmer

Clean Up: fire pit ring

Yesterday, things were a bit cooler and finally nice enough to start a fire in the fire pit!

I’ve been putting small branches and the invasive vines I’ve pulled up into there since last summer, so it felt good to finally burn that stuff away!

While I was at it, I decided to clean up the bricks around the fire pit that the skunks revealed while digging for grubs.

Knowing that these were the glazed bricks we’ve got all over the place under there, I decided to use the sidewalk ice scraping tool. Just a flat blade that would slide across the surface, and cut away the root mats at the same time.

It worked remarkably well!

In the above photo, I’d finished uncovering the bricks all the way around.

There was some seriously thick root mats covering some of them!

The next step was to hose them down with water, including using the jet to pressure wash some of the dirt out from between the bricks, and between the bricks and the fire pit ring.

Where the water pooled showed me the most uneven areas of the brick ring.

What I will eventually be doing is taking them out completely, leveling the base off as best I can, then putting them back.

Ideally, I’d be adding a layer of gravel under there, first.

I am seriously considering taking the wagon and a shovel out to the old gravel pit to see what I can salvage out of there!

Until then, we make do.

My next step was to use break up the ridge of soil and root mats around the ring some more.

Every now and then, I’d find a small rock, but then I hit was seemed to be a much larger rock.

A strangely flat and smooth rock.

I found another brick!

For a moment, I thought maybe there was a second ring of bricks, but the angle of it was too random for that.

Somehow, a single brick got left to one side, and got buried with the others.

The ones around the fire pit getting buried makes sense, but how does a lone brick on the side get left there long enough to be buried, too? Did no one try to mow there, before it got covered? Did people using the fire pit (and I know it did get used) simply walk around it until it disappeared, along with the other bricks?

So very strange!

I set it aside with another brick like it, that I’d found under some nearby maple trees. :-D

(These glazed bricks have been around for as long as I can remember. I have no idea where they came from, but they would be at least 50 years old, and probably quite a few years older. While I intend to take them out of the various areas they are in now, to replace them with what should be there instead (like infill around the house!), these are going to be kept and repurposed. They’re too slippery to use as a “floor” for anything (which is probably what they were salvaged from originally), but I think they would be great on walls or something, at some point.)

Once I broke up the ridge, I used the metal blade on the scraper to push the soil away, to try and level things a bit more.

The grills in the fire pit, btw, are the racks from our old oven. After burning away what was already in the pit, I started working on the pile of branches by the collapsing log cabin. When a solid bed of coals was formed, I put the oven racks in it, then built the fire up again on top, to burn away any grease or whatever that got on them while being used. We basically didn’t bother to clean the oven when we knew we needed to replace it fairly soon. It did have a self-cleaning function, but we didn’t feel it was safe to use. With elements on the stove sparking, we didn’t want to find out if anything electrical would give out in the oven, too!

So I used the fire pit to get the cruddy bits off.

Shortly after this, my daughter joined me, and we built the fire up once again, to get rid of more of the branch pile.

I also used a metal rake to spread the soil out more, then took the hose to it, to break up the clumps. The water no longer pools at the bricks. :-)

After a while, my daughter took out the oven racks and set them aside to be hosed off, later.

The next thing I want to do is empty the fire pit of ashes, which will be spread over a garden area or two.

Once it is cleaned out, I want to add some cinder blocks or bricks into the pit. They will be there to hold one or both oven racks. This way, if we wanted to, we could use pots and pans for cooking over the coals. I do have a campfire rack, but it’s meant to put food on directly to cook, not hold the weight of cooking utensils. The oven racks and bricks will open up more possibilities for what we can do on our fire pit. :-)

While I was working on uncovering the fire pit ring, I had help.

Not the most useful kind of help!

More like the “pay attention to me or I’ll trip you” kind of help! :-D

Eventually, he got tired of trying to make me pick him up and went for a nap. :-)

Such a cutie!

He would make such a loving indoor cat, but we’ve had no luck in adopting him or Creamsicle out. :-(

Lately, Potato Beetle and Creamsicle have perfected the art of rubbing against our legs WHILE we are walking, somehow managing to maintain contact and pressure even as we pull our legs away.

Such determined creatures!

Also, Potato seems to like my new shoes. Maybe that’s it. He’s happy I no longer have these.

My left shoe had actually blown out like the one on the right, but I’d used Gorilla Super Glue on it. Amazingly, it is still holding! The other shoe was only coming loose at the toe tip, so I glued that – only to have the sides blow out, soon after! The tip managed to hold on for days longer.

I’m not a shoe person. It’s so hard for me to find shoes that accommodate my feet, I don’t bother. I have one pair of regular shoes. Maybe a pair of sandals, too, if I can find them. Not this time of year, apparently. :-/

Women’s shoes don’t fit me, at all. I can wear extra wide men’s shoes, but to get the right width, I go with a size that’s a fair bit longer than my feet. Which is why I keep catching the toes of my shoes on things. :-D It means my shoes wear out on the sides faster, as my feet bend in a different area than the shoes are designed for. It doesn’t matter if they are cheapies, or if I spring for a higher end shoe. By the end of a year, all my shoes end up looking like this!

Which, if nothing else, is entertaining!

The Re-Farmer

Some winter damage to fix

This spring, our sump pump is actually going off pretty regularly. Which is great, because it means we have moisture in the ground. The last two springs, I think it went off only once or twice, aside from when we drained the hot water tank into it.

Which brought to my attention some damage to the drainage hose outside.

I think it might have gotten stepped on, while frozen… and it was likely me who stepped on it! :-D

So I went into town to see if I could pick up some replacement hose. Something longer, so that I could direct the hose towards the garden by the old kitchen, instead of having it drain next to the well.

At the hardware store, I was very happy to find sump pump hose kits with 24 ft hoses!

Except… well… see for yourself.

They are very different diameters!

On reading the package, I realized that this hose kit is intended to attach directly to the sump pump itself.

That is not what we have.

I found a very knowledgeable employee to help me out. Unfortunately, I didn’t think to take any photos before I left, so I had to try and describe to him what we had instead.

We’ve got this semi-rigid hose cobbled together, instead. The diameter of this hose, however, should fit the hose kit. It was on the other side that the size is somehow modified so the larger diameter flexible hose could be attached. I had looked at it before and saw that it was clamped very close to the wall, but could not see what it was clamped too.

I still can’t really see.

Something has been wrapped around the end, and then the larger hose was clamped in place.

That “something” looks, for all the world, like batting. Like quilt batting, or aquarium filter batting.

Whatever it is, it’s been there long enough to be covered in crud.

In talking to the guy at the hardware store, he picked several different attachments that I might need, and a plumber’s adhesive that I would need if I had to use one of them. Once I get working on this and remove the broken hose, I should have the pieces needed to attach the hose kit, if it’s a different size. Or, if the end coming out of the wall is the size I’m seeing from the basement, and doesn’t have something weird done to it on the outside, I might be able to use what came with the kit itself.

He said I could return anything I don’t end up using, but that’s not going to happen. Even if I don’t use the pieces, they are things that will come in handy in the future and will not go to waste!

Plus, just in case, I picked up two hose kits. If things are bad enough, I can replace the cobbled together hose that’s inside the basement now and replace it with the flexible hose that should have been there in the first place. If I do end up doing that, one hose will not be long enough to run along the side of the house and reach the garden.

With that in mind, I asked the guy at the store if I could attach the hoses of two kits together, mentioning in passing that right now, the hose is draining next to our well.

That got a rather dismayed and understanding “oh, dear!” as I continued to say why I wanted to have longer hose!

He then found me the piece I would need to attach the hoses together, should I need to.

I was one very happy customer by the time I left the store!

When it comes time to actually start working on the hose, I’ll have to make sure to have the sump pump shut off in the basement. It would not be good for it to turn on while I’m working on the house outside! :-D

So this is a task prepped for, but will have to wait for another day. At least we’re all ready to get it done, though. Other things had priority for today, which will be in my next post. :-)

The Re-Farmer

Clean up: basement – Done!!!

Woohoo!!!

It’s done!

The girls and I made a push to finish tonight and, as I write this, we now have two very pregnant cats in the new “maternity ward”.

Before we hauled out all the stuff waiting by the stairs, my daughters and I went rifling through a shed and the barn to see what we could find to use as doors.

First, we went into the shed, where I knew there were some doors that might work. We decided against them, but found some decent wood in a corner. We found a couple more pieces in the barn.

With the trellis wire left over from covering the counter opening to the unfinished bar, we figured we could build a mesh door to size.

I also started to bring some of my tools down. I’m so excited to be able to do that!!!

While in the barn, we found these.

They are actually plastic windows. They were wide enough to fit over the opening into the unfinished bar – there’s space at the top, but the cats won’t be able to get up there.

They almost fit over the opening to the old basement, but that wider part on the bottom couldn’t be covered.

My thought had been to build the wire mesh door for the bar opening, which would have allowed us to make a hinged door (except we didn’t have any hinges handy). With using one of these windows instead, hinges couldn’t be attached, anyhow.

So I found some cup holder hooks and Bungee cords. The idea was to have a pair of Bungee cords holding the window pane in place. That didn’t work out exactly as planned, as we only had one Bungee cord that was the right size.

We made do. You’ll see how in the next photo. :-D

After bringing the stuff to make doors down, the girls and I hauled out what needed to be gotten rid of. We now have an awful mess outside our main door, but cleaning that up will have to wait until the weather improves. Plus, finished the basement was the priority.

The girls started working on building the frame for the wall opening while I started cleaned the window panes, then started cleaning up the area by the stairs.

When it was time to screw the frame together, the girls couldn’t find any usable screws in any of the buckets and miscellaneous containers we kept. There were just nails.

So we ended up using the deck screws I’d taken out from the barn doors, after our vandal had boarded them up.

I’m still giggling about the irony of that.

Once the frame was screwed together, the mesh was stapled into place in two overlapping pieces. There was a possibility of a cat getting through at the overlap, though. My daughter managed to find a couple of shorter screws and we put a cross piece on the mesh side of the frame at the overlap. The overlapping parts of the mesh were then stapled to the cross piece. This closed the potential gap, strengthened the frame, and it can even serve as a “handle” on one side.

Here is how they look now.

The frame ended up working better in the old basement side of the wall. It’s braced on one side by a table, and a Bungee cord attached to one of the cup hooks is keeping the other side in place. To get through, we can unhook the cord, then slide the door to one side.

As for the window-door, until I can find another cord the same length as the red one, we’ve got a longer one diagonally, just to keep the window pane from potentially flipping over. The extra window pane is now stored in the old bar. Who knows. It might come in handy for something else.

The fun part is, we’re already using the basement as a workshop!

I’m so excited! :-D

One of my daughters took over cleaning while I found and brought more tools down, then helped finish the frame. She even mopped the rest of the floor.

I can’t even think of when this floor was ever mopped, other than parts of it at times like when my brother found the water damage shortly before we moved in and had to scrub away mold and bleach the floor and walls in the corner.

Here is how it looks now at that end.

We have set up cat beds under chairs and the old phonograph. A flattened box is there to act as a rug, and we brought in the litter box that was in the sun room, since the outside cats don’t need to use it anymore.

And here’s the rest of it!

We set up food and water bowls at the far end, nearer the stairs.

When I went into the sun room to get the litter box, Beep Beep was in there, curled up on the swing bench. That was encouraging, since we would be getting her soon. Then Big Jim came out.

He had blood all over one side of his head!

It looked like it was coming from an ear, an injury that was most definitely not there this morning. The poor thing! The blood was dry, so whatever happened, it was no longer bleeding, at least, and it didn’t seem to be bothering him. He sure wanted pets, though!

After setting up the litter pan, food and water, one of my daughters and I went outside with some cat treats. I scattered some both inside the sun room, where Beep Beep and Big Jim still were, and in the outside food bowls.

Creamsicle and Potato Beetle were quick to come for treats, and I was very pleased to see Butterscotch waddling her way over, too. We let them eat for a bit, then tried to get the mamas in.

Beep Beep was more cooperative. She jumped out of my arms as soon as I got inside, but I’d managed to open the door to the basement, first, and that’s where she made her escape to – exactly where I wanted her to be.

Butterscotch was much less cooperative.

My daughter was eventually able to pick her up, and I was manning the doors so she could get Butterscotch inside, and into the basement, at almost the same time.

Butterscotch did NOT want to go down the stairs!

It took some persuading and gentle wrangling by my daughter to get her down enough stairs that I could close the door. Then she went back to the top step, essentially trapping my daughter in the basement.

Beep Beep, meanwhile, had already settled herself in front of the chalk board at the other end of the basement.

My daughter spend the next while trying to coax Butterscotch down the stairs. When she did get to the bottom, she immediately hid in a shelf under the stairs. My daughter brought one of the cat beds, placed inside a crate to make a “nest”, and put it beside where Butterscotch was hiding. This way, we hope she’ll find the nice, soft bed and a more enclosed area she will feel safer in.

And hopefully have her kittens in.

We will now have to add going downstairs to our cat care routine. It should be interesting to see how much of a challenge it will be to keep the mamas downstairs, and the other cats upstairs. Eventually, I want to have the litter boxes for all the cats downstairs, which will mean having the door to the new part basement open all the time. That’s not going to happen while the mamas are down there, for a while.

I hope they feel comfortable and safe down there, soon!

The Re-Farmer

Easter preparations and difficulty typing

I know I should be in bed right now, but I had a few setbacks. Problems with the van being the most obvious one, but also, I had difficulties typing.

My husband got evidence as to why.

Susan decided she absolutely HAD to drape herself across me as I tried to type. She particularly felt the need to roll around, and use my hands as pillows.

For such a tiny cat, she takes up a lot of space. :-D

Meanwhile, I did manage to finish the last things for the basket before I had to head into town.

These are easily the darkest onion skin dyed eggs we’ve ever made! I didn’t leave them in the pot longer than usual, either. This is just from the sheer volume of onion skins they were immersed in. Also, every single one of them are fine. One of the nice things about colouring eggs this way is the high success rate. At most, sometimes an egg will crack in the boiling water.

The tea dyed eggs, however, are typically much more difficult.

Of the dozen I did this way, I lost three eggs completely (they were delicious, though), and I think only one or two peeled without damaging the egg white. Cracking the shells and cooking them again in the dye seems to make it more difficult to peel them. It also leaves them too fragile to use the shaking method of loosening the peel. I did try it, and the egg just split open in the jar.

We’ll just have to made to with slightly torn up eggs this year! :-D

As for the horseradish, usually I just peel a chunk of root and put it in the basket whole. We would then shred it for use during our Easter breakfast made up entirely of basket contents. This time, I decided to grate it, first.

I left it to dry on a paper towel for a while before putting it into a teeny tiny jar.

I almost forgot I had one last thing to prepare before heading to bed. Brining the turkey! We’ve never done a turkey dinner for Easter before, but I had one in the freezer, so we’re using it now. I use a giant stock pot to brine the turkey in. It’s a big bird, and the brine needed almost 3 gallons of water to be able to cover it completely. It makes for a very full stock pot. I have to get one of my daughters to help me carry it to the old kitchen, so it doesn’t slosh all over. This time of year, the old kitchen is about refrigerator cold during the day, and will probably drop a degree or two below freezing overnight, which makes it quite safe to leave the turkey in overnight.

For now, though, I’d better get my butt into bed. There will be lots to do tomorrow! :-) I’m looking forward to it. :-)

Have a Happy and Blessed Easter!

The Re-Farmer

Easter preparations and successful finds

I’m happy to say that I was able to deliver a little care package to my mother for her Easter. I called right after dropping off my daughter to see if she needed anything at the grocery store, but she was able to order everything she needed from the grocery store and have it delivered. Which means they were able to accommodate her in regards to her not being able to pay over the phone. I thought that might be the case, as the grocery store near her caters to a lot of seniors in similar situations.

When I got there, she met me at the door, since her building is on lockdown. Technically, I could have visited her and it would have been okay, but the less people from outside come in, the better.

After the drop off, I went to the grocery store near her place and scored big time!

Not only did they have big bags of cat kibble, but they were well stocked in pretty much everything! They even had a big display of large pack toilet paper, though they were selling for over $30. We are fine for that, so I didn’t get any. Their yeast section was completely full, and I was able to get a nice big jar of the traditional (slower acting) yeast. Between this, what we’ve already got left at home (even after baking day, yesterday) and our sourdough starter, we’re set for a good long time. :-)

Finding a candy thermometer was just bonus! I won’t have to make to with a meat thermometer, when I try a new cheese recipe after Easter.

Once home, I got a couple of pots doing with more eggs; one with the tea dying mixture, and the other with onion skins. We’ve been collecting onion skins all year, and there was so much, I couldn’t even use it all. (click here for how we do our three different types of eggs)

Once the eggs were at the stage where they could be left unattended, I got the dining table all pretty.

Which has fascinated the cats.

Cheddar, at least, was polite about his curiosity. He just sat on a chair and rested his chin on the table cloth. I’ve already found Two Face, just sitting on the table, like a bread loaf.

Once the table was cleared of cats… again… I worked on preparing other basket ingredients.

Each of the items has symbolic significance, some of which are old traditions for our Polish family, while others are traditions we added ourselves. Along with the bread, which symbolizes Jesus (the “bread of life”), and the eggs, which symbolize the Resurrection and new life, we have:

  • ham; to represent joy and abundance, marked with a cross made of cloves
  • sausage; representing the favor and generosity of God
  • butter; to remind us of the goodwill we should have towards all things. We like to make different flavored butters. This year, I’ve added parsley, garlic granules and paprika. Like the ham, it’s marked with a cross of cloves, and the fish shaped bowl it’s in is a reminder for us to be “fishers of men”.
  • salt; in one of the tiny jars, it symbolizes prosperity and justice, and is a reminder to be the “salt of the earth”.
  • cheese; this year, marinated goat cheese, but we’ve used many different kinds of cheese over the years, as a symbol of moderation
  • vinegar; the other tiny jar has red wine vinegar, as a reminder of the wine vinegar mixed with hyssop that Jesus was given to drink, just before he spoke his last words. This is one of our own, added traditions.
  • olives and olive oil (in with the marinated goat cheese): this is another of our added traditions, symbolizing wisdom, peace, and hope.
  • Not pictured is the horseradish, which symbolizes the pain of crucifixion. Traditionally, it can be made into a paste with beet juice, with the sweet juice representing the joy of resurrection. We’ve included the beet juice with our pink pickled eggs.

Other items that would be appropriate to add are a candle, a bottle of wine, and sprigs of greenery.

By the time we’re done, there’s enough food in the basket to feed us for a couple of days! Typically, we eat the blessed food as a brunch on Easter morning.

Gosh, I love making these baskets so much!

Now it’s time to check on the eggs, and prep the horseradish! :-)

The Re-Farmer

Easter preparations: baking day and frozen ground

Today, while the girls continued to work on the basement (I have yet to go down to see their progress!), I worked on baking our Easter bread.

Then, since I was baking anyway, I made some sourdough soda bread, and another double batch of what has become my usual standby, a basic bread recipe modified by the addition of rolls oats and various seeds. This recipe, plus chia seeds and minus the rye flour. Lately, I’ve also included hemp hearts as well, which adds a really nice flavour and texture. Thanks to my dear friend, I even had yeast to use for the non-sourdough recipes. :-)

In this photo, the braided loaf is for our Easter basket, and I made 4 mini loaves with the other half of the recipe. In the back, left, are the loaves of sourdough soda bread. Which did NOT want to rise today. The house was a bit too chilly today, even though it has been warming up again, outside.

In between batches and rising times, I also made a soup using one of my meals in a jar mixes with sausage. The mix had brown lentils, red lentils, orzo pasta, turmeric cous cous, dehydrated vegetables, dehydrated onions, mushroom ketchup powder, 1 cube of vegetable bouillon and 1 cube of chicken bouillon.

The seedy bread was shaped into mini-loaves that made excellent bread bowls.

This was soooo good to break my Good Friday fast (for health reasons, I do not do a total fast).

While doing my rounds this morning, I checked the ground near the power pole in the old garden, where there is horseradish planted. It was rock hard, but I hoped that things would have warmed enough to dig some up by this evening.

After scraping aside last year’s leaves, I found the horseradish has already been trying to grow.

The ground was certainly starting to thaw out by this time, but the soil here is so full of rocks, it didn’t make that much of a difference. I can’t understand why my mother planted these here. For a plant that is grown for its roots, rocky ground would have been something to avoid. The area has always been much rockier than the rest of the garden; so much so, my parents eventually stopped using it completely. The base of the power pole, however, has rocks and gravel packed around it, so it’s even worse than anywhere else.

I did manage to break off a couple of pieces, then decided to see what I could find in the other spot my mother had planted horseradish; at the base of a spruce tree near our feeding station. I had hoped that, between the wood chip mulch and possibly a bit more sunlight, the ground would be thawed out more.

The horseradish here isn’t as big or prolific, but I could see where it was starting to grow.

I did scrape away the wood chips, but it’s still pretty hard to see.

There isn’t as much growing here, and they’re much smaller, but the ground was indeed a bit softer, so I got a couple of decent chunks out. The ground isn’t rocky here, but of course, there’s plenty of tree roots. Again, I don’t understand why my mother chose this location.

After much washing, then scrubbing with an old tooth brush to get into the crevices, I now have several chunks to use.

That big piece with three sprouts? I could potentially plant each of those, and have three fresh plants.

I think the two little ones will be enough for my mother. If all goes to plan, I hope to swing by her place tomorrow with a care package for her. I’ll leave these as is, so she can prepare them as she wishes – or plant them in her own little garden plot outside her window. :-)

We only need a bit for our own basket. I have been thinking of planting horseradish in softer ground; perhaps in a raised bed or planter. Something that will allow a straighter root to develop. If I can think of a good spot for that, I might do that with the big piece. My mother always kept a piece of horseradish, with the green parts still attached, in the basket to be blessed with the rest of the food, specifically to share with friends to transplant, or to transplant herself. I’ve tried it myself a few times, but the only one that succeeded (and didn’t get dug up by squirrels) was the one I’d included with our Easter basket the last time we were able to visit with my father, 5 years ago. I took it back with us to plant when we got home, and it actually survived. It got left behind when we moved, of course.

Normally, we would finished putting all our basket contents together tonight, in preparation for taking it to church for the blessing tomorrow morning, but since there is no church blessing, we’ll finish arranging the basket tomorrow and do our own blessing whenever we’re ready. I still want to do onion skin dyed and tea dyed eggs, which will be the last things that require any cooking.

For now, I think I’ll head down into the basement and see how things are looking after all my daughters’ hard work! :-)

The Re-Farmer