Some time ago, the Cat Lady gave us one of their older cat water fountains. About a year later, they gave us a second one. We’d never used such fountains before, and the cats quite liked them, and have kept it up.
Unfortunately, the motors have been giving out and both of them died not long ago. We’d already replaced the motor on one of them, and it just didn’t seem worth it to do it again. These were the kind with the water flowing through a daisy, and the water reservoir has a clear window to see what the water level is at.
They were pretty difficult to clean, though, and our well water is very hard, making it even more of a challenge. With that in mind, my husband found a very different stainless steel design and ordered it.
This is what we got in the mail today. An Orsda Cat Water Fountain (not an affiliate link). It comes in 2L and 3L sizes. We got the 3L size.
In the first picture, you can see the different areas in the lid. Around the spout is an area water can pool in, but it also flows into a shallower pool area that drains through the filter at the opposite end.
First things I liked, right off the hop: The super tiny cleaning brushes included. That little white piece sticking up (with the yellow label on it). That’s a handle to lift the lid off. The smooth stainless steel design, with two different “pools” for water to collect.
In the second picture, you can see what was inside the fountain. There’s a sealed package with extra filters. There’s a replacement water spout. There was already a filter in the cover – I really like that design – and another sponge filter already in the motor.
Another thing I liked right away. The power cable comes in two pieces. You don’t have to unplug it from the wall when it’s time to clean the fountain. You just separate the cable.
The plug end of the power cable came with a USB adapter, so it can be plugged directly into an outlet, or into a USB port.
If you look at the length of cable from the pump, there is a white piece. That’s a plug. You can sort of see, next to Ghosty’s head, the opening the cable goes through. Once it’s through, the white plug on the cable can be pushed into the hole, creating a water tight seal. The plug has a split in it, so it can be easily popped on and off the cable.
The inside of the fountain is completely smooth. No corners or ridges, so this is going to be very easy to clean. Where the pump goes is slightly indented, and marked where the suction cups will go.
We got it washed out and set up as soon as we could! The cats were very, very curious about it, that’s for sure!
First thing to note is a problem we recognized immediately. The cats would be able to get that cover off, very easily. We’ve got cats that can open up all sorts of things (we’ve had to put knobs and child locks on our cupboard doors, because they figured out how to open them). This was a problem with our previous fountains, too. We had to tape the covers on.
Once I had the fountain up and running, it was less than a minute before the cover got pulls askew! That convenient handle to lift the top off? The cats immediately started chewing and pulling on it.
I’ve since added tape at each end and, so far, it has held!
Something I really appreciated as soon as I plugged the power cables together is, it’s almost completely silent. Basically, you hear water flowing. I hear nothing from the pump itself.
Looking at the reviews, some people have had issues with the pump, but we already had pump issues with our previous fountains. It wouldn’t hurt to pick up an extra, along with more filters, in the near future, as it’s not that expensive. In fact, some of the filter packs cost more than a new pump.
So far, I’m quite happy with it. It will be some time before we see how well it does, with our hard well water. However, if we keep up with the weekly cleaning, including parts of the pump, I think it should work out well.
Most importantly, all the cats seem to be okay with drinking from it.
I could see getting another of these in the future, for my bedroom, which Butterscotch still refuses to leave! 😄
Today was a pretty quiet day, overall. We did have a surprise at our gate around midnight. I started getting motion detection alerts and discovered a horse.
It was our vandal’s horse. Before my father passed away, our vandal used to bring his horses here at times, so when it got out, it probably remembered the way and being able to go through our driveway. I ended up sending an email to our vandal’s wife to let them know. She didn’t see it until morning, and it turned out the horse was back home, safe and sound, by then. I’m glad to hear it. A dark horse on the road at night is pretty risky!
We had plenty of cuteness this morning, of course.
If you click through the slide show, you’ll see a crowded cat cave – there are at least four kittens jammed into there! My daughter had been able to pet the Colby, the fluffy orange and white kitten, yesterday but no such luck today. The big tom visited us today, and discovered roof top dining on the cat house roof. With the heat lamp inside, it would be slightly warmer overall.
The isolation kitties are doing very well. That insulation is getting torn to shreds. I actually caught Pinky tearing at it as I was doing my evening rounds. She’ll be let out soon enough. Thursday night, I hope we can get a couple of cats in there for fasting and a trip to the vet on Friday. I’m really, hoping to get Frank. She sometimes lets us pet her and purrs when we do, but she is a bundle of nerves and still doesn’t really trust us. It’s going to be hard to get her into a carrier.
I’ve been in contact with the rescue and they asked if I decided who we’d be bringing in. I told them about Frank, but said it’ll be whoever we can catch! I let them know that we’ve had to do this before, where they knew the cats were from a colony. This clinic is good with doing whatever cats we bring in, even if we don’t know in advance which ones they’ll be. Getting strays and colony cats fixed is a big thing for them, so they are willing to accommodate.
With that in mind, when it was relatively warmer in the afternoon, my daughter and I set up the new critter cam. This is what I unboxed, yesterday.
I set it up with the app and got it charging overnight. It was set aside on my desk and, in the morning, I found it had caught one of the cats, being where it wasn’t supposed to be! Impressive, considering the camera was pointing at the ceiling all night!
The first thing to do was decide where the base plate needed to go on the little house I made for the camera, then screw that in place. The camera itself has a latch and can be easily removed, as needed.
Once my daughter and I figured out where we want to attach it to the elm tree in front of the kitchen window, we used the draw knife to shave away at the bark, and even using a chisel in one area, to make it level enough to attack to. We need to get rid of this tree entirely, so we’re not worried about damaging it.
After we got the camera arrangement attached, we had to figure out where to put the solar panel. The cord it came with is nice and long, so it can be placed quite a distance, if necessary. Our main concern was putting it somewhere the critters wouldn’t be getting at it, while still being able to face south, unobstructed. It ended up going under one of the main branch, where my daughter was able to create a flat spot to attach it to – the screws it came with aren’t long enough to go through such thick bark to the wood below. Then, between the two of us, we got the holder on and screwed the solar panel in place, which you can see in the second picture of the above slide show.
In attaching the base plate for the camera to the tree, we started hitting something that was too hard for a couple of the screws to go through. These are 3 inch screws, though, so it’s still very secure – and one of the screws that was sticking out quite a bit came in handy, to hang the excess solar panel wire off of. You can see the final set up in the second last picture of the slide show.
The last picture is of one of the stills it took while being set up. It saves stills into a cloud, but it also takes video, which gets saved to the micro SD card.
By the time we were done, there were at LOT of files to delete!
That done, and while my daughter got the evening cat feeding ready, I grabbed a litter box from the cat cage in the sun room. When there were tiny kittens in there, it was being used, but not that they’re all bigger, they ignore it. I was going to just replace the dirty litter box in the isolation shelter with the clean one. As I took the old litter box out, though, I also grabbed the cat bed that was down there. The cats were no longer using it as a bed.
They were using it as a litter box.
Ew.
I scrapped it off as best I could. Normally, I’d have set it in a bucket with some water and detergent to soak for a while, but it’s too cold for that, and I wasn’t about to bring it inside! What I ended up doing is cleaning out the old litter box, refilling it and setting it back in the isolation shelter, so they now have two litter boxes on the bottom, and no extra cat bed.
I’m glad I designed the bottom with clean up in mind. The mesh will make it a lot easier. It’s a real mess down there! Come spring, we can brush it out as much as possible, then hose it down. For now, the cats will just have to put up with the scattered sawdust mess they made on the floor, but at least they’ll have two litter boxes now.
With the camera in place and the litters done, I moved the doorway box shelter back in front of the isolation shelter, with one side wall against the front panel, to keep critters from trying to claw their way through the vinyl covering the wire mesh. Last year, that happened pretty quickly when we had cats in isolation, and cats outside were wanting in. This year, they don’t seem to have tried, but I still want to keep things as covered as possible.
One of my concerns about having the camera is that I might get too many alerts due to cat activity. I wasn’t sure how busy things would get. I know cats like to jump onto the doorway box shelter, onto the bin on one side, the chair on the other, and onto the roof. Plus, I know raccoons have been all over it, trying to get in – they are the main reason I wanted the camera, really. I have been getting motion detection notifications, but nowhere near as much as I thought I might get. Things are pretty quite in there. The only add thing is checking the notification and finding that the camera’s position has been altered slightly. Which means something moved it, somehow. I’m not sure how that would happen.
What I have discovered is that I can use the camera to check a lot more than just the isolation shelter! I can check the main door, of course, as it’s close by, but I can also check the cat shelters by the sun room, and even the catio and shrine feeding station. In the other direction, I can see quite a bit of the East yard before the tree itself blocks the view.
So far, I’m quite happy with how this camera is doing. I don’t even have the motion sensor sensitivity changed from the default (from 1 to 10, with 10 being the most sensitive, it was on 6), and it’s picking things up fine. The one issue I have with other security cameras is that they don’t pick up vehicles. Just people (or people sized critters). Which is fine if you’re using it in the city or something, but where we are, it’s vehicles that I need to monitor more than anything else. We don’t have pedestrian traffic. With this camera, we have no way to test that right now, since it’s not being used for that, so I can’t say whether it works better or not.
Depending on how things work out, what we might do is make a stand similar to what I have right now for the gate trail cam, which would allow us to set the camera up in locations where we don’t have handy trees to attach it to.
Now I’m thinking ahead to how and where we can set up the big trap and try to get some of the more feral mamas, with the camera to monitor the trap, during the winter. We would want to get the feral ladies done before they go into heat in the last winter. If we have the mild winter it looks like we will be getting, they might go into heat really early, like happened this year with several cats.
We’re supposed to get 2 cats done on Friday and, since Frank got away from us last time, we still have donated funds for one more to do, if the rescue can arrange another date for us. It’s through someone else that is able to get these super low rates for spays, and they have only a certain number of slots available, so we’ll see how that works out. After that, the cost will probably go back up. It’s still a lot cheaper than anywhere else. When I’m there on Friday, I should ask them about the possibility of last minute appointments for trapped spays of more feral cats. We have plenty of friendly males we could bring in for neuters at any time. We just really need to get those ladies done!
Well, we’ll see how it works out as time goes by. Until then, we just do the best we can for the critters.
Today was supposed to be an at home day, except for a trip to the post office.
Ha!
After doing my rounds this morning, making sure to open the gate for the septic guy, I was just finishing breakfast when I got a call.
From home care.
Someone had called in sick, and they didn’t have anyone for my mother’s morning assist.
I had just enough time to throw some shoes on, grab a coat and head out. I did phone my mother first. Which is good, because she about to start making herself breakfast. Which the home care worker is supposed to do! I told her, if she’s willing to wait half an hour, I’ll do it for her, then told her about the cancellation.
Then she asked me if I was going to stay to do more stuff for her. I told her, no – I’ve got Friday set aside just for her! I told her I wanted her to take the chicken out of the freezer on Thursday, because I was planning on cooking it for her, and she was very happy to hear that.
Then, I headed out and got there just at her scheduled visit time, which worked out nicely. My mother was starting to do a few things for her breakfast, so I got her to sit down so I could finish it for her.
I did the usual stuff home care would do for her, like empty her commode, but also refilled her water bottles from the tap in the laundry room for drinking/cooking water. I made sure to check her milk supply and she was almost out. For just the one thing, I simply walked to the grocery store to get more for her, since I’ll be doing a full shopping trip on Friday. She’s been working on her list, and it’s going to be a very large one, compared to her usual.
Before I headed out, I got more details about that call she got about canceling her Meals on Wheels.
It wasn’t the Meals on Wheels office or kitchen that called her. It was the Senior’s Centre that oversees the program. She was able to give me the name of the guy that called, and she could hear the worker that delivered my mother’s meal earlier, talking in the background.
They told her that someone had called to cancel her Meals on Wheels and when she asked who, they suggested it was probably me – they actually used my name. So my mother said she would call me. The odd thing was that the woman that delivered my mother’s meal said that she did not deliver a meal that day. My mother told them, yes you did, I’m looking at the tray on my table right now!
With that information, I headed home, with a quick stop at the post office to pick up my parcels.
Before I opened them, I made sure to call the Meals on Wheels office – my husband has messaged me to let me know someone from there had called me while I was gone. There was no answer, so I left a message explaining that I was just at my mothers, what she told me, and that we were very confused by all this – but also very glad that it was confirmed her Meals on Wheels was NOT cancelled.
Today is a Meals on Wheels day.
That done, I finally opened up my parcels. There are two things that I got, that I can give reviews on already.
The first is a cat toy.
I picked it up because it was very inexpensive, and I was curious if it would live up to the promotion.
The first picture shows how it arrives. This is one of those toys that are supposed to change shape as the cats try to get at the captured jingle ball inside.
I had to use double sided tape to get it to hold together. I’m not sure how it was supposed to hold together without it. The two ends did actually stick together at first, but popped apart very easily.
As you can see by the second and third photos in the slide show above, Ghosty was very interested! The pictures are in two of the configurations it can roll into. The third encloses the ball completely inside.
Once it was together, I set it in the dining room for all the cats to check out. For a while, there were four or five of them around it, trying to get at the jingle ball.
The toy did NOT change shape while they played with it, which is supposed to be part of the attraction for cats.
They soon got bored with it, but for the rest of the day, there have been cats in and out of the bigger box. There a cat sleeping in it on my bed, right now. The cats are going to be most displeased when I move it! 😄
The other item I got was a tool to clean our eavestroughs from ground level.
I had considered getting the kind that you attach to a hose, but for this time of year, I’ve got all but one short hose put away for the winter, and that one will be put away very soon. If I’m going to get one of those, which I do still want to, it will be closer to spring.
In the first and second pictures, you can see it came with two brushes and a bungle of pole attachments. The instructions are pretty basic. Screw the pieces together to get the length you want. There is one piece that is for the end and has a cap that can be used to hang from.
It’s a good thing it came with two brushes.
Since the septic guy hadn’t arrived yet, I started off at the eaves above it. This area is particularly difficult and hasn’t been properly cleaned out in a long time. For starters, there is a right angle where the roof over the old kitchen meets the roof over the original log part of the house. That corner is always getting the most debris collected in the eavestrough. The ground below is not level, so using a ladder is dangerous. My younger daughter was (key word, was) the only person able bodied enough to go up there on a ladder, while her sister held it steady. She, however, has problems with heights and even with the ladder being held steady, it feels so precarious, she just couldn’t do it. Now, she physically can’t really do ladders at all, anymore.
Getting into the eavestrough was not easy. The brush had to be bent almost completely down, and it kept straightening while I was working on it. It could only really be used well in one direction, too. If I tried to push in the other direction, it would start unscrewing itself from the pole pieces. In fact, several different ones would start to loosen as well.
It got really hard on the hands, too. I’ve been losing my grip strength for quite some time, and all my finger joints have osteoarthritis, so for me, that’s to be expected. Plus, after a while, that left shoulder of mine – the one I injured when I had my fall in the summer – was starting to really feel the strain.
Still, I was able to get some of the debris out. Once I got as much as I felt I could (no, I could not clear them completely), I moved over to do the long eavestrough on the East facing addition.
Which is when the septic guy arrived, so I paused to keep kittens away from the tank until he was done and the gate was closed.
It was while I was working on this second section that the brush broke, which you can see in the fourth picture.
*sigh*
I got the second one on and continued trying to clear the eavestrough.
Trying.
I did get some out, at least, but definitely not all of it. I’m not even sure if I got most of it out.
Then I got called in to take a phone call.
It was Meals on Wheels.
After hearing the message I left this morning and had contacted the Senior’s Centre to try and figure out what happened.
They called the wrong person.
There is someone else with a very similar name to my mother’s. Similar enough that she sometimes goes by the same name as my mother.
Just first names, of course, but that’s what they went by when they called my mother.
The fact that my name actually came up as the possible person that canceled my mother’s Meals on Wheels means that they did know who they were talking to – and yet, the woman who delivered my mother’s meal just an hour or so earlier was saying she had NOT delivered to my mother.
Whatever confusion there was, the Meals on Wheels lady got it straightened out. It was never my mother that they were supposed to call.
As soon as I found that out, I called my mother to let her know. It turned out she already knew. Her Meals on Wheels had been delivered and the same person had delivered it, so she passed on what happened. So that all got straightened out, thank God!
While talking to the woman from Meals on Wheels, she told me that my mother had called the Senior’s Center earlier and was saying something about my coming over to do bulk cooking for her. She actually thought that my mother had cancelled her home care lunch visits! I told her those had not been canceled, and took the opportunity to mention that my mother was starting to have cognitive issues. If they were to ever get any sort of call about her service, I asked them to please call me to confirm. I explained that, with the limitations on home care meal assists, these Meals on Wheels meals are the only complete meals my mother is getting. She completely understood.
Oh, dear.
Now that I’m writing this, I suddenly find myself wondering.
Could my mother have called home care, too, and cancelled her lunch visits, after I left?
*sigh*
Checking on that will have to wait until tomorrow, and I’m not going to be home for most of tomorrow!
After calling my mother and updating my siblings, it was back to cleaning the eavestroughs. In the last photo of the slide show above, you can see how it reaches the eavestrough. At that angle, it can’t get much of anything, so I keep having to bend it back to a sharper angle.
After that section was done, I moved to the side of the entryway, where this is rather short eavestrough. That one is the hardest to get at. The ground below is sloped more than other areas, which would be good for drainage, except that it slopes towards the well, so we really don’t want water getting under there at all. There is also a couple of rows of the enameled bricks we have all over the place – I remember them from when I was a kid, even – that I really want to remove and replace with gravel, as they are dangerously slippery. Access to the basement window is there as well. Basically, there are a lot of things in that corner that makes getting to the eavestrough very unsafe.
It also has a different design of eavestrough, made of galvanized steel instead of aluminum. The brush could actually get into it a bit better, and I was able to get out some very composted leave mold out of there.
I still couldn’t clean it out completely, though.
Finally, the last section to do was over the sun room. That one was actually pretty clear and didn’t take long.
I did go back and work on the East facing section and got more stuff out, but there was no way I’d be able to get it completely clear with this tool.
Still, what I was able to do was better than nothing!
So… would I recommend this tool?
No. Unless all you’ve got is very light material to clean out, it’s not the right tool for the job. It will get some debris out, but not all. It might be more useful if it were followed up by the type attached to a hose, to blast away the debris the brushes loosened.
The tendency for the joins to loosen is a pain. I could work around it, but I shouldn’t have to.
Having one of the brushes break so quickly wasn’t good, either. It was likely because I kept having to bend it back into a useable angle. At least the second one lasted until the job was done.
[Edit: I went back to the order and looked at the images of the product. In it, they showed the bristle portion being bent at 90° to reach into the cutter, not bending it where it joins the pole. In the box, it was already bent at the pole. I did actually try to bend the bristle portion instead of bending at the pole, and it simply would not bend. At least not with just my hands. Partially because the bristles made grasping it unwieldy. In the end, it just wouldn’t bend for me in the bristle portion.]
Still, I was able to get enough debris out that I think it should be good for the winter. It’s better than nothing, so I am glad I have it. There’s just one eavestrough I couldn’t do, and that’s on the second floor. Someone has to climb onto the roof over the new part of the house to clean it. With how high it is, it doesn’t get as much debris into it, at least.
Meanwhile, my husband needed to go into town soon to do some blood work before a telephone appointment he has with his doctor. Since I’m going to be away for most of tomorrow and the day after, it had to be done today.
So, I was soon on the road again, this time with my husband. The clinic his doctor is in is in the same building as the hospital and lab and Xray, so he could go to the reception desk for his doctor to pick up the requisition, then check in at the registration desk we passed along the way, then then wait until he was called into the lab around the corner. Very convenient!
He was hoping he felt well enough to stop at a restaurant somewhere afterwards, just to have some fries. When I message my daughters to let them know we might be longer, my older daughter offered to send funds for a full burger meal take out for everyone.
Of course, we accepted the generous offer!
Once my husband was done at the lab, we headed over to the DQ. My husband didn’t even try go get out of the truck, and just waited while I ran in to place our order. He has lost so much muscle mass on his legs, he was having difficulty getting in and out of the truck!
Aside from lack of physical activity due to pain, he’s been on Ozempic for years. The side effect of “weight loss” with that stuff isn’t loss of body fat, but loss of muscle mass. For someone who had always been so very athletic when he was able bodied, getting to the point where he has difficulty getting in and out of the truck is really frustrating for him. He actually stopped taking it a while ago, because his private insurance will only cover what they consider a “reasonable” dose, and his current doctor doubled his already high dose. That made it expensive to pick up, until the deductible for our province’s pharmacare insurance is paid. Then it’s covered 100%. He’s been off it so long that he’ll have to work himself up from a low dose again. Frankly, I don’t think he should be on it at all. He’s on it to help control his blood sugars, along with his slow acting insulin, but he’s in so much pain all the time, his blood sugars tend to be high, no matter what. Lots of things cause high blood sugar readings, not just diabetes. Things like chronic pain, sleep apnea, poor quality sleep and stress, and I’m pretty sure the doctor that originally put him on it thought it might help with weight loss, and we all know that losing weight is the magical cure for everything that ails you, right? /sarcasm. He was even told by a diabetic nurse, before his condition deteriorated to the point of permanent disability that, until he got his pain under control, he was not going to get his blood sugars under control.
His pain is not under control. It’s more like “just barely functioning” levels – and that’s with the maximum safe doses of his current pain medication. They’ve tried him on so many powerful painkillers, and most of them just take the edge off. Meanwhile, his blood sugars haven’t really changed, even on such a high doze of Ozempic and, while he’s losing muscle mass, he has had zero change in weight. He’s had some of the other side effects of Ozempic, and they are decidedly unpleasant.
That’s no way to live, but when you’re on such powerful painkillers and they’re not really working, doctors start looking at you and thinking you’re making it up, or it’s all in your head, because it can’t possibly be because they’re failing at finding a way to help. My husband, meanwhile, has basically given up. It’s been so long, and he’s seen so many doctors and specialists, in two different provinces, and this province really sucks compared to where we lived before when it comes to healthcare. At least living here is less stressful than when we were living in a housing co-op in the city.
Today, however, was the first time he actually got out of the house for any length of time, since the last time he had to get some blood work done.
Bonus on our daughter treating us to take out. Both of the girls have been having a rough time the past few days, though for different reasons. Especially my younger daughter. She’s been caning it a lot lately.
It still seems to strange that I’m the most able bodied person in the household now.
…
… I say, as I can feel the entire left side of my body starting to stiffen up.
Time to grab some food so I can take my anti-inflammatories and probably a painkiller, too.
Being broken sucks. Still, I was able to get quite a bit done today, and I’m happy with that. Even if the new tool I got doesn’t quite live up to expectations. It really has been a good day, overall! We have much to be thankful for.
I finally got around to editing and uploading a short unboxing video for the camera we now have in the sun room.
A few extra bits of feedback, since I recorded these clips.
Near the end of the video, you can see the camera moving around with the motion detection tracking. One of the major benefits of this camera is that I can set my phone up on a stand beside my keyboard, have the app open and keep continuous eye on the sun room. The old camera would only do that for a few minutes before I’d get a “continue?” request and, if I didn’t tap fast enough, it would discontinue the life feed. To have continuous live feed running, we would have to buy a subscription. That one difference makes the purchase well worth while.
The problem is, with so many cats moving around, the tracking would be all over the place, sometimes even sending the camera to do a complete rotation. Since the camera is mounted against a wall like it is, that meant getting views of the ceiling! It would move around so much that, even just in my peripheral vision, I was feeling almost motion sickness. The movement was just non stop!
So… the motion tracking got shut off.
I can move it around manually on my phone, though, to look at different parts of the room. Syndol noticed it moving and climbed up onto the shelf under the old kitchen window, standing as tall as he could, trying to get closer to the moving camera! He can’t reach it, but it was quite funny to adjust the camera so I could look directly at him while he was looking direction at the camera!
It has the ability to auto record. If it detects motion, it can start recording video automatically, saving it to the micro SD card. What I didn’t realize at first was that it was set to continuous record, which meant there were a series of 20 minute long video files saved to the micro SD card! With files that large, it takes forever for it to load to do a playback. It can be set for shorter times, but I’m not bothering with that. There’s simply too much movement in the sun room to have all these automatic functions running. As for files on the memory card, if the card is full, it simply discards the oldest files, while storing the newest ones. So if I had anything I wanted to keep, I’d have to make sure to download it. With the motion sensor off, however, there is nothing being recorded onto the card.
If I did see something I wanted to record, though, there are icons I can tap while the app is running, to get stills or video. There’s also the microphone icon that I can tap and hold to talk into the sun room – which rather alarmed the cats when I used it to break up a fight! All in all, there is quite a bit of functionality on there, most of which I have no reason to use, with it being a critter cam.
As for the network connect, there has been a couple of times where the network lost contact with the camera. Normally, I would have hit the reset button, but it’s too high to reach without a stool or household step ladder, so I just unplugged it and plugged it back in. That seems to have done the trick and now I seem to no longer be having that problem.
The only real downside is the tilt limit. The camera can turn 360°, but there’s only so far it can tilt. Which means that I can tilt it “down”, and get a great view of the wall and door under the camera, but I can only tilt it “up” far enough to see the very bottom of the doorway to outside. If I rotate the camera while it is at max tilt, the platform the cats use, or the bathroom window, can be seen, but they appear sideways. It cannot tilt enough to see the south facing windows, which is where the cats like to hang out. This is all because the camera is mounted sideways on the wall. If it were flat on its base, or even at an angle, it would be able to capture more in its field of view.
Oh, that reminds me; I noticed in the settings that the view can be flipped, if the camera is mounted upside down.
The field of view issue in regards to the tilt is not a camera issue, but a mounting issue for our space. If we could mount it level, it would work fine, but we don’t have a space where we could mount it in the sun room that would be work – and be out of reach of the cats! They’d be all over it, as soon as it started moving! So the few issues we’re seeing are not camera issues.
Which means that this camera passes the test. I can see getting more of these to monitor other indoor areas, such as the pumps in the basement. If we were to set one up to monitor the well pump and sump pump corner, I could see an issue with being able to plug it in; that power cable is awfully short, and there are not a lot of outlets down there! For the septic pump, I would want a type that screws into the light socket, and has a built in LED light. Which is what the first one I tried buying was, but we could never get it to connect to our Wi-Fi.
I would also want to have some outdoor ones to monitor the isolation shelter, for example, or other key areas in the inner yard – as long as we can access power! – but there is very little hurry on that. Mostly for budget reasons. Plus, I know my brother will want to set up security cameras around the outer yard, so I will probably leave most of that for him to do. He has something in mind, and I’m content to let him do it as he sees fit. My priority right now is more about being able to monitor the pumps in the old basement.
Overall, I would be okay with recommending this indoor camera.
I’m so glad to see this! I was ready to take them off, later today, and send them back.
They are si bright. I think I will change to one of the other modes that are not quite so blinding.
I can definitely see getting more of these for other areas, in the future. Being able to install the solar panels away from the lights makes them very useful!
Yesterday, the 2 pack of solar lights I ordered came in. I chose these ones specifically because the solar panels and the lights are separate. This way, I could put the lights inside the kibble and water bowl shelters, where it’s consistently in shade, and the solar panels could be installed on the roofs.
In the package were the two solar lights, with motion sensors. On the back (under the cable of the one that’s turned over, in the photo) is a mode button that is also an on/off switch.
Each solar panel comes with a generous length of cable. The lights and the panels use the same type of mount, held in place with a knob that also allows for the angles to be adjusted. They also came with the teeniest remote controls!
Before setting them up, I went through the instructions, which starts be saying to test them first. The solar panels are connected, but placed face down, then the mode button is pressed to turn on the lights and go through the modes. The batteries in the lights already had a charge in them, so they work without being connected, too.
After testing them, I set the first light up under the roof of the kibble house, while the second light was set up on the side of the water bowl house (which is reversed in the Instagram slideshow).
After mounting the solar panel on the corner of the kibble house roof, I ran the cable through the frame and wound it around one of the horizontal supports, to the light. There was still plenty of cable, which was bunched up and held with the twist tie they came with, and it could be tucked on top of a beam under the roof. No hangy bits for critters to catch on!
With the water bowl house, the cable runs along the side, held up in one spot by a hanger I found. There’s already a eye-hook that is supporting a power cord for the water bowl, so the solar panel cable is help up in two places, before the excessed was wrapped up.
The solar panels are shaded in the photo, but the roofs of the shelters all get full sun for most of the day, so that’s not an issue.
What is an issue is, they don’t work.
The lights work hust fine, on their own, but as soon as a solar panel is attached, they turn off. Like a switch. Cable on, light is off. Cable off, light turns on.
I have no idea why.
For now, I’ve left them as they are. I looked up where we got them from, but can’t find contact information (I could easily just be missing it). I ended up leaving a comment in the review section. I’ll see what happens from there. We have 30 days to return for a refund.
I would much rather have working lights, though!
For now, I’ll wait and see what sort of response I get. Otherwise, bye bye lights! We’ll try again, from a different supplier
I like the lights. They are doing the job! Right up until the solar panels are hooked up. They worked when I tested them, so I have no idea what went wrong!
The thread lock on our new grass whip has had its 24 hours to set, and we had a lovely cool morning to test it out in. We actually dropped to 14C/57F by this morning! It was awesome!
I was originally going to test it by starting a path to the barn through the tall grass, but changed my mine. We have a branch pile started that needs to be burned, and there were some large burdocks growing around it. So I decided to make a path to the branch pile and start taking out the burdock before their burrs develop and start causing problems.
I started off just swinging it back and forth, double handed, like a golf club. Which did okay at the edge, but the further in, I had to resort to chopping with it in one direction, then the other.
I discovered a potential problem, but not the one I was warned about.
The warning was that using it was pretty rough on the hands, until you get used to it. Which I would expect, really. It wasn’t my hands that were the problem, though.
It was my messed up left elbow.
When cutting in just one direction, I could use my right hand and chop away at the tall grass – which was incredibly wet at the bottom – well enough, for it being my non-dominant hand. When I switched to my left, however, my elbow did not like it at all. I could only manage a few swings before I had to switch hands again.
Obviously, this is not a problem of the tool, but a warning for anyone else with joint issues of any kind.
The grass I was chopping through was really tall and, between how wet it was and how some of it was already pushed flat to the ground, it took some doing to cut it. I just wanted a path, though, not a clear area, so that wasn’t a problem.
The burdock was the real test. Did the whip have trouble cutting through it?
Absolutely it did. Of course! This is burdock, after all!
What I found worked best was to first use the whip vertically, to cut away the leaf stems at the stalk. It cut through that quite easily. It could also cut through the higher, more tender, portions of the stalks easily, too.
The stalks closer to the ground, though, are very woody and more than an inch thick. Those required a fair bit of hacking! Loppers would have been easier, and in the future, I’ll make sure to have them handy for that point of the clearing, but the whip did do the job eventually.
It also made short work of the other weeds that were growing with the burdock.
The larger burdock pieces got set aside, on top of the branch pile – still barely visible through the tall grass! – to be burned with the branches.
As for now, it’s just past noon and we’re at 23C/73F, with the humidex at 27C/81F. The predicted high for the day is 26C/79F, which we’re supposed to reach at around 4pm, and stay that hot through to about 8pm. It’s still damp out there, but I’m thinking of getting the push mower out, with the bag attached. We were never able to rake up the grass clippings from before, either because of the weather or other things going on. With the grass needing to be cut again, but still a reasonable height, I can use the mower to pick up the old clippings at the same time, and the wagon to haul them to the main garden area. I’ve got the black landscape cloth/tarp/whatever it is that we salvaged from around the old wood pile, years ago, laid out over where we had a squash patch last year. I want to spread the clippings out on that to dry out in the sun a bit, before using it as mulch. We may not be getting rain for a while, but with our high humidity, the ground stays wet for hours.
Another reason to mow the lawn before it gets too tall, even if it’s still wet! The taller it gets, the more it will clog up around the blade.
As for the grass whip, it was just a small test, but so far, I’m happy with it. It’ll do the jobs I got it for, and it seems it will do it well.
Well, the predicted thunderstorms did hit us last night! What a light show, too. Once I started seeing the lightning out my window, I went into the sun room to tie off the doors, then drop a bit of kibble around the room to attract the cats indoors. We got quite a deluge.
Some time later, I started hearing someone going through the old kitchen doors, which was rather odd for the time of morning, so I went to see what was going on. It turned out that one of my daughters heard what sounded like a kitten in distress through the bathroom window and went to check.
There were plenty of cats and kittens, but the creature in distress turned out to be a young racoon. It had jammed itself on top of the table and miter saws, which are stored between the counter shelf and the door, under a built in shelf between a pair of windows. There’s not a lot of room, there!
Thinking it might be stuck, a daughter managed to move the table saw away from the wall a bit. They also untied the doors and opened them wide. There were so many cats and kittens milling about in the doorway, the raccoon would have had a hard time getting through the tied off doors. Even when they were open, there was a lot of cat traffic. I watched on the critter cam for a while, then finally got up and put out some kibble, both inside and out, to lure the cats away from the doorway. The raccoon squished itself as small as it could, while watching me and giving the odd warning growl.
I monitored the critter cam for a while, but the raccoon was out of frame, so I couldn’t tell what it was doing. It was gone by morning, though, so that’s good.
While today is at least a little bit cooler than yesterday, we’re at 77% humidity, making our 24C/75F feel quite unpleasant, even though the humidex is only at 26C/78F. As I was coming back from the post office this afternoon, and got out of the truck to close the gate, I was surprised by the sudden fog.
Then I realized the fog was on my glasses, which were cold from being in the truck’s AC. 😄😄
As for my trip to the post office, I got a new toy!
We picked up a grass whip. I’ve seen them in use in one of the YouTube channels I follow, and am quite excited to try it out.
I had plenty of attention as I attached the blade to the bottom of the handle, then used the thread glue before screwing on the top of the handle.
Then I took the blade off and put it back on again, facing the right way… 😄😄
The thread glue needs 24 hours to cure. After that, I can test it out!
This thing is very reasonably priced and has good reviews, and will be able to clear areas that are too much for our weed trimmer or lawn mower – and be much faster than working by hand or using loppers! It should even cut through small trees, like the poplars that keep trying to take over, everywhere. I should be able to clear a path to the barn with this. Just a path will be enough to allow us to mow – assuming it gets dry enough. More importantly, it can be used to clear in the main garden area, when it’s time to continue building more raised beds.
Which, given the heat and humidity and rain we’ve been having, is going to be a slow job!
It will also allow us to clear the underbrush to access the dead spruces we need to cut down, much more easily.
I’m really looking forward to testing it out! Twenty four hours from now, however, we won’t have reached the hottest part of the day, yet; that’s supposed to happen around 6pm. Which means I probably won’t test it out until the next morning. The lowest temperature of the night is actually supposed to be at 6am or so. We’ll have, at best, a 2 hour window of pleasant coolness before it starts getting hot again.
At least with this thing, it shouldn’t matter if everything is wet with dew or rain!
Recently, I saw this video from Gardening in Canada.
I liked what I saw with the seed starting kit, and her review of it. The main thing being, each tray has its own grow light, and we have lighting issues. The price was in the Cdn$30 range, which isn’t much more than getting a seed starting greenhouse kit, with the 72 pellets and dome, making it well worth picking up. So I logged into my husband’s Amazon Prime account and put it on my own wish list. I was planning to get it on our March budget, and the first disability pay was coming in soon, so I put it in the cart, too.
What I didn’t expect was for my husband to place an order before the end of the month! He saw it in the card, and included it with his own order.
It came in today.
Here are the contents.
As you can see, the cats were very interested, too!
At the top, under Cheddar, are the 5 green base trays for bottom watering and the 5 clear growing cells. Next to Soot Sprite are the tall cloche lids, each with an indentation for the lights and openings to allow moisture to escape.
Bottom left are a pair of tiny little garden gloves. Okay, tiny for me and my wide, simian hands! On top of the gloves are the label markers. Above them are a pair of very interesting looking tools!
Bottom right are the LED lights, tops and bottoms showing. Once inserted into the covers, they can be turned to cover or uncover the openings and control moisture levels. There’s the instruction sheet, and finally the cable to power the lights.
It was the cable that I was unsure of, and this is why.
It’s USB, with octopus cables for each of the lights.
We are going to not only need an adapter to plug this in, but an extension cable. A long one. There are no outlets anywhere near where we can set these up, and the one power bar we have with USB slots on it, both are being used for phone different chargers.
I’m pretty sure we already have both the extension cable and spare adapters. I’ll have to check with my husband, as he tends to have things like that with his computer stuff.
The one surprise for me is that I somehow expected the trays to be bigger. I don’t know why, since I saw them being handled in the video.
We don’t need to start seeds again until after mid March, so we have time to arrange a set up for the trays in the cat free zone, then work out getting power to that USB cable.
Yesterday, we were able to test and set up a critter cam in the sun room!
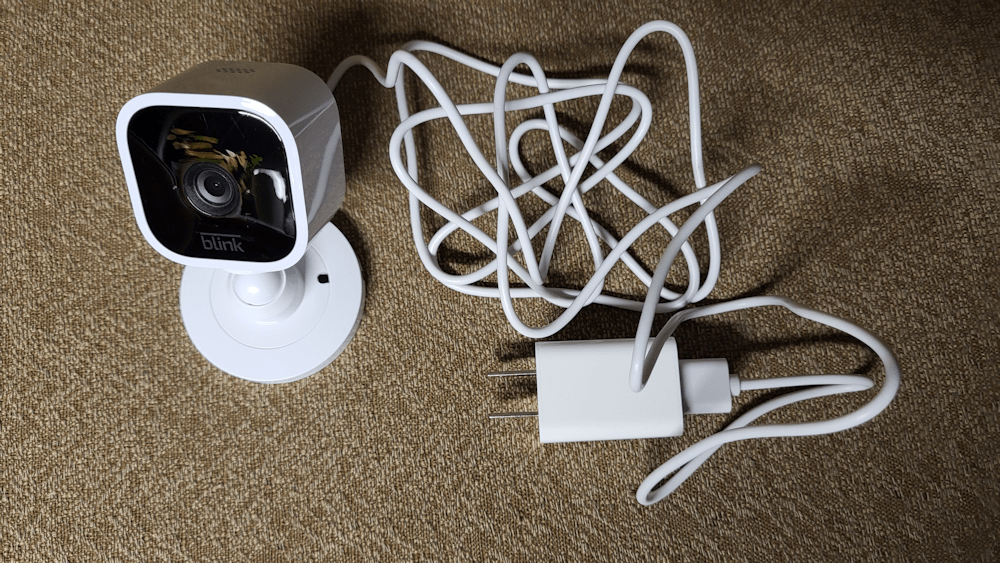
This is the camera that was given to us.
It is a Blink Mini, and it’s really basic! You’ve got the camera and its mount, a USB cable, and an adapter. There are also mounting screws.
I tested it out in the house. I had to download an app, first, and start a new account. Once the app was connected to wifi, there were some blue and green lights, with one of them blinking. The instructions said to press and hold the reset button until a red light started blinking. The reset button was hard to see, and very tiny. I ended up using the tip of a pair of sewing scissors I had handy to press the button. After that, the red light started flashing, then it reset to the blue and green lights, and that was it. I could then use the live feed on my phone and see what the camera could see.
The camera ended up on a shelf in the sun room, next to some stored mouse traps we don’t need, thanks to having so many yard cats. I used some Alien Tape to secure it, since the mounting screws could not be used here. That cable is supposed to go through an opening in the mounting plate, instead of sticking out like that, but I didn’t bother. The cable is secured to the shelf in such a way that there are no dangling bits to tempt the cats, and plugged into the same extension cord the heated water bowl is plugged into. I could then use my phone to see, and adjust the angle of the camera until I was satisfied.
On starting a new account, the app immediately activates a 30 day free trial for unlimited cloud storage. Currently, it seems there is no other storage option. I’ll get to that, later on.
There is a motion detector, and there is the option to have it start recording if it detects motion. The shortest length of time for a clip is 10 seconds. I tested that out, but quickly turned it off. There is just too much cat activity, and I was getting notifications of recordings even as I was in the process of setting things up. I might decide to turn it on for the night, then off during the day, but that’s about it.
After setting it up and testing it out, I left the sun room and started looking up different things about the camera. It seems there is no desktop version of the app, which is frustrating for me. While I was doing that, I opened the app to see the live feed, and discovered racoons in the sun room! Though I’d shut off the motion sensor recording, for some reason it did record several clips, including one of them running off as I entered the old kitchen and started opening the door to the sun room. I saw four big fluffy racoons running off! What I don’t know is why it was recording, why it continued to record a couple more times, and then stopped. I’m sure there’s some setting somewhere that I’m not finding. Whatever it is, it’s not automatically recording anymore, though it does allow for manual recording. Or, more specifically, is has a “save to cloud” button. I haven’t quite gotten to seeing what it saves when you tap that button.
Among the things I like about it:
It has a good, wide angle view of 110°. Even though the camera is set up near the door in the middle of the room, it can cover the entire half of the sun room we’ve set up for the cats. I adjusted it so that it covers the doors to outside and more of the floor. I might lower it a touch more so that the heated water bowl is in view.
It also has really good infrared. I’ve got the shop lights set up to turn on after dusk, if the motion sensors are activated, so the room does get lit up frequently at night. I have them set as dim as they go, but at night, it still feels really bright. Once the lights shut off, though, I can still see the entire room clearly. In fact, it’s slightly better without the glare of the shop lights.
It picks up sound very well. It even picks up sounds from the old kitchen!
It has a two way talk option. I can tap and hold a button and use my phone’s microphone to talk to someone in the room.
Or maybe talk to the cats.
Or use it to shoo away racoons?
It should be interesting to test how that works on them.
Things I don’t like about it:
There’s no option to save or download a clip to device. I ended up having to watch the clip with the racoons on my phone and use screen record to capture the video. Perhaps if I had a subscription, there’d be a way to access the cloud storage for download, but that leads me to my other issue with it.
I don’t like cloud storage. I certainly don’t want to pay for a subscription. I’d rather have the option to store on my own device. In what I read while setting it up, there was mention of non-cloud storage that can be used, but that would require buying a local storage module, and I’m not quite sure there is one available for this specific model of the Mini.
Now, without a subscription, there is still cloud storage, but with a 7,200 second limit. If you exceed that limit, older clips get deleted and new ones saved. You can also set it to delete all clips after a certain length of time, with 3 days being the shortest. With how many cats – and racoons – we have going in and out of the, plus our own daily activities, we’d exceed that 7,200 second limit very quickly.
Now, we would mostly be using it for the live feed, anyhow, which leads me to my next frustration.
“Blink” is well named.
While working on this blog post, for example, I had the live feed set up and running. The sound would blink out, the screen would freeze and restart and eventually it would simply stop sending a live feed and I’d have to start it again.
I thought maybe it was our Wi-Fi signal flickering. Different parts of the house have issues with Wi-Fi, even with the booster my husband got. Nope. It turns out that you need a subscription for the Extended Live Feed. Otherwise, it wants you to touch the screen every 60 seconds, and the live feed stops after 5 minutes.
So what is involved in getting a subscription?
Enter one more frustration.
The app wants me to link to my Amazon account. That’s where one would go to buy a subscription. The problem is, it takes me to Amazon.com I opened an Amazon account many years ago, mistakenly using .com instead of .ca and it’s a pain in the butt. Particularly since I opened the account to create a shop for my sadly neglected craft blog. I was eventually able to add .ca to my account, but the default is .com. The default region is also US, and it does not like me switching it to Canada. My husband has a Prime account on Amazon.ca, so we just use that. I don’t like to use Amazon if I don’t have to, but it’s his account that I go to when I log on.
The app logs me into my old .com account. Once there, it does not let me switch to Canada, or use .ca
I’m not about to go through all this with the US dollar and my account insisting I’m in the US, even though everything else says I’m in Canada. It won’t let me switch to my husband’s account, either.
In the end, none of that matters much. We only have it there so we can check in on the sun room.
As for that one video clip I got that I actually wanted to keep, I got the screen recording from my phone and uploaded it to my desktop. The image quality suffers, of course, but it did let me see what was going on in the sun room before I got into the old kitchen.
It also allowed me to see that there was not only 4 racoons in there.
On first reviewing the clip on my phone, I spotted a 5th one that was out of my field of vision, dashing into the shelf by the window.
After watching the clip on my desktop, over and over, I realized there were actually 8 racoons. Possibly 9. There was one that never actually entered the sun room, but I just saw its face peeking in through the opening of the door.
Another reason I want to lower the camera’s angle a little bit. Part of the reason I’m not sure if it was 8 or 9 is because at least one, maybe two, disappeared out of view below the camera.
[Note: I just watched it again with my daughter and confirmed it was 8]
Final thoughts:
In the end, all we want out of a critter cam is to be able to check the live feed and see what’s going on. Being able to talk through the camera or make limited video recordings is just bonus. While I’d much prefer to be able to download individual files to my device, or have a desktop version of the app, it’s adequate to our needs. Plus, other members of the family can download the app, log in as me, and they can check on the sun room, too.
The real test for this will be through the winter, and seeing how it does when temperatures drop!
Assuming some critter doesn’t discover it and tear it apart or something! 😄😄😄