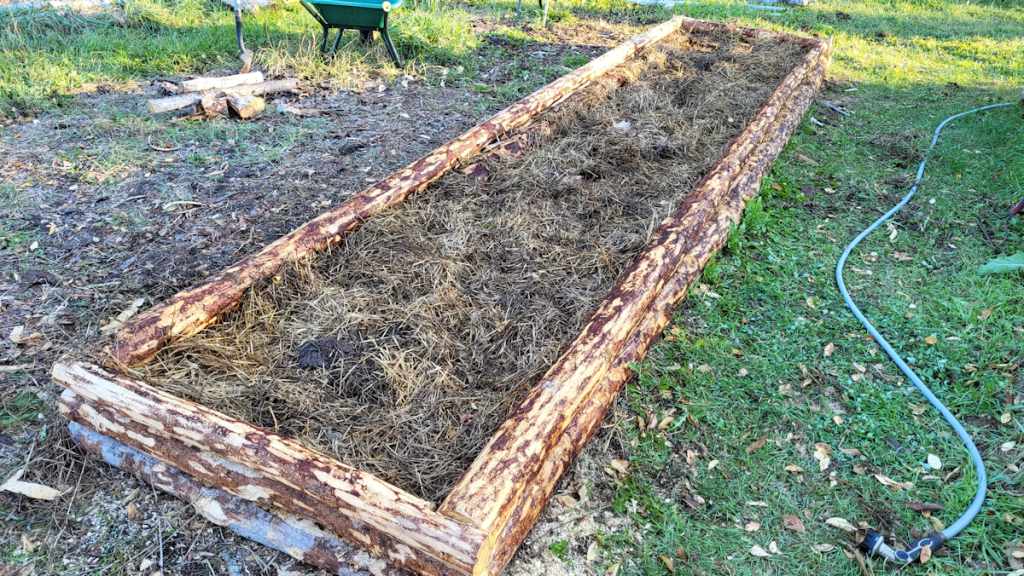
Finally building the new wattle weave bed

Spoiler alert.

It’s not finished, and won’t be for a while!

The first thing I did was harvest our unexpected maple coppice by the pump shack. It’s been a few years since I cut the suckers back from the old tree stump, so they were getting pretty big – big enough to start getting into the power line for the pump shack.

Time to take them down.

I cleared out all of it, including the smaller suckers. It’ll grow back, as maples tend to do, and the first ones should grow pretty straight, without having others to grow around.

The two stacks in the last picture of the slideshow above are the largest, longest and straightest ones. All the rest went onto the branch pile for future disposal.

The ones I was keeping got dragged into the inner yard, where I could work on them in the shade. I’ve been setting aside things in two piles there. One of longer, straighter poles and branches that can go into the chipper chute. The other is leaves, branches, etc. up to 1/2 inch, which can go into the shredder chute. Once I’ve got quite a bit built up, I’ll be bringing the wood chipper over to clean them all up.

The first thing to do was cut away all the little side branches and twigs.

The resulting pile looked so much smaller!

Since these are going to be in contact with the ground, my next job was to debark them.

Which took such a very long time.

It had to be done, though. Otherwise, the maples could start growing again. Willow and poplar – the other two materials we have for this – do the same thing. In the current wattle weave bed, I used stripped wood on the bottom layers, while the rest still had their bark. Amazingly, even without contact with soil, I spotted some fresh leaves growing!

I have to admit to feeling conflicted on this job. The job itself went well; stripping the bark on freshy cut wood went quite well and was almost meditative. I still felt like I was wasting time, when I could have been working on the bed so much faster, if I just left the bark on! I’m glad I took the time to do it, but gosh, it took forever.

I started stripping bark from the largest ones, leaving the shortest pieces with their bark on. By the time I was getting to the last few, the thinner ones were starting to dry up enough that I had to use my utility knife to strip the bark off, more and more.

I’ve got quite the pile of leaves, twigs and bark started for the shredder chute!

The largest of these were going to be the vertical supports. I measure the bed and worked out that I needed 12 for the long sides. I debated whether to just have one more for the ends but decided to have three smaller verticals at the ends, slightly offset from the long side’s posts. I decided to make the verticals a bit taller than the other bed, too, and cut them to 2’6″.

The posts then needed to have points made. For that, I went into the side of the garage where we store the lawn equipment. My late brother had set up a workshop in there, and there’s still an old vice on the counter. I was able to use that – wrapping the posts with an old cloth grocery bag to protect the wood from the vice – and the draw knife. That green wood cut so nicely!!

Ideally, I would then have treated the wood with oil, or charred the points, but I didn’t have oil for that sort of thing, and we’re under fire bans. So they went in as they were.

I’ve decided to add some wattle weave on the retaining wall blocks as well. With the spaced in the old chimney blocks, it was easy to evenly space out where the verticals would go, then hammer them into the soil. I then had to re-level the edge of the bed, since critters have been playing in the lose soil. I used one of the posts to measure roughly 2 feet from the retaining wall to set the corner posts, then set a line between them. I then used the line and the posts in the retaining wall blocks to set the remaining posts, before hamming all of them into the soil.

Then I dragged over the remaining maple pieces to start weaving.

The longest ones were used up in no time. Two were needed for each level.

The verticals are roughly 2 feet apart, like the other bed. In videos, etc. that I’ve seen about it, they tend to recommend 1 foot apart. When they’re that close together, it’s harder to bend the horizontals around the posts, and they are more likely to crack. However, with them being about 2 feet apart, the narrower ends get pretty loose before they stop. I’d do one from each end per level, which meant running out of length in the middle, making for loose ends and a bit of a mess. Some of that will be hidden once the soil it returned. Adding extra length per level would be more secure and less messy in the overlaps if the posts were just 1 foot apart, though. Which doesn’t help much if the wood ends up snapping, trying to bend them around the verticals that close together. Even using flexible green wood. In fact, I still ended up snaping one, trying to secure it, so the end wouldn’t be sticking out.

I’m glad I decided to do the ends as separate little walls. I was able to use those to help secure the ends of the long side pieces.

I ran out of the longs ones quickly, and the shorter ones were too short to be able to secure them between the verticals. They’d weave between 3 posts and just sit there, loosely.

Which is when I decided it was time to harvest some willow.

Once again, this was needed to get branches away from the power line to the house. I took only the largest ones for now; the smaller ones will need to be done, but I don’t have a use for them just yet.

After stripping off the leaves and shoots, there was a very small looking pile left behind! However, several of them were more than 12 feet long. I was able to weave those in from end to end, and just trim the tiny bit of excess with loppers.

But first, they got debarked.

The kittens LOVED playing with the ends while they were being debarked, and had a blast in the pile of leaves and bark.

Once I got as much as I could, woven in – leaving quite a few shorter pieces behind – it was time to call it a day.

I’m going to need a LOT more material to finish this.

The problem is finding lengths that are long, thin, flexible and straight.

The “straight” part is the hardest to find. Typically, the branches and suckers grow straight for maybe three feet, then branch off. Or there’s been some sort of damage that cause them to grow a new “top”.

For the retaining wall side, I could probably get away with adding more vertical posts, then use up all the skinnier, shorter pieces to weave onto there.

Tomorrow, if I’m up to it, I’m going to go into the edges of the spruce grove to start hunting down some of the poplar that has regrown. Hopefully, I’ll find some nice, long, straight pieces.

We have so many willow, maple and poplar suckers that I’d hoped to harvest for this, but the majority of it isn’t actually useable. I need to really hunt for what will work.

Which means this bed is going to take quite a while to finish. Which is fine. It’s not being used this year, and will be ready for next year. I also plan to leave the vertical supports tall, so that things like hoops or whatever can be added, if the bed every needs to be covered, to protect anything that gets planted there.

I am so tired and sore now, though, I might have to take tomorrow “off” and give my body a change to recover.

For now, I’m ready to take some pain killers and go to bed!

The Re-Farmer

Our 2024 Garden: harvest time, and our first yellow peppers!

I had another sleepless night last night (courtesy of the cats!), so my daughters took care of most of the morning stuff. That let me get at least a couple of hours of sleep before I headed out to the garden, just before noon.

We got a smattering of rain yesterday evening, so I used one of the side walls from the broken market tent to cover the onions that were curing outside. Once things were warmer, I uncovered them again, so they could get some sun and air flow.

Speaking of air flow…

We’ve got some warm, sunny days coming up, and mild overnight temperatures, so I lifted the bottom half of the vinyl sheets wrapped around the box frame over the eggplant and hot pepper bed.

As you can see in the foreground of the photo above, Syndol is checking out the eggplant and hot peppers I harvested out of there this morning!

This is the rest of today’s harvest. We have a first today!

Finally! Some yellow peppers!

Yes, a couple still have some green on them, but I wanted to get some of the weight off the plants. It was much the same with the few tomatoes I collected today.

Also, yes, that is a mutant Little Finger eggplant on the left! I actually remembered to bring pruning shears to cut the stems – they are surprisingly spiky! – and it was rather a surprised to cut one stem and get two eggplants! There are two Classic eggplant in there, too. I’m harvesting a bit smaller, as the large ones we’ve harvested before were getting pretty seedy inside. Mind you, we could leave some longer just to collect the seeds, but it’s probably too late in the season for any of the ones still on the plants to have viable seeds to collect.

The long, straight hot peppers were easy to harvest, but the curled one was so twisted around the stalk and another pepper, I ended up breaking off the top of the pepper itself, rather than the stem.

We also have one melon today, and one purple Dragonfly pepper. The colour is very much the same as the eggplants!

Pretty darn good for near the end of September in our area!

The German Butterball potato plants have all died off, so we should be harvesting those, soon. A few of the winter squash are starting to look ready to harvest and get set aside to cure, too. The one Jebousek lettuce that seeded itself should have seeds ready to collect, too. The kohlrabi look like a total loss, though. The flea beetles just decimated them. 😢 We finally got some to actually grow, and this happens. *sigh*

As we build up our raised beds, making it so they can be covered with insect netting is going to be important! I would really like to grow kohlrabi and cabbage and brassicas in general, but it looks like that’s just not going to happen until we have a way to protect them from those flippin’ flea beetles!!

All in good time.

Little by little, it’ll get done!

For now, I’m just happy with what we have!

The Re-Farmer

Our 2024 Garden: transplanting winter squash and peppers

I headed out nice and early this morning, while things were still nice and cool, to do some transplanting. I actually have some time to write this before I need to go to my mother’s, too!

The first priority was to get as many of the winter squash as I could fit into the bed that was prepared last night.

I brought all the transplants over, so I could pick and choose among them. The largest plants, and the ones in pots that were starting to fall apart, were the priority. I set a couple of markers to help me keep track while making the centre line.

The lower the bed, the further the reach, though. I had to use another plant stake to reach the middle and mark a line in the centre. Then I took the two biggest plants and set them at the ends, about a foot or more away from the short logs, then another bigger one in the middle. Once those were in place, it was easy to eyeball how far apart to set the others. I was able to set out 9 pots, roughly 1 1/2 feet apart.

Once I knew where they were going to go, I dug holes large enough for the pots, then filled each one with water. The one thing I did NOT do was amend the soil with sulfur granules. If I’d remembered, a good time to do it would have been last night, when I was using the garden fork and the rake. I was working by hand this morning, and just didn’t have the reach to work anything into the top 6 inches in the middle.

These winter squash are all in the biodegradable pots, which don’t really degrade very well unless they get – and stay – really wet. So when I planted the squash, I broke off the bottom of the pots, then worked a split up a side, before putting them into the ground. Once in the ground, I set them a bit lower, then made a sort of dam around them. This way, when they are being watered, the water will pool in the lower area and get absorbed into the ground there, rather than run off to the side somewhere.

Later, a mulch will be added around each transplant. I’m still planning to put beans and peas on the sides, and more mulch will be added after that. All while still making sure to stay clear of the sides, since the logs will be adjusted as they are permanently set in place and attached to each other.

That done, it was time to move to the high raised bed.

It had a light grass clipping mulch on it, and some weeds that needed to be cleared away. I am SO loving that cheap little hand cultivator I got at Walmart. It really makes loosening the soil and getting those weeds out much easier. I can even use it with my wonky left arm. Not for long, mind you, but enough to give my right arm a bit of a break.

What a difference with a high raised bed, though! I worked around both sides but, if I wanted to, I could actually reach all the way across the bed, without too much difficulty!

Once the soil was loosened and weeded, I used the back of the thatching rake (which I think is actually called a landscape rake, these days), to level and move the soil. For this bed, I built some of the soil up against the edges and packed it down a bit. Again, this is to control the flow of water. I want the water to flow towards the middle of the bed, not down the side walls. That done, I loosened the soil in the middle some more. This time, I did work sulfur granules into the soil.

Then I rigged the hose up to spray over the bed and give it a super deep watering while I put the remaining winter squash transplants back with the others (there’s 7 left, plus one that doesn’t look like it’ll make it) and go through the peppers.

I brought over a tray with the three early varieties of peppers that we have. There turned out to be three of two varieties, and four of another. I set them out in groups apart from each other, but there was so much room in between them, I decided to get the other bin of peppers. There were only pots with Purple Beauty in them. One had two seedlings, and I pulled the weaker one. The other three pots had Sweet Chocolate peppers in them. Two had pairs of seedlings and, again, I pulled the weaker ones.

So the high raised bed now has all peppers in them. Later on, I plan to plant onion transplanted around them. For now, however, they are protected by one of the raised bed covers. It won’t stop the cats from getting in, but it will deter the deer!

Then, because I can’t just toss away seedlings, even if they were thinned out, I found space in the wattle weave garden to transplant the two Sweet Chocolate and one Purple Beauty seedlings.

So that is done for now!

Hopefully, we’ll get more in this evening, when I’m back from my mother’s, and after things cool down again. It’s 17C/63F as I write this, with the humidex putting it at 21C/70F. Our high of the day is supposed to be 21C/70F

At the very least, I want to get mulch around the new transplants. We’re supposed to get rain starting around 10-11pm until 7am, so I’d like to protect them as much as possible, since we don’t have the protective plastic rings around these ones.

Not too bad for a couple of hours in the morning!

The Re-Farmer

Our 2024 Garden: amending soil and planting the first potatoes! (video)

Today, I was able to finally get to that bed along the chain link fence, and get some potatoes planted!

I must say, though; it really was hitting home for me, how much I need higher raised beds. The narrower bed did mean I could reach across it just fine, but my goodness, the whole process was painful. It didn’t help that I was working during the hottest part of the day! We reached our expected high of 16C/61F, while the “feels like” was 21C/70F, at the time I finally got inside. I think I spent about 3 hours on the job, including hydration breaks. I was definitely not going to push myself in this heat.

Yeah, I can hear you folks from the south, giggling at me. 😉😉

Once I was done, I even remembered to take more painkillers before settling down at my computer to upload the video files I took. It doesn’t take long for the whole body to stiffen up, and I end up hobbling around looking in worse shape than my husband, even on his worst pain days!! 😄😄

I still prefer it over housework. I must say, it was great to come in when I saw done, to a house that smelled like cleaners instead of cats! 😁😁 My daughter is awesome.

I had fun putting this video together, including picking music that much better fits me and what I like.

There’s even bonus Syndol, being incredibly snuggly, while I sat in the shade to get some rest and hydration.

The 10 day forecast has changed, yet again. We went from expecting more rain and cooler temperatures to heat and mostly sunny. Tomorrow, we’re now supposed to reach 20C/68F! Which means I need to make sure to get to work on the other beds earlier in the day, before it starts getting too hot.

Which means I should probably get to bed before midnight, for a change!

I hope you enjoy the video!

The Re-Farmer

Our day so far

Morning rounds are so much more enjoyable, now that it’s warmed up, and I don’t have to slog through snow, slush or mud. 😂

First, the cuteness!

Broccoli let me pet her today.

She is so very round.

I counted 32 yard cats today, including 5 that were following around one of the white and greys that was obviously in heat.

*sigh*

Of all of them, the least feral one was Shop Towel!

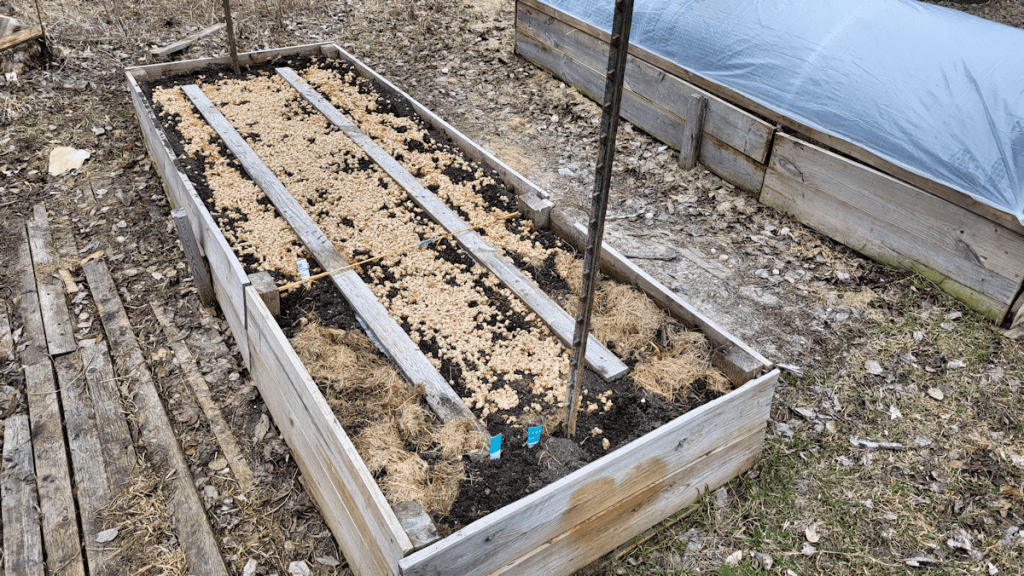
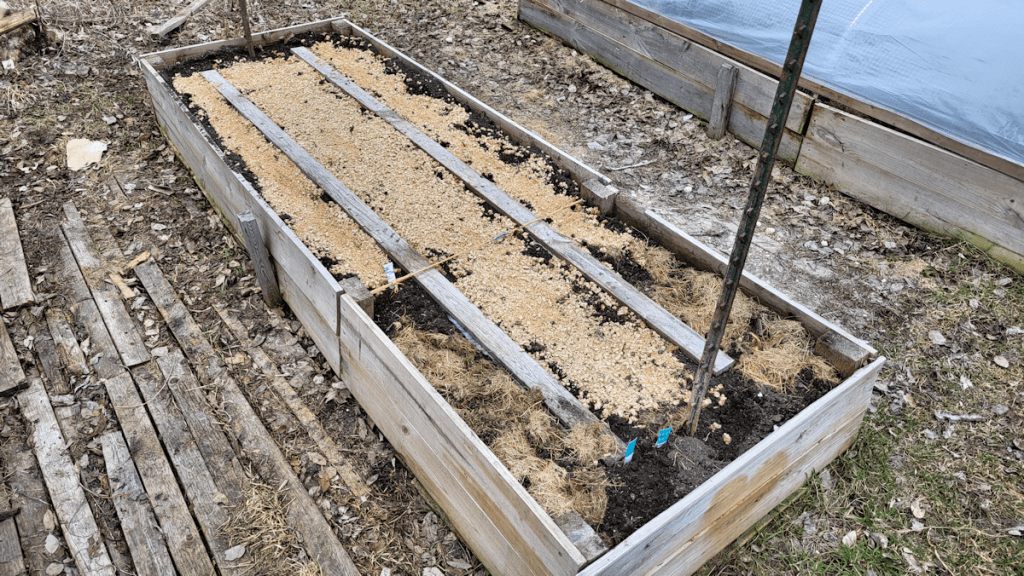
I tended to the raised bed that was planted in yesterday.

In the first photo, you can see that the stove pellet mulch has absorbed moisture and broken apart into sawdust. The second photo is after I gently spread it around. I like using stove pellets as mulch when direct sowing because even things with small seedlings, like the spinach, can easily push their way through the light and fluffy sawdust.

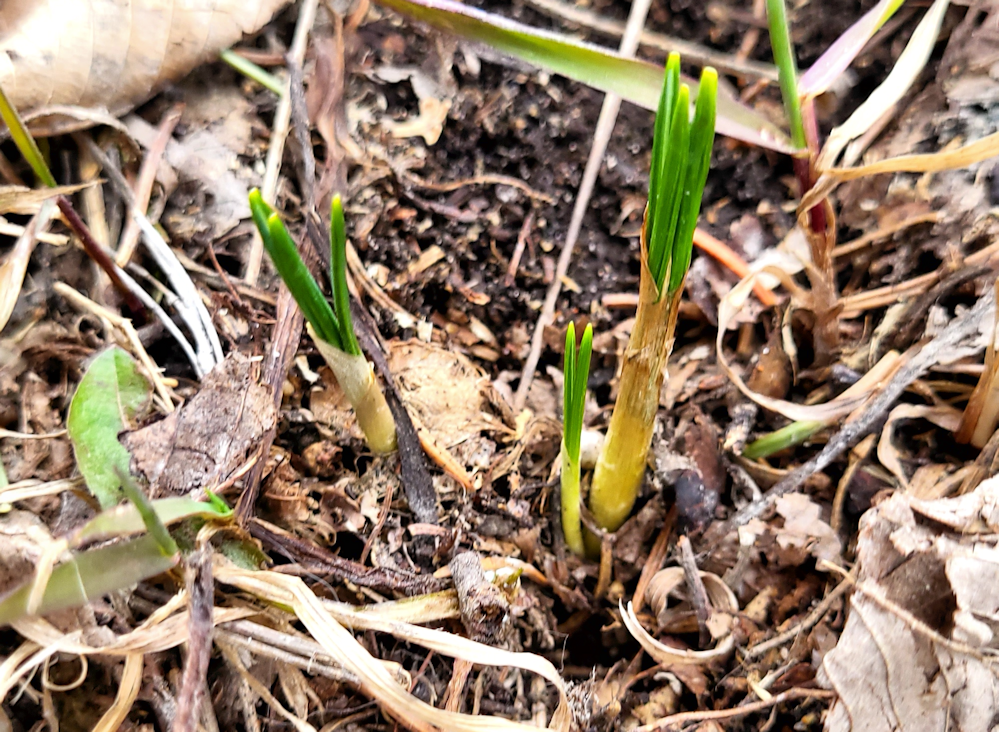
I also managed to get a picture of an emerging snow crocus!

We’re not seeing many, yet, and the few we do see tend to be too far from the path for me to get a decent photo. Looking at the forecast, I was happy to see rain, but a closer look at the hourly forecast shows that we have an only 4% chance of rain, so… none. At best, we’ve got a 25% chance of rain some time tonight.

After finishing my rounds, I headed to the post office to pick up a couple of parcels. One was a courier delivery, so timing wasn’t an issue, but the other was to our postal box, and I wanted to pick it up before the post office closed at 11:30.

There was nothing there.

Strange, but okay.

My husband was surprised, as he got email notifications for 4 different parcels, instead of just the 2 I was expecting. When I had the chance, I went online to check the tracking, which has timestamps on it.

Two showed “attempted delivery” times that were shortly after I left. Two others had time stamps that were after the post office was closed. A fifth (!!) simply said “delivered today”, which would have been a courier.

One of the packages that came in has our sulfur in it; last I checked the tracking information, that one was supposed to come in on Thursday, so it’s three days early!

The post office opens up again at 2, so I’ll head out again this afternoon.

Then it’s back to work in the garden beds! Woohoo!!

The Re-Farmer

Trellis bed progress, and the last potatoes are in

Okay, so I did finally make it outside yesterday to do some work. I may have been mentally drained with all the BS going on with our vandal, but not going out was actually making me feel worse. It was later than I normally would have gone out, but the weather was still good, and there was still enough light.

For a while, anyhow.

My first task was to fill the wheelbarrow with material to add to the bed. The compostable bag of kitchen scraps went in, along with the Spoon tomato and pepper plants from the old kitchen garden, and all the squash and pepper plants from the main garden bed. I also pulled up the potato plants from the grow bags, which meant the Purple Peruvian fingerling potatoes would need to be harvested.

All that material went on top of the straw layer, followed by a layer of leaves and finally a sprinkling of grass clippings.

The grass clippings were more to keep the leaves down for when I tromped all over it, after this picture was taken. Then the whole thing got a thorough soaking. After that, I emptied my last half bag of manure over the grass clippings.

My plan had been to empty the soil out of the kiddie pool the melons were growing in, then use it to collect the soil from the potato bags while harvesting those. I got one load in the wheelbarrow, but the soil in there was very damp, sticky and heavy, and I was starting to lose the light. So I just emptied the one load into the bed, then shifted gears.

One thing about spreading even that small amount of soil onto one end of the bed: those layers REALLY start to sink under the weight! The bed looks over full in the photo, but those layers will probably settle to only half the bed, by the time the soil is added.

The feed bags used to grow the potatoes in are good for only one year’s use. They were all starting to tear apart as I tipped them over and dumped them out. The straw from the top and bottom of each bag could be easily set aside, leaving just the soil to sift through and pile up before moving on to the next bag. I got a decent amount of potatoes out of it. More than either of the other two varieties, and they were decently large for a fingerling potato, too. It was so dark by then, it was getting hard to find the dark purple potatoes in black soil in fading light! I will not be at all surprised if I find ones that got missed, when the soil is transferred over to the new bed. I did try to get a picture of the harvest, but it was a sucky flash picture, so I won’t inflict that on you. 😄

Today has turned out to be a less pleasant day, weather wise, so I’m extra glad I got as much done yesterday as I did. This morning, as I was finishing my rounds, I harvested some Uzbek Golden carrots to go with a roast I was wanting to do today. A nice big hunk of beef roasted with all three types of potatoes that we have, a whole bunch of our smaller yellow onions, and the golden carrots. Those were so big and juicy that, as I was cutting off the tops and tails, several of them would suddenly make a popping noise, and split from end to end!

I checked on the roast before I started this, and it was done – and the house smells delicious!

The Re-Farmer

We have hot water again!

Yay!!!

I was so excited when the phone rang, and I saw the plumber’s name on the call display.

Then confused, when there was nothing but dead air.

It took several calls like this, until I finally made sure my cell phone was on Wi-Fi calling (it keeps turning that off of me!) and got through to him that way. He’d tried calling another number in our area, with the same prefix, and had trouble there, so it seems like it’s a regional problem.

The important thing is, he was able to come over shortly after calling, and get the new tank installed.

Here, you can see his handy little pump draining the tank. We had turned off the breaker but never drained it or shut the water off, so that if we happened to turn on the hot water tap out of habit, it would still work. We just wouldn’t have hot water.

Looking inside, he thought that maybe the bottom element had burned out and said it could possibly be fixed, but I saw no point in that. This tank has already lasted two years longer than expected!

The weird thing was this.

This is where the electrical wires are tucked in, after the tank is hooked up. The plumber could not understand how water got in here!

After switching the tanks and starting to fill the new one, we talked about our well pump. It turned on while the tank was being filled, of course, but was having a hard time filling the pressure tank fast enough, so it started to make that grinding noise that worries me so much. I told him, we have a new pump ready and waiting, but with the possibility of the foot valve breaking, no plumber has been willing to change switching it out, because we’d end up with no water. He agreed with that assessment! I asked if he happened to know of any companies that serviced hand pumps, but he couldn’t say for sure. It’s entirely possible, we can change out the well pump and not have any problem at all, but when I said I didn’t want to risk it until we got the hand pump checked out and working again (if all it needs it new leathers), he thought that was a good idea. If we find ourselves with a worse case scenario, we at least can haul water to the house! Part of the problem is that the pipes in our well are a size that isn’t used anymore, so if the foot valve goes, we’d have to either find the old size somewhere or, if there are none to be had, get a new well drilled.

While the tank was filling, he was careful about using the valve to slow down the flow of water, giving the well pump a chance to catch up.

It takes quite a while to fill a 40 gallon tank!

Once it was full, he got me to turn on a hot water tap – which we have right in the basement, where the laundry used to be – to get the air out of the pipes and the water flowing. Once that was done, we could turn the breaker back on.

It takes a while for 40 gallons of water to heat up!

But heat up it did, and we now have hot water again! He recommended to check it a few times to make sure nothing is leaking, which I’ve done. Hopefully, this tank will last longer but, just in case, I’m hoping that we can pick up a “spare” tank, because we won’t be able to replace a warranty tank with a warranty tank again!

The whole thing ended up costing just under $235, after taxes. Thankfully, my daughter had already provided funds for most of that. Otherwise, I would have had to go into funds set aside for a down payment towards a new vehicle! We’re good, though, and I am very grateful!

It turned out to be a gorgeous day today – we reached 12C/54F this afternoon, which was several degrees warmer than forecast. I took advantage of it – and of having the cardboard from the box the new hot water tank was in – and started filling the trellis bed.

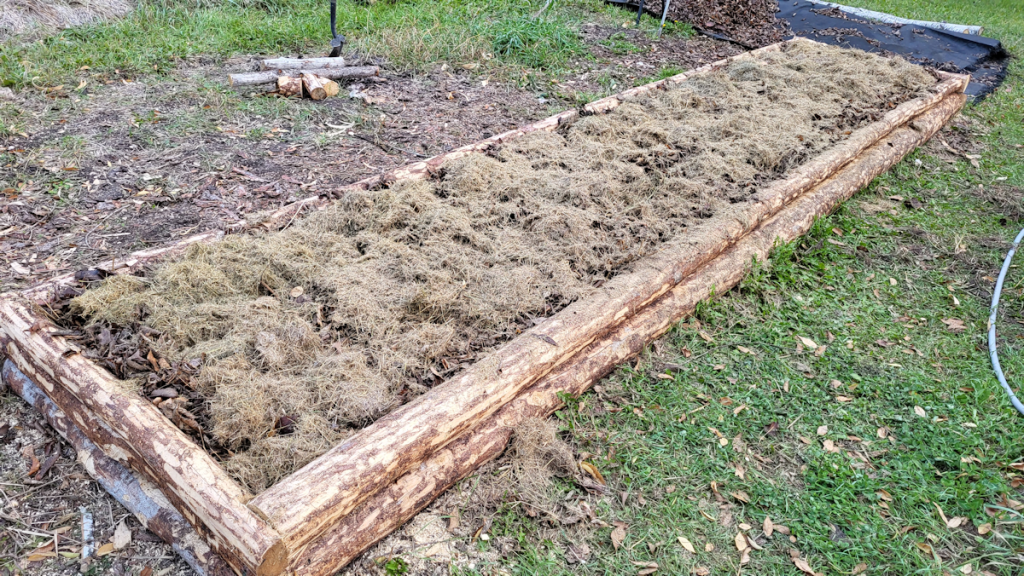
The cardboard almost completely covered the bottom of the bed, leaving gaps small enough that I’m not too concerned about it. After laying out, stamping down and hosing down the cardboard, I added the bark shavings from the poplar poles that will make up the trellis supports, followed by a wheel barrow load of wood chips. That got tromped down and soaked before the next layer was added – tomato, bean and melon plans pulled up from the garden. Finally, I added straw that had been laid out on this area when it was a Ruth Stout style garden bed. Another tromping and a soak, and I stopped for a while. These layers are just enough to cover the bottom logs, but they will settle down once the soil is added. I started adding scraps of wood into gaps as chinking, from the inside, so the straw could be used to hold it in place. There are more gaps that need to be chinked before more layers are added. It will get kitchen compost added, as well as leaves and grass clippings, before soil is finally added to the top. I’ll be using the soil from the melon bed and the grow bags, but those still need to be cleared.

With that in mind, I harvested the last of the onions in this area. There were just a few yellow onions left in the high raised bed, plus the Red of Florence onions sharing grow bags with the peppers. Last night’s frost was too much for the peppers, but some of the larger unripe ones were salvageable. I harvested the last of the peppers in the wattle weave bed, too, along with the two little eggplant that could be picked. We’re at 8C/46F right now, and supposed to drop to 6C/43F overnight, but there’s really nothing left to cover and try to protect anymore.

I’m happy with the progress on the trellis bed. Hopefully, I’ll be able to get that bed filled and set for the winter, and still be able to harvest more logs for the second bed. I’ll worry about the trellis supports later. That part can wait until next year, if need be.

It’s been a good and productive day today!

The Re-Farmer

Progress so far

Taking a break for some food. Here are just a couple of pictures of what I managed to get done so far, today.

The first trellis bed is done. Had to mess around to get the ends of the sides the same height as the three end cap logs. Finally, just in case, I sprayed the holes each rod and rebar with clear sealant I got for the eavestroughs. The hollow rods in the middle end cap log I put in today had to be inserted at an angle, which would allow rain to drain right into the holes in the logs. The sealant isn’t made for something like this, but it’s what I had, and I think it should help. The bed is now ready to be filled.

I finally got the stump chair near the chain link fence built. Then, after adding another coat of paint to the sun room door, I painted the seat as well. Both will need one more coat.

While the day is still nice and the light holds, I’m going to tackle the felled trees in the spruce grove next.

The Re-Farmer