You know those nights where to get into bed and suddenly, you’re just awake? Absolutely zero chance of falling asleep?
Well, I had one of those last night. Finally, at around 4am, I got up to find a food. I sat at my computer table to eat and, since I was there and the computer was off, I decided to clean out the crevices on my mouse. It wasn’t as bad as I expected, so I decided to do the same to my keyboard.
I cannot believe how much cat hair I pulled out from between the keys! How does it even get in there??? Today, however, it feels like I’m typing on a brand new keyboard. 😄
I finally tried going back to sleep at about 5am and managed to get a bit of highly interrupted (by cats) sleep before it was time to get up and do the morning routine and feed the outside cats. Then I tried to go back to bed, but found I wasn’t feeling well for some reason. I finally did doze off, only for the phone to ring and wake me up.
I gave up after that.
I still wasn’t feeling well in general. Part of it had me wondering what I might have eaten to trigger problems (nothing out of the ordinary), and part of it was my joints wanting to give out on me. That whole “shoulder wants to dislocate while reaching to flush the toilet” thing is decidedly inconvenient!
I ended up getting one of my daughters to do the evening outside cat feeding.
I was feeling particularly useless today, so I started looking up recipes. At some point, Pinterest started showing me some Pins for liquid dough flat bread, which caught my attention. We aren’t baking bread anywhere near as much as we should be. Our bread machine stopped working properly a while ago, though we could still have it mix up a batch of dough in the evening, ready to bake in the oven in the morning, but we weren’t always in a position to do baking in the morning. Plus, a single loaf doesn’t go very far with four adults in the household.
Meanwhile, with all of us breaking down, one way or another, we were focusing more on no-knead bread recipes, anyhow. Most of these still require rising time, but sometimes I want something faster. Baking powder pan bread works okay, but variety is always nice.
Today, I found a couple of “liquid dough” recipes that looked good and decided to try one of them out. The dough’s texture is thinner than a batter bread, but thicker than a pancake batter, though there seems to be quite a bit of variability between recipes.
This is the basic recipe I settled on to try today.
Liquid Dough Flatbread
Ingredients: 2 cups flour (AP or whole wheat) 2 cups water 1 egg (beaten) 1/4 tsp salt 1/4 tsp sugar 2-3 tsp dried parsley (or slightly less, if using chopped fresh parsley) Oil or butter (melted) for cooking
Instructions: 1. Add all ingredients together in a medium bowl and whisk together until smooth. 2. Heat non-stick skillet over medium high heat. Brush lightly with oil or butter. 3. Pour 1/2 cup of batter into the hot skillet and spread evenly. 4. Cook until the bottom starts to change colour and is solid enough to flip. 5. Flip, then apply a light coating of oil or butter. 6. Press the edges with a spatula (they tend to curl up). Cook for 2-3 minutes, then flip again. 7. Apply another light layer of oil or butter. Continue to cook for another 2-3 minutes, or until both sides are golden brown. Note: a bubble of steam may form in the middle.
For this, I used olive oil in a handy little dispenser and a pastry brush to spread it, which made things easier. I also used a half cup measuring cup as my ladle, with a rubber spatula to scrape the outside to keep it from dripping all over and making a mess. With the half cup measuring cup, I was able to do 7 flatbreads that were about 8″ across this way, then for the last one, I just poured in what was left, which made for a flatbread about 10″ across.
The original recipe said to put all the ingredients (the egg did not need to be beaten first), except the parsley, into a blender, blend it smooth, then transfer to a medium bowl and stir in the parsley. We don’t have a blender, but why would I want to dirty extra things when a wire whisk and one bowl will do the job? I didn’t even bother to beat the egg in a separate bowl, but just made sure to beat it before incorporating everything else in the bowl.
The finished flatbreads had a lightly crispy edge, and a softer, chewier middle.
We taste tested them plain.
My conclusion:
Very easy and quick to mix up, and not too bad when it came to how long they took to cook, for something that could be cooked only one at a time.
Adding the extra oil when flipping them did result in them being slightly oiler than I prefer – and I didn’t oil them as much as the original recipe called for!
For flavour, I think it would have been better if I’d used butter, ghee or even a flavoured olive oil, rather than a plain olive oil. I think butter would be best, as they rather needed the extra salt. Something to experiment with, if I make this recipe again, as it was a bit on the bland side.
I think I would also like to experiment with trying different additions instead of the parsley. Finely chopped garlic, for example, or a dry grated cheese, like Parmesan, or even some powdered, dehydrated tomato or spinach, for savoury options. I think it would also work well with a bit more sugar – maybe substituting brown sugar instead – and the addition of things like ground cinnamon or cloves, for a sweeter option.
While we were taste testing these plain as a snack, I think they would be a nice addition to go along with a hearty soup or stew, though for that, I really prefer our fluffy dumplings. More likely, we would use this as a wrap, like we use tortillas, with some sort of savoury filling. My daughter thought they would be nice dipped in some hummus or sour cream. Interestingly, she found the flavour quite “eggy”, which I didn’t get at all. Her taste buds can pick up a lot more than mine can, though.
I do think this is something that might work well for campfire or firepit cooking, too. Our well seasoned Dutch oven lid has legs and can double as a griddle that would be perfect for something like this.
In the end, I think this is something that would do well to quickly work up when feeling peckish but, as I mentioned before, it’s a bit on the bland side. I can see myself making a half recipe of this as a snack during the night.
A night like last night, were sleep just didn’t want to happen!!
Today was expected to be chillier, with the forecasted high covering at, or just below, freezing, depending on what app I looked at and when. The next two days are supposed to be much warmer, and likely the last warm days of the year, so I’m planning activities accordingly.
Since moving out here (I forgot all about our 8 year anniversary here, almost a week ago!), our plans tend to very much revolve around the weather and the seasons!
The day started out with my usual routine, which always starts with tending to the yard cats.
Furriosa looks hilariously furious! Pinky is healing well and seems absolutely indifferent to her surgical site. I supposed her shaved belly must feel at least somewhat cold, but being in the heated isolation shelter is probably enough to make up for that. Especially when she has three kittens to cuddle up in the bed and keep her warm!
We’re going to have to do something about the second bed in the lower level. The litter box has been kicked around, and it is being used – somewhat – but they’re also using the lower level cat bed as a litter box, too! The trick will be to open up the ramp door to reach all that, without letting Pinky escape. The kittens have zero interest in leaving, but there’s still a chance she might. I believe she’s been trying to scramble through the roof. The rigid insulation above where the extension cord comes in is now very torn up!
Things that we’ll need to deal with, during the next few warmer days.
The first unexpected part of the day was an early phone call.
From the Home Care coordinator.
She got a report about my mother yesterday.
My mother had called me last night and, at one point, she started going off on how the home care workers, these “educated people”, didn’t know how to use her microwave. It’s so simple! I’d explained to her that her microwave is so old, none of them would have seen one like it before, and to give them time to learn how she wants things done, now that they are doing meal assists on top of her med assists.
Now I know why it was on her mind.
It turns out that when one of the home care workers went to use the microwave, my mother suddenly said NO! very loudly, grabbed her arm and sort of slammed it on the counter (not sure how that would have worked considering how things are laid out in her kitchen), then did the microwaving herself. The worker told my mother not to touch her like that and my mother did apologize.
Still, this is the sort of thing that could get her home care cancelled outright, and between my siblings and I, none of us are in a position to take over if that happens.
We talked about it for a while. One of the things that is part of the issue is how my mother is having more difficulty finding her words and gets very frustrated and angry. She expects everyone around her to just know what she is trying to say, what she wants, what she means. There’s no excuse for taking it out on people – especially not physically! I explained about my mother not understanding why people don’t know how to use her microwave and how, with her, she leaps to thinking people are stupid for not knowing things she finds obvious. This is not a new thing, by any means, but it is getting worse as her ability to communicate declines.
I assured the coordinator that my siblings and I would have a talk with my mother about it, and extended my apologies.
Then I updated my siblings in our group chat about my mother. I just finished doing that when my younger daughter came over and asked me what my plans were for the day. She and her sister had been talking, and were hoping to be able to go hunt for some energy drinks. More specifically, Monster energy drinks. They’re out of stock or of limited stock lately. We’ve tried other brands and have not been impressed by them.
I really miss Beaver Buzz! No one carries those anymore though, according to their website, places like both grocery stores in town still do. Maybe in other provinces, because I’m not even finding them in the city.
We decided to go into town and see what was available at the grocery store and, if that didn’t work out, we could at least try a gas station. They tend to have the individual cans at much better prices. We left early enough that, after checking the budget, we were able to grab a late breakfast, too.
Once at the grocery store, I picked up a few things as well, taking advantage of the trip, while my daughter did a much larger shop. Including energy drinks. She found 4 packs of Monster, on sale, and got the last three.
That done, we were soon on are way home. I considered stopping at the post office to see if any packages came in, but our timing was off. It was still morning, but they close at 11:30 for 2 1/2 hours, and we were just leaving town as they would have closed. When we got home, I checked tracking and found that yes, we did have two “attempted deliveries” (which means, there’s a card in our mail box). A third item is now in the city, though, which means it’ll show up on Monday morning. I decided to wait until then, since one of the items that came in today is the micro SD memory card to go with the security camera I got to monitor the isolation shelter.
I just realized something else this camera could be used for. We will have to trap the more feral cats and, with the females, we’ll have to do this in the winter, before they go into heat in the spring. The problem is, we aren’t able to monitor a trap and don’t want to risk a cat (or raccoon, or skunk…) freezing to death before we can check the trap. If we have this extra outdoor, solar powered security camera, we can set it up and we should be able to get notifications, and check the live feed.
Hhhmmm… that could work.
But first, it needs to be set up to monitor the isolation shelter, so we can tell when the raccoons are trying to tear their way into it again!
Hopefully, we’ll be able to get that done next week.
As soon as I was able to, I called my mother to have a talk with her. When I brought up that the Home Care coordinator had called me this morning and why, my mother immediately said that she realized she’d done the wrong thing and apologized. From how she described it, the home care worker had her hand on the dial of her microwave (which has a dial for the timer and a start button; that’s it) that my mother had pushed away. That actually makes more sense than what the coordinator described to me on the phone. We talked about it for a while and my mother went off again about how they didn’t know how to do things, like use the microwave. I had to keep repeating that her microwave is nothing like modern ones – and even with modern ones, there’s still a learning curve, because they’re all different. To her, not being able to use her “so simple” microwave means they’re all stupid. It took a while to talk her through that.
Then she started going on about her upcoming MRI. She is clearly working herself up about it and was trying to get out of having it done. She doesn’t need it. There’s no reason for it. It’s so late on a Sunday night…
We already went through this last night, but we went through it again. It’s Home Care that needs it, in paneling her for a nursing home. She had some difficulty separating out that this isn’t about her thinking (cognitive decline), but about her physical brain. I finally said that, if they found a tumor or something, they’d be sending her to a hospital, not a nursing home. Not quite accurate. In the end, she fell back on the “it’s a scam”, and starting talking about how they just want people to die. Especially old people.
I had to distract her from that one but I have to admit, she’s not wrong about that last part. Considering the insane rise in MAiD killings, what was done to seniors during the illegal lockdowns resulting in thousands of deaths, on top of the thousands of people in Canada dying every year on waiting lists for tests and treatment, she’s got a point. Some areas – major cities, mostly – are far worse than others. One thing is for sure. Once she does get admitted into a nursing home like she wants, my siblings and I are doing to have to be on top of everything going on with her treatment. If she gets in to the one in town, where she wants to be, I’ll still be the closest and can check on her, but also, that particular nursing home did very well by my dad and my aunt, so I think she’d be okay there. It’s hard to say, the way things are changing these past few years, though. Especially with our current provincial government.
But I digress.
Towards the end of our conversation, I reiterated with my mother on making sure to treat everyone nicely, and she started telling me how much she loves all the girls, how beautiful they all are (it seems some of the new girls are very pretty) and how nice they dress (one of them wore a shirt with flowers my mother really liked). She said some of them stop to chat with her as well, and she really appreciated that. Lately, she says she hasn’t been going to the common room of her building, as it’s getting so hard for her to move around and she doesn’t even get dressed for the day, so having someone to talk to helps her a lot.
She so needs to be in a care home!!
After talking to my mother, I updated my siblings again, then started to send an email to the home care coordinator to update her as well.
Which is when the phone rang.
It was Home Care.
This time, the scheduler.
They are short staffed and don’t have anyone for my mother’s Monday med assist, at 9:15am.
We’re already doing her two Sunday evening assists ourselves, as my brother and I get her to her MRI.
*sigh*
We’ll see how it goes, but we might be able to just leave her morning meds in her little covered bowl for her before we leave her place on Sunday night. Her morning assist is the longest time slot, though, as they also help her with breakfast, empty her commode, apply the Voltaren to her back and hip and help her get dressed, if she needs it. It’s not just about getting her her medications anymore.
We’ll make that decision when the time comes. For now, though, I’ve got it in my calendar and I’ll be ready to do it, if necessary.
I did let her know about the call I got about my mother from the coordinator. She remembered the report and commented that she doesn’t usually see reports about my mother and figured she was just having an off day. !! I made sure to let her know my mother was very apologetic about it, and the lovely things she said about the ladies at the end of our conversation. Home care workers put up with a lot of crap (sometimes literally), so I wanted to make sure to pass on something good!
That done, I sent my email updating the coordinator. I did remember to mention this time, that my mother has been commenting about how her vision is getting worse. Which means her macular degeneration is getting worse. Normally, I’d be getting her to the specialty clinic in the city for treatment, but she physically can’t make that trip any more. Just getting her in to do the MRI is going to be hard enough on her, and that’s about half the distance away!
All that done, the rest of the day was pretty routine.
When doing the evening cat feeding, I changed things up a bit for the isolation shelter cats. I’ve got some ground pumpkin seeds again, so this time their can of wet cat food got made into a cat soup that included the ground pumpkin. If any of them have worms, that would help, but just be good for them in general.
I have got to remember to order more lysine. We’ve been out for a while.
After feeding the cats (I counted 27 this evening) and doing my evening rounds, I had a while crowd following me. A dozen, to be exact.
Fancypants, in the first picture, won’t let me come near him, but does like to follow me around!
In the next picture of the slide show above, you can see the three of them that were trying to trip me up while I walked!
Once back in the inner yard, I spotted that big tom again. I have seen him all of twice before today.
While in and out of the sun room, I was able to pet one of the little tuxedos. There is one confirmed female that lets me pet her, though she is still nervous about it. When the next two are to be brought in for spays, I think this one is big enough to be an alternative if we can’t get two adult females.
Pinky (last photo) not only allowed me to pet her but, while I was walking around, followed me and meowed for attention. She’s still a bundle of nerves and skittish, but she was purring up a storm and allowing full back pets, and even some neck and ear skritches. If we can keep this up, we should be able to get her into a carrier for spay on the 28th. If not… well, we’ll grab whichever ones we can! We’ll just have to make sure not to put food out until after we’ve got two into carriers.
The outside stuff done, today I decided to use up that bone broth I made recently, it a great big pot of pork stew. Normally, I’d use beef broth in a beef stew, and even looked at beef in the grocery store this morning, but it’s just too expensive. So I just cubed one of the pork roasts we had.
When it came time to add the bone broth, I was very impressed with how thoroughly gelled it was. I even gave it a taste while it was still cold, and wow! Talk about concentrated flavour! It worked really well with the pork, too.
Here we have pork stew with fluffy baking powder dumplings, which get cooked right on top of the stew at the end. Those dumplings are one of our favourite things about making a stew! I got the recipe from an old Whole Foods for the Whole Family cookbook, from La Leche League – the 1981 edition – that I hung on to. I got it used and kept it for about 30 years. Then had to throw it out because a cat peed all over it when it was left open on a table. *sigh* I know I wrote the recipe down somewhere in an old blog post, but on an old blog that I can’t even log into anymore (thanks, Google). I think. Still can’t find it, so I went by memory. Seems to be very close! I’ve tried looking online, but all the baking powder dumpling recipes I’m finding seem different.
So I’ll write it down here, so I can find it again, when needed!
Fluffy Dumplings
2 cups flour 2 tsp baking powder about a 1/4 tsp salt (optional: dried parsley flakes) 1 egg, beaten water
Mix the dry ingredients. Once the soup or stew is done and still simmering, add the beaten egg to the dry ingredients with enough water to make a very sticky dough. More like a very thick batter. Drop by spoonful’s onto the top of the soup or stew. Cover and leave to simmer for 10 minutes. No peeking!
One of the things I can’t remember is if the original recipe used one or two eggs. Also, was it 1 tsp or 2 tsp of baking powder? Whatever the original was, this version here cooks and tastes very much the same as I remember. Delicious.
1 large shallot, chopped (I would have used onion, but I didn’t feel like going to the root cellar to get one) 2 stalks of celery, sliced lengthwise and chopped into small pieces 2 medium sized potatoes, peeled and chopped into small cubes 1 ripe avocado, smashed into mush cream cheese; roughly 2 oz (basically, I cut what was left of the piece in the fridge in half) whipping cream; about half a cup 3 cups water and enough bouillon powder to make chicken stock (because that’s what I had available) 1 can chicken (a Costco can, so about a cup of chicken chunks) enough ghee for sauteing (I normally would have used butter, but remembered we had ghee)
Preparation:
Melt the ghee in a saucepan until hot, then add the chopped shallots and celery pieces. Sauté until they start to be translucent. Add the potatoes and stir into the shallots and celery. Add the water and bring to a boil, adding the bouillon powder when it’s hot enough to dissolve quickly. Keep stirring occasionally.
After the water has boiled for about 5 minutes, stir in the smashed avocado. Return to boil and simmer for a few minutes, stirring occasionally.
Add the chunk of cream cheese. Return to boil and continue to simmer for a few more minutes, stirring continually until the cheese is completely melted.
Add cooked chicken chunks and return to a simmer for a few more minutes, or until the potato chunks are fully cooked, stirring frequently.
Stir in whipping cream and return to a simmer to heat it through.
Today, I decided to make something I haven’t made in many years. A no bake cookie.
I was first introduced to them by a friend in high school, while visiting her place. She called them S**t Balls, and that’s the name that has stuck for me!
KH, if you’re reading this, yes, it’s you’re fault! 😂
Since then, I’ve found them by many other names. It wasn’t until I got a community cookbook from the mid 90’s gifted to me that I actually saw a recipe for them. In fact, there were three almost identical recipes, all with different names! There is 5 Minute Boil cookies, using all brown sugar, Chocolate Drop Cookies, using all white sugar but skips the salt, and Fiddle Diddles, using margarine instead of butter, skipping the coconut, but including salt.
My version is a blend of all three.
Here is a slideshow of progress photos, for a double recipe.
Here is the basic, single recipe, and then I’ll go into more detail.
S**t Balls – No Bake Chocolate Cookies
2 cups sugar, white, brown or half and half up to 1 cup cocoa 1/2 cup butter 1/2 cup milk 1/2 tsp vanilla 3 cups rolled oats
Combine sugar, cocoa, butter and milk in a saucepan. Bring to a boil. Keep at a boil for 2 – 5 minutes (shorter time for white sugar only, longer time for brown sugar only), stirring constantly.
Remove from heat, stir in vanilla, then stir in rolled oats.
Drop spoonfulls onto trays lined with waxed or parchment paper. Cool until set. Can be chilled or frozen.
Optional ingredients: 1 cup shredded coconut (but why ruin your cookies??) 1/4 tsp salt
Easy Peasey!
First hint: use a bigger pot than you might think you need.
For my double recipe, I used our bigger stock pot. Once it starts boiling, it can bubble and expand quite a lot, and when the vanilla gets added at the end, it can sometimes foam right up.
Second hint: prepare your trays ahead of time. For my double recipe, I ended up using three 9×13 baking trays, lined with parchment paper.
In the first photo with the ingredients, I have doubled everything except the cocoa. Some recipes use only a 1/2 cup of cocoa, or even just 4 tsp, which is nothing. However, a cup of cocoa is a lot, so in doubling the recipe, I left the cocoa at 1 cup.
There is no salt in the photo, but as I was getting the mixture to a boil, I did add a few cranks from our salt grinder. Nowhere near the half teaspoon for a doubled recipe, but enough to make a difference. A touch of salt brings out the sweetness. Not that this recipe needs anything to bring out the sweetness!
The main ingredient is sugar, and what sugar you use can make a HUGE difference!
If you want a soft and chewy cookie, go with all brown sugar. You definitely have to boil it for a full 5 minutes, though. In the past, I’ve found ambient humidity can make a difference. Even after boiling at least 5 minutes, when it was humid out, the cookies just wouldn’t set and remained sticky and gooey. They still tasted good, but could only be eaten with a spoon!
If you like a dry cookie, use all granulated sugar, and you can get away with boiling it for only 2 minutes. With my double recipe, I boiled it for three minutes. The longer you boil it, the drier the cookie will be.
Of course, if you go with half and half (which is actually what I usually do), you’ll get a cookie that’s a bit moister, but not completely soft. For that, boil it for about 3 or 4 minutes.
The butter I used was still cold from the fridge, so I broke that up with my wooden spatula and stirred pretty constantly while bringing the mixture to a boil. It would be very easy for the sugar to start burning, so watch your temperature, too. Medium high is more than enough to get it to a boil and keep it there.
After the boiling time is done, take it off the heat and stir in the vanilla. Next, add the rolled oats and stir that in very thoroughly.
With the rolled oats, I used slow cooking oats, which have thicker flakes. You could use quick oats as well, but I find they lose their texture more. It’s just a matter of preference.
If you are using shredded coconut, it would be added with the rolled oats. Which we have never done, because none of us like shredded coconut. Ew.
Once the rolled oats are well mixed in, it’s time to drop the cookies.
I used a pair of soup spoons for this; one to scoop up the mixture, the other to scrape it off and onto the prepared pan.
Which can get very messy.
The two photos at the end with the cooling cookies, the first one is of the first tray of cookies, the second is of the third tray of cookies. You can see the first tray, there is more “spread” to the cookies, because it was still quite hot. It got easier to drop the cookies as the mixture cooled down. If you want to shape them a bit, you can use the spoons like you’re doing a quenelle, except round. I couldn’t do it with the first tray, as the mixture was still too hot and runny, but by the time I was doing the last of them, the mixture was starting to harden a bit too much!
With the size of spoons I used, I ended up with about 65 cookies in total, filling about 2 1/2 of my 9×13 trays. To chill them (and keep them safe from cats walking on them), the trays got moved onto the chest freezer in the old kitchen, where it is at or below freezing.
There you have it! A decidedly… questionable looking… no-bake drop cookie that takes very little time to make.
It’s been a long time since I posted anything recipe and cooking related!
Not long ago, I took advantage of an excellent sale, and picked up a whole bunch of fresh strawberries. A couple of clamshells needed to be used up quickly, as they were starting to get past their prime, so I decided to experiment.
I took our basic cast iron skillet corn bread recipe and modified it to make an upside down strawberry cornbread.
It turned out rather well!
First, I’ll give our basic recipe, then explain the modifications. We rarely make it without some sort of modification, so I’ll include those as well.
Basic Cast Iron Skillet Corn Bread
Ingredients:
3/4 cup cornmeal
1 cup flour
1/3 cup sugar
1Tbsp baking powder
1 1/4 cup milk
4 Tbsp butter, melted, plus extra for the pan
Optional:
add seasonings to the dry ingredients, such as paprika, garlic granules or whatever herbs you feel like, to taste.
there is no salt in this recipe, but I sometimes like to add a small amount of course or rock salt that would normally go into our salt grinder, which leaves some nice little crunchy chunks to discover while eating it!
add savoury ingredients like a semi-soft or semi-hard cheese (mozza, cheddar, gouda, havarti, feta, etc.) cut into small cubes (shredded cheese will just disappear), or leftover ham cut into cubes, to the dry ingredients.
instead of butter, you can use oil or melted ghee. We like using ghee quite a bit!
substitute part of the milk for an equal amount of cream, sour cream or yoghurt. You could also try using buttermilk instead of milk, or even use reconstituted powdered milk.
Instructions:
preheat oven to 425F
place cast iron pan with some butter in it into the oven until the butter is melted. Spread the melted butter evenly around the pan, including the sides.
combine dry ingredients into a medium bowl, including any optional ingredients
add the wet ingredients and mix until just combined.
pour the batter into the pan
bake for 20 minutes or until golden brown and pulling away from the sides, or a toothpick stuck into the middle comes out clean
flip onto a rack to cool. Can be served warm with melted butter.
Modification: We start the oven preheating, prepare the cast iron pan, mix the batter, pour it into the pan, place it into the still preheating oven, then set the timer for 25-30 minutes. Basically, it’s because it takes a long time for our oven to preheat to 425F and we’re impatient. It has always worked just fine.
Upside Down Strawberry Corn Bread modifications
Extra Ingredients:
fresh strawberries, cleaned and hulled
butter
brown sugar
Place the clean cast iron pan on the stove and melt a generous amount of butter into it. I used a couple of tablespoons, maybe a bit more, for our 10 inch pan.
After the butter is melted, use some to oil the sides of the pan
Add enough brown sugar to cover the bottom of the pan evenly
Cut the strawberries into enough slices to cover the bottom of the pan; lay them on top of the brown sugar
Chop more strawberries into small cubes and add them to the dry ingredients of the corn bread batter.
Once the batter is ready, gently pour it over the strawberry slices, so as not to disturb them. If there is a chance that the butter and brown sugar might bubble up the sides of your pan, place it on a baking sheet in the oven, or have a baking sheet on the rack below.
Bake for 25-30 minutes, or until the cornbread is golden brown and starting to pull away from the sides
When done, turn off the oven and let it rest in the oven for a few minutes, then remove and cool, still in the pan, outside the oven for a few minutes more. The heat from the cast iron pan will continue to crisp up the edges and caramelize the brown sugar base.
slide a knife around the edges of the pan to make sure it’s not sticking. Take a plate larger than the top of your pan and put it upside down over the cornbread. Carefully flip the pan upside down and remove the pan.
can be served served warm with a touch of cream poured over the top, or completely cooled – if you’re willing to wait that long!
As I wrote this post, my daughters made another batch. It’s out of the oven now, and I can’t wait to have some!
A while back, we tried a recipe for overnight bread, which you can read about here, and find a link to the original recipe we used.
I then tried an “over day” version, using the dough baby from my Babcia’s bread experiment. It was fantastically successful!
We’ve made it again, as a pretty basic no-knead bread and, once again, it turned out awesome!
If you are new to this blog and don’t know the background to this, you can read the story behind my experiment to try and recreate the bread my grandmother made in pre-WWII Poland, as my mother remembers it. Or you can check out all the posts about it at this link. All links will open in new tabs, so you don’t lose your place here!
Here is how we made No-knead bread, using the old dough method.
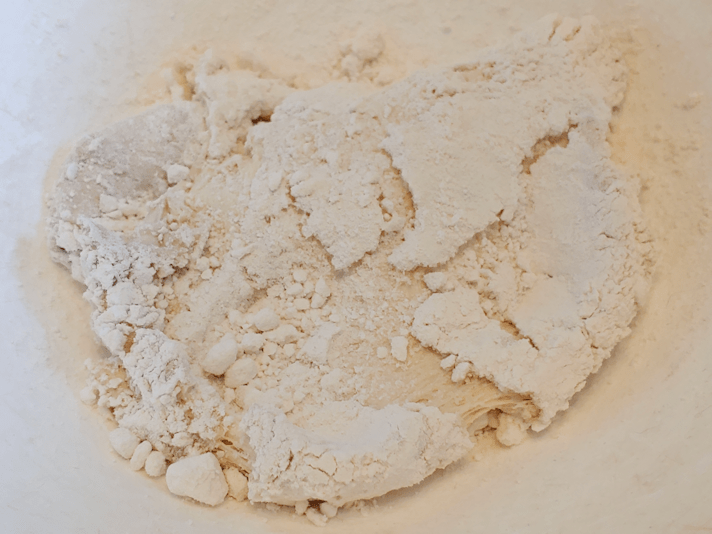
The first step is to dig the dough baby out of the flour it sleeps in.
My Babcia did bread baking once a week, and when the old dough sits that long, it tends to be dry enough to break apart into pieces before reconstituting it. This time, the dough baby had not been sleeping in its bed of flour for that long, and it was still quite… doughy! :-D
So I just pulled it apart a bit and placed it in the bottom of a very large bowl.
I don’t know how much that is. Maybe about 2 cups, including the flour stuck to it? The dough baby rises and collapses while stored in the flour, and I made no effort to measure the quantity.
I also pre-measured 2 Tbsp each of course salt and sugar, and 1 Tbsp of yeast.
The yeast would be optional. The dough would need more time to rise without it, which would give more of a sourdough flavour.
Four cups of very warm water was added to the dough baby. Since it wasn’t dry enough to break into pieces, I spent some time stirring it and breaking it up in the water.
Then, the sugar and yeast was added and mixed in, the bowl loosely covered, and it was left for about 10 minutes.
I like to use traditional active dry yeast, rather than quick or instant dry yeast, but that’s just me. The traditional yeast needs more time to proof in the liquid compared to the quick yeast, and the instant yeast wouldn’t need to be added at all at this point, but would be mixed in with the flour.
If I were not using yeast, I would leave the water, dough baby and sugar mixture in a warm place for much longer, checking regularly to see how active it was.
Here is how it looked after 10 minutes. I stirred it again to break up the dough baby a bit more.
Then it was time to add some flour.
I started by adding 3 cups of flour. It’s easier to mix in that amount compared to starting with just one cup.
I decided to use Durum wheat flour at this point, just because I have it. Use whatever flour, or mix of flours, you like best!
After the first 3 cups was thoroughly beaten in, I added another cup of flour and the salt.
More flour was beaten in, about a cup at a time at first, then a half up at a time.
How much flour to use is something I’ve never been precise about. I know there are bread bakers that weigh and measure precise amounts, but in my experience, that just doesn’t work. The amount of flour needed can depend on things like how fresh the flour itself is, to how much humidity there is in the air.
With 4 cups of water, I would have expected to work in at least 8 cups of flour for this recipe (with my usual kneaded bread, I typically used 5 or 6 cups of flour to 2 1/2 cups liquid).
We are very, very dry right now.
Today, I worked in 7 1/2 cups of flour, and probably could have done with a bit less.
By this point, I was working the flour in with my hand rather than trying to stir it with a spoon. If you have an electric mixer with a dough hook, go ahead and use it!
Before setting it aside to rise, right in the same bowl, I sprinkled some flour over the top and sides, in case it rose high enough to touch the bottom of the bowl’s lid.
Lightly cover the bowl, then set it in a warm place for about an hour. With our chilly our kitchen is in the winter, I heated our oven to its lowest setting (145F on “warm”), then shut it off before I started mixing the flour into the dough. The covered bowl is left in the warm oven, with the light on, to rise. Anywhere that is warm and draft free will do.
Here it is, after an hour. It just barely touched the bottom of the lid! :-D
The dough it then pushed down and worked a bit to incorporate the flour that had been dredged on top.
Next is a very, very important step.
A piece of the dough needs to be removed and set aside for the next batch of bread!
I dumped some flour on a container and plopped about a cup of dough onto it.
Once the new dough baby was set aside, the rest of the dough was dumped onto a 9×13 inch baking sheet that was lined with parchment paper. The last time I made this, I used a parchment paper lined lasagna pan, but I could also have split it into two parchment paper lined loaf pans.
If I didn’t have parchment paper, I would have well oiled the pan, first.
Speaking of oil…
After spreading the dough out to fill the bottom of the pan, I stabbed at the dough with my fingers to create “dimples”, then topped it with oil, course salt and dried parsley flakes.
I happened to still have some fake truffle oil that I used, but an olive or avocado oil would work just was well.
The pan was then set aside for the dough to rise again. Since this batch is so flat and thin, I started preheating the oven for 450F right away. Had I used loaf pans or the lasagna pan again, I would have let it rise longer before preheating the oven. If I had used no yeast at all, it would be left in a warm place until doubled in size.
While the shaped loaf was waiting to go in the oven, there is this to deal with…
The bottom of the bowl still has quite a bit of dough stuck to it!
We can’t let that go to waste!
Into the bowl went the new dough baby, and the flour it had been resting on.
While working the flour dregs into the dough baby, scrape as much of the dough stuck to the sides and incorporate it into the dough baby.
You probably won’t get all of it off the sides, which is okay.
The dough baby is now ready for a nap. I have a canister of flour that I bury it in, but it can also be buried right in a bag of flour, as long as you’re not planning to use the flour for anything else in between bread baking!
After the dough baby has been buried, it will rise quite a bit before collapsing in on itself, breaking through the surface of the flour. Remember to check on the dough baby later on, to make sure it is still covered in flour.
Once the oven is ready, place the pan of bread into oven and bake. If you wish, place a container with about a cup of water on the rack under the bread pan, to add some steam to the oven as it bakes.
For a very flat loaf like what I made today, it took about 25 minutes. A deeper loaf, or a pair of loaf pans will likely need 30-40 minutes. Bake it until it looks like this.
With the oil added to the surface, it will have a deep, golden colour when it’s ready.
When baked, remove from the oven and left to cool for a few minutes. Once it is safe to do so, remove the bread from the pan and onto a cooling rack (parchment paper makes that job a LOT easier!).
I really like the big, flat slab of bread, but it is a bit hard to cut a slice off! :-D
Here is how it looks on the inside.
The crumb is light and fluffy, yet still wonderfully chewy. The star of the show, however, is that golden, flavorful top crust! It’s just a lovely and delicious combination of textures and flavours.
The only problem with this bread is how difficult it is, not to just scarf it all down right away! :-D
Here is the recipe.
Old Dough No Knead Bread
Ingredients:
old dough set aside from previous bread baking
4 cups warm water
2 Tbsp sugar
1 Tbsp traditional active dry yeast (optional, or use 2 Tbsp if you don’t have old dough)
2 Tbsp course salt
about 7 or 8 cups of flour
small amount of good quality oil (olive oil, avocado oil, etc.)
small amount of dried parsley and course salt
Break up the old dough into a large bowl. Pour water over the old dough and stir. Add the sugar and yeast and leave to proof for about 10 minutes. If you do not have old dough, use the larger amount of yeast and proof it in the sugar water. If using only the old dough and no added yeast, leave the bowl in a warm place until the mixture is bubbly.
After the yeast and old dough has proofed, add 3 cups of flour and mix thoroughly until it forms a very smooth batter. (An electric mixer can be used at this stage.)
Add the salt and 1 cup of flour, mixing thoroughly.
Add more flour a little at a time, mixing thoroughly after each addition, until it reaches a thick but sticky consistency. Use your hands to mix in the last of the flour. (If you have an electric mixer with dough hook attachments, switch to the dough hooks at this point.)
Leaving the dough in the bowl, dust the top of the dough with flour and cover loosely. Place in a warm spot to rise until doubled in size.
Prepare baking pans by lining with parchment paper or oiling thoroughly.
When the dough has risen, punch it down again, folding it into itself to incorporate the flour dusted on top.
Dust some flour on a small plate or bowl. Remove about a cup of dough for the next batch of bread, setting it aside on the floured container until later.
Pour the remaining dough into the prepared baking pan(s). Using your hands, press the dough to fill the pan to the edges and corners, then stab into the surface with your fingers to create dimples in the dough.
Carefully sprinkle oil across the surface of the dough, then use your hand to spread it evenly across the surface.
Sprinkle the oiled surface with course salt and dried parsley.
Set aside in a warm place to rise.
While the bread is rising, return the dough set aside earlier to the mixing bowl, along with any flour in the plate or bowl. Use the flour and the dough ball to scrape off any remaining dough stuck to the surface of the bowl, working the dough ball until smooth. Shape the dough into a ball, then bury it in a container of flour, for use in the next batch of bread.
When the pan of rising bread is almost doubled in size, preheat the oven to 450F.
Place the bread in the centre rack of the preheated oven; if desired, place about a cup of water in an oven proof container on the lower rack to create steam.
Bake until the bread is a deep, golden colour – about 25 minutes when using a 9″x13″ baking sheet, about 30-35 minutes if using loaf pans, or a cake or lasagna pan. The finished loaf should sound hollow when the bottom is tapped.
Set aside to cool in the pan for a few minutes, then transfer the bread to a rack to finish cooling.
Today, I bring to you a variation of the traditional Polish dish called haluski. You can go here for a traditional recipe with some common variations. The link will open in a new tab, so you won’t lose your place. :-)
Oddly, though my parents were both born in Poland, and I grew up with a lot of traditional Polish foods, haluski was not one of them. Mind you, when I was a kid, I hated cabbage and probably wouldn’t have eaten it if my mother did make some! Even so, my parents also took us to Polish celebrations and events in the city, and I have no memory of this dish. I did not discover it existed until within the past year or so, while looking up things to do with cabbage!
Of the recipes I found, the most basic is onion, cabbage, noodles, and a lot of butter. Some include bacon, kielbasa or a variety of cured meats, like pancetta. I tried making it with bacon, and we liked it enough that it has since become a fairly regular dish in our household. My husband is not too keen on cabbage, though. ;-)
This time, I decided to experiment with the recipe, and I am very happy with the result. The plain egg noodles were replaced with mushroom egg noodles and, because I still had some left, I included dried mushrooms as well.
The dried mushrooms are a mix of white button mushrooms, crimini and shiitake mushrooms.
The next time we dry mushrooms, we need to do a whole lot more! :-D
The noodles I used are a brand that is easily found in our area, usually in its own little display. They are made with 2% porcini mushroom granules.
While preparing the noodles according to package instructions, I chopped the cabbage and onions, cut the bacon into small pieces, and set the dried mushrooms to reconstitute in boiling water. If I were using fresh mushrooms, I would have just sliced them.
Not pictured is the butter and seasonings. The seasonings can be just salt and pepper. As I still have some left, I used mushroom salt, as well as freshly ground pepper, garlic granules and paprika. Fresh garlic can be used instead of the granules, adding them in just before the cabbage.
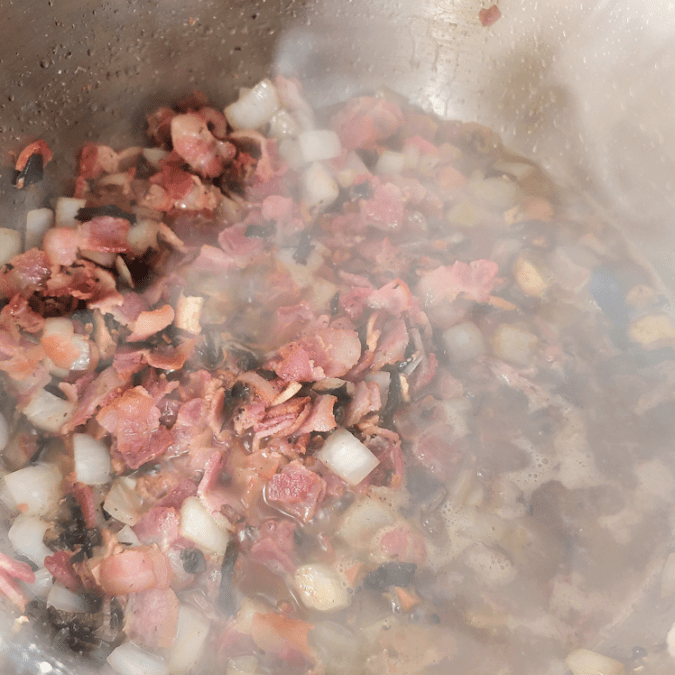
The bacon pieces were added to a large pot and fried until they started getting crispy. The bacon fat is used in place of butter at this point.
Then the onions were added and, after they had softened a bit, the reconstituted mushrooms were added. The liquid was included, too, which helped deglaze the pot. The seasonings were also added at this point.
Where I using fresh mushrooms, I would have added them to the bacon before the onions.
Next, the cabbage was added, along with a dollop of butter, and cooked until soft.
By the time the cabbage was ready, the noodles were cooked and drained.
The cooked noodles were then mixed in, along with another dollop of butter.
Here is the end result, sprinkled with dehydrated parsley from our garden.
The mushrooms and mushroom noodles were a very tasty modification to this traditional dish. The flavour they add is not overpowering, but there is a whole new layer of umami in the dish that works very well! I think it would have done nicely with a dollop of sour cream on top, too.
Here is the recipe! If you give it a try, I hope you come back to let me know how you like it. :-)
The Re-Farmer
Mushroom, Bacon Haluski serves 4, generously
Ingredients:
1 medium cabbage 1 medium yellow cooking onion 1 package bacon slices, 500g 1 package mushroom egg noodles, 350g 1/3 cup dried mushrooms of choice seasonings to taste (mushroom salt, pepper, paprika and garlic granules were used for this recipe) butter, as needed
Directions:
remove outer leaves from cabbage, core and chop into pieces about the same size as the noodles
chop onion and slice bacon into roughly half-inch pieces
line a small bowl with a coffee filter. Add the dried mushrooms, breaking up any larger pieces, and cover with boiling water
cook noodles according to package directions
while the noodles are being prepared, place the bacon pieces into a large pot. Cook on medium high heat until desired crispness, stirring frequently
add chopped onion and cook until the onion begins to turn translucent, stirring frequently
add the reconstituted mushrooms (the coffee filter makes it easier to pick them up out of the liquid). Cook briefly, then add the liquid the mushrooms were soaking in. Stir to deglaze the bottom of the pot.
add seasonings. Continue cooking, stirring often, until onions are soft and the liquid is cooked down until almost gone
add the chopped cabbage, along with about 1/4 cup butter (adjust quantities of butter as needed). Combine well and continue cooking, stirring often, until cabbage is at desired tenderness
add cooked and drained noodles to the cabbage mixture, adding more butter as desired
combine well. Cook until the noodles are heated through.
Today my daughters did the baking, starting with a sourdough “batter” bread.
There’s a reason the word batter is in quotations…
The girls have been finding recipes they like and, after trying them out, adding them to a notebook with any modifications or adjustments they’ve come up with.
One of my long time interests is experimenting with historical cooking.
I say experimenting, because it’s not unusual for these recipes to include ingredients that are no longer available, hard to find, unknown or even extinct. Plus, they often don’t include a lot of information, either because it was assumed the reader already understood what was needed, or it was simply technologically impossible for the time period.
Thankfully, that’s not as much of a difficulty for recipes from more recent time periods.
Not too long ago, I discovered a YouTube channel called Townsends, featuring all things 18th century. I highly recommend it! I was intrigued by this video on how to make Mushroom Ketchup.
Yes, you read that correctly! Mushroom. Ketchup.
It sounded both weird and delicious at the same time! :-D