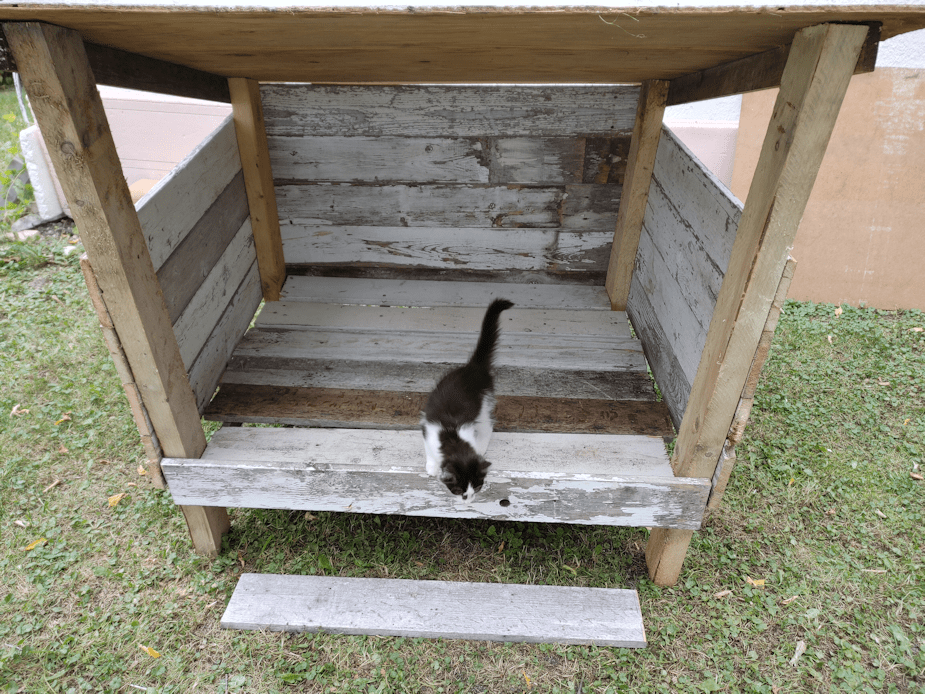
My younger daughter starting working on a shelter for the water bowls, and we got some more progress on it last night. This is being built with whatever scraps we can find in the barn.
Construction is almost complete. A couple of floor boards are not nailed down yet. It got too dark to see. The scrap boards used for the floor and walls are pretty old, and there was a fair amount of rot on the ends. For the walls, I laid the boards so that the strongest wood could be nailed in place, then the rotted ends were sawed off. The same boards were used for the floor. Since this is to hold water bowls, there are spaces left in between, so that if any water spills, it’ll run through the gaps and not accumulate inside.
I might be able to cover those triangle shaped gaps at the sides. I was originally going to just leave them, but they are pretty big. Big enough that I think too much snow might blow in during the winter.
Once the construction is complete, it’ll get a scrub down and a paint job.
It’s big enough to hold the four water bowls we have, though it won’t fit as many cats at the same time as the kibble house can. That won’t be a problem, as they don’t crowd around the water bowls the way they do for the kibble.
Once painted, this should actually last a few years, in spite of how bad some of the boards are. The frame is made with sturdier wood, so it’s actually pretty strong.
It will be good to not have to dig the water bowls out of the snow this winter!
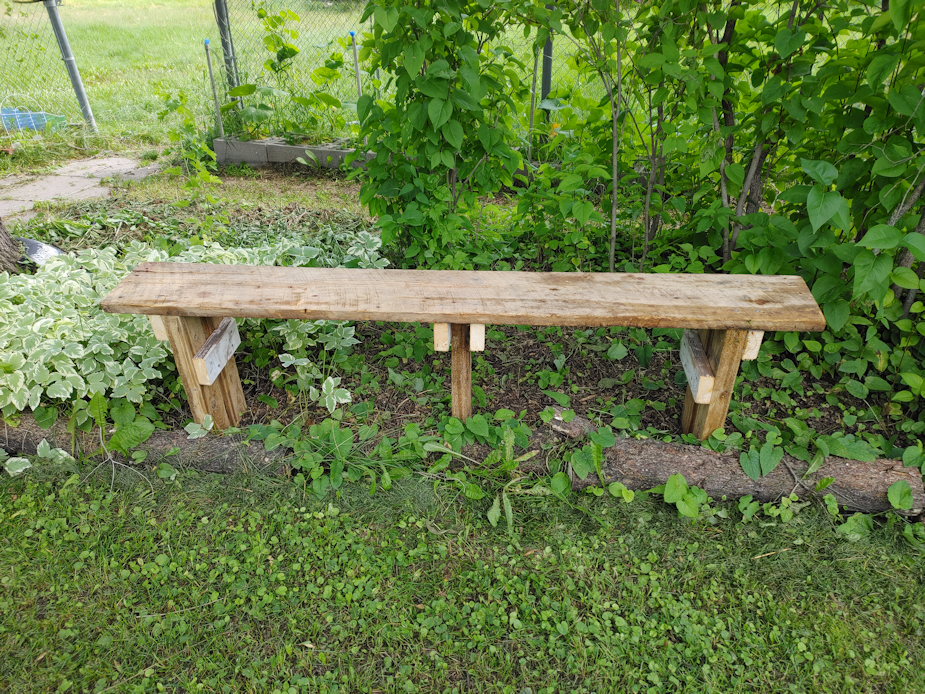
This morning, I moved the painted scrap wood bench back to it’s spot under the white lilacs.
For all that the salvaged wood had damage to it, this is a VERY solid bench.
And heavy. Much heavier than it looks. I don’t know what kind of wood they are, but the true-to-size 2×4 board I used for the legs, plus the seat board, are dense and have a lot of weight to them. With care, this thing should last many years.
Once I set it in place and sat down on it, I gave the seat a good look. I think it could use one more coat of paint. There are cracks and old nail holes that I’d filled with paint, but once the paint dried, they’re not quite filled anymore. Especially that big crack you can see on the left. When I give the stairs a second coat of paint, I’ll go ahead and add another coat to the bench seat, too. There’s no reason not to.
This is an ideal spot for a bench. Nice and shady, but also open and airy. There have been many times since we’ve moved here, where I’ve been working in the heat of the day and wished for a nice cool place to sit for just a few minutes. We do have a few places to sit down, but they are all in full sun.
Over time, I hope to have seats and benches scattered all over the place. Nice little spots where one can take a break and enjoy a bit of shade on a hot day. 😊
After giving the leg ends a second coat, and filling in any spots that looked like they got missed, this morning, I finally flipped the bench to pain the top this evening.
Once it was right side up, I could also see spots on the legs and cross pieces that got missed, simply because it was more difficult to see and reach while upside down. I also took the time to make sure paint got well into any holes or cracks in the wood, so no water can come in contact with unprotected wood.
I thought it might need three coats of paint on the top, but now I think one more coat on the top, and it’ll be done. The paint filled things in better than I expected. I don’t know what this seat board was salvaged from, but it’s got saw cut markings on it, nail holes, and even several small nails and some kind of heavy duty staple stuck in it that I couldn’t get out without damaging the wood. Nothing the paint can’t smooth over.
For something thrown together in an afternoon, using scraps dug out of the barn, I’m really happy with how this bench has turned out.
This afternoon I worked on pruning away some low hanging branches on the Chinese elm by the chain link fence. We’ve pruned these a few times over the past few years, but they fill in again so quickly! It had gotten to the point that some branches were overhanging our “parking lot” – which meant they were also starting to shade the tomatoes we have planted against the chain link fence too much.
Thankfully, we have a really good, really long, extended pruning saw! Once I got the biggest branch down, it uncovered a bunch of dead branches that I took down as well. The branches were big enough that I had to break them down before I could haul them to the branch pile for chipping. I also used the loppers to cut away a whole lot of new little branches that were low enough to snag on my hat every time I walked by!
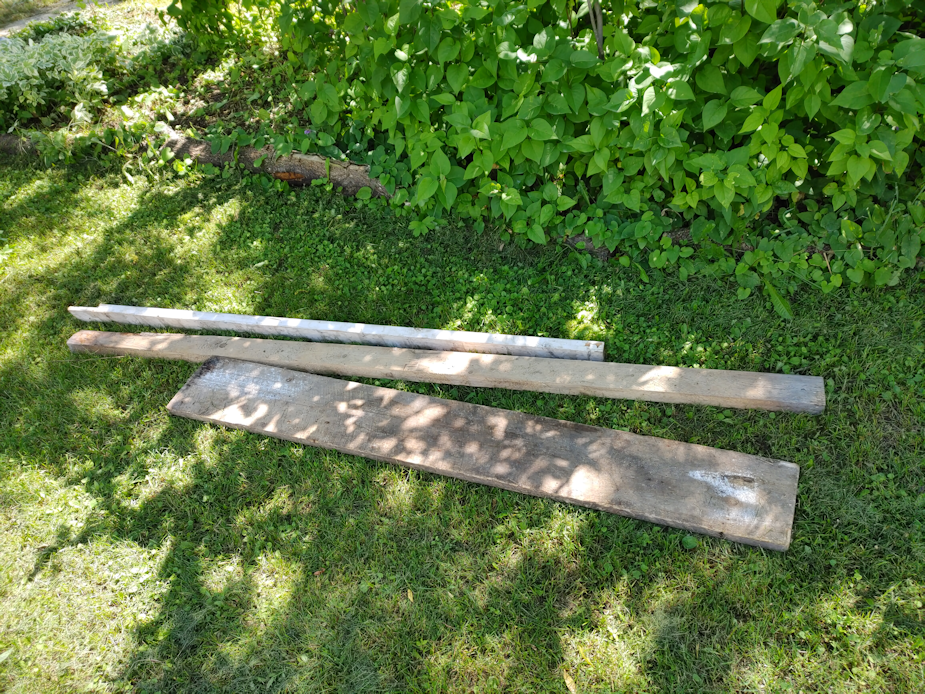
While it wasn’t an exceptionally hot day today, it was still hot enough to make the job less than pleasant. What I found myself really wanting to do was be able to just sit down in the shade every now and then. There’s nowhere to sit in that side of the yard. So, when I was done cleaning up the branches, I decided to go into the barn and see what I could find to build something.
This is what I came out with. Three pieces of scrap wood.
They’ve been in the barn for a long time, so I hosed them down and gave them a scrubbing to get the worst of the dust and dirt off.
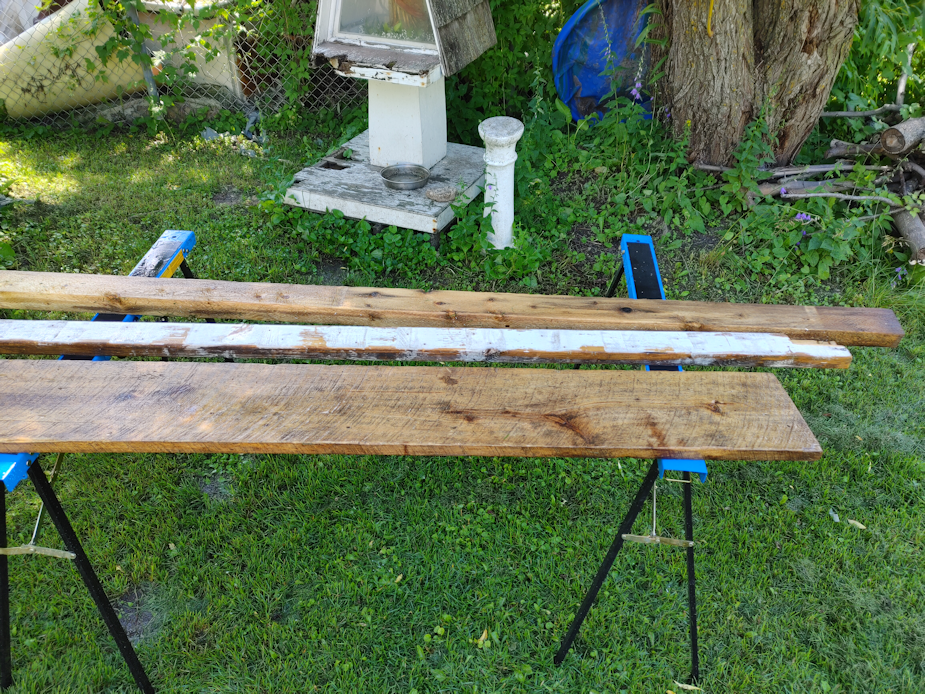
I had only a general idea in mind of how I wanted to build this. There’s one 10 inch wide board for the seat, and a 2×4 for the legs – and it’s actually a true 2×4; I was wondering why these boards seemed bigger than the usual 2x4s you get from the lumber yard. Those are cut to 2×4, then shrink while curing, so they’re actually 1 1/2 x 3 1/2. The third board, with the white paint on it, is that kind of 2×4, and you can see the difference in size in the picture. I added that board for structural support.
For the legs, after cutting off the rotten end of the board, I was able to cut four pieces at 20 inches long. That left a slightly shorter piece that I used for a centre support. I then cut six 9 inch pieces for cross pieces and structural support. The legs for the ends were joined with the cross pieces at what will be the top of the legs. For the slightly shorter centre leg, I lined it up with the others and added the cross piece so that they all matched in height.
Normally, I would have used screws for this, but I didn’t want to fight with our drill, so I dug up a bucket of nails we found while cleaning out the house that were long enough.
Then I flipped them around and added more cross pieces to the pairs of legs, to make sure they wouldn’t wiggle out of place. For the support leg in the middle, I added another cross piece to support the seat. The board had a section of tree bark on it and was rounded, so I could only manage two nails on one side. Not as strong as I would have liked, but it should hold.
Then it was time to add the seat. Which was a pain in the butt. I don’t have any clamps. The bench pieces were laid out on its side, and I had to support the leg pieces with my legs while I nailed the seat in place. Since the legs are an inch narrower than the seat itself, I also had to hold the leg pieces up half an inch at the same time. It actually worked far better than I expected! 😄
Once I had a single nail in each leg, I could lift the bench up off its side, and do the rest of the nailing.
I had company.
The big black and white kitten came back to see what I was doing!
It is so very cute!
There we have it! The bench is done!
It’s actually a bit of a mess. I was using a hand saw or the mini-chainsaw to make my cuts, and they are far from straight or tidy. I’m sure the lengths aren’t exact, either. But then, it’s also going to be sitting on uneven ground, so it really doesn’t make much of a difference. Once the legs are settled into the softer ground, it’ll work itself out. In fact, it seemed just fine when I tested it out and sat in the shade for a while.
The seat hadn’t completely dried out from being washed, though! 😂
I should probably add some angled pieces under the seat to prevent any wobble, but between the cross pieces under the seat and the centre support, it’s pretty sturdy. With the legs at 20 inches, plus the thickness of the seat, the bench is slightly higher than typical, which makes it much better on my wrecked knees. Setting it up against the log border of this bed means that I can use the log as a foot rest, too.
All we need to do now is pick up some more paint. We’ve got the tree stump bench near the garden that needs to be painted, too.
So far, we’ve got the picnic table in a bright, almost peacock blue, and the kibble house is a bright yellow. The inside of the outhouse is a pale mint.
What colour do you think I should paint the benches? Should we go with something bright again? Or more subtle? I find myself thinking a deep red would be nice. Or maybe a green similar to the lilac bushes beside it?