Today, started bringing seed starting supplies to the basement, and went through some of my seed inventory for potential seed starts.
In past years, I would have had all sorts of seeds already started. Things have changed a lot with our winter sowing experiment. We have quite a variety of seeds already planted, taking up quite a few beds, which I need to plan around. I’m not going to assume we will have any new beds ready to plant in for this year, and will just focus on what we have ready right now.
With that in mind, here is a video I took while going through my bin of seeds that would be started indoors.
I won’t actually start seeds indoors until at least a week from right now, with some things to be started in April. That should give enough time for my seed orders to come in. Aside from a few varieties of winter squash, herbs and tomatoes I want to start, we will have the new varieties of eggplant, mini bell peppers and a honeydew melon I want to try this year. This time, I will not start as many seeds of each for transplanting this year! Last year, I had not expected to have 100% or near 100% germination rates on so many seeds. We had so many things to transplant, there wasn’t much space left for direct sowing.
I have decided I will go to a Walmart tomorrow to pick up a few things, and will pick up some seed starting mix while I am at it.
I forgot that the aquarium light with the timer on it has a bulb that needs to be replaced; this fixture holds two bulbs. For now, I have brought down the fixture with one larger bulb that came with our big tank. Meanwhile, I’ve placed an order from Veseys for a pair of 4 foot T5 bulbs. I’d had a hard time finding the right bulbs elsewhere and, when I did find them, they were shockingly expensive. Veseys had the best price I’d found, even taking into account the extra shipping cost for bulbs, but by the time I was ready to order them, the size I needed was sold out, and then I simply forgot about it. So those are now ordered and should be on their way soon.
The first day of spring is coming soon. I was planning to do our first “garden tour” video on that day, but I will be going to my mother’s. I might just do it tomorrow, before I head out, instead. We are supposed to have a steep temperature drop, from an expected high of 6C/43F on the first day of spring, to -10C/14F the day after. Things are going to be really slippery around the yard after all the melt! It’s already pretty treacherous in places, while I do my morning rounds.
Anyhow. I hope you enjoy the video. I used a new chest harness my husband got for me to hold the phone I was using to record video. While editing, I did find my voice was a LOT louder than typical when I record video, and had to adjust the audio volume down. When I had to sit down to continue recording, I was concerned things were too close to the camera, but I think it worked out okay, in the end. Please feel free to let me know what you think.
Okay, I did say, months ago, that we did not need to order seeds this year.
I also said that I knew I probably would order more, anyhow! 😄
I’ve placed two orders so far. One was with MI Gardener, and I just got the email notification that they have been shipped. I explain what I chose, and why, in this post. Most are “back up” seeds, in case our winter sowing experiment fails.
I also placed an order with Veseys, but this was more for the food forest. The seeds ordered were so that I could take advantage of a promo code to get free shipping. I explain what I ordered there, and why, in this post.
So, why am I ordering even more seeds?
I mean, besides the fact that I just want to… 😄
Well, this order is with Heritage Harvest Seeds. It’s actually been a couple of years since I’ve ordered from them. They are a small heirloom seed company that is even further north than we are, so as far as climate and growing season goes, I know anything I order from there should grow here.
Another reason is, more back up seeds!
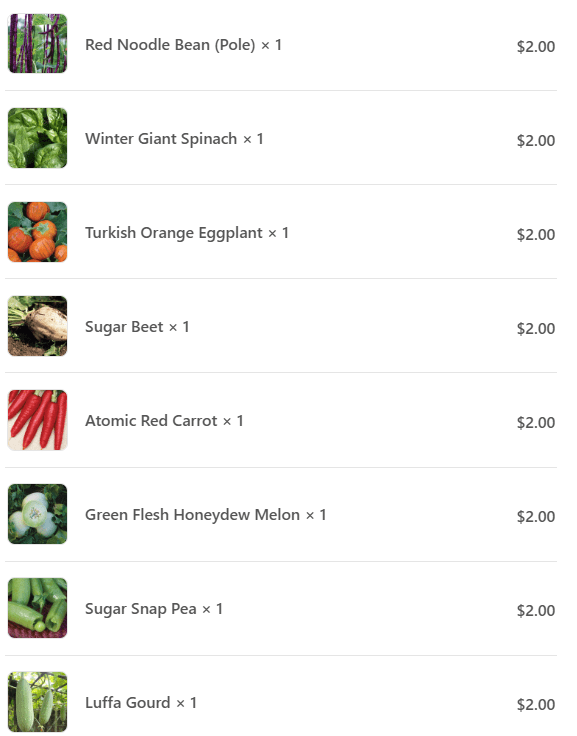
This is what I ordered today. (all links should open in new tabs)
At the top of the list is Cream of Saskatchewan Watermelon. We tried growing these last year, and one one tiny little watermelon out of the only surviving transplant. I want to try them again, but this time give them more dedicated space, rather than having it share a bed with a whole bunch of melons. I do still have seeds left, but they are a couple of years old, so I want to have some fresh seed.
Next is the Arikara squash. This is a variety of winter squash I have been eye balling for years. I chose is specifically due to its rarity, with the goal of saving seeds. From the website description:
Originally grown by the Arikara Indians of North Dakota, This squash is oblong with pinkish orange skin and a green star on the blossom end. The Arikara Indians picked the blossoms and dried them for winter use. A very good storage squash that can be used for soup. (90 days to maturity) Extremely rare.
I may not grow these this year, as I have other winter squash we want to grow, and if I’m looking to save seeds, I don’t want to risk cross pollination. We shall see how things work out.
I also ordered more White Scallop Squash. We had issues growing them in containers last year – they simply did not germinate – but did finally get some in one of the garden beds. By then, it was so late in the season, I’m amazed we had any to harvest at all. The last of the seed went into the winter sown bed with all summer squash. These are back up seeds, in case none survived the winter.
In my MI Gardener order, I did order sugar snap peas. This time, however, I ordered Super sugar snap peas! 😄 From the website:
One of the sweetest and crunchiest snap peas available! The 3 inch pods are delicious eaten raw or cooked and are very productive. A favorite of all who try them! Tall vines to 6’ in height.
If we have the space, I’d like to try both varieties of sugar snap peas we’ll have this year. If we end up with space for only one variety, I’d like to try this one, first.
Last of all, I ordered two packets of Yukon Chief corn. Last year, we had two short season varieties to choose from. Yukon Chief and Orchard Baby. We did Yukon Chief first, due to it’s super short growing season. This year, we will be trying the Orchard Baby. Hopefully, if we can keep the racoons from eating them first, we’ll be able to save seed. We did really like the Yukon Chief, though, so I ordered two packets this time, for next year, and plan to save seed again.
One of the changes at Heritage Harvest is that they now have a $20 minimum order. We’ve never had problems with having our seeds shipped with regular mail, but apparently, others have. Solving the problem meant to have expedited mail with a tracking number, but the extra cost of that only makes sense with orders of at least $20. That brought our final cost to Cdn$36.50
Except it didn’t cost us anything. At least, not anything out of budget.
One of the payment methods is PayPal. This year, we actually got payment for ads on this blog (it took 3 years!), which was sent by PayPal in US dollars. It went into my personal PayPal account, and I left it there, so I used that to pay for this order. Which got converted to US$26.45 at the current exchange rate.
Which worked out quite well, I think.
So that’s what I got today; a combination of things to plant this year, and next year, and back up seeds, if the winter sowing didn’t work.
I have to admit, I had to mightily resist ordering more. They have the Tropeana Lunga onions that grew so well for us when we tried them a few years ago. I was also tempted by the Amish Bottle Onion, simply because of its rarity (and the shape, which I find easier to cut when cooking). I even seriously considered the Yellow of Parma onion, for its excellent storage and up to 1 pound size. We have so many of our own onions seeds, though – as well as seed producing onions – that we may never need to buy onion seeds again. I also want to try the Red Mangel, though that would for a time when we have animals, to grow as feed. There are just so many things I want to try!
This will do for now, though. We have more than enough seeds for this year, and years to come!
We just need to keep expanding the garden beds for now, and grow what we can in the beds we have available now.
Okay, after going through their website more, I made some decisions and placed an order at Vesey’s. It was mostly for our future food forest, but I did order a couple of seed packets so I could take advantage of a promo code for free shipping.
As I was preparing to write this post, however, I got a phone call.
From home care.
Guess who has to go to my mother’s again this evening, to do her med assist?
Two nights in a row. Apparently, someone just called in sick.
My mom is going to be furious.
*sigh*
I will just have to deal with that, later.
Meanwhile, here is what I ordered today. (Links will open in new tabs)
These were the one thing we absolutely wanted to get this year. The Opal Plum tree. The description from the website:
Prunus spp. Opal stands alone as the hardiest European type Plum available on the market. It is vigorous, productive and self-fertile. Even in short summer seasons, the fruit will reliably ripen. The plums are round, red-purple with a golden flesh and have a complex and sweet flavour, fresh or dried. Hardy to zone 3. We ship 18″ trees
The key points were that it is self fertile, so we don’t have to plant it next to our dying wild-type plums, but can plant it in the section we’ve designated for a food forest. It’s hardy to our zone, so we don’t have to do like we did with our zone 4 Liberty apple, and tuck it into a sheltered area. (Hopefully, it survived the polar vortexes we got this winter!)
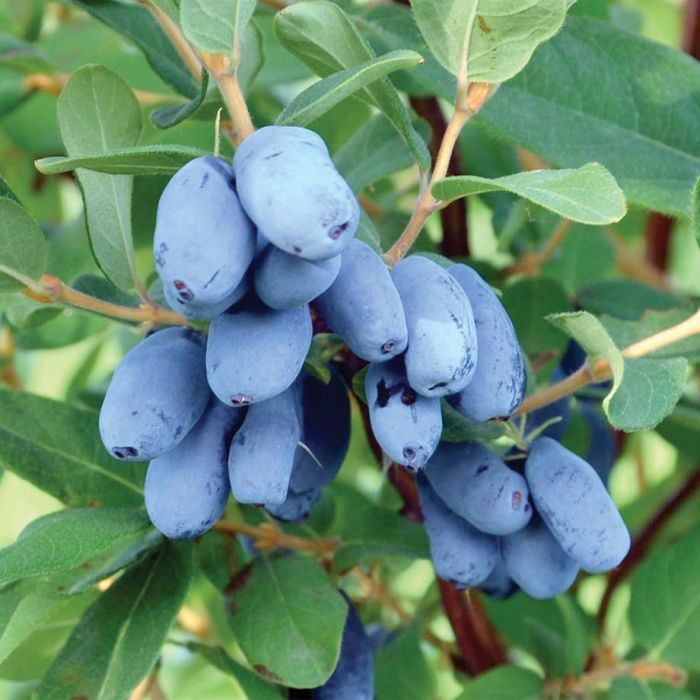
I decided to also order some more haskaps. We already have three, but they have not been doing well at all. While I should probably transplant them, I’ve decided to get a couple more that will be planted in the food forest area, this time.
The second is Boreal Blizzard, an early producing and largest fruit variety.
We currently have “Mr” and “Mrs” haskap varieties, where are sold as cross-pollinating varieties. The “Mr” is an Aurora, and seems to bloom too early to pollinate the “Mrs.” variety, so I am hoping that the early Boreal Blizzard variety will work out better.
If these haskap do well, that will confirm that the ones we have now are not producing because they are in a bad location. Which I am 99% sure of, but it really is a good location – for us!
To use the free shipping promo code, I needed to have at least one packet of seeds.
I had been looking at these last night, while planning my order, but they were listed as sold out. This morning, they were back in stock! So I snagged them.
This is the Sweetie Snack Mix of small sized peppers. They have a short growing season, too, so they should work out. I think my family might like them better than the larger bell peppers we’ve been trying so far.
Last of all, I got some flowers for the girls. 😄 The Jet Black Hollyhock. These are pollinator attracting biannuals and should be self seeding, so we will plan out where to sow them with that in mind!
There we have it. Another order in for our 2025 garden, and our food forest.
The grand total for this, after tax, came to $137.08, however we will only be billed for the seeds when they get shipped in the next day or two. The sapling and haskap plugs will be shipped closer to our last frost date of June 2, and we will be billed for those, then.
The flower seeds were not that expensive, but that packet of mini peppers cost $8.75, with only about 20 seeds in the pack. That’s almost 44¢ per seed!
Still cheaper than buying them at the grocery store, but what a huge leap in prices for vegetable seeds! During the illegal lockdowns, with people panic buying and prices going up and up and up, so many people decided to try growing their own food, a lot of seed suppliers were completely sold out. They are still recovering from that. I know some smaller Canadian seed growers had to back out of the consumer market completely and only sell commercially in bulk. Add to this, in the years since, more people are trying to grow their own food because the grocery prices have gotten so high. That increased demand puts a major stress on supplies, too. Which is why I’m seeing the cost of vegetable seeds skyrocketing, while the number of seeds in the packets are going down, but not with flower seeds. I haven’t been looking at herb seeds lately, so I don’t know how they are doing for pricing.
With this order in, the next thing we’ll need to decide on is what variety of potatoes we want to grow and where. Anything beyond that is just gravy.
Okay, I wasn’t really planning to buy more seeds this year. Not exactly.
With our winter sown beds, which are detailed in the video below, we actually have a lot already planted for this year’s garden…
… that’s IF they survived the winter.
If they didn’t, then we’re not going to have a whole heckuva lot at all, because I finished off seed packets in doing this method.
There are a few things that I am thinking to start indoors – especially now that we have the portable greenhouse – but other things I will likely buy as transplants in the spring. Decisions will be made in the spring for that.
In the end, though, I broke down and made an order with MI Gardener. I’ve been looking at Canadian seed sources but, in the end, it came down to price. I’ve been really shocked by how expensive some seeds have gotten, even with very low seed counts in the packages, at a number of the sites I’ve bought from in the past. Plus, some of the things that interested me were either sold out or no longer available.
I didn’t even make a large order. Just a few things, some of which I probably won’t even plant this year.
The first item in the list is red noodle beans. We tried growing these a few years back and ended up having a drought and heat waves that year. They grew, but I only found a single pod when I was cleaning up for the end of the season, and it was the saddest, skinniest little thing! Along with the bush beans I have winter sown, I want a pole bean and a shelling bean. We have plenty of bean seeds, but no red noodle beans, and I’d really like to try those out.
Next is Winter Giant Spinach. I winter sowed all our spinach seeds so, if they don’t take, this will be our fallback planting.
Next is Turkish Orange Eggplant. We grew Classic and Little Finger eggplant last year. This year, I want to try a different variety. I’m not sure we’ll grow them this year – we’ll see if the order comes in early enough to start them indoors – but it will be an option. If nothing else, we can try the portable greenhouse to extend the season.
I got a package of sugar beet, but don’t expect to plant them this year. I want to actually try and make sugar with them, so this is going to be one of those “fun” things I like to include in my garden every year.
We have more than one variety of carrots winter sown. We still have more Uzbek Golden carrot seeds, if the winter sown ones don’t take, but it would be nice to have another variety as a back up seed.
We did the Summer of Melons mix last year. This year, we still want to grow at least one variety of melon. My younger daughter prefers honeydew types over cantaloupe types, and this Green Flesh Honeydew variety seems to have a short enough growing season to make it worth trying. We have other melon and watermelon seeds already on hand we can try this year, but we will definitely be scaling back from the number we grew last year!
Next are some basic sugar snap peas. I have shelling peas already, and want to have both types.
Last of all…
Yup.
I’m going to keep trying!
I ordered some luffa seeds.
If they come in early enough, I might try them this year. I’m not completely decided on where we will set up the portable greenhouse but, once we do, I will try growing the luffa there in pots, rather than transplanting them into a garden bed.
That’s it, that’s all. A whole 8 items.
All of these together came to a grand total of US$23.50, including shipping. Granted, with our Canadian dollar tanking so much right now, it will probably be closer to Cdn$50, but that would still be less than if I’d try to order these, or similar varieties, anywhere else.
[update: the order was processed, and it came out to Cdn$34.82]
The other things we will need to order or buy for this year’s garden will be things like potatoes and fruit trees. They wouldn’t be shipped until closer to our local last frost date of June 2, so we have time. We just have to settle on what we will be getting this year, first.
I have never ordered from MI Gardener before, but have heard nothing but excellent things about them, so I look forward to getting and trying out these seeds this year!
It’s cold AF out there, which means I’m thinking of the garden!
We are doing things very different this year, though.
The first major change is that I winter sowed a number of garden beds in the fall. You can see what and where, in this last garden tour video of 2024.
In previous years, I would have already at least started onions and shallots by now, and possibly some peppers. With the winter sowing, however, I have – hopefully – a head start on all these. I combined old and new seeds in various combinations into shakers before scattering them onto prepared beds and deep mulching them.
This is what I’ve got already sown.
Garlic – saved cloves
Seed combo 1: root vegetables Carrots: Uzbek Golden and Napoli Beets: Bresko, Merlin, Cylindra and Albino Turnip: Purple Prince Radishes: French Breakfast, Champion, Cherry Belle and Zlata Onions: saved seed (mix of red and yellow bulb unions) Note: left over seeds from this mix were planted in a final bed with saved Jebousek lettuce seeds added in
Seed combo 2: Summer squash mix Sunburst pattypan White Scallop pattypan Magda Green zucchini: Endeavor Yellow zucchini: Goldy
Seed combo 3: Kitchen Garden mix Swiss Chard: Bright Lights and Fordhook Giant Spinach: Space, Lakeside, Bloomsdale and Hybrid Olympia Kohlrabi: Early White Vienna and Early Purple Vienna Bok Choi: Hinou Tiny (saved seed) Shallots: saved seed Onions: saved seed
Seed Combo 4: tall and climbing (mostly) Sunflowers: Mongolian Giant and Hopi Black Dye Peas: Dalvay shelling peas (not saved seed) and King Tut purple peas (saved seed) Bush beans: Royal Burgundy Corn: Montana Morado (saved seed) Onions: saved seed
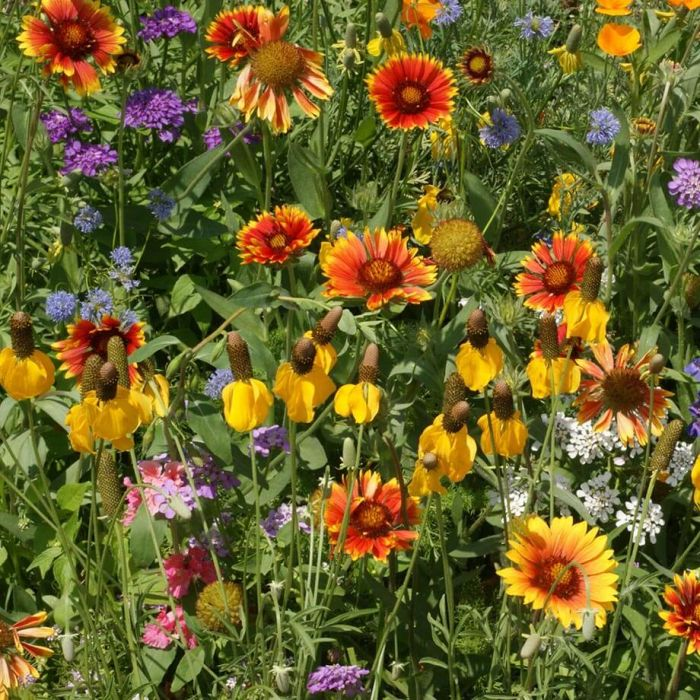
Flower Combo 1 Nasturtium: Dwarf Jewel Mix Butterfly flower: Orange Shades (milkweed) Forget Me Not
Flower Combo 2 Western Wildflower Mix
Perennials: Strawberries: Albion Everbearing and an unknown variety of small strawberries, plus whatever survives in the asparagus bed Purple Asparagus Sunchokes Onions for seed
So that is quite a lot of stuff that’s already been sown!
In theory, because they were heavily mulched, plus have an added layer of snow to insulated them, these seeds should start germinated as soon as the soil warms up enough.
In theory.
There are two things that I expect will reduce the germination rates.
First, I used this as an opportunity to use up some older seeds. Most of the summer squash, for example, is seed that’s 3 or 4 years old. The white scallop squash were new for last summer, so those should have a higher germination rate. Considering how many seeds were scattered in one bed, having a lower germination rate is not a bad thing. It would have me from having to thin them.
Second, these polar vortexes we’ve been hit with. While all the beds were mulched, the temperatures got so cold, it’s entirely possible a lot of these seeds have been killed off. I still expect some to come up – the onion and shallots, beans and peas are, I think, most likely to survive the cold. At this point, however, I will be amazed if we get anything. In fact, I’ll even be surprised if our Liberty apple tree survived, for all that we made sure it was planted in a well sheltered microclimate.
In the spring, once the snow starts melting away, I will need to remove the mulch so that the soil can warm up faster. With some beds, like the one in the old kitchen garden, I am hoping to be able to put one of the covers over them with plastic to warm them up faster. With the summer squash bed in particular, I’m hoping to arrange enough hoops or something so that it can be covered for its entire 18′ length. That bed will also need extra protection from slugs.
Aside from these winter sown beds, this is the space we still have available.
In the main garden area.
There is the low raised bed that will eventually be paired with another bed, yet to be built, to form a trellis tunnel. Right now, one half of that bed was cleaned up and replanted with onions that we gathered seed from, last year. I was able to do all red onions along one half, and all yellow onions along the other. The other side of the bed is where we had melons last year, and that half is still open for planting.
That leaves three other 18′ beds that are available. One has the logs to frame it, and those will be permanently joined once things thaw out in the spring. The other two have no log frames, yet. We have some dead spruces that are either cut down or have fallen down that we can use for that, but that will be worked on throughout the summer, or until whatever we plant in the beds are too big to work around.
There is also the bed with the Albion Everbearing strawberries in it. Those should survive the winter. Given the trouble we had with deer eating them, what I will probably do, once the ground is thawed out enough, is transplant them into the old kitchen garden – more on that later. Once that’s done, the bed will be available for something else.
As we are able, we intend to add many more beds to this area, focusing first on the trellis beds to the East, then reclaiming what has been a squash bed for the past few years to the West. This will require harvesting more dead spruces for materials, so it may be slow going. Last year, we got very little progress done, largely because of the weather!
In the Old Kitchen Garden
There is just one rectangular bed in the old kitchen garden that is winter sown. That leaves the tiny raised bed, the retaining wall blocks and the long, narrow bed against it, and the L shaped wattle weave bed.
For the long bed at the retaining wall, I will be doing some changes. Along the inside of the bed, it is bordered with a couple of logs to make it a lower raised bed. The top log is too crooked, so we can’t raise the soil level any higher, as it ends up falling through the gaps. I’ve decided I will remove that crooked long, but keep the straight bottom log, and then harvest willow branched and coppiced maple to wattle weave on top of it. This bed also has some short logs on the ends of the retaining wall blocks. The vertical sticks we used to hold those in place have started to break up, so I will probably replace those with a wattle woven wall, as well. Once this is done, we can add more soil to make it a slightly higher raised bed and not have soil falling into the path anymore.
The short side of the L shaped bed is where I am thinking of transplanting the Albion Everbearing strawberries. Considering how well the strawberries we grew from seed are doing there, I think that will work out.
As for the strawberries that we grew from seed, in the long side of the L shaped bed, while they are doing very well and are very prolific, they aren’t that good of a strawberry. Those will be transplanted out, but I haven’t decided where, yet. It will be somewhere that they can be left to grow wild and spread naturally.
That bed also had thyme we transplanted in, and chamomile that self seeded, in it. It’s unlikely the thyme survived the winter, but it’s possible the chamomile self seeded again. We shall see in the spring.
The tiny raised bed needs no work on it. Just the cover needs some maintenance from the cats using it as a hammock.
Then there are the retaining wall blocks. A lot of them have mint in them that we expect will come back. The ones with chives in them will come back, for sure. As for the remaining empty ones, they don’t get a lot of light and the growing space gets overtaken by an invasive flower that comes in from below, very quickly, so we will need to give a lot of consideration over what can be planted in there.
Chain link fence
We have a similar issue with the chimney block planters at the chain link fence, except it’s elm tree roots, not flowers, that have invaded those blocks! These need to be treated as a container garden, when it comes to what gets planted in them. Nothing really seems to do well there. Partly because of the invading roots, but also the blocks themselves would also be making the relatively small amount of soil they hold more alkaline. We will need to make sure to continue to amend the soil with sulfur granules or other acidifiers, more than other areas (our soil is already quite alkaline).
The other chain link fence bed is winter sown, but in the fall, I’m hoping we can finally redo the bed with permanent walls. Right now, we have scrap boards against the chain link fence to hold the soil in, and bricks around the other side and the end that are simply resting on the soil. I want to make this bed higher – to make it easier on my back, if nothing else! I need to come up with something better to go along the chain link fence; the old boards I found were already starting to rot, so they won’t last much longer. For the rest of it, I wouldn’t mind doing more wattle weaving, but that needs a LOT of long, straight, narrow, flexible branches, and we just don’t have that. What we do have will probably be used up this spring when I add wattle weaving to the narrow bed in the old kitchen garden.
The next area at the chain link fence is the asparagus bed and the sunchokes. The sunchokes should be fine, and need almost no maintenance. The purple asparagus is likely a lost cause. We should have been harvesting asparagus for the past two years and, while some are coming up, spring flooding has really set them back. The strawberries interplanted with them try to do well, only to get eaten by deer, in spite of protective measures. There is nothing we can do about the spring flooding, even though it doesn’t flood there every years. We could try making a higher raised bed but I really don’t think it’s worth the effort to dig up the asparagus, build a higher bed, and replant them, in this location. Especially with elm trees so close, as their roots are so invasive. I still want to grow asparagus. We’ll just have to find a better place to do it.
The East garden beds
We currently have one winter sown bed in the East yard. That leaves two more 9’x3′ beds, plus a new 4′ square bed, available.
The compost ring is in this area, and I fully expect lots of things to start growing out of there this year! One year, we had lots of mystery hybrid squash show up. Last year, it was almost all tomatoes, though some potatoes (which never got harvested) also showed up. With what we’ve been tossing in there after preserving the harvest, I wouldn’t be surprised if more tomatoes, squash, melons and even bell peppers started to grow in there.
Those are the areas we will have available to plant in this year, right from the start.
There are a few things that I will want to start indoors for spring transplanting. Others, I will probably buy transplants, instead. Here are some things I’m considering.
Tomatoes: We ended up growing a lot more tomatoes than intended, and way more than we use. For this year, I’m thinking we will just grow a cherry or grape tomato for the family to snack on. We don’t need to do paste or sauce tomatoes again this year. If we do grow a slicing tomato, it will be just a couple of plants. We do have tomato seeds we can start, but are severely limited in space for starts this year, so I might just buy transplants. We shall see.
Peppers: we’ve been experimenting with short season varieties to figure out what the family likes, which had us growing away more than needed. We’ve saved some seed but, again, we don’t have a lot of space to do starts. If we grow peppers again this year, I will probably buy two, maybe three, transplants and that’s it.
Corn: last year, I tried a super short season variety. This year, I have seeds for another short season variety to try. Just enough to see if we like them. This year, I will see what I can to do set up supports around the corn before they get big, as we have a real problem with the stalks being blown over by high winds. We also need to find a way to keep the raccoons from eating them!
As for the Montana Morado corn that was winter sown, there were very few seeds. I’d collected the kernels from what plants survived when we grew them a couple of years ago, and we were intending to test them out as a corn flour. Before we could do that, the cats knocked the container over during the night, spilling it all over the floor. I’d swept them up and threw them away, not thinking that they could still be used as seed. Over time, I would find a few kernels here and there that got missed and saved those. If any of these winter sown seeds survive, I am hoping to use them to collect more seed. We shall see.
Peas: we have the shelling peas winter sown, but I would like to grow some edible pod peas, too. The family likes those better.
Beans: we have bush beans that are winter sown. I would like to grow at least one variety of pole bean, and one variety of shelling bean. We have lots of bean seeds to choose from.
Melons: we do love our melons, but this year, I think we will plant only one variety of melons, and one variety of watermelons. These would need to be started indoors, in late April.
Winter squash: last year, we tried the Wild Bunch mix and had such a high germination rate, we didn’t have the space to grow any others! Two 18′ beds were filled with winter squash. Last year, we also bought two varieties of winter squash my daughters wanted to try, so I want to try those this year. They will need to be started indoors around the end of March or mid-April. I’ll have to check the seed packets again to be sure.
Potatoes: normally, I would have ordered my potatoes by now, for spring delivery, but just haven’t done it. We do want to grow potatoes – and a lot more of them. I’m just not yet sure where we could plant them right now. If worse comes to worse, we can buy our potatoes from stores in the spring, instead of ordering them online.
Salsify: we got seeds for these a few years ago, but never got around to actually growing them. This year, I’d like to finally do that! I’ll have to double check the packages to see about starting them indoors or not.
Herbs: I have quite a few varieties of herbs. I need to check which ones need to be started indoors. The long term plan is for things like herbs, greens and other things we use in the kitchen frequently, to be grown in the old kitchen garden, since it is closest to the house. The problem is, we keep forgetting to actually use them!
Flowers: my daughter particularly want to grow flowers but, in my seed cache, I have a packet of Crego Mixed Colour Aster seeds. These were given out in the memorial cards of an old friend that passed away suddenly, last year. I would like to find someplace to plant them in her memory, this year.
Wheat: a few years back, I got a rare, heritage variety of Marquis wheat seeds. If we have a free bed, I would like to finally plant them. I only have a couple of packages, so we won’t have enough to use them for anything. I will be growing them solely to save more seed for future planting. At some point, we hope to reclaim enough growing area to plant a small field of wheat and have enough to actually use to make flour, and still save seed. Mostly, though, I want to keep a heritage variety alive.
So that’s the general plan for now. Very little is going to be started indoors this spring.
If the winter sowing doesn’t pan out, we’re going to have a much smaller garden!
It will be a few months before we will know of they survived these cold snaps. Hopefully, we’ll be able to tell early enough to know what seeds or transplants we’d need to buy to replace them, before it’s too late in the season.
For now, we have reached our high of the day; -20C/-4F, with no wind chill.
Time to warm up the truck and go to the post office!
For the next while, I’ll be going through my old posts and videos about our 2024 garden, looking at how things worked out, and use that information to decide what we will do in our 2025 garden.
These are some things that turned out pretty different from our plans. Especially the tomatoes!
I’ll start, however, with the alliums.
Garlic, onions and shallots – how it started
The garlic, of course, was planted in the fall. They went where I had the space prepared and available, which was the old kitchen garden. The long, narrow bed along the chimney block retaining wall was filled, as well as the tiny raised bed along the south side. The short section of the L shaped wattle weave bed was filled, and the last cloved were planted down the centre of the larger rectangular bed, which still had tomatoes growing in it.
With all of these, I tried to plant the cloves a fair distance away from the walls of the beds. In planting garlic in raised beds previously, most of them disappeared, while the ones planted in ground in the main garden area did really well. My conclusion is that the ones in the raised beds simply froze. Even though they were well mulched on top, there was nothing extra insulating them around the sides.
The onions and shallots were started early, indoors. The yellow bulb onions were a variety called Frontier, which was new to us, along with a new variety of shallots called Creme Brulee. For red onions, we were going to try Red Wethersfield again.
With the seedlings, the onions and shallots did well, though the Red Wethersfield onions had a rougher time of it. In the end, though, we did have quite a few seedlings to transplant.
How it went
Hit and miss.
As with everything else, the garlic was delayed. In fact, it was so long before they broke ground that I started to fear we’d lost them all. As the season progressed, however, they did very well, and we got to enjoy plenty of garlic scapes when they finally appeared!
For the onions, I try to interplant them with other things in hopes that they will deter deer and other critters from eating the things they are planted with, or in some cases, just to fill in gaps.
With fewer Red Wethersfield seedlings, I tried transplanting them among the tomatoes in the old kitchen garden, then spread the last of the seedlings in the wattle weave bed.
The yellow onions were interplanted with tomatoes in the main garden area, before the last of them went into one of the newly shifted beds, filling a little more than half of it.
For some reason, I got it in my head that the Red Wethersfield were interplanted with the sweet peppers in the high raised bed. Those were the shallots. The last few shallots went into the same bed as the last of the yellow onions. I planted them at the far end of the bed, with a space in between, so there would be no confusions over what was where, with the space in between getting direct sown with summer squash.
The unexpected surprise, however, was all the onions we found while shifting and cleaning up various beds.
While reworking the long bed at the chain link fence, I found a number of onions that survived the winter. Those got transplanted to one of the low raised beds in the East yard.
As we were weeding and eventually shifting the beds in the main garden area, we ended up finding a lot of Red Wethersfield onions we’d planted the previous year, around the Roma VF tomatoes, that just disappeared. We assumed they all died.
In weeding and shifting the other beds, more surviving onions were found, and even a couple of shallots. All of these got transplanted into the newest low raised bed, where most of the Summer of Melons were transplanted. As onions are biannual, I was very excited by this, as it meant they would be going to seed, which we could collect for next year, instead of buying more.
All of these transplanted onions took and most of them did very well. We found ourselves with many onions blooming.
How the harvest went
More hit and miss!
With the onions that were allowed to go to seed, we found ourselves with many, many flower clusters. They bloomed and bloomed and bloomed!
They bloomed for so long, I wasn’t sure we’d get any finishing their cycle so we could have seed to collect! I did end up being able to collect quite a few flower clusters that had dried on their stems and set them to continue drying out in the cat free zone. I collected the last of them, some of which were still rather green, and set them to dry in the cat free zone, after we had our first frost, which onions can handle.
Every flower in those seeds heads have three seeds in them.
We got quite a lot of seeds, just from the first batch harvested. The second batch took longer to dry out, but they eventually did, and I was able to separate out the seeds. Which meant I have seeds from yellow bulb onions from previous years (Oneida, I believe), Red Wethersfield onions, plus some shallots from previous years (I can’t remember the names of the varieties we tried before, just now), all mixed together!
The Red Wethersfield onions we planted this year, though, were a complete loss.
The cats killed them.
The yard cats just love the garden beds in the old kitchen. They loved to go in between the tomatoes in the larger rectangular bed and just chill, or they would roll around luxuriously – all over the onions! Even when I tried sticking plastic forks into the soil beside them, hoping the tines would deter the cats, they just squeezed in between them and rolled around, anyhow. When I finally cleaned up that bed at the end of the season, I did find a few tiny survivors, though. I saved them, and they can be transplanted in the spring.
The yellow bulb onions and the shallots that shared the bed with them also had cat issues! They actually grew quite well, and we did get a couple of decent sized bulbs out of them. Those where the ones that didn’t get rolled on by cats! At least, not right away. We simply could not keep the cats off that bed, and they really, really liked to lie on the onions or roll in the soil. They didn’t kill the onions, but broke the stems, which meant the bulbs could not grow any bigger.
The shallots had cats rolling on them, too, but they had the extra problem of fighting for resources. While I tried to remove as many of the elm roots that invaded the soil, it doesn’t take them long to grow back, and they send their capillary roots up into the softer, moister soil. They will even force their way through the bottoms of grow bags, as we discovered last year.
The yellow onions that were interplanted with the tomatoes fared better, even though the tomato plants ended up completely overshadowing them. More on that when I talk about how the tomatoes did, in another post.
Still, we managed to get a decent harvest, which was cured and braided, and we now have plenty in the root cellar.
The real success, though, where the shallots that were planted with the peppers. I did not really expect to have a good harvest from them, but when I started reaching around the pepper plants to pull them, I found a lot of nice, big shallots!
These, too, we left to cure, then braided, and are now in the cat free zone, where we can access them more easily to use in our cooking.
Oh, and then there was the garlic.
Usually, they would have been ready to harvest in June or maybe July.
They weren’t ready to harvest until the fall!
We did have really good bulbs, though. Not the biggest, perhaps, but certainly not small. In fact, there were enough good sized bulbs to make them worth planting!
Conclusion, and plans for next year.
Things are going to be pretty different, next year!
One thing will stay the same, and that is the garlic. Those are already planted in the bed where most of the yellow onions were. After spacing them out, I changed my mind and started them at the north end of the bed, where the shallots were, instead of the south. The south end of the bed gets shade for longer periods of the day, because of the trees closer to the house. Starting from the north end means the soil will warm up faster, in the spring.
I was really, really happy with how the shallots turned out this year. We’ve struggled to grow shallots every year, but this year they did fantastic in the high raised bed, in between the sweet peppers. As for the red and yellow onions, it was disappointing that the cats did so much damage – especially for the Red Wethersfield onions. At least we got a harvest with the yellow onions!
BUT…
We have seeds.
Lots of seeds.
This year, we are trying the winter direct sowing. I ended up making a couple of different mixes of seeds, and included onion seeds in the shakers. In the last bed that got winter sown, it got shallot seeds added in, too. So we now have several beds already sown with onions and shallots. Being cold hardy plants, they should start germinating before the other seeds in the mixes do which, hopefully, will go a long way in keeping critters away when the other seeds start to sprout.
If they sprout.
We’ll find out in the spring!
There are still plenty of seeds left, so we have the option of starting some indoors as well, if we want, but I don’t think so. We do want to keep growing onions and shallots, and if the winter sown seeds don’t survive, not starting any indoors means none to be had at all. Their growing season is just too long. I will take that change this year, though.
Onion seeds are only good for about a year. I might end up giving the rest of the seeds away or something, so they don’t go to waste.
Once onions go to seed in their second year, however, they go to seed every year.
In getting the bed ready to plant the garlic, however, I found more onions and shallots that got missed. The bed that had onions interplanted with tomatoes now has summer squash winter sown in it, and I found more missed onions while preparing that bed, too.
The Summer of Melon’s bed that had the transplanted onions in it got half-prepped for the winter. Just the side that had the onions and bush beans. (The other half will wait until spring)
All of the onions that were in there, plus the others I found in preparing other beds, were replanted in the cleaned up half of the bed. I was even able to separate them out by colour, and found myself with half the bed now planted with Red Wethersfield, and the other half with yellow onions, plus a few shallots in the very middle, as a divider.
We should have plenty more onions going to seed for us next year, too!
In the end, for all the issues we had, I would say this was one of the best years for garlic, onions and shallots we’ve had yet.
I hold out home that, with the winter sowing, next year will be even better.
Not all of it. Just where the wild strawberries and herbs are growing.
This was the first time I used the pair of hand rakes my brother and his wife gave me. Now that they’ve sold their property, they are living in a townhouse, and have no need for gardening tools anymore. I don’t think these were ever used before!
They work really, really well! The only complaint I could have about them is the straps for the hands are on the small side. At least for broad simian hands like mine! 😄
Oh, gosh. I just realized what I caught a kitten doing in the other mulched bed in that first photo.
*sigh*
The next photo is the packaging for the hand rakes, though Instagram cut part of it off, even though I have it set to “original size” on the slideshow. The website says uncleweiner.com (not an affiliate link). A rather unfortunate name, but a good product!
Oh… gosh. They are located in Prince Albert. That’s… double unfortunate! 😂😂😂
In the last photo, you can see I had a helper when it came to mulching the Albion Everbearing strawberries in the main garden area. I put the chicken wire back over it to keep the leaves from being blown away but, as you can see, it doesn’t lie flat on the strawberry bed. Little Magda quite enjoyed going under there!
That done, I got another wagon load of leaves and started on the patch that’s been covered by the insulated tarp all summer.
After removing the old T posts and a board I’d put around the edges, to keep it from blowing away, I peeled off the tarp. That was unexpectedly difficult. All along the edges, Creeping Charlie had started growing on top of it. It turns out that some of them set their roots into, or even through, the tarp!
So the first thing I did was drag the tarp out to the front yard, where I have one hose still set up. The tarp was spread out to its full size. After hosing it down for a while, I went over it with a stiff bristle broom to get rid of the bigger debris, then used the hose to pressure wash it as best I could. It then got another scrubbing with the broom and a rinse.
For now, I’ve left it out where it is, to dry off as much as possible. Unfortunately, there are some holes in it. Some are tears from winds that happened a couple of years ago. Others were caused by weed roots pushing their way through and into the insulation layer! So parts of it now have water on the inside of the tarp. Not much I can do about that. I don’t have tarp tape, but I do have clear Gorilla tape, so I hope to at least patch up the bigger holes – if they are dry enough! Eventually, the other side will need to be cleaned, too.
That done as much as could be for now, it was back to the patch of soil it covered. In the second picture, you can see how it looked after the tarp was removed. Most of it does look dead but, along the edges, you can see white lines of roots extending into the what will be the growing area.
The soil needed to be loosened for the seeds, so I used the landscaping rake for that – and promptly found a roll of wire, buried in the soil! When we first moved here, this is where most of the chimney blocks and all the ceramic flues had been stacked, along with bricks and other odd things, and even garbage. We cleaned it up, but clearly missed this piece of wire!
The entire area got raked from the inside out, so as to pull the living roots out of the growing area, while also loosening the soil for the seeds.
As you can see in the next photo in the slideshow, the cats were very interested in what I was doing!
After the soil was loosened, I took the container of seeds shaken up in some seed starting mix, and scattered it evenly – I hope – over the area. Then I drew the back of the rake back and forth over the area to cover the seeds a bit.
While chasing away cats that figured this was a big new litter box, just for them!
Last of all, I scattered a wagon load of leaves over the entire area. This layer of leaf mulch is not as thick as on the garden beds. I was trying to more or less emulate how it would be, if leaves had fallen naturally on the ground. They will not be removed in the spring.
These seeds are a Western wildflower mix, so they should be able to handle the winter temperatures just fine. Any that succeed in germinating should have little problem growing through the light mulch.
The seed mix description doesn’t tell everything that’s in this mix. It just says “This mix includes Lupins, Poppy, Coreopsis, Flax, Blanket flowers and much more.” It should be interesting to see what comes up next year!
One packet of seeds is supposed to be enough for 1000 sq ft. I used two packets. Technically, this means this area should be very densely sown. I’m not going to assume they’ll all germinate. We’ve tried to plant these plus an alternative lawn mix in areas nearby, and only some of them took – a year after they were sown! – and in only one area.
Still, if all goes well, enough of them will germinate that they will choke out any weeds that might otherwise spread into the area, and the wildflowers will spread their own seed further into the maple grove.
By the time that was done, it was starting to get close to sunset, to I moved on to things to go in the front yard. One of those was to clean up the flower bed the haskap bushes are planted in.
The first two photos in the above slide show are before and after shots. The dead flower stalks were clipped with loppers for a chop and drop. The old mulch I’d pulled off the garden bed at the fence was then raked on top along one side, and leaves along the other edges were raked up and added to the other sides. I don’t mind if the mulch reduces the number of flowers here. They get so tall, they cover the haskaps! Now, they are a mulch for the haskaps, and the lilac at one end.
I also snagged a couple of bricks and broken pieces of sidewalk blocks from the pile in the foreground. I keep thinking the catio is going to blow away, now that it’s wrapped in plastic for the winter. A corner of the plastic did tear off in yesterday’s winds, so that got tacked back into place, and there is now a weight on each corner of the roof.
I finally got around to laying out the hoses, to get the kinks and twists out. Once they moved, I was able to get to the old basement window to clean it up, then switch the summer window for the winter one. There was more to clean up than usual this year. The kittens have been using the area in front of it as a little box. 🫤 The window is now clear, though, and has a cover leaning over it. Eventually, we will pick up a window well and cover for around this window. The window wells are pretty affordable. The covers can sure get expensive, though!
That cleaned up and done, it was time to roll up and tie off the hoses. I ended up using a garbage can, laying it on its side over a hose, then rolling it with the hose around it. Doing it that way prevents the hose from twisting and kinking, though in these cooler temperatures, any kinks that were in the hoses when I laid them out were still pretty bent up when they were rolled up. Those are now ready to set aside for the winter.
Aside from finishing cleaning the insulated tarp, this is it for winterizing on the south side of the house. Tomorrow, I’ve got some things I want to get done in the main garden area. Our high is expected to be only 4C/39F tomorrow, but the day after is now expected to hit 9C/48F. I might wait for the warmer day before breaking out the chain saw to clean up the dead spruce tree that fell on the crab apple tree.
How much I get done tomorrow, though, may be up for debate. I felt really good while working outside, but once inside and sitting for a while, all my joints are stiffening up. Including my hands. I’m having a heck of a time typing right now. I forgot to take painkillers before I started this post.
Hopefully, I will finally get a good night’s sleep, and that will help. What I’d really love is have a hot soak in the tub, but it’s not worth the risk of injury, trying to get in and out. Sitting on the bath chair in the shower just isn’t the same, though!
Ah, well. It is what it is!
Whatever happens tomorrow, it felt great to be working outside, and I’m quite happy with the progress I was able to do while I had the chance!
I really wanted to push to get the rest of the seeds in for our 2025 garden. I still had to wait until the afternoon to start, so the ground had time to thaw from overnight frost. From there, it was a race against time to finish before I lost light. I even managed to get some quick footage for an October garden tour video. I haven’t checked the files yet, though, to see if they are worth using.
The first area I worked on was along the chain link fence. The long bed in the first image above was mostly done already, since I’d harvested potatoes out of it. I even found a couple of little potatoes that I’d missed when harvesting.
It still took a remarkably long time to prepare it, though. The section that had the purple caribe potatoes that never grew was compacted like crazy, even though I’d loosened at least part of it, to plant the kohlrabi.
Those actually had some leaves trying to grow! If they hadn’t been eaten by flea beetles, they’d still be growing now.
There was also the lone Jabousek lettuce that had seeded itself and survived being munched by deer. I got a bucket to use to collect the seeds. There was a lot for just one plant! I ended up putting a healthy scoop of them with the remaining root vegetable seeds, giving it a shake to mix them in with the other seeds, potting soil and vermiculite.
I also cleaned up the chimney block planters along the other section of chain link fence a bit. I just took down the tomato supports and cut the tomato plants at their bases, leaving the roots. I will be leaving those as is until spring.
As for the narrow bed, once the soil was loosened, weeded and leveled, I scattered the seed mix. This mix has Dalvay shelling peas, a few King Tut purple peas we saved, Royal Burgundy bush beans, Hopi Black Dye and Mongolian Giant sunflowers and a few black Montano Morado corn seeds I’d saved, plus onion seeds.
The onion seeds are so much smaller, though, I scattered the larger seeds first, which probably included a few onion seeds as well, then went back over the bed to scatter the remaining onion seeds. There wasn’t enough to do the entire bed, though, but I made a modification, later.
First, though, I went over the bed several times, looking for the larger seeds and pushing them into the soil, spreading them further apart, if necessary. When I found the bush beans, I pushed them into the soil closer to the brick edging. If I had to move peas, I pushed them into the soil closer to the chain link fence. The Mongolian Giant seeds were easy enough to see, but the corn and black dye seeds are so dark, they were much more difficult to spot. I’m sure I missed quite a few. I also replanted the two little potatoes that I’d found.
If all goes to plan, the peas will be able to climb either the fence, the corn or the sunflowers, the beans will have room to get bushy along the outside edge of the bed while doubling as ground cover, and the onions will dissuade hungry deer.
Once I’d pushed in as many of the larger seeds as I could find, I got some of the shallots and onions I’d set aside earlier for replanting. I transplanted them around the outer edge of the end that did not get the scattered onion seeds. These shallots and onions are there to go to seed – and to dissuade any hungry deer, I hope! Everything in this bed, except maybe the corn, is stuff deer love to eat!
After planting the shallots and onions, the soil was gently raked to make sure everything was covered before getting mulched with leaves topped with grass clippings.
That left the root vegetable – and now Jabousek lettuce – seeds to sow. Those went into the low raised bed that the German Butterball potatoes had been in, which is in the second photo of the slideshow above.
When the potatoes were harvested, the bed was weeded, and hadn’t been touched since. All it needed was to break up soil clumps, pull out any weed roots that got missed, soil clumps broken up and leveled.
With this higher bed, I did things a bit different. Anything along the walls of the bed would freeze, since the mulch can only protect from the top. So I focused on making sure the middle of the bed was readied for seeds, leaving about 6 inches from the walls unplanted.
This seed mix has Uzbek Golden carrots, Napoli carrots (an orange variety), Merlin, Bresko, Cylindria and Albino beets, French Breakfast, Champion, Cherry Bell and Zlata radishes, Purple Prince turnips and our saved onion and lettuce seeds in it.
It sounds like a lot, but this was finishing off packets of older seeds, so there wasn’t much of each variety, plus I don’t expect a high germination rate for any of them.
Once the seeds were scattered and gently raked over, they got mulched with leaves topped with grass clippings.
That is the last of the winter sowing vegetables to do! The only thing that could still be sown before winter is the wildflower mix, and that could even wait until spring, if I wanted. The space I’ll be planting them is still covered with an insulated tarp, and that won’t need to be moved to cover the septic tank for a while, yet.
While I was working on this, my younger daughter was taking care of things in the house, including re-installing the arm based over the new tub surround. She was able to find a way to fit the big L shaped bar in, as well, though it does make one of the corner shelves in the surround of limited use, now. Which is fine. The arm bar is needed more.
Now that the arm bars are in, my husband can finally use the shower! Even with the bath chair, he can’t get in and out without the arm bars.
My older daughter is not well today, and we’re all pretty broken and hurting, so my daughter offered to get us take out, if I were up to it.
Yes. Yes, I was!
Meanwhile, my brother and his wife were coming over for one last trip – to drop off the trailer they’ve been using to bring everything from their property to wherever it needed to go. They arrived after I left for town, but I was able to see them before they left. Tomorrow is the possession date for the new owners, so they not only pushed hard to get their own stuff out, but to make sure the new owners had things like flax bales to cover their septic field, and a few other things that got set up for them.
One thing they did was take off their “road sign” at their driveway. When the road past our driveway was named for our family, the municipality made five signs, but only needed four, so my brother was allowed to take the extra. They’ve had it at their driveway ever since. It has now been removed.
That sure made things feel a lot more final!
It would be good if we could use it at our intersection. There was one when we moved in, but then the stop sign it was attached to was knocked down and the road sign stolen. We’re pretty sure our vandal did that, but have no way to prove it, but like we can’t prove he stole the sign with my father’s name on it off the corner fence post, or that he stole the trail cam we had mounted on that post.
The municipality never replaced the road sign. I suspect that if we put this one up on the stop sign that got repaired, it would just get stolen, too.
Well, we’ve got our own painted sign at the corner, with a camera on it in case there are more vandalism attempts. That is working out just fine.
There is, of course, still lots more work to get done in the garden, but getting this winter sowing done was the thing that had to get done first. Now, we just do as much as we can while the weather holds. At the same time, my brother will be coming out as often as he is able, as he wants to sort things to their more permanent locations. Particularly the farm equipment, now that the storage trailer is in place. A lot of small things just shoved into the barn that will need to be sorted into the storage trailer or bread truck (which will be a workshop). He also has a dismantled shelter he needs to rebuild over the tractor that got its radiator damaged while lifting the discer off the trailer. It will need to be replaced, and he’s planning ahead to be able to do it during the winter, so having a roof over the tractor will be very important.
Anyhow…
They got here after I left to pick up the food, but I got home fast enough to at least give my brother a hug – my SIL was so exhausted, she fell asleep in their truck! – before they had to go.
We’re going to be seeing a lot more of my brother and, hopefully, his wife from now on!
That makes us very happy.
Getting the last of the winter sowing done today also makes me very happy.
It felt so good to get a really productive day outside. It’s been so long!
I did have to wait until the afternoon, when it warmed up to our expected high of 6C/43F. Even so, some of the areas I worked in that were shaded longer were still partially frozen.
The first thing I did was finish off the bed I was working on yesterday. That little section was shaded and still rather frozen, so it took longer than it normally would have. When I was done, I grabbed a nearby roll of plastic that was rolled up and waiting to be put away for the winter and laid it out on the bed, starting from the shaded south end. It wasn’t long enough to cover the entire bed, but all I really wanted was to get the end that got more shade to warm up a bit, once the sun was able to start hitting it.
Once that was done, I shifted to the old kitchen garden and cleared the rectangular be that had the Forme de Couer tomatoes this year. That bed was shaded by the house on one side so it, too, was partially frozen. After clearing it of weeds and mint rhizomes, I grabbed one of the plastic sheets that had protected the eggplants and peppers earlier, and laid it over the soil. This bed is shorter, so the plastic was plenty long enough.
I had decided to use the high raised bed, which is already prepared, and the open section of the garlic bed for winter sowing, so I didn’t need to clear another bed, yet. Leaving the plastic to warm the soil, I headed into the house and started going through my seeds.
After going through my seeds, I decided on some ordered chaos.
I’m also going to need to clear one more bed.
Most of the seeds I will be sowing are older seeds, so I don’t expect a very high germination rate for some of them. I also decided to include some additions.
Here are the beds I was able to finish planting before it started getting too dark.
The first image of the slideshow above is in the old kitchen garden. With that theme in mind, I’ve got more “kitchen” greens. These include:
– spinach – four different varieties – Swiss chard – two different varieties – Shallots – saved seed collected from a lone surviving shallot a couple of years ago – Kohlrabi – both purple and green – Hedou Tiny bok choi – we got these as free seeds a couple of years ago, but they were smothered by elm tree seeds after they sprouted. A couple of seedling survived and bolted, so I let them go to seed and saved them.
Lastly, I included some onion seeds collected this year. Hopefully including the onions and shallots will keep the deer and damaging insects away.
These and another group of smaller seeds were added to a repurposed herb/spice shaker container, along with some seed start mix and vermiculite I had left over from starting seeds indoors in the spring, and given a thorough shaking.
After emptying this container into the old kitchen garden bed, it was mulched with a thick, insulating layer of leaves that was topped with some grass clippings, as was done with the garlic already planted.
In the next image, you’ll see the bed I had started on last night. This one is now a summer squash bed. Years ago I had accidentally bought three collections of summer squash when I meant to get just one. We’ve been using the seeds for several years now, but they are starting to get old. The only new seeds were the White Scallop patty pan squash. The others are Sunburst (a yellow patty pan), Endeavor (green zucchini), Goldy (yellow zucchini) and Magda (mottled pale greens, similar to zucchini). I don’t expect much for a germination rate for the older seeds.
With these larger seeds, I scattered them from end to end on the bed, then pushed each one into the soil, spreading them out more evenly in the process, used a rake to gently cover them over, then mulched with leaves and grass clippings.
The next two photos – the remaining end of the garlic bed and the high raised bed – have root vegetables, plus protective onion seeds. These include:
– the last loose seeds of Uzbek Golden carrot (I still have the home made seed tape of those) – pelleted Napoli carrot – beets – three red varieties left over from before, plus a white Albino variety given to me – Purple Prince turnip – radishes – three red varieties left over from before, plus a yellow variety given to me.
Plus, protective onion seeds were added as well.
I used the shaker over the small area next to the garlic, but I honestly couldn’t tell if any seeds got out. I mulched it anyhow, but when I got to doing the high raised bed, I took the shaker lid off and just scattered the mix. I could at least see the pelleted carrot seeds! This bed is shorter, and I ended up not finishing off the container. I’ll find somewhere else to sow the rest of the seeds.
After mulching the high raised bed, I moved the wire cover onto it for winter storage. The wire is open enough that it won’t prevent snow from covering the bed, and the snow is an important part of this winter sowing process.
This left me with two containers of seeds. I decided to plant the flower seeds. I wanted those in the main garden area and decided to use the space by the high raised bed where the pumpkins and drum gourds had been planted. It’s a small space and did not take long to clean up. That last space got:
– Butterfly Flower: Orange shades (a milkweed) that I tried starting indoors this past spring, but never got to direct sowing the rest. – Forget Me Nots – given to me by a friend – Nasturtium; Dwarf Jewel Mix – I got those this year and never got around to planting them.
I look forward to (hopefully) have a busy patch of flowers for the pollinators in the main garden area next year! The Nasturtium should also act as a trap crop, luring in insects that might harm some of the other plants.
For flowers, I also have two packages of Western wildflowers mix. I have an area along the edge of the maple grove that has been covered with the insulated tarp, folded in half, since it was taken off the septic tank lid in the spring. I’m hoping that did the job of killing off any weeds under it. Once the tarp is removed, that is where I intend to plant the wildflower mix. It has 16 varieties of annuals and perennials native to Western Canada in it.
I am now left with one last container of seeds to plant, but I was losing light and need to prepare another bed for them. This container has:
– Dalvay peas, including seeds I collected from the ones we planted this past year – King Tut purple peas; from collected seeds – Royal Burgundy bush beans – Hopi Black Dye sunflowers – just one of the two packages I had – Mongolian Giant sunflowers – I had only one packet of those – a small number of Montana Morado corn. We’d grown them a couple of years ago and left them to go to seed, as we were going to test grinding them into flour, only to have the cats dump the entire bowl of collected seed. I managed to salvage a few seeds – less than a dozen.
I chose this combination so that the peas could climb the sunflowers, while the pole beans can shade the ground. This group of seeds did also get onion seeds added to it. Everything in here is prone to being eaten by deer, so I’m hoping the onions will be enough of a turn off for them.
After talking to my daughter about it, we figured the place to plant this is in the long, narrow bed along the chain link fence. It’s mostly clear already, as it had potatoes in it this past year. There’s just one self seeded tomato plant still needing to be cleaned up. Plus, the kittens have been using it as a litter box, so that needs to be cleaned out, too.
So that is my plan for tomorrow. To get that last group of seeds winter sown seeds in. Then, I’m hoping to get a bit more clean up before taking the garden tour video I’d originally intended to take in the middle of the month. This will be the last garden tour video of the year.
In the spring, once the snow is melted away, the mulch on all of these will need to be removed, to allow the soil to warm up and the seeds to germinate. If all goes to plan, this will give us a head start to our 2025 garden.
With most of these, I completely finished off the seeds I had left from previous years. I still have plenty of other things that can be started indoors, and others for direct sowing.
Next year’s garden will be very, very different from how this year’s garden turned out. Not having four 18′ beds dedicated to winter squash and melons is going to make quite the difference! We will be planting fewer tomatoes next year, too.
Even if this winter sowing experiment doesn’t turn out turn out, I could get away with not buying any new seed this winter.
I will still buy more seed, of course! Just probably not until a month or two from now. I’ve already got my eye on some rare heritage breeds that I’d like to grow, if only to help keep the varieties going.
Mostly, though, I’d like to finally get some new beds started, and get at least one permanent trellis built.
Today is October 10, and yes, we have garden progress!
Last month, the 10 was our average first frost date, so I took garden tour video. I might do that again, later today, depending on how other things go. I might also leave it for the middle of the month. We shall see!
While doing my rounds this morning, I finally pulled the red onions in the high raised bed and set them to cure.
The strong fence wire on this cover was perfect to hang them on! Only a few didn’t have enough greens to hang them, so they got set out on the frame to cure.
After I took this photo, I also gathered the whole three shallots that were left by the summer squash, and hung them on the frame wire, too.
I am perplexed by these onions. As far as I can remember, these were supposed to be the Red Wethersfield onions, which have a round, flattish shape. These look more like the Tropeana Lunga or Red of Florence onions we grew before, but we didn’t have seeds for those this year.
So I decided to look at my old post about planting in this bed.
Well, that explains it.
These aren’t onions.
They are the Creme Brulé shallots.
I completely forgot that I planted shallots in this bed. I was sure I’d planted Red Wethersfield in here!
It’s a good thing I use this blog as a gardening journal!
So… those shallots are HUGE! Their size was another reason I didn’t think they could be shallots. Particularly since the ones planted in the bed with the yellow onions and summer squash were so much smaller.
Which had me wondering…
Where are all my Red Wethersfield?
Well… I did know where some of them were, but did they survive?
I had planted some of them among the Forme De Couer tomatoes, but we weren’t able to keep the cats off of them. This was all I could find. A few got planted in the wattle weave bed, but I could see no sign of those.
I was sure I had more transplants than this, though!
Ah, well.
I will be keeping these. As we clean up and prepare the beds for the winter, I will find a place to transplant them, then mulch them over the winter. Hopefully, they will survive the winter and go to seed next year, and we can try again.
As for the bean pods with the onions, those are the Carminat purple pole beans I’d left to go to seed. There had been at least a couple more pods, but I couldn’t find them. With one, I did find the torn remains of the pod, so I’d say the racoons were at it again.
These are all the seeds that were in the bods. It looks like only one is damaged.
They will sit in the cat free zone to dry a bit more, now that they are out of their pods, then I’ll package them up for next year. These do grow very well here, so when we plant them again, I want to mark off one or two plants to specifically leave for growing more seed.
Meanwhile, it’s getting close to the time to plant garlic for next year. I will select our largest heads of garlic in the root cellar, rather than buying more.
Which means we will have onion seeds (with still more to collect from the garden), pole bean seeds, and garlic from our own garden for next year. I’ve also saved seed from that blue squash we had to harvest when it broke off its own stem, and we plan to save seed from that one big Crespo squash. There is the possibility of cross pollination with the Wild Bunch Mix winter squash we grew, though, so any seed we save there may not be true to the parent, even if I was able to hand pollinate from the same plant.
It doesn’t look like those Uzbek Golden carrots that bloomed are producing any seed. The flowers are died off, but there’s no seed. Perhaps because these are first year blooms? I don’t know.
We are slowly getting to the point where we will be able to save more and more of our own seed. I don’t expect to be 100% using our own seed, if only because I like to try new things, and we are still working out what varieties we like best in some things, but I do expect to be able to grow at least 90% of our garden from our own seed within a few years.
Just a little big closer to our goal of being as self sufficient as possible!