Our 2024 Garden: first direct sowing! (video)

Okay, so I’ve scattered seeds and such, but today is the first day for direct sowing. It was such a gorgeous day for it, too!

I planted all the edible pod peas from the package, minus the ones that split apart as they soaked between damp paper towels overnight. Not a lot of carrots were planted; I’ll include them between other things, over the next while. I’ll probably do the same with more spinach. Basically, they’ll be space fillers and ground covers until it’s too warm to plant them anymore.

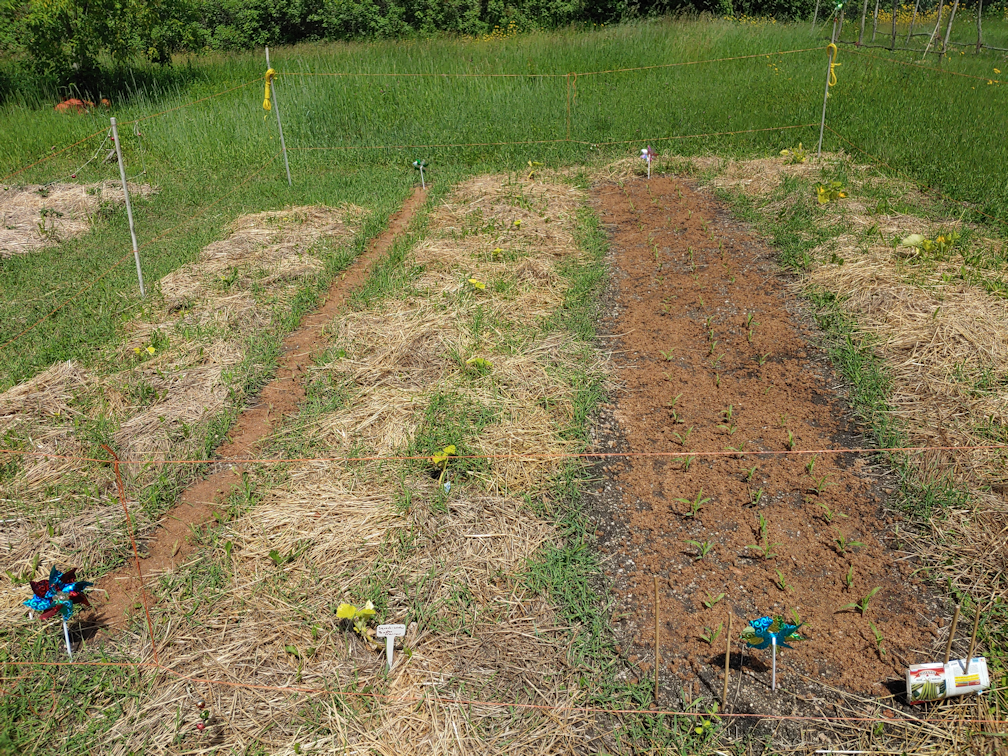
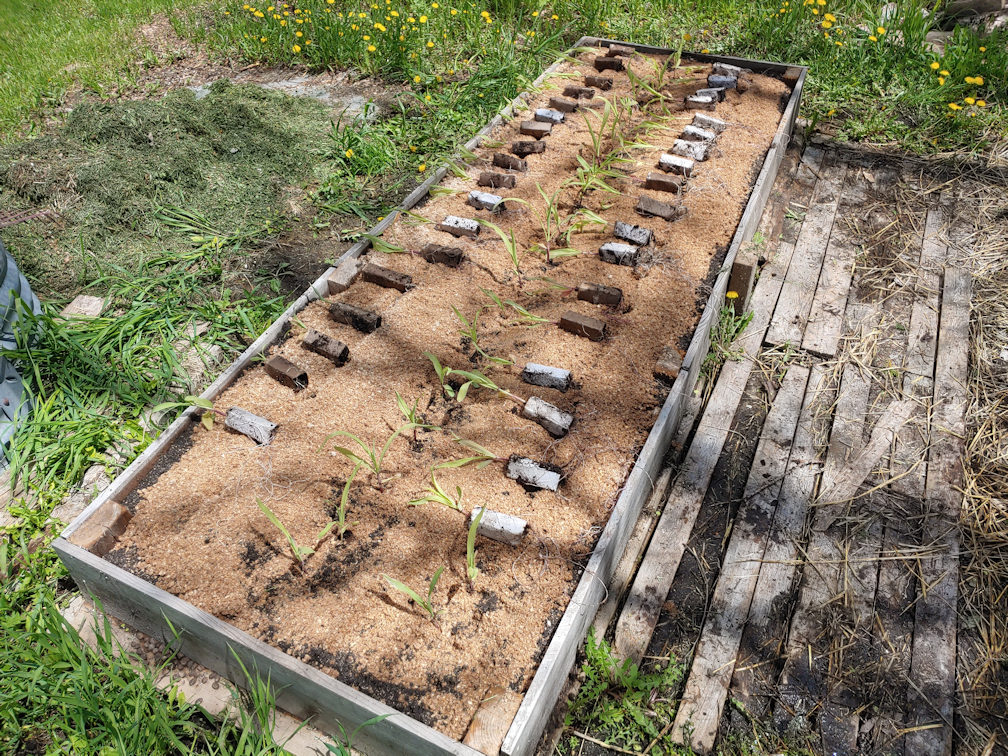
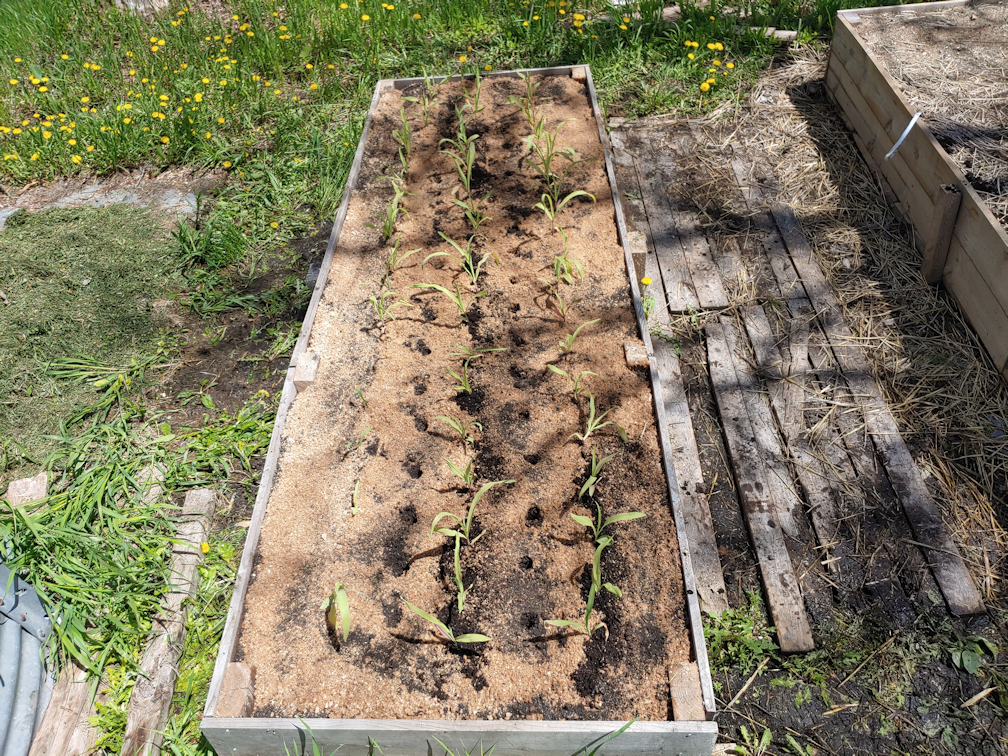
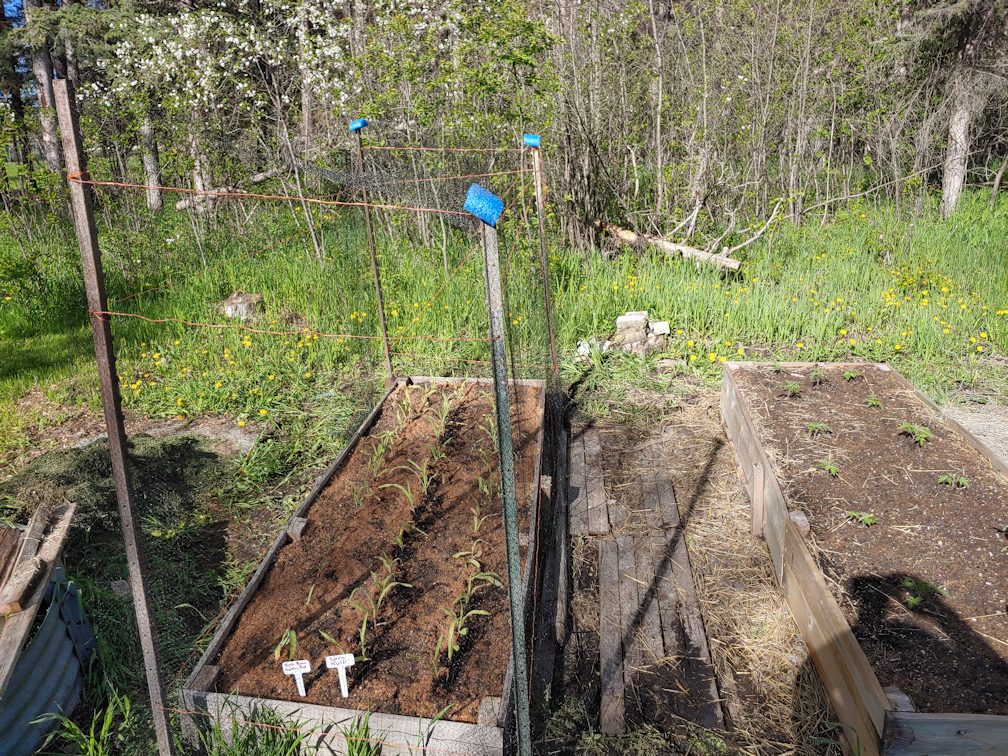
The box frame cover got worked on first, then set aside, since I put in the old salvaged T posts to hold netting for the peas to climb. I couldn’t drive them in very far, so they will need to have support added to them before any trellis netting is added, so they don’t get pulled into the bed by the weigh of the peas – or the net, for that matter! I intended to add a third post in the middle, but hit something hard. Possibly one of the branches set at the base of the bed, when it was first built and filled. Or a rock that got missed.

I found my pH meter and did a reading. No surprise the pH is still at 8. I even stuck it into the compost heap nearby, and the needle barely moved. I had a bit of an ah-ha moment earlier today. Well, more like a “duh, of course” moment. Maritime Gardening did an April garden tour video and was taking about how acidic his soil is, and mentioned that liming the soil can make the soil more alkaline.

Liming.

Lime.

Garden lime.

Which is made out of limestone.

Which is what we are sitting on top of.

Our area has limestone quarries and commercial gravel pits – we even have our own little gravel pit – with limestone based sand and gravel below a very narrow band of topsoil.

Of course our soil alkalinity is maxing out the pH meter. How could it be any different? *smacks forehead over what should have been obvious*

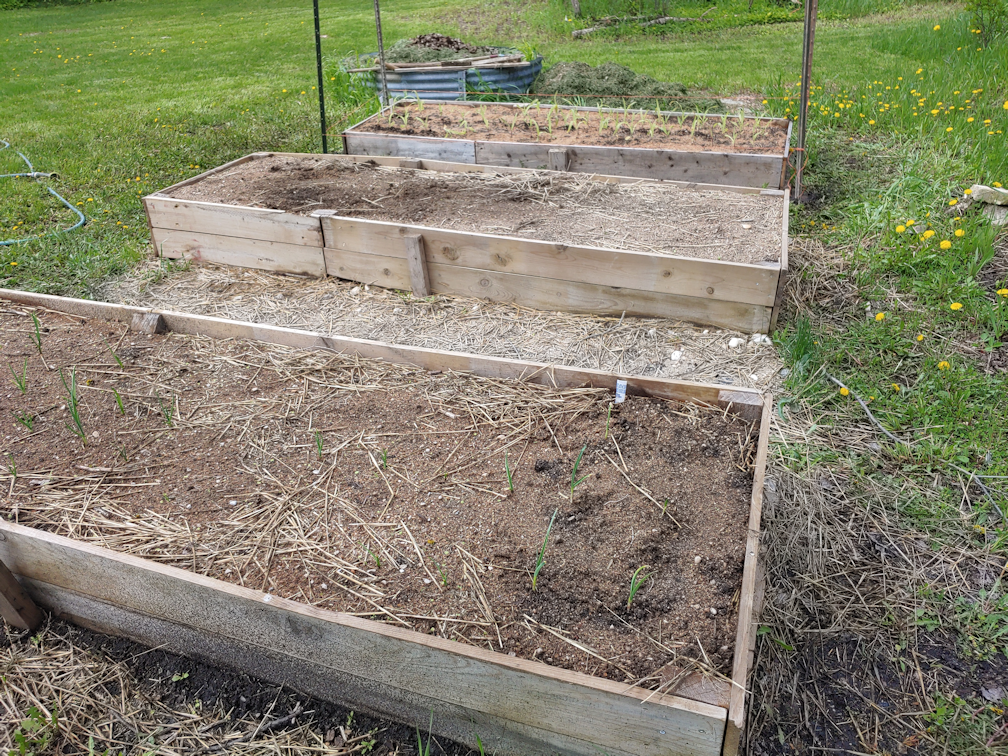
Increasing the acidity is going to be a challenge, that’s for sure. The use of raised beds will make it easier, at least.

Our order of sulfur is supposed to arrive by Thursday. Once we’ve got that in, we’ll be able to start amending the various beds with it, to increase the acidity. My husband actually ordered 2 different bags. One bag is 90% sulfur, 10% betonite clay. The other is guaranteed 99.5% elemental sulfur, but both are supposed to be broadcast evenly, then worked into the top 6 inches of soil, at a rate of 250g/10m² (0.5lb/100ft²). These low raised beds are 27ft², so they shouldn’t need much but, from what I’m reading, the more alkaline the soil, the more sulfur is needed (which makes sense), plus our soil type would also need more, for it to make a difference. Even so, it won’t actually do much for us this year; if we were treating a field, we’d be adding it to the soil a year before planting a crop. Any amending we do this year will mostly benefit what we grow, next year. Once we’ve started incorporating it into our soil, though, we should test the soil every few months to see how much difference it has made. Still, every little bit will help.

While it will be slow going to increase our soil acidity, using sulfur is supposed to be one of the quickest ways to do it!

Anyhow…

In the early evening, the girls and I went around the yard, checking things out and enjoying the longer daylight hours and warmth. We blew past our predicted high and reached 16C/61F! Plenty of trees and bushes have leaf buds showing. It took some searching, but we were thrilled to find a few shoots of snow crocuses and grape hyacinth emerging through the leaf litter. We even spotted the leaves of two tulips that had emerged near the saffron crocuses! These were not there, this morning!

We are getting into that period when everything starts to just explode into new growth.

Before long, we’re probably going to be complaining over how hot it is! 😂😂

For now, I’m just really happy to get some progress done outside. We’re supposed to get some rain next week, but we should have plenty of lovely days like today, to get things done outside!

The Re-Farmer

Our 2023 garden: spinach, beets and radishes

I finished preparing the bed we harvested the garlic from, and sowed for a fall harvest.

I chose Cherry Belle radishes and Bresko beets. I wasn’t sure how many seeds I had left, so I brought two different varieties of spinach. I was able to sow the Lakeside variety, which is what we planted in the spring. I was so impressed with how they didn’t go bitter, even when they started to bolt, I definitely wanted to sow those again.

I used the boards I’d brought out to shelter the tomatoes from the wind in the spring and laid them out around the edges, where weeds are such a problem, as well as across the middle to divide the bed into three sections. I ended up adding a couple more boards at the ends, too. Aside from hopefully keeping the crab grass at bay and dividing the bed, they also give me something to step on while tending the middle rows.

The first thing I did was give the entire bed a watering, using the cone setting on my sprayer for more even coverage. Then I used a hoe to trench out three rows in each section. Those got a watering on the jet setting, because I wanted to drive the water deep. Even though I’d already watered the bed, the moisture didn’t get very far, and the trenches were quite dry. The water also leveled out the soil in the trenches, so they weren’t so deep.

Next, I used grass clippings to mulch along the boards and in between the rows. Once the mulch was down, I used a broken piece of bamboo stake to make the rows the seeds would be planted in.

I picked up a seeder at Dollar Tree, and this is the first time I used it. It worked rather well. In the photo are the beet seeds, which were easiest. The rounder radish and spinach seeds did sometimes get a bit out of control, though! 😄

The beets went into the middle sections, the spinach at the end closer to the house, and the radishes at the far end.

Once the seeds were in and lightly covered, I used the flat setting on the hose to water each row and settle the soil further around the seeds. The grass clippings were toasted dry in the sun, so I used the cone and shower settings to soak the mulch. Last of all, I used the jet setting to clean the loose grass clippings off the boards.

What I will probably do later is put some kind of cover over the whole thing. I think we have some mosquito netting long enough for it. I mostly want to keep the insects from eating the greens. Last year, the radishes seemed particularly vulnerable. As they get bigger, they will definitely be tempted for the deer, too!

We were at 26C/79F while I was out there. Another reason to make sure the bed got extra watering! The two northernmost rows of squash were wilting in the heat again, so I’ve got the sprinkler going on those. Squash need a lot of water, anyhow! I had been concerned that the two southern rows would have trouble because they get so much more shade, while the two northern rows basically get zero shade from sunrise to sunset. With this year’s heat, that shade it turning out to be helpful! Last year, with the flooding, it was the other way around. The squash that were in full sun strove mightily to recover from the flooding, while those in shade basically had no chance at all.

For the next week to ten days, we’re going to see increased heat. Depending on which app I look at, we’ll either have no rain at all, have several days or rain, or several days of thunderstorms! It’s awfully hard to plan things with such conflicting information!

The Re-Farmer

Our 2023 garden: summer squash, peppers and onions

Well, we have now planted as much as we can until we build the new trellis beds.

The first job was direct sowing summer squash. I forgot that we have 5 varieties. Which worked out well. There were four empty mounds from yesterday, so prepping another row of six mounds meant two for each type. Much less than we would normally plant per type, but this year we seem to be more about variety than individual quantity.

The last row will not be used this year, since it gets the most shade. Each mound got two are three seeds – all the seed packets are from previous years, and several of them had only five seeds left in them. With older seeds, we have to consider that some of them won’t germinate at all. The varieties we have are sunburst and G Star patty pans, yellow and green zucchini, and Magda.

Next, the grow bags were gathered and filled.

The low, black ones were “raised bed gardens” we got from the dollar store last year. The green ones I picked up from the dollar store this year, and they are really good! I folded them down to about half height. The fabric seems really strong, and they have sewn in handles that also seem really strong.

Four of two different varieties were planted in the wider black bags/beds. Two each of a third variety went into the green bags. They all got Red of Florence onions planted around them. These are Early Sunsation, Early Summer and Dragonfly.

The last five feed bags were filled, and each got one Cheyenne pepper in them, with more Red of Florence onions. The last bag got all onions.

We still have lots of each type of pepper (and you can see the one late germinating Spoon tomato!), which can be given way. I plan to continue to interplant the onions any chance I get. We started a lot of them, because we use a lot of onions, and ran out fairly quickly, last year.

Oh, I didn’t bother taking a photo, but I also planted a few beans. The row of green Lewis beans had a lot fewer come up than the yellow Custard beans. The gaps in the yellow beans are minor, but less than half the green beans either didn’t germinate, or didn’t grow well once they did (some have just stems left, as if the leaves just died off), so I planted more.

We have so many varieties of beans I hoped to plant this year, but at this point, my priority is to get a trellis bed built so that we can put in our melon transplants.

Thankfully, all of these are short season varieties, so we should still have plenty of growing season left for them. The pole beans, however might have to be skipped this year. We shall see.

A high priority over the next while will be to mulch around today’s transplants, and the summer squash mounds. That means cutting more grass and collecting the clippings!

It’s only the 10th of June today. We should still have time. Plus, it’s an El Niño year, which means we should have a warmer, wetter summer and fall, and a mild winter, too. Anything that extends our growing season, I will be thankful for!

The Re-Farmer

A bit behind…

I meant to have this video done and posted a while ago, but had some technical difficulties with my computer.

I don’t think my computer is much longer for this world!

Anyhow…

I did some time lapse video while direct sowing some greens and popcorn. I hope you like it. 😊

The Re-Farmer

Our 2023 garden: sowing carrots, beets, turnips and bush beans

I really need to give myself a break.

With the weather we’ve been having, I have been feeling really anxious about getting the garden in “in time”, when we physically don’t have places prepared for everything yet. I feel like I’m falling behind, and everything is being planted late.

Then I remind myself.

Today is May 29. Normally, I wouldn’t be transplanting or doing a lot of direct sowing until after June 2.

Still, with the weather forecast being what it is, the more we get in the ground now, the more time we’re adding to our short growing season.

I headed out shortly after 7am this morning, to beat the heat, and didn’t come back in until almost 11. It was already feeling too hot by 8am, but I stuck it out as long as I could. My main focus was to finish planting in the beds the tomatoes were transplanted into, and get something into the high raised bed.

I’m still bordering everything with the yellow onions. I decided to plant bush beans in the high raised bed. That will make harvesting so much easier on the back!!

There wasn’t a lot of space left in the low raised beds, though that is partly because of the boards protecting the tomatoes. Once those are removed, it will open things up.

In the bed on the far left, with the Indigo Blue Chocolate tomatoes, I sowed all the Gold Ball turnips in one half, and Merlin beets in the other. These were densely planted in many short rows, more Square Foot Gardening style. When we planted the Gold Ball turnips last year, something ate them pretty much as soon as they germinated. I’m hoping surrounding them with onions will help keep away whatever ate them – I never saw any hint of what it was. I had intended to put a floating row cover over the turnips to protect them, but the space is too narrow for that.

In the bed with the Black Beauty tomatoes, I planted one long row of Uzbek Golden carrots. There was only space for the one row, which I then covered with boards. I will check under the boards daily and remove them as soon as I see carrots sprouting.

Both beds got a thick mulch of grass clippings along the outside, next to the onion transplants. Aside form helping keep the soil cool and moist, and slow down the weeds that come up from under the log boarders, the grass will also help prevent soil runoff while watering. I’ve basically used the last of our grass clippings at this point. We haven’t been keeping up with the mowing, unfortunately. Not only are the dandelions now all going to see, but in a lot of places, so is the grass!

With the high raised bed, I planted the yellow Custard beans – a new variety for us – on the left in the photo, and the green Lewis beans – a variety we’ve grown before – on the right. At each end, I stuck in a few more onion transplants. By this point, only the smallest yellow onion transplants are left, and I was planting them a bit closer to each other than usual, but I was still left with may 10 little transplants left. They’re so small, I probably shouldn’t bother transplanting them, but I’m sure I’ll find someplace to shove them into the ground!

(As an aside, while working on all this, I was happy for a breeze that kept away the mosquitoes. It wasn’t enough to keep away what turned out to be horseflies! Thankfully, they didn’t seem interested in bighting me today. Just in dive bombing my head.)

The large low raised bed you can see on the right is still completely empty. I’m considering using it for the Roma tomatoes, which are growing much faster than expected – one bin in particular is has plants so big, if it weren’t for the labels, I’d have thought they were Black Beauties or Indigo Blues that were started so many weeks earlier! Why that one bin of Romas is so much larger than the others that were started at the same time is an interesting question. I was originally wanting to plant peppers in that bed, but the Roma tomatoes need transplanting more urgently. I wont’ be able to fit all of them in there, but if I can at least get the biggest ones transplanted, that would be a good thing.

Before heading in, I made sure to water the corn bed, too. There are corn seedlings popping up now! I’m quite happy to see them. I was afraid that, with the heat and minimal rain, they might not make it. Checking the raised box beds in the East yard, I was happy to be able to see more carrot seedlings showing their true leaves, without having to look close and wonder, are those seed leaves carrots, or a weed? It’ll still be a while before the carrots are strong enough that we can safely weed around them. Right now, weeding mostly involves removing the biggest leaves from the weeds, and pulling and dandelion flower buds, and being careful not to disturb any carrot roots.

I was thinking of doing more transplanting later today but, at this point, I think the mowing is a more urgent priority. Not just because of how overrun both the inner and outer yards are getting, but because I need the grass clippings!

I also want to get in and around the garden beds and where the squash will be planted with the weed wacker.

When I came in, my weather app said it was 23C/73F. I think it felt quite a bit warmer than that! We’re supposed to reach a high of 26C/79F, with chance of a 43% chance of thunderstorm at about 4pm. I suspect I will have no problem getting out and doing the weed whacking when it’s cooler.

For now, though, it’s time to stay inside, stay cool, and hydrate!

The Re-Farmer

Our 2023 garden: corn, peppers and thyme

I had to go to the nearest Walmart to get cat kibble this morning, and took advantage of the trip to get a few more little things. It was insanely busy with people. We’re coming up on a long weekend which, for many people, is the traditional time to put in their gardens. It’s also when a lot of people open up their cottages for the summer, so it was busy everywhere! All the garden centres and greenhouses are open now.

For us, today is 2 weeks to our last frost date. That means it’s time to sow our Montana Morado corn!

Which, of course, is never as simple as just putting things in the ground!

I chose to plant these in the low raised bed we grew summer squash in, last year. As with just about everything else, the squash did very poorly last year. It was, however, the bed that needed the least amount of work done on it before I could sow.

Not by much, mind you.

After removing the grass mulch from last year, I had a whole lot of weeds to dig out. Mostly crab grass. That stuff is brutal!

The entire bed got worked over with a garden fork to loosen the soil. Then I had to go back over it to pull out as many weeds and roots as I could. Aside from using the fork to loosen the soil even more to get the roots and rhizomes out, it was very handy to support myself as I worked. I also used a board across the bed to step on, so I wasn’t stepping directly on the soil.

We really need to get more high raised beds built. This was very hard on the back. I suppose it would have been easier if I could kneel down to work, but my knees are shot, so I’m bending from the waist, for the most part.

While working towards the north end of the bed, I started finding more tree roots, from the nearby trees that my mother allowed to grow in what used to be garden space.

More reason to get those high raised beds done!

When the weeding was done, I went to get the seeds and a rake to level the bed. I brought a container to pour the seeds into and see how many there were. There was supposed to be at least 75 seeds.

I counted 94!

Once the bed was leveled, I took the board I had to support my foot while weeding, and used it to mark off three long rows. I wanted to stay well away from the edges. The crab grass is the worst along there, as the roots make their way under the log edging. Then I used the handle end of the rake to punch holes along the rows every 6 inches or so. Typically, it’s recommended to plant 2 or 3 seeds every 12 inches, but I’m doing dense block planting. I also hate wasting seed, so I planted one seed every 6 or so inches. This should be good for pollinating, and if some of the seeds don’t germinate, the resulting gaps won’t be too large.

I lost a seed while planting, though, so there’s “only” 93 in. 😄

Everything was well watered, of course. I always water before putting the seeds in, then again once they’re done.

Once planted, I put a thick layer of grass clippings all around the edges. The ends don’t have logs to hold the soil in, so hopefully the grass clippings will help keep it in place, too. Mostly, it’s to try and keep the weeds from creeping in from the edges. Once that was done, I put a very light mulch of grass clippings over the planted area. Basically, I just shook bunches of grass and let the wind blow it on. I wanted enough clippings to protect the soil, but still keep it light enough that the corn won’t have any problem pushing through.

Once the corn is up, I will might interplant some bush beans in between the rows. Maybe. I did that with the kulli corn we planted last year, and they got huge, but never reached the point of producing cobs. I now think that there was too much nitrogen in the soil in that bed. High nitrogen leads to lots of plant growth, but can result in lower yield. Or, in our case, none at all. With how densely these are planted, though, interplanting with something like beans might be too much.

Once that was done, I decided to take a chance and do some transplanting.

The Sweet Chocolate peppers that were started back in February have gotten nice and big. Normally, I wouldn’t dare transplant them before our last frost date, but I’ve been eyeballing the forecasts and decided to take the chance. It was either plant them now, or pot them up. The German Winter thyme that was started at the same time were also quite ready to be planted.

While I was transplanting, I got my daughter to cut the tops and bottoms off of some distilled water jugs for me. Since my husband needs to use distilled water for his CPAP humidifier, we have lots of those! Hopefully, they will help protect the peppers during any cool nights. In this bed, they will be easy to use row covers if we get frost warnings, too.

I had three pots with thyme to transplant – a fourth one was transplanted into a pot to stay in the house. I don’t think they’ll need any protective covers unless we get actual frost.

Eventually, I want to plant the chamomile in here, though it’ll be a while before those are big enough to do that. The spearmint and oregano we started from seed are not doing well. I might buy oregano transplants, which would also go into this bed. Spearmint is not something I usually see in stores as transplants, so we might skip those this year and try again next year. The second variety of thyme we planted at the same time as the chamomile doesn’t seem to be doing as well as the German Winter thyme has. We’ll see how they do over the next couple of weeks.

Once again, while working in this bed, I was quite impressed by how moist the soil was under the wood chips. The mulch is really doing its job!

Oh, there was one thing about transplanting the peppers that has made for a learning experience.

We started the seeds in bio-gradable pots that are designed so that they can be transplanted directly into the soil, pot and all, with no root disturbance. When the peppers needed to be potted up, they went into the larger Red Solo cups that way – except for a couple that were thinned by transplanting.

When taking the peppers out of the cups, the ones that were still in those bio-degradable pots… were still in the bio-degradable pots! They were actually rootbound inside a pot within a pot. So when I transplanted them, I removed the shells of pots they were in. The pots were very soft and easy to break off, but hardly any roots had tried to grow into them.

I still have some of these pots and seed start trays. I’ll use them but, in the future, I think we’ll skip buying those. A bio-degradable pot isn’t much use if the roots can’t get through them after being potted up!

So this is now done. The first corn is planted, and the first peppers and herbs are transplanted.

The corn is meant to be planted at this time. I just hope I didn’t jump the gun with those peppers!

The Re-Farmer

Our 2023 Garden: poppies are in (video)

Well, I wasn’t able to get progress images of what my daughters did, but I did get to set up another time lapse video later on. I was able to reclaim the bed by the chain link fence and sow one variety of bread seed poppies.

Having the rake handle break on me while I was clearing outside of the chain link fence was a bit of a downer! We had others I could have used, but I just kept using it, anyhow. It got the job done!

Also, I had a lot of cats visiting me while I worked!

I hope you enjoy the video. 😊 If you select to watch it on YouTube, you can hit the like and subscribe buttons, if you wish.

The Re-Farmer

Our 2022 garden: survivor, and filling the gaps

Ever since I found that one giant pumpkin plant with a broken stem, I come out in my morning rounds, expecting it to be yellow and withering away.

Which is most certainly NOT happening! Even with an ant hill almost right up against it, that pumpkin is still green and growing!

How remarkably resilient!

This morning, I decided to fill in gaps by the sweet corn. There is no sign at all of the green bush beans that were planted along one side.

These are the beans I picked up to replace them; Stringless Green Pod. Odd to have a description instead of a variety name, but this brand does that a lot. At only 50-55 days to maturity, there is no issue at all with direct sowing this late. With the other beans we’ve planted, we’re still in the window of successive sowing for our area. There were also enough seeds to plant them on both sides of the sweet corn rows, which is what I’d intended with the seeds from last year we’d planted. There just wasn’t enough of them left to do both sides.

With all the water that got into this area, I’m actually a bit surprised we got as much corn sprouting as we did, but both the Latte and the Tom Thumb corn have plenty of seedlings. While planting the new beans, however, I could see the soil was crusting at the top.

Time for mulch.

I used roughly half of a 40 pound bag of stove pellets. The Tom Thumb corn got a slightly thicker layer of pellets, since there is nothing else planted with them. After the beans start coming up, we’ll see if more needs to be added there or not. The beans themselves are intended to act as a mulch for the corn, so it may not be needed.

Normally, after soaking down a layer of pellets, I’d use the back of a fan rake to spread the sawdust evenly. Not an option when added around seedlings like this. I gave them a good soak, then came back later and used different pressures of water to break up the pellet shapes and spread the sawdust out more. This should both help keep the soil from drying out and crusting on the surface, but also absorb and hold water if we get another deluge.

My next goal of the day is to do some mowing in parts of the outer yard. The area I did with the scythe can now be done with the push mower, and I want to at least clear along the sides of the driveway and in front of the chain link fence. My BIL and his family are coming out tomorrow evening, and it would be nice for them to have somewhere to park. :-D

I get to break in my new boots in the process. Not that they seem to need breaking in! My steel toed shoes have been falling apart for a while, but I have the hardest time finding footwear that fit my wide, messed up feet. I usually get a men’s size 9, triple wide, just to be able to get my feet in, but a lot of styles rub or pinch in the wrong places, because they’re made for the average man’s foot. My feet are shorter and wider than average. Just like the rest of me. ;-) The end result is that even if I find a pair that fits, the shoes bend with my feet in places they were not designed to bend. With the stress in the wrong parts of the shoe, they always end up cracking and splitting in the same places.

I wreck shoes rather quickly.

My husband, darling that he is, ordered a pair of work boots for me online. He chose a men’s size 9 1/2, triple wide, lace up boots with zippers on the inside, so they can be removed without undoing the laces.

They came in yesterday.

I was really not expecting much. I figured they would be too big, but there is no consistency in sizing at the best of times. Online shopping is much, much worse.

Much to my shock, not only did they fit, but they seem to fit perfectly! It actually feels bizarre to wear them. I’m just not used to this. Not only are they wide enough for my feet, but they’re not too long; there isn’t a huge empty space in front of my toes, like there usually is. They are even bending in the right spots as I walk!

There are only a couple of issues. The first is that I can’t lace them up all the way to the top, because of my over developed calves. Which is fine. I can’t even lace up my snow boots all the way, so I’m used to that.

The second issue involves the zipper area. There is a gusset under the zipper, and the top of it rubs against the skin of my leg. More on the left leg than the right, and to the point of considerable pain. I ended up stuffing my pantlegs into the top of the boot to stop it.

The solution to that is, I have to wear them with tall socks.

I never wear tall socks.

Usually I wear ankle socks. If I wear sport socks, I fold them down to the ankles, like Bobby socks. If they don’t get folded down, they fall down, anyhow. It’s those overdeveloped calves again.

Not much choice, though. If I don’t wear them, I’ll ended up bleeding.

So far, I’ve just been wearing them for normal walking around. We’ll see how they do with the constant walking while mowing the lawn. So far, the boots seem to be keeping the socks from falling down like they usually do.

Time to give them a real test!

The Re-Farmer

Our 2022 garden: kulli corn, yellow beans and garlic

Yes! Finally! Major transplanting was started today. :-)

The first thing I needed to finish was topping up the low raised bed they were going into.

Since the snow melted away, we’ve been adding our kitchen compost in the trench, which already had some straw in it, and I even tossed in the soil from various pots we had, from house plants that died, to seed starts from last year that didn’t germinate. The last layer before adding the soil was some fresh grass clippings.

This is the first time this pile of garden soil has been uncovered since last year.

So. Many. Thistles!

And those roots go all the way though the pile.

Which meant I had to bring the makeshift soil sifter into service, so get as many of the roots as possible out. It was long and tedious, but at least it was made a bit easier by scavenging a couple of scrap boards out of a pile to support the steel mesh, rather than the found branches I was using before. Sifting the soil had to be a gentle process, because there were SO many worms.

I kept the worms for the new bed. :-D

After the soil was added, stove pellets were scattered across the top and hydrated so act as a thin mulch. It won’t stop any weeds, but it will help keep the soil surface from compacting. After several soakings, the sawdust was spread evenly with the back of a fan rake.

It took a couple of hours, but I could finally transplant the kulli corn!

They had a major root system going! It made it difficult to get them out of the bins, then pull apart the tubes. The toilet paper really wanted to come apart!

With the larger bin, it was even more difficult to get them out, and the whole thing ended up falling out and apart. I think only one corn plant actually got broken, though. We’ll see if it makes it.

I counted the seedlings, then marked three rows of 20 evenly spaced spots for the corn. The actual total was 58, including some smaller ones that may or may not make it. We ordered 100 seeds, and there were extras, so we’re looking at roughly 50% germination rate. Which I don’t mind. We would have had trouble finding space for more. They are quite closely planted, as it is. Which should be good for improving pollination.

Of the remaining rolls, I broke apart the cardboard and rifled through it. No sign of the remaining seeds that did not germinate. The carboard went into the compost pile, while the remaining soil was used to top dress any seedlings that looked like they could use it.

I had also grabbed a bag of bush beans from last year, picking the one that looked like it had fewer seeds. That was the yellow “Golden Rod” variety. We still have some green bush beans left, too.

I counted the bean seeds and there was 38 – which was perfect! I could plant two rows of 19 beans, in between the corn.

As they are “old” seeds, I don’t expect 100% germination. This bed is very densely planted, but they should be complimentary.

The corn, however, needed to be protected. The question was, how?

I made a trip to the barn and dug out the T posts I spotted in one corner, a while back. There turned out to be 6 of them, all different lengths. :-/

I had to dig holes to be able to set them, using a garden trowel, since a spade would have been just too big. Within inches, I was hitting water, then rocks and gravel. After placing the posts and trying to push the soil back against them, there was literally water, shooting out from the ground, as I stomped on the soil!

We have no post pounder, so I found a heavy hammer to try and drive them deeper. Especially the longest one, but I think that one ended up hitting a rock. Being the short person that I am, for the taller once, I had to stand on the corners of the bed to reach. Even with a board across the corner to stand on, I was wobbling all over the place! LOL

Once they were in, I strung some twine around to further support the net, once it was added. That was a job that had to wait for when the girls were available.

In the two garlic beds, the nearer one had only 6 remaining garlic coming up – and one of those was barely there. I could find no sign of the few others that had emerged, as well.

I decided to transplant those 6 garlic into the other bed. That one has a lot more garlic trying to grow, but there was still plenty of space at one end to transplant the remaining 6 of the other variety.

The left a bed available for planting into, which we did end up doing.

The main challenge was, how do we cover the bed with netting, yet still be able to access the plants, easily, for weeding and eventual harvesting of yellow beans.

Piece of pool noodles were added to the tops of the posts, so they wouldn’t tear apart the net. When the one on the tallest post fell off, I left it. If it tears, it’ll only go down to the twine, and will actually line up better with the rest.

When I brought the T posts out of the barn, I also grabbed a stack of narrow pipes. I have no idea what they were for, or why they were stored there, but I figured the might make good supports. The short ends of the net are wrapped around those pipes and zip tied into place. For the long sides, we zip tied narrow fence posts we found… somewhere, to weigh down the netting. Any gaps were further secured with ground staples. If we want to tend the bed, we can remove the ground staples and lift the poles to get under the netting.

Hopefully, that will work out.

The corn can potentially grow to 8 ft tall, which is higher than the netting, but if they do get that tall, we’ll deal with it, then.

That was my big job for today, but it wasn’t the only one we got accomplished! I’ll write about that, in my next post. :-)

The Re-Farmer

Our 2022 garden: peas, carrots, turnips, onions

We got some gardening done! There was a break in the rain and we quickly headed out.

My daughter had the bigger job to get the peas in. We’ll be using the pea trellis we used for the purple peas last year, as we still need to do some work on the other trellis frames. The ground was prepped in the fall, but she had to work through it to pull weeds that were trying to reclaim the space, first.

Now it just needs to have some of the wood shavings, or maybe the stove pellets, added to protect the soil surface from crusting. It’s a light enough mulch that the seedlings won’t have trouble pushing through.

The edible pod pea packet turned out to have very few peas in it. Those are between the two labels on the front left side of the trellis. The rest has pod peas in sown. There are still some seeds left of those, which will probably be planted in with the corn.

This should be the last year this trellis, and the nearby beds, will likely be used for gardening. If all goes to plan, next spring, we’ll be planting food trees here. :-)

While she worked on that, I seeded the bed that was already prepped and mulched with the stove pellet sawdust.

My priority was to get more carrots planted, as they should have been started a while ago. I marked out short rows (making things more like square food gardening), as well as a perimeter line. I started with the Black Nebula carrots. The packet had a nice amount of seeds, and it filled about half the bed, which is about 14-15 ft long. Next, I planted the Uzbek Golden Carrots, which came as a freebie from Baker Creek. There were very few seeds in the freebie packet, and I was only able to plant 4 short rows. For the rest, I planted the Gold Ball turnip, which we got as a freebie from Heritage Harvest seeds, and the Purple Prince turnip at the far end of the bed. I still have some Purple Prince seeds left, but the others in the bed got used up.

We planted the last of our onions started from seed already, so for this bed I used the onion sets I picked up at the grocery store as back ups. I got two boxes of yellow onions – no variety name is on the box – and it took almost all of them to fill the perimeter at 3-4 inches apart. The bed got hosed down to settle the soil over the seeds and onion sets, then support posts were hammered into the ground to hold the netting, after cord is strung through the holes in the posts, and crisscrossed over the middle. This bed will not be getting anything else added to it, so it can be covered sooner rather than later. The other beds have room for transplants in their middles, so they will get their net covering once that is done.

In planting the onions, I naturally was able to grab the biggest sets, since they tended to be on top, so when the bed was completely surrounded by onion, I had a pile of tiny onion sets left behind.

Well, we can’t let those go to waste!

They went into the retaining wall blocks. Two already have shallots in them. After pulling weeds and roots from the empty blocks (the others that look empty had mint transplanted into them in the fall) and adding the wood shavings, I had 6 blocks ready. I was able to fill 5 of them; 4 with 4 onions each, and one with only 3. That one block at the side is still empty. There is a matching block at the other end that doesn’t have anything planted in it, but it looks like it has chives coming through!

We have one box of red union sets left. Depending on where they end up being planted, if we have any left over, I’ll be finding space of them here, too.

The bunching onions planted in the bed along the retaining wall are still looking wimpy after transplanting. Hopefully, all these onions will make things too stinky for the grogs to want to go after the lettuce and beets. A groundhog could easily tear through the net, if it really wanted to. It’s going to be the big garden area that will be the most difficult to protect, however.

~~~pause for real world interruption~~~

My older daughter and I just finished bringing the transplants in. We have so many strong, healthy tomatoes! It’s going to be a challenge to plant them all, since they’ll mostly be going into new beds. Maybe that’s where those grow bags and fabric raised beds will be the most useful!

We’ve got our work cut out for us, but I don’t know how much I’ll be able to do tomorrow, as I’ll be heading to my mother’s to help her run errands. She is suddenly taking her back no longer hurts – I guess it took that long for the meds to have their effect, but she still says that when she takes them, they do nothing. She feels up to going out for her errands, though. She has her telephone doctor’s appointment, so I will probably go over there early enough to be there for her appointment, in case she needs things explained to her.

The question for me will be, can her car make it through that one muddy spot on the road? I might have to take the van, even if my mother will need a stool to get in and out!

The Re-Farmer