First up, some good news in progress that made it worth being up way too late again.
At around midnight, I was contacted by someone from the new rescue. Some spaces are opening up, and she was wondering what friendly yard cats might be available to take in for fostering and adoption?
She had a few in mind from pictures I’d sent before, but requested more up to date photos and videos that she could show to potential fosters. My daughter and I did that while doing the morning cat feeding. Unfortunately, a couple of times when I thought I was taking video, it turned out it wasn’t recording. Instead, I had a second or two of video of our feet or whatever, taken at either end of what was supposed to be a video for the rescue! We have a whole bunch of adult males in particular that are so friendly, it’s almost impossible to get still shots of them, as they are all over each other, trying to get pets.
So I will have to try again later today. If all goes well, we might be able to have our tiny girls that are friendly, but still too small to spay (even though they are almost a year old) be taken in. Or Sir Robin. Sir Robin desperately wants to be an indoor cat! I haven’t even seen some of the adult feral females in a few days which, unfortunately, means they may well have just had kittens somewhere in their hidden places.
Tis the season.
Speaking of the season, here is how our seedlings are looking.
Two snail rolls have graduated to the upper level and are now under the shop light, giving them a few more inches of space that I couldn’t give them with the gooseneck light fixture they were under.
The Golden Boy celery is thriving since being “potted up” to the snail roll! That poor little luffa is getting its true leaves, but is looking pretty sickly. The summer savoury is looking very leggy and weak, but the tarragon – the very few there are – are looking stronger.
The second picture is of the eggplant and peppers tray. Those seedlings are looking very sad and weak, and there are so few surviving. I’ve already resown them, but I won’t try again. They are short season enough that I might try direct sowing, instead.
With how few there are, I’m seriously considering “potting them up” into a snail roll. I could easily fit them all into a single roll, with room to spare. I’m just not sure how well they’d handle being transplanted. It can’t be much worse than they are doing now.
In the first picture, you can see quite a few more of the hollyhocks now. There are still two or three seedlings disguised as vermiculite in there.
In the next picture, you can see a second Orange Currant tomato is up – plus there’s another elbowing its way up that I didn’t even see until I looked at the photo, later.
It’s the same in the next picture. I could see one Manitoba tomato had emerged, but looking closely in the photo, I can see the stem of another, pushing it’s way up.
Still no sign of anything in the Chocolate Stripes or Blueberry tomatoes, and still no Florence Fennel visible.
All in good time.
Tomorrow is the last business day of the month – payday – so we are expecting to do our Costco stock up trip in the city. I’ll see what they have for seed starting mix. I only got one bag and it’s pretty small. I might only get four seed snails out of it. I won’t be starting more seeds for a couple more weeks, but I will probably be starting more. Costco carries the big Pro Mix bags, which would last me for the rest of the seed starting season. I might have to sift it before using it. I haven’t heard people talking about needing to do that with their seed starting mixed this year at all, though, so it might not be an issue. I might need to get more potting soil, too. I still have some but, with so much material getting sifted out, I don’t have as much potting soil as it appears in the bag! Any time I pot something up, I would be using potting soil rather than seed starting mix.
We really need a better set up for starting seeds indoors.
I did a lot of prep in advance. I had enough bubble warp to make the eight snail rolls that I needed, so I went with that, this time. The bubble wrap has perforations to make 12″ square sheets. I made strips 3 sheets long, then cut them in half, giving me strips that were 3′ long and 6″ wide, using clear packing tape for where I needed to join pieces together. I saved the masking tape for holding the rolls together, labelling half the strips I needed in advance.
Then I used hot water to moisten the seed starting mix. I had a bit left over from last time, plus added the new bag I got. No sifting needed! It took almost a gallon of water to get it sufficiently damp! I also set up a heat mat and a plastic tray under the shelf the seedlings are on, to hold the rolls.
Once everything was set up, it was time to make the seed snails and plant some seeds.
I had a bit of a surprise with the tomato seeds. Specifically the seed counts. I always empty the packet of what I’m working on into a bowl to make it easier to grab the seeds, one at a time – usually with the tip of a damp bamboo chopstick for small seeds. The Orange Currant packet said 25 seeds, but there were only 18. I normally would have planted about a dozen seeds and saved the rest; I chose varieties with growing seasons short enough that I could try again if germination or survival rates were low. I ended up using the entire packet.
The Blue Berries tomato had a seed count of 10, but there was only 9. I even double checked the packet to make sure nothing was stuck inside. Not a bit deal.
The other two varieties, meanwhile, had more than what the packet’s seed count said. I planted a dozen seeds each of those and have some left over if I need to try again.
I’m not complaining about the seed count. MI Gardener even did a video on Instagram, I think, talking about why they do see counts instead of weights, and that they always try to have over counts, but mistakes sometimes happen. Their seed packets are only $2 each, so I’m really not worried about it.
The strips I made for the seed rolls were all quite a bit longer than needed. This is deliberate. It gives me enough slack that I can “pot up” the tomatoes more than once, as the seedlings get bigger.
With the Florence Fennel, I made that roll bigger because I wanted to plant quite a bit more. Those can also be succession sown. We don’t normally buy bulb fennel, even though we enjoy it, because it’s one of those “treat” vegetables, rather than a staple. Hopefully, we will have lots to enjoy. I’ve tried growing them once before in the old kitchen garden and they were mostly a fail (the leaves could be used, but we never got bulbs). We didn’t realize, at the time, just how much the ornamental crab apple trees shaded everything. That’s been largely dealt with but, this year, I’ll be sure to set them where they will get more light!
With the flowers, I plan to direct sow some of the left over seeds later on, to extend the blooming season. They are going to be scattered all over the garden areas, rather than into dedicated flower beds.
I’m a little perplexed, though. I had wanted to start some of the aster seeds I saved from a packet of memorial seeds. I distinctly remember labelling a paper seed envelop (from some of the free ones we got with our seed orders) for them, as well as one for the asparagus seeds I’d collected. Now, I can’t find either. The other seeds I’d collected were larger so they went into little spice jars. I have those. They all should have been together in my seed storage bin, and I just can’t find them anymore!
I really want to plant those memorial asters again.
But I digress…
Once I got all the seed rolls done – which used up all the seed starting mix I had! – I topped them with a bit of vermiculite. Even the hollyhock, which the packet said not to cover. I just dusted a bit for the benefit of the seed starting mix surface; not enough to actually cover the seeds. After that, they all got a thorough misting.
The first was the tray they were in. All those rolls were heavy enough I had to be very careful not to break the tray when moving it.
Then there was the problem of light.
Once they were under the shelf and on the heat mat, I tried to set up one of the full spectrum lights I have. Unfortunately, the only place I can clamp the fixture onto is the edge of the table, and the lights didn’t quite reach under the shelf. I had to pull everything out and set things up closer to the edge, which I had hoped to avoid doing. It leaves me very little work space on my table.
I was just finishing up when my daughter came down to see how I was doing (she’s been taking over the outside cat feeding of late, letting me sleep in in the mornings, and get jobs like this done). I took advantage of her and got her to help me transfer the seed rolls out of the plastic tray and onto one of the metal baking sheets I had been using to hold seedlings in the Red Solo Cups. They are too wide to go under shelf were I’d originally intended the tray to be, which is why I hadn’t used one in the first place. In the second picture, you can see how it’s now set up, on a strong and sturdy metal tray over the heat mat and with the lights.
I had not intended to do so many seed snails but, for this year, they are the most practical way to do it, and they really do save a lot of space.
The next group of seeds that will need to be started are in the 4-6 weeks before last frost category. I’ll do those around the middle of April or a bit later. More than enough time to get more seed starting mix.
Hopefully, we’ll have a good germination rate – and the mouse or whatever that ate my pepper seedlings won’t like anything growing here!
First up, this is my first order from West Coast Seeds, a Canadian seed source that comes highly recommended. I used the Gardening in Canada affiliate link, so Ashley gets a cut. I gain so much from her videos, it’s my little bit to support her.
The other reason I wanted to order from here is because of my current seed starts. When I turned the light on over the trays in the basement, I decided to check on my luffa. Of the four pre-germinated seed, only one has emerged and it still just as seed leaved.
Yes, I dug around to check the others.
With the first one, I started off gently moving the seed starting mix aside, but there was nothing. In the end, I was digging around aggressively, and there was no sign of a seed. Which means it rotted away. The remaining two seeds, I did find when I initially, very gently, most the seed starting mix aside, stopping as soon as I touched a seed. There is no side of growth, though.
It may be that, even on the heat mat, the basement – and, therefore, the seed starting mix – it just too cold.
These seeds were ones I got from MI Gardener and have a days to maturity of 120. Thanks to Gardening in Canada, I learned that West Coast Seeds has a variety of luffa that needs only 55 days to maturity! I could actually direct sow those and get luffa!
Of course, I can’t just order a single pack of seeds, so I went looking.
This is what I ended up getting.
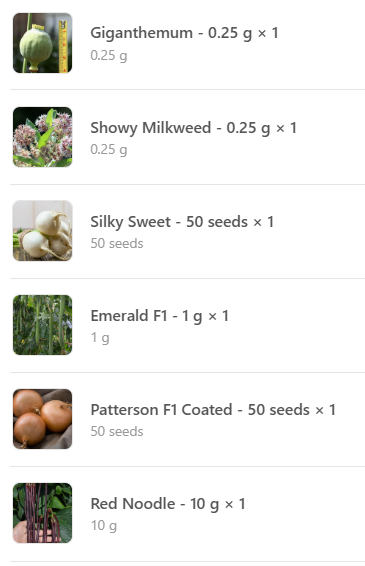
From the top (all links will open in a new tab):
Giganthemum: This is something that Ashley from Gardening in Canada had in her recent seed haul video. Yes, I already have bread seed poppies. This variety, however, is supposed to get seed heads as large as a baseball! It has edible seeds, which is the main reason for ordering them. I have a space selected to grow bread seed poppies as a perennial, where I will allow them to re-seed themselves. What I will probably do is find another such location, in another part of the yard, and grow both varieties.
Showy Milkweed: this is the main variety of milkweed for Monarch butterfly conservation efforts. I’ve got an orange variety of milkweed that I have not been successful with. Hopefully, we’ll be able to get this variety established as part of our efforts to attract more pollinators.
Silky Sweet turnip: I already have some white turnips winter sown. I chose this variety because it just sounded like it would be really tasty. It matures in only 35 days and is a cool weather crop, so this can be succession sown throughout the spring, and again in the late summer/fall, if we want.
Emerald F1: This is the luffa gourd that matures in only 55 days! It’s listed as a dual purpose gourd, as the immature gourds can be eaten, but I think that’s true of all luffa varieties. We might try eating some, but that I want are those sponges!
Patterson F1 onion: Okay, yes, I have my own saved onion seed, plus red bunching onions and red bulb onions started. My saved seed is a mix of red and yellow bulb onions. I chose these because I wanted to be sure of yellow onions, and they are described as being exceptional storage onions. Unless I start them as soon as they arrive, though, these will be for next year.
Red Noodle bean: I couldn’t help it. I just really, really want to successfully grow the red noodle bean at least once! When I tried to grow them last year, I had an amazing germination rate, the seedlings exploded into growth, got to about 6-8 inches tall, and then stopped. They never got any bigger, and I don’t know why. I can make guesses, considering the horrible growing conditions we had last year, but they are still just guesses. I have quite a variety of bean seeds, both bush beans and pole beans, as well as varieties for drying, so we will have lots of choices, once the soil warms up enough for direct sowing.
There we have it. My first West Coast Seeds order.
Oh, my goodness! I just checked my Amazon tracking. My chicken coop and my lights and seed mats have arrived!
If I leave right now, I can get there before the post office closes for 2 1/2 hours over lunch.
A couple of days ago, on checking the seeds I’ve set to pre-germinate, it looked like some were just starting to show radicals. Nothing ready, but it seemed they soon would be.
So I grabbed one of my deep celled trays and prepared it in advance. These trays have 21 cells, and I’m looking to have 1 row of each of the seeds I have pre-germinating right now. The seed starting mix in the cells are all pre-moistened, ready and waiting.
When I tried pre-germinating seeds last year, I let them sit for probably too long. Their roots started to go into the damp paper towels and had to be very carefully pulled free. From what I’ve been seeing online, they really should be potted as soon as the radicals appear.
So that’s what I’ve already done with the luffa.
Yesterday, that first seed I saw that looked like it was starting to show its radical – a Caspar Eggplant – had started to germinate. Just the one. So I planted it into a prepared cell, then topped it with vermiculite, partly so I could easily tell which cell has a seed planted in it.
Today, I found another eggplant, plus some Sweet Chocolate peppers.
I would prefer to have these on another heat mat, but I only have one. The light fixture above them, however, does put off some heat. With smaller seeds closer to the surface like these, it will actually be enough to affect them.
I did have to raise the light fixture another inch to fit the large celled tray under it, but that should be okay. I’ll keep transferring seeds over as they germinate. With these larger cells, I should be able to avoid potting them up for some time, if at all.
As long as the pre-germinated seeds survive the transfer, I should have 7 plants each by using this tray. If I’d been using the Red Solo cups, I can fit 9 cups in each of the bins I have to hold them, so that’s what I would have been shooting for as a total. Seven should be enough, and I am not expecting 100% germination rates, nor 100% transfer survival rates.
Today, I finally got around to starting our onion seeds.
Usually, I start onions by densely sowing them in trays. Onion roots can handle quite a bit of abuse. When it’s time to transplant, I just pull them apart as I go. The problem with that, is, the roots do get pretty tangled together, and there have been times when I’ve even had to use water to wash away the growing medium in order to get individual seedlings out.
This time, I wanted to try something different.
I’ve been seeing the “seed snail” method that got me curious. Basically, seed starting mix it laid out on a strip of something – plastic, cardboard, paper towel, etc. – and rolled up. Seeds are planted at depth at the top, covered with more seed starting mix, and it’s done. When it’s time to transplant, the roll is undone and there is less root disturbance when accessing the plants. If the plants need to be “potted up”, it can be unrolled, more starting mix added, then rolled back up again.
In looking it up more, I see people using this method for pretty much everything, including things with very large seeds that grow pretty big. I’m not so sure the method lives up to the hype for larger things in particular, but something like onions? It seems perfect.
The thing that I was most curious about was, the material used to make the roll. One article I read, which was not positive towards the method, used paper towel. I can’t imagine using something that practically dissolves in water, over time! Others described using heavy paper or cardboard. I don’t really have anything like that, in the size and shape needed. I’ve also found that using paper products tends to wick moisture out of the growing medium, away from the plants, and need more watering. Even with the biodegradable pots, I’ve found the pots themselves need to be kept wet, or they start drawing moisture away from the plants.
One thing mentioned as working well was the thin foam sheets used to wrap breakables for packing.
Did I still have some?
I quick look in a storage bin in the root cellar, and I found I had plenty!
So that’s what I used.
Before I started on that, though, I prepped the last of my seed starting mix from last year. It had quite a lot of pieces of wood and such, which would be more of a problem with a seed snail. I wanted to sift it, but didn’t have a sifter. In the end, I used a metal colander with finer holes all over, and sifted it into a giant mixing bowl.
I got quite a bit of larger material out. I also had some concern that I might not have enough sifted started mix for the project.
I had four seed options. There were our own saved seed, which is a mix of red and yellow bulb onions. Then there were the seeds I got from MI Gardener. Red Long of Tropea, which are very much like the Tropeana Longa onions we’ve successfully grown before. Red Wethersfield, which we tried but did NOT successfully grow before, and Red Beard Bunching onion.
I was at first thinking to do the bunching onions later, but they are 110 days to maturity, while the other two are 100 days to maturity, so I prepped four strips. I taped shorter pieced together for the length, then folded and cut them in half lengthwise. That resulted in two strips of about 31 inches, and two of about 29 inches long, and about 6″ wide.
That sifted seed starting mix was absolutely beautiful to work with! So soft and fluffy!
Each strip got a layer of starting mix about a quarter inch thick, laid out right to the edge of one end and the bottom. The top had about an inch empty, and the other end had about 8″ empty. I had my work surface covered with a repurposed clear garbage bag, which actually made it easier to roll them up. I could lift the plastic up against the base of the snail, to keep starter mix from falling out.
I prepped masking tape ahead of time. Four were labelled. After rolling up the snails, I used a black piece of tape to hold it together near the bottom, before tucking it into a bin. After they were all rolled, I sowed the seeds and added the labelled strips of tape to hold it together near the tops.
In the first picture here, the seeds are sown, more seed starting mix was set on top and every so gently tamped down to get rid of any air gaps. In the next picture, they’ve been topped with vermiculate.
Once topped with vermiculate, they got a very thorough watering with a spray bottle, then more water was added to the bottom of the bin they’re in, so they can be watered through capillary action, too. Last of all, the bin’s lid was laid on top to act as a moisture dome.
This was all done in our basement dungeon. I don’t have any of the grow lights, the heat mat, trays, etc. ready. I won’t need them for quite some time yet. So these went upstairs to the cat free zone (aka: the living room). It’s not particularly warm there, but warm enough. Plus, the window gets full sun only for a few hours in the morning, so we have supplementary light above.
It should be interesting to see how this method works out.
In the past, when densely sowing seeds in trays, I would usually finish off the package. This time, there are seeds left in all three packets – plus there is lots of our saved seed. So there is the possibility of trying again, if this doesn’t work, as long as they get started early enough.
Anyhow. The main thing for now is, the onion seeds are started!
Okay, so we’ve gone over the winter sowing, then the very disappointing transplanting. How, we get into the direct sowing.
For direct sowing, we did summer squash, pumpkin, pole beans, bush beans, carrots, peas, corn, sunflowers and, to fill in space after losses, Fordhook Giant Swiss Chard. We also planted potatoes and, for a second try, flowers (which I covered a bit in my last post).
Sunflowers, Pumpkin, Corn, Beans and Chard
The pole beans we planted were the Red Noodle beans, in the same bed as the Hopi Black Dye sunflowers. This bed also had seed onions from last year, plus the oodles of tiny self seeded onions I found and transplanted in between the seed onions while preparing the bed.
The Red Noodle Beans germinated and started growing really quickly. I’d planted them along the trellis side of what will eventually be a trellis tunnel. They came up so fast, I rushed to put trellis netting up, even though the structure had only the vertical supports up.
I could have saved the effort. That initial growth spurt was it. They never got any bigger that what you can see in the above slide show. I had a few spare bean seeds left and ended up planting them in gaps between some sugar snap peas. Those stagnated just as much, in a completely different bed.
*sigh*
The Hopi Black Dye sunflowers, however, were a pleasant surprise. It took a long time, but they did finally germinate. They, too, stagnated and took a long time before they started blooming. Some had a single head, while other developed seed heads at almost every leaf junction.
In the same bed as the Red Noodle Beans and sunflowers, I planted the free pumpkin seeds that are given away at the grocery store in my mother’s town. This year, their packets (they limit one per person) had five seeds in it. Last year, they packets had three seeds.
There was no variety name given, but the town encourages people to grow the seeds and enter their pumpkins in their pumpkin fest, from which they later save seeds to give out for free the next year.
I planted them in protective collars, in between the self seeded onions and tomatoes I found in the bed.
The pumpkins where the last thing I direct sowed this year. All of them germinated, and the plants were all some of the healthiest squash we got. They actually came up faster than the sunflowers. When one of them started to develop a pumpkin, I trained that vine up the trellis netting – by then, it was obvious no beans would be climbing it.
These vines were very resilient. Even after they seemed to be completely killed off by frost, but we still had warmer days after, they started to grew new leaves and even started to try and bud!
At least we got one pumpkin out of it, with five plants. Last year, we had three plants, and got five pumpkins.
We got three. One of them got eaten by a deer. It recovered, though.
Despite this, those three little plants actually did start producing! We got a remarkable amount of beans from then, considering how spindly they were!
That did leave me with a lot of open space, and I was out of bean seeds, so I tried planting Swiss Chard.
All I can say about those is, they germinated. Quite a few of them, actually. None of which grew beyond their seed leaves.
*sigh*
I hadn’t planned on it, but I also planted some yellow Custard beans. These were from old seeds that I had, and they went in between rows of corn and between tomatoes.
The bush beans were included in these beds partly for their nitrogen fixing qualities. Corn is a heavy nitrogen feeder.
I planted Orchard Baby corn, which is a short season variety. I got three rows of corn with two rows of beans in between them. The tomatoes got a few beans planted down the middle of the bed, plus one went into a gap between tomato varieties.
I had extra corn seeds, so those got planted around the Arikara squash, nearby.
Most of the beans didn’t germinate at all. Only two or three made it. I wasn’t surprised by that, as these seeds were a few years old, so I replanted them. Eventually, pretty much all of the beans did germinate, as did the corn in that bed.
The corn with the Arikara squash, however, did much better! They germinated faster, grew faster and produced cobs faster.
As for the yellow Custard beans, they did eventually start to bloom and we even had beans to harvest, but the plants never grew even close to their full size or production. The ones planted among the tomatoes had a 100% germination rate, though one got dug up by a cat later on. They, too, struggled to grow, bloom and produce. We did, however, get yellow beans to harvest, later in the season.
Summer Squash and Potatoes
With the winter sown summer squash bed a complete fail, plus the small section of winter sown root vegetable mix by the garlic rolled on by cats, we had some open space to work with.
The winter sown summer squash bed became our potato bed.
While cleaned up the bed and digging a trench for the potatoes, I did find a couple of squash seeds but, overall, they seemed to have completely disappeared.
The potatoes we’d bought earlier and started chitting in the basement all failed. They started to grow shoots while in the basement, but I think it was too cold in there for them to do well. Once inside the portable greenhouse, however, they didn’t go any better – and then they got knocked over when the wind almost blew away the greenhouse, knocked over by cats and basically cooked in the heat of the greenhouse.
I got more seed potatoes. Those were chitted in the greenhouse, and did not get cooked.
With the cats seeing all freshly turned soil as an invitation, we made sure to put netting over the potatoes, right from the start. Over time, they got mulched, then mulched again.
I had to hand pollinate them, as the male and female flowers bloomed out of sink.
Only one white scallop squash survived, and that was set back even more than the zucchini. In the end, we got only one scallop squash to harvest.
It was very disappointing, but at least we got something, before the frosts killed them.
Peas and Carrots
The peas were among the first things we planted, and we had two varieties. Sugar Snap peas and Super Sugar Snap peas. We also had two varieties of carrots. The Uzbek Golden carrots were also in our winter sown mixes, plus we tried Atomic Red carrots this year.
The peas were already germinating when the carrots were planted. I’d already set boards out, which protected the carrots until they germinated, and then were used to keep the soil from eroding while watering, as this bed has no walls.
The peas were probably the best we’ve ever grown, even though they did not reach their full potential with the heat, drought and smoke.
There weren’t a lot of pods to harvest, but I could at least snack on them while doing my morning rounds – until the deer got at them.
*sigh*
The carrots were both successful and not successful. There was good germination, and we eventually did a fair bit of thinning by harvesting. Few got very big, though. At the end of the season, when it was time to harvest everything and prep the bed for next year, there were quite a lot of carrots.
Little carrots.
But will, we had something! In fact, once we concluded that we like the Super Sugar Snap peas more than the Sugar Snap peas, I was able to leave pods on select plants specifically for seed saving.
Flowers
I already covered this quite a bit in my last post, but we did direct sow flowers this year. The winter sown bed got destroyed, so we started over.
In the second photo of the above photo, you can see that cats were not the only problem we had, trying to protect the winter sown flowers. The wind completely destroyed the cover we put over them.
I found more Dwarf Jewel nasturtiums to try again. I also found some mixed Cosmos seeds, and decided to plant the memorial Crego Mixed Colors aster seeds I had.
My mother used to grow Cosmos, so I knew they could grew here. We also have wild asters growing, but not domestic ones, so I wasn’t sure on those. Nasturtiums are completely new.
The bed got protective netting as soon as it was planted.
They took so very long to germinate. The asters, longest of all.
The nasturtiums bloomed and we were able to collect seeds, but they were much smaller than they should have been. The Cosmos eventually got big and bushy, but by the time the started to bloom, it was late in the season and they were killed off by frost long before they could go to seed.
The asters were what I wanted to go to see the most, as they are in memory of an old friend. Thankfully, the Cosmos protected them from frost, and I did manage to collect seed.
Final thoughts.
This was a very rough year in the garden. It made me so very glad we had the winter sown beds! Much of what we planted, however, is stuff we will continue to plant. One really bad year is not going to stop that. Locations and varieties may change, but the staples will always be there.
Beans: as disappointing as this year was, beans are a staple crop and we will be growing them again; both pole and bush beans, to extend the season. By the time bush beans are no longer producing as much, the pole beans are ready for harvesting.
At least, that’s how it normally works.
I really want to grow red noodle beans again. They are supposed to do well in our climate zone. There’s only so much I can blame on the drought and heat, or even the smoke. Maybe not next year, though. I also want to grow beans for drying, but that will depend on space.
Corn: These were also disappointing this year, but I do plan to grow more next year. I’ve got way too many varieties of corn seeds, but I have more Yukon Chief, which is a super short season variety we’ve grown before, that I will be planting next year. I’m also going to be growing a sweet corn that matures later, so they can actually be planted close together and cross pollination should not be an issue. Corn is a heavy feeder and you don’t get a lot for the space they take up, but I just really like corn!
Sunflowers: I’ve got the saved seed from this year, and I’ll be trying those, next year. Each year we do that, the variety will get more acclimated to our area. At some point, we might even have enough to use the Hopi Black Dye sunflowers as a dye! At some point, I want to try the giant varieties again (like the Mongolian Giant we winter sowed, but everything in that bed failed), but probably not next year.
Chard: I’ve already got a new variety of those winter sown with our garlic. I might try others, both old and new varieties, with direct sowing early in the spring, but I’m quite blown away by how the ones I did direct sow never got past the seed leaf stage. Not sure what to make of that.
Pumpkin: we have a new variety of pumpkin seeds to try next year, which I will probably start indoors first. It’s the seeds we get locally that do amazing when direct sown, so I’ll likely get more of those next spring, too.
Summer Squash: Once again, we have new varieties to try. I might start them indoors again, too. Direct sowing just doesn’t seem to work well. I know my mother used to direct sow zucchini when she gardened here, but that was a long time ago, and the soil and growing conditions have changed quite a bit.
Peas: we already have some dwarf peas winter sown in the kitchen garden. I’ve got another new variety waiting to be planted in the spring, plus we have our saved Super Sugar Snap peas to plant next year. I’ve just got to figure out how to protect them from the deer!
Carrots: I’ve already got a rainbow mix of carrots, winter sown. Hopefully, they will do better, size wise, than this year’s did. I still have other varieties of carrot seeds, including saved Uzbek Golden carrot, which we quite like. I’ll probably direct sow some in the spring. It will, once again, depend on space available.
Potatoes: I’m still surprised by the potatoes that never bloomed. Of course, potatoes are a staple crop, so we’ll be planting them again. In digging them up to harvest them, and to clean up the bed in the fall, I found a LOT of tree roots had grown into the bed, which may have contributed to the problem.
We’ve got to do something about those trees!
For now, the amount of potatoes we grow is nowhere near enough to last us through a winter, but we’re still looking to find varieties that both grow well here, and that we like. In the future, as we reclaim lost garden spaces and continue to expand, the goal is to plant many more potatoes to store in the root cellar.
Flowers: Of course, I’ll be planting the saved memorial aster seeds, plus some dropped seed might come up on their own. We have new Cosmos varieties, Bachelor’s button, saved nasturtiums, and other flower seeds to plant. It’s more about deciding where to plant them, as some were specifically chosen so that they can self seed and be treated as perennials. Over time, we plan on having areas filled with wild flowers all over, to both attract pollinators and deter deer.
Well, if you’ve managed to slog your way through all that, congratulations! And thank you for taking the time! If you have any thoughts or feedback, please feel free to leave a comment.
While I tried to include quite a few images with this, since I’m posting images almost exclusively on Instagram (I’ve used up almost all the storage space that comes with my WP plan), it’s a bit messed up. So, if you want to get a better look at things, here are the garden tour videos I did in June and July.
I sounded so hopeful in June.
Not so much by the end of July!
Ah, well. It is what it is!
In my next post, I’ll be analyzing our perennial and food forest stuff, and then one last post in the series with an overall analysis, and what we’re planning on for next year.
We’ve got a lot of work ahead of us, that’s for sure!
I definitely want to start with the good news, before getting into the gardening stuff.
As I was putting things away in the sun room, I saw a cat in the cat cage jump out and meow a greeting. Nothing unusual about that, except that this cat had something around its neck that was flapping.
We had put collars on the cats that got fixed, to make them faster to identify, but I also made sure they were reflective collars, so they would be less likely to get hit by a car or something. Most of the cats lost their collars long ago. Judgement had lost one or two already, but he still had a ratty yellow collar still on him.
I took it off and threw it away!
Now I’m hoping to see Syndol back, too! It’s not unusual for cats to disappear for the summer, then come back for the winters, but sometimes they don’t come back at all. So this was a nice surprise for the day.
My priority for today was to finish what I started in the old kitchen garden. The rectangular bed in particular needed a bit more work. I was able to pull more weeds and roots I could no longer see when I stopped last night. I also found the gap under one log was quite a bit larger than the hole the cats had made, so I found more sticks to push in front of it. The gap extended all the way to the corner, though, so I used the scrap board I’d been using when hammering stakes into the ground to lay across the opening on the inside, then added a few more sticks to hold it in place.
Then I could use the rake to level all the soil again.
The section of the wattle weave bed I’d prepped yesterday needed some clean up again. I kept having to chase cats out of the garden beds because they kept wanting to use the nice, soft, fluffy soil as a litter box!
After levelling the soil in the rectangular bed, I marked out four rows with stakes and twine. This required repeated removal of kittens. In the second picture, you can see what I planted and transplanted. In the row north of centre, I planted the mixed beets, so they wouldn’t overshadow the Hedou Tiny bok choi I sowed on in the row south of centre. The bok choi can get quite tall, after it has bolted and gone to seed, but for harvesting, they should only be about 2 or 3 inches tall. I do plan to leave one or two to go to seed to collect at the end of the season.
In the outside rows, I transplanted a whole bunch of the onions I’d been finding. On one side, I transplanted the ones that were clearly bulb onions. On the other, I transplanted the ones that look like they might be white bunching onions, except I’ve never tried to grow white bunching onions before.
In the next picture, you can see where I planted one packet of dwarf peas. I got two packets, but this is a very short row, so I only needed the one. The peas went in the back of the bed (north side). I’d already transplanted some onions at the end and at the front near the corner before. Today, I took the two garlic bulbs I’d found, broke up the cloves, and planted them in line with the onions. They filled the entire remaining front space.
Once everything was in, it all got mulched with leaves. Then I mulched around the herbs in the tiny bed as well. I didn’t cover them, as we’re still using them as needed. Before the hard freeze hits, I’ll cover them completely with a leaf mulch, and we’ll see how they survive the winter!
I also moved the raised bed cover over the rectangular bed for the winter.
I didn’t take final pictures, though, as I decided to take garden tour video, instead. I’ll be going through them and putting together a garden tour video. If I’m satisfied with what I took. Otherwise, I might take new recordings tomorrow, before I head into the city for the Costco shop. We’ll see.
At this point, the only bed I was considering winter sowing into is the small bed off to the side where the Albion Everbearing strawberries had been last year. It still needs to be cleaned up, and I plan to sow bread seed poppies there. That can wait until spring, though, if necessary.
As it stands now, other than mulching the transplanted strawberries and little things like that, the garden can be done for the year. The winter sowing is in, and anything left can wait until spring if I can’t get to it in the next while. We’re getting a bit of rain right now, and the next couple of days are supposed to be dry and cooler, but Sunday and Monday are supposed to get warm again, with plenty of sun, so there’s still the possibility of getting ahead of things for next year.
So, to recap, we have winter sown for next year:
Purple savoy cabbage White and Purple Vienna Kohlrabi Daikon Radish White Egg turnip Rainbow Mix carrots Spring Blush peas American spinach Yellow Swiss Chard Garlic Hedou Tiny bok choi Assorted Mix beets Tom Thumb Dwarf peas
Then transplanted miscellaneous onions and garlic that were found during bed prep. Plus seed onions.
Last year, I scattered seed mixes and they did surprisingly well. This year, I’m hoping the more orderly plantings will survive the winter and give us a nice head start in the garden next year!
I got back from the city early enough, and it was still warm enough, to get some progress done in the garden.
My first priority was to winter sow in the east yard low raised beds. Two of these beds were already prepped, but not covered in any way, so they did require some clean up. The cats have been using them as litter boxes!
Some of their “presents” were astonishingly huge.
Ew.
My original plan had been to do the kohlrabi and cabbage on the outside of the beds, then have peas down the middle of one, while leaving a gap in the middle of the other to plant pole beans in the spring.
I forgot. The kohlrabi and cabbage will need to be covered in netting to keep them from being decimated by flea beetles and cabbage moths. Having something growing on a trellis in the middle is probably not a good idea!
In the first picture below, the beds are cleaned up, leveled and rows marked out.
In the second picture, you can see the planted rows of purple and white kohlrabi. If I had gone ahead with the plan to grow pole beans down the middle, these rows would have been further apart. I decided to stick with just the two rows and moved them closer to the middle. These raised beds are more prone to freezing than the beds in the main garden area, simply because the boards are so much thinner than the logs used in the longer beds. We’ve lost almost entire beds of garlic over the winter due to excessive cold, even with a mulch. I’m hoping that, with sowing them closer to the middle, deep mulching them with leaves, plus the predicted milder winter we’re expected to have, they will survive. The plant spacing for these, according to the package, is 4-6 inches, so I tried to scatter the seeds with my little hand seeder fairly lightly. If they survive and germinate, they will still need to be thinned later on, but not by too much. Hopefully, if I have the space, the will be thinned by transplanting.
In the next picture, I have the Purple Savoy cabbage. This is the first time we’ve tried to grow cabbage. I originally planned to have two rows on the outside, then peas in the middle, but decided to do three rows of cabbage. As they need about a foot per cabbage for spacing, I tried to scatter two or three seeds every foot or so, though a few spots accidentally got quite a bit more! You can sort of see a grid in the soil, from where the seeds were covered and the soil gently pressed down, while the rest of the rows I made with a hoe remain untouched.
Grommet REALLY wanted to “help” me with the sowing!
I had made sure to rake up plenty of leaves into the wagon and the wheelbarrow before I started, and was able to give the beds a good mulching for the winter. Then I transferred one of the raised bed covers for the winter. There is another one on the third bed I could move over, but I decided against it. That cover’s wire mesh does not have hoops to support it. Cats would knock that flat and out of shape in a heartbeat. So it’s up on top of the box frame one the other bed, which I’ve found surprisingly useful. I plan to make more 3′ x 9′ covers like this over time, but we need to buy more lumber for it, first.
That done, it was time to shift over to the old kitchen garden.
The cats have been having a field day in the cleaned up wattle weave bed, so that got a clean up, first. My plan is to winter sow dwarf peas in the back of the south facing section of the wattle weave bed, and transplant any onions, etc that I found in the rectangular bed in the front.
That… might not quite work out! At least, not so much for the onions part.
The first thing was to harvest the remaining Swiss Chard. It wasn’t until I uploaded the pictures onto Instagram that I realized I forgot them outside! They should be okay overnight.
In the second picture, you can see an area on the south side of the bed, where the cats dug into the dirt. I suspect there was a mouse or something that got their attention for them to dig it out that much. There had been grass clippings chinked in the gap between the logs, but that disappeared. It’s been filled repeatedly, and the cats keep pulling it out. So one of the things I needed to do was find a way to block that gap in a cat proof way.
Once the chard and remaining kohlrabi roots were cleared out, it was time to loosen the soil, pull the weeds and set aside any little onions I found.
I found so many, I started just tossing them with the weeds after a while!
What I really wanted to find out is what was going on with what looked like a cluster of garlic coming up, and another cluster of what I thought were onions but, as they got larger, the leaves started to look like some sort of ornamental allium, instead.
In the next picture, you can see that there were two entire bulbs of garlic that somehow got missed! I planted garlic in here a couple of years ago. This year, two garlic bulbs grew among the seed mix in this bed. They grew into nice sized bulbs that got harvested.
Now I find two full bulbs of garlic that somehow got missed over two growing seasons! I will probably separate the cloves and transplant them.
Next to the garlic is the cluster of alliums growing near by that did turn out to be onions. Several of them were growing together like bunching onions, rather than bulb onions, but I’ve never grown bunching onions. They are large enough that I will probably transplant them, too.
In the next photo, you can see most of the other onions I found while cleaning the bed. There were so many tiny ones! One red onion was quite large. I will transplant the larger ones, but I don’t know if I’ll bother with the teeny ones.
While working across the bed, I was finding a surprising number of roots. Some were definitely from the rose bush at the end of the bed, but it’s possible others were from the ornamental crap apples and the double lilac. It definitely made the job take longer. As I worked my way up the bed, I took advantage of having lots of old stakes handy from the bed along the retaining wall, before the wattle weaving was added on top of the retaining wall blocks. Some of the largest, strongest ones were used to stabilize the top side logs, as their supports were getting old and starting to break.
To block the gap, I used some flat pieces of scrap wood that were in the corner, then a whole bunch of old stakes, on the inside of the wall. Once the bed is done and ready for planting, these will be mostly buried and hidden from view.
As you can tell by the last picture, and the flash needed for the pictures of the onion and garlic, I had to stop before it was all finished. It was simply getting too dark. I was working by the light of the shop lights at the sun room window by then, and those were on only because their motion sensors were being triggered.
I don’t have anywhere to be at tomorrow, so I’ll be able to finish the job then, and do more winter sowing. I should also be able to clean out that little bed off by itself in the main garden area, where I’ve decided to plant bread seed poppies. Since I didn’t winter sow a variety of peas I’d meant to plant between the cabbage, I’m considering finding somewhere else to winter sow them. Once the dwarf peas are planted, that’s two varieties of peas that are winter sown, so leaving the third variety I was planning to winter sow for the spring would be fine, too. I also have our own saved sugar snap pea seeds that can be sown in the spring.
The rectangular bed that’s being cleared now will have beets and tiny bok choi winter sown in it, probably interplanted with some of those onions and/or garlic I’ve been finding! I was thinking of planting something down the middle, but I can’t for the life of me remember what that was right now. I’ve got diagrams drawn out, but those are in the basement, along with my seed inventory.
So that’s the garden and winter sowing status, for now. We should have a nice head start into next year’s garden, if this works out.
I will also be making what will probably be my last garden tour video of the year. Last year, I ended up doing my October video using video recorded on November 1, because the video I’d taken on October 31 was done too late in the day, and everything was too dark. So I want to make sure to get it done earlier, and earlier in the day.
Thankfully, it looks like the weather will hold for a while yet, and I should be able to get other things done before the snow flies. We’ll see how that works out!
After all the rain we had, I wasn’t sure if I’d be able to work in the garden today, though today’s weather was supposed to be better. I had to head to the pharmacy, so I figured I would know when I came back.
I ended up in town a lot longer than expected!
My daughter’s prescription, that they did not have in stock yesterday, the main reason to go back to the pharmacy. My husband had ordered refills for delivery, so I figured I would get his bubble packs while I was at it. My daughter wasn’t feeling well enough to come along, unfortunately. I headed out and got to the pharmacy shortly after 11am.
That turned out to be an oops. They don’t get their inventory orders in until the afternoon. Typically around 1pm.
Also, since my husband’s refills were ordered for delivery on Thursday, and today is Tuesday, they weren’t ready yet, either. Those were left for delivery. I asked about my daughter’s meds, as I thought she got a partial refill, but no, she hadn’t gotten any of this one at all, and she needed them.
At first, I was going to head home then come back tomorrow until I remembered I was going into the city tomorrow. So I gave them my cell phone number and told them I would stay in town, and they could call me when the meds were ready.
That left me with quite a bit of time to find something to do, so I ended up doing a lot of walking!
Most places were closed for the season, but I did remember there’s a second hand store, so I went to check that out. I ended up spending a whole dollar when I left…
I already a similar drinking jar at home, but it’s colorless. They had a couple like that, but only one in this green tinted glass, so I got it.
I did enough wandering around that my left hip was starting to talk to me. Not pain – it hasn’t hurt like it used to since I got that injection at the sports injury clinic – but it started feeling like it was about to give out. By then, it was past 1:30, so I went to the pharmacy. I was just going to sit and wait, since they hadn’t called me yet, but they are so on top of their customer service, I had someone asking if I needed help before I had a chance to! It turned out they were working on my daughter’s prescription right then, so I didn’t have long to wait.
From there, I headed home, where my daughters had a late lunch waiting for me. The weather was good and things were relatively warms, so as soon as I finished eating, I decided to go for it, and headed to the garden.
My focus for today was to get winter sowing done, and I decided to do the sowing planned in the main garden area, first. The first thing I needed to do was a lot of raking of leaves! Once I had both the wagon and the wheelbarrow filled, I started at the trellis bed.
This bed already has seed onions planted along the non-trellis side. I chose the Spring Blush peas for the trellis side, and the rainbow mix of carrots in the middle.
The rows I planted in remain marked with stakes and twine. There is room between the carrots and the onions to plant something else. Fresh bulb onion transplants, perhaps, or more carrots.
In the second photo above, you can see the row of peas is shorter! There were only 25 peas in a packet. I should have bought two! I planted a pea every 6 inches or so, but it would have been good to plant the full row and have them more densely planted, in case some don’t germinate. As it is now, in the spring, I can plant something else in the remaining space that can use the trellis.
Once that was done, I covered the whole thing with a deep mulch of leaves. I actually ran out and had to get more.
Then I decided to finally use that pile of cardboard that I’ve had set aside for the entire season! I used it to cover where the next trellis bed will be built, as well as the path, to kill off the grass below. If I’d had enough, I would have put cardboard on the other paths, before I put wood chips on them as a mulch. The dandelions in particular had no problem growing through the mulch, and you can barely even tell the wood chips are there anymore. *sigh*
There was still enough time and light to work on the next bed.
The only problem was, that bed had turned into a pool!
I removed everything that was holding the plastic down and just started rolling it up. The piece of wood I used to roll up the excess is long enough to rest on both sides of the bed, so there was space below. Rolling it up meant pushing the water further and further to the end before it could finally overflow the plastic. Which meant that only the very end of the bed got an extra watering.
I left that to drain while I went to rake up more leaves.
In the next photo, you can see where I planted the Daikon radish and White Egg turnip. Those went on the outsides of the bed, leaving the middle for a spring sowing of probably pole beans. I’m planning to plant bush beans in the high raised bed.
In the last photo, the bed is mulched with leaves. Once again, the stakes and twine were left to mark where things were planted.
By this time, it was getting quite dark and it was time to stop for the day. The beds that I have winter sowing planned for in the main garden area are now done. In this area, there are still two beds that need to be cleaned up but, if necessary, that can wait until spring.
I did move my supplies over to the east garden beds. Two of those beds will get winter sowing, hopefully tomorrow afternoon, after I get back from the city. That will be the warmest part of the day. Those beds will get kohlrabi and cabbage sown into them, as those beds will be easier to cover with insect netting to protect from flea beetles and cabbage moths.
After that, I have one bed in the old kitchen garden that still needs to be harvested of alliums and Swiss Chard, and then I will be doing winter sowing in there and the wattle weave bed. The only other area that needs to be cleaned for winter sowing is the square bed off to the side of the main garden area that I’d grown the Albion Everbearing strawberries in, last year. The survivors got transplanted along the new asparagus bed, and I’ve decided the space may as well be used as a permanent poppy bed, since I expect those to self seed readily, and it can be treated as a perennial bed. However, if I run out of time to winter sow those, they can still be done very early in the spring.
So there we have it! Four more things winter sown for next year.
From the predictions I’m seeing, it’s supposed to be a mild winter, but other sources say a harsh winter. We shall see! Hopefully, the winter sowing will survive and we’ll have a head start to next year’s garden!
With how short our growing season is (I’m not counting on the newly revised averages yet), every little bit will help.
One of these years, I hope to get enough to actually can or freeze again! The last two years have been pretty brutal. If we depended on the garden for food at this point, we’d starve! :-D
Little by little, it’s getting done, and I’m feeling pretty good about it so far!
I had a wonderfully productive day in the garden today, so I am splitting things up into a couple of posts.
I decided to shift gears today. After looking at what I was wanting to winter sow and where, I decided to leave cleaning up the last two beds in the main garden area for later. Possibly until spring, depending on how things go over the next while. I needed to move on to other areas. Areas I knew would be faster to work on, since I wouldn’t be dealing with the roots and rocks situation!
The priority was going to be the old kitchen garden, but first I decided to do the winter sowing in the garlic bed. I didn’t want to have the plastic cover over the garlic for too long, as I was concerned the mini greenhouse it created might mess with the garlic.
Here is how it looked, after the plastic was removed.
I’d already raked up as many leaves as I could stuff into the wagon and the wheelbarrow for mulching.
As for the plastic, I was going to roll it up for storage, but remembered the low raised bed I had recently cleaned up. The cats have been digging in it, so I tided that up, then just shifted the sheet over.
The boards and bricks that had weighted down the sides against the hoops before are now being used to keep the plastic snug against the soil, and from blowing away. I found a short log that I could roll the excess up into. Later on, I did take all those rocks you can see at the end, and set them on the plastic, under the roll. It is slightly elevated, and the wind was moving it around quite a bit, considering how litter wind we had today. The rocks weighing down the other end weren’t enough, so I found a short board I could wrap the plastic around and weighted that down with the rocks. If it were spring, this would be a good solarization set up. For now, it’ll just keep the soil a bit warmer, and keep the cats from leaving me more “presents”. 😄
Then it was time to get back to the garlic bed, and clear away the hoops. With the twine marking the three rows of garlic, I used those as a guide while using stick to create furrows in between. I went back over them with my hands to lightly compact the bottoms for better soil contact – and remove as many little rocks as I was able to!
For the varieties, I chose American Spinach and Yellow Swiss Chard.
I didn’t mark the rows, so this picture is to help me remember what I planted and where!
I chose this variety of spinach because, after reading the back, it seemed the most appropriate for the location, as well as winter sowing. The Yellow Swiss Chard is a new variety, with an unusual colour for Chard, so I wanted to give it a go. Both packets still have seeds left, so we could potentially do another sowing in the spring, after these have germinated.
The seeds got lightly covered, and gently tamped down, again for better soil contact. I had made the furrows deep enough to form shallow trenches. The soil was damp and didn’t need watering – I don’t want them to germinate too early! – but next year, the trenches will help hold water, in case we end up with another drought year. Plus, it makes it easier to see where the seeds were sown.
You can see that in the next picture, along with the “first” mulching of grass clippings taken from other beds. Because the garlic is so close to the outside of the bed, and the bed has no log frame, I wanted to give the sides extra insulation. When the leaf mulch is removed in the spring, the grass clippings will be left as erosion and weed control.
I was originally going to remove the twine and stakes marking the garlic rows, but decided to leave them, and put the leaf mulch right on top, which you can see in the last photo. I finished off both the wheel barrow and the wagon of leaves before it was done. I got another wagon load to finish mulching the garlic bed, and had just enough left over to mulch the Albion Everbearing strawberries I’d transplanted from their original choked out bed to beside the new asparagus bed. The strawberry plants were still very green! Hopefully, they will survive the winter and we’ll have nice, big strawberries next year.
So the garlic bed is now DONE!!!
With the stakes left behind, the bed will be visible after the snow falls. This area gets very flat with snow in the winter. If we can get at the beds this winter, I would want to dig snow out from the paths and onto the winter sown beds for even more insulation – and moisture – in spring.
That done, I started moving my tools and supplies over to the old kitchen garden, where I wanted to work next, but first, I decided to gather a small harvest.
I dug up just a few Jerusalem Artichoke plants around the edges of the bed, and this is what I was able to gather from under them. I will leave the rest of the bed to overwinter. Later on, I’ll use loppers or something to cut the plants, which are still very green, and drop them on the bed as a sort of mulch.
The Jerusalem Artichokes (aka: sunchokes) did not grow very tall this year, compared to others. I did water it at times but, I’ll admit, it was largely ignored this year. As with everything else, I think the heat, the drought and the wildfire smoke set them back. I think they also got less light this year. The Chinese Elm trees beside them had been pruned, but the branches have grown back. I want to get rid of them entirely, because of the billions of seeds they drop in the spring, but for now we’ll just try to prune them again, when we can.
As for the sunchokes, I noticed a difference this year. For starters, I didn’t find any of those grubs I found so many of, when I harvested this bed completely, last time. Sometimes, I’d find them half burrowed into a tuber – both living and dead! Other times, I’d see the holes, then find a dead grub inside when cutting open the tuber. I was not impressed! This time, I saw zero grub damage. Sweet!
The tubers themselves are actually less nubby, too. A lot of the ones we harvested at the end of the season last year had so many nubs on them, they were hard to clean. This time, there are a couple of nubby ones, but most are smoother. Which I much prefer!
With leaving the rest of the bed to overwinter, I hope that we will have a much better growing season overall, and a lot more plants to harvest from. That seemed to work out when we did it before, as last year’s harvest was quite decent.
This done, I could finally move on to the old kitchen garden and start on the beds there.
Which did take longer than expected, but for a very different reason this time!