I headed out to town this afternoon to get the cash donated for tomorrow’s spays. The girls and I will be heading out later this evening to get the two ladies closed up in the isolation shelter for the night, along with a wet cat food treat, before they have to start fasting after 9pm.
On the way home from town, I stopped at the post office to pick up a parcel, and found the insulated cat house I’d ordered was in as well.
The first picture in the slide show above shows the parts and pieces. The liner for the bottom, the roof and the sides are all lined with self-heating insulated material. It also came with two pegs to secure it to the ground.
The second picture shows it all assembled, plus I cut a couple of pieces from a long and thin scrap of rigid insulation we had left. They are slightly longer than the shelter itself.
When doing the evening feeding, I moved the box nests in the catio to make room for the new shelter. In the third picture, you can see it set up on top of the insulation. Since it is inside the catio, I am not bothering to use the stakes, but if I did, there is a loop at each end for them.
In the last picture, you can see it didn’t take long for it to get jumped on! I straightened it out but, if it continues to be an issue, I’ll move it under the floating shelf.
Hopefully, this will attract the more feral cats into staying in the inner yard more, instead of disappearing somewhere in the outer yard they’ve found nests in.
It was still pretty nice out, so I got another quick project done, in the water bowl house. I started off by emptying it of everything but the pieces of rigid insulation, and getting some measurements. I then went through our pile of scrap wood that my brother gave me when they were bringing all their stuff out here after selling their property, to find something I could cut to the right length for the sides, and something I could use for a shelf board.
I’d found a 2×4 long enough to cut two support pieces out of, and the shelf board is an actual Melamine covered shelf; the longest of the ones my brother passed on to me. It was actually a smidge too long to fit between the true-to-size 2x4s forming the frame in the back of the shelter, so I shaved off the width and length of a blade on each end with my miter saw. That was just enough for what was now the back of the board to fit between the frame. I did not bother to secure the board to the supports, though, so we can take it out as needed.
Then I added a couple of screws to that loose board in the wall. This structure is mostly nailed together and, for some reason, that corner keeps getting knocked loose. That will no longer happen!
In the second picture, everything is put back in again. The cats really love that cardboard box, so I put it back, too.
Eventually, I want to get another shelf board that is long enough to reach from wall to wall and add it in front of the board that’s there now. We do have some scrap pieces of plywood that could be cut to fit, but it’s thinner and would bow under the weight of cats without some sort of support in the middle. For now, the cat beds in the back have a little more shelter, the cats can sit on the shelf above – and the box will no longer be crushed by cats getting on top of it! We might even be able to pop open that cat cave again, so they can shelter inside it again.
According to the weather apps, we’re currently at -5C/23F, with the “feels like” at -9C/16F.
I don’t know where the weather station for that reading is, but it’s been mostly sunny today and feels much warmer than that, to me!
Warm enough that I decided we should go ahead and cover the portable greenhouse with the tarp so graciously gifted to us.
In retrospect, we should have removed the torn up plastic over first, but the tie downs are attached to it, so I didn’t think of it.
I had already adjusted the tie downs so that they no longer stretched away from the corners, creating tripping hazards. Instead, I wrapped them around the sides and and was able to secure them around the corners at the opposite end. They are long enough that the ones from the back corners wrapped around the doorway and were secured on the inside. Which meant there were no tie downs to work around while adding the tarp.
So this is a really high end tarp, which is so appreciated. It also is black on one side, so we decided to have the black facing out, so that it could warm up more in the sun.
As you can see in the second photo of the slide show above, the tarp is a fair bit bigger than the portable greenhouse frame!
I had the help of a daughter to get it unfolded, then up and over the frame. After that, I worked on it on my own, since I was figuring things out as I went along.
I deliberately put the tarp off center so that I could secure the side facing the kibble house to the ground, right at the base of the frame. I spend the next while trying to figure out how best to origami it in a way I thought would be least likely to get caught up in the wind. Once I secured most of it, I ended up tucking the excess on the side facing away from the kibble house, under the frame itself.
From the back and sides, it made a nice little package.
If you click through to the next couple of pictures, however, you can see the front was a very different challenge. I had considered and tried a number of options, and even considered turning that end into a sort of tent. Which probably would have turned into a wind tunnel, so it was probably good I decided it wouldn’t work . We need to be able to walk through there, shovel snow, etc, and it would have blocked things way too much. I ended up folding quite a bit of it under, tucking the edge back over the frame to secure it. Which left me with no grommets I could use to secure that anything around the doorway from the wind.
I had set up an old bench we found… in the spruce grove, if I remember correctly – that I’d had against the back to keep the wind from flapping the torn cover around. I also had our wire mesh door and folding table along the more exposed east facing side, for the same purpose. Those got put back, once the sides and back were done.
The doorway needs to be kept available, of course, and there was no way to shelter the doorway and still be able to get in and out as needed. I had to find another solution.
I tied one end of the twine to the frame on the inside on one side, wrapped it around the back, then secured the other end to the matching part of the frame on the other side, making sure all was snug and tight. If you click through the next couple of pictures, you can see how it was secured by twine, bench, wire mesh door and table. The bench has to be lying on its side, as it is too broken up to stay upright if there is any wind, or even if a cat just jumps on it. 😄
The door is wide open, and wind and snow will get into it. There is no getting around that, at this point.
As I was working in it, cats and kittens were very curious and checking everything out, so I am confident they will be comfortable using it for shelter. It is definitely warmer in there, too. Having it black side out is going to make a big difference, I think. Enough to make up for losing the greenhouse effect. It’s now quite dark in there, but the cats don’t mind that at all.
Now, if only we could find a way to make sure no cats try to jump up onto it! The tarp may be 10mm thick, but cat claws could still cause damage.
So that’s a bit more winterizing we found ourselves needing to do. I think it will work out all right for the most part. It’s only the front that concerns me. We don’t have any high winds in the forecast right now, though, so it will be a while before it gets a litmus test!
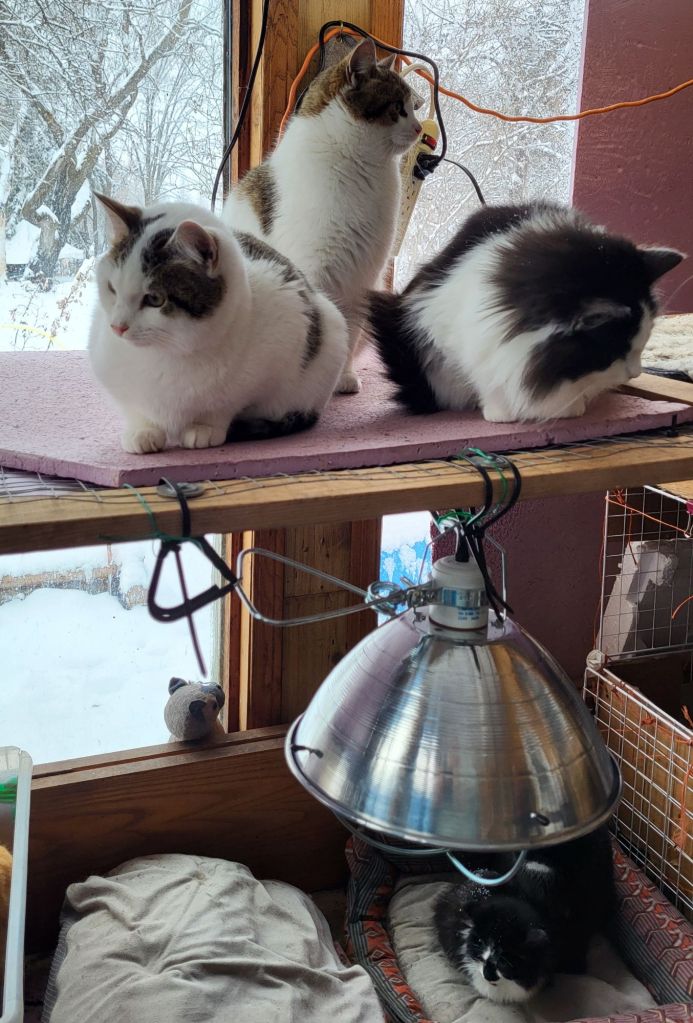
I’m not sure if there’s eight of nine jammed in that one shelf!
We have been able to finish deep cleaning the west facing side, and it was ready to have shelves brought back in. The other side was half done, but we still needed to move out the counter shelf and table saw so we could do a deep clean under them.
The counter shelf is something we have under a built in shelf between two smaller windows. The inner panes on both of the windows cracked a few winters ago – likely a combination of temperature differences and the entire room slowly shifting downwards at one corner. The pane on the bottom window broke apart to the point that there were shards, so I removed the broken inner pain as best I could, and then we set insulation against it, to protect both the glass from temperature differences between inside and out, and the cats from any broken bits of glass that couldn’t be removed.
The shelf itself is sitting on bricks to elevate it a few inches. Kittens and skunks like to hid under it, but the – and the raccoons – also get between the shelf and the window. Things that had been stored on top of the counter also got knocked in between the shelf and the window, as well as under the shelf itself.
So… basically, I was expecting quite a mess under there.
Before I started, though, we fed the outside cats. My younger daughter was on cat herding duty, getting any cats and kittens that made a dash while I stepped out with the food bowl. Once she got the doorway clear, she could close the doors for me – usually at least the storm door with the missing window screen that makes it so incredibly handy.
As I was scattering kibble in different trays, my daughter got the storm door closed and was waiting to see if I needed anything else. That’s when we both spotted something strange, sticking half out from under the counter shelf, near a kibble tray we keep under the table saw.
Strange, flat and furry.
It was the remains of a kitten.
My daughter was horrified and had to leave. I can’t say I blame her.
Once I finished putting the food out, I got a shovel to use to get the remains the rest of the way out, after moving the kibble tray and the table saw.
It turned out to be really easy. The sun room has been hot and dry all summer, which basically mummified the remains. My guess is that a skunk had gone under the counter shelf and, while scrambling around, pushed the remains out one side.
It was a larger kitten. A grey tabby. That’s all I could tell. There wasn’t much left of it.
With how often cats and kittens appear and disappear, we just can’t tell if any are missing because they’ve wandered off, or because something happened to them. This is the first time we found one that passed under that shelf, though.
After I buried the remains, I was pretty nervous about moving the shelf, but thankfully, there was just stuff knocked off from the top to clean up, and a whole lot of insulation bits from the cats scratching at it.
So all that got cleaned up, and then the area got soaked and scrubbed and soaked and scrubbed and soaked and scrubbed again!
When it was time to let the floor dry before moving the shelf back, I was able to start moving shelves into the other side of the room. I decided to put the cube shelf right against the west facing window, and then set one of the large plastic storage shelves next to it. The main goal was to fill the corner, so there would be no space for critters to do their business in it. Both shelves were set on bricks, just in case the floor gets wet, as water flows towards that corner.
We won’t be able to set up a platform again, with this set up. I’m going to have to figure out a way to hang one of the heat lamps there. The platform worked well for that, as they could be hung under it.
Something to think about.
Once the shelves were set up, the cat beds that were hosed out and sitting in the sun to dry were brought back in, along with the two cat caves, which now have wire supports inside them to keep them from collapsing and being smushed flat by kittens crawling on top of them.
The first picture is of the counter shelf corner, after clean up but before scrubbing and mopping. The window sill got a scrubbing, too, but I didn’t take the insulation out. The shelf shelter is on the other side of the window. Between the two, it should keep the now single pane glass window protected on both sides from temperature extremes.
The second picture shows the new set up in the west facing side. The cube shelf will be left empty, so that cats can sit and look out the window in their own little shelves. The second shelf from the bottom has the self warming mat, which is tied down so it won’t get knocked off the shelf easily. The blue striped cat cave has a loop at the top. I used that to tie it to the shelf above, so it won’t get knocked out.
The plaid cat cave above is a really weird design. It’s basically a bit drawstring pouch. It could never hold itself up so, for the longest time, I rolled the sides down to make a cat bed. It still got squished out of shape. It now has a wire frame inside to hold it up, while still allowing the drawstring cord to be pulled partially closed. It’s still tippy, though, and it’s now tied to the shelf above, too.
Cats were moving onto the cat beds in the shelf before I was finished setting it all up!
That side is now essentially done. Once the other half is finished, the kibble trays will be rearranged so that it’s not all on one side. Some of the cats get pretty aggressive at feeding time, so it’s good to split up the trays to give them more space from each other.
The cat bed from inside the cat cage is back in its cube, which now has insulation pieces on the bottom and outside walls. The bed itself will keep the wall pieces from falling in. So far, the cats have been ignoring the bed in favour of the cubes above, now that those have insulation pieces as floors.
When that was all done, the floor was dry enough to return the counter shelf and table saw to their spots. Then the rest of the floor in that corner got another sweeping, soaking, scrubbing and mopping.
By then, it was getting dark, so that was in for the day. Tomorrow, I’ll start bringing in the last two storage shelves and figure out how to set them up so that cats won’t use the corner on that side to do their business, either. Drives me nuts when they’ll use the concrete floor, right next to a litter box!
Then I need to go through the storage bins and other stuff that were on the shelves before we took them out. It’s all sorts of tools and supplies that I want to have easy access to, while also keeping the cats out of them, or keep them from knocking things right out of the shelves. There’s no way to stop the cats from going into the shelves, so I want to plan around that.
There’s still the things we used to make the platform, which need to be stored somehow/somewhere.
That’s something we’ll figure out as we go along.
For now, though, the cats have their beds in the sun room again, and they are very happy about it!
Yesterday, we had my husband’s prescription delivery and I headed out too early. It was cold, so I went into the garage to get out of the wind and started poking through the lumber and other left over building material my brother gave us while they were moving things out.
I struck gold.
I found a few pieces of plywood that looked liked they were the size I needed and brought them to the house, after the prescription delivery.
Today, I could have gone into the city to do our Costco shop. It is, however, Black Friday. I don’t know why we have Black Friday in Canada, since our Thanksgiving is in October. Truthfully, I was really confused about when the US Thanksgiving was, since these sales have been going on for about two weeks. Even so, this is the “big day” for sales which, for me, means, staying away from stores as much as possible! It’s not like we’d be buying anything different that we usually do, and that stuff tends to not go on sale.
I’ll be doing that tomorrow. Even shopping on a Saturday at Costco would be better than shopping on Black Friday!
So, today was a home day.
As I write this, we’re currently at -16C/3F, with a wind chill of -29C/-20F Our high of the day was supposed to be -13C/9F, but I don’t think we reached it.
With that in mind, I decided it was a good day to see what I could do with those pieces of plywood, and whatever else I could find.
What we have been wanting to do is build some sort of shelter over the isolation shelter opening. It’s a large opening and the winds can blow right in – and would blow in snow, as well. We needed something to keep the weather out. It needed to be easily moveable, but also heavy enough that it wouldn’t get blown away. The plywood I found looked like it would fit the bill for making a box that would fit over the ramp door.
All three pieces were exactly 2′ long, but one was slightly narrower. The narrower piece became the top. I made the 2′ the height of the box, since the bottom level of the isolation shelter is 2′ high. That does not count the pallet floor or wheels, though, so I knew I would need to keep that in mind, too.
The slideshow below is a couple of photos of the basic box shape.
That bit of a gap from the narrower piece would go against the isolation shelter. I didn’t take any measurements, so this was just in case it lined up with the top of the latch on the frame.
I had some lumber left over from making the garden bed cover frames, so I cut 2′ of that to join the bottom of the box and stabilize it. That is meant to go under the ramp door. I might end up removing that, though. The wood split on one side as I nailed it in place. I found a skinnier but longer nail for the other side, and ended up splitting the plywood.
As you’ve probably guessed, this entire projected was made with scavenged materials.
Speaking of scavenged materials…
I had found another piece of plywood with a perfect circle cut into it that would have made a great “door”, but it was too small to fit the front of the box.
I did, however, still have a panel of the old tub surround in the house.
So, I laid that down and used the box itself to mark out a piece large enough to cover the front completely. I decided I would use that to cover the front and make a cat flap door. You can see progress photos in the slideshow below.
One the front panel was cut out, I found the center, the marked off four inches on either side, then … I forget if I went 10 or 11 inches from the bottom. That got cut out to make the door flap.
I then cut about half an inch off the bottom, and less than 1/8th of an inch off one side. I didn’t measure. Basically, I had a piece of wood I was using as a straight edge to cut against, and it was whatever amount looked right. The main thing is that the flap had to be able to move freely in the space. With a gap on the bottom, I figured it would be easier for the cats to figure out how to use the flap, as they would instinctively snuffle at the gap to try and get in or out.
All I had to create a “hinge” for the flap was duct tape, though. So I secured that as best I could, while still allowing for the flap to freely swing in both directions.
The next thing was to attach it to the front of the box, and secure it. Slideshow below…
I had some smaller nails that were white that I bought for something else quite a while ago, and those were perfect for attaching the panel.
I used a lot of nails, since I figured cats might end up dashing out and bashing into the sides when startled.
Which is also why I added a cross piece above the cat flap on the inside. I was able to nail that into place at each end, but I also wanted to attach the panel to the cross piece, and for that I needed smaller nails.
After scrounging around through various buckets we found while cleaning the old basement, I found three short little nails.
They would do!
I’ve kept a chimney block in the basement because it’s been such a handy work surface for various projects, and it came in handy again. I set it up inside the box, under the cross piece. It was shorter than the height needed, but a piece of scrap 2×4 was enough to make the difference. The panel is now secured to the cross piece above the cat flap, where I figured it would need the most support.
I then spotted a potential problem. All of this exposed wood that’s going to be in the snow all winter. Even if we had paint, I wouldn’t have wanted to use it, as it would need time to dry, and I wanted to get this out as quickly as possible.
That could only be nailed down on the sides, as the nails I had are 1″ and the plywood is 3/4″, so I used quite a few to secure it. In the first photo of the slideshow above, you can see that I also used more duct tape around the edges of the panel at the cat flap, plus added another strip above the flap, just in case.
The next image shows how it looks on the inside, with the cross piece, and the last image from the back. I’d laid the top of the box to mark out how large it was, on the back of the tub surround piece. This piece has holes in it from the arm bars, which didn’t matter for the front panel, but for the roof, I made sure there were no screw holes. This time, when using the piece of scrap lumber as my cutting guide (I just used a utility knife to cut it), I lined it up with my marks, then cut on the other side of the wood, to create an overhang on three sides.
It was now done!
Next year, when we get more paint for the isolation shelter, we’ll paint the exposed wood on this, too, but there is no urgency on that, now that there is a roof in place.
At this point, I needed to get this up the basement stairs and outside. Between the unfortunate way the door is hung (it swings over the stairs instead of into the entry) and the cats, I commandeered my daughter for assistance. She helped me get it outside and set up over the ramp door, lifting it so I could slide that back cross piece under it.
I foresaw a few potential problems, once the box was in place. I’d hoped to avoid them, but nope.
In the first photo, you can see the first problem. The patio blocks are not level, and one in particular has been heaved by the roots of the elm tree in front of the house, quite a bit. It actually cracked the front panel at the corner. In the next photo, you can see that not only is it lower than the frame between floors, but not at all level.
What you can’t see is that the cat flap could only swing outwards. Inwards, it was hitting the ramp. The extra height the pallet floor and wheels added were causing this problem.
All I needed was a raised the box higher by a couple of inches. Leveling it was not going to happen, but it at least needed to be raised up and supported enough to not wobble or anything like that.
Bricks from the old wood burning furnace chimney to the rescue! I found four that had the least amount of mortar stuck to them.
It was enough. The flap can now freely swing in or out. The bricks provided a stable enough lift that there is no wobble at all, even though it’s still not level.
In the future, we need to rip out this patio and redo it so it’s level again, but there’s no point in doing that until we get rid of the tree in front of the house. Not only is it lifting the patio blocks, but there are cracks in the basement wall.
While setting up the box over the ramp, there were several cats inside the shelter, very interested in the goings on. Others had already dashed out as soon as we started fussing around the shelter.
For the cats inside, it would be an easy thing for them to figure out the cat flap. What we need to watch for is if they can figure out they can push against it to get in. If it seems that this is an issue, we can prop the flap open, or even remove it entirely. That would allow some of the weather in, but it’s far enough away from the entrance that it should not affect much more than the ramp itself.
When we have cats isolated in the shelter, we’ll need to move the box away completely and close the ramp door. Once that is closed, the box won’t be needed to keep the weather out. There is enough space beside the shelter to store the box until it’s needed again – where it can double as another shelter for the cats. We already have a small food bowl beside the shelter for cats that aren’t willing to go inside it, but it’s completely exposed. Even if it’s for just a couple of weeks while there are cats recovering from spays inside, that would be useful, as long as it doesn’t block access to the sliding door we use to refill the kibble bowl in the second level.
What I’ll probably do in the spring is add legs to the box to raise it up a few inches, so we don’t need to use bricks. The bricks we are using now will be just fine for this winter, though.
When we first moved out here and started cleaning up around the yard, it amazed me just how many bricks I was finding, all over the place.
Now that we’ve been here a few years, we’ve found those bricks incredibly handy, and I even find myself thinking, we need more bricks! 😂
So that’s one more job done for the isolation shelter. Hopefully, the cats will be fine with it, because it will make a big difference in the conditions inside during the winter. Especially when we get hit with winds from the south.
I’m rather pleased with out it turned out, and really grateful for all that scrap wood my brother gave us. The pieces may have been too small for projects my brother needed to work on, but they are perfect for small projects like this!
With last night’s chill, the yard cats were most definitely feeling it! A whole lot of kittens are hanging out in the sun room, curled up on various beds and blankets, in piles.
It’s getting time to open up the cat house to clean it up, as well as setting up one side of the sun room, for the winter.
They are also seem extra enthusiastic at feeding time, with this new kibble!
I had a bit of a surprise among the cats swirling around my feet as I tried to get out of the old kitchen, closing the inner door behind me to keep cats from running into the old kitchen, and not step on any cats while stepping down from the doorway.
An adorable little face I don’t usually see this close to me!
Baby Hypotenose was in the crowd. I got this picture of her, later.
The irony is, I’m less sure of who the mother is! I’m about 95% sure it’s Sprout, as I saw her with Hypotenose Jr and an orange kitten. Then the orange kitten disappeared.
Sprout quite a bit more feral, and is one of the mamas that isn’t very motherly.
As for Baby Hypotenose, as I was setting kibble out in the sun room, she was right in there with the other cats, milling around under my feet.
So I tried to pet her.
She let me!!!
She started to run off, but stopped and let me rub her neck and shoulders. I’m so happy! We’ve been able to identify her as female, only because she’s a bit of a show off when she runs around with her tail up. We have one female kitten that’s a lot more socialized. If we can get Baby Hypotenose socialized, too, that’ll make at least 2 female kittens we’ll be able to get to a vet over the winter!
Here’s hoping!
There was another rare visitor in the sun room, though not one I was able to touch. I got this photo later on, too.
They’re going to miss this tree when we finally have it cut down. The cats love to climb all over it.
I’m thinking we leave a fair bit of the trunk standing. My usual thought is that we could use the stump to support a table or a bench. Actually, it’s thick enough it could probably support both.
If we leave more of the trunk, though, we could also add cat shelves or small shelters onto it.
That’s not going to happen for a while, though. We need to get it done, though. It’s roots are cracking the basement all, and the branches are overhanging the roof. My daughters were able to trim some away, but the bulk of it will need a professional tree company to remove, without risking damage to the roof.
Unless my brother decides to do it himself. Which I wouldn’t want, as it would be a pretty dangerous job. It’s just too close to the house.
For now, though, the cats love it. They also use it to get onto the roof, where they can then go to the second floor windows and check out what my daughters are doing! 😁
Like this little one was checking me out from the branch above me.
I’m not going to go into too much about the assembly now; I’ve decided I’ll be making a voice-over video of the process when it’s done, so I can go into more detail. For now, here’s the short form.
The first thing I did was mark the centers of all the cut lengths on all sides. I even remembered to bring my carpenter’s triangle this time – and I got a lot of use out of it, today!
The front and back panels, which will be 4′ square, got assembled first. These used the true-to-size 2x4s for the outside, with a single regular 2×4 across the middle.
Of course, that didn’t turn out as easy as expected.
The regular size 2x4s turned out to be a fraction of an inch too long. With the first frame, I ended up recutting it too short, but was able to use the piece I’d cut off, sanded down until it fit, to fill the gap. With the second piece, I used the miter saw’s blade to basically shave off a bit at a time until it fit, so I didn’t have to fill a gap again!
Once the front and back panels were done, I used the side pieces and the centre marks to work out where to attach the triangle blocks. Once those were attached to the front and back panels, the panels were attached to the pallet, with the cross pieces to make sure they were spaced properly.
Once the first panel was attached flush with one edge of the pallet, that officially became the front of the shelter. The bottom cross pieces were set in place along the short sides of the pallet – making sure all the corners were at 90° – before the back piece could be attached, then the side pieces were attached to the pallet as well.
The top cross pieces were then added, which also set the front and back panels correctly, and finally the middle cross pieces were added.
Once it was all together, I rolled the whole thing out of the garage and through the grass. The wheels handled the grass just fine, and it was quite easy to move around! One of the last things I’ll do is add some handles to use to move it around but, for now, I can just grab the frame.
None of the joins are prefect, of course. In fact, some of them are downright messy. But, the corners are square and the whole thing is extremely solid and stable, and that’s what’s important!
Once that was done, I was able to use the funky calipers my daughters got me for Christmas a few years ago to measure the distance inside the frame, at the centre mark. A 2×4 was cut, checked and double checked for it, then got half painted. Since I had the paint out anyhow, I covered a few spots on the frame that needed touching up.
This cross piece will support the floor. The floor in the back half will be from one side to the other, while the front half will be from one side to the middle, leaving an open space for any isolated cat to access the upper level.
That was as much as I could get done today. Tomorrow, the other half of the cross piece will be painted. Until that’s dry, I won’t be able to measure and cut pieces for the floor, but the bottom half of the back panel will be walled in, so I should be able to start measuring, cutting and painting boards for that, as well.
The boards I have that are left over from another project are 12′ long, though. I’m going to have to rotate the table I have the miter saw on, to have the space to work with them!
As I’m doing all this, I’m always turning things around in my mind about what should be, or can be, done on the inside before the whole thing gets the welded wire mesh added, since none of it can be done once the mesh is in place. I find myself thinking of adding something across the front or side to hold food and water bowls, slightly elevated and secured somehow, so they don’t end up knocked about. If I do that, I might change things up so that the front door, which will be made to swing down and become a ramp when left open, is in front of where the litter box will be, instead of in front of where the sleep cubby will be.
I’ll think more on that, as the floor boards are added, as well as the vertical pieces that will need to be added to support the access doors and panels. I also want to include things like a scratching post and other spaces for cats to lie on.
I wonder if we have any scrap carpet somewhere that can be used for this? I know we have a roll of carpet in the barn, but it’s been sitting there for probably at least 10 years, of not longer, and I doubt it would be useable. There might be something in the storage shack, but it would be hard to find anything under all of my parents’ belongings.
Still, it might be worth a look!
If we have cats that have to be in this thing for possibly weeks at a time, I want it to at least be fun and interesting for them!
I have to admit, going outside in the mornings has gotten a bit nerve racking. My daughters fed the outside cats early this morning, and it’s much the same for them, now, too. We keep looking around, wondering what we fill find.
Happily, this morning, all we found were active, playful – or napping! – kitties.
Finding Rolando Moon chilling in the wheelbarrow was quite funny!
While I was watering the garden this morning, ahead of the upcoming heat, I was watching the cats and noticed that only one kitten was with Brussel. Which sort of confirms to me that three of the recent losses were from her litter. The one remaining kitten, at least, looked very strong and healthy.
As for the new litter that was brought to the junk pile, I am thinking there is two kittens in the litter, but that I’m sometimes seeing other white and greys playing with them. I saw the two of them lying in the open together, with Mama nearby, and they seem a bit older than I originally thought, too. I was entertaining the possibility that Button was part of this litter and had been brought over ahead of the others or something, but I still think that’s unlikely. Possible, but unlikely.
One of the things we are talking about doing is building a larger, outdoor cat cage. Something like a catio, but self contained and moveable. When we get to the point of trapping females to get them spayed, we will need somewhere to isolate them for 2 weeks. We can’t use the sun room for that anymore; I don’t think we can fully close the doors, due to shifting. Mostly the outer door. I think the inside door can still close.
I was talking to the Cat Lady about it and asking if her husband had any construction sites in the area, and the possibility of scavenging building materials that would otherwise be doing to the landfill. He’s an engineer and doesn’t typically deal with that side of his contracts, but there aren’t any builds in our area, anyhow right now. She promised to bring it up with him, and maybe he can throw some castoffs into his truck when visiting a work site. Most of the building projects we have in mind are pretty small, so we could manage with castoffs. It would be a win-win, since it would mean at least a little bit less going to the dump.
They are in the process of having a catio being custom built at their new house – something to make it easier to keep the cats up for adoption separate from their house cats. They have a catio from their previous house that doesn’t work where they are now. They will try to get it to us. That would make things a lot easier, I think. Depending on what it’s like, we might just need to do some modifications. If that doesn’t work out, we can use the parts and pieces for something that suits our space.
We are such sucks for the cats.
Anything we can do to make it easier to catch and fix the outside cats will be a huge help, too.
The inside cats have been particularly messy and destructive for the past couple of days. The outside cats did some damage, too but, at least with them, it wasn’t on purpose (more on that in another post).
While doing my rounds this morning, I caught this little bugger.
There’s Syndol, using the tiny raised bed’s cover as a hammock again!
I’m actually impressed on how well it’s keeping him suspended above the garlic!
My daughter and I were working in the garden this morning, before it got too hot. The weather apps seem to change the forecast every time I check them, but we’ve had predicted highs ranging from 26C/78F to 29C/84F! We’re already at 22C/72F as I write this, and it’s not even noon, yet. I had to go into the garden shed, where I thought Broccoli might have her babies – the cats can get in through a hole in the wall in the back. Sure enough, I startled her when I opened the door, but I didn’t hear or see any kittens. It wasn’t until I went back again later that I saw them – and they were not actually all that hidden, either!
Broccoli was not around at the time, but we knew that, with our needing to go in and out of the shed, that she would end up moving her babies to who knows where. So we took a big risk. While my daughter kept an eye on the babies, I brought the big cat carrier from the sunroom over. It already had a blanket inside, but I added the self warming mat for the babies.
As we were moving them into the carrier, I could see Broccoli at the corner of the house in the old kitchen garden, watching us. Before we were done, I saw her dashing through the maple grove on the far side of the shed.
The carrier is now set up in the sunroom, and I’ve even more the critter cam so I can see it from my phone. My daughter is also monitoring the house from across the yard. It’s pretty normal for the mamas to leave their babies to sleep while they go hunting or whatever, so it might be hours before Broccoli comes back to the shed to nurse her babies, then figure out where they are. As I write this, the kittens are peacefully sleeping, but when the get hungry, they will start calling for her, so she should find them all right. If we can get her with them in the sunroom, we can close the door. She can stay safe with her babies in there, with her own food, water and litter box, and we should finally be able to socialize her! We’ll be able to give her some wet cat food, which we normally don’t give to the outside cats, which should help. I’ve already sent pictures to the Cat Lady. If all goes well, we’ll be able to finally get Broccoli spayed when the kittens are older, and be able to socialize the kittens as well.
It all hinged on whether or not we can lure her into the sunroom and keep her there!
Her two calicos, we assume, are female. I didn’t even bother to check. As we were moving them, I could see the black and white is a male.
They are so flippin’ adorable.
This does mean we will need to avoid going into the sunroom as much as possible, until we’ve lured her in and closed the door. The sunroom is where we keep a lot of our tools and supplies. Hopefully, it won’t be long before we can close the door with mama in with her babies. After that, we’ll just have to do things like go in only through the old kitchen. Unless we can move her and the babies into the baby jail cage under the plant table, and close her in with them briefly, while we go in and out of the sunroom. Whatever it takes to get her with her babies and not hide them somewhere else!
Look at these three handsome boys, posing so nicely for me!
We still haven’t named the orange and white one. He’s mostly friendly, but not too keen on attention. Syndol, on the left, can’t get enough. Patience, in the middle, is becoming more tolerant and accepts pets – on his own terms!
I didn’t get a head count among the outside cats this morning, but there didn’t seem to be as many. I didn’t see Rolando Moon, but Judgement is hanging out more. Which I like because Shop Towel is also hanging out more, but they don’t seem to be fighting anymore. It was usually those two that would go at each other the most. It seems having just one of the boys nipped has made a difference.
The cats indoors have been more of a pain. Ginger is still being bullied, particularly by the tuxedo boys.
When the kittens were small and kept isolated in my room, it was pretty hard on the girls. Especially my younger daughter. Many of the cats would gravitate to her bed – with her in it. There’s not a lot of room, so she would basically be stuck under the weight of all these cats on her covers, with a couple that would worm their way under the covers. They would also cause a lot of destruction in the studio half of their upstairs “apartment”. As you can imagine, it made sleep a difficult thing! Once we could start leaving my door open, that made life a bit easier for them. The cats would instead take over my king size bed! I even have blankets and cat beds in one corner for them, though it’s not unusual for my entire bed to be covered with piles of cats, all mashed together. Even little Peanut Butter Cup now hangs out on my bed, sometimes even in one of the cuddle piles! She’s adapted really well to being indoors, and even lets us see her naked belly and her well healing surgical wound. It’s been harder to check Tiny Beast and Tissue!
With having the door open again, we hoped Butterscotch would finally start leaving the room – and she did start to! We’d be putting food out in the dining room feeding area, before filling the bowls in my room, and I’d find her at the two steps between the old and new parts of the house, very interested in those food bowls! She’d immediately run back into my room, but at least she was starting to check things out.
Well, some altercation must have happened that we missed, because suddenly that stopped. Not only did she stop leaving my room, she even started to isolated herself in my room. Since coming indoors, she’s been in full retirement mode, and spends much of her time in one of the cat caves or – her favorite spot – in the wall shelf that my bed is against, sleeping on my clothes – but she used to also sleep on one of my pillows, with the other cats around. We’d even see her cuddled up with another cat or two, and sometimes engaging in mutual grooming.
Well, that suddenly stopped. She now spends almost all her time in the wall shelf. She stopped coming out to eat or drink, unless there were almost no other cats around. She also started growling at other cats, even when they weren’t anywhere near her. Once we saw she would go to a litter box, see a cat, then run back into her hidey hole, we knew something had to have happened.
When it’s feeding time, the majority of the food bowls are all in the dining room now; we stopped feeding them in the basement months ago, because Ginger was struggling with the stairs. Once those food bowls were filled, we’d go to my room and add food to the few bowls that are there. Unfortunately, for some reason, some of the cats will abandon the food in the dining room and all but attack the food in the bowls in my room, as if they were starving. Somehow, they prefer eating in my room, and I don’t know why!
We used to be able to set a bowl aside on my craft table, or their window seat that’s on my craft table, for Butterscotch so she would get some food while the vultures circled around the other food bowls. However, she will no longer come out for food if they are around. So now, as we go into my room with the food, we close the door so none of the other cats can rush in. There are some we do allow in that Butterscotch seems to be okay with, like our elderly Freya. Then we leave the door closed long enough for Butterscotch to be able to get, drink and use one of the litter boxes before opening the door again.
Well, this morning was a problem.
First, a problem for me, getting any sleep! Aside from waking up because I had so many cats lying on my legs, it was getting painful, I found myself losing about 2/3 of my bed space. It’s a good thing I have such a huge bed! Getting up to go to the bathroom requires a wrestling match with cats that don’t seem to care one bit if I start moving around and pulling back the covers. They don’t move unless I move them!
Then I’d come back and find the only space left for me is the top half of the bed.
I don’t mind sleeping across the bed, though. It’s just more awkward to get in and out.
Which is how I found myself sleeping across the top of my bed, with my head near the shelf Butterscotch hangs out in. She even came out for pets, which was encouraging.
Not for long.
I had finally fallen asleep again when I became instantly awake because my elbow was suddenly feeling very, very warm. I opened my eyes to see Butterscotch next to my pillow, hunched over. I immediately chased her off, then scrambled out of bed, searching for the wet spot. Turning on a light, I spotted Butterscotch, who was not at all happy. I managed to grab her, and put in the most accessible litter box.
The other cats, of course, were milling around. It was getting close to feeding time, after all. At least, in their minds!
Butterscotch ran off.
I managed to grab her again, and this time I tucked her into the big covered litter box. She started to run away, but I guess she just had to go too badly, because I could soon hear her actually using it.
On checking my bed, I finally found a small wet spot on an excess part of a pillow case – I’ve got king size pillow cases, but no king size pillows, so there’s quite a lot of extra pillow case. Thankfully, that’s all I had to change.
Then I went to check on Butterscotch and found David standing in front of the litter box she’d been using, while she was frantically climbing a chair to get away and back to her hiding place.
I could hear that the girls were up, so I got them to help me feed the cats early. While they made noise filling the other bowls, I snuck off with some food for the bowls in my room and made sure to close the door behind me. We left it closed until after I finished doing my morning rounds, to give Butterscotch a good long time to get food, water and use the litter again, if she needed to.
Once the door was opened again, the rush of cats into my room was insane. They converged on the food bowls, as if they hadn’t eaten in a week, scaring poor Butterscotch back into her shelf.
I wish I knew what happened to set her back like this. You’d think a cat that spent most of her life surviving the outdoors would not be intimidated by a bunch of house cats. You’d think she would be more like Toni or PBC; when the usual bullies tried to hiss and growl at them, they would just ignore them completely. Expect PBC. She’ll sometimes hiss back, if they get too annoying.
I know that, in time, she’ll eventually get over it. It just seems to take longer, since she already preferred to spend her retirement curled up and sleeping.
So we continue to try and make life easier for her and keep the other cats away, so she can get a break from them.
Well, it wasn’t how I hoped to set it up, but it’s pretty much the only option.
I took the platform out completely to work out how to hang the heat lamp, as well as to reach where the power bar is hanging. This gave me the opportunity to remove one of the shop lights, as it will be needed in the living room, when we start our seeds.
All the possible places to attach the lamp were too far to the sides, and too close to stuff being stored. I tried to set up the metal saw horse in the middle of the space, but that put the lamp way too low. So the platform got put back, and the lamp was hung directly to the side of the frame. No need to make holes in the insulation.
It was first secured with garden twist ties, both on the hanger, and the clamp, so it can’t swing around. Then zip ties were added, for extra security.
The platform bounces a lot when the cats jump on it, so that needs extra support. I think we have long enough boards, salvaged from a shed, in the basement. A pair of those under the platform should be sufficient.
I think this location is best, too. If I’d put it on the other side, it would be right over the cat beds, which might actually get too warm. We don’t want to mess with their ability to acclimate to the outside temperatures. Plus, that would put it close to the windows. The temperature differences, inside and out, could lead to glass cracking. That’s already a concern.
The insulation under the platform mesh will help keep the warmth under the platform, even with the lamp to the edge like that. It is over where some of the food bowls are, which I’m sure they will appreciate at feeding time! This room does not need – and should not have – a lot of heat in the winter. I think this set up will be just enough for the coming cold.
I just checked the critter cam my SIL gave us, and I can see a pair of cats almost directly under the lamp, while others are on the cat beds, as usual.