It looks like we’re being hit by the edge of a storm passing to the south of us, so we wanted to make sure we could close the inner door overnight.
All I wanted to do was trim the pegs and get them flush to the surface, first.
You’d think that would be easy, right? Ha! Of course not!
I first tried using a small cutting wheel on the Dremel.
I went through two of them before I gave up. The space was just too tight, and the cutting wheels shattered!
I did have a small saw that I brought, just in case. I just couldn’t cut flush to the surface (may apologies for the crappy photos; the light sucked, too!
Unfortunately, that left me with quite a bit of wood to get rid of. For this, I switched to small sanding disks.
I don’t know how I would have done this without my Dremel tool. We probably would have had to take the door off completely, which would haven us a whole new set of problems!
It’s really hard to see, but the wood plugs are now flush with the surface.
This was enough to let us close the door, and that was the main thing!
Tomorrow, I’m taking the van in to the garage earlier in the morning, so we’ll finish the rest after I get home. We’re expecting snow all day tomorrow, and through to Friday morning, but the temperatures aren’t expected to take another deep dive until the weekend. That gives us time to get it done, without getting things too cold in the entry.
I’m glad we have a storm door, of this would be waiting until spring!
Well, for better or for worse, I’ve started working on the door hinges.
This is intended to be a temporary fix, until we can replace the door and frame completely, but I have no idea when we’ll be able to do that, so this patch job may need to last a while.
The first thing to do was to open the door as wide as possible (with a built in closet in the way, that isn’t as far as I’d like!) and place supports under it to hold the weight.
One of the things we’ve been finding lots of, while cleaning this place up, is laminate floor tiles. It’s amazing, how handy these have become. A couple of pieces of wood under the door made up most of the height, then it took 3 of these tiles to get it fully supported where it needed to be. We’ve also used them to put under bench legs and wooden shelves in the basement, to get them off the damp concrete, and so on. I’ve found a couple of cases of these tiles, just in the basement – there are more in the barn. Definitely things to keep, even though they’ll never be used as flooring! :-D
Once propped up, I could remove the screws which, I’m happy to say, were not damaged as I had thought they were. I do not have to replace the screws. I was able to remove 2 of them with just my fingers, and the only reason I had to use a screwdriver for the 3rd one was because it was the offset middle one, where the hinge wasn’t pulling away from the door as much.
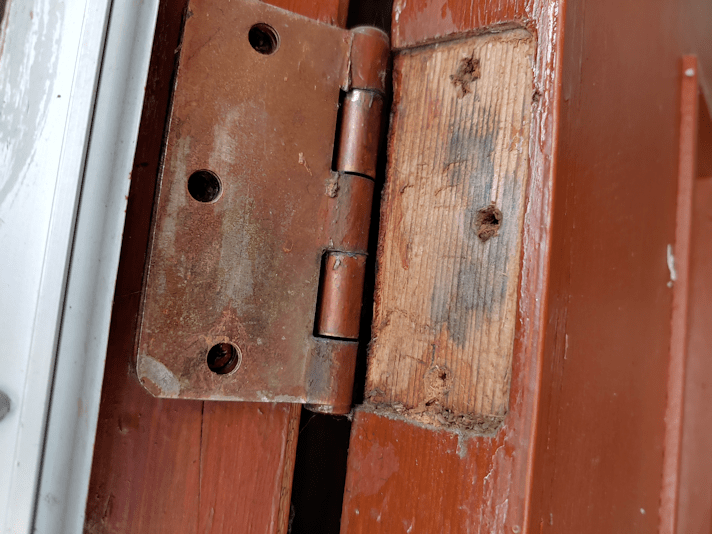
The hinge still needed to be pried loose before I could take a good look at the damage. It fits perfectly in that recess.
Because of how close this is to the frame and storm door , I actually got a better look by taking a picture, then with my own eyes!
The damage isn’t actually as bad as I feared it would be.
The next step was to bring out the Dremel to clean out and enlarge the screw holes.
The Dremel just barely fit in the space available, but it worked. I used a couple of grinding and engraving tips; first a small cone shaped one to clear out the holes, then a metal tip to clean out further into the openings than the cone could go.
The wood is so dry, there was smoke coming out of the holes from the friction!
For the wood plugs, I ended up choosing some pieces of lilac branches I’ve still got hanging around. They were already the size and shape I needed; I only had to strip bark off the pieces, then make one end slightly narrower. Also, I will need to pre-drill holes before putting the screws back in, to prevent cracking, and the core of the lilac is already little more than sawdust that can easily be removed. They’re basically already pre-drilled. :-D
I was going to use wood glue to put the pegs in, only to discover it had dried out, so I went with all-purpose glue that I happened to have.
After making sure the pegs fit into the holes, I applied a bit of glue to their ends, then gently tapped them into place with a little bitty hammer I happened to have. With a normal sized hammer, I wouldn’t have had the space to swing, without hitting the window of the storm door.
The pegs will now sit for a few hours before I check the glue and decide to cut the pegs flush tonight, or wait until tomorrow morning. If I can cut the pegs, we’ll be able to close the door most of the way as the glue finishes setting overnight. If not, we’ll be stuck with this all night…
These are the pieces of insulation we’d cut last year, to fit over the inner door, held in place with Velcro strips, to keep frost from forming on the bottom of the door, and ice on the windows. It worked well, but there were some issues with the strips, and we haven’t found a workable alternative, yet. Thankfully, this winter has had only a few days cold enough for the ice and frost to form.
The arm bar is coming handy for holding the pieces in place!
If this works out, we’ll do it again for the middle hinge. That should tide us over until we can replace it all with an insulated steel door and a steel frame.
While doing my rounds this morning, I was joined by Nosey and the Spice boys.
Usually, I am joined by Potato Beetle, but I didn’t see him until I was going back to the inner yard.
Up in a tree.
Waaaaaaayyyy up in a tree.
Something seemed off about it, so I went around to the power pole nearby to see what was going on. Once I got around my late father’s car, I found the problem.
There was Nicky the Nose, on one of the bottom branches!
Gosh, he’s a big, burly cat!!
Looks like he’s been trying to assert dominance again, and it was a standoff. Nicky is too big and heavy to go any higher, but Potato couldn’t get down without getting too close to Nicky.
We’re not having that! I dug out one of the pruned tree branches from the nearby pile and waved it around at him, and he took a flying leap from the tree, into the snow and ran off.
It took a while, but I stayed outside long enough for Potato Beetle to get himself down from the tree, so I could cuddle him while bringing him over to the kibble house.
I don’t know how to feel about Nicky. I don’t want to turn away any stray cat that’s hungry. Nicky, however, does what dominant toms do; goes after the males to drive them way, to keep the harem for himself. The other toms that used to visit back when Nicky first showed up are gone. No idea what’s happened to them, but he’s the only one left. Even Creamsicle seems to be gone completely, now. Moved on to another farm, or dead, we have no way of knowing. As the kittens get older, he’ll be after them, too. So while I am more than happy to feed and care for any stray that shows up, Nicky isn’t just any stray. He’s causing issues with the colony. I don’t know if we should be driving him away, or if we should be trying to socialize him more, to put a stop to it!
Ah, well. We’ll figure it out.
Today is supposed to be another warm one, and then temperatures are supposed to plummet again on the weekend. We didn’t start working on the door yesterday. It may have been warmer, but we had some wicked winds from the south, and that door faces south. The winds were a bit much to have just a storm door, should we have needed to leave the inner door open for any length of time. In fact, the entire house was shuddering and whistling for much of the day. Today seems to be a lot calmer. We shall see how it goes!
Today, I was finally able to continue setting up cat proof greenhouses in our unused fish tanks, to start seeds.
What I wanted to do was line the tanks with rigid insulation where they were near walls. Since there is no way to lower the lights to be closer to the seed starts, I was going to line the insides with foil for reflective light.
I may not need to do that.
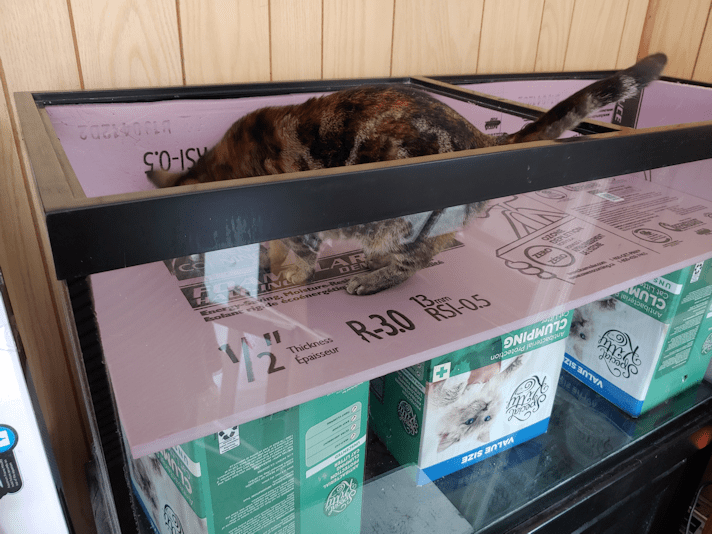
Here is the big tank.
I got photo bombed by a Susan.
I had three boxes with identical dimensions, which allow me to raise the rigid insulation floor high. As the seedlings get bigger, I can change the positions of the boxes to get different heights. I’ve got 3 boxes in there, but I might try to squeeze a 4th one in, to stabilize the floor better.
Because of how the top of the tank is designed, to hold glass covers that broke long ago, I had to cut the insulation to fit the opening, rather than the space I wanted them in. That meant the floor piece has quite a gap around it. The sheet of insulation I cut to size for the long, back wall had to be cut into thirds to get it in. Plus, there is a sheet at the end. The wall in the back of the picture is one of the original log walls. The wall at the left is an exterior wall. Yes, it has more modern (almost 50 years old) insulation, but it’s still pretty cold!
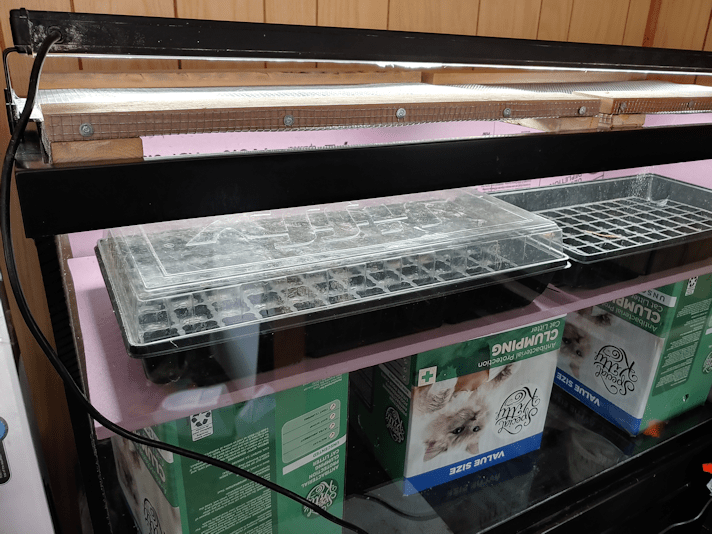
The insulation on the sides helps to fill the gaps around the floor piece, which stabilizes it as well.
At these dimensions, I can only fit two seed trays in here, which means there is a fair amount of space around them to add more containers with seed starts. I just have to figure out what waterproof surface I can fit in there to put them on.
I think I can get away with not adding foil, though. What do you think?
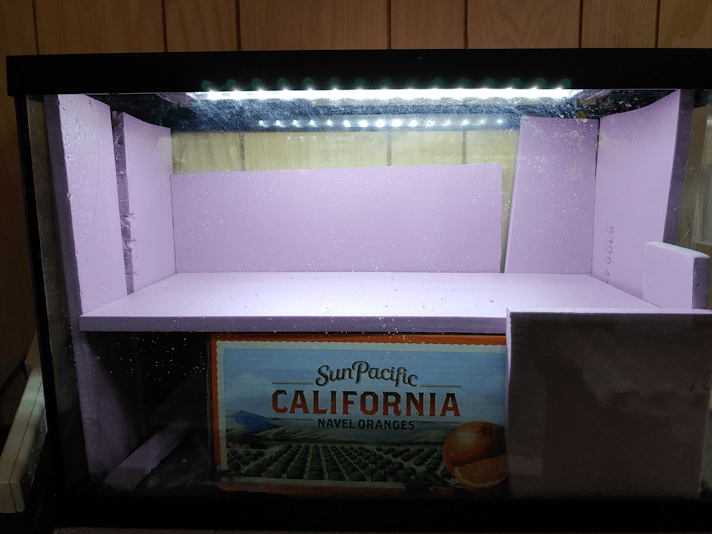
The second tank was much easier and faster.
Once again, I had to cut pieces smaller, to be able to fit them through the top. I only needed to add insulation to the back, which is against the exterior wall, but I added more to the sides to help fill in gaps around the floor piece.
I’m going to have to find something better to raise the floor. The orange box is a bit too small.
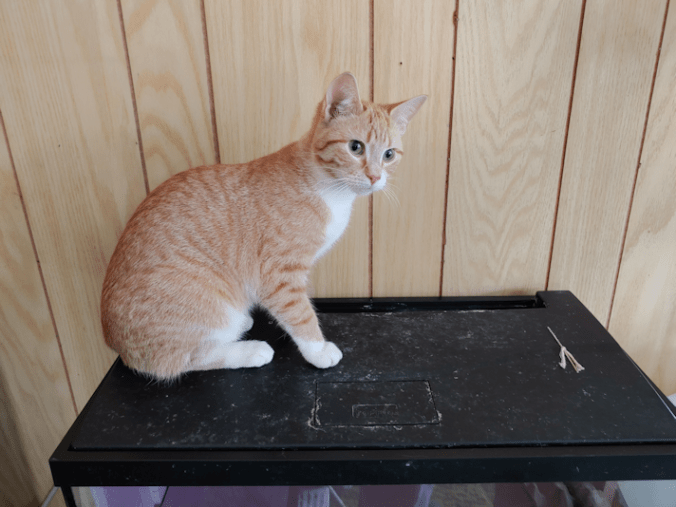
Photo bomb, courtesy of Saffron!
As you can tell by the dusty footprints, the cats like the lid of this tank!
At this point, I should be ready to start seeds in here. According to the package instructions, I don’t need to start my onion seeds – the ones that need to be started the earliest – until the end of March, but experienced zone 3 gardeners in groups that I’m on have already started theirs, and say they should be started now. The seed trays I have are too big to fit into the smaller tank, so I will have to find something else waterproof to hold seed starts in the little tank. I want to buy more seed trays, anyhow; I’ll have to take a good look at what dimensions are available.
There is only so much I’ll be able to fit in these, even if I’ll later be able to move the onions into the sun room and make room for something else. I did find something that I might be able to use, for when I’m starting the squash and gourd seeds.
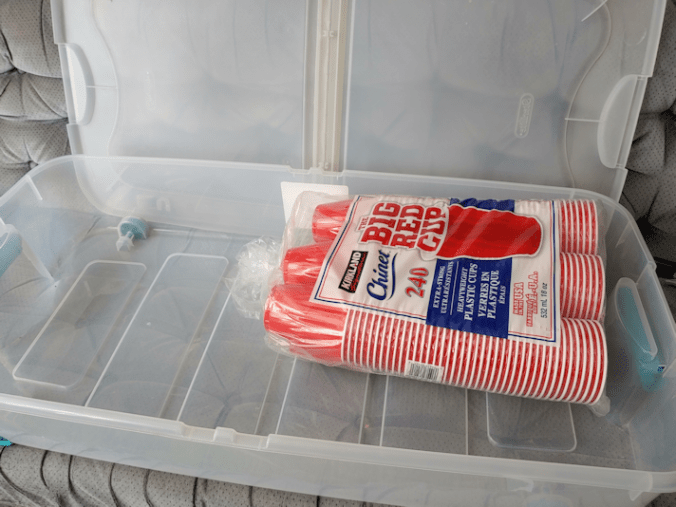
The squash and gourds need more space to grow, and they are the things that need to be started soonest, after the onions. I’ll be using these cups, with drainage holes punched into their bottoms, as pots. The storage container is designed to fit under a bed, but the hinge on the lid is broken, so it has been languishing in the basement until now. I have a second one. Once I figure out what to do with the stuff stored inside it, I’ll be using that as well.
We have so many varieties of summer and winter squash, as well as gourds, to try. Depending on how many seeds are in each package, I may not plant them all. Some are packed by weight rather than number of seeds. I figure, at most, I’ll start 10 seeds each of the summer and winter squash. Whatever the germination rate turns out to be, that’s what I’ll be planting. If I get just a 50% germination rate, we will still have lots of each variety, and with the number of varieties, we should have plenty for both fresh eating, and preserving and storage. For the gourds, I’ve decided to start 5 seeds of each, and see how they do. One of them is an eating variety, but the others are to dry and use for crafting purposes. Curing them takes about a year, so the sooner I can get some grown, the sooner I’ll have materials to work with! If space in an issue, though, I’ll drop the gourds for this year.
I still have the mini greenhouse that my daughter bought for me last year, which can hold three of the trays that are in the big tank. The cats still managed to get into the closed plastic cover, and it gets knocked over easily, so anything we start in there will be done later in the season, and in the sun room!
With the trays I have now, all I need to figure out is what to use in the small tank, and I should be able to start the onion seeds very soon!
We’ve got some lovely mild weather right now. It’s kind of deceiving, to look out the window during our cold snap and see bright blue skies and brilliant sunshine when it’s bitterly cold, but now that we’re warmer, it’s overcast and deary looking. Those insulating clouds, however, are part of the reason we can enjoy these milder temperature.
The outside cats like the warm spot on the roof of their shelter, above the terrarium bulb! They were quite active when I came out to do their food and water.
Note in the background, a certain Nicky the Nose, tucked under the lilac by the storage house. He shelters under the building, when he’s not sneaking into the cat shelter to visit the ladies. :-(
Inside, we have tiny little bursts of sunshine of another sort!
This is the first time we’ve seen this succulent blooming! When we got it, it was one of 3 succulents in one pot that they soon outgrew. The other two varieties are still struggling along, but this one seems to finally be thriving! We’ve had to move it a few times because, apparently, it is delicious. The cats kept trying to eat it! Even when it was hanging in the dining room window, they would manage to clamber up and reach it. We finally seem to have found a spot where they haven’t been able to reach it. At the rate it’s growing now, we’ll have to keep an eye on how low it starts to hang, or they’re try eating it again!
Meanwhile, we have these lovely little busts of sunshine in our window to help us thing of warmer, sunny days!
The next couple of days will be even warmer, which means we’ll finally be able to start working on the main door that’s falling off its hinges, and see what we can do to fix it until we can replace the door and frame. Until then, we’ve been using the door as little as possible; mostly, just when we have to unload the van or something, which we do assembly line style. That way, only the storm door gets opened and closed frequently.
It should be interesting to see how damaged the door is, once the hinge plate is moved away. That will determine what we end up doing to get it usable again.