Well, for better or for worse, I’ve started working on the door hinges.
This is intended to be a temporary fix, until we can replace the door and frame completely, but I have no idea when we’ll be able to do that, so this patch job may need to last a while.
The first thing to do was to open the door as wide as possible (with a built in closet in the way, that isn’t as far as I’d like!) and place supports under it to hold the weight.
One of the things we’ve been finding lots of, while cleaning this place up, is laminate floor tiles. It’s amazing, how handy these have become. A couple of pieces of wood under the door made up most of the height, then it took 3 of these tiles to get it fully supported where it needed to be. We’ve also used them to put under bench legs and wooden shelves in the basement, to get them off the damp concrete, and so on. I’ve found a couple of cases of these tiles, just in the basement – there are more in the barn. Definitely things to keep, even though they’ll never be used as flooring! :-D

Once propped up, I could remove the screws which, I’m happy to say, were not damaged as I had thought they were. I do not have to replace the screws. I was able to remove 2 of them with just my fingers, and the only reason I had to use a screwdriver for the 3rd one was because it was the offset middle one, where the hinge wasn’t pulling away from the door as much.
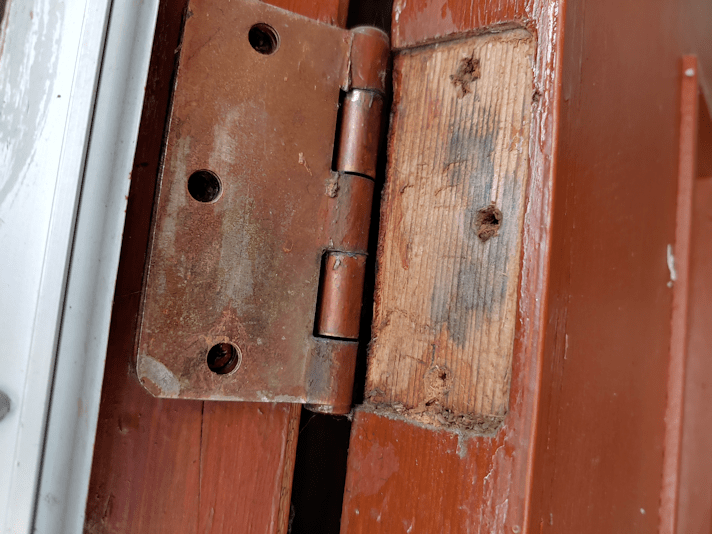
The hinge still needed to be pried loose before I could take a good look at the damage. It fits perfectly in that recess.
Because of how close this is to the frame and storm door , I actually got a better look by taking a picture, then with my own eyes!
The damage isn’t actually as bad as I feared it would be.
The next step was to bring out the Dremel to clean out and enlarge the screw holes.

The Dremel just barely fit in the space available, but it worked. I used a couple of grinding and engraving tips; first a small cone shaped one to clear out the holes, then a metal tip to clean out further into the openings than the cone could go.
The wood is so dry, there was smoke coming out of the holes from the friction!
For the wood plugs, I ended up choosing some pieces of lilac branches I’ve still got hanging around. They were already the size and shape I needed; I only had to strip bark off the pieces, then make one end slightly narrower. Also, I will need to pre-drill holes before putting the screws back in, to prevent cracking, and the core of the lilac is already little more than sawdust that can easily be removed. They’re basically already pre-drilled. :-D
I was going to use wood glue to put the pegs in, only to discover it had dried out, so I went with all-purpose glue that I happened to have.

After making sure the pegs fit into the holes, I applied a bit of glue to their ends, then gently tapped them into place with a little bitty hammer I happened to have. With a normal sized hammer, I wouldn’t have had the space to swing, without hitting the window of the storm door.
The pegs will now sit for a few hours before I check the glue and decide to cut the pegs flush tonight, or wait until tomorrow morning. If I can cut the pegs, we’ll be able to close the door most of the way as the glue finishes setting overnight. If not, we’ll be stuck with this all night…

These are the pieces of insulation we’d cut last year, to fit over the inner door, held in place with Velcro strips, to keep frost from forming on the bottom of the door, and ice on the windows. It worked well, but there were some issues with the strips, and we haven’t found a workable alternative, yet. Thankfully, this winter has had only a few days cold enough for the ice and frost to form.
The arm bar is coming handy for holding the pieces in place!
If this works out, we’ll do it again for the middle hinge. That should tide us over until we can replace it all with an insulated steel door and a steel frame.
Hopefully.
The Re-Farmer


Done correctly, it should last for years. The Home Depot DIY manual considers it a permanent repair, at least in as much as anything is permanent with buildings
LikeLiked by 1 person
Pingback: More digging, and I’m a suck | The Re-Farmer