Counting today, we’re expected to have three cold days before the spring-like temperatures return.
Not that it’s particularly cold – until you step out into the wind!
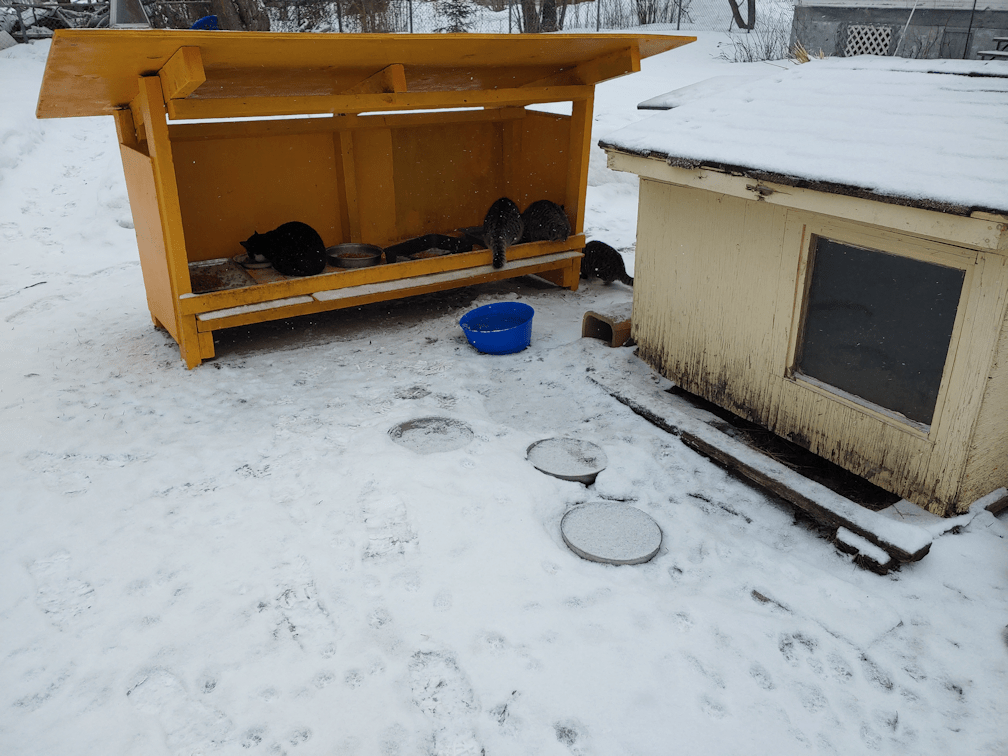
The outside cats barely made an appearance this morning. They were far more interested in staying out of that wind!
The wind was mostly coming from the north, which meant stepping around the house to put seed out, was like walking into a wall.
A cold wall.
The path to the sign cam was pretty much blown in.
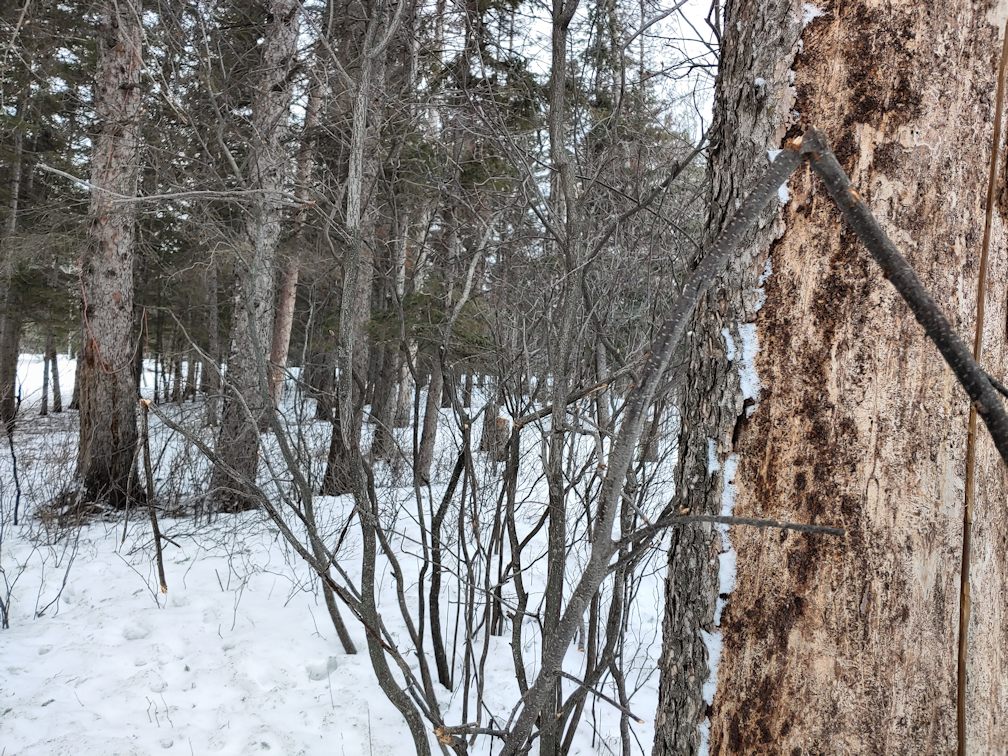
I paused this morning to check out the deer damage to the Chokecherry and Saskatoon bushes we uncovered while clearing out the invasive spirea at the edge of the spruce grove. Cleaning things up meant they got more sunlight and actually produced fruit during their first uncrowded summer, but now the deer can get at them. All the lower twigs are nibbled away, and there are many broken branches. And by “lower twigs”, I mean basically anything under about 7 feet. The deer can reach pretty high when they stand on their hind legs!
I wonder if these deer were among those causing damage?
I didn’t see any deer when I came out this morning. They’d already left. :-D
The winds are still high and it’s quite unpleasant out there.
Rolando Moon the Wise has staked out her spot in the sun room, where it’s much warmer and cozier! Not to mention, she has her own private food and water bowls. :-D
As for today, we’ve got a big project to work on. While doing the laundry last night, I came to the entry and found water all over the floor.
It wasn’t from the washing machine. At least not directly. It’s from the drain. I’ve long had concerns about it. When the water starts to drain, you can hear it flowing, but the tone changes until the sound stops. Basically, the water is draining out of the washing machine faster than the water is flowing through the pipes, and what I’ve been hearing is the water backing up until it reaches the end of the drain hose from the washing machine, and then you can no longer heard the water flowing. I’ve been keeping an eye on it, to see if it’s at risk of overflowing, but until now it’s been fine.
I did a larger “heavy duty” load last night, and it may have been just too much water this time.
So what I want to do is see if we can clear the drain a bit. Which means we have to move the washing machine.
The washer and dryer just fit between the built-in closet and the wall the taps are in. There are two steps from the entryway into the dining room, and the bottom step is several inches in front of the washing machine. Which is handy for short little me to stand on and reach the bottom of the washing machine, but it also means we can’t simply pull the washing machine straight out. In order to move the washing machine, we have to move out the dryer.
Since we have to move the machines out, anyhow, we’re going to clean up the mess we know is back there. The cats have been knocking things down off the shelves and, from the smell of it, they’ve been peeing back there, too. It’s just so difficult to get back there, we haven’t done it, yet. I would love to find some way to keep the cats from going back there, but no practical solution has come up yet.
I am not looking forward to this particular job. I’d almost rather be working outside, in the wind!
Today is 10 weeks from our average last day of frost, and we had a few seeds to start.
But first, we needed to make space. These would be going into the big aquarium greenhouse, on the heat mat, which meant the Sophie’s Choice tomatoes had to be moved. All the pots have seeds germinating in them, so it’s okay to take them off the heat mat now.
Space was made for them to fit onto the tray in the small aquarium greenhouse, which is where we have a few rescues. At the bottom left is the only luffa we’ve got so far. The seed leaves have wilted away, but the true leaves are still holding out. In the top left corner is the rescued Canteen gourd. It had seemed to be doing well, then suddenly it started wilting and the seed leaves started wilting away, but it has actually perked up again. If it can manage to develop some true leaves, there’s hope for it. With the Canteen gourd, however, the replacement seeds we planted are doing much better. The two plants with the largest leaves in the photo are Canteen gourds, as are the not quite as robust pair in between the luffa and the original Canteen gourd.
There’s also one surviving tomato plant in there; I can’t remember which type is it. There are a few others in the mini-greenhouse, too.
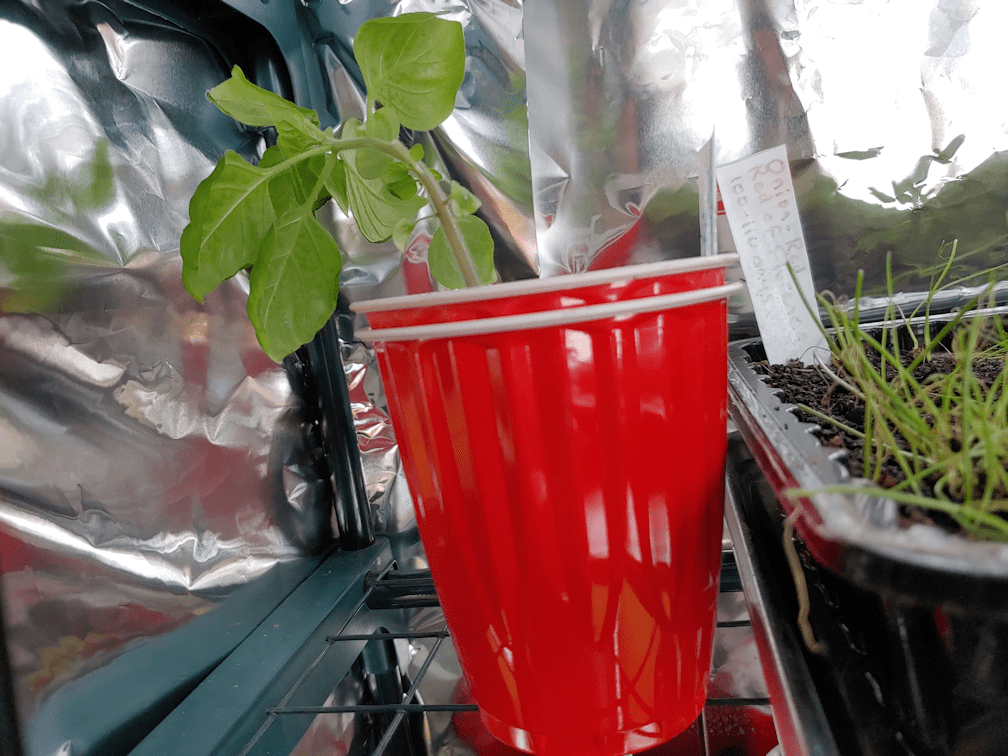
The one Wonderberry that sprouted from the first planting has gotten big enough that it was too tall for the lower shelves in the mini-greenhouse, so I couldn’t put it in one of the trays with other pots. So it got double cupped and tucked in with the bulb onions at the very top, where the mini-greenhouse has a peak. It didn’t like my attempt to put it in a lower shelf, but it should be standing tall again, soon.
Here we have the pots that my daughter and I started today, joining the luffa pots that we planted a couple of weeks ago. Still no sprouts. :-(
Everything got two pots each. Two types of gourds got started today; the Tennessee Dancing Gourd, and the Ozark Nest Egg gourd. Both did surprisingly well last year, in spite of the drought.
The Crespo Squash was also started. Then, we decided to plant extra eggplants and peppers. We do have surviving ones from the first planting that seem to be recovering all right from being flattened by a cat, but we’ve decided to play it safe and plant extra. The last of the Little Finger eggplant seed were planted, but we still have a few left of the Purple Beauty pepper.
The next batch of seeds should be started about 2 weeks from now. Hopefully, we’ll be able to move at least the onions to the sun room. They can handle cool weather better than anything else we’ve got started right now.
This morning, I decided to finish my mourning rounds by finally digging out the BBQ, so I could put the new cover on it. I was waiting for a slightly cooler day, when things wouldn’t be melting while I worked.
Though it was still very much a “rubber boot” morning!
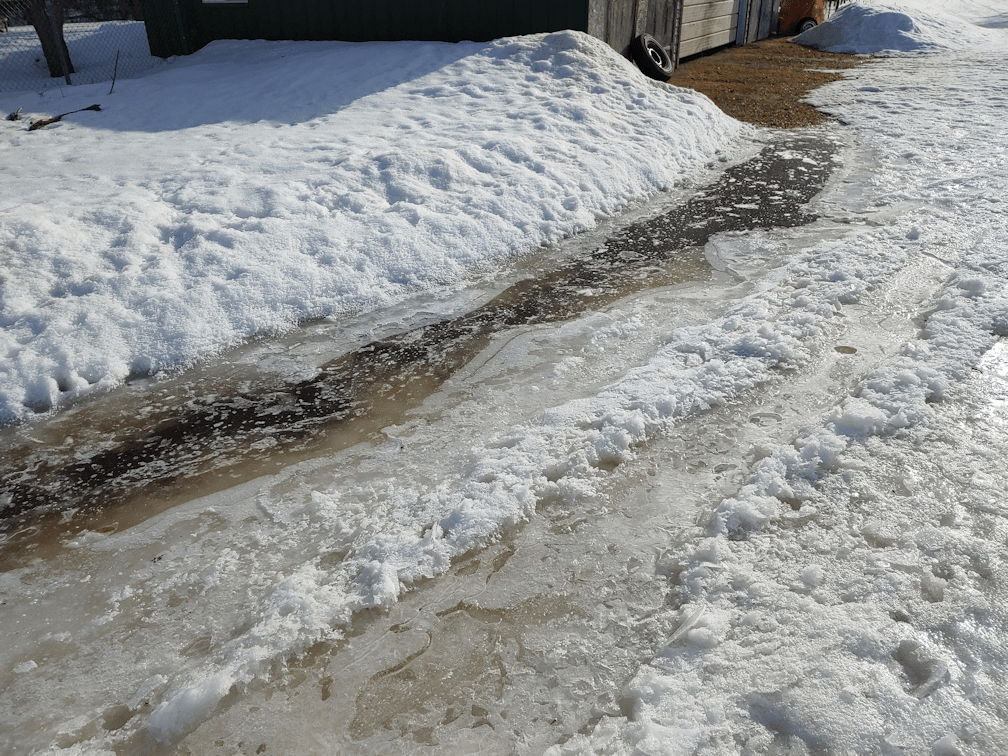
This is the cat path from the kibble house to the storage house. The cats made the paths you see on the left with their muddy little feet, while the path veering right goes to the fire pit.
As you can see, there is a low spot right here, filled with snowmelt. I had to slog through it several times while I was working this morning!
With the melt-thaw happening over the last while, the top of the snow has formed a pretty hefty crust. In fact, this morning I spotted our piebald deer through the bathroom window, on the far side of the old kitchen garden, walking on top of the snow. Not only did the snow hold her weight, but when I walked past the area later, I couldn’t even see tracks.
As you can imagine, the ice chipper got a good workout while I was digging, this morning!
I cleared a path along the side of the collapsed tent, removed hard packed snow that was on top of the remains of the canopy, then had to cut away parts of the torn canopy to free the BBQ. Unfortunately, I still had to deal with the piece of tree that had broken the tent in the first place.
That out-of-focus branch tip in the foreground is part of the branch that you see stretching up and out of frame at the top.
I had to break off that branch in pieces to be able to access the back of the BBQ and the other corner of the tent. On the plus side, since the branch was sticking up into the air like that, the pieces are very dry. They’ll be great for the fire pit.
This was the main problem. One of the canopy supports was across the side element on the BBQ. There had actually been a folded up camp chair leaning against it. There’s a little pillow attached, and it actually protected the BBQ. The little bit of scuffing you can see under the canopy support happened just this morning, after I moved the camp chair out.
I couldn’t get that piece off the BBQ. It wouldn’t even break for me, as others did. All it would do is slide back and forth, but there was still too much weight from the canopy remains, and the snow trapped in it, to lift it.
There was a possible solution, though. We had dropped the tent legs as low as they could go, to cover and protect the picnic table and BBQ, making sure it was thoroughly pegged down with the support ropes, to make sure it wouldn’t blow away. What I could do was remove the canopy from the frame as much as possible, then raise the legs up to the first notch.
It took a while – and more digging to reach – but I managed to get three of the legs raised to the next highest position.
Which helped to a certain extent, but that fourth leg by the broken piece of tree would not budge.
I had forgotten just how big it was! The ice chipper is right at the largest end of the piece. Once I figured out where the end was, I could use the ice chipper handle to lever the branch loose, so it was no longer frozen to the ground. It was leaning right against the leg, pushing it over.
As much as I levered and wiggled the whole thing around, it still wouldn’t move off the leg.
There had to be a reason I couldn’t see.
Yup. Here it is.
There was a large branch, hidden in the snow, that I had been trying to roll it against! I stabbed along the length of it with the ice chipper until I found it’s end.
I was not about to dig all that out.
I grabbed a hatchet, instead. I didn’t need to even cut all the way through. Just enough that it would break, and I could finally clear it from the leg.
Which worked, but then I discovered another problem. The leg still wouldn’t move.
I chipped away around it. What you’re looking at is ground level. When the tree fell on the canopy, it drove the leg into the soil. Which is amazing, considering the legs have a flat plate on the bottom, so they can be pegged to the ground. Which they are. So the bottom of that leg, and the base of the part that slides up to raise the height of the tent, are frozen into the ground.
Well, crud.
I ended up having to break as many parts of the canopy frame as I could, to finally be able to clear the BBQ enough to cover it.
Which I finally did!
Then I used some of the heavy blocks of snow that were on the torn canopy to weigh down the bottom edges.
The frame is a mess, but it can’t be removed until the ground thaws out enough.
I like that the new cover for the BBQ has grommets on it. We’ll be able to peg it to the ground in between uses, so the wind won’t tear it off.
The branch pieces were set aside on the snow near the fire pit. Maple will make a nice cooking fire.
Then, since I was there anyhow, I dug a path from the fire pit to the wood pile.
Normally, I’d say we can use the fire pit now, and have ourselves a cookout if we want, but with that big puddle in the path, I think it’ll wait a bit longer. We don’t all have rubber boots.
For now, I’m just happy to have the new cover on the BBQ.
As long as we don’t get any more pieces of tree falling on it, now that there’s no longer the tent frame to protect it!
Spring is still trying to show us it has arrived, though in a couple of days, winter is expected to come back for a while.
Which might make it a bit easier to deal with this.
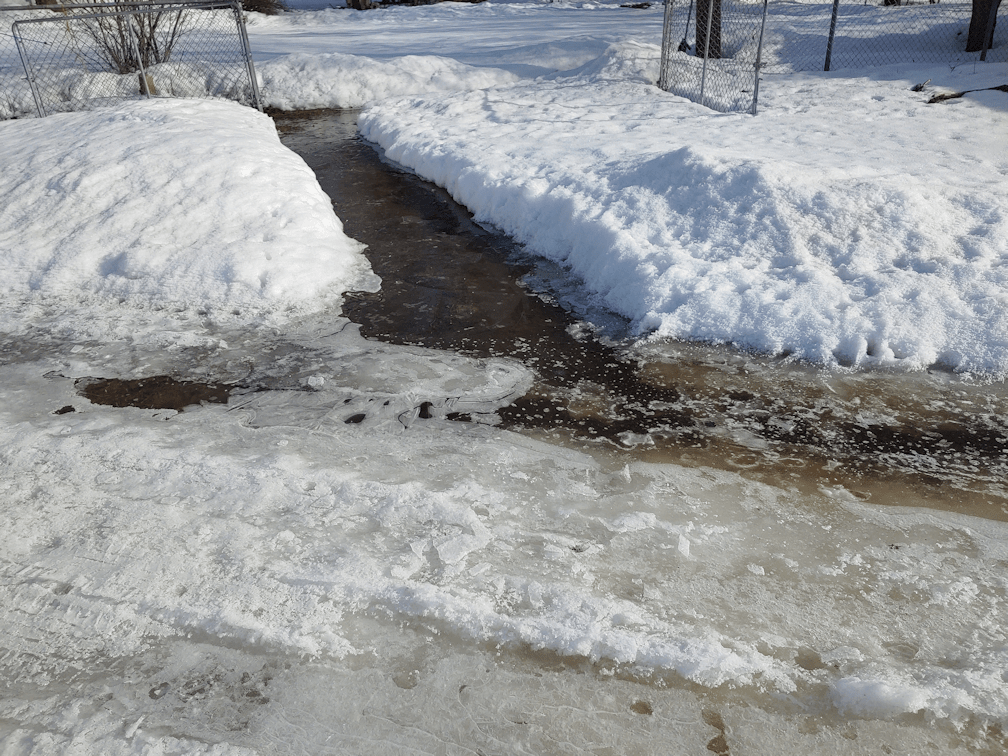
This is the food path we dug to the vehicle gate. The meltwater fills this path, and continues down the paths to the back of the garage, and the outhouse.
In previous winters, we’d been able to keep this vehicle gate, and part of the yard, clear of snow so that we could still drive right up to the house. We had quite a bit less snow than this year, yet we still had “lakes” forming in this gate, and in that low area in front of the outhouse. Without being able to clear all that snow, plus the larger amounts of snow we got this winter, we’re going to be dealing with a lot more meltwater in those low areas.
That “river” of melt water is in the path we dug that was wide enough for my husband’s walker, to get to the front of the garage.
Here’s the rest of that path, all the way to the small gate. You can see where puddles are starting to form in the tire tracks in the snow. In previous years, this entire area would get filled with water. Which meant we could not get to the garage, either from the front or the back, without having to go through a large puddle of water and/or mud.
With the amount of snow we got this year, we can reasonably expect those areas to have quite a bit more water. If that happens, we may have to start parking the van near the small gate, so we can reach it without having to walk through too much water or mud. Another area that tends to collect water is right in the middle of the driveway at the gate. Which means we have to stand in water to open and close the gate.
Another reason why I’d love to get a couple of loads of gravel onto the driveway!
I’m okay with the cold coming back for a bit. As long as we don’t warm up too quickly, the ground will have a better chance of warming up and absorbing the moisture. Looking at the 14 day forecast, it looks like that’s exactly what we’ll be getting.
One of my favourite crafts to do is to crochet. I am even a teacher, certified with the Crochet Guild of America, and quite enjoyed doing classes, back in the day.
These days, I don’t crochet very much, partly because my hands have become so rough, most yarns catch on my fingers, even pulling the loop off my hook at times. I don’t like the idea of working with high end, $30 skeins of yarn, only to have my hands catch on the strands and tear them apart. And no; working with gloves on is not an option!
Also, hand lotion does butkiss.
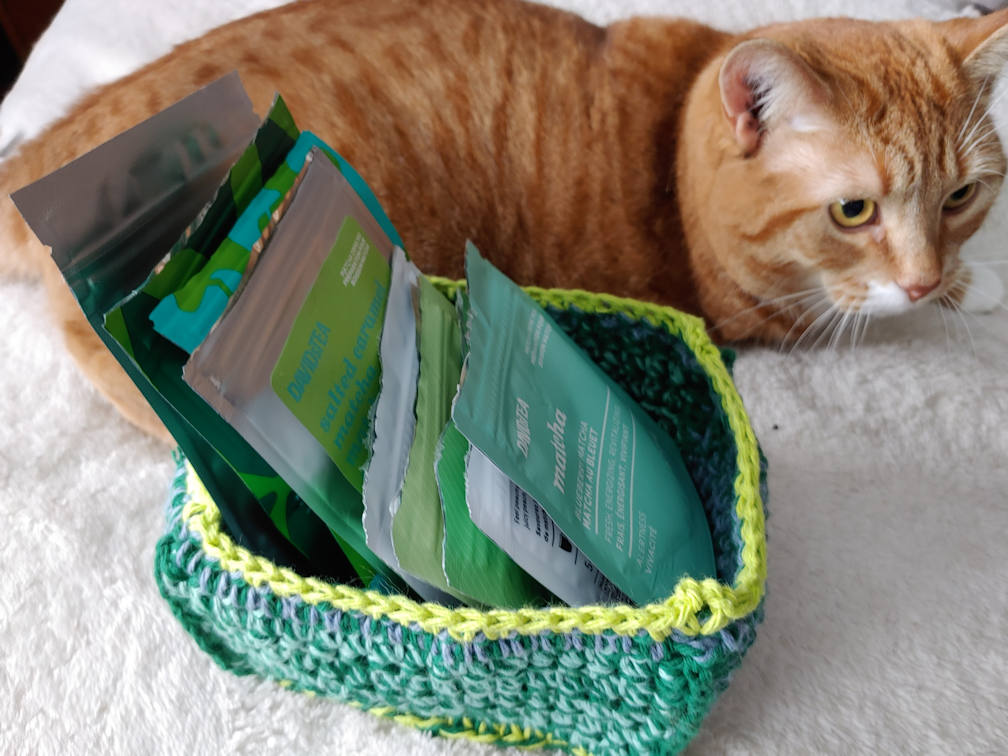
One kind of yarn that doesn’t do that is cotton. So when my daughter came to me with a request for a basket cozy for her teas, it was the perfect project for some nice, sturdy cotton!
With a special appearance from Ginger!
For her birthday, we got her a set for making matcha, so of course she had to get a nice selection of matcha blends to use it with. Taking advantage of a sale at David’s Tea, she was able to get a whole bunch of mixes, plus some straight up matcha. I didn’t realize the basket was for just her matcha teas, and used what colours I had. They just happened to suit the intended contents!
This was done with two strands on the hook, with the main colour a darker green, because I had enough of that yarn for the entire project. The other colours I had were in much smaller amounts.
To make this box, I started by making a flat rectangle for the base, a couple of rows smaller than the size I wanted, in single crochet. Then the base got a round of single crochet on all sides, which brought it to the desired finished size. Then, a loose round of slip stitch was worked into that last round. The slip stitches formed the base the sides were worked from. Each side was worked individually. I did the long sides, first, using a mint green I had just barely enough of, then switched to a sort of periwinkle blue for the short sides. I used just the main colour, in a single strand, to stitch the corners together with a modified single crochet. Then I went back to the blue and green combination to go all around the top to tidy it up. Finally, I used a single strand of bright green and a smaller hook, to tighten up that top, so it won’t flop around as much. To keep the corners from becoming rounded, I just added a little picot that doubled as decoration.
As the sides were worked from the slip stitched loops on the base, that left open loops facing outwards. Switching back to the larger hook and using the bright green with the main grain, I did one last round of single crochet into those loops, to make the base a bit more stable, and balance out that bright green at the top.
My daughter was very happy with it!
It was so much fun, today I made another tea cozy. This time, for one of my tea cups.
I think these were actually sold as soup cups. It’s about twice the size of your basic coffee mug.
Normally, when I make cup cozies, I make them with a strap that goes through the handle and buttons into place on the other side. It not only holds the cozy in place, but it protects your fingers from coming in contact with a scalding hot cup. Which is a big deal for people with nerve damage in their hands that prevents them from feeling heat!
That design works great with regular mugs, but with a cup that’s short and fat (like me!), they would slide off on the side opposite the handle.
So for this one, I made an over-the-handle loop. I started with a round, flat base that was just barely the same size as the bottom of the cup, then worked a couple of rounds without increasing, to start building up the sides. After that, I worked in rows, leaving a 5 stitch gap for the handle. I had very little of this yarn, and Nosencrantz had gotten to the purple, chewing through in several places, so I used the little bits for the stripes. Between the two colours, I managed to finish it. :-D
After finishing with the last two rows in blue, I joined the purple at the handle gap, working down from the right hand side, then around to the top of the other side. This closed up the handle gap from a 5 stitch opening to a 3 stitch opening. After making a little 3 chain loop at the corner, I then slip stitched into the last row of blue, all the way around, with the last slip stitch worked into the first stitch in purple. Next, I made a chain 3 to close the gap, slip stitching into the 3 chain loop at the opposite corner, then finishing off the yarn.
The slip stitches keep the top edge from being too stretchy, and the loop stretched over the handle pulls it all in. There is no way this cozy is going to slide off the other side!
I’m using it right now and, in retrospect, I would change one thing. I would make it one row shorter. That would require making the handle loop a chain or two longer to reach over the handle, without too much strain on the strands. When drinking from the cup, the cozy is juuuust tall enough that it gets in the way of my lips a bit.
We have three more cups like this (alas, our fourth one broke). I think I have enough cotton yarn to tweak it a bit and make a couple more. :-)
I really love doing structural crochet. I also love making useful, rather than decorative, things. I’m glad I can still work with cotton, because it’s perfect for both.
When finishing the toilet tube seed pots we made yesterday, we had to put the lids on the bins, to keep the cats out, so it took quite a while for them to dry.
They still weren’t totally dry, but I figured it was good enough! After all, we’re just going to be bottom watering these, anyhow, so they’re going to get soaked, soon.
I started with the tubes intended for the paw paw seeds. After filling them 3/4s of the way with pre-moistened seed starting soil, I started carefully finding the paw paw seeds in their baggies, while my daughter continued to fill the tubes intended for the tulip tree seeds.
After placing a seed into a pot, soil from the baggie was used to top up the pots. In the above photo, the two on the left have seeds in them.
None of the paw paw seeds showed signs of roots, though they did look more… filled out, shall we say. More rounded. Which is to be expected, considering they’ve been in damp soil all this time.
Once filled, they tucked into the bin a bit more tightly than while empty, which is what I want. It’ll keep them from falling over, and keep the toilet rolls from unraveling when they get wet.
After putting the filled pots back in the bin, they got watered, and any that showed the soil settling quite a bit, got topped up with more soil. Then water was added to the bottom of the bin.
The tulip tree seeds also did not show any signs of roots. In fact, they still looked almost exactly like they did when we first got them, except a bit darker from being in damp soil.
They got watered from above, topped up with more soil as needed, then water added to the bottom of the bin, as well.
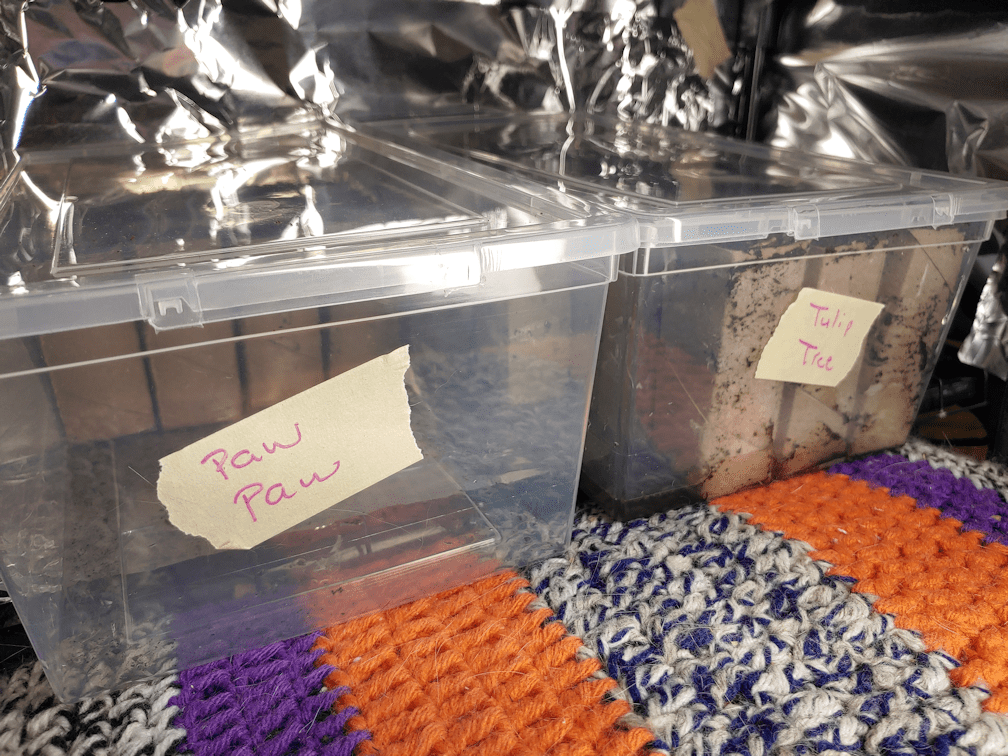
They then got lidded and labelled, ready to go into the mini-greenhouse.
The lids will be left on, loosely, to help keep the moisture levels even.
A bit of re-arranging of the other seedlings and trays, and I was able to put these on the two bottom shelves where, even if the cats manage to get in, they will be safe.
Now there’s another reason to use these bins for seed starting. Cat protection!
The instructions they came with said that these take a very long time to germinate, and that the roots will be growing long before the leaves start to show. So we will just keep these moist and otherwise leave them alone. Not having them in the baggies anymore means we won’t get to see those roots, but I think it will be better for them to be in these little pots instead of the baggies. Less chance of the roots getting damaged, I think. It will also be much easier to move them around in these bins, than in the tray that was holding the baggies. Those black trays may fit the shelves in the mini-greenhouse just right, but they are awfully wimpy things, and hard to move around. A couple of them have already started to crack on their edges, from bending in the middle when picked up.
So this is now done. The tree seeds are in little pots and, perhaps in a month or two, we might see sprouts emerge. I have no idea what to expect from these, and am just hoping for the best!
I got a phone call from the Cat Lady this morning.
Cabbages finally made it in to the special vet to be spayed this morning, and she is recovering nicely. So that is good news.
The other good news is that we have an appointment for Turmeric to be spayed, early next month.
Turmeric will be coming back to us for recovery, while also being added to the adoption list with the Cat Lady’s new rescue organization.
That’s the good news.
The not so good news is that the organization she left, with them wanting to send Saffron and Nicco to BC being the last straw for her, isn’t too happy with her. As a large organization, they have access to lots of resources – and they are making it difficult for her to access those resources!
Which is making things more difficult for her in general. As you can imagine, things are incredibly stressful for her right now!
You’d think they would be more interested in rescuing cats and be glad to work with other organizations with the same goals, but apparently not.
This isn’t necessarily a bad thing. One of the things they did was stop accepting intakes through our local vet. The vet was taking in “too many” really sick cats, and the bills were really high, so they basically cut off that clinic temporarily.
Well, guess who is the vet that agreed to work with the Cat Lady?
Yup! Turmeric is going to the same local vet we’ve been using all this time!
They have become incredibly busy, though, so it’s hard to get an appointment in. I noticed a while ago that they have extended hours, and are even open on Sundays, which had been their one day off, a few months ago. Clearly, people are happy with this clinic!
The other news is with Saffron and Nicco. Using what resources she still has access to, she has worked something out with another rescue in the city. They have adoption facilities in a non-franchise pet store that is very busy. It’s not an ideal situation, but it’s still better than being sent half way across the country! She’s known the woman who runs it for 20 years, so she knows they are a good place. The fur-girls will be going there, now that they are recovered from being spayed. With how successful and busy this place is, she’s expecting them to be homed within a week.
I found out something else when she contacted me about the appointment for Turmeric.
While her new rescue organization has lots of support and is getting donations, most of this is being bankrolled by her husband right now. Thankfully, he owns a business that didn’t get destroyed by government restrictions over the past two years, and can afford it for now. So all the out-of-pocket stuff they’ve been doing has really been out of his pocket! So when we bring Turmeric in to be spayed, and will not be getting any bill for it, it’s because HE is paying for it!
What an amazing man. Her whole family has really been all in with her cat rescue operations!
All the more reason I want to help out with the fundraiser I’ve got through Ko-fi.
The only problem is, as with the rescues, not a lot of people are donating. I’ll keep the fundraiser going for a while longer, but if people aren’t interested, I’ll just shut it down and refund the (much appreciated!) donations currently made. Everyone is going through hard times right now, and I understand that they have priorities that are higher on the list than cats! We shall see how it works out.
As for myself, I’m just in awe of the Cat Lady, and all she is going through right now, trying to do right for the kitties.
Once again, the kibble was all gone from the food trays, and I don’t think we can blame that piebald deer this time.
We did get some rain and a light snow last night, so we could see tracks all over the place.
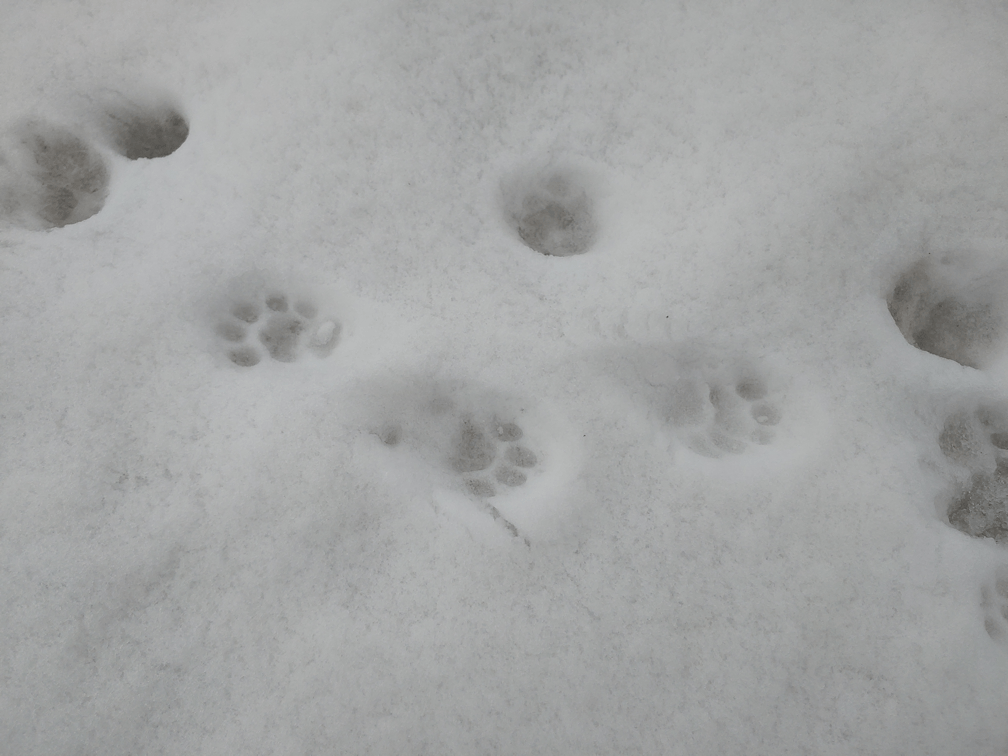
These are kitty paw prints.
With their pretty little toe beans, well defined in the snow.
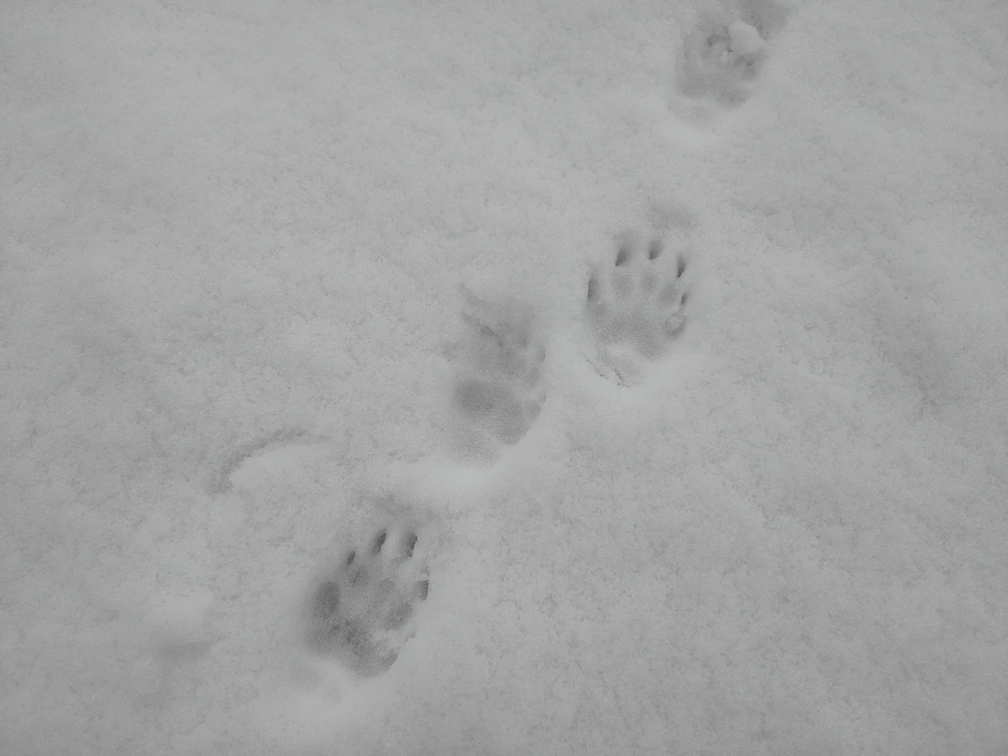
These are NOT kitty paw prints.
Check out those claws!!! Aside from the claws the paw prints are about the same size as most of the kitty prints.
These are from a skunk, and I found some tracks around the kibble house, too. I know for sure it was a skunk, because I saw it running around our driveway last night, on the garage cam’s live feed.
Skunks don’t go into total hibernation. It’s more of a “lethargic sleep” than full hibernation, and they do come out now and again, throughout the winter. February and March are their mating season, so not only would they be out in full, we’d have pregnant females by now, looking for food.
Speaking of food…
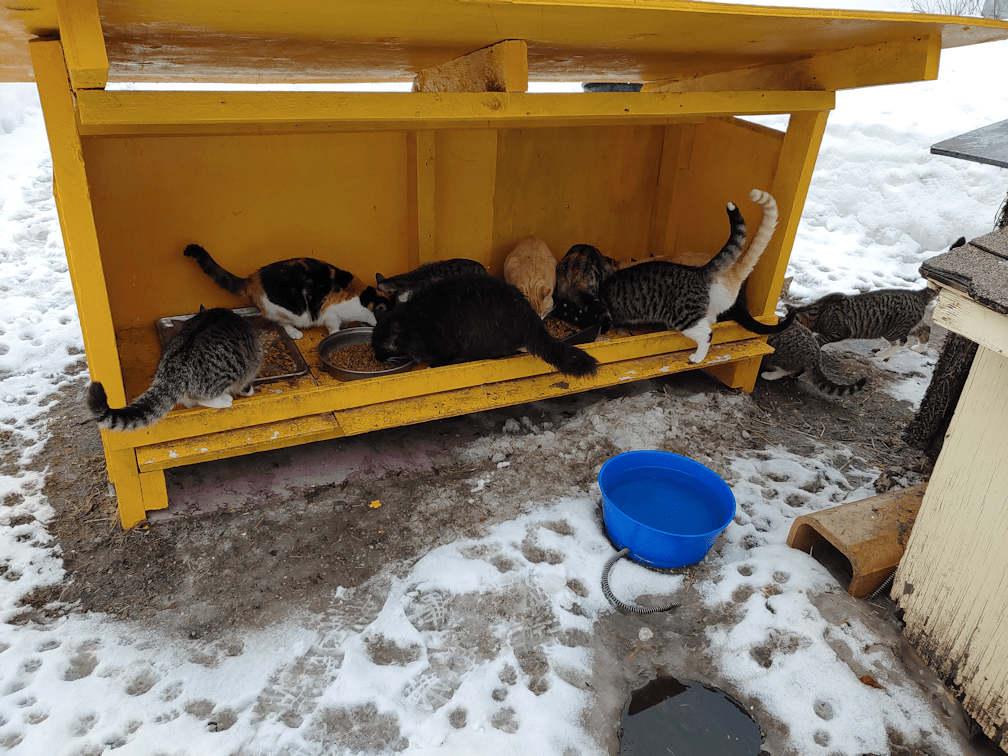
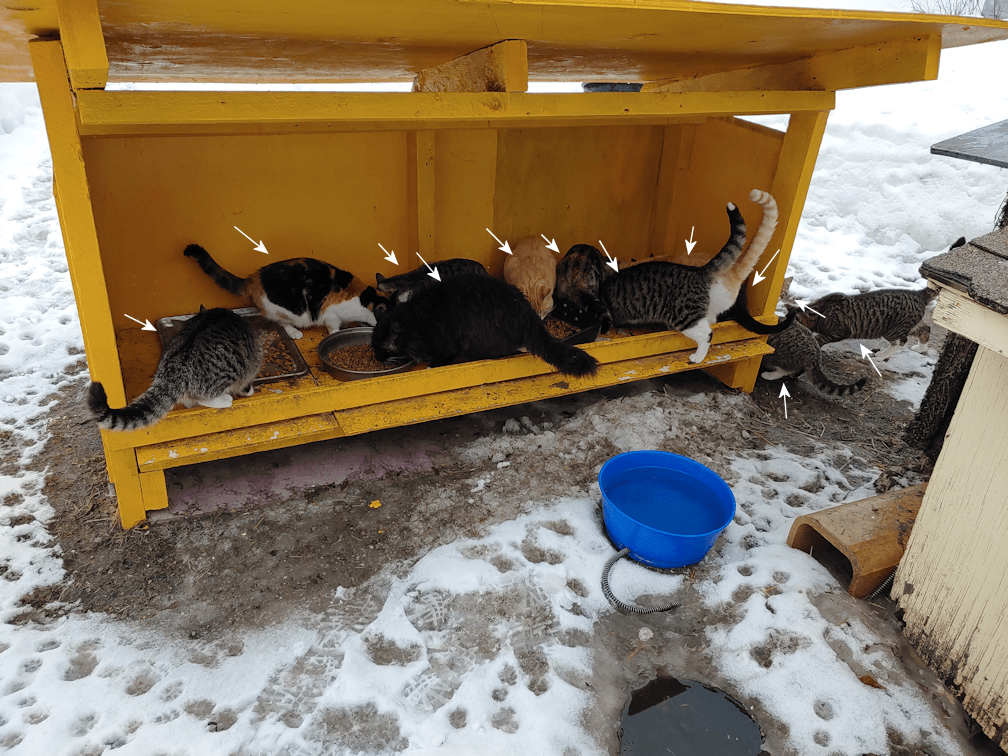
Did you find all twelve hungry kitties in the kibble house?
Tuxedo Mask is almost completely hidden by Creamsicle Jr, in the far right corner of the kibble house. I love that you can juuuust see the tips of his ears above Creamsicle’s back.
Then there’s one of the ‘iccuses peaking from behind the kibble house, at the tray on the ground.
Along with these twelve, there were three more in the sun room. Not quite all of the yard cats, but close!
While I have purchased pots that can be planted directly into the soil when it’s time to transplant seedlings, the sheer number of such pots we will need makes buying enough for all of them bad for the budget. In particular, I want to start the kulli corn in biodegradable pots, for as little root disturbance as possible.
After last year’s attempt to use toilet paper tubes failed dramatically, largely due to using peat as a growing medium (it simply would not absorb moisture all the way through!), we’re going to try things a bit different this time.
There are a lot of web pages and videos on how to make pots from toilet paper tubes. This one is the best one I’ve seen so far. There’s the added bonus of it showing the pots made into squares, which was what I was thinking of doing already.
It’s pretty basic, really.
We knew we’d need a lot of tubes, so we’ve been saving them for many months. Last year, I had a fairly large box that we would drop the tubes in, and when we ran out of room I’d transfer them to a storage bin, to make more space.
Which was really silly, now that I think about it. It only matters if you want to keep the tubes round, and there is no need for that at all.
This little box has two layers of tubes in it. After flattening a tube, I’d drag it across the edge of the bathroom counter, to crease the fold even more.
It’s amazing how many tubes can be fit into such a small box this way!
Today, I snagged some of them to make pots for the tree seeds. I don’t know if there are any roots starting to show in the little baggies of soil. I am thinking it would be much less disruptive on the roots to “transplant” them now – when there may not even be any roots yet – into little pots, compared to trying to move them out of the baggies when the roots are actually visible.
So I grabbed a dozen tubes for the paw paw seeds, first. The different brands all have different tubes. The ones I grabbed were the tallest, with the thickest carboard.
This first batch was done like in the video.
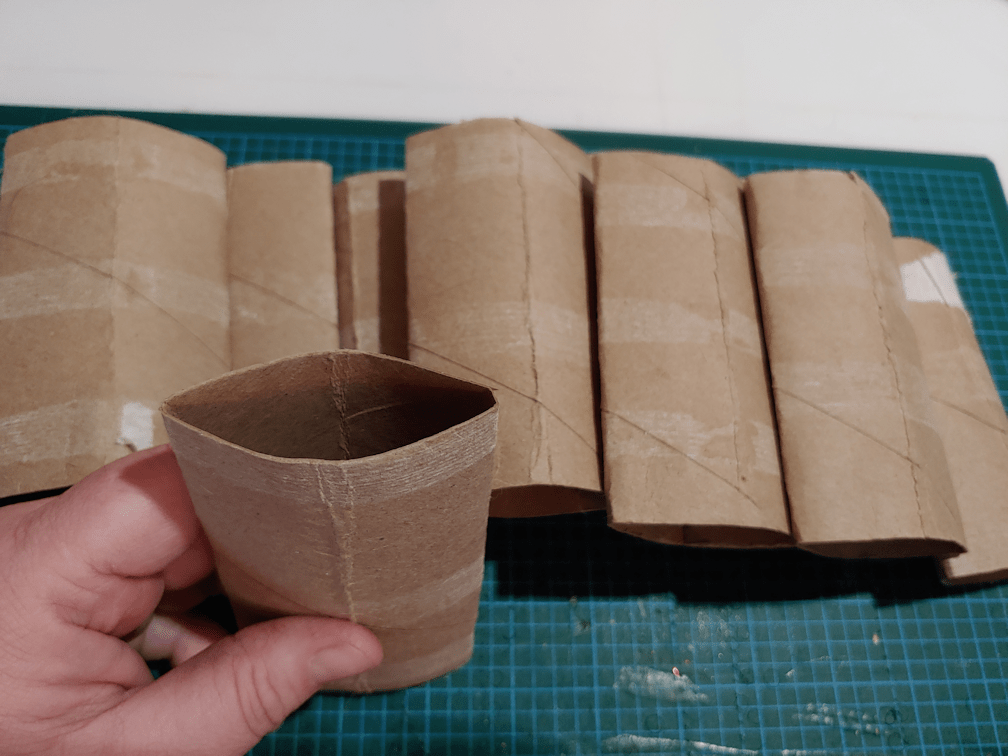
The first thing that needed to be done was give them all a second crease for the square, keeping the sides even by lining up the first creases with each other. The carboard was way too thick to fold them like he does in the video.
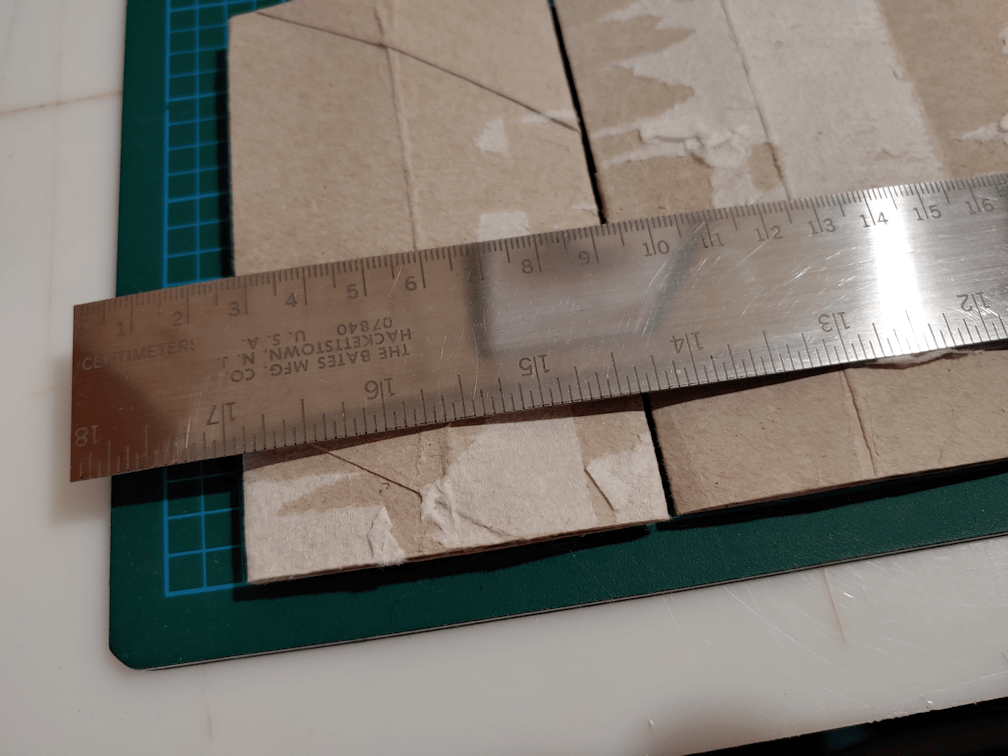
Then, just because I prefer sharp creases, I ran the tubes over the edge of the desk I was working on. You can tell the difference it made in the photo above. The tube I am holding is not being squeezed in any way. For the other one, I’d laid the tube flat on the desk and pulled my metal ruler over it to sharpen the crease. Which it did, but not as much as using the edge of the desk.
The creases were about 1 1/2 inches apart, so that is the distance than needed to be marked from the edge.
Since I had the cutting mat and a metal ruler, I only needed to mark one tube out of six. After lining them up along the bottom edge of the cutting mat, I could line the end of the ruler up to the side edge and the long edge with the mark on the first tube, across all the tubes.
Using the ruler to hold the tubes in place, I could mark them all at once, then repeat for the next batch. This way, it only took two lines to mark all 12 tubes.
The next step was to cut slits at the creases, up to the marked line, to create flaps.
Then the flaps were all folded inwards to create a bottom.
Once they were all folded under, I set up the storage container I got for them, and some water.
All the bottoms got dipped in water, then tucked into the storage box.
With these tubes, four of them fit snugly across a short side, so they’re not going to flop around. This was an important consideration when I went looking for bins to use for this. When we used the toilet paper tubes last year, the tubes came apart completely once they got wet, even as the peat in the middles remained bone dry. I wanted straight sided bins that were fairly small, to hold them all tightly. If the tubes were still round, they would have taken up more space, but there would be gaps between them, and I didn’t want those gaps, either.
These now will be left to dry, and we’ll fill them tomorrow.
For the next batch, more tubes were needed. We have 26 tulip tree seeds to transfer.
After grabbing a bunch of tubes, I found a couple of shorter ones. There is a surprising amount of variance between brands! I switched out the shorter ones for taller ones.
Height is why I wanted to change how the bottoms were done for this batch. With how the first ones were done, each flap completely covers the bottom, making a 4 layer thick base. There’s no need for that.
So for these ones, instead of cutting flaps that were half the width of each side, I went for a quarter of the width.
That worked out to be 3/4s of an inch. Each square in the grid on the cutting mat is 1/4 inch, so the tubes were all lined up to the base line of the grid…
…then the ruler was lined up with the 3/4 inch line, on each side of the row of tubes.
Which was a bit of a pain, when it came to using the ruler to hold the tubes in place while marking the line, since there was a space under the ruler.
It was much easier to do it from the middle instead of the ends. :-D
Then the tubes all got slits cut along the creases, up to the line.
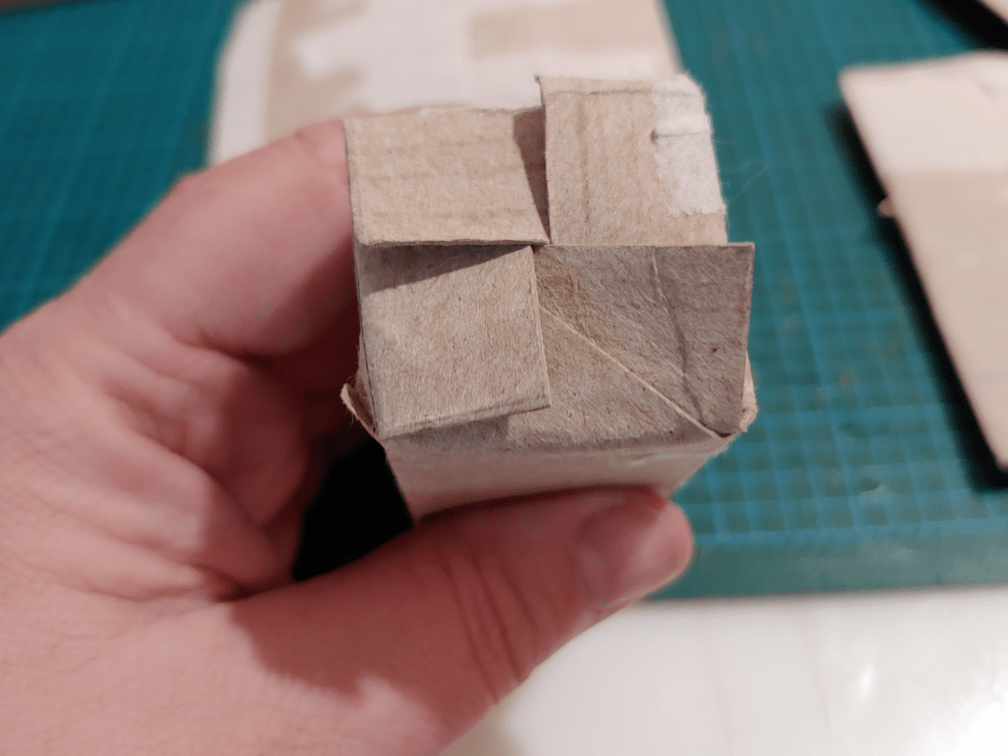
When folded in, this allowed for them to overlap and be locked into position.
These tubes were slightly shorter than the ones used in the previous batch, but by doing it this way, the pots ended up taller, as you can see in the comparison above.
Since the flaps could hold themselves in place, I could have skipped the water part if I wanted to, but I chose not to. They got dipped.
This brand’s tubes were not only a different length, but also a slightly different width. Just enough that they did not fit snugly across the short side. However, 8 tubes did fit snugly along the long side.
Tomorrow, these two sets of pots will be filled and planted with tree seeds. The tree seedlings will remain in pots for 2 years before being transplanted to their permanent locations outdoors. Starting them in these will allow us to “pot up” the seedlings into large pots as they get bigger, without disturbing the long tap roots they are expected to develop.
After these are done, we’ll start prepping tubes for the kulli corn. As with the tree seeds, it will be one seed per tube, so we will need 100 of these. I was able to find slightly larger versions of these bins, and one should be able to fit all 100 of these pots. The bins also have lids of the same transparency as the bins, which will allow us to use them as cat-proof greenhouses, if necessary.
I think I might have to pick up more of them. They’ll make moving seedlings outside to harden off much easier, too! They also happen to be pretty inexpensive, too. After much searching when doing shopping trips in the city, I found them at a local Red Apple store, which was just an added bonus. I’d actually found some at the local dollar store I was going to settle for, but the sides weren’t quite as straight, and the lids were opaque. I’m glad I decided at the last minute, to try another store.
The dollar store bins will instead be used to hold the little odd balls of yarn and small crochet projects on the go by my desktop, that the cats keep managing to steal away, so matter how diligently I bag them up!