It looks like the bitty baby has been absorbed into the creche!
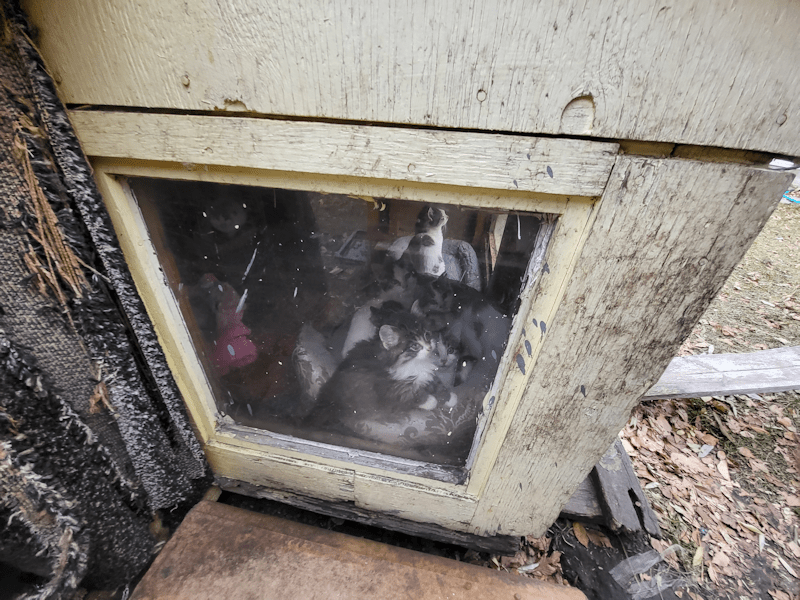
What a snuggle pile!
The Re-Farmer
It looks like the bitty baby has been absorbed into the creche!
What a snuggle pile!
The Re-Farmer
While working on the wattle weave bed in the old kitchen garden, I had to go around the beet bed constantly. Our beets did not do well this year, and in the end, I hadn’t bothered harvesting anything. It just didn’t seem worth it.
While working on the other bed, however, I sometimes had to stick a spade or garden fork into the ground to have them out of the way for a while, and a few times that meant sticking them into the beet bed.
Which is when I noticed that some of them actually looked useable.
So I harvested them.

This was all I got, out of the three varieties of beets planted in that bed. They’re so small, but my daughters like them at this size. They’ll be able to use them for maybe one or two meals.
Which is a heck of a lot more than I expected to get out of that bed!
At this point, we’re not sure if we’ll grow beets again next year. We’ve only been gardening for three years here, but each year has been worse than the one before. Perhaps we’ll try again, after we’ve built up the soil more and have better raised beds. If we do grow beets again next year, I think we’ll only do one variety, and save trying multiple varieties for the future. It’s hard to know which of the ones we tried are types we like, when we’ve yet to have a really good growing year for beets.
I’ll take what we can get for now, though!
The Re-Farmer
I was going to post progress pictures, but I need to conserve storage space on WordPress until I go back and resize more old photos. I might do a start-to-finish photo video, instead. Until then, here it is! The L shaped wattle weave bed in the old kitchen garden is DONE!!

The insides of the woven walls were first lined with grass clippings. It turned out to be a very windy day, which made that job more challenging then it should have been!
Next, I used a hoe to make a trench down the middle, pushing the soil up against the grass clippings. The cardboard from the sun room I’d set aside for the burn barrel came in handy, as it was suitable for lining the bottom of the trench. With the bed being so narrow, the size of the boxes didn’t matter as much, since I had to cut them to fit, anyhow. The cardboard then got a soaking.
Next came a layer of corn stalks reserved from the garden clean up, which got a soaking. I raided the compost pile of half rotted kitchen scraps to put on top of the corn stalks, followed by a soaking. Then I raked some leaves off the grass nearby and added that on top, which then got a soaking. At this point, I climbed in and walked back and forth over it, to crush the organic materials. Whatever we decide to plant here next year, I don’t want the roots to be finding big gaps in the soil and drying out.
Finally, I headed out and uncovered the pile of garden soil we bought a couple of years ago. The cover kept the pile from washing away, but didn’t keep the light out, so the pile was covered with a matt of weeds!
I also realized the “tarp” I’d found to cover the pile had channels in it. We’d noticed them when we first dug it out, but only recently did I find the carport support peaces my brother said was in the hay loft. Some time after that, I’d dug out a tarp I thought we might be able to use to cover the hole in a shed roof, but when I unrolled it, I saw it was part of the carport. I figured it was a roof sheet or something, since it isn’t that big. Now I realize that this piece was part of it, too. So I dragged it off and lay it out on the lawn, with weights to keep it from blowing away. We’ll hose it down and see what we can do with it. The first sheet I’d found had a row of tears in it. This one does not.
I’ll have to find something else to cover the garden soil pile with.
It took 4 1/2 wheelbarrow loads of sifted soil (to get as many weed roots out as I could!) to cover the whole thing. In the process, I had to stuff more grass clippings higher up the wattles, so the soil wouldn’t fall through the gaps.
No, this time I did NOT give it a soaking! I didn’t want to compact the soil.
By this time, several hours had passed, so I took a break for a lunch the girls prepared for me, then it was back to work. There was a little bit of grass clippings left, so that got scattered over the soil – at least what the wind didn’t blow away while I was trying to spread it evenly! I then raked up and added a mulch of leaves. That did get a soaking, to keep the wind from blowing it away. Finally, I grabbed the wagon and filled it with as much wood chips as it would hold without spilling as I pulled it back. It turned out to be just barely enough to cover the entire bed with a thin layer.
Once that was done, the entire bed got a very thorough soaking. I wanted all the layers to be good and damp. I might even soak it a couple more times, before our highs start dropping below freezing. We hit a high of 18C/64F today (though with that wind, it didn’t feel like it!), but tomorrow our high is expected to be only 6C/43F, and that’s the warmest day we’ve got left. We are expected to have less than a week with highs above freezing. Which isn’t too bad, for November.
Anyhow. The more the bed gets moistened before things start to freeze, the better it will be for spring. With all the layers, the bed got filled to the top of the shortest walls. My intention was to have it a bit lower, and that will happen as the layers settle and the organic matter decomposes. I expect it to drop at least a couple of inches over time.
While working on this bed, I spent a lot of time going over and around the rectangular bed we’d planted beets in. Once the L shaped bed was done, I decided to work on that one, too. It is framed with logs, and I’d like to raise it a bit higher. This is how it looked, at the start.

The first year we had a bed in this space, it was a sort of triangle shape that was too wide at the end near the house. My daughter and I changed the shape of it, then grabbed some pieces of smaller dead spruces that had been cleaned up, to frame it on three sides and keep the soil in place. We planted carrots here last year, which the groundhogs decimated repeatedly. Amazingly, we still got a crop out of it. This year, we planted beets, which failed. Sort of. I’ll talk about that in a separate post!
There is a pink rosebush on the left, and this year – after pruning away more branches from the ornamental apple trees – it finally had substantial growth and huge numbers of flowers.
It’s amazing what a little sunlight will do!
This year, when we covered the rectangular bed, I had a board across the end by the rose bush to hold the mesh down, but otherwise, there’s nothing there. The ground slopes downwards from the house, so that end is lower than the end closer to the house.
That will be built up.

The first thing I did was dig a shallow trench across the bed near the rose bush. I still had some short logs I’d brought over for tiny log bed and border that didn’t get used (you can read about that here, here and here. Links will open in new tabs, so you don’t lose your place. 😊) I placed one of the shorter logs across, in the trench. Then I pounded in three stakes at each corner, to create upright supports. When I find logs long enough, they will be placed between the stakes. I want the long sides to go on top of the cross piece closer to the house, with a second cross piece to fit in between them, but have it the opposite way on the low side. One of the current side logs is a fair bit shorter than the other, but I think I find find something to fill the gap.
Though I plan to make the bed only one log higher, with the rose bush getting so big, the wall beside it is probably going to be three or four logs high to keep the branches out of the garden bed. I forgot to take a picture, but I’ve already added another log to that end. It’s slightly longer than the one in the photo, so that it is overlapping the longer side log. When I find a gap filling piece for the bottom, it will be tucked under that second log. The second log isn’t as thick as the bottom one, so I tied off the pair of uprights on either side of the ends, to secure them, and will do the same with each log that gets added. I made sure those pairs of upright supports where the tallest and strongest, since they’ll be holding the most logs.
And that was enough for today! I need to go hunting for long enough logs for those sides. If I can’t find any that are suitable, we might add more of those support stakes and use shorter logs instead. We have plenty of short ones that couldn’t be chipped, that were cut to roughly four foot lengths. The bed, however, is about nine feet long, so that might not work. We’ll see.
That done, I had time to work on emptying the rain barrel, which had enough water still in it to do the Korean Pine and Ash tree seedlings in the outer yard, as well as the haskaps and a currant bush in the south yards. So that’s now empty and ready for winter. Usually, I tuck it away in the old kitchen garden for the winter, but I think this time I’ll leave it where it is. It’ll get snow in it, which should be fine. I just don’t want to be chipping it out of the ice and snow again, to set it up to catch the snow melting off the roof in the spring.
While I was doing all this, I had the attention of so many yard cats! Even the ones that don’t like people, like to hang around while I work.
While I was putting things away for the night, I spotted this…

He was napping in the wheelbarrow at first, but I interrupted him while taking a picture. 😊
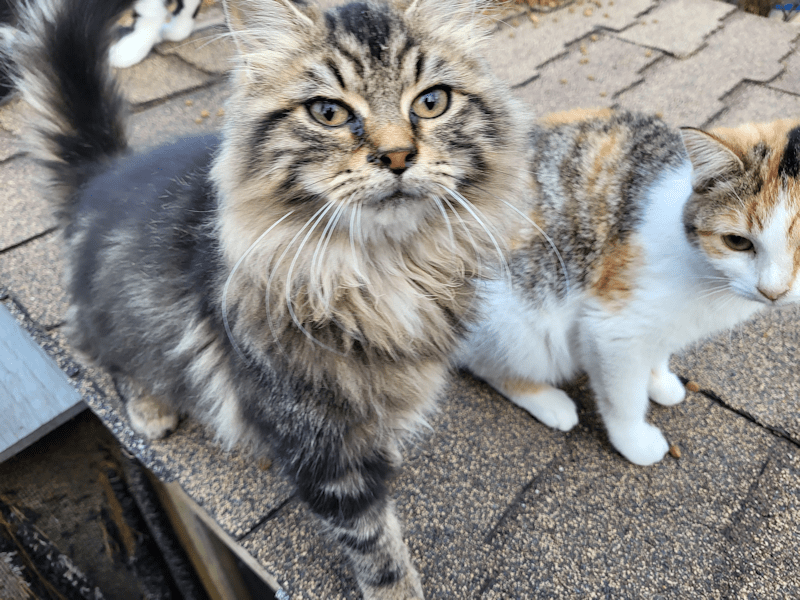
What a handsome boy! We have managed to pet him every now and then, but he isn’t a fan of attention.
I did get to give the bitty baby a cuddle, though! He came out to explore, and after several attempts, I was able to cat him. He put up quite a fight until I got him into snuggle position and started scritching his ears and he finally calmed down. I hung on to him for quite a while before putting him down, and he didn’t run away. Hopefully, he will become more accepting of cuddles as time goes by. We’ve had others that became less accepting of cuddles and attention over time. Ah, well. We do what we can!
The Re-Farmer
When I’m feeding the outside cats in the morning, and I don’t see the bitty baby in the cat shelter, I usually find him here.
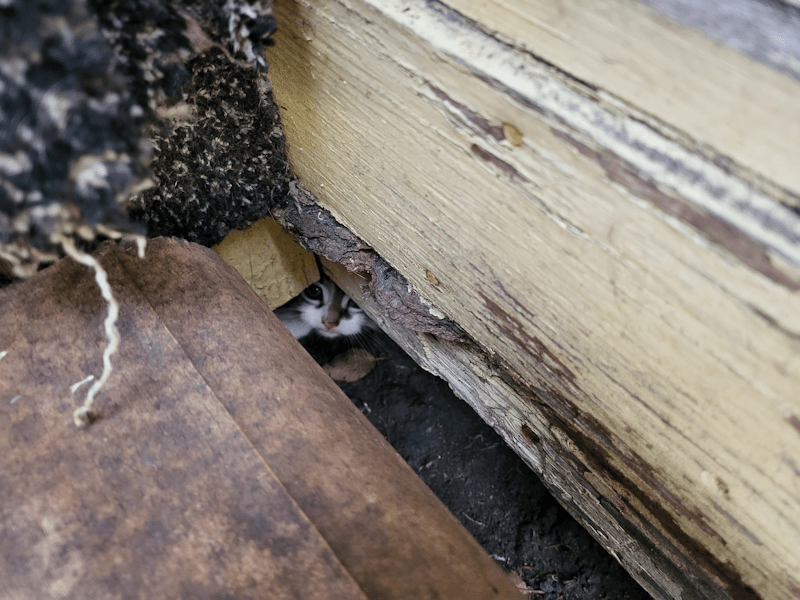
Peeking.
If I try to move closer, his entire body explodes in spitting and hissing.
It’s hard to be a fearsome beast, when you’re just so incredibly adorable.
The Re-Farmer
More specifically, $579.06
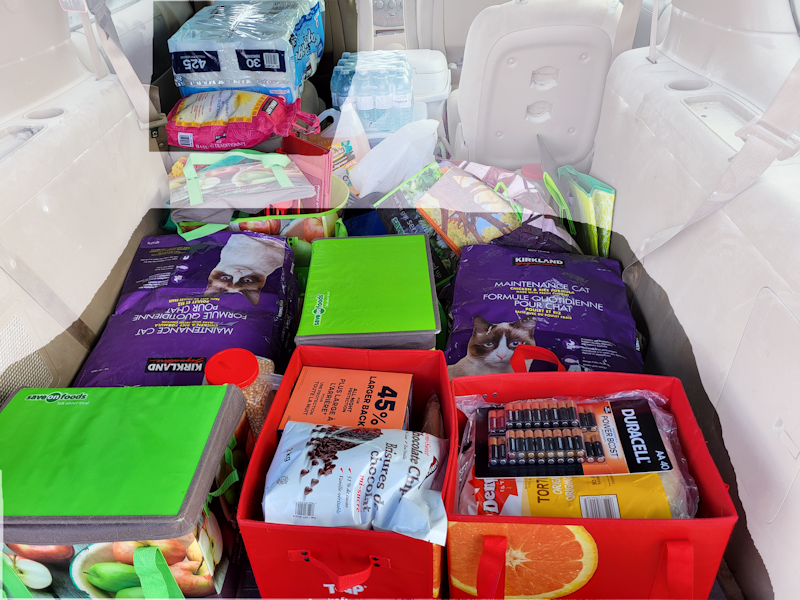
I forgot to take a picture while it was still on the flat cart. Not visible, because they are on and under the seat that isn’t folded down, is a box with three rotisserie chickens – which are still cheaper than buying a three pack of whole, raw chicken – a case of 48 cans of wet cat food, and a double flat of 60 eggs.
There’s more toilet paper for stocking up, as well as an extra bag of rice. They did not have the larger bags of cat kibble, so I got four 9kg bags of Kirkland brand, which cost $28.99 each.
The two insulated bags are not completely full, but I wanted to distribute the weight between them more evenly. There’s a litre of whipping cream; something we don’t normally buy, but at $4.69, is quite a bit cheaper than elsewhere. It’s the same with the 10 pounds of butter at $4.99 each. Everywhere else, even the no-name or house brands are around $6.50 each. A big block of Old Cheddar now costs $29.99, and that’s cheaper than the few other places that carry that size. I got a pork loin and pork blade, both of which were small enough to cost under $20 each by weight. (I’m so glad we’re getting a quarter beef in December, because beef prices right now are really high.) There’s a pack of Kirkland brand cream cheese which, at $9.49, is much more affordable here.
I got a 6 pk of canned chicken, which was $21.99 – I think it actually stayed the same price as last month. I got a couple of big jars of mayonnaise that was on sale; regular $10.99, which is higher than last time, but the sale price was $8.49. Since my bee keeper cousin lost so many of his bees to our long, late winter, I bought a 3kg bottle of honey, which cost $24.99 I think that’s actually the same as what my cousin charges. I usually try to get his 5kg size, and the last time I got any from him, it was only a 1 kg jar, so I can’t quite remember. I also got more brown sugar for the pantry, as well as chocolate chips, peanut butter and popcorn. The package of AA batteries, which is mostly for the trail cams, now costs $25.99 – plus the eco fee. I don’t get the cheap brands of batteries, because the trail cams suck them dry in no time. If the new, solar powered trail cam handles winter well, I think we’ll get more to replace the old ones. The batteries on that are still 100%, while I’ve had to replace the batteries on the older ones at least twice, each, since we got the new one.
What else is in there? Oh, a case of bar soap, a stock up on feminine hygiene products, and a couple of packages of tortilla wraps. I did not get any other bread product, though I did look for hot dog buns. In fact, I’ve been trying to find hot dog buns since I got the giant package of wieners at the wholesale store. I haven’t found any! We’ll just have to start baking more bread again. We do less of that in the summer, partly because of the heat and partly because there’s just too many things outside that need to get done.
And that’s it.
I didn’t even fill the flat cart for the cost.
*sigh*
Bahahahahaha!!! Oh, this is too funny! While I was writing the above, there was a sudden noise at my window, and all the cats sleeping on my bed jumped. Now, they are all watching with great fascination, as my daughter cleans, then squeegies, my big window from outside, their heads following along in unison.
Anyhow… Where was I?
Oh, yes.
Distracted.
Like these guys.
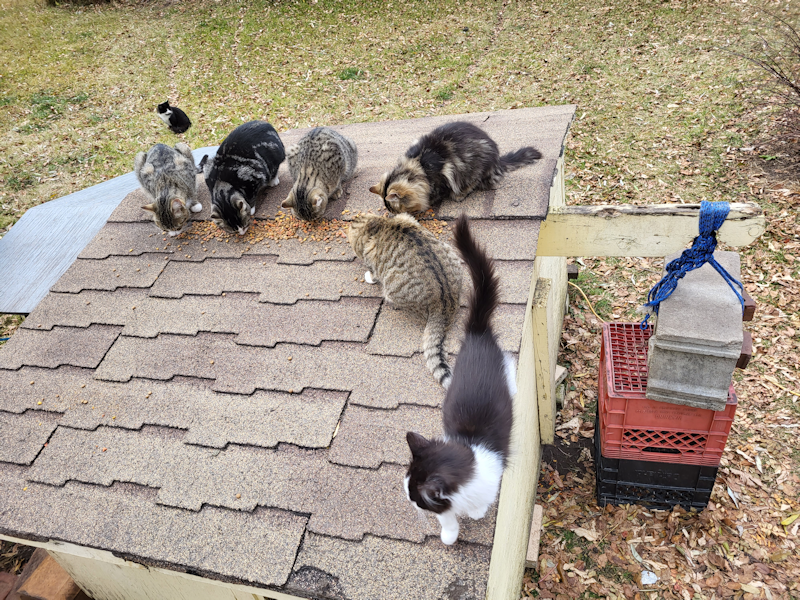
When I back up to the house to unload the van, that gets the attention of a lot of cats. Princess even jumped into the back of the van while we were hauling things out. The smell of that rotisserie chicken was just too tempting! She never found it, though.
When we were done, there were about 5 or more kittens under the van. Slamming doors and kicking the sides was not enough to chase them away. I even turned the hose on and tried spraying under the van, which worked for some kittens. Other kittens started chasing the water! So my daughter distracted them with a bit of kibble, long enough for me to get the van started and out of the yard. Once it was parked, I topped up the kibble bin, then gave them their full evening feeding, with powdered lysine dusted over the kibble this time.
One thing we have not been doing of late is putting out feed for the birds. Normally, this time of year, we’d be switching to deer feed, but I’m not sure if we’ll be keeping that up. One reason is the racoons keep tearing apart the hanging feeder. We started just leaving seed on the ground, but not all birds like to eat from the ground – and the racoons still eat the feed meant for the birds. So when the black oil seed ran out, I just didn’t get more.
The deer, however, are still checking the feeding station out.
When I got home, drove through the gate and was back in the van after locking it again, I looked up to see a stag in our “parking lot” area near the garage. It had just come through the inner yard, and was standing there, staring at me! I started to drive very slowly, and it made its way into the overgrowth where there had been standing water during this spring’s flooding. The grass there is actually taller than the deer! It didn’t even run off, but just slowly made its way through the fence around the outer yard, and kept on going.
So beautiful.
We might not buy more seed for beside the house, but at some point I want to start getting a round hay bale and leave it out behind the barn for the deer, to draw them away from the house.
But I’m getting ahead of myself.
After today’s trip, we should be done with stock up shopping for the month! It is less than we normally would have gotten, but it was what this month’s budget allowed for. We still saved enough by driving to the city to make it worth the cost of gas. Locally, gas prices dropped to 180.9 cents/L, but I filled my tank at Costco at 175.9 cents/L. It’s 3.79L to one US gallon, so that works out to 685.6/US gallon (US$5.03) locally, or 666.6/US gallon (US$4.89) at Costco.
Gas prices are still way too high, but I’ll take any break in price I can get.
And that’s it. Our monthly stock up shopping for November is done.
This turtle is more than ready to climb back into her shell.
The Re-Farmer
We finally have Plushy getting more socialized – and now she’s giving us attitude!
Doesn’t she look absolutely regal?
In an “off with your head” kind of way?
😄
The Re-Farmer
I’m planning to do our final (hopefully) trip into the city for a Costco stock up shop for this month, so I would normally not have gone anywhere today. Especially with it being Halloween, and I would expect the stores to be filled with last minute shoppers.
I did, however, want to pick up some lysine for the outside cats, to use until the powder I ordered comes in. Since I was going to be in town anyhow, I remembered to grab the empty 5 gallon water jugs for refilling. We have four of these for our drinking water, and try to never go less than one on the go, and one full one waiting, though sometimes that doesn’t quite work out.
Once at home and my daughter took care of hauling the water jugs inside, I started getting ready to give the outside cats some lysine with their evening kibble top up.
*sigh*
I got my daughter to bring me a mortar and pestle. I was expecting to be opening up gel caps with powder in them, like the cat lady was telling me she does.

I even got the same brand she gets!
As for getting it on the amount of kibble I put out at once, which almost fills a gallon sized container, I stole one of the bins we used for taking transplants outside for hardening off in the spring. I put the measured amount of kibble in the bin, ground the tablets into powder and sprinkled that on top, then tossed it until I was sure all the kibble was coated.
I think, the next time I do this, I’ll give the kibble a very light spray of water first, so the powder will stick to it better.
Then the treated kibble got poured back into the gallon container, and I fed the kitties.
They didn’t seem to notice any difference with the kibble, and ate it without any hesitation.
The kittens are already mostly improving with all their leaky eyes, stuffy noses, coughing and sneezing, but this should help them get better faster, and hopefully prevent them from getting sick again. It’s especially dangerous if they get sick in the winter, and with so many really young kittens this year, they are the most at risk.
Speaking of kittens…
I couldn’t get a photo, but when I headed out to town I could see a ludicrously big pile of kittens on the new cat bed I’d put in front of the east facing window. It was hilarious! With the other cat bed at the corner by the south facing window, that entire side would have been packed with babies! They all started moving around and looking to come outside when they saw me, so I hurried away. The last thing I wanted was to have kittens following me to the garage, when I can’t see them while backing out.
After adding the lysine to the kibble, I stayed out and worked on the sun room. This meant leaving the doors open, much to the joy of many kittens. Not all of the kittens are interesting in exploring the sun room, though. At least not yet, but I was very happy to see this!

The bitty baby was out! He was hunting leaves and making friends with some of the cattens. Aside form the one time I saw Junk Pile nursing the bitty, along with her own kittens, we still have yet to see an adult cat mothering this little spitfire. Yet, clearly mothering is happening. He does look bigger, and he’s getting more active, exploratory and playful. All good signs.
I had quite a bit of furry company while working on the sun room. They were into everything!
One of the first things I had to do was clear the wall under the bathroom window, then clean the cube shelf and set it up. Because there’s the possibility of water getting onto the floor, I made sure to put it on some scrap pieces of rigid insulation. Once that was in place, I could start working on the other side.

I’m still debating putting rigid insulation against that big window in the corner. These are double pane windows, but the inner pane on that one has been gone since before we moved here, so it gets covered in frost in the winter. I do want to let the light in, though, so maybe we’ll get one of those clear plastic window kits, instead.
This half is mostly garden related stuff and, of course, having a place to sit.
We used to have a large cardboard moving box behind the door for tall stuff. After digging around, I found a tall aluminum garbage can I could replace it with. It had been sitting outside for who knows how many years, and the bottom of the inside needed to be scraped of… something. After cleaning it as best I could, I cut a piece of insulation to fit the bottom. That way, it’ll be quieter if we drop something hard or metallic inside. Eventually, we’ll have more garden tools stored in there for the winter. Another piece went on the floor under it, for those times when the floor gets wet.
It’s not quite finished, of course. Some things, like the tool box, will be moved out of the sun room completely, when it’s no longer needed for outside stuff. We found a set of legs to make a folding table, and I’ve got those behind the swing bench until we can find and cut a piece of plywood to size and attach them. The folding chairs get stored in the old kitchen.

This side… still looks like a disaster! *sigh*
When I found the metal garbage can to use for storing tall things, I also found a smaller plastic garbage can inside it. It was intact, so I gave it a cleaning, and now it’s sitting upside down by the walker to dry. I’m not sure where it’ll finally go, but this room does need a garbage can. There’s a bucket to catch drips if we get rain and the roof starts leaking again (still no word on when the roofers will be coming out). I had some square buckets on the counter shelf I was using for small hand tools, only to discover water in the bottom of one of them, and the tools inside were starting to rust. *sigh* So I cleaned the tools as best I could, then left the bucket to catch drips. We don’t have rain in the forecast anymore, but it did start raining a bit while I was in town, so until the roof gets done, we’ll just leave the drip catchers where they are.
I would love to find a better place to store the bin of insulation pieces. They come in so handy, though, I want to keep them accessible. There’s a few other things that need to be organized better, but that can wait. The main thing is that everything that was outside is now inside, the room is more useable, and it’s easier to get at things like the table and miter saws. Even the electric chainsaw now has a spot on a shelf. However that, and the battery powered mini chainsaw, will be going into the house for the winter, though. Things get too cold for batteries or chainsaw oil in the winter.
So there we have it! The sun room is pretty much done, and mostly winterized. At some point we’ll set the food and water bowls and a litter box up in there, for when we need to use it as a kitty recover room again, but aside from little things like that, it’s finally done.
Now I can get back to working on garden beds again! 😁
The Re-Farmer
Judgement is from one of the older litters, but I’m not sure who the mama is, other than one of the ‘iccuses (Bradiccus, perhaps) that have all disappeared.

He was busy judging a crow flying overhead as I took this photo.
What a beautiful catten!
The Re-Farmer
I was able to get at least a bit of progress in the sun room today. This is what where it was left off after my daughter worked on it.

The only thing different is the addition of the new kibble bin that doesn’t fit on the shelf. The room has been slowly becoming a disaster, and using it as a recovery ward for the cats certainly hasn’t helped. Where the swing bench had been was the worst of it, with so much stuff fallen behind, and the messes the cats made. The rest was going to be easy after that!
Because of the mess the cats made on this side of the sun room, it needed extra cleaning after being emptied out.

It got emptied, then vacuumed, including around the windows and walls – lots of cobwebs! The windows finally got washed on the inside. The shorter extension cord could finally be wrapped on its hooks (there are no outlets in this room), and I added some hooks so the longer extension cord that is powering the kibble house is now running through the tops of the doors rather than the bottom.
Then the kittens got kicked out and the door closed so that floor could get a thorough washing. Some areas needed to be scrubbed by hand, and I still couldn’t get all the stains out. Last of all, it got rinsed of cleaners, with the ceiling fan running to help it dry faster.

It was getting pretty dark by the time I starting to bring stuff in again, though mostly to protect some things from critter damage. The floor is still damp, too.
After five years, I think we’ve got a pretty good bead on how we need to use this space. The main thing is mobility friendly access. When we first moved here, my husband kept his walker in the main entry, folded up against the washer and drier. There were two problems with that. First, it was in the way of using the washer and drier, and second, it became increasingly difficult for him to get in and out with it. The door’s threshold is fairly high, requiring him to lift the walker wheels over it, and then there are two steps to go down. He didn’t mind it too much at first but, over time, his back just kept getting worse. Then we finally cleared and cleaned the sunroom, which was a HUGE job (I still can’t believe all the stuff my parents had in there!). My dad kept his own walker in the sun room, and now my husband’s walker is kept here, and it’s much easier for him to get in and out. I still want to get little door ramps for him, as he does still need to lift his walker a bit to get through the door, but it’s greatly improved his ability to get in and out by using the sunroom.
So access is a primary concern when it comes to how we want to set things up.
We also use the room a lot for keeping tools and supplies, and we need to find a better way to organize those. The table saw I found in one of sheds had been by the door into the old kitchen, but there it ended up blocking access to things, It’s now set up near the counter shelf by the doors to outside, with the miter saw I got at a garage sale sitting on top of it for now. The swing bench will stay where it is now – right in the corner, with no shelf behind it. The last time we moved things around, I’d set it up against the wall with the two windows, but my husband moved it against the shelf, so he could sit on it and see outside. That blocked access to the shelf and, before we knew it, all sorts of things were falling behind it and getting stuck – and of course, the cats took full advantage of that! So now the cube shelf will go against the wall under the bathroom window. I’m going to try and keep all the tool related stuff on that side.
We found using the room as a greenhouse was handy, but we need to figure out a more efficient way to do it. Being able to set up a surface to hold transplants over the swing bench worked out pretty well, even if it meant only the cats could use the bench! So this side is going to be organized in a way that we’ll be able to set transplants up again in the spring, including a better way of setting up the lights. For a “sun” room, it’s actually pretty dark in there!
One other thing we use this room for is an isolation ward for recovering cats. Which means we’ll be wanting to set up food and water bowls, and a litter box, which is currently in the cats’ house outside. It hasn’t been used yet but, once snow is on the ground, I think the kittens will figure it out! We’ll get another one for the sun room.
We will also be using this room to store things for the winter, until they’re needed again in the spring.
All of this, we will need to figure out as we bring things back inside. Now that that floor has been cleared and sanitized, we can work out how to organize things most efficiently.
While I was finishing up and things were getting dark, I was very happy to see how well the new solar powered motion sensor light was working out. When I checked on it last night, it didn’t turn on. It’s mounted to the top of the outer door, so it should have turned on when I opened it. It didn’t turn on, but I startled some critter out of the kibble house! I could hear it run across the yard, and slam into the chain link fence as it went under it. It sounded bigger than a skunk. I’m thinking racoon, but they usually freeze instead of running away, so I’m not sure. As I came out of the sun room to check, I heard more noise – from the four deer in the yard that got startled and ran out towards the barn! I grabbed a flashlight and went back out again. I could hear something was crunching kibble, but couldn’t see what it was. From the sound, I was pretty sure that one, at least, was a skunk, which turned out to be correct.
With all that going on, the new light would have been very helpful, but it just wasn’t turning on. I knew it worked, because when switching it from off to either high or low light, it turns on and stays on for about a minute before shutting itself off. I had turned it on just before starting to screw it onto the door. Thankfully, the way it is sitting, I didn’t have to unscrew it from the door, and could shift it enough to reach the switch and turn it on. I’m not completely sure why it was off, but my guess is that I switched it off by accident. While I was attaching it to the door, at one point it slipped and started to fall. I managed to catch it, but must have hit the switch in the process. Whatever it was, I got it going again, and set to the brighter light.
Which was really handy as I finished up! I had plenty of light to see what I was doing – and it even lights up as far as the inside of the kibble house. The cats running around also triggered the motion sensor, which means any skunks, racoons or deer will also trigger it. Hopefully, that will be a deterrent.
Ha! Who am I kidding! It won’t deter them, but it’ll make it easier for us to see what’s stealing the kibble!
If all goes well, we should have the sunroom organized and finished tomorrow. Then we can go back to putting the garden to bed for the winter. We’ve got some nice, warm days coming up, which means we can give the trees we planted one more deep watering before the temperatures drop again.
As long as the weather holds, there will always be a bit more we can get done!
The Re-Farmer
We have been working hard to socialize as many kittens as we can.
There is, however, a downside to that.
The more socialized the kitties, the more likely they are to hang around us, even when we are doing things that are potentially dangerous for them. It goes beyond deciding to run around our feet while we’re walking and accidentally getting themselves clocked in the head. I had a couple of examples, just this morning.
While doing my rounds, there was no wind at all, and the ground was covered in frost. I decided it was a good time to do a burn in the fire ring (the burn barrel is too old and damaged to use anymore). The fire ring is where we put the used stove pellet litter. It has time to dry before we do a burn, along with any paper garbage we have that can’t be composted so we don’t have to drag it to the dump, plus a few branches or whatever wood that’s around to keep the fire going stronger.
Do you have any idea how hard it is to tend a fire while kittens are trying to climb your legs, or even wanting to climb into the fire ring to find out what the noise is?

I managed to keep them safe and away. Here, Baby is sitting on the remains of the burn barrel that was here when we first moved in, staying warm. He, at least, wasn’t really trying to get any closer.
Most of the time.
After the fire was burned down enough that I could cover it and let it smolder (the litter sawdust doesn’t like to flame up, but it will smolder for days while covered), I worked on the cats’ house a bit, as they were done eating and it would no longer scare them away from food.
Here is an old picture of what it looks like while open.

As you can see, there are chains to keep it from opening too far and breaking, and the counterweight both helps open it smoothly, but also makes it less likely to drop unexpectedly. The cinder block alone wasn’t enough, though. We’ve added four more bricks into the openings to make it heavier. Even with that weight, though, that roof is heavy enough that if it started to drop, there wouldn’t be much to even slow it down, never mind stop it. As you can imagine, we’re pretty careful while working around it.
The problem?
While setting up the new cat bed and cleaning the windows, curious friendly kittens would jump up and walk around the top of the walls. Which is what the frame of the roof rests on. If that thing dropped for some reason…
*shudder*
So there I was, working in and around the cat out – and trying to chase away the kittens that are no longer scare of us, or anything we’re doing, anymore!
Today, we will continue working on the sun room. It’s going to be warm enough and dry enough for the next while that just about everything can be taken out, including a couple more shelves and the table saw, so give the concrete floor a more complete cleaning. My daughter has already cleaned up the worst of it, but it could use a good bleaching now!
Something else I’ll have to keep the friendly kittens out of while I’m working!
The Re-Farmer


