Morning mystery… solved?

Though my husband had been able to feed the outside cats this morning, when I headed out an hour or so later, I found some of the kibble trays already needed to be topped up. While I was doing that, I came upon some mysteries.
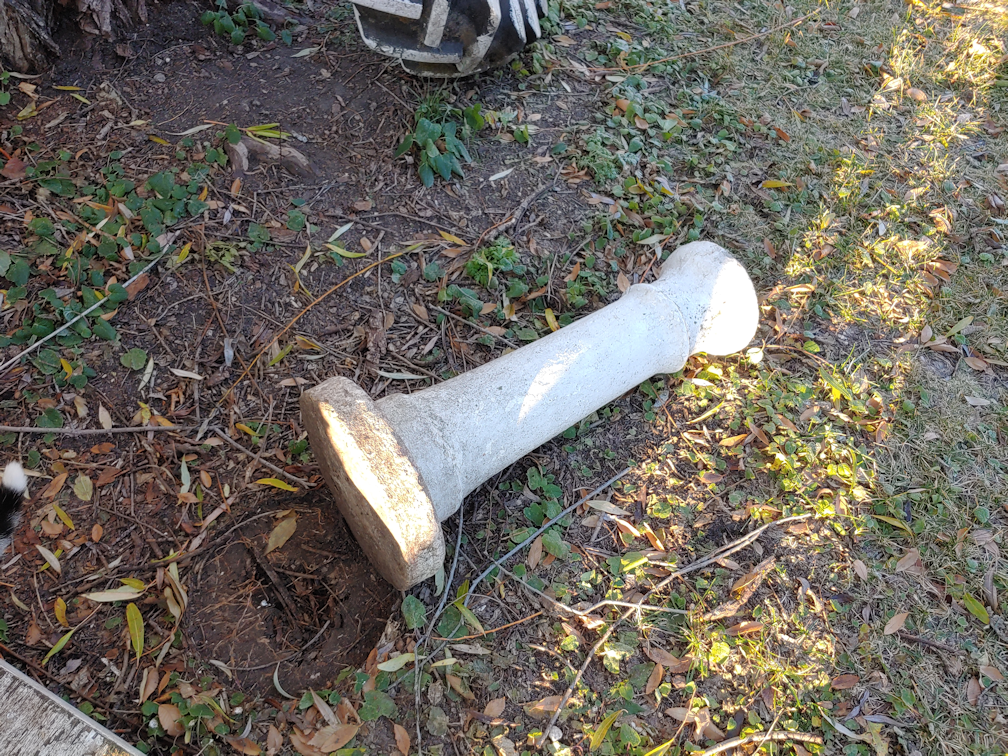
The most obvious one was the knocked over concrete pedestal. We often see a cat perched on top of it. It’s heavy, but because of the height, not as stable as I would like, which is why it’s not being used to hold the concrete Mary statue that I think it was originally used for.

This was more of a surprise.
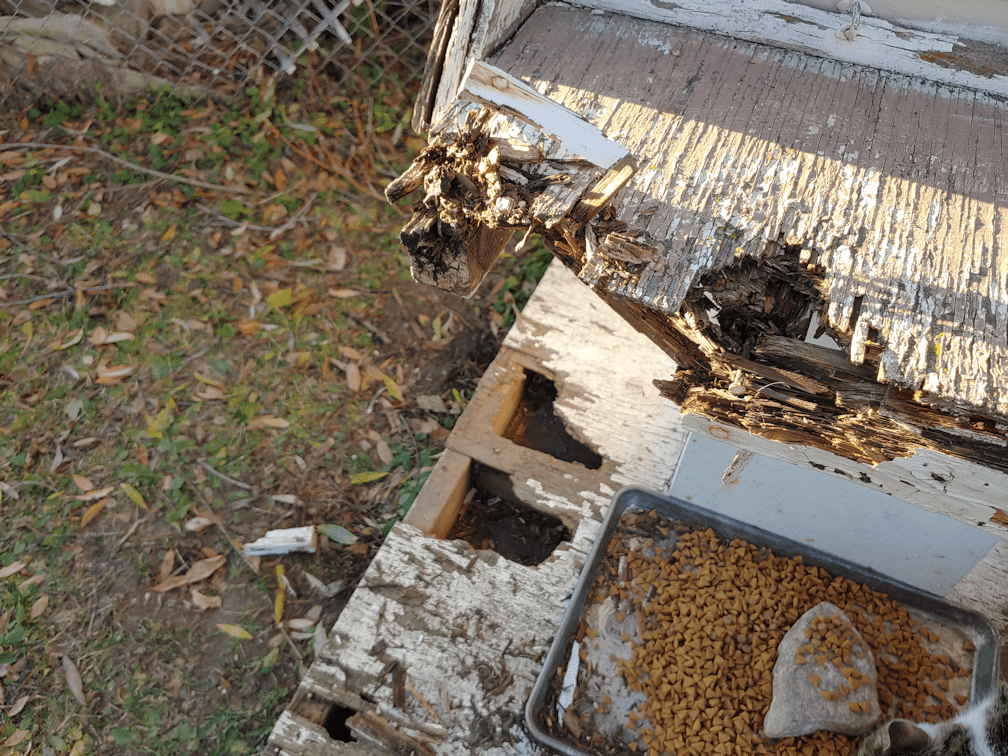
The shrine was not maintained over the years, so there’s quite a lot of rotted wood, but what on earth could do this sort of damage? The cats like to go up here, too. Could there have been a massive cat fight? Even so, how could the cats have done this sort of damage?
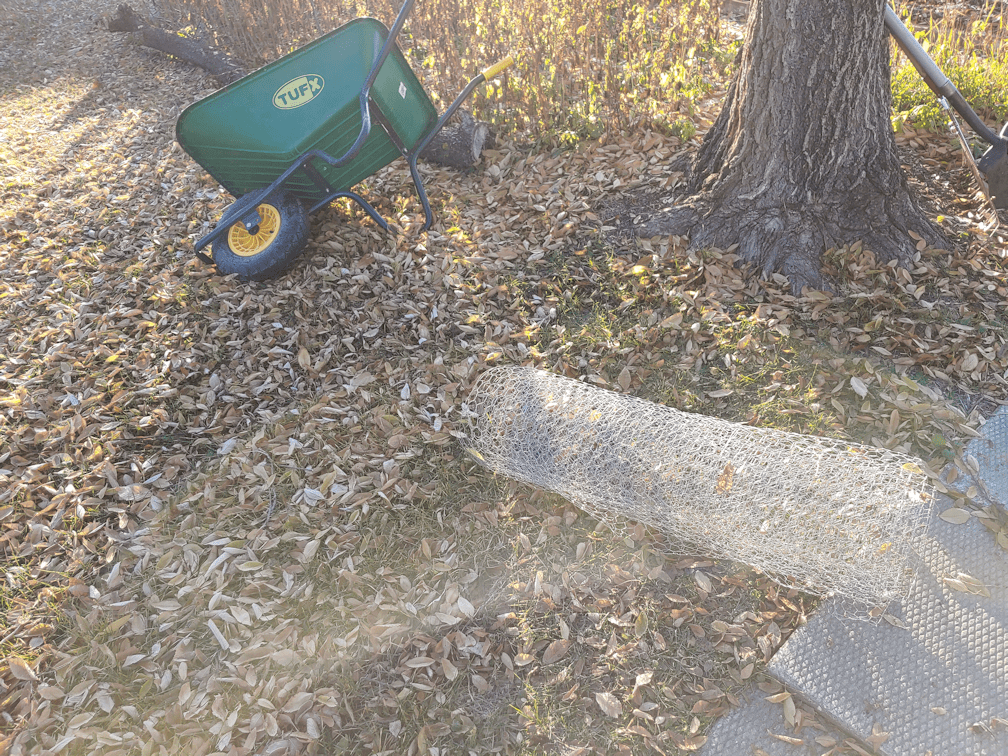
Then there was this. That chicken wire is what had been protecting the cucamelon and gourd bed. Last night, it was in the upright wheelbarrow, waiting to be put away for the season.

If there had been a cat fight this violent and far ranging, we would have heard something. Wouldn’t we?

I continued my morning rounds, heading up the driveway to check the gate and switch out the memory cards in the trail cams.

I had lots of company this morning!

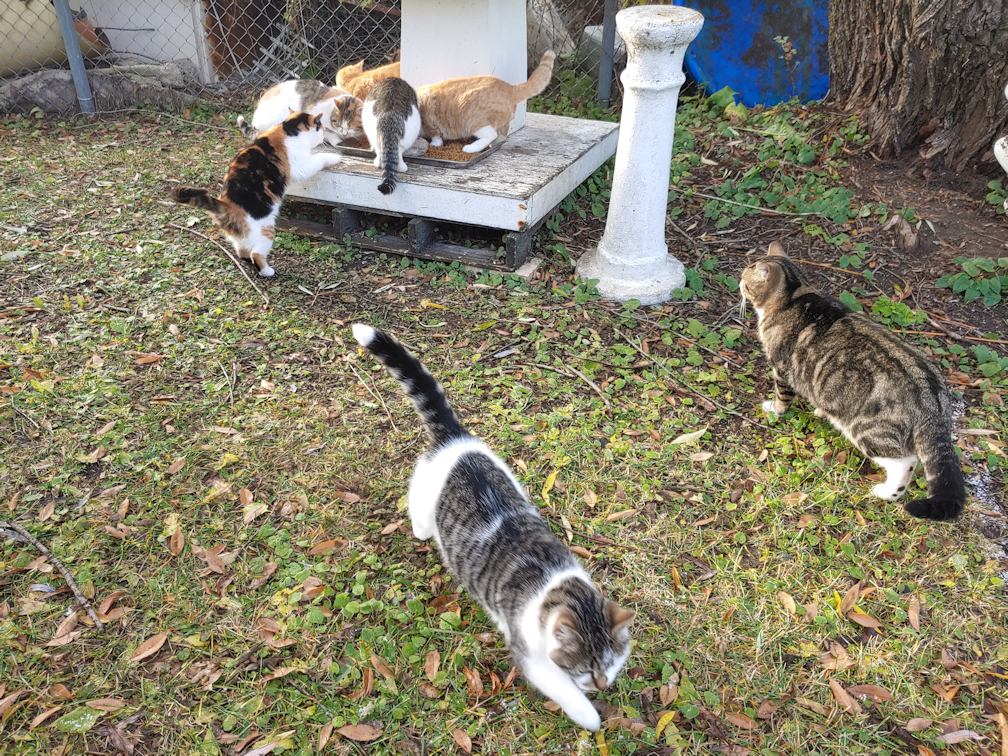
Though there are six cats in this photo, I ended up with eight of them, following me around!

I found it funny that Agnoos and … one of the ‘icouses (“Sadicous, I think)… found the frost covered plywood “bridge” nicer on their toes than the ground!

While the kittens kept their distance and explored the driveway and culvert, I had Creamsicle Baby, Nutmeg, Rolando Moon and even Butterscotch, all vying for attention! Creamsicle Baby in particular was so demanding of attention, he was not only winding around my feet while I walked, but even jumping up to grab my hands. I was carrying Nutmeg then, later, Butterscotch, so I couldn’t bend over to pet him. He would not let me pick him up when I tried, though.

While continuing my rounds, I made a point of checking out where our sign is going to be set up. My brother really wants to get those posts in before the ground freezes too hard. He’ll be coming out on Saturday, which is supposed to be warmer, and the posts will be installed right at the fence line, so as not to mess with municipal rules. He ended up getting four 8′ posts – two for the sign, and two, just in case. He decided to get the taller posts so the sign would be higher. If the posts are 2′ in the ground, then the top of the sign will be at 6′ instead of 5′, as it would have been with the 7′ posts he originally intended to get. Higher means more visibility, and it’ll be harder to vandalize. Sad thing to have to take into account. I’ve been sending photos of the sign in progress to my brother, and after one set of them, he answered by basically saying “it’s looking good… it’s going to get vandalized…”

With that in mind, he plans to use carriage bolts to attach the sign.

When I started working on this sign, I basically used whatever I could salvage. I found the piece of plywood in the barn, the white paint was left over from fixing the sun room door frame, I already had the reflective paint I’d bought for something else, etc.. The only money I spent was on the paint for the lettering, which I didn’t skimp on since it will be used for other things, too, and a set of craft brushes for the lettering. Since I knew the paint would ruin the brushes, I bought the cheapest ones I could find. Then my brother finds out what I’m doing, and suddenly he’s all excited about it and buying fence posts and carriage bolts! :-D The posts, alone, cost more than what I spent! So sweet of him. I’ll just have to touch up the bolts with white paint, so they won’t be big black circles in the lettering.

With that in mind, when I came in from my rounds, I paused to finish painting the sign. This time, I used a much smaller brush and used it to straighten edges, fix some serifs, and basically make it look all nice and tidy. Well. As much as I can, with my shaky hands. It’s not perfect, by any means, but not anything anyone will notice from the road.

It’s not done, and the paint has a couple of days to dry before the sign will be installed. It’s much sooner than I expected, but that’s okay. Hopefully, our vandal will find it too chilly to try and damage it.

Speaking of which, I have a court date for our restraining order, tomorrow. It’s been over a year since I filed for it. Because of the repeated delays due to restrictions and shut downs, this time the judge actually wants me there to ask me questions. Hopefully, this means it will be finally granted, and our vandal will be required to get the mental health help he needs.

Anyhow…

Once the sign was done, I finally sat down to check the trail cam files – and got a surprise!

A cow, walking up to the gate and checking it out.

!!!

The electric fence had just been fixed, yesterday!

The funny thing is, as I was walking up the driveway, I saw the hoof prints of a cow, frozen into the gravel of the driveway. I just figured they were from the cow that got caught on the trail cam, the night before.

As soon as I could, I headed back outside to check the outer yard fence line.

Clearly, something did go through here, pulling the wire into our side of the fence, but maybe a calf, not a full sized cow!

I then went to the section of fence they had gone through previously, and it was clearly where they had come through. The tall grass was trampled, and there was plenty of dung about. The one cow I saw on the trail cam clearly had company!

The time stamp on the trail cam video (it’s a good thing we have two cameras on the gate, because while both had their motion sensors triggered, the cow was visible in the dark in only one of them) was about quarter after 9pm, so by the time I was out this morning, the cows were nowhere to be seen, though I could hear them. I sent a message to the renters to let them know, being sure to tell them there was no urgency. We’ll just keep the inner yard gates closed.

The thing is; last night, while the vehicle gate was closed, the people gate was opened while my daughter and I worked in the yard. With the electric fence fixed, I didn’t bother closing it again.

So… could it be that a cow came into the yard, and did the things I found in the morning? There’s no chance of seeing tracks in the grass and leaves. I can see knocking over the wheelbarrow and pedestal, but how would a cow cause the damage to the shrine?

Is my mystery solved? Or not?

The Re-Farmer

Boxes, tubers, broken tools and… cows!

We’re having another lovely, mild day with sunny skies. A perfect day to get more done outside!

My main goal for the day was to finally build the third low raised bed box and set it up.

The ground is starting to freeze, though, so I couldn’t make quite as deep a “foundation” as with the other beds. It should be all right, though.

This is as much as going to be done with it, for now. Things are supposed to get warmer of the weekend, so I might get a chance to bury stuff from the compost pile down the middle, then top it up for the winter.

While I was building the bed, my younger daughter started working on beds in the old kitchen garden.

Beds that were more shaded than other areas.

Beds that were more frozen than not!

Alas, it was too much for our garden fork; one of the few useable tools we found that hadn’t been “disappeared” while the place was empty. It had a tendency to bend in that spot, and when my daughter tried to straighten it, it broke! The poor thing felt so bad.

The old kitchen garden got left for warmer days, and my daughter moved on to clean up the remaining bed at the chain link fence. The chicken wire protecting the cucamelons and gourds had to be removed, the plants pulled, and the soil moved to prepare for the block planters.

The cucamelons did not to well in our drought. The plants grew, there were many, many flowers, with teeny little fruit, but very few of them ever matured. Very likely, they just didn’t get polinated.

As my daughter dug the area up, however, she discovered they did much better below the soil!

Cucamelons produce tubers. I’d read that, in colder climates like ours, they can be dug up, put in a pot of soil and overwintered indoors, then transplanted in the spring. I tried that last year, but the tubers just disappeared in the soil. They, however, were nowhere near as big and thick as these ones!

My daughter set aside the biggest ones, and we will try overwintering them. Maybe at this size, they will have a better chance of surviving to be transplanted.

When my daughter was done cleaning out the bed, she headed inside and I continued working on it.

We had four of these chimney blocks waiting. My daughter had already moved the soil, and I just needed to level it for the blocks.

I found more cucamelon tubers in the process!

I ended up moving the blocks a little bit further away from the fence, so that when we bring up the remaining blocks and lay them down, the fence post won’t be in the way. I put leaf litter in the bottoms of the blocks before filling with the soil, since there is so much of it handy.

It was around this time that I could hear the sound of a utility vehicle nearby, so I headed over. The wife of the couple renting the property had come over to check the electric fence. I have spoken and messaged with her quite a few times, but this is the first time I met her in person! She brought their little daughter along, too, and she was a great help with holding the wire for Mom. It did take quite a while to find one of the ends; it must have gotten caught on a cow’s leg when it got spooked. Not only was it well away from the fence, but a couple of the support poles were pulled right out of the ground!

There was just enough slack that she could twist the wires back together, then we went around to another section where she said she had found a cow had gotten through, in a very unusual spot. She agreed with me, that something must have spooked the cows into going through areas they normally don’t.

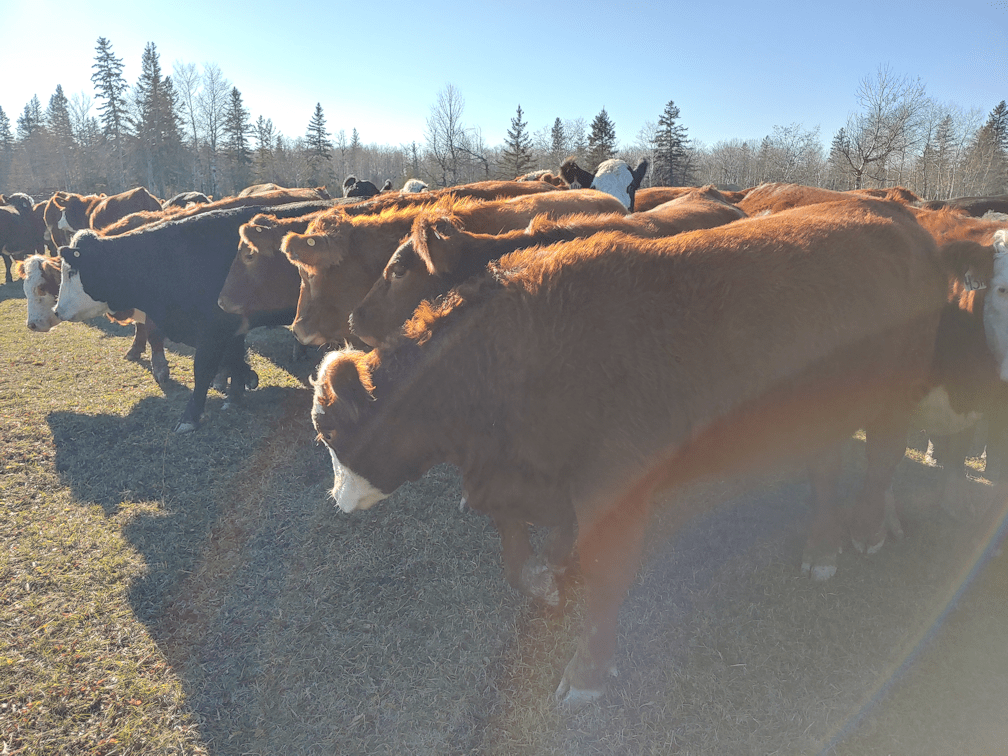
While we were walking around, the cows were intensely curious about us humans – and looking for another grain treat!

Just look at those adorable faces!!

Unfortunately, they were a bit TOO interested in Tiny Human, who was starting to get scared. With just cause. Cows may look docile, but they can be aggressive and dangerous to an adult, never mind a wee one. Tiny Human was much more comfortable being carried by Mom!

I took the opportunity to tell her about where we are looking to put a fence through the old hay yard, so we can plant trees for a wind break against the south winds. She let me know that they will likely take out the old fences completely, and put in new, because of the cows getting through so often. We also talked about redoing the fencing around the septic field, so we can still access it from our side, rather than filling in those gaps the cows got through this time. She said she would pass on the things I brought up, and hopefully her husband will soon be able to find the time to come over and we can do a more thorough walk about and discuss it in more detail. They are such good renters. With all our long term plans, I don’t want to be doing anything to make it more difficult for them. That’s part of why I wanted to make sure they knew about where I want to add the fence and plant a windbreak, since it takes away some of the land the cows graze in.

So, all in all, it turned out to be a very productive day, on several levels. :-)

The only down side, is we how have to replace a garden fork. :-D

The Re-Farmer
Foiled!

Last night, while I happened to be near the live feed to our garage security camera, I was distracted by movement. I looked over just in time to see…

… this cow, making her way back up the driveway!

She managed to get through the fence into the outer yard, but was foiled by the gate.

No road access for you, Lady!

I went outside to check and saw several cows in the outer yard, but they got spooked and ran off. I didn’t want to take a chance of them getting hurt in the dark, so I just closed up the gates to the inner yard. I then sent a message to the renter, rather than phoning, because it really isn’t an urgent thing. I’m glad I did it that way, because their small children were in bed already.

So when I did my morning rounds, I checked out the outer yard fence line. Usually, they break through the gate opening near the barn. I currently have a chain across it – the chain we used across the driveway until we could repair and return the gate our vandal damaged – that has reflective rope wrapped around. I could see hoof prints in the frost on our side of the fence, but not on the other side. The renter’s electric fence wire, however, was loose and clearly broken somewhere.

There was one other obvious place to check.

Sure enough, this is where they came through, as you can see by the trampled grass and tracks in the frost.

There is no barbed wire in this section of the fence, nor the one to the right. The wire starts up again at a post that is off frame. This is clearly by design, as the wire is wrapped securely around the post it ends at (you can sort of see it on the post on the left).

The white pipe coming out of the ground near the tree is where our septic tank’s grey water is expelled. It’s unfortunate that willow was planted so close to it. We will have to keep a close eye on the area, because the roots could mess up the buried pipes. The remains of a fence surrounds this entire low area, and my guess is that this section of fence was left open to access the septic field.

Which was a great idea, but no one maintained or repaired the fence around the septic field.

So now, the only thing keeping the cows out is the renter’s electric fence. You can just see the orange colour at the top of one of the supports for the wire, next to the fence post on the right. I couldn’t see the wire at all, so it would be somewhere in the grass.

The rent will come by to fix the electric fence when they can; I made sure to tell them there is no hurry. I don’t mind the cows grazing down the overgrown areas in the outer yard! I didn’t see them this morning, though I could hear them. They have not been back here for long. The herd is being rotated a lot faster than usual, as the renters are trying to keep them on grass for as long as possible, while the weather holds, but there just isn’t a whole lot of it. The grass certainly recovered well when the rains finally came, but nothing like what there would have been had we not gone through such extreme heat and dryness this past summer. Part of the deal with the renter is that they maintain the fences. It’s such a mess here, though, just to access it. The cows don’t even usually go here at all, so it was very unusual for them to break through here, and they only would have done that if the electric fence stopped working. Which happens every now and then.

I look forward to when we can finally clean up in this area. This is mostly a “hire burly, able bodied people with equipment” sort of job, though, and other things are higher on the priority list.

The Re-Farmer
Ginger Bug Progress

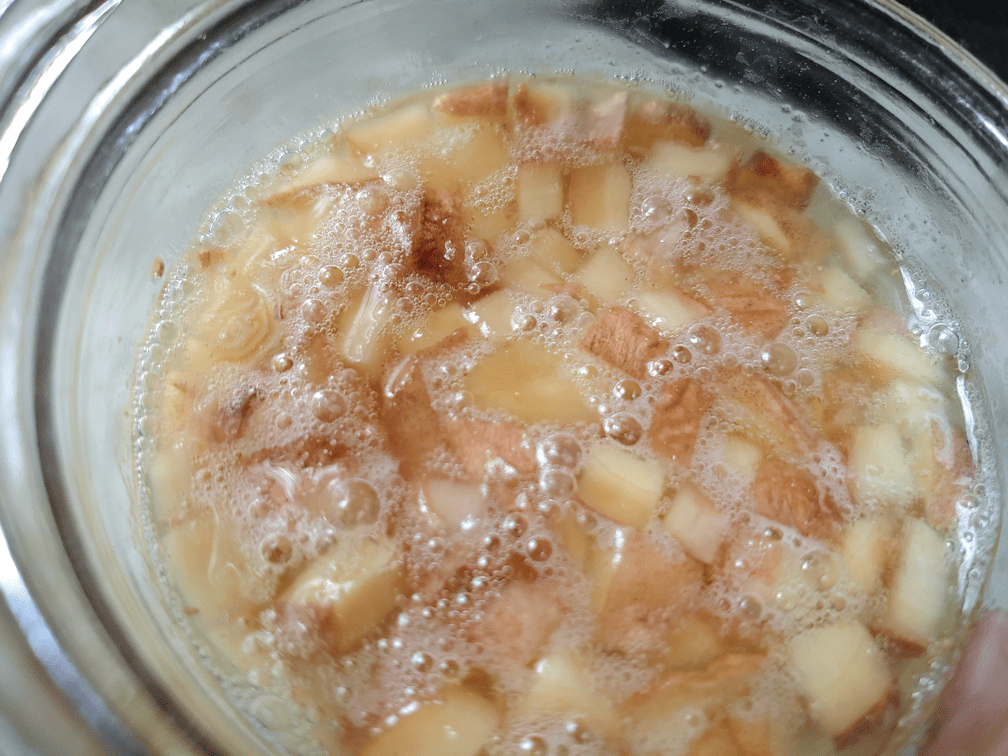
Well, we are into our third day of starting our ginger bug. It got its third feeding last night, and third morning stir today.

Look at those bubbles!

While researching how to make this, I saw sites that said it could be used after three days. Others said to wait four to ten days. All seemed to agree that it could be used once it starts bubbling.

Which means we should be able to start fermenting some pop, any time now!

I picked up some cranberry-raspberry juice to try first. There should be enough for at least two or three 8 cup batches. The recipes I’ve been reading said to use 7 1/2 cups juice to 1/2 cup ginger bug. Eight cups is not a lot, though.

Time to go back over the various instructions I’ve found and confirm the next steps we need to take. Then I have to decide on what container to use. Depending on what we go with, we might do a double recipe. We shall see!

The Re-Farmer

Sign progress

This morning, I finally started on the lettering for the new sign I’m making, to replace the one that was stolen.

My brother had mentioned what I was doing while visiting my mother and winterizing her new air conditioner (and he even found the right size screws to replace the ones that were missing from the seat of her walker). Yesterday, she called and asked me about the sign my brother said I had ordered. Of course, my brother told her I was making it, but somehow, she decided as was… paying someone else to make it? I’m not sure. I’d even told her I planned to make one, when I told her the one with my dad’s name on it had disappeared, but I guess she forgot. As we spoke, I mentioned that I wasn’t in a hurry to finish it, since I wasn’t sure what I would do to put it up. I don’t want to dig post holes, and the fence posts are all falling down, but we do need something permanent that can’t be stolen. I also mentioned that we would probably need to put a camera on it, too, and we don’t have a spare right now.

Well, I found myself chatting with my SIL later on, and it turns out my brother wants to come out here with his post pounder and put in a couple of fence posts before the ground freezes! He even offered to pick up a couple of 7′ fence posts, and the sign could be screwed on later.

At which point, this morning I decided I may as well get the lettering finished. I used painter’s tape to divide the sign into sections, then a pencil to draw in the letters and numbers as a guide, then added the first, base layer of the blue paint.

I removed the identifying features, but here is how it looked, with and without flash.

There was a bit too much light in the room, but you can still see the sparkle from the reflective paint in the photo where flash was used.

I picked up a set of really cheap craft brushes to use for this. After this first layer of paint is dry, I’ll do a second coat with the same size paint brush I used for the first coat, and then will use smaller brushes to tidy up the edges, the serifs, and maybe add a few decorative flourishes to the uppercase letters. Once that’s done, I’ll be able to see if it needs a third coat.

I’m debating whether or not to outline in a contrasting colour. I have paint markers in silver and gold that can leave fine lines, and should be able to withstand being outside. That might be too much, though. I just hope the letters will be easy to read from the road. I find myself thinking they may be too small, but then I remember that the old sign’s letters were much smaller, and it could be read from the road, so this should be fine.

I think it will look really nice, once it’s installed!

The Re-Farmer
What a crowd!

The entire household is really sluggish today, which means I headed outside to do my rounds later than usual. Though the outside cats had their food topped up yesterday evening, it looks like their hunting has not been very successful, because it was all gone, and they were very hungry!

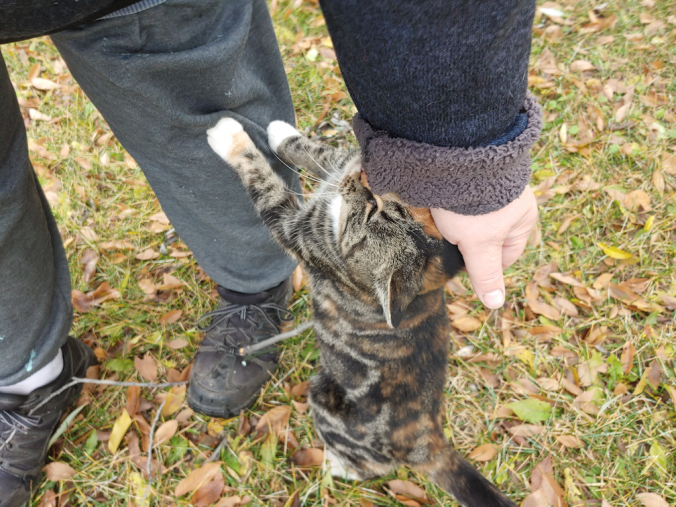
I even got to pet one of the ‘icouses, though I’m not sure which one. I can only be sure it wasn’t Bradicous, as there was no white tail tip, and it wasn’t the one with the black nose, nor the one with the mostly white back legs.

They were running all over the place in excitement! As you can see, Creamsicle Baby is still here – and Butterscotch is not happy to see him. What a mean Mom!

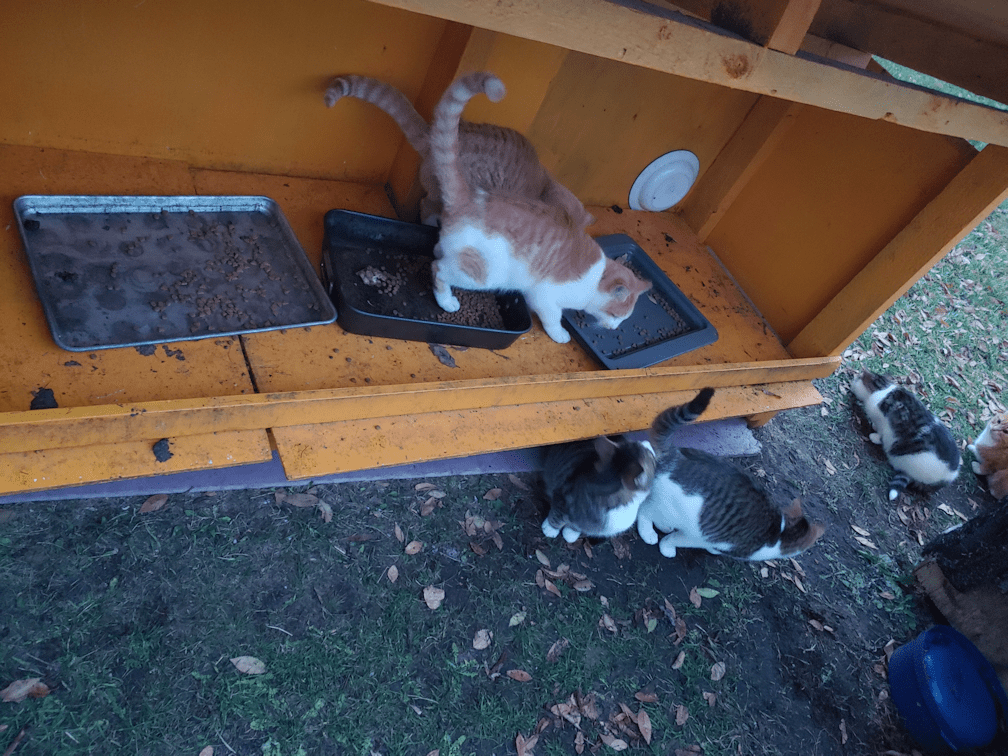
The kittens kept running from kibble tray to kibble tray in excitement!

Not only did we have all 11 kittens running around, but a whole slough of adults! Ghost Baby is getting braver about coming closer as I fill the tray under the shrive, though she still won’t eat if I’m too close. We had Ghost Baby, Junk Pile, Rosencrantz, Butterscotch and Roland Moon for the ladies. Potato Beetle, Nutmeg, and Creamsicle Baby made up the gentlemen. Which made for a crowd of 19 cats – assuming I’m not forgetting someone!

Butterscotch came over for some attention. She even followed me while I was doing my rounds and let me carry her for a while. Nutmeg and Rolanda also came over for extra attention. Nutmeg even followed me into the sun room when I tried to go inside, and he did NOT want to leave!

They do make morning’s fun. :-)

The Re-Farmer

Back Tracking a Bit, and Looking Ahead

A while ago, my daughters cleaned up the beds in the main garden area while I worked elsewhere. I’d asked for photos, but thought they’d forgotten to take any. One of them, however, did remember to get before and after pictures, and recently passed them on to me.

So here is some of the cleanup done by my daughters, almost a week ago.

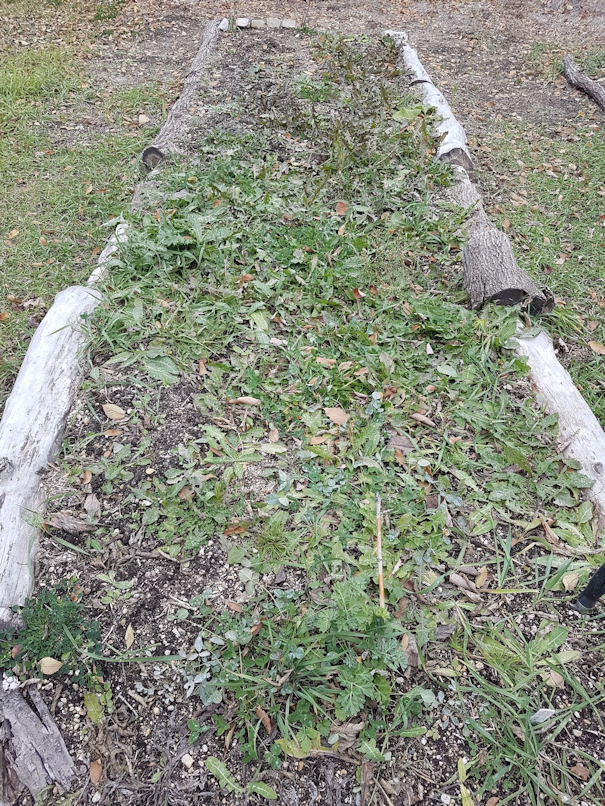
This first bed had two types of onions in it; the yellow onions we stared from seed that actually survived the cats, and red onion sets. Before those were planted, a row of… Hmm. I’ll have to check back. I believe it was the purple kale that we got as free seeds from Baker Creek that got planted down the middle. If anything germinated, something got to them before we ever saw them.

As the onions got harvested later, the bed was left empty when they were done. It had been weeded as much as I could, between the onions, while the onions were growing. This turned out to be one of the easiest beds to clean up and took them very little time.

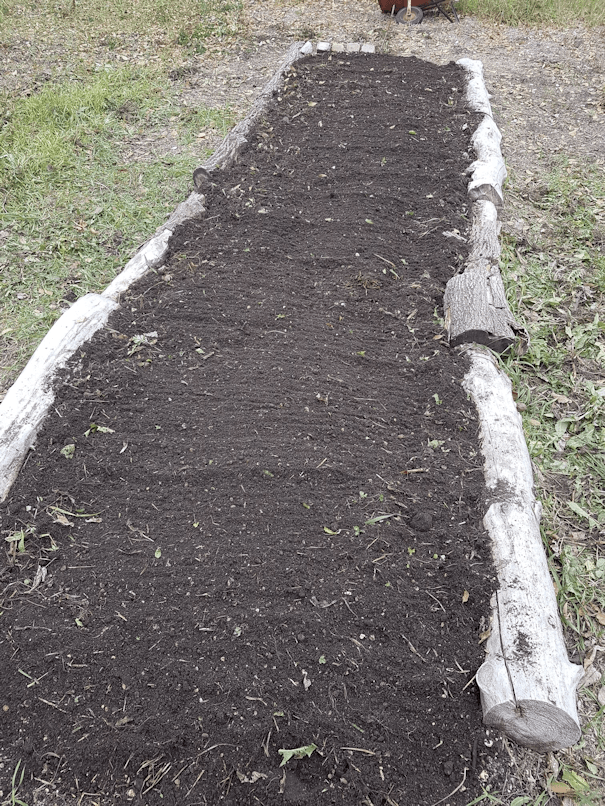
This is one of the three beds that started out with spinach. After the spinach was harvested, they sat empty until the heat waves finally passed. On the left of this bed, I planted radishes and … gosh, I can’t remember, but it was another cool weather crop. Neither survived the grasshoppers. Eventually, we planted some lettuce seeds that had spilled out of their envelopes and got mixed up. They turned out to be mostly one type; Merlot, I believe they were called, with a couple of buttercrunch that we got as free seeds from Baker Creek. We were able to add a mesh layer over the chicken wire cover on this bed, so they survived. Unfortunately, after a while, the lettuce leaves got very bitter and nasty tasting. I don’t know why. It’s not like they were bolting, and we weren’t getting anymore heat waves, but it got so bad, we just couldn’t eat them anymore. It’s a shame, because they handled the frosts we got extremely well. They didn’t go to waste, though, and are now adding nutrients to the high raised bed. :-)

This was another bed that started out with spinach. Believe it or not, this bed got weeded quite thoroughly before I planted different radishes and one of the chard varieties. You can see the one chard that survived, surrounded by wire, in the background. Closer to the front you can see some bricks and stones that are surrounding the last couple of radishes that survived. This bed turned out to be very difficult to clean up and was thoroughly filled with rhizomes. It took so long to clean up, this was where they had to stop for the day.

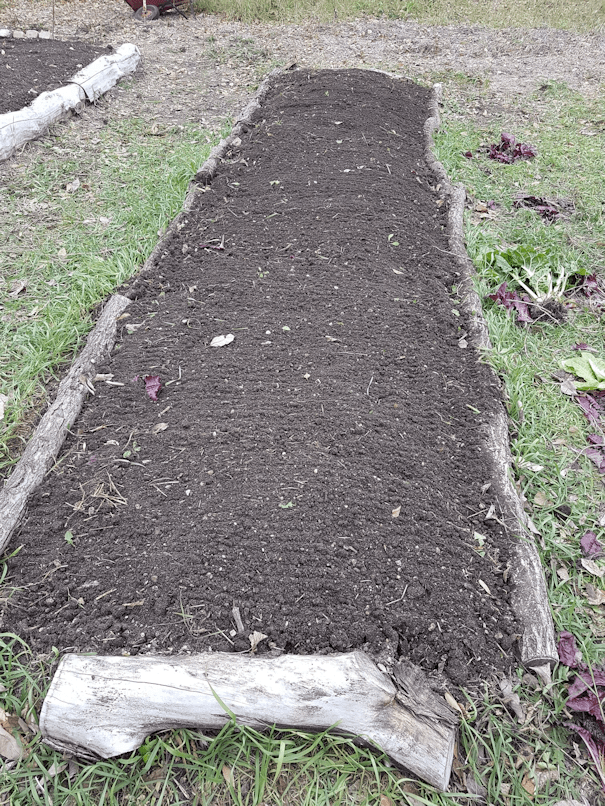
Before they left, though, my daughter had gotten a before picture of this last bed. It was the third bed with spinach in it, then it got planted with the Bright Lights chard and French Breakfast radishes. The chard did well until it got hit repeatedly with frost. It handled a couple of frosts very well before finally freezing beyond recovery. There were only a couple of the radishes that never quite recovered from the grasshoppers. Like the lettuce, they got pulled and composted into the high raised bed. My older daughters were able to come back to finish cleaning this bed a couple of days ago, and it was much faster and easier than the last one they did!

Over time, each of these beds will be replaced as high raised beds. They are about 14-15 feet long, but will be reduced to 9 ft, so it will be easier to build frames for protective covers that can be easily moved by one person. We will keep using the dead trees we clean up from the spruce grove to build the beds for as long as we have enough of them. That should be enough to do the remaining five beds. That will leave us room to do a second row of high raised beds, if we choose, but by then, I think we will no longer have enough wood from dead spruce trees to use. We shall see. It’s a big job that is going to take a while to do. In the spring, we will plant into these beds as they are, but now that we have a chain saw, I expect to be able to cut down the dead trees and cut the lengths we need in advance, so that in the fall, we will just need to assemble them.

To get the height of our first high raised bed, we used eight 9ft logs and eight 4 ft logs. With five more beds to build, that means 45 nine ft logs and 20 four ft logs. It took us most of four trees (including one that was smaller than the three we cut from the spruce grove) to make this one bed. The remaining trees that need to be cut are all quite large, but if we assume four trees per bed, that means we’ll need 20 more trees to do the remaining beds.

We have more than that many dead trees to cut. It will only be a question of how solid they are, or if they have rot or ant damage to the trunks. A few of them are so big that I would want to split the logs cut from the bases of the trunks, lengthwise, and use them at the very bottom of the beds, so they’re not too thick. If the wood on all the remaining trees is sound enough, given their size, I am thinking we will probably need closer to 15 trees to finish the beds rather than 20. Considering we have probably another 24 dead trees to cut, that just means more beds we can build!

Just thinking of having a whole row of high raised beds here makes me very happy. I can hardly wait!

The Re-Farmer

Look who’s back again!

Well, we’ve been having all sorts of yard cats that have been away for a while, coming back again!

When the girls popped outside for a bit, they discovered Creamsicle Baby was back.

He even brought his brother, Nutmeg, with him. :-) Creamsicle is looking thin and hungry, but last night he seemed to be more hungry for human attention than anything else! He just couldn’t not get enough pets and cuddles. The kittens weren’t too sure what to make of him. I know they’ve seen him before, but it’s been a while. Tuxedo Mask in particular was following him around with great curiosity.

Best of all, Creamsicle Baby was still here in the morning!

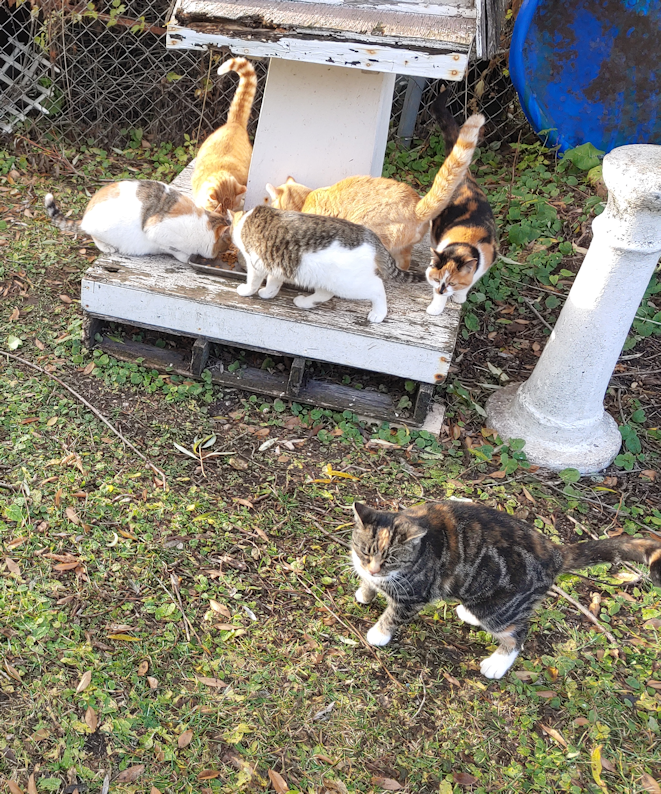
My goodness, the cats were just all over the place, while we were feeding them!

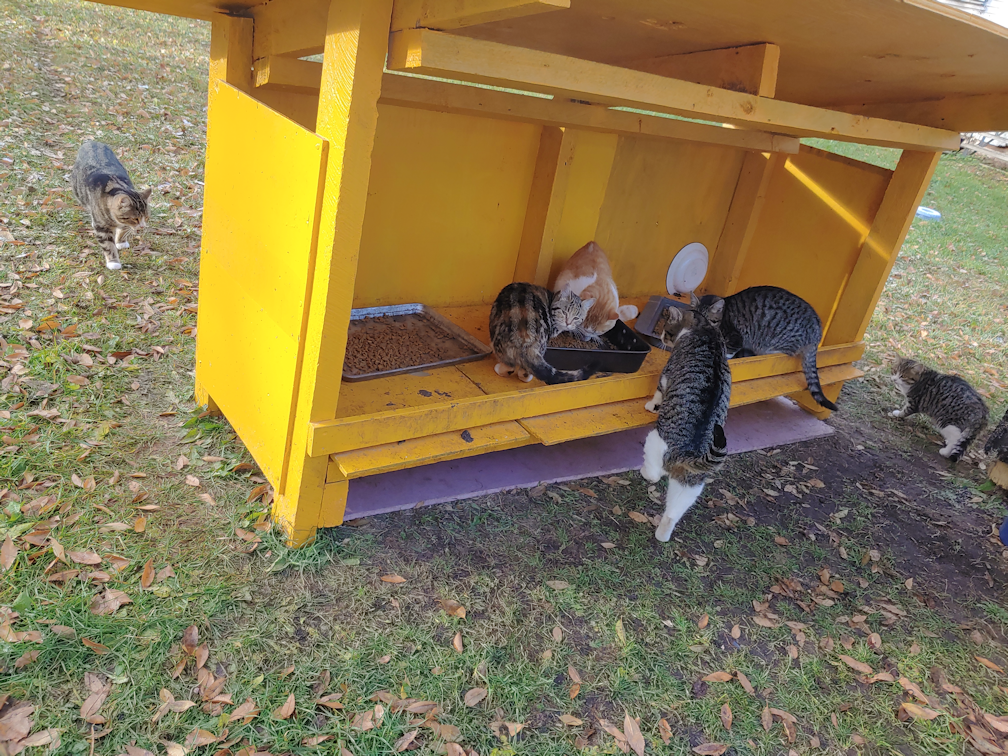
I don’t think I’ve seen so many of them trying to fit around the one tray under the shrine, either. :-D

After we were done with the outside stuff, my younger daughter and I made what I hope will be the last city trip this month. After this, I have only a court date at the end of the week at the smaller city, and after that, I should be done with anything but local trips. This trip was mostly for stuff the girls needed, but it gave me a chance to get a few last items for the pantry or freezer. Then, on the way home, we were able to stop at the mail and pick up the big box of tea my older daughter ordered!

Among the things I picked up today was juice to use once our ginger bug is ready. Between the home made, fermented pop and the tea, we’ll be well set for non-water beverages to enjoy over the winter. I also picked up some extra milk so I can try making the soda cheese my mother used to make that I finally got her instructions for. Her instructions were for 5 gallons of milk, though, and I only got 1 extra gallon, so I’ll have to adjust the ratios! After I double check with her that she actually meant to say “gallons” and not “liters”.

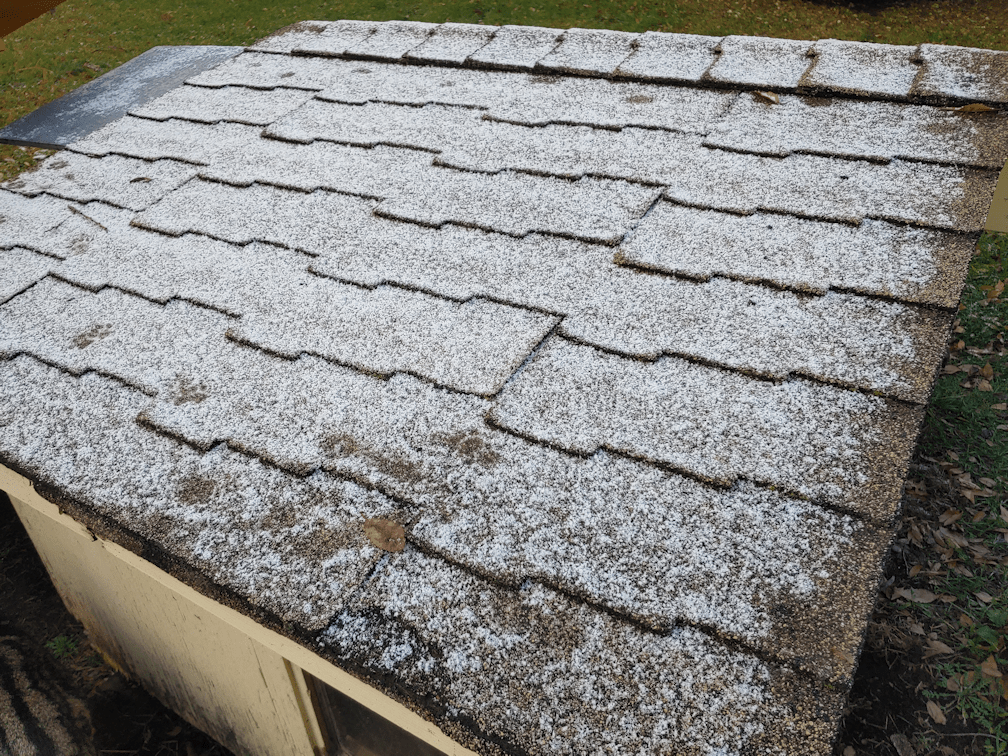
We are still having mild temperatures, even though we did actually get a bit of snow.

There was just enough that it was still around to see on things like the roof of the cat’s house, but not on the ground. We’ll have a couple of days just above freezing, then we’re supposed to warm up again. We’ve still got stuff to do outside before the ground freezes, but on the colder days, I am hoping we can start doing a whole lot of baking, in quantities sufficient to add to the freezer.

As long as the weather holds, we’re going to be very busy!

The Re-Farmer

Thinking of 2022; first seed order placed

While we have already been picking up some seeds here and there for next year’s garden, still have some from this past year, and even have some seeds we have saved, last night I placed our first online seed order. We will have a “seed” budget over the next few months that will also include, hopefully, fruit trees and berry bushes as well.

A lot of stuff is still listed as out of stock. This is most likely because the sites are at the end of the 2021 catalogue year, and their 2022 products are not ready yet. Still, it meant a few things on my wish list did not get ordered, and I found alternatives, instead.

This order was with Veseys. I have been very happy with what I’ve had from them – even the stuff that ended up failing, like the mulberry tree, since they had no control over it getting hit with that one bitterly cold night that killed it off! :-D There are several other places we will be ordering from, month by month, but this is what I ordered last night, with why they were chosen.

All photos belong to Veseys, and I will link to their individual listings. (For future readers, if the links are dead, it’s likely because they no longer carry the item anymore.) All links will open in a new tab, so you don’t lose your place.

This past summer was a hard one for the winter squash. We did not get enough winter squash for storage, and that’s the main reason we were growing them at all. While we still have Red Kuri and Teddy squash seeds we can grow next year, I like variety. Hopefully, between them all, we’ll have at least something for the root cellar!

Georgia Candy Roaster Winter Squash

This is the long squash in the photo. I have heard from quite a few different places about how delicious these squash are, so I want to give them a try.

Winter Sweet Organic Squash

Another good storage squash that I chose specifically because the listing says they are best for eating several months after being picked. So this one is for the long haul!

Bresko Beet

We’ve tried different varieties of beets, and grew lots of them this year, but with the growing conditions, we got remarkably few beet roots out of it. I don’t know that we will order other varieties as well, but I don’t expect we will plant as many as we did, this past summer. The listing specifies that this variety is a good storage beet, so that’s a big selling feature for me. Pickled beets are fine and dandy, but having some for fresh eating will also be good.

Aunt Molly’s Organic Ground Cherries

I’ve been wanting to grow these for a while! Before our move, we did grow these in our balcony garden with success, and I just love them. Which is odd, as they are in the tomato family, and I can’t eat tomatoes unless they’re processed. One of the cold climate gardening sites I follow listed these as something they regret planting, as they became invasive, and they didn’t like how they tasted. It seems these can self sow and are hard to get rid of, once established. With I see as a bonus! These will be planted in a location that can be permanent, so they can self-sow as much as they want.

Conservor Organic Shallot

We will be trying these again! I really enjoyed the shallots we bought as sets, to replace what we tried to grow from seed, but they were used up very quickly. We need more for our household, and the sets only had 25 per bag! I want to try and grow from seed again. This time, we have what we need to ensure the cats’ won’t be able to get at them and destroy them again!

Red Baron Onion

Another one we will be trying again. When we started these seeds for our 2021 garden, I had used an cardboard egg tray for the “pot”. The cardboard just sucked the moisture right out of the growing medium.

We did plant the last of our seeds in Solo cups, though it was incredibly late in the season. What we did get got transplanted near our tomatoes. It didn’t really work, but while I was working on that bed yesterday, I found a single Red Baron onion in the ground, with just a hint of green on it. So I planted it back into the ground! Onions go to seed in their second year, so it should overwinter just fine under the mulch. We shall see! Even if it doesn’t, though, I look forward to trying to grow these bunching onions from see again.

Oneida Onion

Of course, we must have regular cooking onions, too! This is a variety I chose for its storage potential. I was happy with the yellow onions we grew from seed compared to the ones we grew from sets. We go through a lot of onions in this household, so I will probably be ordering other varieties as well – as long as we can find the room for all the growing trays when we start them indoors! At the very least, I want to get a variety of red onions I have my eye on, in another site.

We got a bush bean collection last year that did surprisingly well under difficult growing conditions. This year, I wanted to try a pole bean collection, but it was out of stock, so I found individual ones to try. We may still get bush beans as well. I am also interested in getting beans for drying. We shall see.

Carminat Bean

Since everything purple seemed to do much better than other stuff in our garden this year, I figured a purple pole bean would be worth a try! They are supposed to be a high yield bean that stays tender even as they get larger.

Seychelles Bean

This pole been variety was new for Veseys for 2021. They are supposed to produce for a very long time. As they are also expected to grow up to nine feet tall, these, and the Carminat bean, should be great to grow on the squash tunnel.

Latte Corn

This past summer, we had a sweet corn collection with three different varieties. This year, I decided to get just the one – and we will be planting them closer to the house in next year’s garden! These are an early variety that can handle colder soil, which will be important for spring sowing. Also, they were on sale. ;-)

I plan to get a couple other varieties of corn from elsewhere as well, so we should still have three or four different kinds of corn next year. We shall see.

I decided to try turnips this upcoming year. A couple of varieties caught my eye.

Tokyo Silky Sweet Turnip

I chose this variety because they get harvested at such a small size, and are supposed to be mild and sweet. The leaves can be used like spinach, too.

Purple Prince Turnip

These are a fast maturing summer turnip that are also supposed to be harvested at a smaller size. The greens are also good for eating, so they are another dual purpose crop.

Eureka Cucumber

And finally, we have these cucumbers! I chose this variety for its dual purpose as well. Harvested at smaller sizes, they are a good pickling cucumber. Leave them to grow larger, and they are good for fresh eating, too.

So this is our start! Along with the garden beds we used this past summer, we will need to expand our garden even more for next year. We will likely need to build more trellises as well.

One thing we learned from this past year’s garden is, if we want to meet our goal of growing enough food to preserve through the winter for the four of us, we need a much bigger garden! Partly, we need to plant more of some things, because who knows how much will actually survive? Plus, a few packets I’d ordered turned out to have fewer seeds in them than I expected. As I place our orders, I’ll need to keep an eye on the quantities and decide; do I order more packets, or order more varieties?

Hopefully, we will not get another year of severe heat and drought conditions. Nor another year with a plague of grasshoppers. And be able to keep the critters out… There are so many things that can affect yield. Someone on one of the gardening groups I’m on, posted this little rhyme.

One for the rook
One for the crow
One to rot and
One to grow

Planting four times more than we think we will need seems a bit much, but after how things went this past year, there are some things it really does seem appropriate for! And that’s just food for us. When we get chickens and possibly goats, we will want to grow as much feed as we can. Plus, I want to eventually grow flour corn and things like wheat, chickpeas and flax. I’m even looking at getting sugar beets, and my daughters are interesting in growing hops for beer making. By the time we’re doing that, however, we’ll be growing in the outer yard!

Little by little, it’ll get done.

The Re-Farmer

Starting a Ginger Bug
No, I’m not talking about our furry Ginger Bug! I’m talking about using the actual roots.
In keeping with our stocking up on the assumption we’ll have a month or two where we can’t get out to do any sort of shopping, we’ve been thinking not only of essentials, but those little things that improve on quality of life. One thing that we considered is liquid refreshment. Drinking plain water gets boring, fast – and we buy our drinking water. We really should have tested our well water by now, but to get the full testing done is very expensive and time dependent. We’d have to take a sample and drive it to the lab in the city as quickly as possible. Even just getting a sample bottle requires going to another town. One I haven’t been to since I was a kid and went to a cattle auction with my dad. So that will just have to wait again.

Our usual default drink that isn’t plain water is tea, and my older daughter has already taken care of that department. She went through the sale section of David’s Tea and ordered 13 different types of tea! They should arrive in the mail this week.

The other thing we do enjoy is pop (soda). Usually Coke Zero for my husband and I, while our daughters prefer Ginger Ale. I actually don’t like Ginger Ale on it’s own, but love it mixed with fruit juice. There’s something about that carbonation that really hits the spot.

Which is why I’ve decided to start fermenting our own pop. It’s supposed to be all healthy and everything, but really, I just want to make a thirst quenching fizzy drink.

To start the process, we need to make a ginger bug and get the fermentation process going. I meant to start one a few days ago, but got busy with other things, so I finally got it started last night.

The basics of a ginger bug is fresh ginger root, sugar and water.

I looked at a lot of websites and videos, and there is a lot of conflicting information, of course. Some say to leave the skin on the ginger, because that’s where the yeast it, while others say to peel it, and it’ll ferment just fine. Some say to grate the ginger, others say to use a fine shredder, and still others say to just chop it up. Some were very specific about using a wooden spoon to stir the bug, while in some videos, I saw people using metal spoons to stir. Of course, the quantities and ratios of ginger:sugar:water are all different. With all this, everyone seemed to have very successful ginger bugs, so I figured things were pretty flexible! Then there is the container to put it in. As an open ferment, some cover the jar with cloth or a coffee filter, while others keep it in a sealed jar. Which, to me, seems to really increase the risk of an explosion.

So I just sort of took it all in and did my own version.

I decided to chop the ginger into a small dice, going with the sites that said it made it easier to strain the liquid out later. I don’t like floaties, if I can avoid them! I left the skin on, because peeling ginger is a pain in the butt.

As the ginger bug needs to be fed, I chopped extra and put the excess in the fridge.

I decided to use:

3Tbsp ginger
3Tbsp sugar
2 cups water

I put the whole thing in a 750ml jar to have room to add more ginger and sugar, and for stirring. I also used some of our purchased water, rather than our well water. If I were to use our well water, I would have boiled it and let it cool to room temperature, first.

I could have used an elastic to hold the coffee filter on, but I find a canning ring is much handier.

The jar itself is now stored in a cupboard. Not because it needs to be tucked away, but to keep the cats from knocking it off the counter or something!

It not needs daily tending and feeding until it gets fizzy.

Which means it will get stirred every morning, then fed every evening.

While that is fermenting, we need to think about what to make with it! Of course, we can make basic ginger ale, but as I mentioned, I’m not really a fan of plain ginger ale. Apparently, you can use sweet tea as a base, so that’s always an option, though I am leaning more towards things like cranberry juice or pomegranate juice. I don’t normally buy juices; I find them way too sweet. There are many options, though, and I’m looking forward to experimenting!

The Re-Farmer