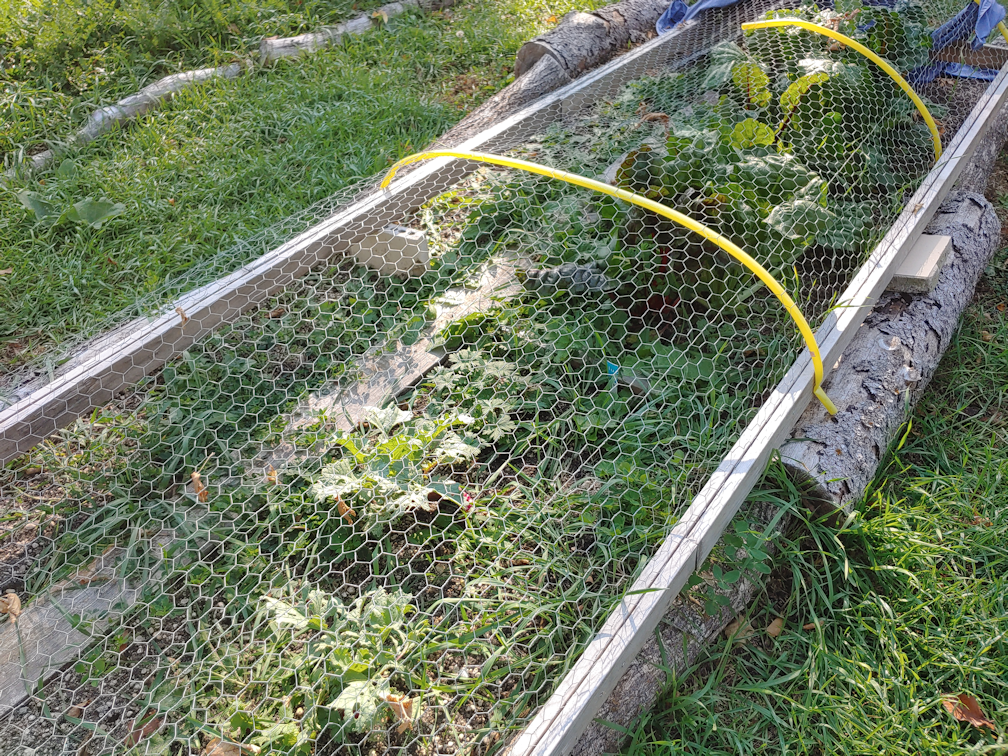
In the main garden area, which will be a permanent garden, we’ve still got the two beds covered with mesh to protect them from the deer. Unfortunately, that leaves them pretty neglected, due to the difficulty in moving such long frames.
Of the radishes we planted, there are two French Breakfast radishes that survived the grasshoppers, and they are actually now looking stronger and healthier than ever! They were so eaten up, I did not expect them to.
And just look at the big mutant radish bulb. :-D
Will they get to the pod stage they were planted for? I have no idea. Normally, I’d say it’s way too late for that, but then I look at the long range forecast and think… maybe they will?
The surviving chard, on the other hand, are just thriving! The problem is, we’re not really using them much. It’s not that we dislike them or anything. It’s just a pain to get at them.
The lettuce is also doing really well – as is that one tomato plant that showed up on its own!!
If I were not sure that deer are still passing through the garden areas, I would take the covers off completely. Then they could be tended and harvested more easily. Which won’t be much use if I come out one morning and find it all gone. Mind you, from what I’ve seen on how big radish plants get when they start to develop pods, we’re going to have to take the cover off at least that bed. And what will we do about this very strong, very healthy tomato plant that started itself so late in the season? I don’t even know what kind of tomato it is. Can tomatoes be transplanted into pots and grown indoors over the winter? I have no idea.
At least the groundhogs are no longer a problem. For them to go into hibernation so early, I would be thinking we’re in for an early and bitterly cold winter, and yet it’s supposed to continue to be warm throughout October, for as far ahead as the long range forecasts go. Plus, The Old Farmer’s Almanac is predicting a milder, wet winter for our region.
Once protected from critters and insects, we can at least say that the chard, lettuce and radishes were – eventually – a success. When we have our permanent, high raised beds, which will be only nine feet long, we will be making sure the covers we make for them will be easy to move aside as needed!
When it comes to the sunflowers, it looks like we’ll have a few Hopi Black Dye seed heads that will fully mature, but I wasn’t expecting much from the Mongolian Giants.
Then I took a closer look at one of the largest heads.
This is only about a third, maybe a quarter, of the size it should be, and yet there are maturing seeds in here!! There are so many developing and opening seed heads still, too. I don’t think there are any other Mongolian Giants like this one, with pollinated and maturing seeds in them, but while looking at them this morning, I did see some bees fluttering around, so who knows what will happen? It’s been such a strange growing year, there’s just no way to know anymore.
Some sad little peas among some sad little corn! This is the sweet corn block that is doing the worst, and yet they are still trying to produce little bitty cobs! We’ve got the most pea plants growing in this block, though, so at least this area should see the most improvement from their nitrogen fixing capabilities.
And we’ll even have a few peas to harvest!
The Montana Morado corn – what’s left of it – is being left to go to seed, and a few of the cobs have uncovered themselves. Which is helpful, since it lets me see how the seeds are maturing and drying on cob. A fair number of peas interplanted with them have been managing to grow, too. Not a lot of pods developing, but I’m seeing flowers around.
When it comes to the corn, I find myself waffling back and forth over whether or not we want to try growing them again next year. I still want to get Maize Morado seeds to try, and maybe we’ll do the Dorinny Canadian hybrid again. It’s hard to guess how much better the sweet corn would have done, had we not had drought conditions. The soil is nitrogen depleted, but we did use a water soluble, high nitrogen fertilizer on all the garden beds, a few times over the summer, plus were able to amend a bit with the purchased garden soil.
Is it worth trying the sweet corn again? I really love corn, but until we are able to improve our nitrogen depleted soil, is it really worth it?
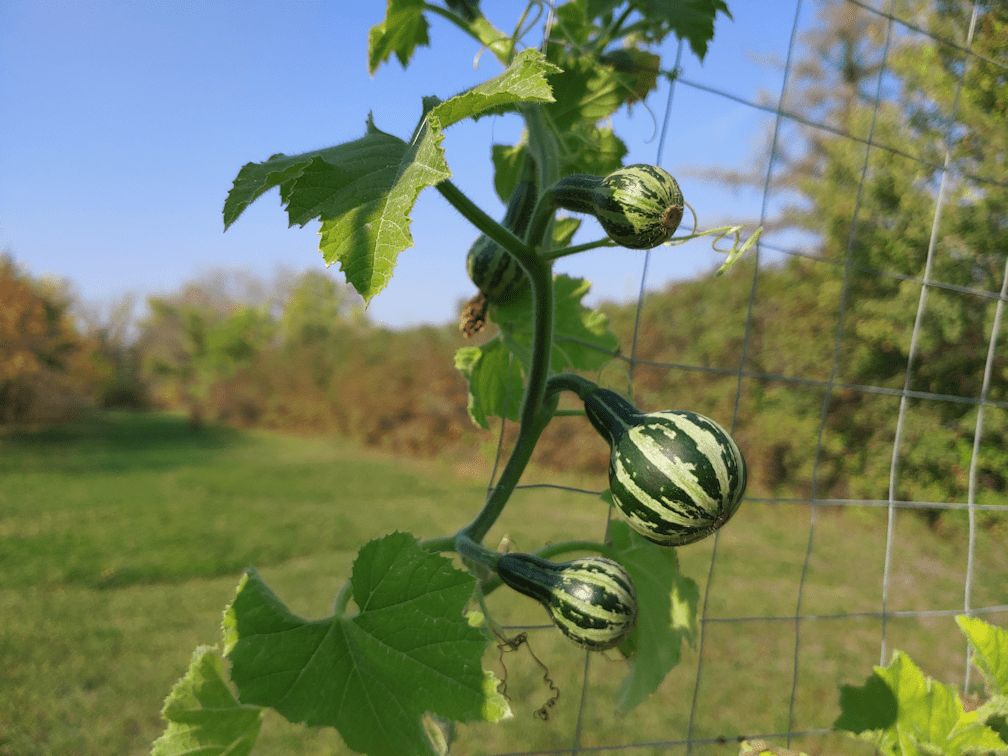
While the squash and melons are died back, or in the process of doing so, I continue to be amazed by the Tennessee Dancing Gourds.
These were one of our “fun” crops. Yes, I hope to use them for crafting purposes, but really, I just thought they were adorable and hoped that maybe, just maybe, they would grow in our Zone 3. From reviews I read when I bought the seeds, I knew they could be prolific, and the certainly have been, even with poor growing conditions.
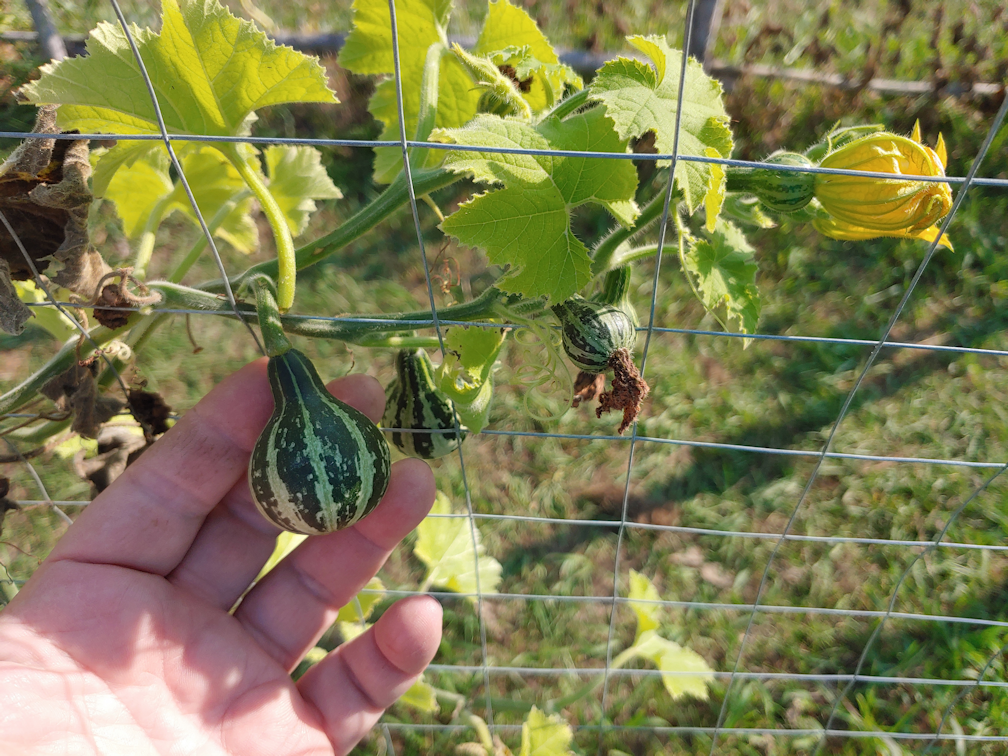
While I’ve harvested only four mature dancing gourds, that are now drying out on our kitchen counter (protected from the cats!), there are more on the vines that are just as big, but still firmly attached.
More amazingly, the vines are still growing and blooming, with both male and female flowers. They have been doing amazingly well!
The luffa have decided to surprise me. I thought that, by now, they were basically a lost cause.
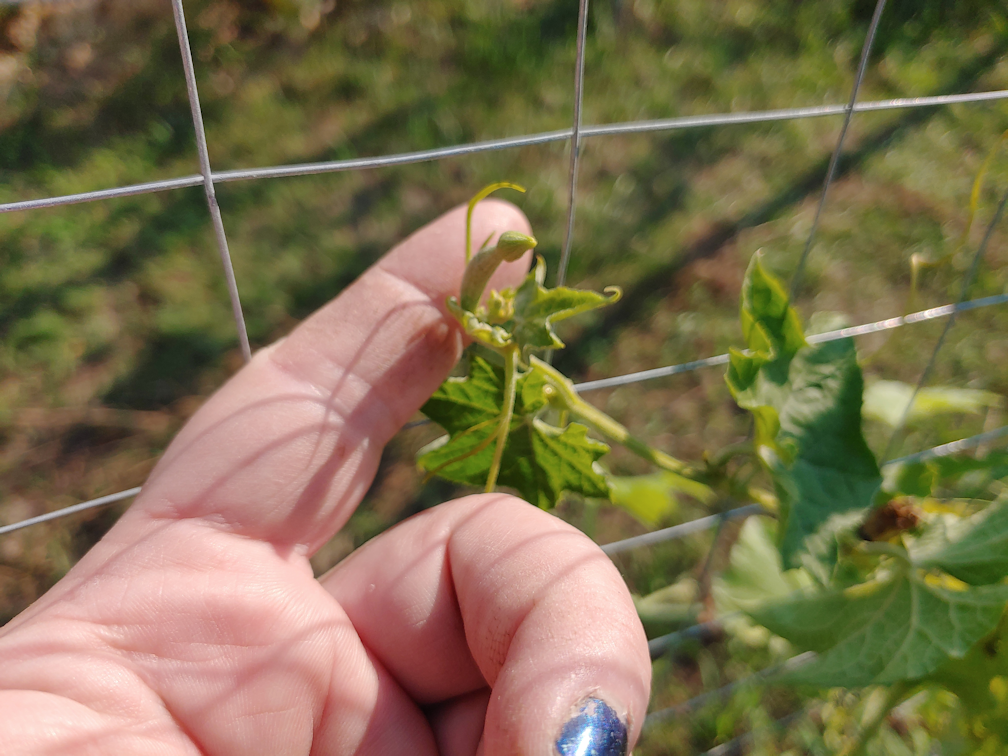
The very first luffa gourd that started to form ended up withering away, so when these ones showed up, I tried to hand pollinated them. Which I hope worked, but it’s still too early to tell.
You can just see a minuscule female flower developing, above my finger, too.
There are more male flower buds forming, and even another tiny female flower, with its tiny gourd, developing.
The vine itself is the only one that has grown enough to start making it’s way over the top of the squash tunnel.
I took this picture above my head to show the flowers that are blooming, but I was pretty blinded when I took it. So it was not until I uploaded the photo that I realized, there are gourds forming up there, too! There is no possibility of hand pollinating them, as I can’t reach them, but they might just make it!
None of the gourds we planted are zone 3, so that was a strike against them growing here, right from the start. While they would have loved the heat of our summer, it was difficult to water them adequately during drought conditions, so that was another set back. Though we have not have frost yet, we have had some pretty chilly nights, so I am really amazed they are still green, growing and flowering, while plants more suited to our zone, such as the nearby winter squash, are dying back. Especially the luffa, which didn’t even start blooming until very late, and didn’t start producing female flowers even later. It is unlikely the mild temperatures will continue long enough for the luffa gourds to fully mature, but the Tennessee Dancing gourds are doing just fabulously! I definitely want to try growing both, again. If they did this well in such poor conditions, imagine how well they’d do in better conditions?
While going through the garden beds this morning, I was just blown away by how much is still growing – and still getting a chance to grow, if the forecasts for October stay true!
The last time I had so many photos to share, I put them together into a video, but it only ever got one view. Clearly that’s not something people are interested in. So today, I will instead make a series of short posts, instead, starting with our winter squash and melons.
This is the very first Red Kuri/Little Gem squash that matures. As you can see in the photo, the vine is completely died back – except for the few inches on either side of the stem!
The vine with the next biggest one still has some green leaves on it. There had been another small squash that started to develop, but it withered away and fell off.
The other one, however, is still getting bigger, and just starting to deepen in colour. The vine it’s on has a lot of cold damaged leaves, but is still mostly green and growing, so this one may actually get a chance to fully mature.
The vine the mutant is on is also still growing, with fresh new leaves showing up even as the older ones get killed off by colder overnight temperatures. We still have not had a frost, which is the only reason we still have hope for our garden!
We are back down to the two Teddy squash, one on each plant. The others that had started to form, withered and fell off, likely due to lack of pollination. I don’t know how much bigger this well get, as they are a very small variety to begin with.
If you notice the white on the squash and leaves, no, that is not powdery mildew, or any other sort of fungal disease. That’s road dust. Even with the lilac hedge nearby, dust from the nearby road still gets through and coats things. Even the summer squash, which is furthest away, has road dust on them. Another reason we want to complete the hedge with dense bushes, and also plant taller trees. They will serve as more than wind breaks and privacy screens, in this area!
Here, you can see that the melon vines have all completely died back. All of them. And yet…
… the remaining melons are very firmly attached to their vines! Of course, they can’t grow any bigger, but I’m hoping as long as they stay out here, they will continue to ripen.
Under the conditions we’ve had, I’m really impressed with all of these. The melons managed to be quite prolific. The winter squash were not as prolific as they normally would have been, but we will at least have a few squash to try, and to see if we like them enough to want to grow these varieties again. We certainly would be willing to grow the Halona and Pixie melons again, though I think that we will try new varieties next year, to see what other varieties we enjoy eating.
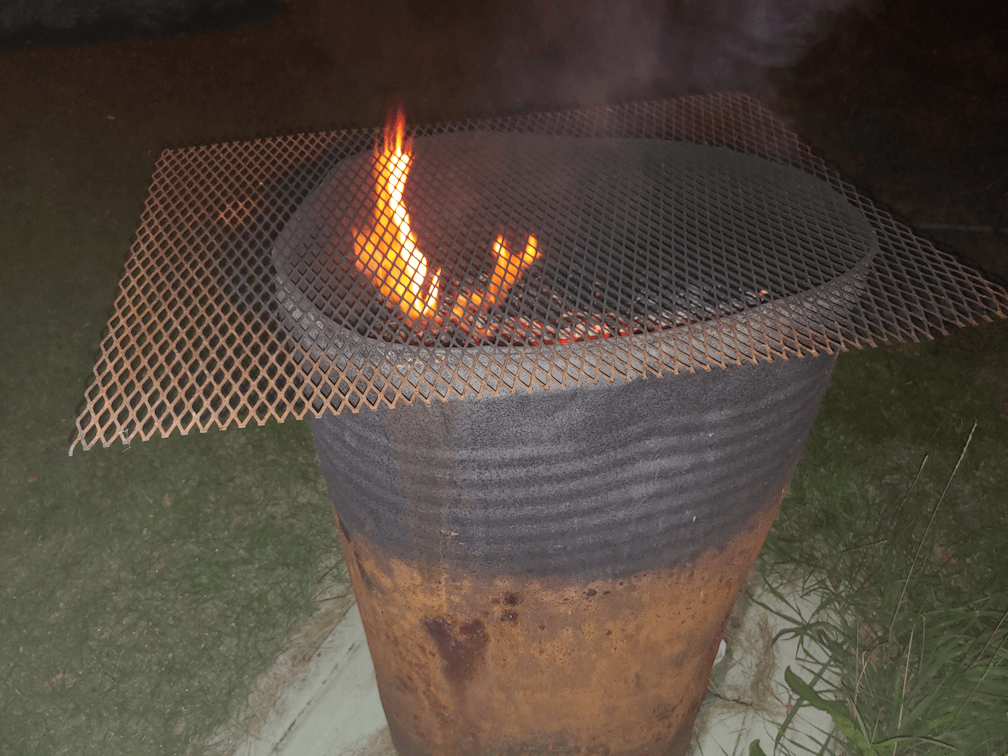
Last night, I did something we haven’t been able to do in almost two years – and the last time I did it, I probably shouldn’t have!
I did a burn.
The burn barrel has been full for some time, but with the conditions we’ve had for the past two summers, we had full burn bans, including burn barrels and fire pits. I suppose we could have done burns in the winter, but we had such a bitterly cold winter in between, we just didn’t.
While I was outside, tending the fire, I had cats and kittens, circling around me the whole time! The kittens were curious enough to play around me, but not enough to come close. :-D
Speaking of kittens…
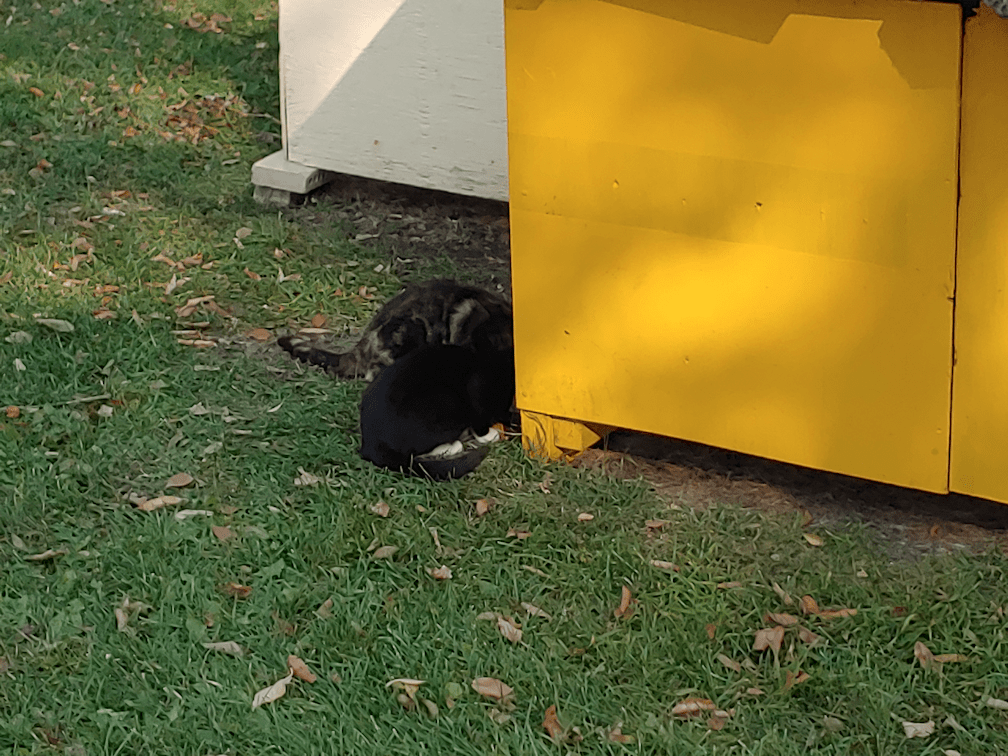
I did a head count will feeding the outside cats this morning. For two areas, it’s easy. Rosencrantz and her babies were at their private dining area (and what is Toesencrantz doing, the way he’s all stretched out and flattened like that?? LOL), while Butterscotch and Tuxedo Mask were at the kibble tray on the ground. So we’ve got three kittens accounted for.
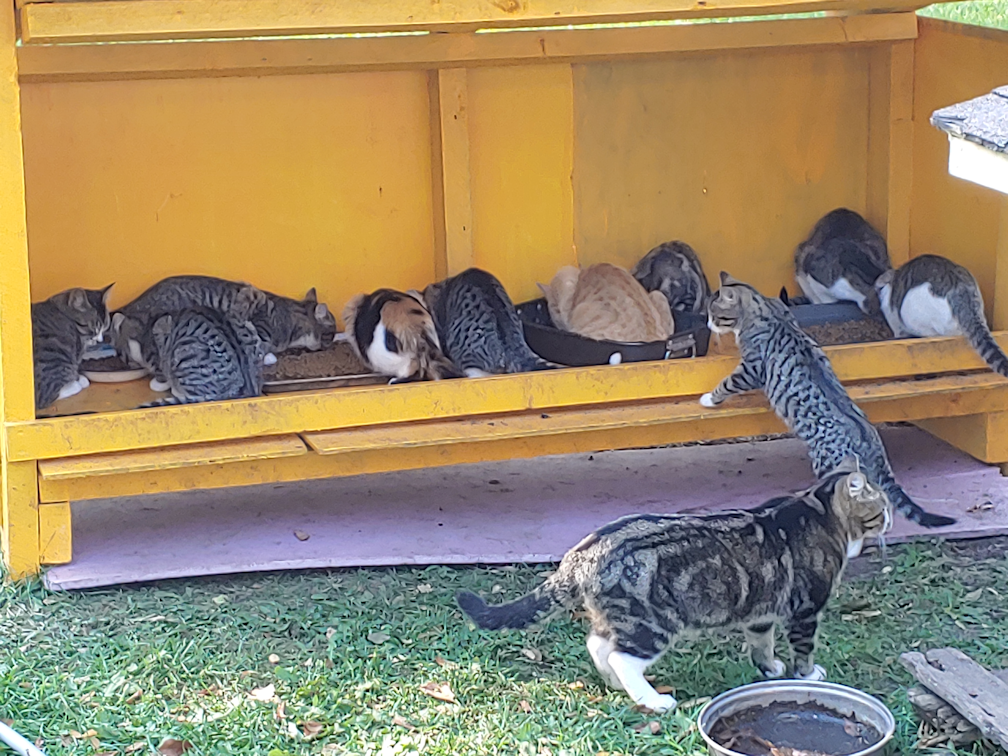
Inside the kibble house, however…
So we have Potato Beetle in front and Rolando Moon in the roasting pan. That leaves… nine kittens?
Do we have twelve, this morning?
Then I realized I was seeing double.
There are two Junk Piles in the kibble house. Junk Pile Cat and her mini-me, Junk Pile Baby! Who is almost as big as her mother.
So now I’m thinking that on the one day that I counted a dozen kittens, I may have accidentally counted Junk Pile as as kitten.
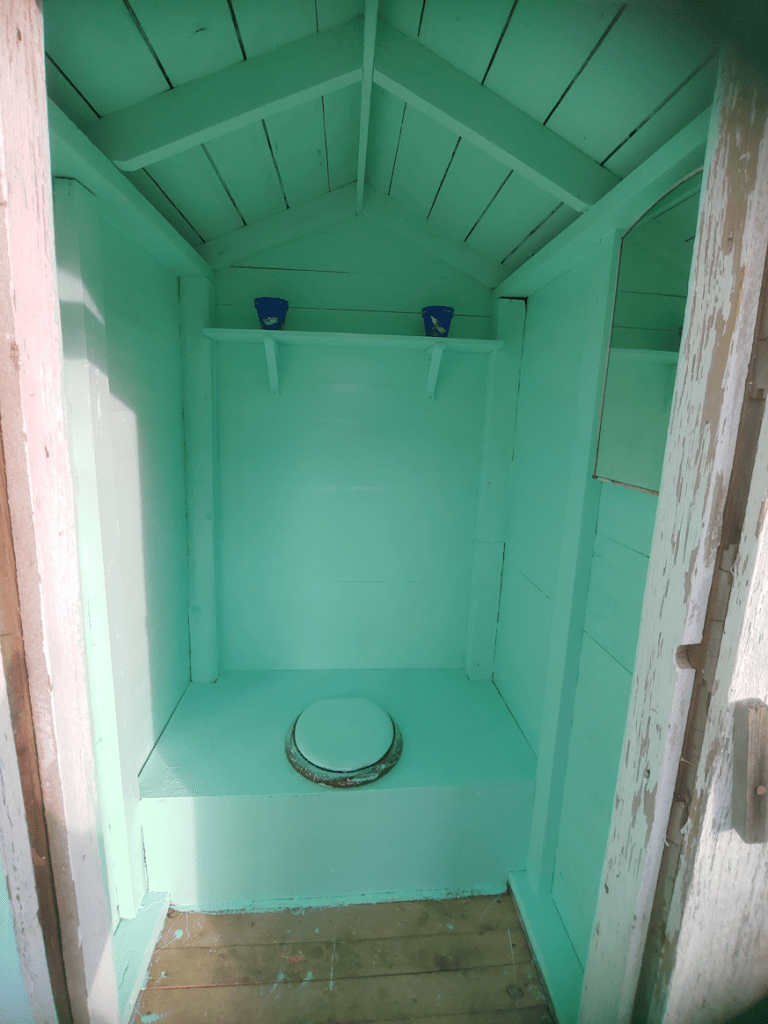
Well, we’ve done as much as we can with the outhouse for now, and I think it’s turned our rather well!
The first order of business was to paint the shelf boards.
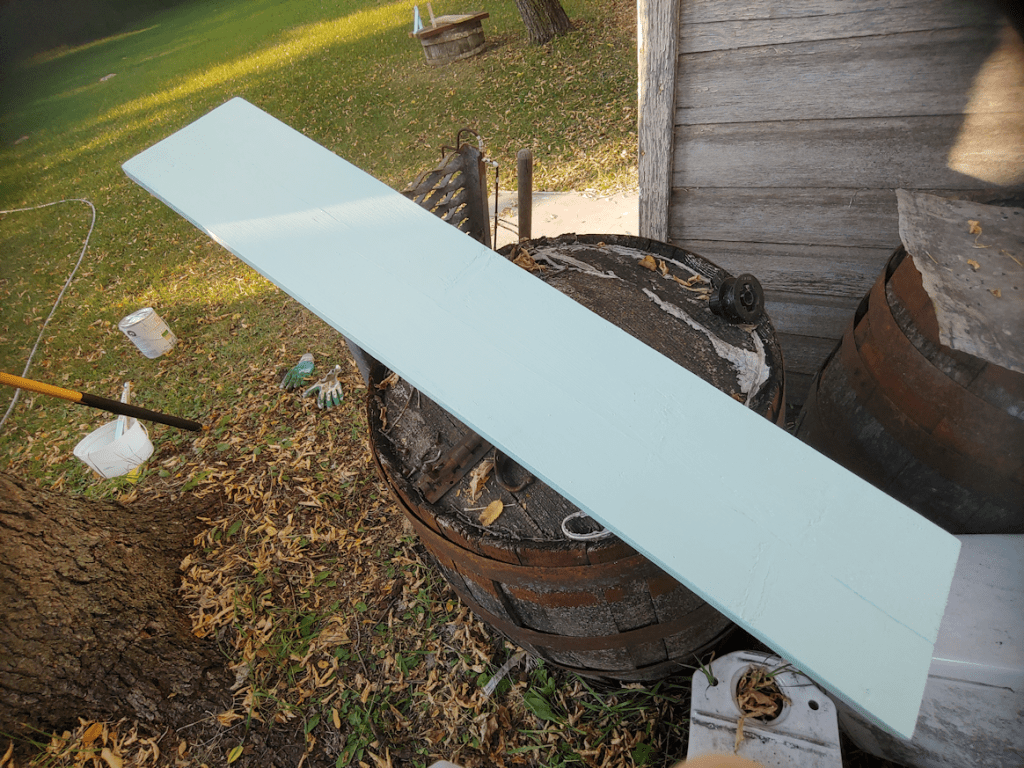
The longer one was the one that got painted on one side, and the edges, yesterday. I decided to paint the remaining section of the board, too, for a future shelf after we get more shelf brackets. After a cleaning and a sanding of the rougher edges, it gone one side and the edges painted, too.
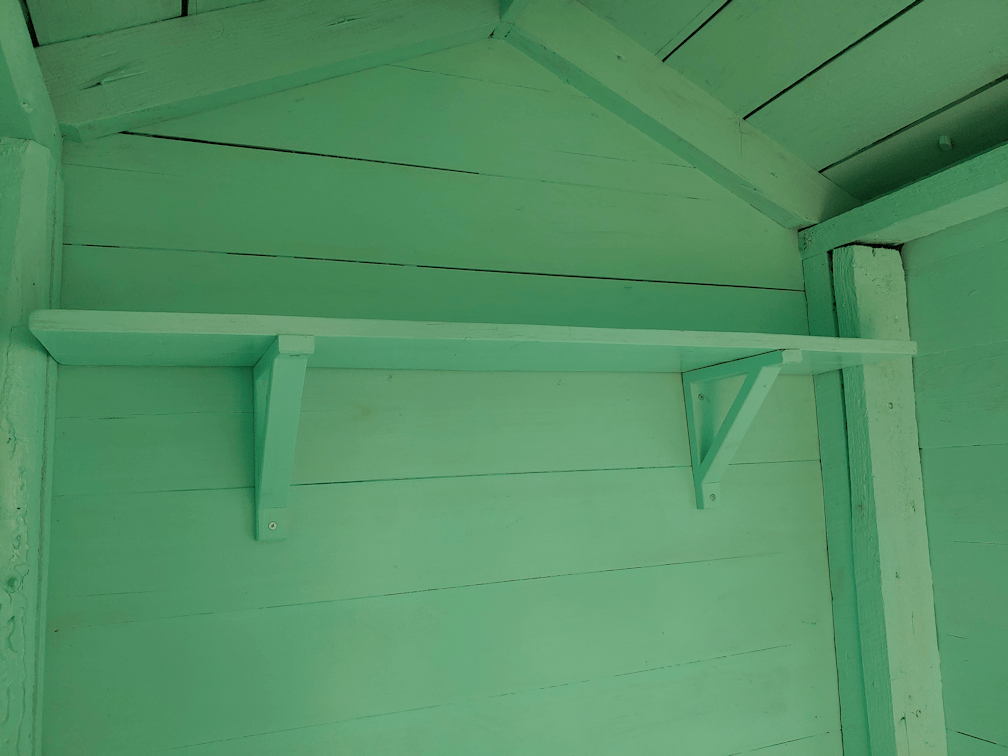
Leaving those to dry, I put up the shelf brackets, living them up with the top of one of the boards.
That screw in the top corner was a real pain in the butt to do. There’s almost no space for the screwdriver! I also put the screws to attach the board part way, so that when I came back later, I’d only need to bring the screwdriver.
I noticed one of the girls had moved the mermaid toy into the middle shelf (I’d put it on the bottom). Remembering that there were some fake flowers in the garage, I went digging around and found some small ones to put beside her. :-D
After giving the shelf boards a couple of hours to dry, I came back later to put up the longer shelf board.
We wanted the shelf to be pretty high up, but when I tried to put it in place, I found it was narrower than where I’d checked the fit, before! Not by much, though, and I was able to jam it in and screw it in place.
That done, it was time to paint. Since there was so little paint left, the first thing that got done was the other side of the second shelf board, then the inside of the door. The back wall was done as high as the shelf, and the wide walls on either side of the seat box were done.
There was just enough paint left to do the wall joists in the middle, and the final dregs were used to paint the inside edges at the bottom boards under the joists. I’d painted the tops, but not the inside edges before. One of the boards only had half an edge along most of its length; a chunk seemed to be missing! LOL
Then I cleaned off the paint brush on the toilet lid again. :-D
After washing up the paint supplies (including the empty can; I figure we can reuse it for something), I took a couple of decorated terracotta plant pots we’d found when we first cleaned out the sun room and put them on the new shelf.
Gosh, that looks so much better!!
The girls are already talking about getting another gallon of paint to add another coat in the future. Other than adding the battery operated light inside, whatever we figure out for the floor, and eventually replacing the toilet seat, it’s basically done on the inside. Oh, and the latch for the inside.
While waiting for the painted shelves to dry, I took a closer look at the outside.
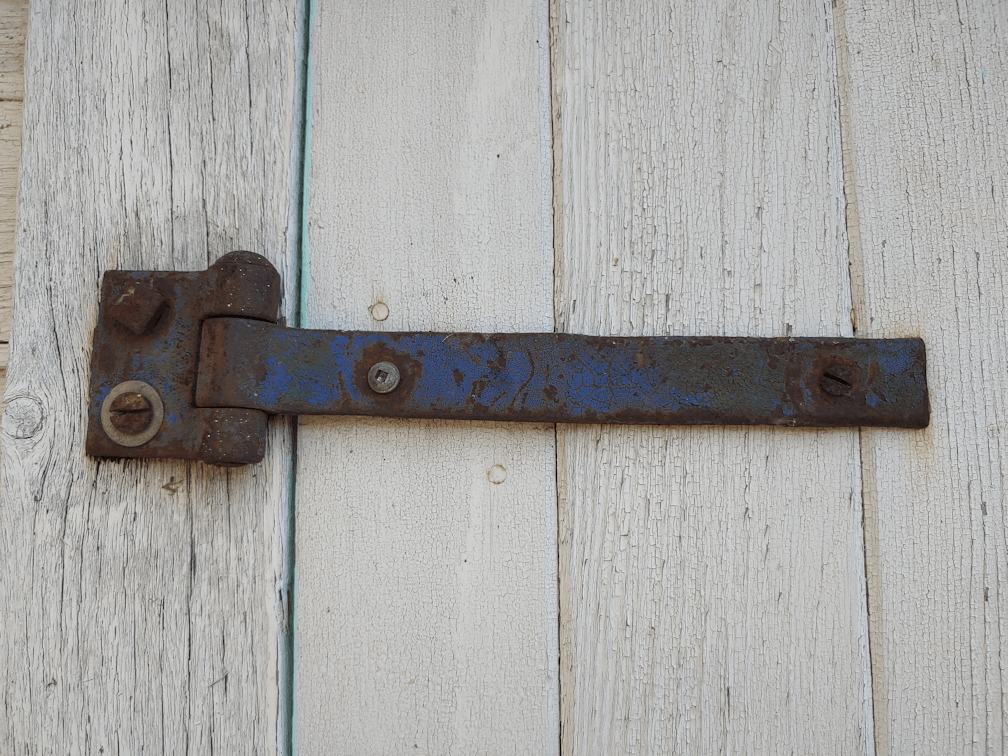
This is one of the hinges that needs to be replaced.
Why does it have four different screws???
The other one has three different screws.
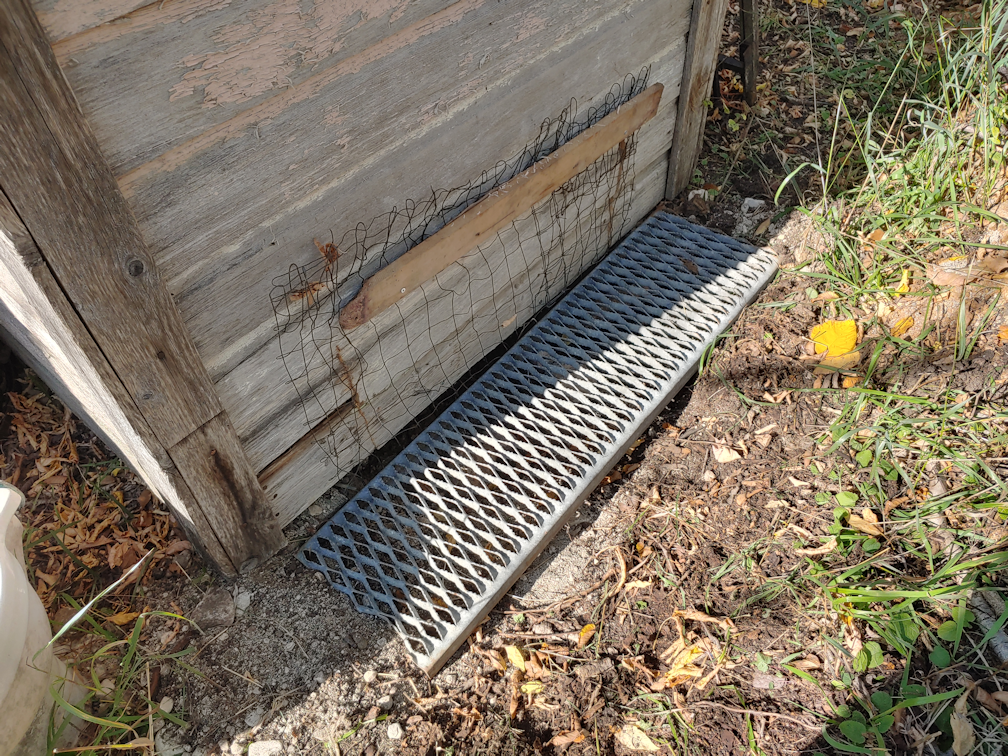
I also took the metal thing that had been in front of the door, to cover the hole that was getting bigger, over the wire mesh at the back. I didn’t even bother to level it or anything. That can wait for when we actually paint the outside.
I also looked at the roof, thinking ahead to when we fix it up. There’s quite a lot of rotted edges on there. :-/ One of the things I wanted to do in repairing it was making an overhand above the doorway. We definitely want to have it overhang the roof trusses, too. After they have been reinforced because of the rotten edges!
It would be good if we can get that done before winter, but we shall see. After the roof is done, we’ll work on painting the outside. The front of the outhouse is white, but the other three sides are a pink. It may have started out as a red, but there’s so little left, it’s rather hard to tell. You can see some of it in the above photo.
The girls want to keep the pink. :-D
By the time we’re done, this thing is going to be downright adorable. Plus, it will last longer, until we build the outdoor bathroom we have planned.
We had another very foggy morning, so I didn’t head out to do my rounds, then into the garden to do a bit of harvesting, until later. It has been a few days since I picked anything. With the colder overnight temperatures, things are not ripening as quickly. Though the forecast was for overnight temperatures was for 7C/45F, we actually dipped down to 4C/40F. There were no frost warnings, but at those temperatures, if I’d known they were coming, I would have done something to help the more tender plants.
I didn’t pick any sunburst squash at all; they’re growing a lot more slowly, so I’m leaving them to get bigger. They seem to be handling the chill nights all right, otherwise.
It now looks like we will have several mature heads of Hopi Black Dye sunflowers! That would be so awesome. I might even be able to save seeds to plant next year.
The middle of the three blocks of sweet corn are a bit of a mystery. There are so many cobs like this; they have almost no husks on them, and the cobs are not developing well. It’s only this one corn block that’s like this. Very strange.
Speaking of corn, the renters started harvesting their corn yesterday, and I could hear them already out there this morning. Yesterday saw their three dump trucks going back and forth all day. When I checked the trail cam files, the newer camera, which saves 3 stills and 1 short video every time the motion sensor is triggered, had almost 340 files for me to check this morning! I noticed the trucks did not have any corn cobs in them, though. Their corn was still very green, and it looks like the entire corn plants got ground up, cobs and all. I think it was a very bad year for corn, overall, both in gardens and in fields!
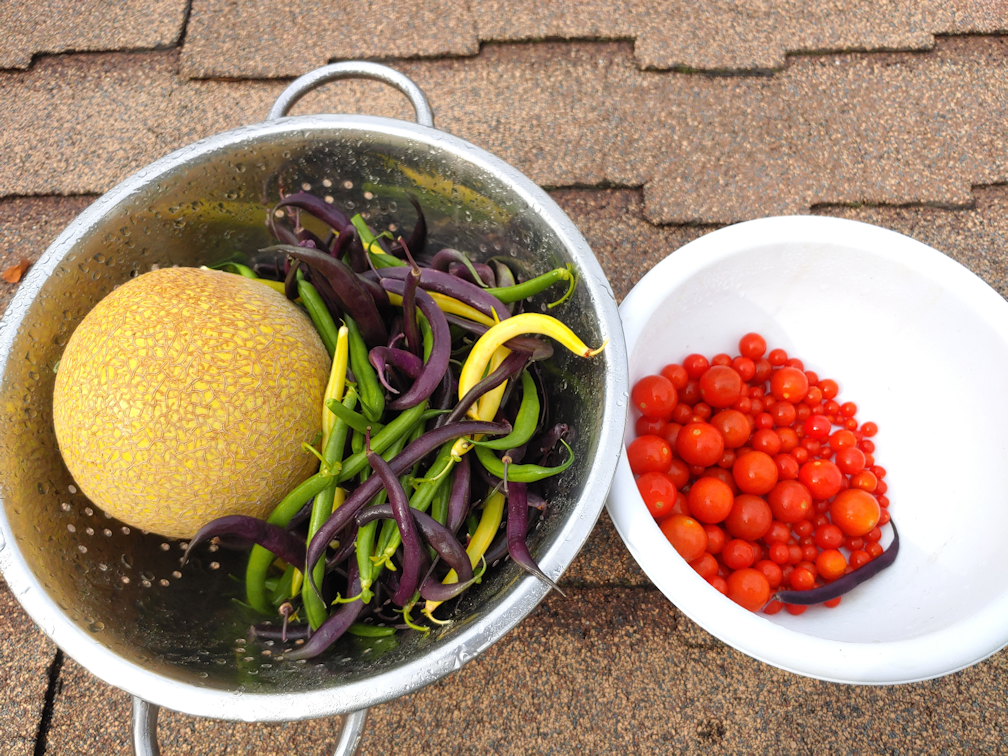
That one big Pixie melon finally came off its vine today! I’m surprised by the other ones. The vines have now died off completely, but those melons are still very firmly attached! The beans are still doing amazingly well, with lots of small pods still developing, and even flowers still blooming. There are lots of tomatoes, too, but with the cooler night time temperatures, they are taking longer to ripen.
Well, it looks like things are finally warmer and drier out there right now. Time to go finish some projects outside! :-)
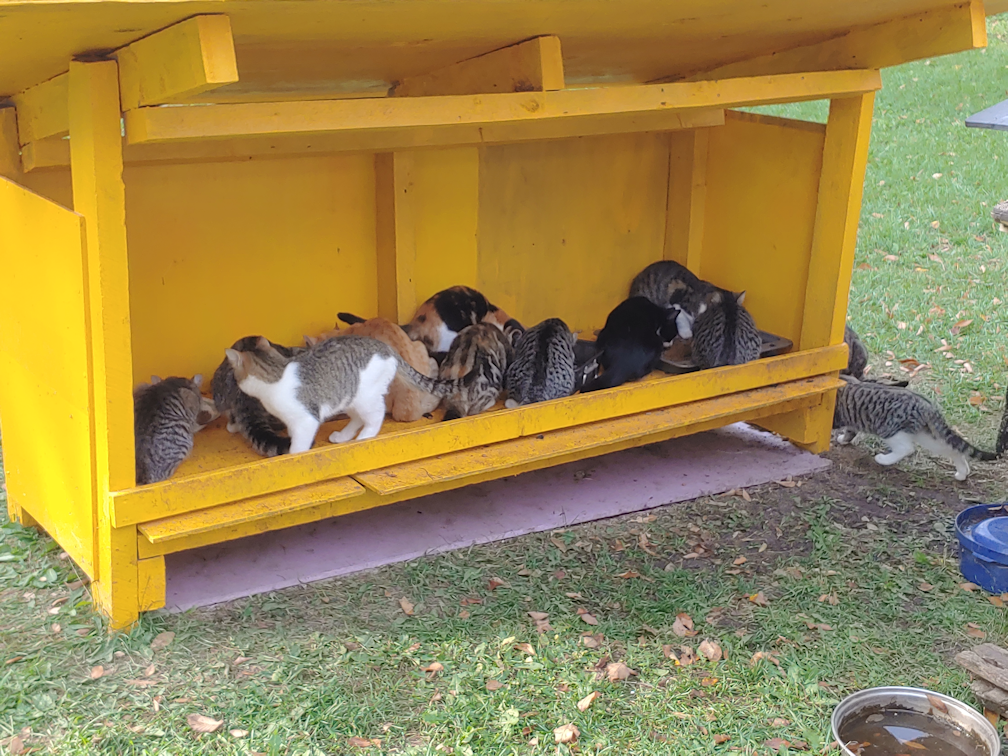
Once again, we have nine kittens and three adults in there. Junk Pile cat is even there, tucked into the corner on the right. Potato Beetle is barely visible at the tray on the ground, and Nutmeg is in the middle of all the kittens. Rosencrantz, Toesencrantz and Nosencrantz were at the tray under the shrine, with Ghost Baby nervously prowling back and forth, wanting to go to the food, but nervous with so many other cats. I had to chase off Potato Beetle, because he decided he wanted to eat at the tray under the shrine, too, but when he saw Rosencrantz and Ghost Baby, he went into hunting mode.
Nasty boy!
Rolando Moon was also around, but she preferred to wait well away from the other cats before she went to eat.
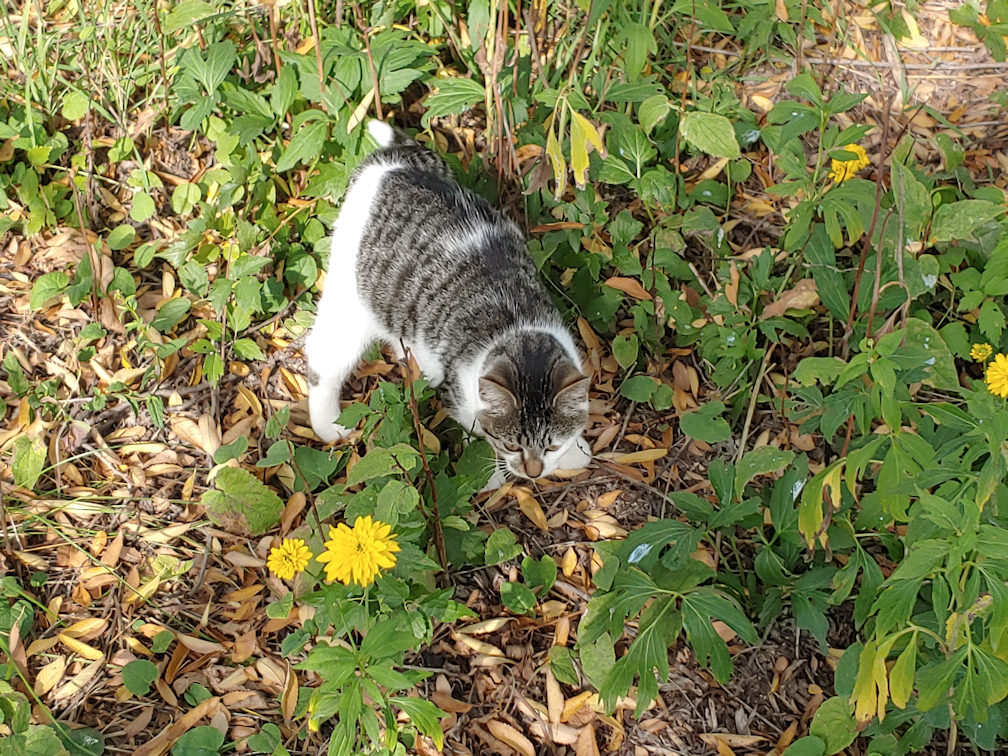
Little Nosencrantz has taken to following me around at a distance, as I work around the yard. This morning, she came over while I was picking tomatoes. I was able to step over to her and pet her, without her running away! Perhaps she was more distracted by Rolando Moon on the other side of me, growling a warning for her to stay back. :-D
Thanks to my wonderful daughter taking over for me, yesterday, we had a couple of fresh loaves of bread to try this morning.
I’d started by having the dough baby soak overnight, then added flour to make a sponge. After several hours, this is what the sponge looked like.
My daughter set aside half of this, then used the remaining sponge to make our basic bread. Instead of using loaf pans, she made two big, flat loaves on a baking tray. Here is what I used for breakfast, this morning! :-)
The bread had a very mild sourdough flavour. For all the months the dough baby sat in the flour, it did not get any stronger in flavour. It was mild enough that I could put them with slices of brie under the broiler, and the flavour of the bread did not overpower the flavour of the cheese. The bread had a very nice texture to it, too.
As for the sponge that had been set aside; my daughter had used the flour from the dough baby’s canister in the bread, but there was still some left. I kneaded some into the sponge to make a stiffer dough, then refilled the canister half way with fresh flour, added the bough baby, then topped it with more flour. The canister is semi-transparent, so when I checked on it an hour or so later, I could see the dough baby had risen enough to work its way through the flour, so I gave the canister enough of a shake to cover it up again. With our temperatures slowly cooling (though I saw a 30C day in the forecast!!), we’ll be using this more often, which should further develop the flavour.
As someone who has never managed to keep a sourdough going for more than a couple of years, I really appreciate how low maintenance the old dough method is. If we can’t going to bake as often, it’ll just stay in its flour bed and dry up. It doesn’t need to be constantly used, fed, stirred, or kept warm. I think this will work out really well for us!
The plan was to head over to the outhouse, quickly do a second coat of paint until we ran out, then get back to working on the bread baking.
Instead, I kept adding more things to do, and by the time I got inside, I had to get my daughter to continue the bread baking, as I was no longer physically able to do it. Which is what she is working on now, as I write this blog post!
While looking for something else entirely, I found a pair of wooden shelf supports and instantly realized that they could be painted and used to put a shelf in the outhouse. So when I headed out to do the second coat of paint, I also poked around the barn and a shed to find a thin board wide enough for the supports. It was about six feet long, though, so I basically held it up to the outhouse door from the outside, and eyeballed where to cut it to fit along the back of the outhouse. It ended up being just over half the length of the board, so I figured if I was off with the longer one, I could still use the slightly shorter one.
It ended up being just a hair too wide to fit between the corner posts. A few swipes with a micro plan and some sand paper was enough to get it to fit perfectly!
That done, I sanded the rough edges, then scrubbed and hosed it down before setting it aside to dry. Then I added a second coat of paint, just to the seat box inside, before painting the shelf supports.
I’m thinking I might paint the rest of the board, too. If we get more shelf supports, we can add it onto one of the side walls.
It took a while for the washed shelf board to dry, so I decided to give the mirrored shelf a scrub down, too, then once that was dry, I hung it back up inside the outhouse.
Rolando Moon decided she absolutely had to be on top of where I was putting the tools and screws! The violent beast went from demanding I pet her, to attacking the hand that was petting here, making me bleed! I did manage to get the screws with washers out from under her, though.
I just wanted the washers, though. There were just two, for the top screw holes, which are slightly wider than the bottom ones. I used new screws to hang the mirror back up. After washing the blood off the new screws and washer, from the wound Rolando Moon gave me!
Previously, it had been hung up right against the centre joist, but I chose to centre it between the corner and the joist, instead.
Then, I just had to do it…
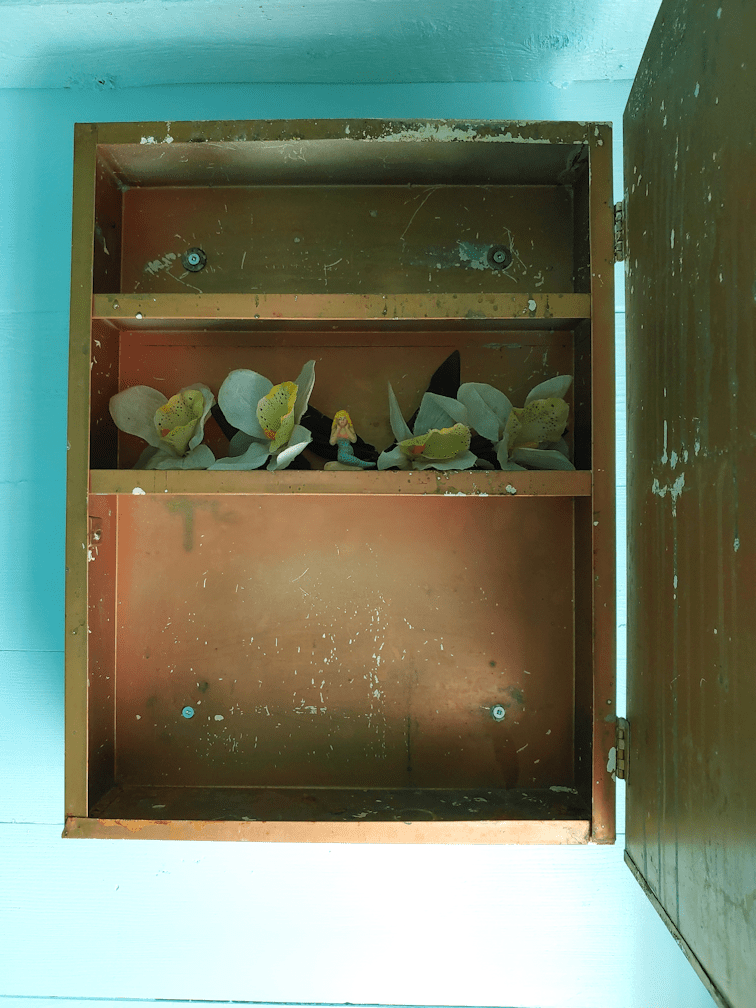
I just had to put the little mermaid I found while I first emptied and cleaned out the outhouse, inside the cabinet.
She lives here now.
:-D
Once we’ve picked one up, the LED battery operated light switch will be mounted directly opposite the mirror.
By the time this was done, the shelf board was dry.
After removing Rolando Moon, I got the one side painted. Tomorrow, I will paint the other side. By then, I should be able to mount the shelf supports, using the boards on the wall to make sure they are level, then attach the shelf board once the paint is dry. Only then will I continue doing the second coat of paint inside, until the can is empty. If I end up not doing the ceiling, or the narrow parts around the door, that’s not going to be a problem. As long as the areas that are most likely to get scrubbed in the future get a second coat, it’s all good.
Since I could no longer work on the inside, I decided to work on the outside, and empty the pit of groundhog gravel.
The wire mesh on the back was held in place by being hooked onto two bent nails, that were nowhere near each other. You can see one at the top right. The other is barely visible, near the bottom left. It didn’t take much to remove the mesh.
There was a second, smaller piece of mesh, partly buried until a thick layer of grass and roots.
*sigh*
That took some doing to move out of the way.
I thought I would be able to remove the two bottom boards by taking off the smaller pieces on the side, then pulling them off. They where, however, thoroughly nailed in place, with old and rusted nails that were not about to come out. So, I instead dug out my jig saw and used it to cut a piece off the bottom.
As you can see, it’s solid gravel against it! I ended up having to cut a second piece off. I was then able to start shoveling the gravel out, and when I could no longer get the shovel far enough in before the 2×4 across the bottom stopped me, I used a garden hoe to move more gravel closer, then shoveled some more.
I never did reach the … compost… layer. I did hit a lot of rocks, though! I emptied it as best as I could, without removing the more recent… deposits.
Then it was time to cover the hole back up.
I put the two pieces of siding back, then screwed the bottom one to the 2×4 behind it. The next time we need to get under there, we can just remove the screws and the boards will easily pop out again.
I then folded the smaller piece of wire mesh to fit the opening. I found a scrap piece of board with screw holes already in it, so I used that to fasten the mesh in place. The wire is folded at the bottom and weighted down with rocks. Critters can still get in if they really wanted to, but this is temporary. When we get to painting the outside, we’ll make things more permanent, perhaps replacing the cut boards with a hinged flap that can be latched to keep the critters out. Who knows.
I have no idea why that other large piece of wire mesh was used to cover almost the entire back of the outhouse. It really served no purpose, since only the gap at the bottom needed to be covered. Even the smaller one on the bottom couldn’t keep the critters out.
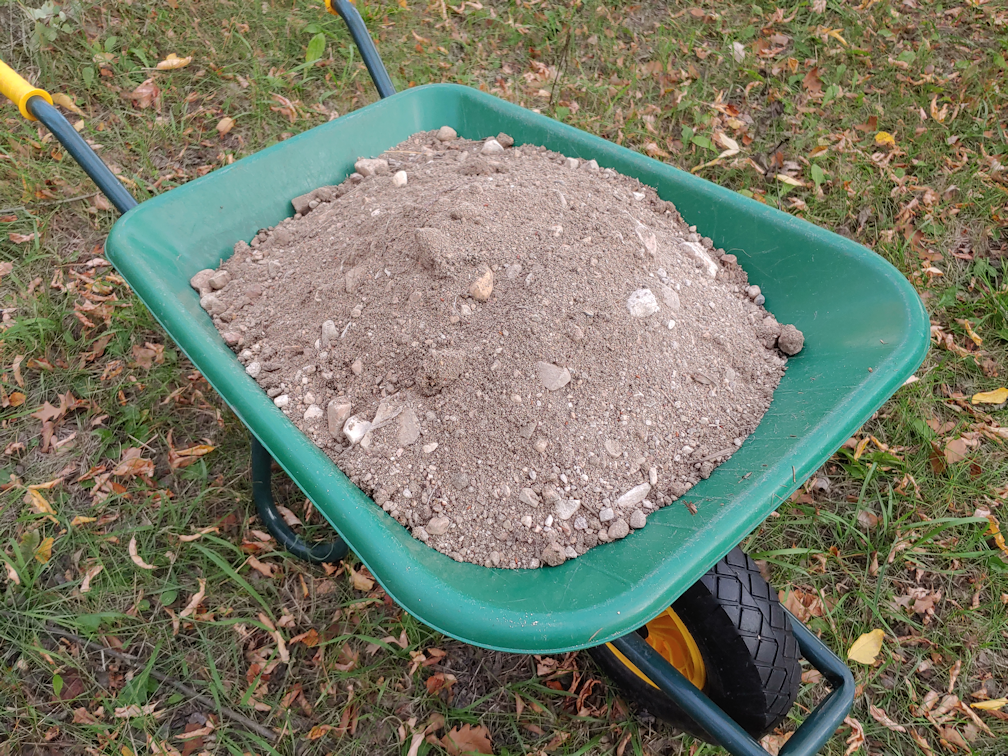
I was able to fill the wheelbarrow with clean groundhog gravel! If there was any chance the shovel full I pulled out wasn’t clean, it went onto the nearby cat litter compost pile, instead.
The clean gravel was put to good use.
It was enough to make a thin layer on top of the boards in the path between the new low raised bed boxes. The bigger rocks went up against one of the boxes, where there is a larger gap, then it all got spread out and hosed down, so that the finer particles would wash into the gaps between the boards below. It seems to be more clay than sand and gravel, though. We will still need to add more, but this is a good start.
And that was it for today!
Deciding to include a shelf added at least an extra day to finishing the inside, but I think it will be worth it. I’m more happy about getting the pit clean up over and done with for now!