Last night, I finally had a chance to clean up and move out the temporary fire pit I’d set up to burn things that wouldn’t fit in the burn barrel.
It was too dark for photos at the time, so I went back this morning.
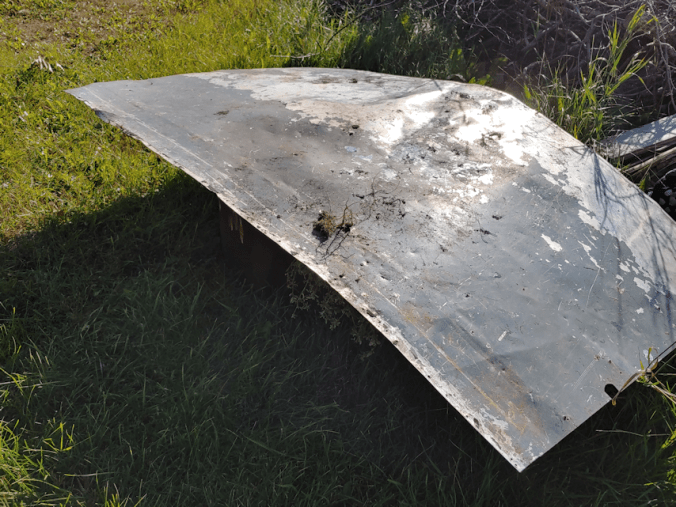
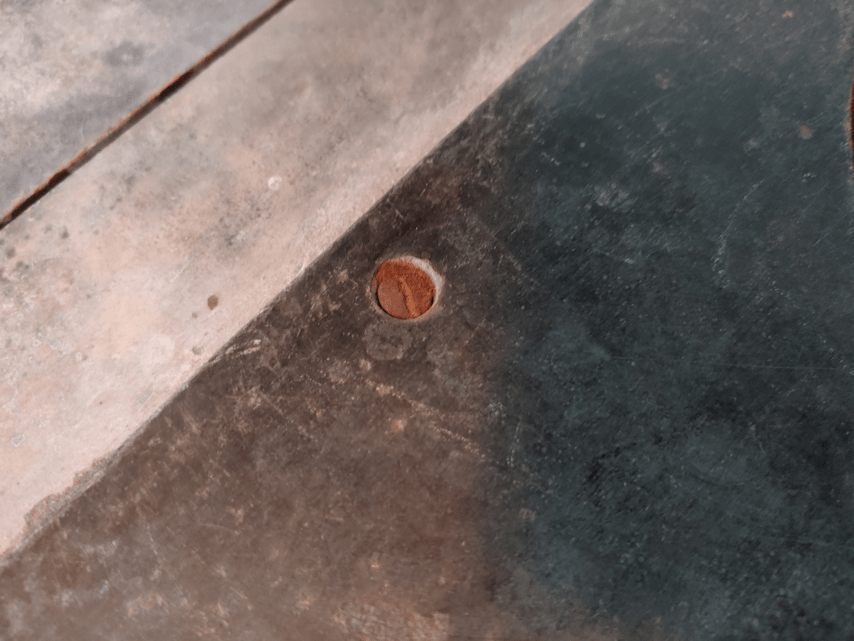
This is where it had been sitting, and you can really see how the heat affected the ground, through the metal sheet it was on.
I’ve set it aside near the burn barrel for now. It worked out so well, I want to have it handy for future use.
That weed that managed to grow through a hole in the metal sheet was certainly tenacious!
I had originally intended to dump the ashes behind the old outhouse. That is where we’ve started to dump things that are compostable, but not appropriate to use in the garden later. Then I remembered something.
Not far from the burn barrel, there were two tractors. My dad had given one of them to my nephew. He and my brother, amazingly enough, got it running and were able to move it, though my nephew had to come back another time with a buddy to help him get it home. The tractor had been sitting there so long, its wheels had sunk into the ground, leaving behind holes. They had filled the holes with scrap wood and rocks that they found around the area, but it wasn’t quite enough. While we don’t usually go into this overgrown area, it was still a safety hazard. Especially when the renter’s cows got through the fence. Human or cow, it would be easy to break a leg in them.
I could use the ashes to fill the holes the rest of the way!
So I did.
Here, you can see 3 of the tire holes. The fourth is hidden by the little maples. The holes from the back tires each needed a full wheelbarrow of ashes to fill. A third wheelbarrow was enough to fill the smaller holes from the front wheels. That was even with the pieces of wood and rocks filling them! After those three loads, the fire pit was empty enough that, with maybe another shovelful or two scraped up, I could remove the ring and use the sheet of metal to pick up and pour the remains into the wheelbarrow. That last little bit went onto the larger holes.
So I was able to accomplish two things at once; remove the temporary firepit, and fill in some holes!
As for the little maples growing where the tractor was, I am debating if I want to let them grow, or if I should take them out. In time, we plan to fill in and level out this area, and maybe put in some polytunnels, raised beds, etc. This would be years in the future, and I don’t even know if we’d go into this space. If we leave them, and then find we want to build around there, they would be much harder to get rid of than now.
I still need to cut away the trees growing through the remaining tractor. I can decide then.
More and more of the sunflowers are opening up, and today I spotted one that’s different.
Most look like this.
Bright, sunny, mostly yellow with light oranges and greens around the developing seeds.
Then there was this one.
The camera actually lightened it up a bit. Compared to the others, this one looks almost black in the middle! Very dramatic.
This may be the first of the slightly shorter variety of giant sunflowers we first planted, so start opening its seed head. If so, I expect to see more. :-)
Last year, we made apple cider vinegar using the bright red apples from just one tree. The result was a delicious, delicately pink cider vinegar, and we were looking forward to making it again.
There was just one problem.
The instructions we followed said to put the jar in a dark place, so we tucked it into a cupboard. Unfortunately, it attracted fruit flies. The jar was covered with a coffee filter and they couldn’t get in but, as it fermented, some had bubbled up enough to dampen the paper. Which meant any time we opened the cupboard, we’d find a cloud of fruit flies inside!
Not good.
Since then, we’ve bought the things necessary to make mead. This includes smaller bungs to fit airlocks into gallon jars. We will be using some to make hard apple cider out of our crab apple juice, later. With airlocks being so cheap, I’ve picked up extra, so we could have all our gallon jugs, plus the 5 gallon carboy, all going at once, and still have extras.
This year, I will be taking advantage of our mead making supplies.
Since making the ACV requires using apple pieces, I need to use a wide mouth jar. I also want to make more than last year, so I wanted to use something bigger than a quart jar.
Every now and then, we picked up the big gallon jars of pickles at Costco, and I’ve been keeping the jars. That’s what I’ll be using to make the vinegar this year.
The question then becomes, how do I use an airlock on one of these?
Now, if I had some silicon grommets (which I learned the name of only yesterday), I could drill an appropriately sized hold in a cap, pop on a grommet, and insert an airlock.
I don’t have those. I do have extra bungs, though.
I don’t have anything I can use to simply drill a hole that big into a cap, though, so I had to do it the use-watcha-got way.
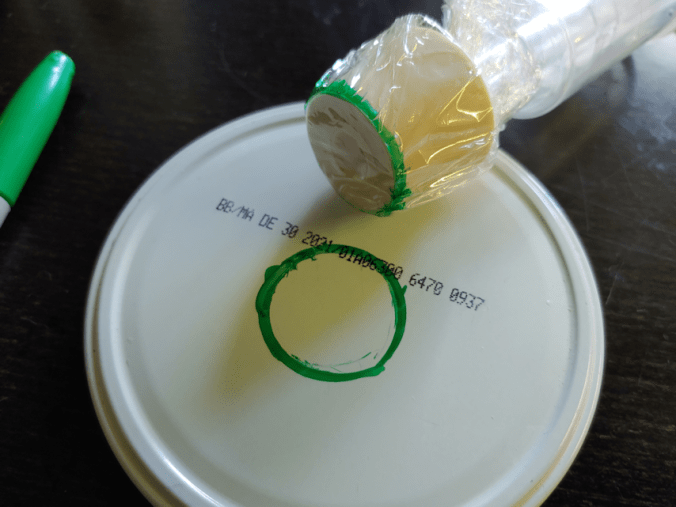
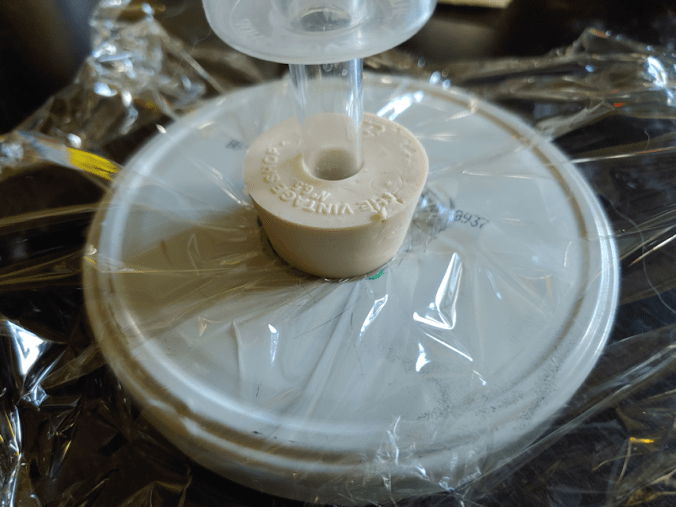
The first thing to do was mark the size of hole I needed. After protecting the bung with plastic wrap, I traced around it with permanent marker. As the bung is tapered, the actual size of the hole needs to be slightly larger than the inside of the circle.
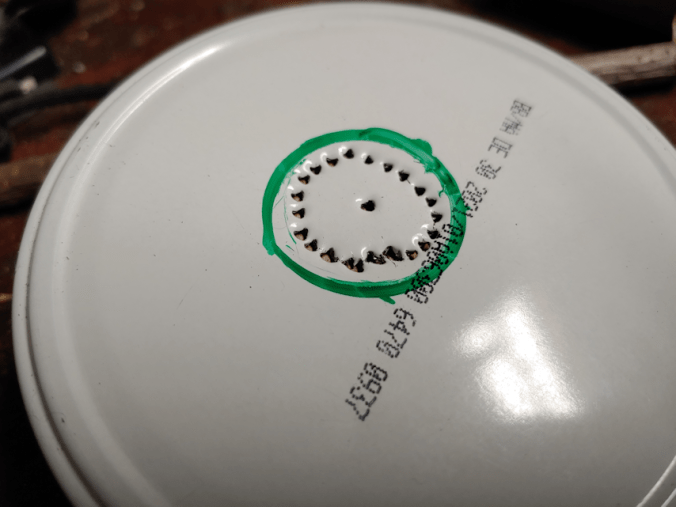
With a scrap of wood underneath, I punched a series of holes well within the marked circle, then used pliers to break off the middle.
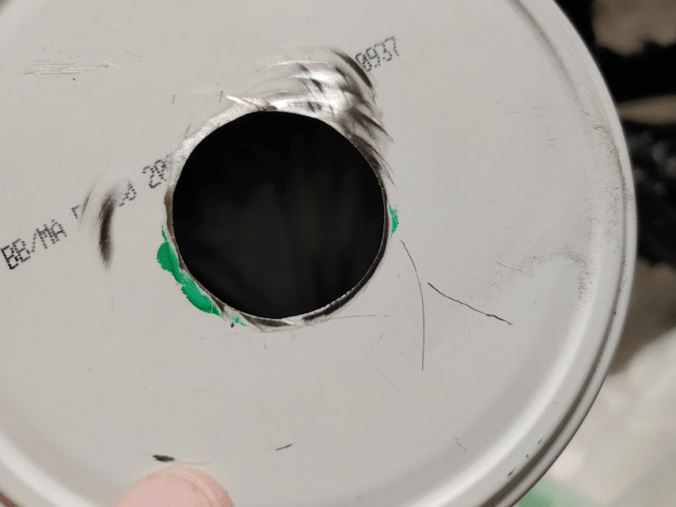
Working directly over a garbage bag, I used a series of metal files to grind away at the opening to smooth it out, then make it larger.
Once I’d reached the inside of the marked circle, I switched to the Dremel to grind and smooth the metal.
Then it was time to test the size of the opening. A perfect fit!
We’re not done yet!
Though the metal was ground smooth, it still is sharp enough to potentially damage the bung, if I were to push it in tight enough to great a proper seal.
Silicon sealant to the rescue!
I used the same stuff we got to fill screw holes when our satellite dishes got moved, then again, for a final seal in the cracks on the rain barrel we set up by the garden. It’s a multipurpose, indoor/outdoor product that is coming in very handy.
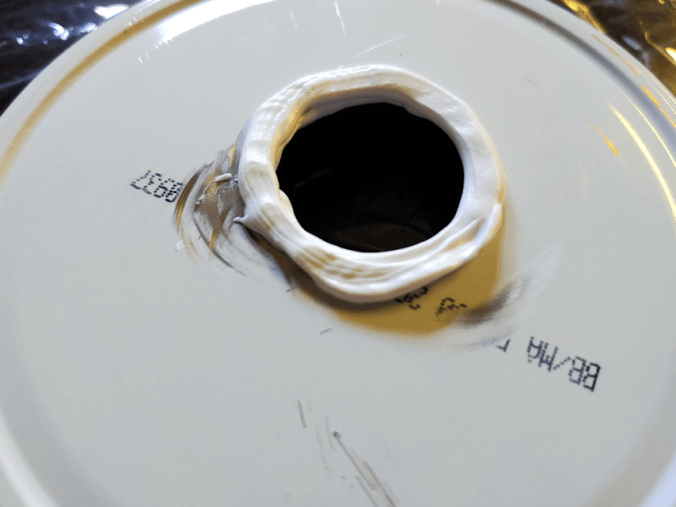
The tube it comes in is also very easy to control, even for a job as small as this. After giving the cap a very through cleaning, I lay a bead down on both sides of the cap, right on the edge of the hole, so that top and bottom would touch and completely cover the metal edge. Basically, I imitated a silicon grommet. This should both protect the bung, and ensure an air-tight seal is created.
Now it just needs time to cure before I can test it again with the bung.
Since we have so many apples, I might make two; one with the airlock, and one without, to see which works better. I’ve also picked up some fancy-schmancy ACV “with mother” to use as a starter (last time, we just used water and sugar). Using just a coffee filter, it relies on exposure to the air to get the bacteria needed for fermentation. So it’s touch and go, whether you get a good bacteria or not. With an airlock, it won’t get that exposure, so using a vinegar with the mother in it will ensure the right kind of bacteria is already in there.
There are areas around the house that we do and do not allow the cats. For example, they are not allowed on the kitchen counter the sink it in, nor where counters were food is prepared, but there is one small counter by the window they are allowed on, so they can sit and look out the window.
The dining table is another place the are not allowed.
Unfortunately, it’s hard to enforce this when we’re asleep.
This is what I found this morning.
The bowl of carrots and potatoes were scrubbed last night, to be cooked today. The cucamelons are kept out for snacking.
It turns out the cats like to drag off the carrots.
Shortly after I took this photo, I spotted Saffron running by behind me.
Then she dropped a pilfered cucamelon she had been carrying, and started batting it around.
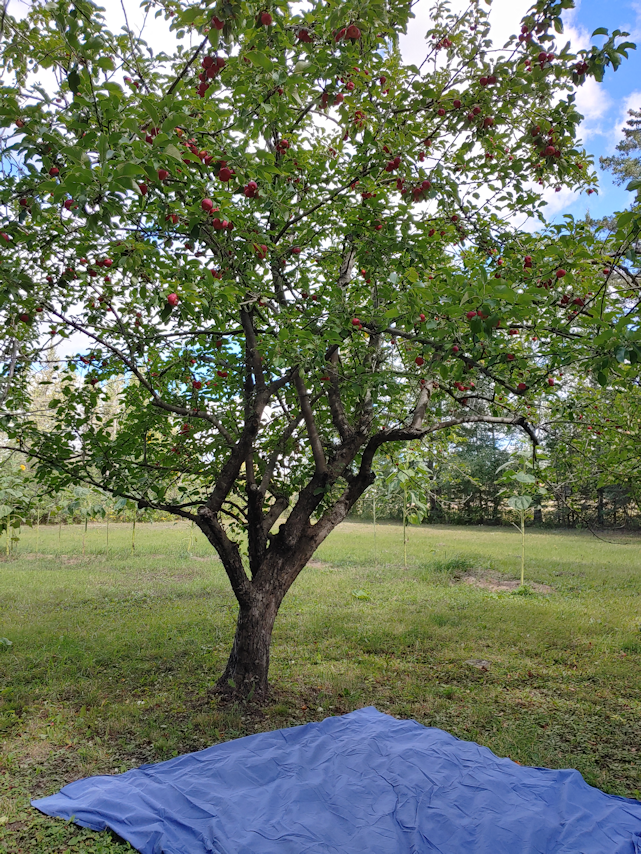
Today, I headed out to pick the apples off of one of our crabapple trees.
This is the one that has such bright red, sweet apples. It also ripens earlier than the other trees.
Last year, most of the apples disappeared before I had a chance to harvest them, so I wanted to get them before the … deer? … get them first.
When we were cleaning things out, I was flummoxed by finding a grabber with spoons attached to it. My mother eventually remembered that my dad used it to pick apples.
I’m happy to say that it works absolutely beautifully!
Since there were so many apples to pick this year, I laid out a sheet on the ground for them to fall on. It also made it much easier to move the apples into a bucket.
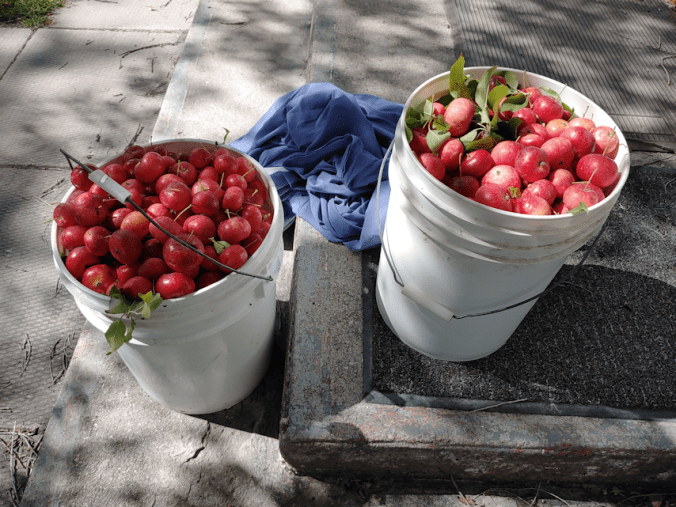
I was able to fill a 5 gallon bucket just with the apples I could reach with my hands, or the grabber. I did try shaking the trees, too, but the branches are a bit too thick to be able to shake much at that height, so I didn’t get a lot that way.
Using the step ladder, I was able to fill another 5 gallon bucket. I could have gotten more, but by then, it was getting too dangerous to try and get the apples, even with the grabber. The remaining apples will be for the birds. :-)
Ten gallons of apples is so awesome! Last year, I used the apples from this tree to make apple cider vinegar. After trimming and chopping, I filled a quart jar 3/4s full.
That’s it. That’s all we had.
This year, I plan to make more apple cider vinegar, then juice at least a gallon, to make hard apple cider. There should still be plenty to give to my family, when they come out this weekend, if they want some.
For the hard apple cider, we have gallon jugs, bungs and airlocks to use. When we made apple cider vinegar in a quart jar last year, it was a success, but there was a problem with fruit flies being attracted to the coffee filter covered jar in the cupboard. So this year, I plan to use an air lock (they’re so cheap, I’ve been buying extras).
I’ll be using a repurposed gallon sized pickle jar for this, which means I need to find a way to get an airlock into the lid.
Which I’ve already gotten started, and will show how in my next post. :-)
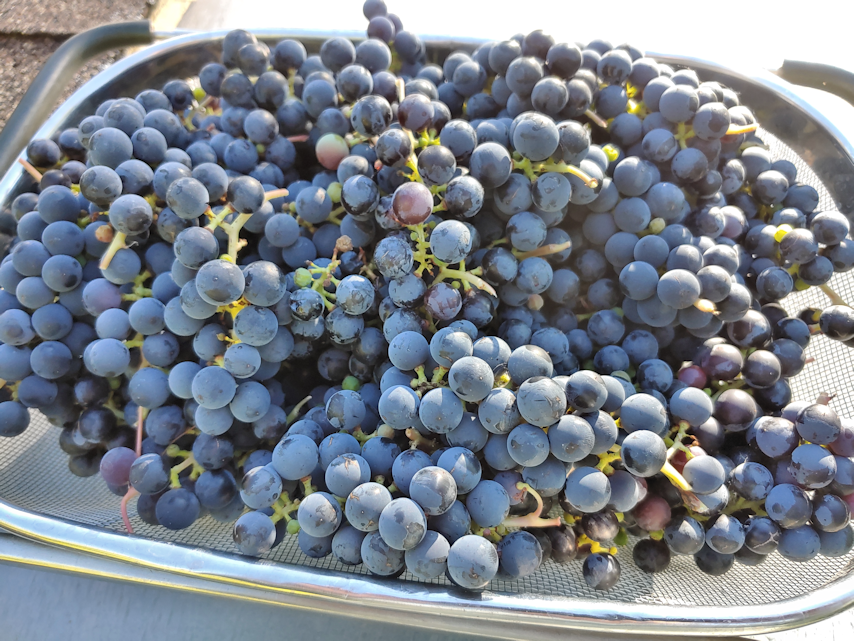
What a difference in how they looked, two years ago, and now! The above photo is from 2 years ago. This year’s grapes are easily double in size – and these are not a large fruit variety!
It’s even more appreciated, since after cleaning out and trellising them last year, we didn’t get any grapes at all last summer. Not a one.
In picking the grapes this morning, I did have a bit of a problem. Most of the grapes were on the other side of the trellis. Which is when I realized the trellis was so close to the wall, I couldn’t get at them.
Thankfully, the trellis is just on a couple of bars pushed into the ground for support. I was able to move them a few inches away from the wall, and that was enough for me to be able to get back there to harvest the grapes. I’ll have to go back to them to pound the supports into the ground more, but I will likely do that when I prune the vines before winter.
At the moment, we’re not really sure what we want to do with the grapes, so they’ll be given a wash, then frozen, like we did with the chokecherries. If we do decide to do something like a jelly or syrup, or add them to the must when making mead, freezing them first will make it easier to extract the juice.
I must say, for a variety that clearly isn’t a table grape (my mother doesn’t remember what they were), they taste quite good, just as they are!
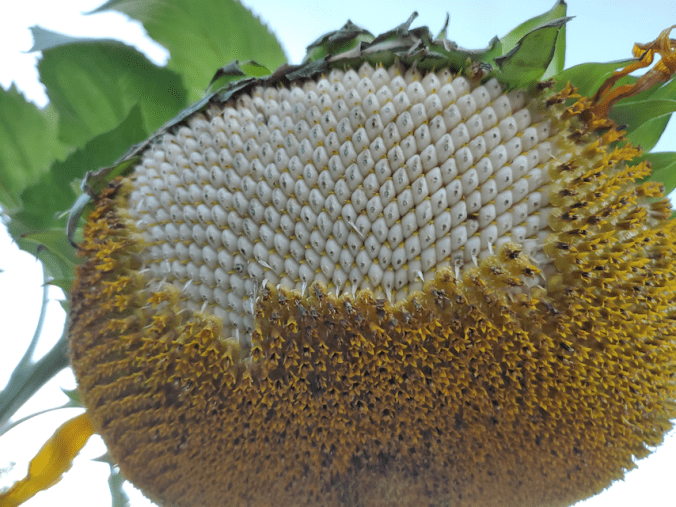
The first seed head to blossom is already losing its little flowers!
I think I should be able to harvest it and set it to dry at this point; at least that’s what I’ve learned from my research. But would the seeds normally be this white?
I think I’ll leave it a bit longer. So far, no birds seem to be going for it.
Pollinators aren’t’ the only ones interested in the budding sunflowers.
The leaves make great shelter for resting dragonflies!
Those leaves have a lot of holes in them. I can’t see what’s causing them, though. They still seem to be doing all right, so I’m not concerned at this point.
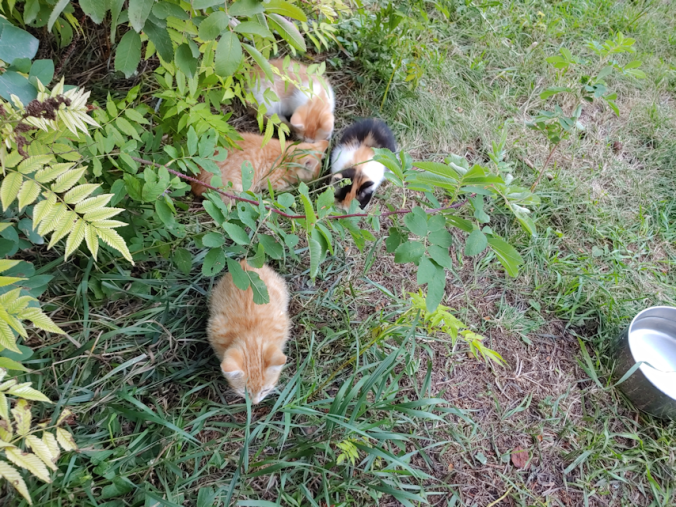
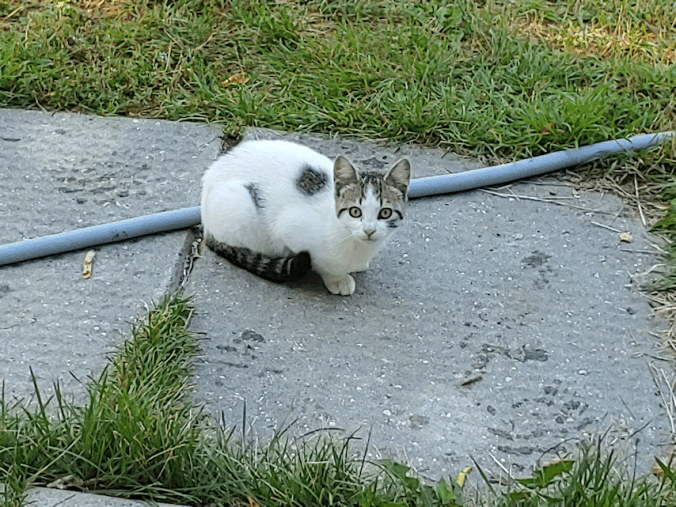
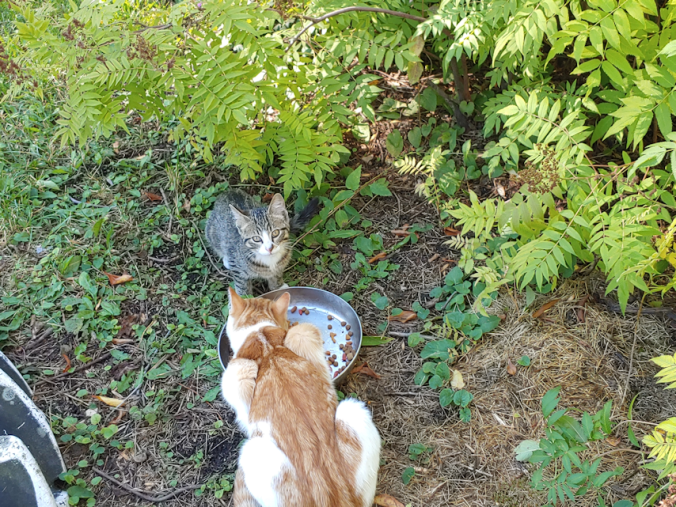
Last night, the outside kittens got their first taste of cat treats!
It got their interest, but not quite enough to come close. ;-)
They were enough to keep Tabby from running away, though!
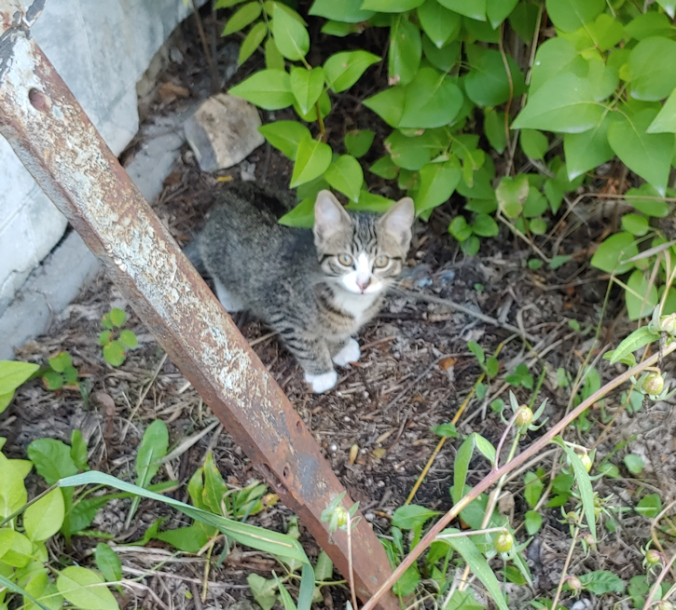
If Little Braveheart got any of the treats last night, I never saw it, but she has been increasingly less jumpy around me in the mornings, and preferring to eat by the house.
Even Tabby is not running off quite so quickly.
As for Little Braveheart and Tabby’s sibling, we still hardly see it at all. It’s the same with Rosencrantz’s baby – and it appears there’s just the one left from her litter. I have not seen any sign of the other two, since that one day I spotted them at the pump shack. :-(
Another reason to socialize the outside cats as much as possible. They’ll stay closer to the house, where their chances of survival are higher.
One of these days, I want to break out the big guns.
Looking at the weather forecasts, it’s looking more and more like our planned outdoor gathering with family to celebrate multiple birthdays and anniversaries is going to be an indoor celebration!
So today, I focused on tidying up the Old Kitchen a bit more, so my mother, at least, can sit in it comfortably. Between the Old Kitchen and the sun room, we should be able to fit all of us, if a bit tightly. Of course, if my mother is up to doing the stairs between the old and new parts of the house, we can always move to the dining room.
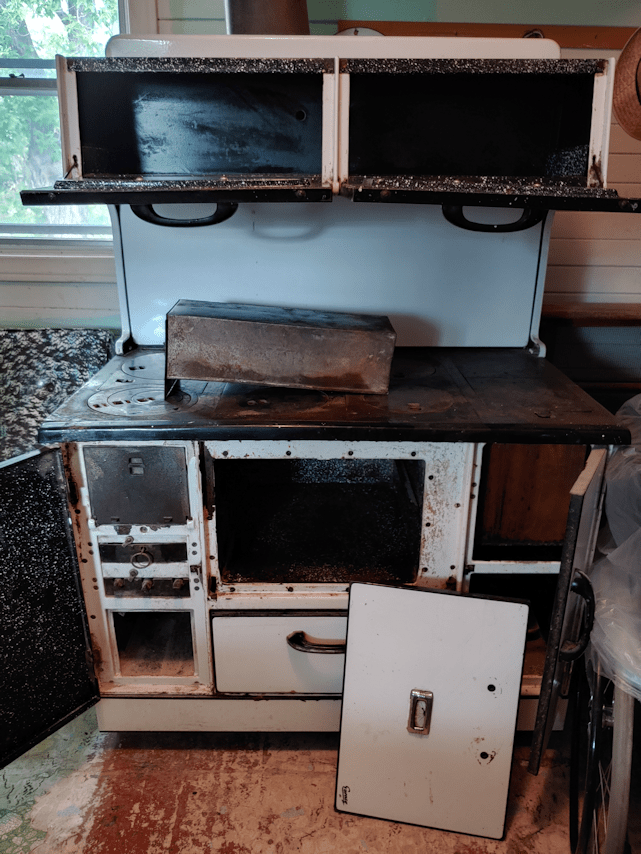
While wiping things down, I started doing a more thorough cleaning of the old wood burning cookstove. It’ll probably just have a tablecloth thrown over it and be used to hold the food, but I wanted to get some more progress in cleaning it out. Including several decades old ashes in the fire box!
Here is how it looked after I removed the top pieces, and brushed the ashes through.
I should be able to remove the metal plates at each end, which would allow me to remove the grate at the bottom, but I couldn’t see how to do that. For now, I just tried to sweep away as much as I could.
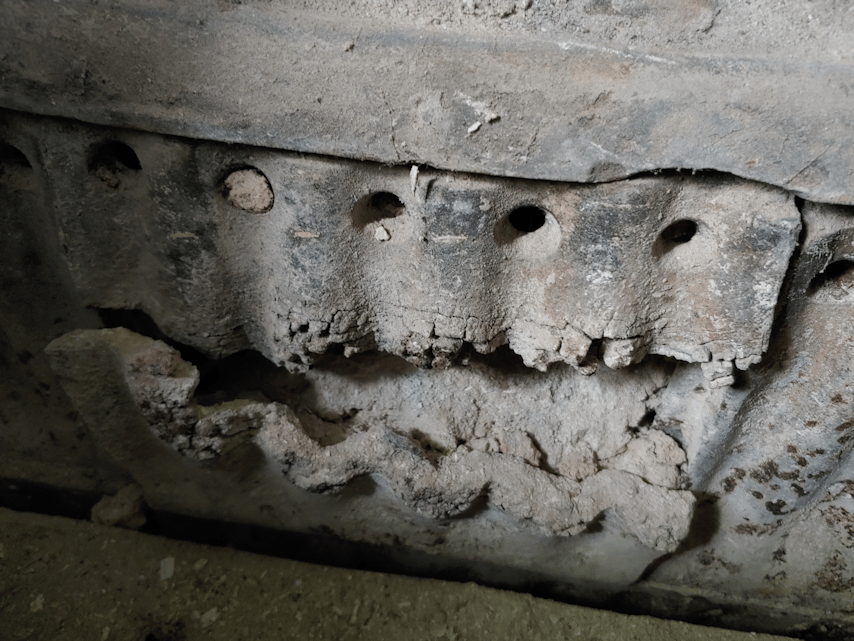
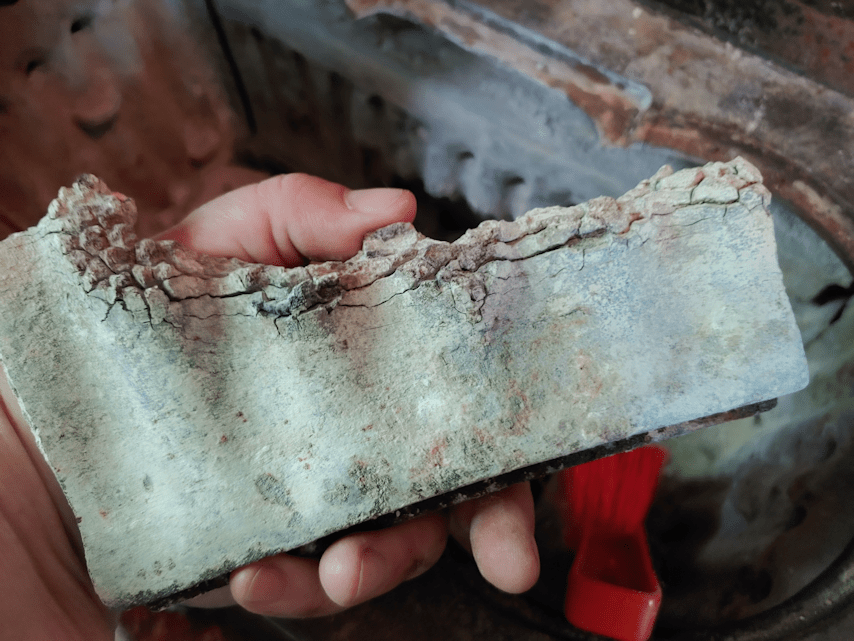
Doing so revealed something strange about the inside wall.
The middle plate looks absolutely destroyed!
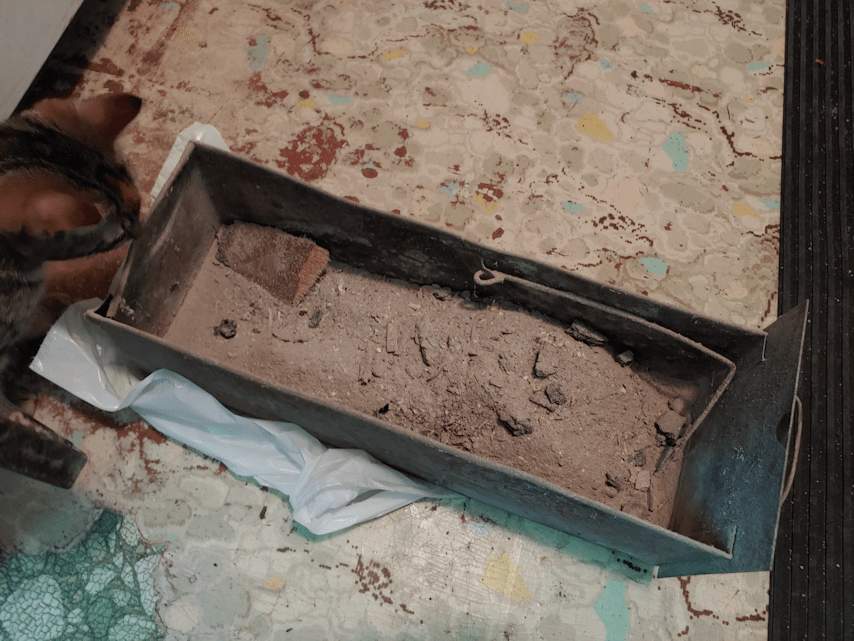
I left that for later. First, I wanted to get rid of the ashes. Under the grate are three rollers that can be turned from the outside; a crank handle to do that seems to be missing, but I was able to turn them with my fingers. This allows the ashes to fall into the box below.
I had mostly emptied this box before, so this is all ashes from the fire box.
I’m not sure where that unburned piece of… paneling? … came from. I might have simply missed it, before.
The piece to hold one end of the handle is broken.
After taking the ashes out to the compost, I hosed it down. Then used a chisel to scrape off things stuck to the sides and bottom that were definitely not wood ashes. :-( After hosing it down again, I set it aside to dry, then went back to working on the fire box.
I ended up taking out the bottom of that destroyed panel completely.
This is thick, cast iron. Just how hot did things get, for this top happen?
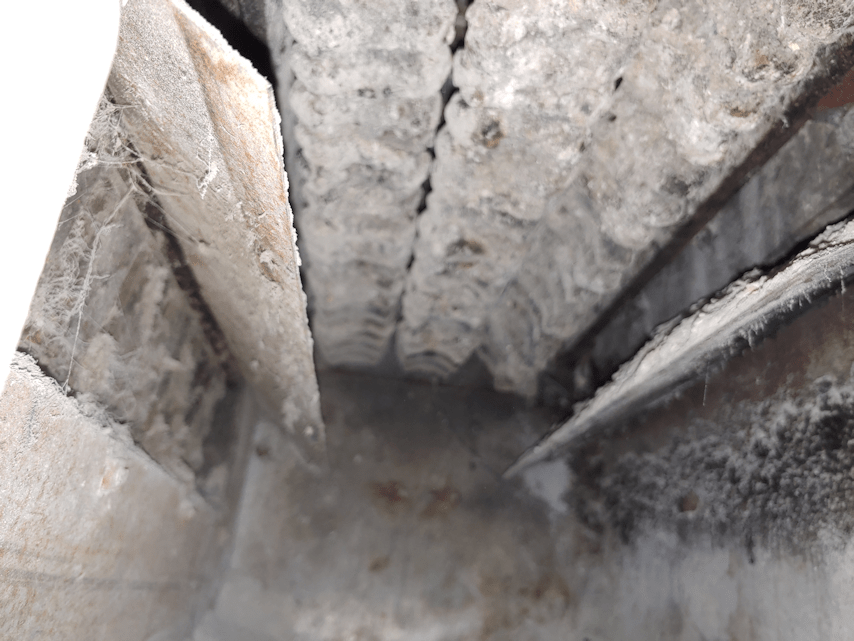
Once it was out, I tried to sweep away more ashes.
I ended up knocking out chunks of packed ashes, like this one. More was jammed behind the top piece of the metal panel, and I took that out to get at the rest.
Ashes are not supposed to be able to get in there!
I then started sweeping out the space the ash box fits into. In the ashes I swept out, I found some odd things, like old nails and…
What is this???
That, my friends, is the screw end of a light bulb.
Later, I found the filament in the ashes, too. No glass, thank God!
Why on earth would someone toss a light bulb into the fire? The nails, at least, I can see happening. Scrap wood would have been burned, and if they had nails in them, no one would have taken the time to pull them out, first.
But a light bulb???
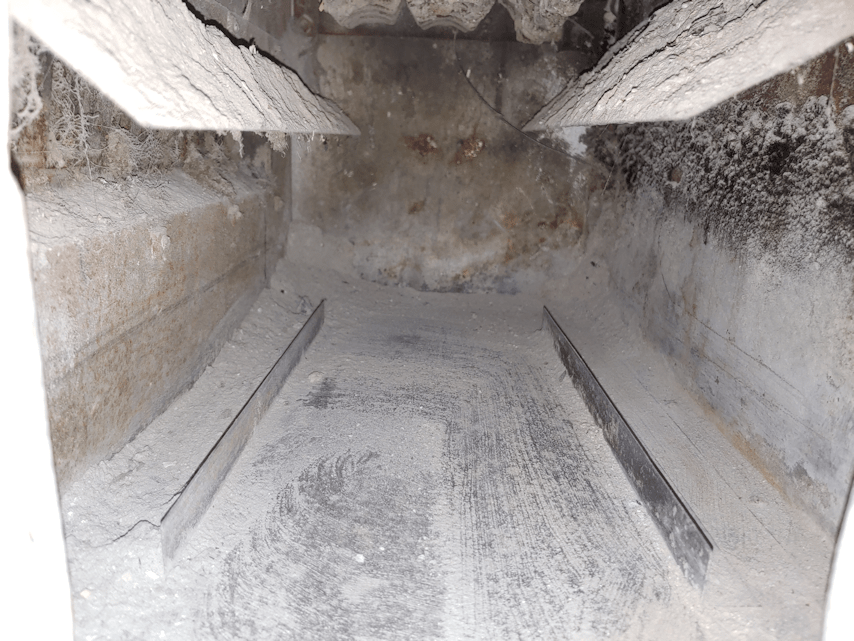
Then I used the miracle of technology that is my phone camera, to see what I couldn’t see otherwise!
This is where the as box slides in. The flaps above divert the falling ashes towards the box.
The camera focused on the flaps, but you can see the rollers above, that keep the hot coals from falling into the ash box.
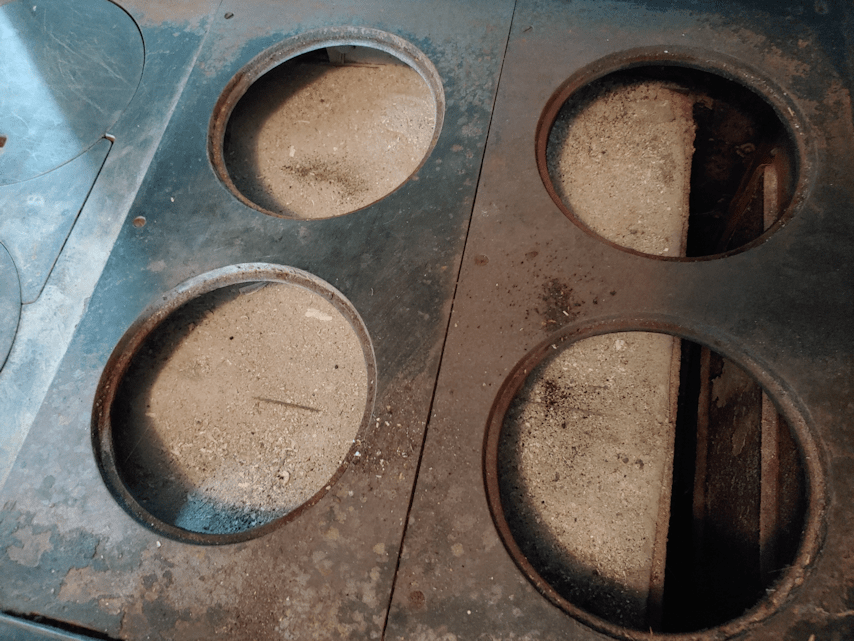
I did as much as I could for now on the fire box side. Next was the cook top above the oven.
As you can see, the oven box is covered with ashes. Now that I’ve seen the broken panel piece in the fire box, I know why.
I didn’t even try to get those out. The metal pieces can be removed for easier access, but…
… they are held in place by screws, and there is no way I’m going to try and take those screws out now!
Though I’ve taken the ring plates out before, somehow I never looked at the bottoms of them.
!!!
It seems the fire was allowed to be built up too big and too hot to cause all that damage in the fire box, which then lead to ashes and sooty smoke getting into the space around the oven box. I was quite young when this was still being used, and don’t remember much about it, but I may well have been among those causing the damage. :-/
I really wonder, at times, how we didn’t burn the house down back then!!
I just brushed off as much as I could from the underside of the ring plates. The panels over the water reservoir didn’t need as much.
I didn’t even try to clean the inside of the water reservoir this time.
I did go into the drawer under the oven. The handle and a piece of hinge from the broken oven door is in there, along with …
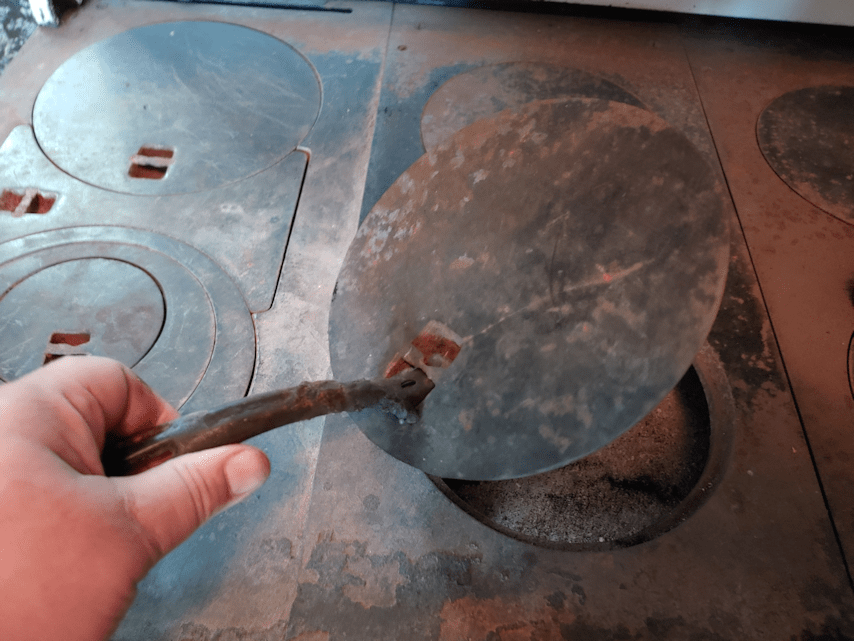
… the lifter for the ring plates.
I just used my hands to lift them, but when the stove is in use, this tool is vital.
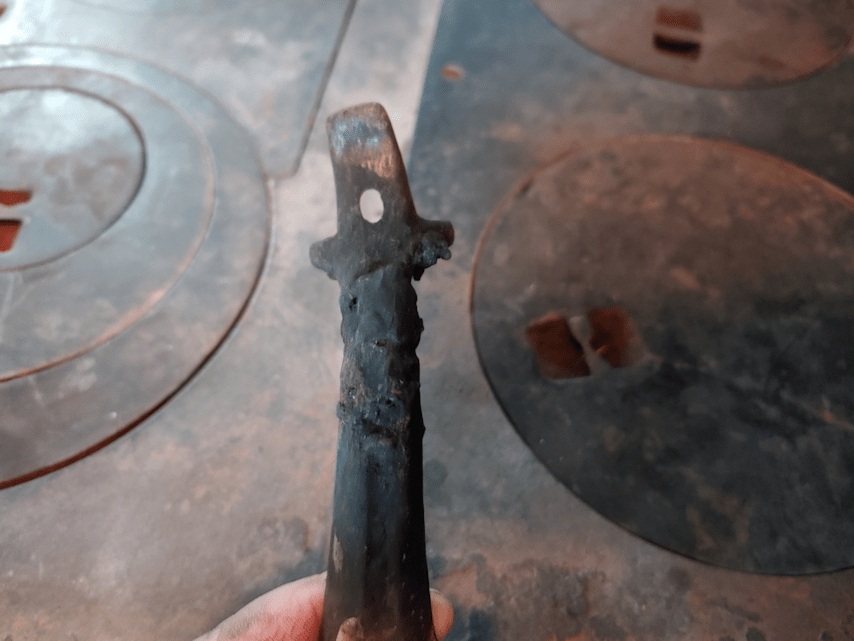
I… can’t imagine what was done to it to cause this damage. !!!
The final thing to do was give it all a wipe down, then leaving it to dry completely before closing it up and putting everything together again. The cook surface and parts like the front of the fire box, and the panels below it, are the only things that are not enameled. Eventually, I want to use stove blacking on those parts. The rest still needs a very thorough scrubbing and rust removal, but I really don’t know far I’ll bother to go with that. We can’t use it – partly because of the damage, partly because we’d lose our insurance if we did – so mostly, I just want to keep it from degrading further. It would be great if we could get it all fixed up but… I’m not sure that it’s worth it. Especially since, there is another one in the storage shed that I know my late brother used, back when that building was his workshop. As far as I know, it’s in good shape. It’s not as old as this one, but is almost exactly the same design.
Who knows. When we finally build our outdoor cooking area, maybe we can include the wood cookstove as part of it. I think I’d really like that.