Future plans; checking out the old chicken coop

While doing my evening rounds today, I decided to take a look at the building that we had used as a chicken coop, when I was a kid.

Since we first moved here, the roof/attic has been slowly settling downwards by noticeable amounts. The board you see me puling away from the wall used to be directly above the door. As things settled downwards, this board ended up over the top of the door, making it impossible to open. Now, it has dropped further but has weakened to the point I could just pull it away from the wall and the door.

That meant I could pull the door open.

Sort of.
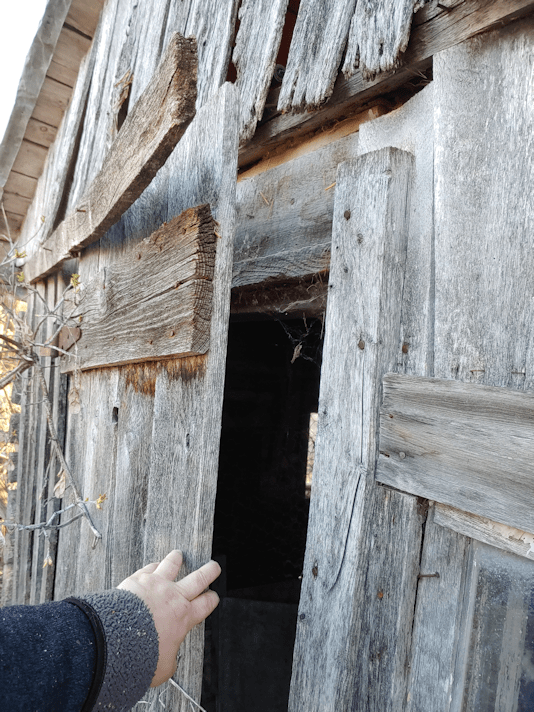
When I pulled on it, that top hinge came loose (the bottom one was already loose). I ended up just lifting the door out of the ground it was being pushed into, and sliding it to the side.

Previously, the only way I could get a look inside had been to shove my phone through the gap in the door and use voice commands to take pictures, hoping it was angled half-way decent. Today is the first time I could actually go in and see what’s in there since… well, since we still had chickens, when I was a kid.

I didn’t go far.
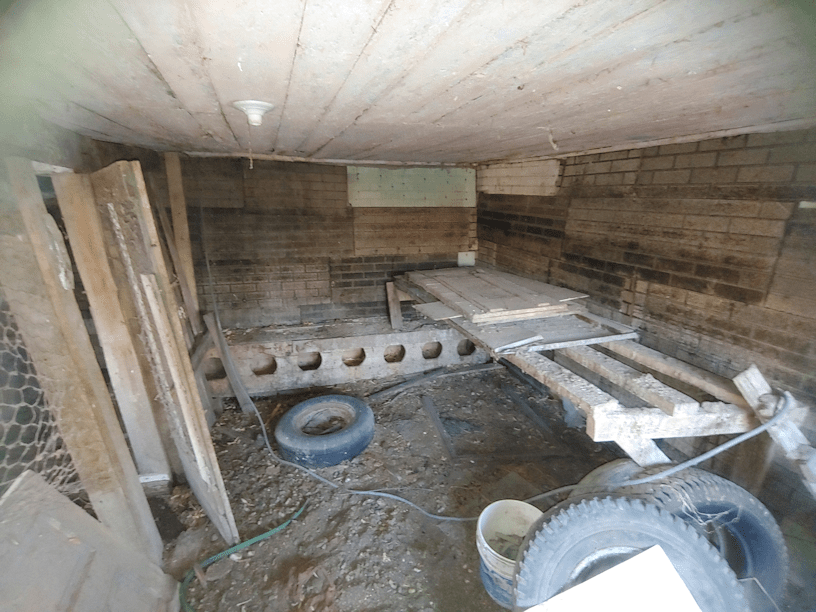
Why are there so many old tires, all over the place? And so many of them still on rims!

At the far end you can see the nesting boxes, and to the right is the roost.

It was so strange to look at it. In my childhood memory, that roost was much, much higher. In my mind’s eye, I was expecting it to be a couple of feet from the ceiling. I actually remember looking UP to the roost, when I went in to tend to the chickens!

I’m pretty sure this old cabin did NOT have a dirt floor, but it was always covered with straw, except for the part under the roost, which was covered in chicken poop, so I can’t quite be sure.

I’m kinda hoping I am remembering that wrong, and this really is a dirt floor. I remember helping clean out the old straw, but not well enough to remember if there was a floor under there.

Whatever it is, I did not go any further in than I could while stepping on some boards near the door.

I don’t know what that material is that’s covering the walls. It’s almost like asphalt shingles, except much thicker.

You can see where the clay between the logs crumbling out in places, such as right by the door in the above photo.

This little side area is where we would keep new chicks. There is another little space at the far end with a door that was basically a frame with a screen finer than the chicken wire I’m taking this photo through. New chicks would have been small enough to squeeze through chicken wire. I can’t quite remember, but I think that’s where the feed was stored.

You can also see the outlet where we plugged in the heat lamp for the chicks. Below the window is an opening for the chickens to go outside. There was chicken yard enclosed around 2 sides of the cabin, with the area on the other side of this wall sectioned off, and another door to access it from outside. This way, the new chicks could be kept away from the older ones, even when they were big enough to venture outside. When they were fully grown, the doors into the chick enclosures would just be left open. In the summer, we would leave the main door into the enclosure open during the day, so the chickens could wander around the barn yard as they pleased, then closed them up in the coop for the night, making sure to close up little opening in the wall, too. Skunks, foxes and weasels were the most common predators we had to keep them safe from. Especially skunks.
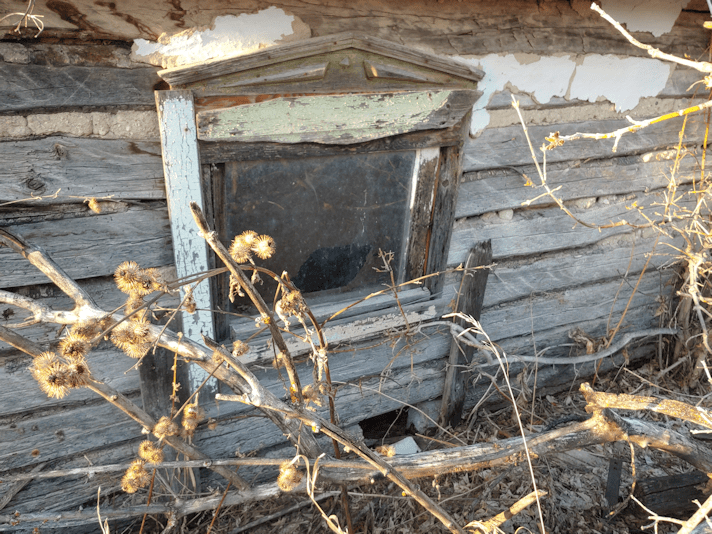
To take the above photo, I am standing in what used to be part of the smaller chicken yard. You can see the piece of electrical cord coming out from under the right side of window frame. The cut end is hidden behind a dried up leaf. The outlet itself is in a different location than where that wire is, so I don’t know what it’s actually for. You can also see signs that the outer wall used to be covered in plaster and painted white.

It’s in rough shape and kinda gross, but of the 3 log buildings we’ve got, this is the one that’s the most solid and least damaged. If there is any chance of salvaging it, we’ve got to take care of some things.

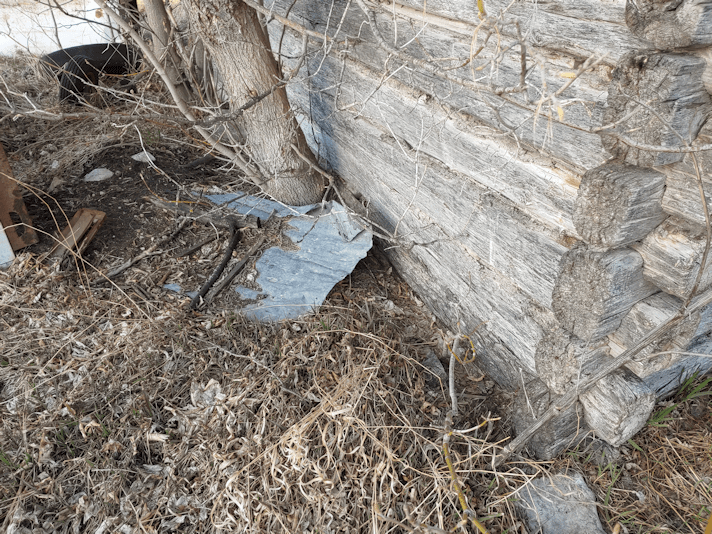
One of those things is to cut away the trees that have been growing against it. This one here is growing partially out from under the back wall. Though efforts had been made to protect the roof by adding what looks like a corrugated tin over the original wood shingles, the branches of this tree has torn off a whole section of it, and is tearing more pieces off with every strong wind. You can even see one of the pieces of tin from the roof half buried under debris at the bottom of the tree. Which gives an idea of just how long ago it was torn off and has been sitting there.

Quite a few sheds and outbuildings have trees growing right up against them. They are almost all maples. One near the pump shack had been cut down; there is a rather large stump there. Maple stumps throw out new growth, though, which might be great if you actually want to coppice them, but not so good if you’re trying to protect buildings.

When we moved here, my original timeline has been to work on the inner yard for the first 2 years, then start on the outer yard in the third summer. Last summer was a bit of a write off in some ways, so it’s going to take another year to finish that, but there are things that need to be done in the outer yard that really shouldn’t wait.

Cutting away the self-sown trees that are causing damage is one of those things!

The Re-Farmer

Replacement door: that didn’t quite work

After all that work to resize the replacement door for the sun room, painting it, carving out the recesses (and fixing my goof), touching up the paint, the door finally got hung up today!

Aaaaannnnd…

It doesn’t fit.

Part of the problem is the hinges. The original hinges on the door were put back on, not the hinges from the old door. The screws are stripped on some of those and we weren’t even able to get all of them off to salvage them. The hinges that were on the replacement door position the door slightly differently. Once the door was hung up, the girls found it was too “tall”. By mere millimeters!

The easiest thing to do turned out to be removing the top molding of the frame.

So they did that.

It still didn’t fit.

This is the door, at the middle of the frame.

We’re looking at about 1/8th to 1/4 of an inch here.

This is the door at the top of the frame.

Yeah.

There’s a gap.

So, weather willing, tomorrow we will get that table saw out of the shed and see if it works. If it does, we’ll take the molding off the top and side, cut it and reinstall it.

Straight.

Then carve out a new recess for the plate that gets installed in the frame, because that’ll be cut right off.

Once we’ve got that done, we’ll just repaint the frame.

What a pain in the butt this is turning out to be!

If the table saw turns out to not work… I’m not sure what we’ll do. I’d hate to have to take the door off and trim the door knob side! We can’t trim any more on the hinge side at this point. We’d have to take the door knob assembly off, and I suppose we could use the circular saw again. It would be very difficult to take off such a tiny amount with that, though.

*sigh*

Ah, well. It’s not like we have a lot of choices. We’re just making do with what we have for now.

Speaking of making do…

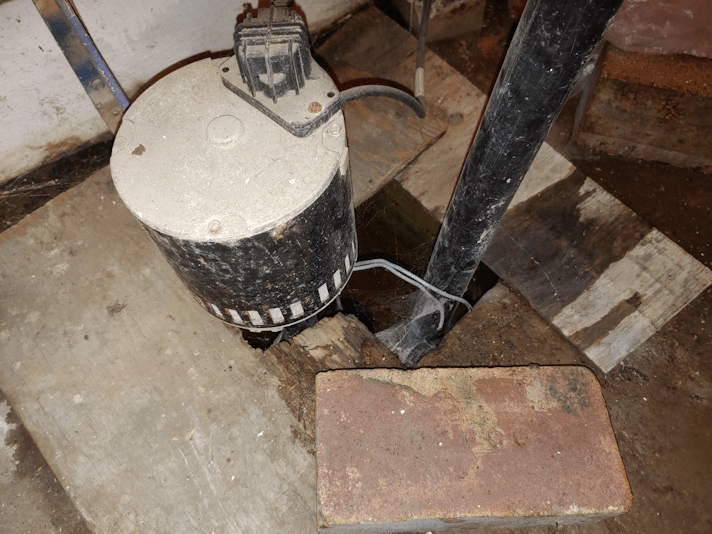
When my brother and I visited our mother earlier today, I made sure to ask him about the sump pump hose attachment, showing him the pictures I’d taken.

I learned all sorts of details from him! Like why he had to McGyver the pipes in the basement, adding an extension. Someone else had tried to replace the pump and pipes for my dad and… well, let’s just say, after my dad called my brother to come fix it, he found the pump dangling at about a 30 degree angle, because the person who did it couldn’t be bothered to add a section of pipe to extend it, so it could stand straight in the reservoir. So my brother did that, and the pump is now nice and straight. It may not be the prettiest job, but it’s solid, and I should not need to replace any of it.

I also learned that he had installed a flexible hose on the outside. No, not the one that’s there now. He used a proper sump pump hose kit, like what I bought two of. He said it was about 50 ft long, and drained over by the storage house.

Then one day, he came over and the hose that’s there now had been attached. The long one was gone.

From what he’d been able to gather, someone had run over the hose with a lawn mower.

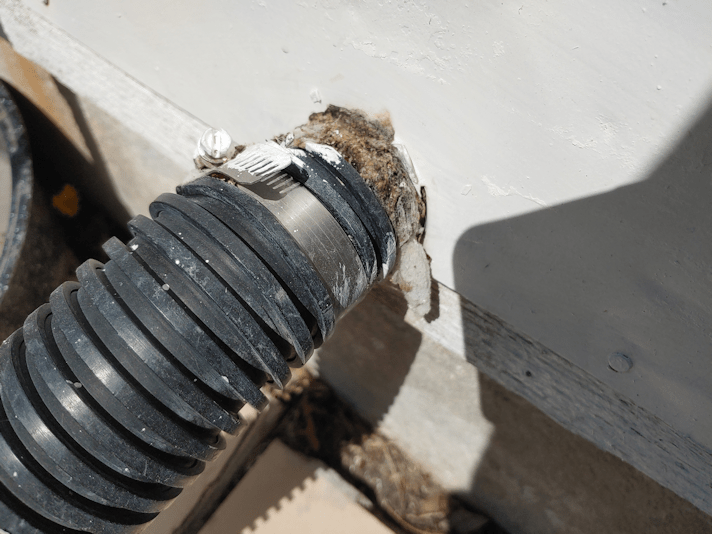
So my dad used what hose he could find and, rather than getting a fitting to attach the larger hose to the smaller pipe, he wrapped something around the smaller pipe, then clamped the bigger hose on. I had thought the stuff looked like batting, and he thinks it was probably stuffing from an old couch or something like that.

I confirmed that the pipe going through the wall is 1 1/4″ pipe, and that it should be just the end of the pipe on the outside of the wall; nothing weird done to it – though it might have been cut shorter on the outside. I’ll know that when I take off the broken hose.

The fittings that come with the hose kit won’t work, though, since they have a threaded end to attach directly to the sump pump. I should have what I need to attach the hose to the pipe, though, in among the extra parts and pieces I got, just in case.

Now that I’ve double checked details with my brother, this is something I hope to get done, tomorrow!

The Re-Farmer

Morning adorableness

Before I head out to visit my mother (outsider her window… :-/ ) for Mother’s Day, here are some adorable, furry worms to make you smile!

I’m glad Beep Beep used this cardboard nest we set up to have her kittens in. The box is the base from a case of cat food tins. Not only did it turn out to be the prefect size, but it makes it easy to slide in and out of the crate (which is on its side) to check on the babies.

The concrete floor is pretty saturated this spring. Under the crate, there is a puddle of moisture. A bit like condensation created by the warmth of cat bodies above. The crate keeps the cardboard from contacting the floor, so it stays nice and dry.

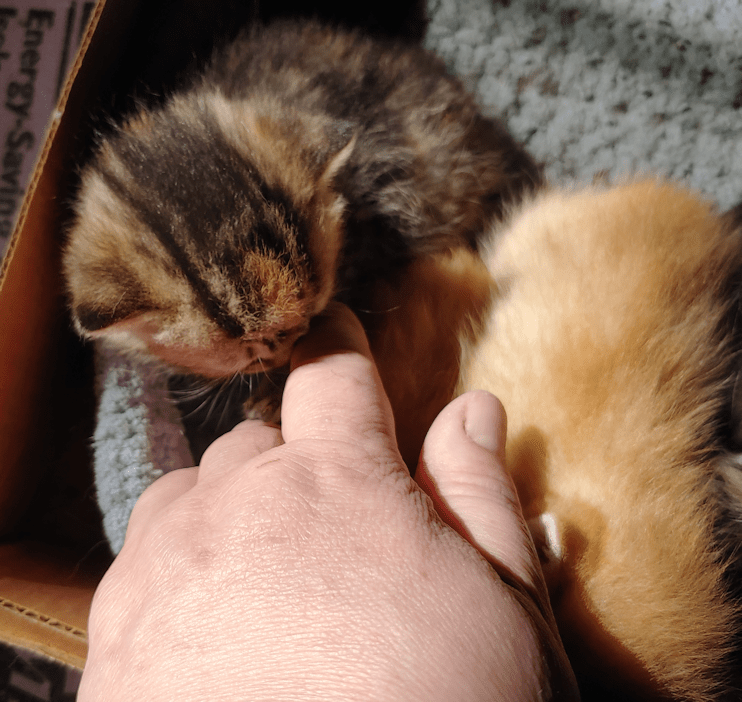
As I was petting the babies, this little mini-Beep Beep (right down to the orange spot on her forehead!) grabbed my hand…

… and started licking my fingers!!!

Yeah, I melted into a puddle of goo over the adorableness of it.

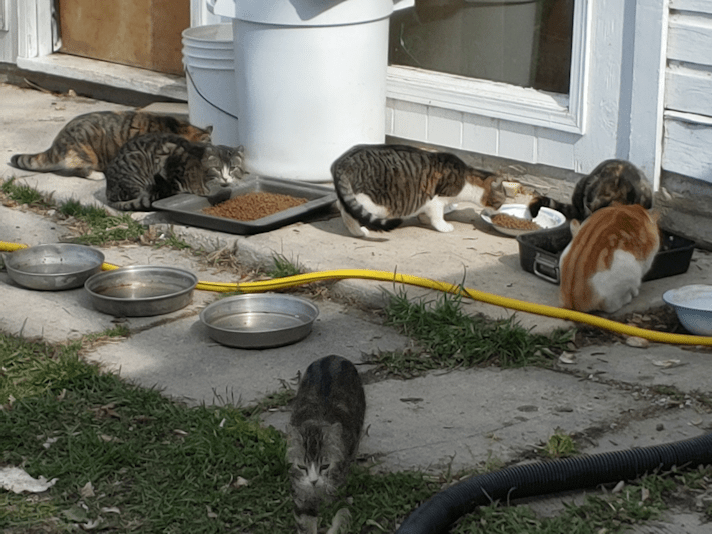
Then it was time to tend to the outside cats, and we had quite the crowd this morning!

At the top left is Rosencrantz! She stared showing up again very recently. I wonder where she goes, when we don’t see her for weeks at a time?

In front of her is Pump Shack cat and in the top middle is Junk Pile cat. While I was able to pet Rosencrantz this morning, these two just won’t let us near. :-(

Butterscotch and Creamsicle are eating on the right of the photo, and Potato Beetle was with them, but he found me more interesting than food!

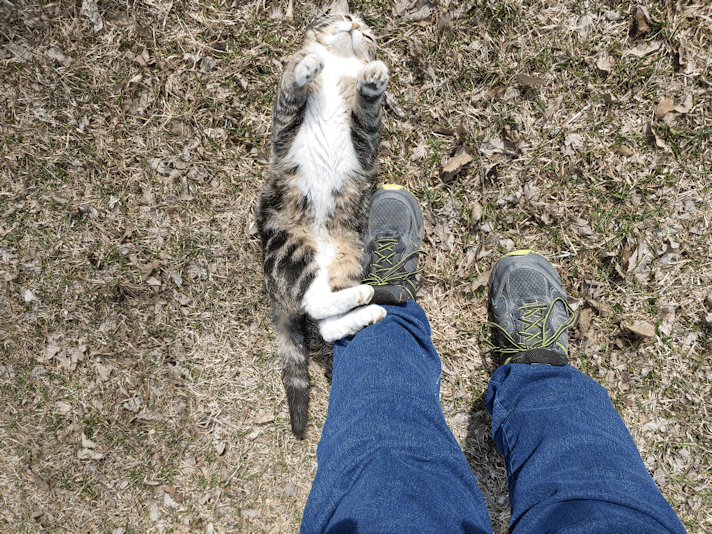
Why?

This is why.

He just HAD to fling himself bodily across my feet and start rolling! He eventually slithered his way across my feet, around my legs, to eventually end up sitting at my other foot, looking up at me, as if to say “why haven’t you picked me up yet?”

He did it one time while I was looking at something else, and I did end up stepping on his tail a bit. At some point, this guy is going to have to learn that moving feet are not a place to drop in front of! :-D

Happy Mother’s Day!

The Re-Farmer

Historical cooking: chickpea soup with fried bread

One of my Recommended posts was for the Historical Italian Cooking YouTube channel. Recently, they put out a new video for a super simple dish made with ingredients we typically have on hand. Today, I was able to give it a try!

Here is the video.

You can also visit this link for the written recipe.

This is an ancient Roman dish; chickpea and leek soup, with a fried flatbread called lagana.

About the only thing we had to go out of our way to get for this recipe was the white wine.

There was one ingredient we couldn’t find, though. Durum wheat flour. Any type of flour is just now becoming easier to find, but there’s no chance of finding any out of the ordinary flours. All Purpose flour, which is what we have, is made with a blend of hard and soft red wheat. Here in North America, durum wheat tends to be used in pastas. It’s the sort of thing we’d have to go to specialty stores to find. I’m sure I could find it in the city, but certainly not locally.

So I substituted AP, since that’s what I had.

First, the soup ingredients.

Another substitute I made was to use canned chickpeas instead of soaking dried chickpeas overnight. The recipe called for 2 leeks, but has almost no other quantities given. I had 2 leeks, but they were pretty massive, so I used 2 cans of chickpeas to balance out the quantities. There’s also the white wine, some olive oil, and caraway seeds ground with a mortar and pestle. I eyeballed most of the quantities based on watching the video. :-)

The soup was started by boiling everything but the leeks in salted water for 10 minutes. Then, the leeks are added and cooking continues for another half hour.

While that’s being done, the flat bread is made.

The flour was the other thing with a quantity given: 300 grams.

Unfortunately, my kitchen scale disappeared. So we had to use a converter. I used a little under 2 1/2 cups of flour. Salt is added, then a dough is formed with some warm water. That’s it, that’s all!

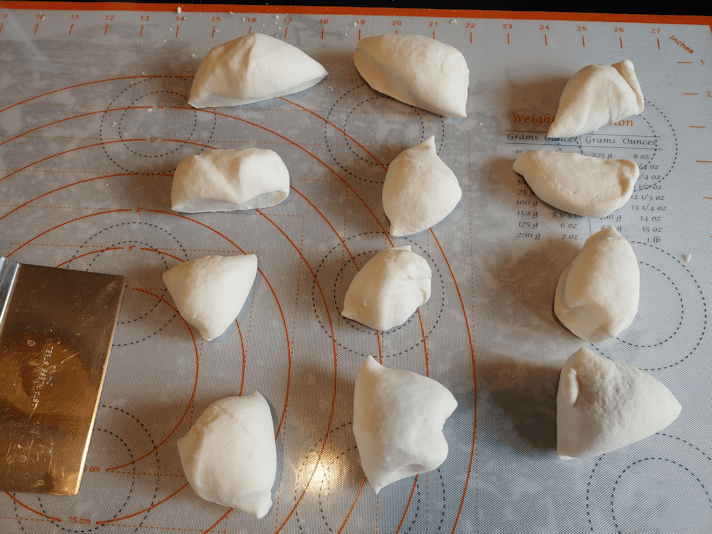
After the dough is kneaded until smooth, the recipe said to divide it into 10 pieces. There are 4 of us in this household, so I divided it into 12 pieces, instead.

The pieces of dough are then rolled out into rough circles.

The recipe calls for olive oil to be used to fry the bread. Olive oil has a low smoke point, so I modified the recipe a bit more. I added a bit of vegetable oil to increase the smoke point a bit. I was just frying in a pot on the stove, so this was more of a safety issue.

Once the oil was hot, the rolled out dough was fried, one at a time.

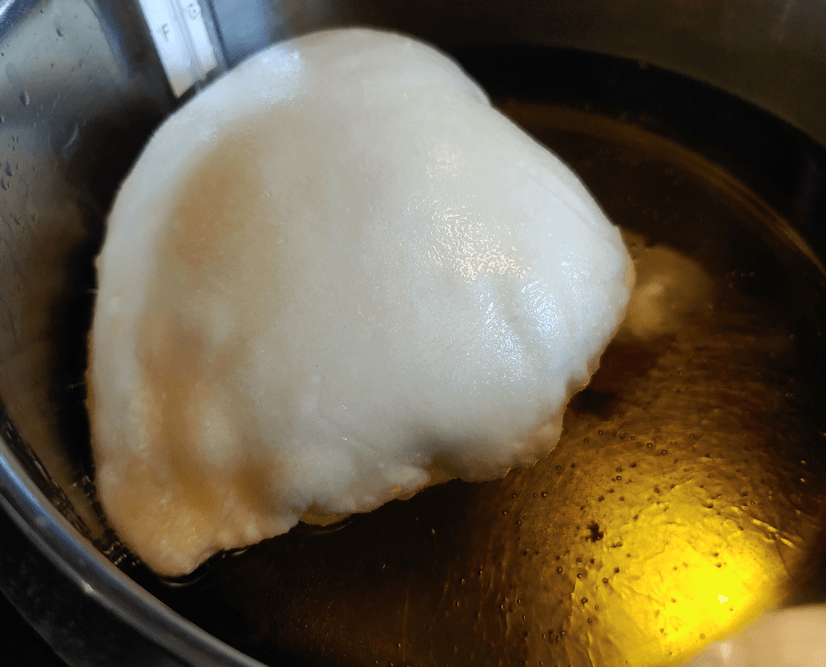
The dough bubbled up a bit in the video, but not into big dough pillows like this! :-D This could be because of the different type of flour, or even because of the oil blend.

Not that I’m complaining! :-D

These fried up very quickly. Maybe half a minute on each side, to get them to a golden brown, before placing them on paper towel to drain. The bubbles cracked on a couple of them, allowing oil to get into the pockets. That took a fair bit of draining! The bread was finished well before the soup itself was.

They look absolutely amazing!

Taste test time!

The soup itself was very mild tasting. Possibly because I used more water than in the recipe. I couldn’t distinguish individual flavours of the caraway or the wine, for example. No one ingredient overpowered the other.

The lagana bread had a surprising amount of flavour for something that is just flour, salt and water! The outside was crispy, while the inside was chewy. It went incredibly well in the soup. A real balance of flavours. Making one without the other would not be as good as the two together.

This is a remarkably easy soup to make. The lack of quantities in the recipe made it a bit more interesting to work out, but that just gives room to adjust to one’s one preferences!

I can definitely see us making this recipe again!

The Re-Farmer

No, I didn’t forget!

After an oddly sleepless night and a fair bit of running around, I just didn’t have the energy to post earlier today.

I did, however, get kitty pictures! Here’s a bit of cuteness to make you smile. :-)

That one smooshed kitten… :-D

Creamsicle was very demanding about being picked up this morning!

The Potato Beetle is a trusting soul. Trusting that when he flings himself to the ground in front of my feet and start rolling, I won’t step on him!

The cuteness. It just oozes out everywhere! :-D

The Re-Farmer

Aaaannnd… something else to fix

One of the odd things we have on this house is this window cover that the visiting goat discovered.

When I was a kid growing up here, this did not exist, but I think I understand why it’s here.

It is over the window we used to toss firewood through, when we had the wood burning furnace. The window is about 6 – 8 inches below grade. I clearly remember tossing wood through, bouncing logs off the ground in front of the window, into the basement. Sometimes, the log would hit the window frame. So the bottom of the window frame and the dirt in front of it got pretty bashed up. At some point, someone fixed the frame and added a dense, hard plastic to the ground in front of it, and made a sort of retaining wall out of bricks and paving stones on each side

Judging from the shape of this cover, it was meant to hang over the window, with the thinner portion fitting between the little retaining walls, to cover the basement window completely. It’s hinged, so it could be lift up as needed.

However, we have never seen it down, because a small fence post was put into the ground in front of it, holding it up above the window. My guess would be that this allowed access to the window, while the cover itself served as a roof to keep rain and snow out of the sunken area in front of the window. Otherwise, any moisture would leak into the basement.

We took advantage of this by putting the food containers for the outside cats under it, so rain wouldn’t turn it all into mush. It worked well, and it’s something we would continue to do, once the winter debris is cleaned up.

With that in mind, today I lifted the cover higher, so I could start cleaning stuff out from under it.

It fell off.

But only one one side!

It was an easy matter to rip it loose from the other side, too.

As you can see by the underside, it’s a fair bit of moisture damage.

The screws on the hinges pulled right out of the weathered wood.

Seeing this, I am amazed it didn’t come apart under the weight of that goat! :-D

This cover was made up of two wood panels attached to each other.

Oh, look!

The narrower piece was attached to the wider piece with screws, that were sticking through underneath.

Three of them.

I have gone under this cover, letting it rest on my back while I tended to various things at the window, so many times.

I’m now wondering how I managed to do that and never stab myself in the back, or scrape the back of my head, with those screw ends!!!

Meanwhile…

The hinge screws are still in the hinges. One of the hinges – the one that broke first – is quite loose from the wall, too.

So… this is something we’re going to need to replace. As odd as it is, it serves a purpose.

We’re going to have to figure out how to replace it, and with what.

Now that the old cover has broken off, we can think about making an improved version. Since I doubt we’ll ever have the cover hang down to cover the window, we don’t need to have the narrower end. I would also want it to be all one piece. The little fence post can stay to hold it up at the lower end, but I would like to use a material that is lighter; a hard plastic of some kind, that can handle the sun without breaking down, perhaps. I also would want to set it up so that it can be swung upwards, with something to hold it against the wall, so we can access the space under it without having to be bent over, holding it up with our own backs.

Hmmm… An idea just occurred to me. If we’re building a new cover anyhow, it could be made with legs to support it at each corner, instead of the fence post that’s there now, in the middle. The legs could be on hinges, so when it’s lifted, the legs will fold downwards rather than sticking straight out. That way, no one would be bashing their heads into a leg when it’s up. :-D

There is a piece of dense plastic near the window that may have been used as a cover there before. I could see no evidence it was ever attached to hinges, so it may simply have been placed against the wall on its own, to cover the window for the winter. I don’t actually know. I’m just guessing, based on the shape. It’s even heavier than the wood version, though, so it’s not something we can use to replace the cover, as it’s set up now.

This does remind me of something else for the to-do list, though. For the summer, the basement window, plus the foam insulation cut to fit into the frame, gets removed, and a metal screen gets used, instead. This helps with air circulation in the old basement, helping to keep it dry. My older brother even had a fan set up on the inside (which disappeared before we moved in) to draw air in, along with the big blower fan that’s still down there, to help keep that basement’s floor dry.

The wood framing the metal screen was pretty old and starting to break when we first moved her, and this past winter, it finally broke apart. We will need to find some wood to make a new frame before we’ll be able to use that screen again.

Another couple of things for the to-do list! :-)

The Re-Farmer
Replacement door progress: almost there!

Today, I finally got a chance to continue working on the replacement door for the sun room.

Cutting out recesses for the hinges.

To line them up with the recesses that are already in the door frame, I dragged the broken door over and lined it up with the replacement door.

After making sure they were facing the right way, I used one of the hinges we took off to line up the recessed area, then traced around it.

And only now, as I look at this photo, I realize that for all the care I took to line it up and facing the right way, I got it backwards.

Dangit!

Ah, well. We’ll work it out.

*sigh*

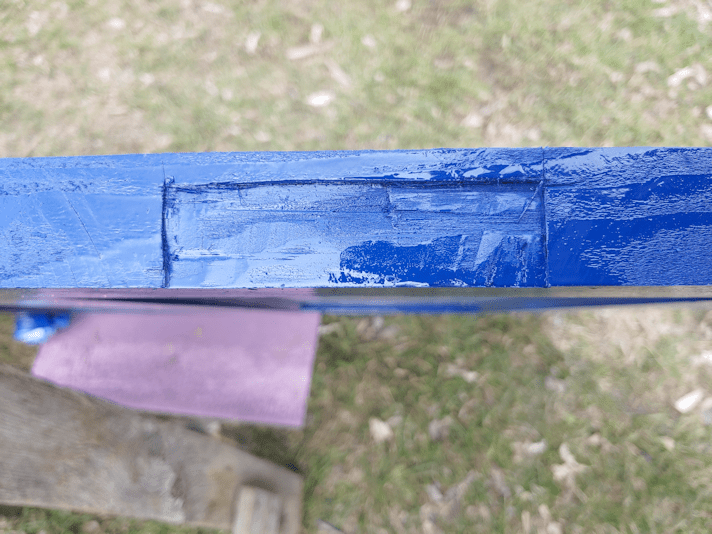
I ended up carving out the recess with a combination of chiselling it, and shaving it with a utility knife.

My daughter then turned the door to access the outside of it, painted the carved out areas, and gave the outside of the door a final coat. It’s got some rough areas in the wood, so she really wanted to make sure it was well coated to protect it from the weather.

Now that I realize I goofed on the recesses, I’ll just carve out the remaining bit, so the recess runs across the door, then we’ll paint that over, too.

Ugh. I can’t believe I made such an obvious error. I even remember telling myself, when thinking about it a couple of days ago, to make sure I didn’t do that!

What a goof I am! :-D

The Re-Farmer

Some winter damage to fix

This spring, our sump pump is actually going off pretty regularly. Which is great, because it means we have moisture in the ground. The last two springs, I think it went off only once or twice, aside from when we drained the hot water tank into it.

Which brought to my attention some damage to the drainage hose outside.

I think it might have gotten stepped on, while frozen… and it was likely me who stepped on it! :-D

So I went into town to see if I could pick up some replacement hose. Something longer, so that I could direct the hose towards the garden by the old kitchen, instead of having it drain next to the well.

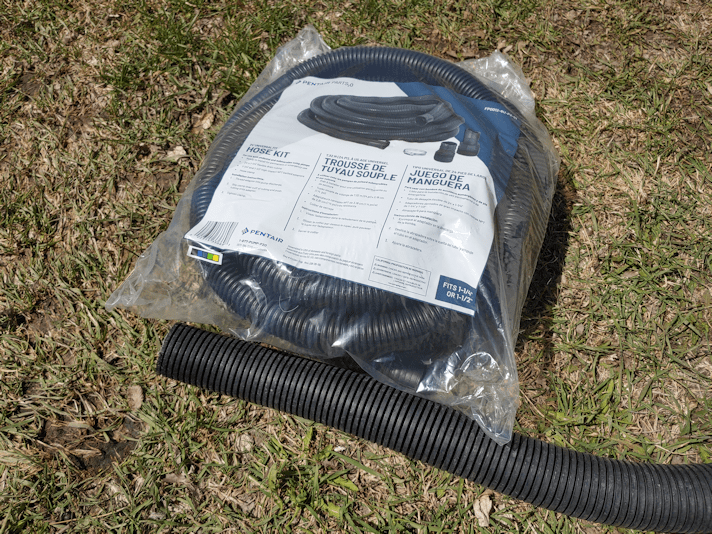
At the hardware store, I was very happy to find sump pump hose kits with 24 ft hoses!

Except… well… see for yourself.

They are very different diameters!

On reading the package, I realized that this hose kit is intended to attach directly to the sump pump itself.

That is not what we have.

I found a very knowledgeable employee to help me out. Unfortunately, I didn’t think to take any photos before I left, so I had to try and describe to him what we had instead.

We’ve got this semi-rigid hose cobbled together, instead. The diameter of this hose, however, should fit the hose kit. It was on the other side that the size is somehow modified so the larger diameter flexible hose could be attached. I had looked at it before and saw that it was clamped very close to the wall, but could not see what it was clamped too.

I still can’t really see.

Something has been wrapped around the end, and then the larger hose was clamped in place.

That “something” looks, for all the world, like batting. Like quilt batting, or aquarium filter batting.

Whatever it is, it’s been there long enough to be covered in crud.

In talking to the guy at the hardware store, he picked several different attachments that I might need, and a plumber’s adhesive that I would need if I had to use one of them. Once I get working on this and remove the broken hose, I should have the pieces needed to attach the hose kit, if it’s a different size. Or, if the end coming out of the wall is the size I’m seeing from the basement, and doesn’t have something weird done to it on the outside, I might be able to use what came with the kit itself.

He said I could return anything I don’t end up using, but that’s not going to happen. Even if I don’t use the pieces, they are things that will come in handy in the future and will not go to waste!

Plus, just in case, I picked up two hose kits. If things are bad enough, I can replace the cobbled together hose that’s inside the basement now and replace it with the flexible hose that should have been there in the first place. If I do end up doing that, one hose will not be long enough to run along the side of the house and reach the garden.

With that in mind, I asked the guy at the store if I could attach the hoses of two kits together, mentioning in passing that right now, the hose is draining next to our well.

That got a rather dismayed and understanding “oh, dear!” as I continued to say why I wanted to have longer hose!

He then found me the piece I would need to attach the hoses together, should I need to.

I was one very happy customer by the time I left the store!

When it comes time to actually start working on the hose, I’ll have to make sure to have the sump pump shut off in the basement. It would not be good for it to turn on while I’m working on the house outside! :-D

So this is a task prepped for, but will have to wait for another day. At least we’re all ready to get it done, though. Other things had priority for today, which will be in my next post. :-)

The Re-Farmer

Dismantling the failed goat catcher

Another thing on the to-do list accomplished!

The pen we threw together to try and catch the visiting goat was finally dismantled. Which never did work. :-D

The “door” end was already trying to make its escape. :-D

The straw I hoped the goat would use for bedding went onto the little garden near the old kitchen; another area we’re trying to build up the soil with layers of organic matter.

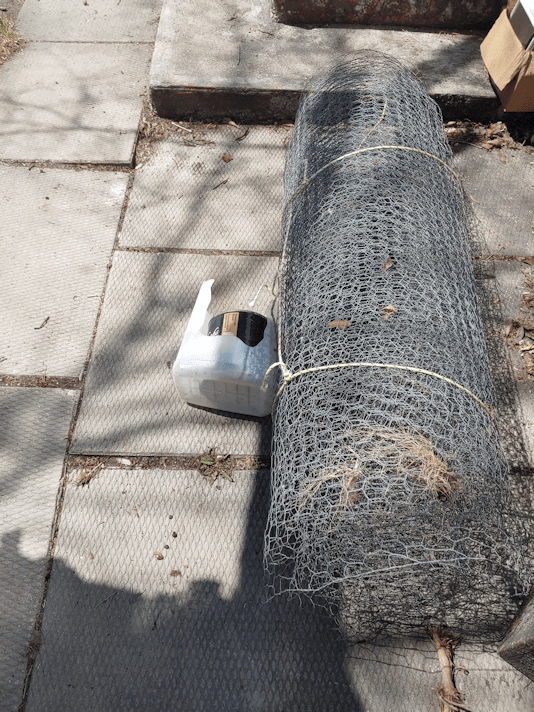
The chicken wire belongs to the goat’s owner, so that’s all rolled up and, along with the containers he brought to try and lure the goat with food, it is set aside and ready to be returned.

After what happened when I walked the goat over to his place, I don’t particularly want to see him, or even go to his place, so I might just drop them off at the end of his driveway when we have the chance. :-/

The frames are just set aside for now. I plan to take them apart and will likely use them to make trellises for the squash. Before I do, I will have to snag one of the girls to help me get that table saw out of the shed so we can test it out. If it works, I’ll be able to cut straight ends to the pieces, and even *gasp* have matching lengths to work with. :-D

If it doesn’t work, I’ll see what I can manage with the circular saw.

For now, though, it’s done. We no longer have a pen in the middle of our south yard! :-D

Another thing checked off the to-do list!

The Re-Farmer

A bit of prep and clean up

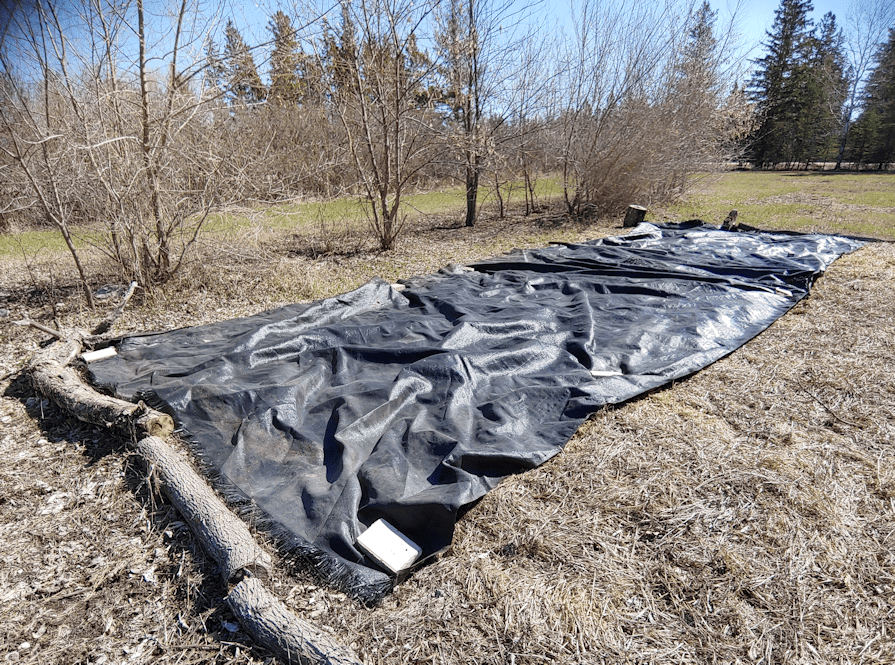
Yesterday, the girls were able to take our two black tarps and set them up on a future garden bed area.

We mulched this area with straw last year, as a start to try and amend the soil and add organic matter to it. The old garden area had been plowed probably the fall before we moved in. I don’t actually know. It left the entire area very rough, but the ground itself is incredibly hard and full of rocks. I remember as a child, we were constantly picking rocks out of here, though one section (now full of trees) was so bad, my parents stopped trying to plant anything in it.

We want to amend the soil by adding organic matter to it, but we have also not decided where we will be permanently adding garden beds. For much of this area, we are already planning of eventually putting fruit and nut trees, though for this year, outside of the section in the photo, we will be planting giant sunflowers.

The black tarps are there just to warm the soil faster. Along the North side, I plan to plant birdhouse gourds in a row running East to West. In front of it, we will plant pattypan squash and the zucchini mix, in rows running North to South, all with trellises.

That may change, if none of the birdhouse gourd seeds sprout! Still no sign of them right now.

After this year, I hope we will have cleaned things up and worked things out enough to decide where we want to plant raised bed gardens. And by “raised bed”, I don’t mean the ones I’ve seen videos of, where people just border an area with rocks or a layer of bricks that get referred to as raised beds. I am thinking of beds that may be as high as 3 or 4 feet. Accessibility is what I have in mind for these, as my body ages and I know my mobility in my hips and knees will continue to decrease. This means finding permanent locations, and from what I’m seeing, this may end up being on the South side of the house, rather than the North.

We shall see.

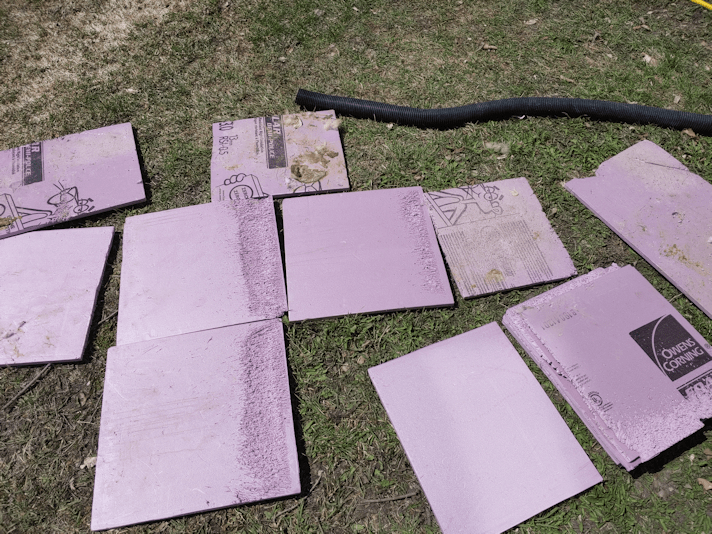
Among the other things I finally got to today was dismantling the cat condo I put together out of cardboard boxes and rigid insulation. The remains of the boxes went to the burn barrel area, but I wanted to keep the insulation for potential future uses.

I am amused by the very defined areas that cats used it for scratching! These pieces were all in the backs of each “condo”, and the scratches near the “ceiling”.

No wonder other pieces were falling inside. I cut them in sizes that would support each other. That doesn’t work if they get moved around by enthusiastic scratching! :-D

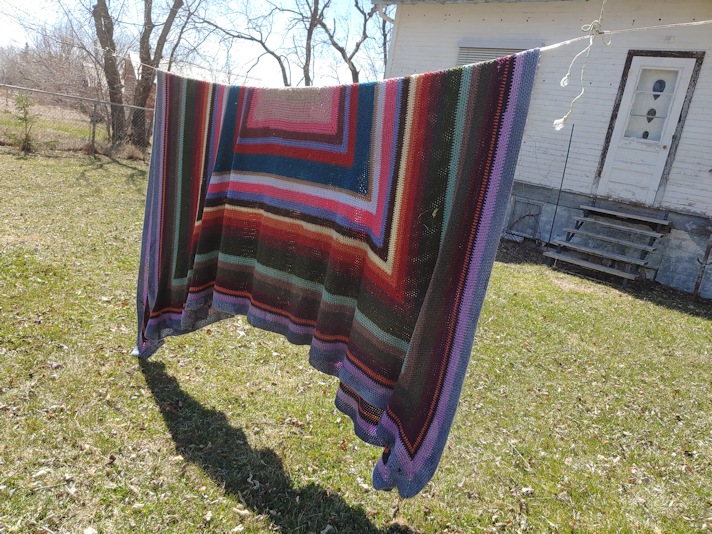
Another thing I finally set up for a bit of cleaning was the large crocheted blanket that was set up on my dad’s old swing bench, to help the cats keep warm.

The peed and crapped all over it. :-(

I’d already draped it over the sawhorses and gave one side a thorough soaking and de-pooping with the hose. Today, I did the other side on the clothes line.

The blanket, on its own, is already pretty heavy. Full of water, it probably weighs more than 20 pounds. It stretched the clothes line until the bottom was piled on the ground. The clothes line is on a pulley system, so clothes can be hung from the platform at one end, and the line moved as needed. (When I was a kid, there were three lines set up, but there’s just the one, now.) So I used some rope to tie the top and bottom parts of the line closer together, then slid that over to lift the blanket off the ground a bit.

I had actually tightened the line before putting the blanket on it, too!

We have another, smaller blanket we use for the cats. It was covering a shelf, so it didn’t get filthy like this one did. It, too, got a soak from the hose to try and clean it. Both are way to heavy to ever put into a normal washing machine, so a hose is the best we can do, right now!

I am hoping that, sometime next week, we’ll finally be able to empty the sun room to give the floor a thorough cleaning. We should be able to continue cleaning out the old kitchen, too, so we can turn it into a pantry.

Little by little, it’ll get done!

The Re-Farmer