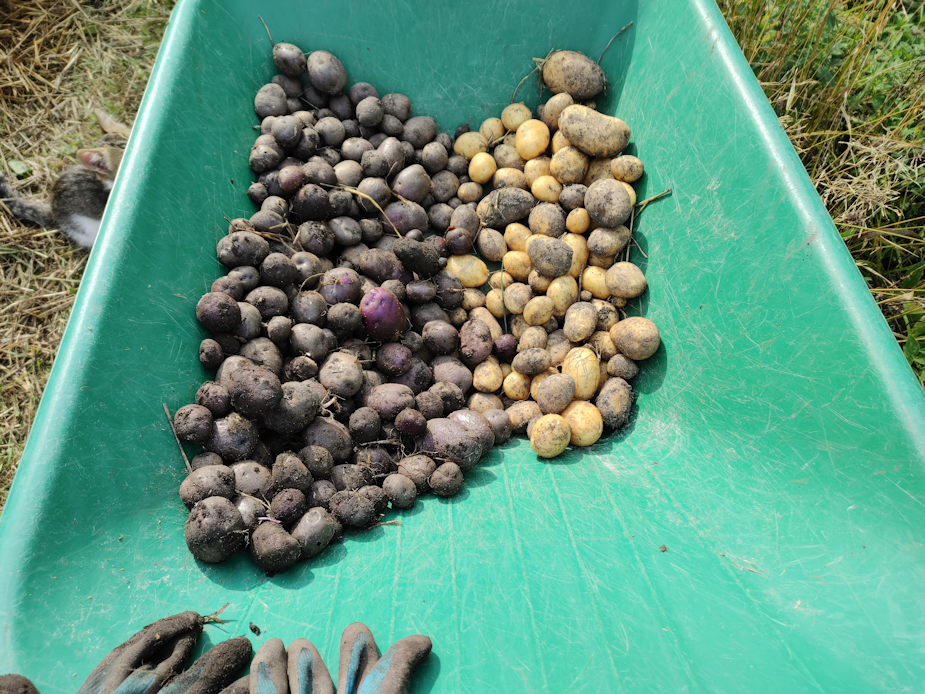
Okay, it’s that time! I’ll be working on a serious of posts, going over how our 2022 garden went, what worked, what didn’t, and what didn’t even happen at all. This is help give us an idea of what we want to do in the future, what we don’t want to do in the future, and what changes need to be made.
Our 2022 garden had a lot of challenges, and a lot of failures. Some of challenges and failures started well before we planted a single thing outdoors.
With our short growing season, we need to start a lot of things indoors. That, in itself, is expected and not a big deal. Our circumstances, however, have thrown in some major difficulties.
Fourteen of them, in fact.
Well. Sixteen, when we were trying to get them going this year.
Our indoor cats.
The other challenge is a combination of space and light. This house is oriented to the East. Our largest windows face the sunrise – with a grove of 60’+ spruces not far away. Our south facing windows are smaller and inaccessible for the purpose. The exception to that is the sun room, however the sun room is not warm enough to start seeds in when we need to. Plus, during colder weather, we allow the outside cats to use it for shelter.
Which means we need to figure out how to start seeds indoors, provide adequate artificial light, and protect the seedlings from cats that are determined to either roll on them, or eat them!
The first solution was one that we started doing last year. We have two aquariums that we have been able to convert into greenhouses, of a sort. When we moved out here, we brought our big tank, with a second light fixture to replace the kit light. Both work just fine, and provide adequate light for starting seeds.
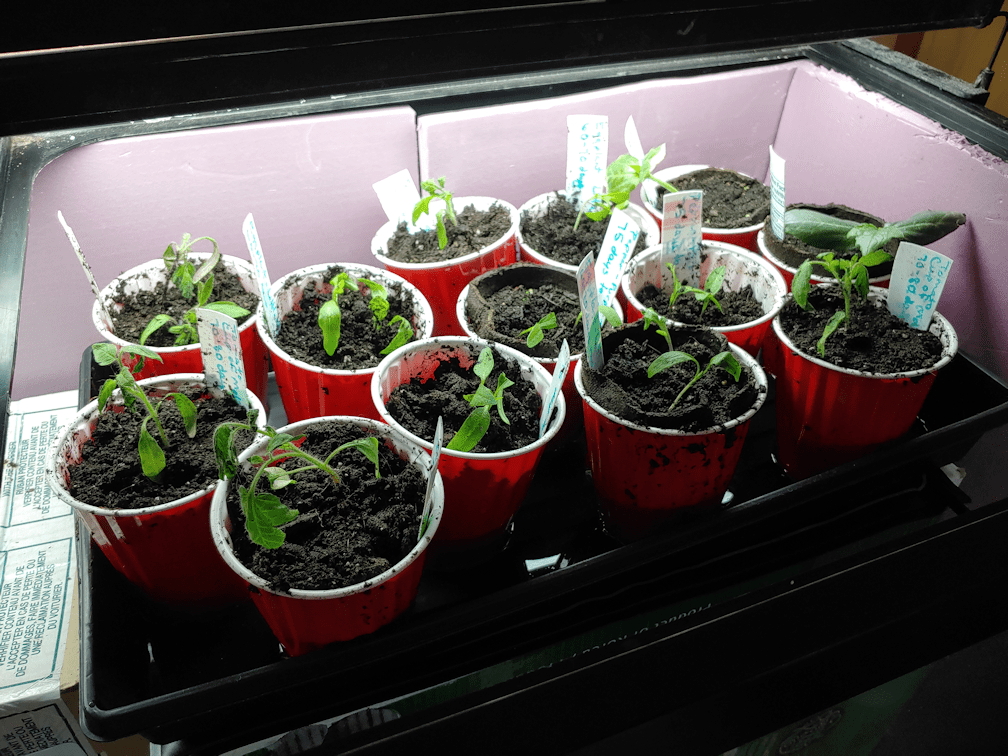
The corner of the living room the tank sits in gets cold, so we added rigid insulation against two walls for extra protection. We were also able to get a warming mat to place under seed trays of things that needed extra heat. Since the lights can’t be raised or lowered, we used cardboard boxes under the seed trays to adjust the height, with new plantings closer to the lights, and larger ones lower down, rotating and adjusting as needed. We built frames with hardware cloth to cover the top of the tank, which both protected the seedlings from the cats, but also allowed more air flow.
This above picture was taken with the hardware cloth covers removed for access. As you can see from the bedraggled seedlings, we didn’t quite manage to protect them from the cats. More on that later.
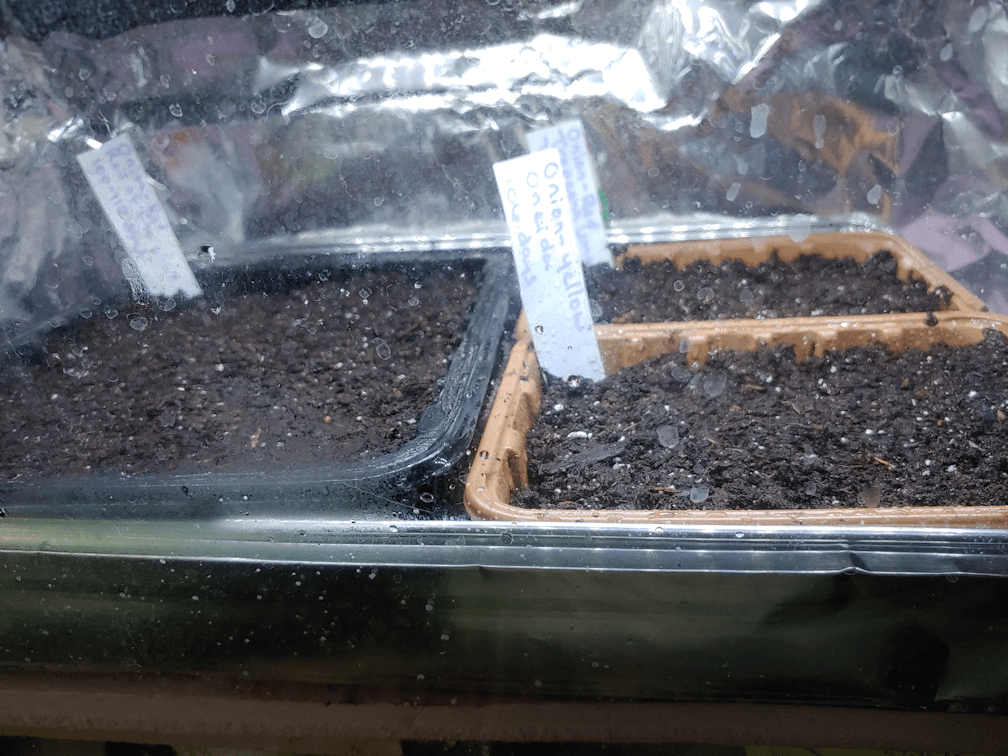
The other tank is much smaller; just a 20 gallon tank. It, too, tended to get chilly, plus the light it came with was not as bright as having two lights, as with the large tank. It has insulation on three sides to protect from the chill walls, which also got covered in aluminum foil to reflect the light.
When we first started using this tank the previous year, we used the original lid it came with. The cats were incredibly determined to get at the trays below, and were able to reach through the opening for the filter, no matter what we used to block it, completely destroying the trays below. This year, we found some window screens in a shed, and used one of those as a lid, weighted down with hand weights. We removed the light from the bottom of the original lid and attached it to a foil lined piece of rigid insulation, and simply set it on top of the window screen. The cats still sometimes managed to knock the weights around and displace the screen but, over all, it did keep them out.
The problem with both tanks, but especially the little one, was air circulation. For that, we used a tiny fan we found in one of the basements while doing clean up. We could put it right into the big tank, or on top of the hardware cloth covers, aimed downwards. For the small tank, we could just set it on the screen, also aimed downwards. Ultimately, though, we used the small tank as little as possible.
We had an awful lot of seeds to start indoors, however. Way too many to fit in the tanks. Since the seeds needed to be started at different times, we could start the earliest ones in the tanks, then rotate them out when the next seeds needed to be started.
The question was, rotate them out where?
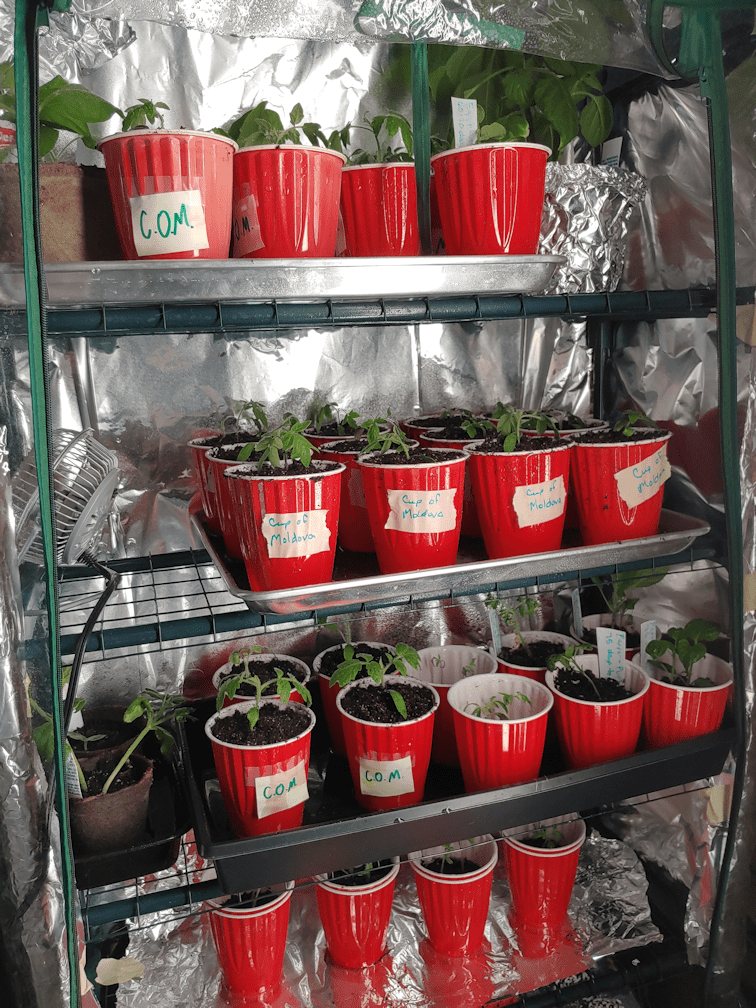
One of my daughters had bought a mini greenhouse for me the year before, so we brought that into the living room. We also bought a long, narrow, LED shop light to illuminate it better. That worked out well enough that we later bought a second one.

We set it up as close to the window as we could, on a chair to catch more light. The only way we could use the light, however, was to hang it from a plant hook in the ceiling above, so that it rested on the chair as well, oriented vertically.
The cats were absolutely determined to get into it!
They managed to squeeze in from under the chair, so we tried taping the plastic cover to the chair.
That wasn’t enough.
We added pieces of cardboard to block the spaces they were squeezing through.
It… mostly worked.
In the end, it was a combination of taping the bottom, the cardboard, and covering the back and sides of the frame with aluminum foil – which also helped reflect light onto the seedling better.
They still managed to get in.

I came out one morning and found cats had somehow squeezed through one of the zippers, pushing it open more, and rolled all over a couple of the trays.
It was such a disaster!
We did managed to save some of the seedlings, but not all. Thankfully, we had seeds left for some of them and were able to start over.
We were eventually able to keep the mini greenhouse sealed up well enough to keep the cats out, but it meant keeping the plastic cover on and closed up at a time when the seedlings didn’t need a cover. This meant no air circulation in there at all. Even so, there were times when a cat or two managed to get in, and try to eat some of the seedlings!
I was able to rig the little fan up inside the mini greenhouse, aimed at the walls in such a way that the air flow would be pushed upwards and around the whole space.
That little fan got one heck of a work out!
So we finally got that working, but there’s not a lot of space in between the shelves. Before long, some of the seedlings began to outgrow the mini greenhouse. They needed to be moved out, and the only place we could move them to was the sun room – but we had to wait until it was warm enough!

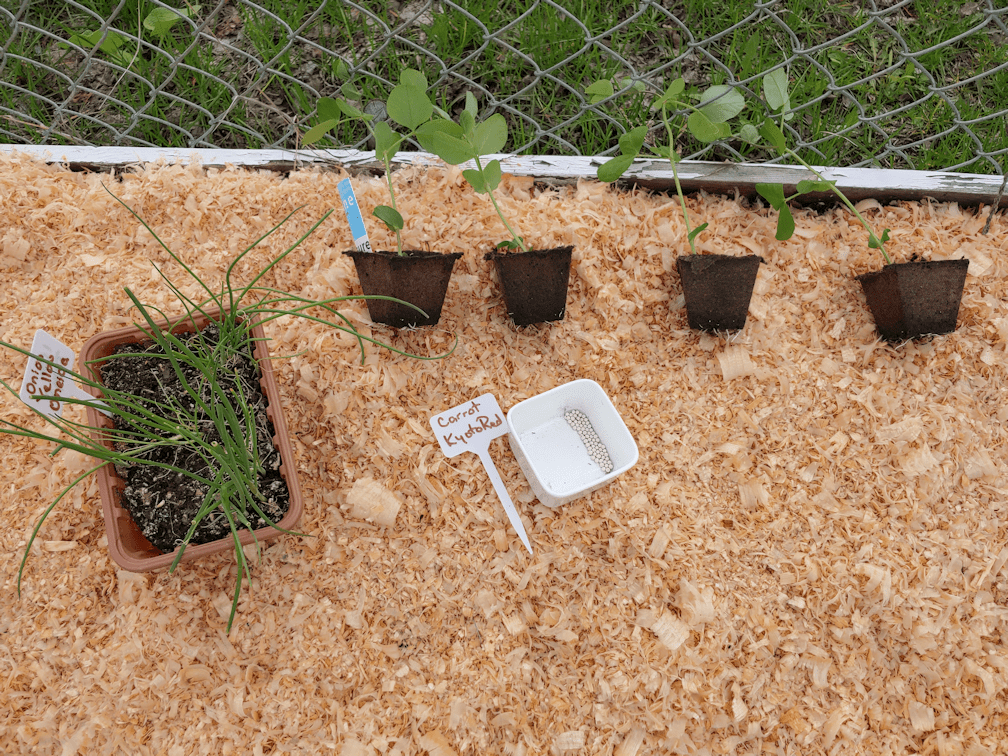
Eventually, we were able to move the largest seedlings onto shelves in the sun room, while other seedlings got rotated into the mini greenhouse, and newly sown trays were set up in the aquarium greenhouses. We had our seeds organized by when they needed to be started, with the earliest started 10 weeks before our average last frost date, then 8 weeks, 6 weeks and finally 4 weeks.
We still ran out of space.
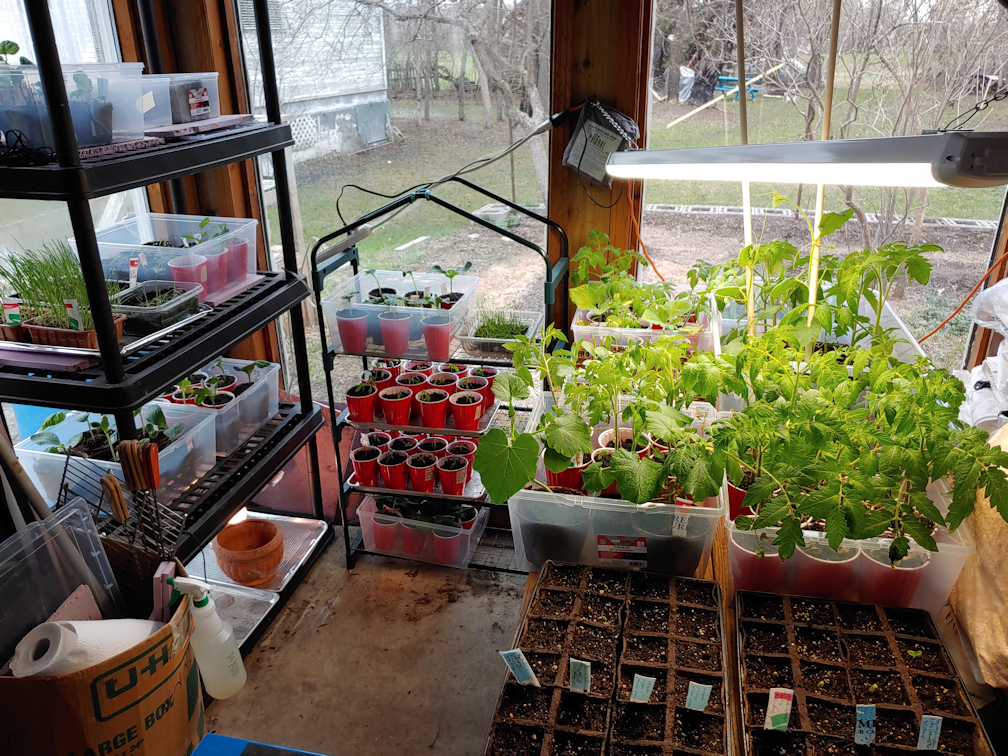
In the end, we set up a surface to hold seedlings over the swing bench, and eventually we could move the mini greenhouse to the sun room – and finally take the cover off! The second shop light was hung above the plants over the swing bench, and we eventually hung the one from the living room on the inside of the shelf.
For a sun room, the sunlight doesn’t actually reach far into the room.
There were so many things that needed to be started indoors! In fact, most of what we were growing needed to be started indoors, with only a few things that needed to be direct sown.
That’s not really going to be changing, so we need to figure something better out. How do we provide the seed trays and seedlings with the light, air flow and space they need, while also protecting them from the cats?
Well, the girls and I have been talking about it, and the only real solution we have is to find a way to keep the cats out of the living room completely, and turn the living room into a plant room.
The question is, how?
There are floor to ceiling cabinets between the living room and dining room. On one set, the living room side is completely covered. On the other, there is a “window” at one shelf that allows access from both sides. It’s a favourite lounging place for David! Between the cabinets is an open space somewhat wider than a standard sized door for access between the two rooms.
The only way to prevent the cats from getting into the living room is to build a barrier in that space, with a door in it, plus another barrier to cover the “window” in one of the cabinets.
Barriers which need to be strong enough to withstand cats trying to get through, yet still be easily removeable.
One of my daughters has drawn up plans for a barrier with a doorway, while the “window” will just need a simple rectangular frame to fit the space. It’s basically going to be all wooden frames and hardware cloth.
Unfortunately, we’ll need to actually buy the lumber for this, and lumber is extremely expensive right now. There is nothing in the piles of salvaged lumber in the sheds and barn suitable for what we have in mind.
It’s something we’ll have to figure out soon. Some things, like onion seeds, could be started as early as January. February at the latest. Honestly, I just don’t see how we can get the materials and build the barriers that quickly. We could start off using the large aquarium, which might give us until March to get it done, but… I’m not very hopeful.
It would be a lot easier, if the cats weren’t so absolutely determined to destroy the seed trays!
The Re-Farmer