Today was our first attempt at making hard apple cider. We are using the remaining apples from the one crab apple tree we have that produces the most amazing, sweet, delicious little apples, after using some of them to start an apple cider vinegar.
When we first moved here and saw how many crab apple trees we had around the property, we looked into what was needed to make hard apple cider. At first, we didn’t think it would be anything we could do, or at least not anytime soon. Making hard apple cider, we found, required using a large press to crush whole apples, then sealing up the resulting juice to ferment a few months.
We didn’t have a press, and with so many other things on the go, we were not about to build or buy one, either.
Then I found the CS Brews YouTube channel, now called CS Mead and More. I liked it enough to include it in my Recommended series.
They started making hard apple cider, using store bought juice. Sometimes, right in the container it was packaged in!
We could make hard apple cider without having a press, after all!
One of the things we found when cleaning up this place after moving in, was a juicer exactly like the one we had to leave behind when we moved. I think one of my siblings bought it for my mother, but she hardly used it. Everything was still in its original packaging, even!
We decided to try making hard cider using our own juice.
Now, making it using store bought juice in the bottle they were sold in works, because everything comes pasteurized and sanitized off the shelf. Basically, enough juice needs to be poured off to make room for the sugar and yeast, an airlock gets put on, and you can leave it to ferment to get a very basic hard apple cider.
Of course, doing it the traditional way, with a press, the juice didn’t get pasteurized or filtered or anything.
We decided to try making our own hard crab apple cider with raw, unpasteurized, unfiltered juice. The juice would be going straight from the juicer to the sanitized gallon jugs, so the chance for contamination would be very lower.
Lower than trying to do it the old fashioned way, that’s for sure!
The first step was to clean the apples and de-stem them. They didn’t have to be cored, but the stems would cause problems with the juicer.
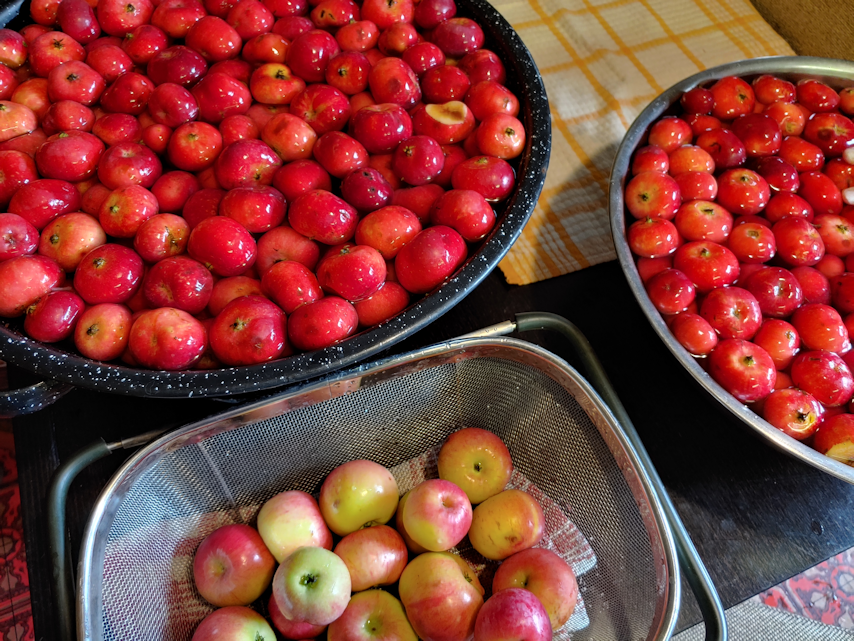
The crab apples from the one tree completely filled my two largest bowls. Though I cut away some obvious nasty bit, I wasn’t worried about light bruising. I also have the not-quite ripe apples from the tree that broke in the wind storm.
It’s a good thing we had so many of these apples this year, since I had to toss the cider vinegar, and start over again.
Juicing the apples turned out to be more difficult than expected. It was made slightly easier when we found a way to raise the juicer high enough that a 1L pitcher could fit under the spout. We had 2 one gallon jugs, and a gallon is about 4L, so I could use the pitcher to loosely measure how much juice I was putting in. However, these little apples don’t have a lot of juice in them, and their pulp kept jamming the machine. My daughter kept having to stop the juicer, open it up and peel away the pulp that accumulated on the perforated metal cone inside, instead of going out the back. The pulp was so dry, it could be taken off in ribbons!

Using information I got from one of the hard cider making videos, I used 2 cups of sugar per gallon. Each got 2L of juice before I put in a bung and shook the heck out of them to dissolve the sugar.
Look how pink that is!!
Also, you might notice the liquid is not at the same level. Though these are both 1 gallon jugs, one is actually bigger than the other. They are 1 gallon at about the “shoulder”, which leaves space for the fermenting liquid to bubble up a bit.
I also used the same wine yeast we’ve been using for everything else; I don’t know the specific strain of yeast, but it’s basically what is available for a non-sparkling wine from the local brewing supply store. Again, following what I saw in the video, I dissolved about a tsp of yeast in a bit of juice, then added it to the full jugs, after getting a hydrometer reading.

After the yeast was added, they got another thorough shaking, then the airlocks were put in place.
I’m also trying to be more diligent about recording everything. I have to admit, I still don’t understand the hydrometer information, so I wrote down all three readings. It has a “potential alcohol by volume” measure right on there, but I keep reading that it isn’t any good, and that it’s better to use the specific gravity reading. It doesn’t help that I can barely see the tiny numbers and lines in the first place!
I found it interesting that the readings for the 2 jugs that were made up identically, are slightly different. It’s possible that the different sized jugs means that one does have slightly more juice in it than the other, and that could explain the difference.
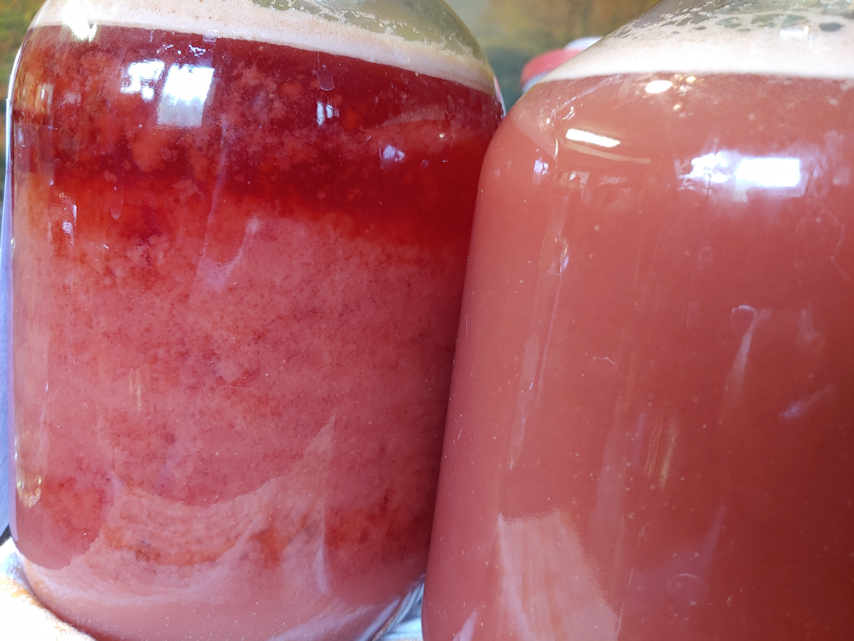
The juice is not only incredibly pink, but incredibly cloudy! They were, of course, just shaken when this photo was taken. You can tell which one got finished first, as the cloudiness is already starting to settle.
We have set the jugs up on a side table in the dining room for now. It’s not a particularly bright room, it’s warmer than the old kitchen, and we can keep an eye on them. I just took a look at them, after they’ve had several hours to settle. I will have to take a photo of them during the day. They look very different right now! The sediment has settled to the bottom, and the clear juice in the middle is looking a deep, deep pink – but there is a significant layer of lighter pink foam at the top! I used the temperature gun on them, and got different readings, depending on where I aimed it. The top, where the foam is, was fluctuating between 19C and 20C (66-68F). The middle was around 17-18C (62-64F), while the bottom, where the sediment has settled, is 17C (62F). Which I think is good.
Also, I’ve turned the thermostat up for the house. It was set just below 15C/59F when the furnace turned on earlier today, so I’ve upped it a few degrees! So the ambient temperature will not be too cold, either.
I have no idea how this will turn out. Will the fact that we used raw, unfiltered juice be a benefit, or a disaster? Will we get something that tastes horrific, or wonderful? Considering how great the apples themselves taste, I would hope the resulting hard cider would be its match. I have no idea. This is a total experiment for us!
As for the remaining apples, it took so long to juice enough to fill the jugs that we didn’t juice the rest of them. I had started cutting them up to cook them into a dessert, but realized I didn’t have the energy for that left, so they ended up in the freezer! Meanwhile, my poor daughter had been standing at the juicer for so long, her back was starting to give out on her! We couldn’t even plug it in somewhere where she could sit down, since there are so few outlets in this house.
Here’s hoping the end result is worth it!
The Re-Farmer


Hard cider… Reminds me of that dinner scene in Paint Your Wagon where the rescued farmers tell Ben (Lee Marvin) that they grew apples in Pennsylvania before heading West. He asks if they were making Apple Jack (and not the cereal or the My Little Pony). They get indignant over the suggestion and ask if he thinks everything should be made into ‘spirits’
“Only when absolutely possible” ROFL
LikeLiked by 1 person
LOL! I’d forgotten about that scene!
Gosh, it’s been ages since I’ve seen that movie. :-D They don’t make ’em like that, anymore!
LikeLiked by 1 person
You definitely can make you own hard cider, much easier than wine and way better quality. Last year I did about 700 liters mixing about a dozen apple and pear varieties with wild crab and heritage apples. Begin by picking apples when they start falling naturally, let rest for 10 days (fully ripens and reduces water content), mill, let sit for 3 hours (allows natural yeasts to transfer to the pommage). Press, let sit for 3 days in a clean food grade pail, lid on loose. Let ferment naturally at constant temperature, about 20C. Add camden tablets, 1 per 5 liters of must, add yeast, K1-V1116 activated for about 2 minutes in a small amount of lukewarm warm water. Let ferment for about 10 days until fermentation slows. Rack to carboy under airlock, secondary fermentation for about 6 weeks. Rack to clean carboy and age in cold storage for 3-6 months. Rack again to further age if desired. Filter, back sweeten (2.5 cups brown sugar in 19 liters is good) and carbonate under 30 psi CO2 while refrigerating for 2 days. Equalize pressure to 10 psi. Bottle or serve as draft.
The more varieties of apple the more complex the taste. Some tart bitter pear varieties really add to the flavour but need longer aging. No need to be really obsessive about sterilization as long as starting pH is below about 4.3. Minimize exposure to air after fermentation slows. A 0.5 micron filtration step really improves shelf life and cleanliness of taste.
LikeLiked by 1 person
Oh, wow! Thanks for all that info.
I wonder how mine will work… LOL We couldn’t let the apples sit for 10 days; even the few days I waited so I could give some to my mother, they were starting to degrade. The apples from this tree are not a type that stores well.
I did mine based on what I saw at CS Brews (now CS Mead and More). We are using 1 gallon carboys for the first fermentation instead of a bucket. We used the bucket the first time we made mead, but I am more comfortable with an airlock than a loose lid. Where we live, I’d be concerned about some of the wild yeasts that might be in the air. Not to mention all the cat hair. ;-)
Right now, the airlocks are active, but I am also seeing movement in the juice itself, so there is definite activity happening in there! Our biggest issue will probably be temperature. They’re maintaining 18C, so far, but it’s getting pretty chilly again. We might have to find ways to keep them from getting too chilled, soon.
Thanks again for so much info! :-)
LikeLike
Pingback: Poor Man’s Hippocras: in progress | The Re-Farmer
Pingback: Making hard crab apple cider: racking day – what happened? | The Re-Farmer
Pingback: Year End Review: top 10 posts! | The Re-Farmer
Pingback: Making hard crab apple cider: bottling day one | The Re-Farmer
I live in south-central Alaska, and sought out two crab apple trees to plant when I moved into the home I now live in. I was remembering the pickled crab apples served in New England restaurants as a side dish or garnish during my college years. My trees are two different varieties, one (Almay) with beautiful pink flesh and bright red skins. That little tree produced a bumper crop this year, and I decided to try the pickling process at last with some of them. In past years I have either baked them whole in the microwave (!) with a sprinkle of sugar and cinnamon and a splash of red wine, or made them into apple sauce. I found a couple of recipes and have just finished putting the few jars of pickled apples which emerged to bed. The recipes were similar but one called for equal amounts of vinegar and water for the process, the other called for straight vinegar, which is the one I chose. Not sure I wouldn’t opt for a little lengthening of the vinegar next time around. They are spicy and sticky, and look quite pretty! We will see how they hold up.
LikeLiked by 1 person
That sounds awesome! I never thought of pickling crab apples before.
LikeLike
OOps re my note about apple tree varieties – I see that I typed Almay when it should have been Almata – sorry about that!
LikeLiked by 1 person
Pingback: Year End Review: our top 10 most popular posts for 2021 | The Re-Farmer
Pingback: Year End Review: Our top 10 most popular posts | The Re-Farmer