I started out with more of the 1×4 boards, but found a bit of a problem at the edge. The remaining space was too wide to use another of these boards by around an inch.
I did have a single 1×6 board, left over from when I guilt the low raised beds in the east yard. This one was never used because it has some damage and is rather warped, but I only needed 23 inches.
The board was too wide, though. I marked the overhang from below, but was stuck with how to cut the excess off. I wasn’t about to drag the table saw out of the sun room for just one cut, and the piece was too small to use the circular saw. I ended up getting my jigsaw and using that. The cut was a bit wonky, but it’ll do!
The next step was to paint the floor boards and half the verticals. I didn’t have a lot of room on the saw horses, so I painted the verticals on their edges, as well as their ends. I supposed the cut ends didn’t need to be painted, since they’ll be hidden once they are screwed into place, but I did them anyway.
While those were drying, I needed to figure out what to use to build the removeable insulated shelter box. Inspired by a comment, I decided to see what I could salvage from the remaining pallet.
This pallet has some charring on it, and quite a bit of damage. I used the circular saw to cut along both sides of the 2×4 supports (I can’t remember what these are actually called), doing one side, then flipping the pallet to do the other side. Some of the pieces were already split, or split while being cut, but most of them stayed intact.
That worked well until the very last section. The remains of the pallet kept wanting to move and jump about, and using the circular saw was just too dangerous. I ended up using the jig saw for the last pieces.
That left me with a completely uneven stack of short boards. I wanted them to be even and equal in size, so I made use of the screw clamp on the miter saw to cut stacks of them. I could fit 7 of these pieces at the same time. The screw clamp could hold a higher stack, but any higher and the top pieces would be above the guide that the stack is pushed up against, to ensure cuts are straight.
With the first stack, after shaving off one end to make them all even, I measured what was left and decided to cut the stack to 13.5 inches. This was a length that all the pieces were long enough for.
When I started the next group, though, I found some were shorter than 13 inches!
I continued to cut stacks of 7 to 13.5 inches with the longest pieces, then did then did the last short ones at 12.5 inches. In the Instagram photo, the two stacks in the foreground are 13.5 inches, and the one stack at the far end are the 12.5 inch pieces.
Some of these will not be useable, but that can be sorted out later. At this point, my thought is to make the box, then add insulation around the outside. That can be tacked into place with just enough pieces of lath to make sure the insulation doesn’t get scratched at. The cats like using the rigid insulation for scratching! The main thing will be to keep the box light and easy to move, while still being large enough for a cat to enjoy hiding out in it.
I haven’t quite decided how to do the entry. I could just leave one side open, but that won’t give a convalescing cat that cave-like feeling of security. So it will need to be at least be partially covered, but not so much that we see or can’t reach inside for cleaning.
I’ll work that out, later.
For now, though, I at least have the materials to get started.
It is now time to head out to do my evening rounds. The paint on the uprights should be dry enough to flip them to paint the other half. By morning, they will be dry and the uprights can be set in place, then the floor boards on the ends can be cut to fit around the verticals.
I think, before the floor boards are added permanently, I’ll see if I can added a lounging shelf or two, about half way up one or both levels. Just a little something extra. We shall see.
For now, though, it’s time to get back outside and get the other half of those verticals painted.
I’m starting to get quite low on paint, though I’m honestly surprised I still have any at all at this point!
The whole thing is coming along quite nicely, though. I’m no carpenter, but I’m happy with how things are working out.
As soon as I was done tending to sick kitties, doing my morning rounds and grabbing a quick breakfast (a piece of pie my daughter made using that winter squash we had to harvest early – breakfast of champions!), it was back to work on the isolation shelter.
The horizontal piece that will be supporting the second level floor needed to have its other side painted, plus I needed to cut the horizontal pieces and paint them, too.
Well, I didn’t quite get to start on that right away. I had to clean up a cat mess, first!
Among the things I brought to the garage, just in case I might need them, was a container full of odds and ends that the cats had knocked onto the floor over the winter. When the girls tried to clean it up in the spring, they didn’t have the chance to try and sort through everything. When I brought it to the garage, I dug out the cardboard base that had been under the wood chipper when we unboxed it – a large, flat surface with sides on it that I could use as a tray. I dumped it all into there and took a look, then set the whole thing on top of the stack of scavenged lumber I’d brought over.
Of course, I had to move it while digging for pieces I could use, and set it on top of the lath bundles above.
Then forgot it there.
Some time during the night, some critter – likely a cat – knocked it upside down.
Since I was picking them up anyhow, I brought over a bunch of repurposed sour candy containers (my husband had bought a case of them) I had intended to use for seed and sorted them as best I could. Some odd things ended up back in the cardboard “tray”, some of the screws were the same as what I was using on the isolation shelter build but, mostly, it was finishing nails of various sizes – some ridiculously tiny. I ended up filling three containers of those!
Getting them out of the dirt floor was the worst. Eventually, though, I was able to grab handfuls and just lay them on my work table. Once everything was clear of the lumber, it was much easier on the back to go through the last of them on the table!
I think it took me at least an hour, just to clean up all those nails. When I’m done building the shelter and cleaning up so we can park the truck in the garage again, I’m going to have to make sure to rake the dirt floor towards the walls, and triple check to make sure nothing got missed. The last thing we need is for a nail or screw in one of our tires!
That done, I could finally access the lumber I needed! Specifically, the two pieces of standard size 2x4s.
Unfortunately, both pieces were so dirty, I had to bring the hose over and actually scrub them clean. One of them looked like it was covered with ashes.
I first measured around the bottom half of the shelter, where the verticals will go. Those were all about 18″. I say “about”, because one side is, for some reason, slightly different, and I had to cut one piece about an eighth of an inch longer. Then the top half got measured. It was the same thing; I needed 22″ pieces, except for one, that needed to be just a tiny bit longer.
I was able to cut all the 18″ lengths, but after cutting three 22″ length, I ran out of 2×4 The remaining piece left over was way too short. I did have one piece of true-to-size 2×4 left that I could have cut a 22″ piece out of, but I didn’t want there to be a single piece with different dimensions.
So I went hunting in the barn.
I didn’t find any scrap 2×4’s, but I did find a pair of large baking trays, like the one we found in the basement and are now using under the water bowl shelter for kibble. I figured we might find a use for them, so I brought them out. Then I checked the shed near the barn. Happily, I found a single piece of 2×4 long enough that I could cut a final 22″ length. It needed to be scrubbed clean, too.
Once all the pieces were cut, I set them outside to dry in the sun.
Since painting them was out of the question until they were fully dry, I decided to drag out the leftover boards from when we build the raised bed frame covers, and start cutting floor pieces. For some reason, I had it in my mind that they were 1×6’s, but they were 1×4’s. They’ve been stored against a wall in the side of the garage my mother’s car is parked in. Normally, that would have been fine, but we’ve had such wet weather, the dirt floor got damp, even that far into the garage, so they needed to be brushed clean, too.
At least they weren’t as bad as the 2x4s I had to scrub with water!
I thought I would have to rotate my work table to fit the 12′ lengths, but it turned out I didn’t have to. I was able to move the miter saw to the far end of the table, which gave me just enough space to fit a board. Most of the floor pieces for the back of the shelter needed to be 4′ long. Once the first cut was made, space was no longer an issue.
With the first board I used, though, there was too much damage in one area, so one of the 4′ lengths couldn’t be used. I might still be able to use part of it, though, for something else.
One board needed to be cut shorter, as it will go between the frame pieces. With these being standard 1x4s, while the frame is true-to-size 2x4s, that one board has a bit of wiggle room. I set the others where they will go in the shelter, and found they were about 2″ short of the centre line.
I then had a decision to make. I could leave it as is, and have a slightly larger opening for a cat to access the second level, or I could cut another piece and have a smaller opening.
Then I remembered, I has some old 1×3 boards we found in a shed some years ago. Was one of those long enough to cut 4′ off of it?
Why yes. Yes it was!
So now the floor will extend just an inch past the centre mark.
Once those were all cut, I painted them, along with the second half of the 2×4 that will run across the centre, to support the floor boards. The floor boards only need to have their tops and ends painted, except for the two boards that will be at the ends, which needed to have one of their edges painted, too.
At that point, since the verticals were still drying, I was pretty much done for the day – but I was then left with a conundrum.
I was expecting to use triangle blocks to attach the vertical pieces, but I would need 32 of those. I had a few from earlier cuts I’d set aside, and cut as many as I could out of some of the other scrap ends I had left. I ended up with 16 triangle blocks in the true-to-size 2×4 scraps, and only 4 in the regular 2×4 scraps. The vertical pieces are all regular 2×4, so if I used those 16 pieces, they’d all be wider than the pieces I was using them to join.
Plus, I’d have to cut gaps in floor board pieces to fit around the verticals. If I were to use the triangle blocks, I’d have to cut much larger gaps, and I am not about to try and go all journeyman on things, to cut them to fit over the angles on the blocks.
There was an alternative, though.
Inside I went, did some searching, then made a call to the local hardware store, for a pocket hole jig.
Then had one small kit in stock! Plus, it was only about $20, so quite affordable.
I asked them to set it aside for me, then headed into town.
Once I had the kit, I just had to use it right away!
I did a few test drills on some scrap wood, then drilled pocket holes on all the vertical pieces. They’ll be joined from the narrow sides.
Tomorrow, they’ll be painted, including inside the pocket holes.
That done, I checked on the boards painted earlier. They were pretty much dry!
So I set the horizontal piece that will support the floor in place at the centre marks. Unfortunately, it turned out to have just the slightest twist to the board, but not enough for it to be a problem. It’s still a nice, tight fit, so I didn’t need to add wood glue, or even anything to hold it until I could screw it in place.
I then laid the floor boards on top. They won’t be permanently attached for a while yet, but I’ll be able to measure things and see how many boards will be needed to cover one side of the remaining space.
While working on all this, I decided to make some major changes to the inside of the shelter.
My original plan was to have an insulated shelter box, with an access door, on one side of the back half, while the other side, with an access door, would have a litter box. The front would be open screen, except for the front door, which would swing down to form a ramp when open.
Then I decided to make a separate insulated box that can be taken in and out of the shelter for cleaning. That way, it could be smaller and more cozy.
The top half was going to be open, with spaces for cat beds, food and water bowls and whatever. It would also have an access door to reach the food and water bowls.
Altogether, that would have made for three access doors on the bottom level, and one for the top level.
As I was setting the floor boards and seeing how things fit, it occurred to me.
There’s really no specific reason to have the shelter box on the bottom, other than I happened to draw it that way.
Building all this on the bottom level would be rather more difficult than on the top level.
Instead, the bottom level can be screened in on all sides, except for the door/ramp. The litter box can still be kept in the bottom level. Any spilled litter can just be swept through the gaps in the pallet base. If I want, I can still add a shelf or two between some of the vertical supports for a cat to lie on, but nothing that would need more than reaching with a brush to sweep off through the doorway.
The top level can have the solid back wall, plus an access panels on each side. One to take the shelter box in and out. We can even make two of them. One, an insulated winter one, and the other a more airy summer one. A second access panel would be to reach the food and water bowls. I’m still trying to work out how to make these as sliding doors, rather than swinging doors. I still don’t know what I have available to make the doors out of.
I wonder if we have some small pieces of half inch plywood hiding in one of the sheds somewhere? I’ve gone through them so often, looking for specific things, I would not necessarily have noticed other things.
All that, and I’m still not 100% decided on how to do the roof of this. Ideally, it would be hinged for access, too.
That can wait, though. Gotta do the interior stuff, first!
In the end, I had to force myself to stop and leave painting the verticals for tomorrow. I’d been out there for most of the day and was getting really tired and hungry, but I wanted to keep on going! I want to get this thing ready as quickly as possible.
Oh, that reminds me. While at the hardware store, I looked at their supply of hardware cloth (welded wire mesh). They only had quarter inch size. I am looking for half inch. That will be the one thing we have no choice but to buy, as there is nothing suitable that we can scavenge here. I think I do have a small amount left in the sun room, but not enough for the entire shelter, that’s for sure. We probably won’t have a budget for until the end of the month. Still, that’s one of the last things that will need to be done, so that’s okay.
I’m rather pleased with today’s progress – and with my new “toy”!
I’m not going to go into too much about the assembly now; I’ve decided I’ll be making a voice-over video of the process when it’s done, so I can go into more detail. For now, here’s the short form.
The first thing I did was mark the centers of all the cut lengths on all sides. I even remembered to bring my carpenter’s triangle this time – and I got a lot of use out of it, today!
The front and back panels, which will be 4′ square, got assembled first. These used the true-to-size 2x4s for the outside, with a single regular 2×4 across the middle.
Of course, that didn’t turn out as easy as expected.
The regular size 2x4s turned out to be a fraction of an inch too long. With the first frame, I ended up recutting it too short, but was able to use the piece I’d cut off, sanded down until it fit, to fill the gap. With the second piece, I used the miter saw’s blade to basically shave off a bit at a time until it fit, so I didn’t have to fill a gap again!
Once the front and back panels were done, I used the side pieces and the centre marks to work out where to attach the triangle blocks. Once those were attached to the front and back panels, the panels were attached to the pallet, with the cross pieces to make sure they were spaced properly.
Once the first panel was attached flush with one edge of the pallet, that officially became the front of the shelter. The bottom cross pieces were set in place along the short sides of the pallet – making sure all the corners were at 90° – before the back piece could be attached, then the side pieces were attached to the pallet as well.
The top cross pieces were then added, which also set the front and back panels correctly, and finally the middle cross pieces were added.
Once it was all together, I rolled the whole thing out of the garage and through the grass. The wheels handled the grass just fine, and it was quite easy to move around! One of the last things I’ll do is add some handles to use to move it around but, for now, I can just grab the frame.
None of the joins are prefect, of course. In fact, some of them are downright messy. But, the corners are square and the whole thing is extremely solid and stable, and that’s what’s important!
Once that was done, I was able to use the funky calipers my daughters got me for Christmas a few years ago to measure the distance inside the frame, at the centre mark. A 2×4 was cut, checked and double checked for it, then got half painted. Since I had the paint out anyhow, I covered a few spots on the frame that needed touching up.
This cross piece will support the floor. The floor in the back half will be from one side to the other, while the front half will be from one side to the middle, leaving an open space for any isolated cat to access the upper level.
That was as much as I could get done today. Tomorrow, the other half of the cross piece will be painted. Until that’s dry, I won’t be able to measure and cut pieces for the floor, but the bottom half of the back panel will be walled in, so I should be able to start measuring, cutting and painting boards for that, as well.
The boards I have that are left over from another project are 12′ long, though. I’m going to have to rotate the table I have the miter saw on, to have the space to work with them!
As I’m doing all this, I’m always turning things around in my mind about what should be, or can be, done on the inside before the whole thing gets the welded wire mesh added, since none of it can be done once the mesh is in place. I find myself thinking of adding something across the front or side to hold food and water bowls, slightly elevated and secured somehow, so they don’t end up knocked about. If I do that, I might change things up so that the front door, which will be made to swing down and become a ramp when left open, is in front of where the litter box will be, instead of in front of where the sleep cubby will be.
I’ll think more on that, as the floor boards are added, as well as the vertical pieces that will need to be added to support the access doors and panels. I also want to include things like a scratching post and other spaces for cats to lie on.
I wonder if we have any scrap carpet somewhere that can be used for this? I know we have a roll of carpet in the barn, but it’s been sitting there for probably at least 10 years, of not longer, and I doubt it would be useable. There might be something in the storage shack, but it would be hard to find anything under all of my parents’ belongings.
Still, it might be worth a look!
If we have cats that have to be in this thing for possibly weeks at a time, I want it to at least be fun and interesting for them!
As I posted earlier, in the wee hours of the morning, my daughters and I had done out last night to see the Perseids meteor shower. My daughters had read that the peak viewing period would be around 3am. We even brought out the tripod so I could set my phone up and take photos.
Well, we didn’t see very many meteors, but we did get a light show!
My older daughter’s the one who actually took most of the photos. I the fourth one of the slideshow, at the top near the middle, you can just see that a meteor was caught in the shot.
It was an awesome night, too. Lovely and cool – just the perfect temperature! – with nice clear skies for viewing the stars.
The meteor shower is supposed to be visible tonight, too. I checked The Farmer’s Almanac, and it says that the peak viewing period should be around midnight, not 3am, but I guess that depends on what time zone you’re in. Either way, we plan to be out again tonight, at around midnight.
After we were done, my older daughter got back to work and my younger daughter ended up staying up as well. They have been arranging their sleep schedules so that and one of them is up and available, any time of day, and my younger daughter has the “day shift”. 😁 She was a sweetheart and took are of feeding the outside cats this morning – and washing the one kitten’s infected eyes – for me, so I could get a bit of extra sleep.
Once I got outside, my priority was to water the garden before it got too hot, then did a bit of harvesting. After I had breakfast… er… lunch, I made a trip to the post office, making sure to leave the gate open when I got back. I got some more painting done on the pre-cut frame pieces for the cat isolation shelter – three sides are now done. I then spent the next couple of hours, mowing. The driveway hasn’t been done in so long, I had to go over it twice to get it cut to the length I wanted.
I’m going to have lots of “hay” to collect! The grass is so thick in places, even this mower, set as high as it could go, was struggling!
Gosh, it all looks so much better!
Now that that’s done, I’ll get back to cutting more lengths of wood for the isolation shelter frame, so they can be painted before construction, too.
As I think about the construction, I am debating how to make the access doors. There’s going to be a main door that will swing down and convert into a ramp when it’s open. When not in use as an isolation shelter, we plan to leave it open and available for the cats to become familiar with it, and a ramp would make it easier for kittens to get in and out.
Since I don’t have salvaged windows that slide open to incorporate into the design, I am thinking of making sliding doors instead of doors that swing out. I think that will give more security for if we have a particularly feral cat inside. We’d be able to reach in and out without having to open a sliding door all the way. With a swing door, the door itself would be in the way if we wanted to open it partially. A sliding door would also be handy for releasing a cat from a trap, as it could be opened just enough to fit the end of the trap.
I’ll have to think about that, some more. Whatever I decide for the access points, the rest of the structure doesn’t need to change, so I can literally wait until the shelter frame and interior is completely assembled, then see what works best.
I’m having fun with this build! It’s going to be the most complicated thing I’ve built and, with using salvaged materials or whatever we can afford to get, the plans have to be pretty loosey goosey!
I’m so glad to see this! I was ready to take them off, later today, and send them back.
They are si bright. I think I will change to one of the other modes that are not quite so blinding.
I can definitely see getting more of these for other areas, in the future. Being able to install the solar panels away from the lights makes them very useful!
In the city we lived in before moving here, there were bottle depots all over. Anything that you paid an enviro fee on at the grocery store could be brought over, and you’d get the money back.
So we were in the habit of keeping our recycling organized and kept it up.
Then we discovered there are no bottle depots here. In the years we were living in other provinces, we sort of expected they would have them by now.
Since we need to go to the landfill anyhow, and they have recycling stations, we started sorting things differently. Glass is separate. All other recycling goes together. They even have signs at the landfill bins saying not to sort the recycling!
But we just don’t do it with the aluminum. I know most of the stuff that goes for recycling is more of a problem than just using the landfill, but with metal, that’s something different.
So we’ve been keeping our aluminum separate, but not taking them to the landfill. We’ve been storing them in the garage where my mother’s car is parked.
Unfortunately, since there are so many cat food cans in there, critters get into them. We also started running out of space, and were starting to store the bags outside the back door of the garage.
We now have a scrap company that is going to come by when they are in the area. They weigh things on site, so you know exactly what you’ll get for the metal. They take all scrap metal, old appliances, batteries, etc., but aluminum is priced differently.
We don’t know when they’ll be in the area next, but the last time the guy called, it was to come by the same day, and we just weren’t ready for that – plus, I was taking my mother to a medical appointment that day.
Meanwhile, even if they did come out, not only did the critters get into the bags again, but my mother’s car can’t be moved right now – and not just because of all the cans that ended up under the front end!
So when I found out my brother was coming out today, I headed out early to open the gate for him, then my younger daughter and I got to work on the aluminum, picking up all the loose pieces and rebagging those with torn bags. As we filled new bags, or found still intact bags, they got moved to a spot outside of the garage, where they would be easy to collect.
There’s about 28 or 29 bags in there. Some of them have nothing but cat food cans in them! Some of there had stuff with labels, logos or brand colours that changed, years ago.
The garage in front of my mother’s car looks so much better now!
We did, however, find some very old cans of paint that were intended for the dump (they have an area set side just for old paint cans), but they got buried. These were cans we’d found in the basement, and some of them were leaking.
They’ve been moved into a plastic garbage can for now. The next time we go to the dump, we need to remember to grab it. The smell is so strong right now!
We got that done and I had time to grab a late breakfast. I was just finishing it when my brother and SIL arrived. It was a long, slow drive for them. The truck was heavily loaded, and they were hauling a bailer!
Some of the stuff they brought went to the barn for storage. They are planning ahead for my brother’s retirement, so they’re going to be bringing stuff here to the farm to store.
Including equipment.
Like their smaller lawn tractor.
That was brought over in case they needed to mow a spot for the baler. That’s not going to happen, though. The high area they plan to use is too overgrown.
They do have a mower attachment for a tractor that can clear it all, so they’ll be bringing a tractor and mower out next.
!!!
Oh, and the lawn tractor? I thought they were going to take it back, but nope. They left it here for use to use!
Yes, I did lawn mowing already, today! 😄
For now, the baler is stored next to the bags of aluminum. My brother and I went walking around so I could point out to him the various low areas we’ve discovered since moving here, and the few high areas that can be used to store equipment.
The grass where we went through is almost as tall as me in places!
My brother isn’t going to be haying and baling their acreage anymore, so they’ve been using the tractor mower to keep it under control; if it’s not cut, it makes growing conditions worse. That’s the situation we’re going to find when the overgrown areas are finally cleared. At ground level, the grass is going to be sparse and mostly dead.
It’s a shame we couldn’t borrow a few cows! 😁
So my day started very early, and we got lots of work done.
I’ll be heading back out again to do more painting, then get back to mowing!
We’re going to have to figure out how to fit it in the garage where we store our lawn and snow equipment. It’s getting pretty full in there, and it’s mostly stuff that needs repair!
The problem is, I’ve been up pretty much since sunrise and hadn’t gone to bed until around midnight, so I am ready for a nap! 😄
Okay, time to get back to work. Just a bit of painting, the the fun of mowing the lawn with a lovely little lawn tractor!
When I first started thinking about the plans for a smaller isolation shelter, one thing I did not think about was painting it. That’s always been something we dealt with after the build. Paint, however, is going to be needed, to protect the wood and keep it from rotting too quickly. This is especially important, considering that I’m using salvaged wood that already had damage to it.
Given that this build is going to have a lot of stuff going on on the inside, I decided it would be much easier to paint the parts and pieces before assembly, rather than trying to reach inside to do it.
In going through our leftover paint, the can that felt like it had a decent amount in it was the peacock blue used on the floating benches (benches built on tree stumps that aren’t painted, so they’ll look like they’re floating when things grow back under them) and the folding table we cobbled together. The can of red seemed to have some weight to it, plus I also found a quarter can of white that was used to make our sign for those trying to find our address that doesn’t exist on any online maps.
I know we’ll need a decent amount of paint, so why not mix them together? They are all water based exterior paints, so mixing them would work fine.
I started off by setting up the frame pieces that are already cut.
They all needed a bit of a cleaning of dust, dirt and debris, first. Once that was done, I opened the cans to see what we had.
The blue was about half full, but there wasn’t much left of the red or the white.
I had a very pleasant surprise once they were all mixed together. I really like the resulting colour! When it’s time to buy more, which I expect to need to do before the project is done, I definitely want to colour match this!
I had looked for paint rollers and trays, and I did find the roller frames and a tray, but no rollers. I know we have some. I even remember finding one still in its package. Where they ended up, I have no idea.
So, paint brush it was.
With the frame pieces, they were pushed close together so the tops could be painted all at once. The cut ends were done, and part of exposed sides of the row, but that’s it. After they were painted, I spread them out for air circulation as they dried.
I really like that colour!
Once that was done, it was time to put the wheels on the pallet.
My original plan had been to cut away part of the slats at each corner, so the wheels could be attached to the solid wood below. They were far too damaged to bother, though. These pallets were used by the roofers. While they were working, I have a fire going to burn the branches and wood that were too big for the commercial wood chipper used when we got the branch pile cleaned out, a couple of years ago. It was cold and snowing while the roofers were working, and they would sometimes go to the fire to warm themselves. When they were done, they tossed the pallets to the still-hot ashes. So what you’re seeing on the bottom of the pallet is ashes and a bit of scorching. The pieces at each long end got the most damage, so it was easier to just break them off and pull the nails. The slats were so cracked, it was easy to break them off by hand!
The ends were also a bit too damaged, so when I used the wheels to mark off where the pilot holes needed to be drilled, I butted them up against the next slats in.
Then I had to dig through our collection of wood screws to find ones suitable to attach the wheels. The ones I’d already brought to the garage were for attaching the frame pieces together, so there are a lot of really long screws, but no shorter ones. After digging around in the sun room, among the boxes of screws that cats hadn’t managed to spill all over the floor, yet, I found some that would do. Thanks to the new cordless drill and driver set, and the set of driver tips my husband got me for Mother’s Day, attaching the wheels took almost no time at all!
My husband is such a sweetheart.
Once the wheels were on, it was time to flip the pallet over and test them out.
Oh, they are going to make moving this thing SO easy!! They might have some trouble going through the grass in the yard, but that should be manageable. I love that they all rotate 360°, too.
That done, the top got brushed clean, and it was time to paint!
Have I mentioned, I love that colour?
I plan to do just one coat of paint, and will not be painting the underside. I did make sure all the edges were well coated, though.
Once that was done, I went and took garden tour video, then checked on the frame pieces. They were still too wet to flip, so the other sides will be done tomorrow, then the edges. In between painting, I’ll be measuring out and cutting other pieces, so by the time those are painted and dry on all sides, I’ll have more cut pieces ready to paint.
So that is progress on the cat isolation shelter, so far.
Next, I need to work on the garden tour video.
Oh, I’ve just been getting messages from my brother. They’ll be coming over tomorrow, early in the morning, to bring stuff to store in the barn. They do know we haven’t been able to mow a path to the barn, but I hadn’t told him yet that we have no working lawn mowers at all. He knows, now. They won’t be staying long or making much of a visit. My SIL is allergic to cats, so they can’t come into the house, really.
I’m looking forward to seeing them! That will be a great start to the day!
Yesterday, the 2 pack of solar lights I ordered came in. I chose these ones specifically because the solar panels and the lights are separate. This way, I could put the lights inside the kibble and water bowl shelters, where it’s consistently in shade, and the solar panels could be installed on the roofs.
In the package were the two solar lights, with motion sensors. On the back (under the cable of the one that’s turned over, in the photo) is a mode button that is also an on/off switch.
Each solar panel comes with a generous length of cable. The lights and the panels use the same type of mount, held in place with a knob that also allows for the angles to be adjusted. They also came with the teeniest remote controls!
Before setting them up, I went through the instructions, which starts be saying to test them first. The solar panels are connected, but placed face down, then the mode button is pressed to turn on the lights and go through the modes. The batteries in the lights already had a charge in them, so they work without being connected, too.
After testing them, I set the first light up under the roof of the kibble house, while the second light was set up on the side of the water bowl house (which is reversed in the Instagram slideshow).
After mounting the solar panel on the corner of the kibble house roof, I ran the cable through the frame and wound it around one of the horizontal supports, to the light. There was still plenty of cable, which was bunched up and held with the twist tie they came with, and it could be tucked on top of a beam under the roof. No hangy bits for critters to catch on!
With the water bowl house, the cable runs along the side, held up in one spot by a hanger I found. There’s already a eye-hook that is supporting a power cord for the water bowl, so the solar panel cable is help up in two places, before the excessed was wrapped up.
The solar panels are shaded in the photo, but the roofs of the shelters all get full sun for most of the day, so that’s not an issue.
What is an issue is, they don’t work.
The lights work hust fine, on their own, but as soon as a solar panel is attached, they turn off. Like a switch. Cable on, light is off. Cable off, light turns on.
I have no idea why.
For now, I’ve left them as they are. I looked up where we got them from, but can’t find contact information (I could easily just be missing it). I ended up leaving a comment in the review section. I’ll see what happens from there. We have 30 days to return for a refund.
I would much rather have working lights, though!
For now, I’ll wait and see what sort of response I get. Otherwise, bye bye lights! We’ll try again, from a different supplier
I like the lights. They are doing the job! Right up until the solar panels are hooked up. They worked when I tested them, so I have no idea what went wrong!
Today I needed to hit a Walmart and a Canadian Tire, and took advantage of a city trip to pick up a few more stock up items, while I was there.
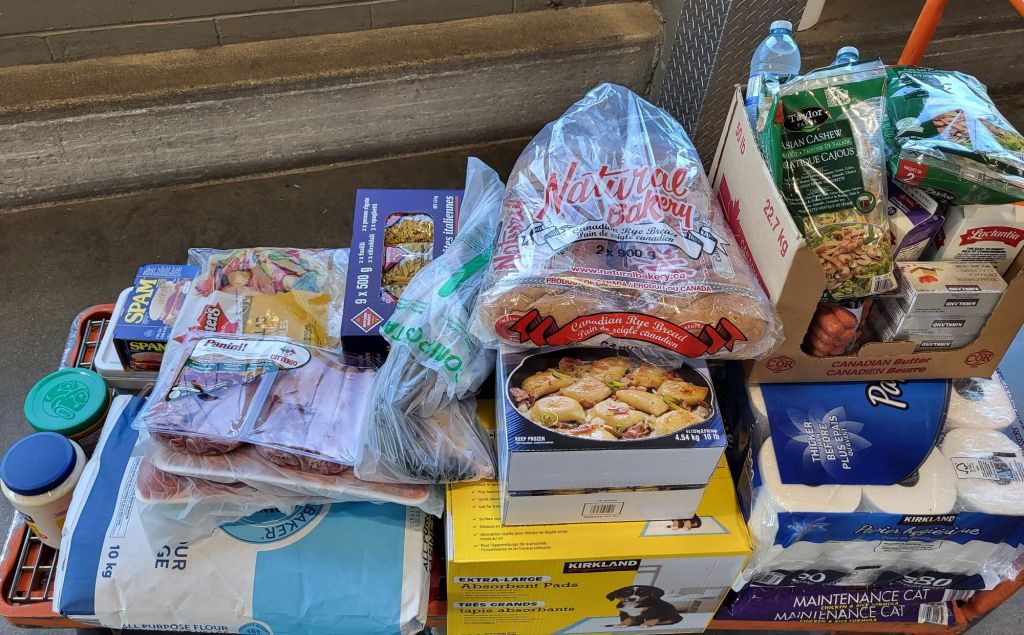
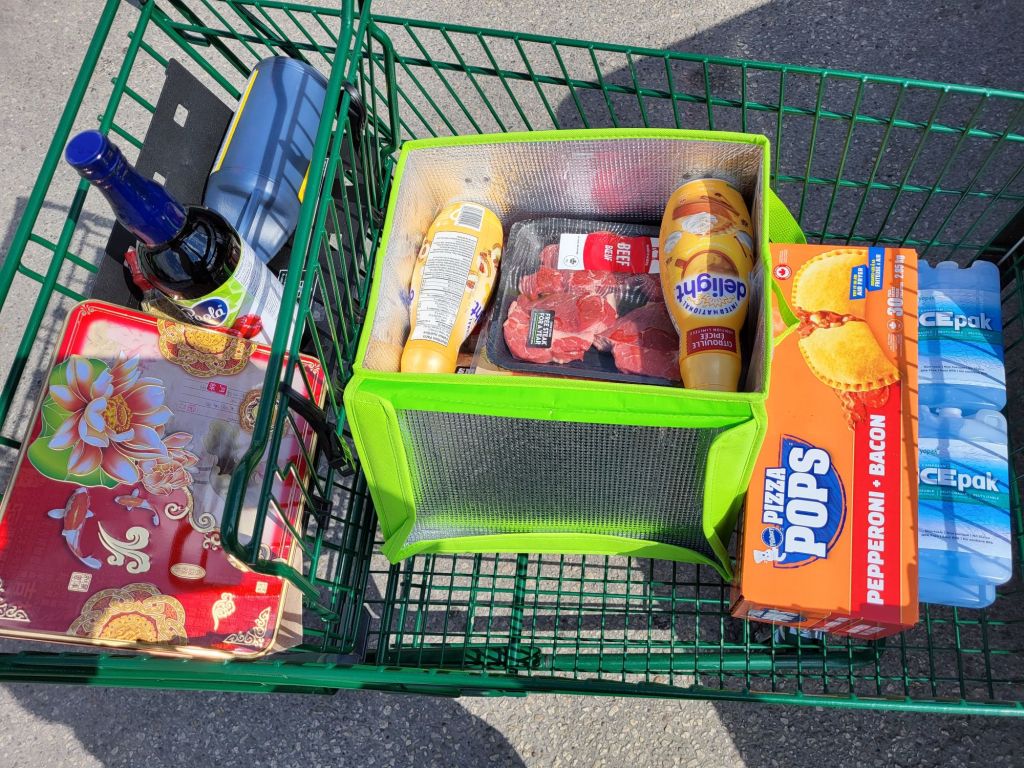
This is what $144.48 looks like.
*sigh*
And I was picking up the cheap stuff, for the most part.
For my husband, I got some Coke Zero and distilled water for his CPAP humidifier. The girls were out of soy milk, but so was Walmart. I got two 2L cartons of lactose free milk instead, which was on a two-for sale, plus a 1L carton for my own use.
Wait a minute…
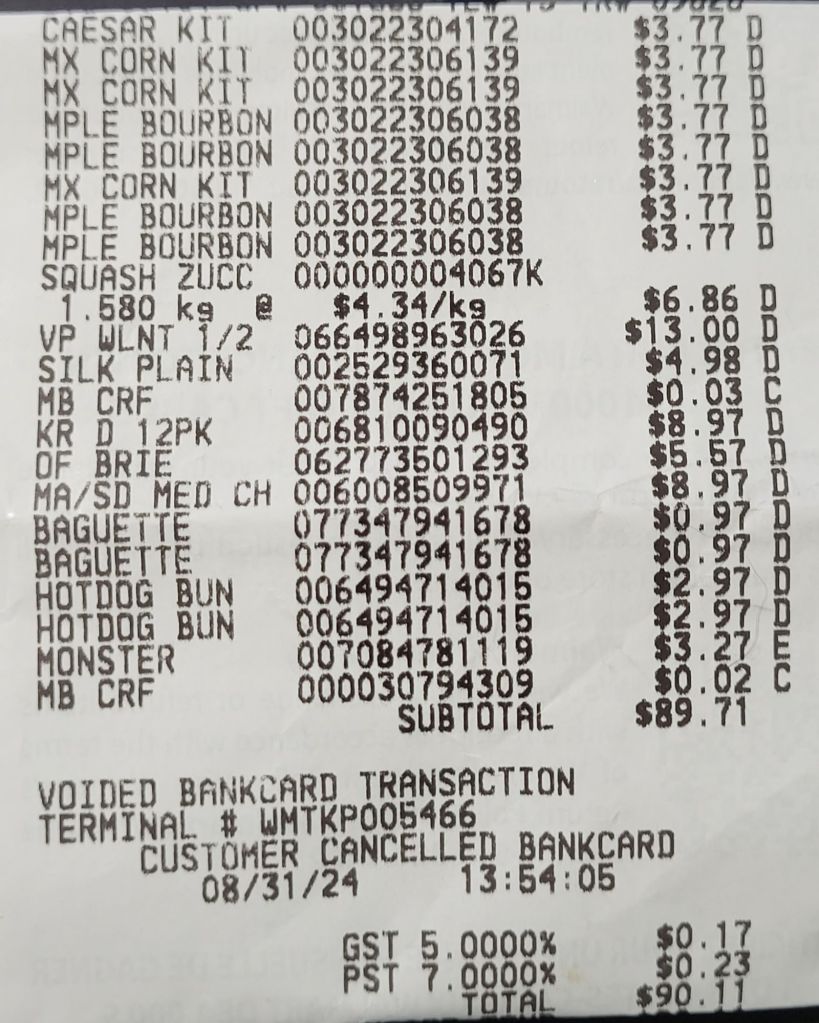
I got charged for three 2L of lactose free milk. I don’t see a 1L of regular milk in there.
Crud. I wish I’d noticed that before I drove all the way home! Not worth the cost of gas to go back and fix it.
The hot dog wieners were also on a two-for sale, but I got only one package of hot dog buns. My husband and I prefer to have them cut up and added to other foods.
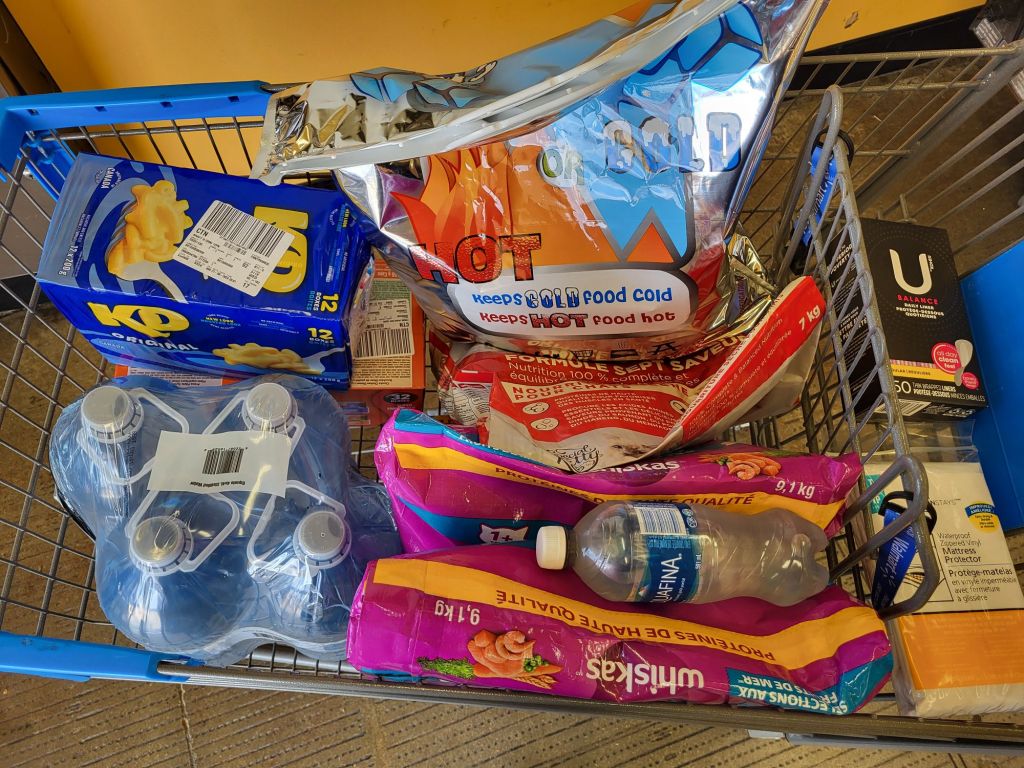
I got two bags of kibble; a 9kg of Whiskas and a 7kg of the Walmart brand. I also got some wood glue for the isolation shelter that’s being worked on right now.
I spotted an Annie’s pasta and cheese sauce display, and they were 97¢ a box, so I got 4 of two different flavours for the pantry, plus a couple of loaves of rye bread for the freezer. I picked up a bottle of lemon scented cleaner – the girls have noticed that when they used it to clean up the cat messes, the cats seem to avoid the area for a while, and we’re thinking they don’t like the lemon scent. We’ve tried using citrus scent to repel the cats from places, but it never worked. I guess generic “citrus” isn’t as useful as lemon. They certainly don’t object to orange scent at all.
Last of all, I picked up a bottle of magnesium for myself.
That’s it. That’s all I got for $144 and change.
Next I crossed the street and went to the Canadian Tire. One of the things I was after there was a new power bar to replace one I have in my room. They had a clearance sale on a couple of bars that have the plugins turned sideways, with one type having USB ports. With the power bar I have now, I have two things plugged in that take up four spots. With the new bar’s design and the USB ports, I freed up three plug ins. I got a second non-household one that has the plug ins spaced out in two rows, and a built in cord storage, for the same clearance price.
I also found some inexpensive outdoor wheels for the isolation shelter’s pallet base. They rotate 360°, so that will make it easier to move the finished shelter. I didn’t find the right size hose clamps I was after, though. They had one size bigger and one size smaller, but not the size I needed! There wasn’t even a space on the shelf for them.
I just looked them up at a local hardware store. They have the size I need – and in stock!
Looks like I’ll be making a side trip after I go to the dump!
Which will be opening soon, so time to get things together and start heading out again.
I’ll be honest, here. We’re really just winging it on this build, even though it’s going to be quite a bit more complex than the kibble house and water bowl shelters. It all comes done so what materials we can scavenge.
The original plan was for a 4′ x 4′ cube, divided up inside to have an enclosed shelter that will be insulated, a not quite enclosed shelter for a litter pan, and two levels with space for food and water bowls, and just hanging out.
We had a couple of pallets that were left by the roofers. My original intention was to dismantle them and use the wood mostly for the floor.
That did NOT work out!
The pallets are nailed together mechanically. The nail heads are deeply embedded in the wood – and the wood is quite thin. When I tried to pry them off, the wood started splitting.
Time for plan B!
The pallet will be the floor, more or less as is.
I measured the pallet’s length and width at the boards inside, and each side was slightly different. I brought over the circular saw and cut the ends flush to the outside boards. The most damaged side will be the bottom of the floor.
I could still work with 4′ lengths on two walls, and the other two will be 40″, to fit on the pallet. The shelter will still be 4′ tall.
For the main parts of the frame, I’m using the true-to-size salvaged 2 x 4 lumber in the barn. There’s hardly any of that left, but there’s enough for this project. It feels like a shame to “waste” it on something like this. The wood is old and the ends have started to rot a bit, but it’s really solid and heavy wood. It is, however, what we have, so that’s what we’ll use. Other parts of the build will have more modern, standard 2×4’s, which are not true to size, and are quite a bit lighter. We have even less of that, so we’ll have to plan accordingly.
For now, I’ve cut lengths to make the front and back panels, which will be 4′ square. The frame will be attached directly to the pallet once put together, but that won’t happen quite yet. The dirt floor of the garage is pretty level, but not flat, mostly due to shallow tire ruts. Right now, the pallet can’t lie flat on the ground. I’m heading into the nearer city tomorrow, and will be looking at what wheels are available, and affordable.
Once the pallet has its wheels, it will be able to straddle the uneven parts of the floor, and be sturdier to work on.
Once the “box” is framed out, the interior will be worked on, including things like extra surfaces for cats to lie on, something they can scratch at, and so on. Once that’s all figured out, access panels or hinged doors will be made so that the litter box, food bowls and enclosed shelter can be reached from the outside. For the enclosed shelter, what I will probably do is make an insulated box that can be removed completely, if necessary.
I haven’t fully decided on how to do the roof. It will most likely be a low slope metal roof. I just haven’t decided how I want to make the slope while not having any gaps.
Last of all, the welded wire hardware cloth will be added to those walls that are not enclosed with wood. We might not be able to pick that up until the end of the month, though. Unless we find something on hand that we can use.
Anyhow. That’s progress so far. Reworking the plans and making the first cuts for the frame.