Change of plans, and a new crib

So it looks like my plans to plant the potatoes today is not going to happen. We were expecting rain, but it has turned out to be colder than forecast. While the rain has been light, it has been pretty constant. Which is fine. It just means we have to spend less time soaking the area we’ll be planting the potatoes in, tomorrow.

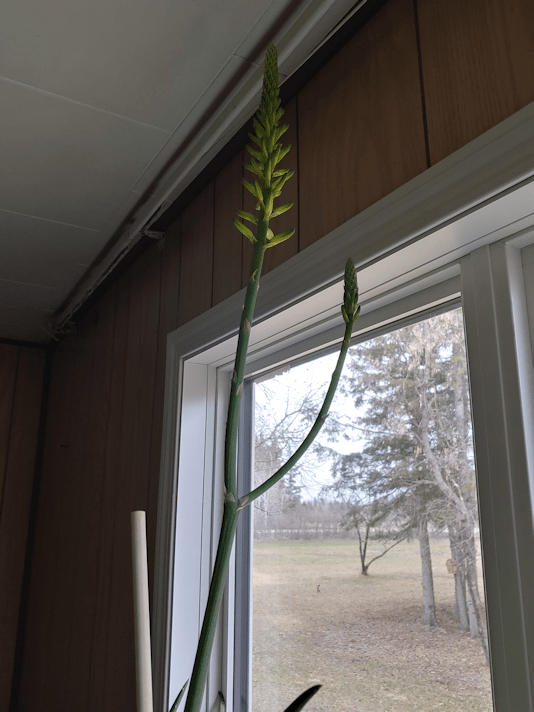
It might be cold and dreary outside, but Sarlac, the aloe, is enjoying things just fine. That flower spike is just inches from the ceiling!

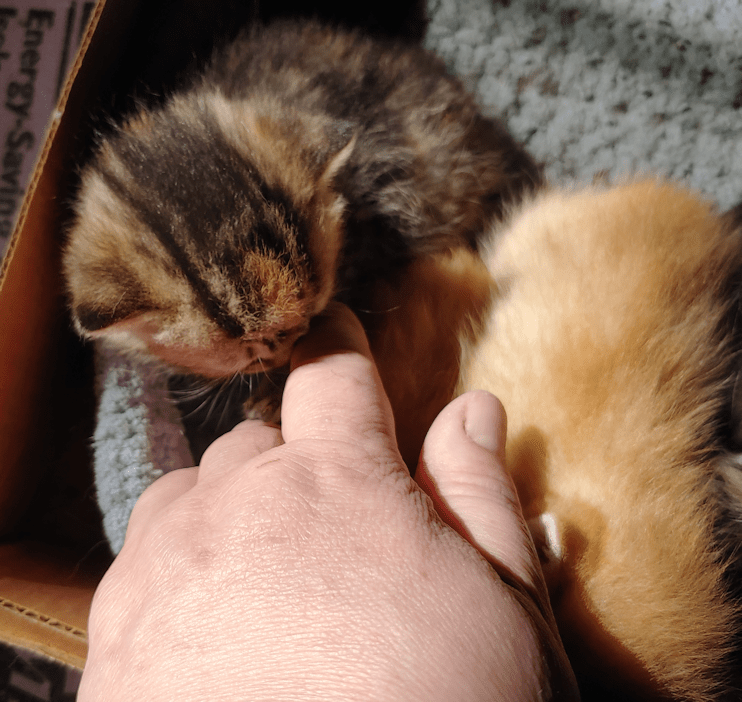
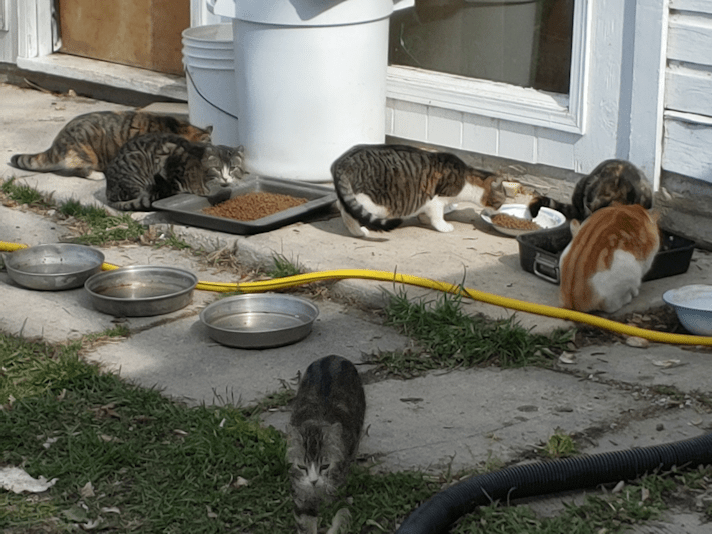
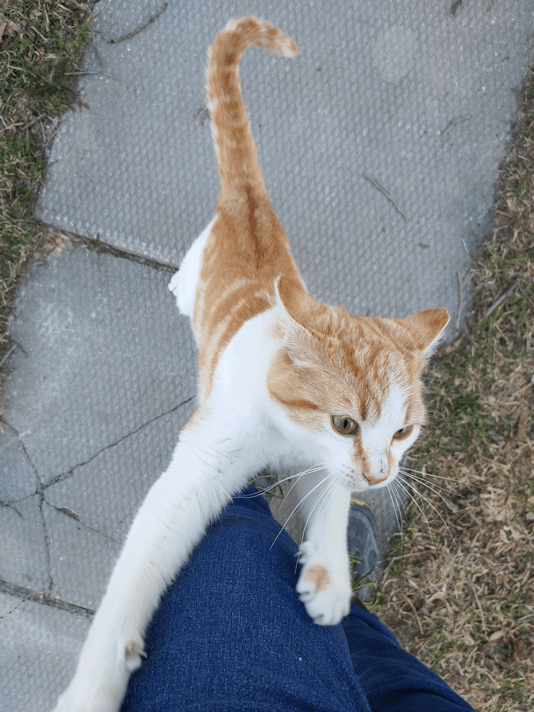
Of course, one of the first things in my morning routine is to check on the kitties. We’ve been talking about how we wanted to change things up for them, as they get bigger and more active.

In the top right corner of the photo, you can see the crate we’ve been using to put their little nesting box in.

You can also see the dampness, under it.

With the rain today, and more forecast here and there over the next week, this will only get worse. While the crate keeps the kitten’s box from being directly on it, the increased humidity is making the basement feel noticeably colder. We do have a heater down there, but it’s not something that should be left on, unattended, for long.

We had already considered using one of the large boxes my husband’s new computer came in, to make a sort of “play pen” for the kittens. On seeing how much larger and wetter the damp spot is, I started thinking of alternatives. We had intended to place the box itself over a sheet of rigid insulation, which would have prevented any sort of damp puddle from forming at all, in the first place. However, the larger space would be harder to stay warm. The current little nest is well wrapped and small enough that Beep Beep’s, and their body heat alone could keep it nice and snug. Not so, in a larger space.

So…

They are now upstairs. Just a couple of feet from me, as I type this!

We’ve got two boxes set up, one inside the other, so half the space has a “roof” over it. There’s lots of padding on the bottom to keep them soft and warm. Beep Beep wasn’t sure what to make of things when we walked off with all her babies, but once we showed her the new set up, she settled right in.

The babies were very quick to explore their new space, which is about triple the size of what they had before. Then they went right back into a pile on their familiar little bedding. :-D

So far, the other cats have been curious about the new set up, but easily discouraged away, so they won’t jump in. With the box set up between my desk and my crafting table, I can keep a close eye on them.

This means we can start leaving the new part basement door open all the time, and slowly start moving all the litter boxes, food and water bowls, downstairs. There’s plenty of space to store the cat food and litter, too.

I’m looking forward to not having cat litter and kibble tracking all over the house… :-D

Since working in the garden was out, I went into town to run some errands. Since I was in the area, I stopped at the garage to see if they’d been able to look at my mother’s car.

Yes, they had.

Yes, it does need a new differential.

*sigh*

The owner was in the process of trying to track down a second hand one for me. Until then, though, I booked an oil change for Saturday, then asked about tires for our van. Being May, we should be able to safely rotate out of our winter tires by now. ;-) I have our summer tires bagged and waiting, but I would kinda like to get new ones, so I asked for a price on that.

It turned out to be quite out of budget, so when I bring the van in for the oil change, I’ll also bring our summer tires, and get those switched over as well.

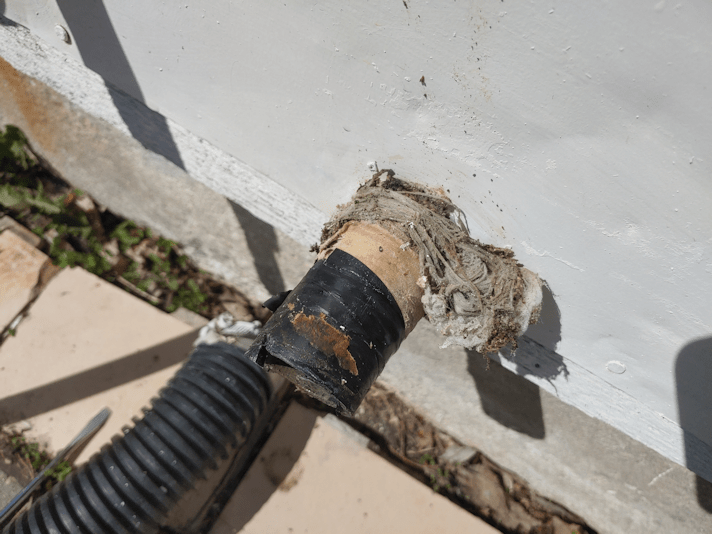
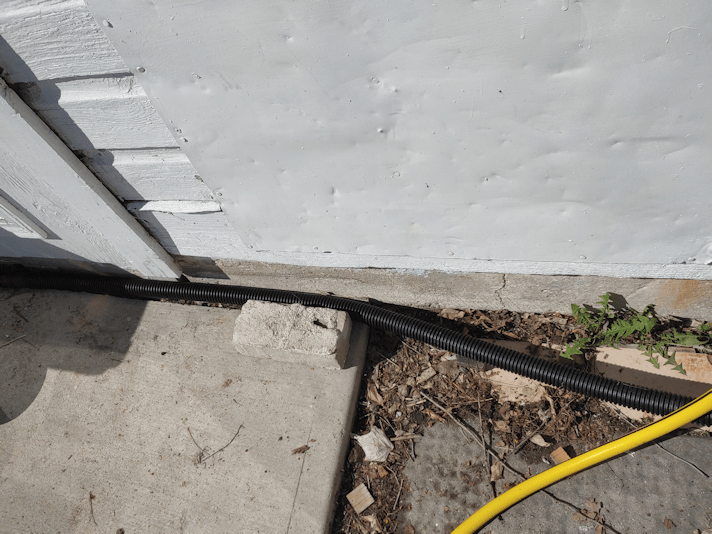
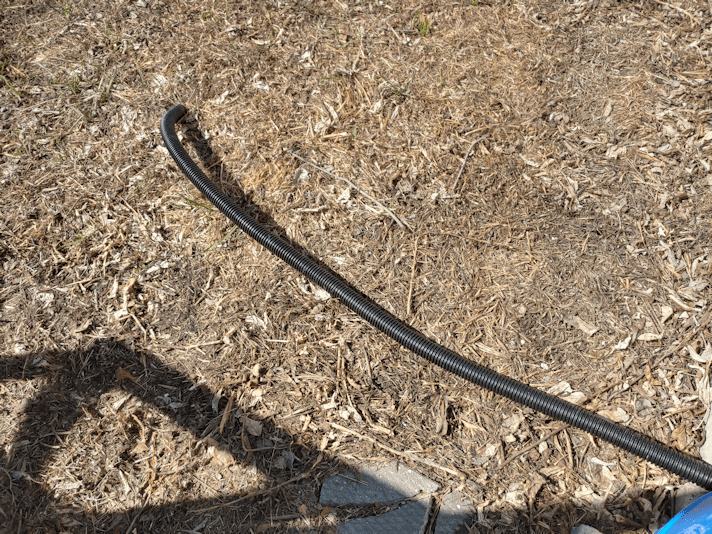
One of my other stops was at the hardware store. I was hoping to find replacement hinge kits for the gates in the chain link fence. I was showing a photo to one of the staff when the guy who’d helped me get what I needed to fix our sump pump hose walked by with another customer, and paused to ask how the fix went, and I was happy to tell him what a success it was. He then took a quick look at the photo I was showing the other staff member, who was new enough to not know they don’t carry anything for fences and gate, and was able to recommend other places in town I should be able to find them, then continued on with the customer he had been helping.

With that question answered, I went into the paint section. We have decided to go ahead and paint or stain the old picnic table. It’s not in the best shape, but we could probably get quite a few more years out of it, if we treat the wood. After talking to the lady in the paint department, I decided to go with paint, rather than a stain. My daughter and I had been talking colours, so with that conversation in mind, I chose a bright teal blue. While a quart would probably have been enough, I figure we’ll be painting other things, too, so I got a gallon. It was funny to see how excited the lady who was helping me got when she saw which colour I chose. Apparently, bright colours are not typical choices people make, but it’s something she prefers herself. She asked to see pictures of the table when it’s done! :-D

I got a business card for one of the managers, and have already emailed her to tell her how great the staff has been. I know stores get complaints all the time so, if I can, I try to make sure to give credit and commendations, whenever I can!

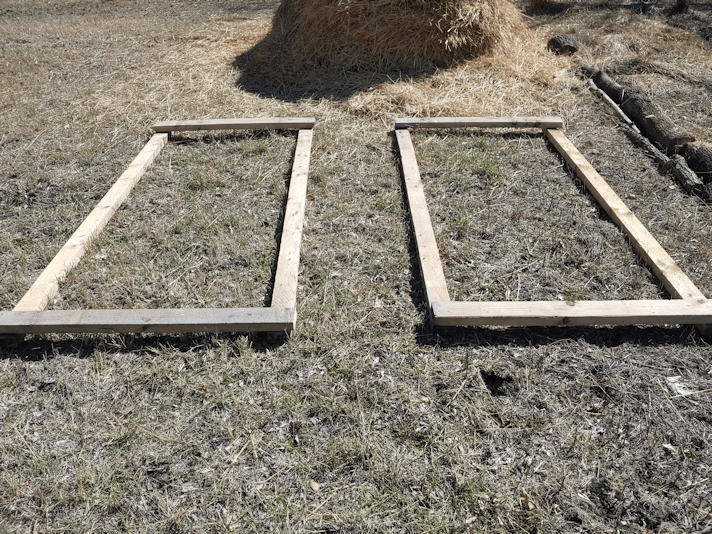
While there, I was also able to pick up some peat and composted manure. I want to put some of that down first, then put the potatoes on it, add a thick layer of straw, then add some peat on top, more to keep the straw weighted down, but also help retain moisture. None of the videos I’ve seen about this way of growing potatoes has suggest this, but we have definitely noticed that wind can be an issue and figured, it at least couldn’t hurt!

Hopefully, I will be able to get this done tomorrow. We now have rain forecast for tomorrow afternoon, but it’s also expected to be much warmer – and staying warm – than today, so the potatoes should be fine.

Over the next day or two, I hope to get those carrots and parsley seeds in, too.

Weather willing! :-)

The Re-Farmer

Recommended: XiaoXi’s Culinary Idyll

Welcome to my “Recommended” series of posts. These will be weekly – for now – posts about resources and sites I have found over the past while that I found so excellent, I want to share them with you, my dear readers. 🙂 Whether or not I continue to post these, and how often they are posted, will depend on feedback. Please feel free to comment below, and if you have a favorite resource of your own, do share, and I will review them for possible future posts.

I hope you find these recommendations as useful and enjoyable as I have!

My very first Recommended post was for the YouTube channel Liziqi. I love the video format that makes it accessible to all, including those who don’t understand any Chinese language. Since discovering this channel, I’ve found a couple others that I now follow that are similar, yet very different. This is one of them. XiaoXi’s Culinary Idyll, which focuses on both cooking and hand crafts.

I didn’t know that, when I stumbled on the first video I saw: How to make delicious braised chicken out of stone.

Out of stone? That certainly piqued my curiosity when it showed up in my feed, recommended by YouTube.

As I started watching the video, I was perplexed. Where is the chicken? What is he going to do with that rock he dragged out of a riverbed?

By the time I got to the cooking part of the video, I was completely hooked.

How do you braise a chicken out of stone?

First, find a rock and carve it into an exquisite cooking pot.

This is a very new channel, less than a year old at the time of this writing. So it didn’t take long for me to go through all of the videos.

The first videos started off with a very different feel. At first, it was straight up cooking videos.

Other videos featured a lot more people and activities.

Then the crafting portion came into the picture – with a sense of humor!

Are you having trouble making traditional noodles by hand? That’s okay – use a machine!

First, cut down a tree…

As I worked my way through the videos, from oldest to newest, I got the sense that the makers of these were kind of feeling their way around on the focus. Where the Liziqi videos started out with just her, filming herself until she could finally hire a couple of people to do the recording for her, these videos appear to have been made with a professional film team from the start.

I’m okay with that.

The format they seem to be settling on is basically just the one guy who first makes a thing, then somehow uses that thing to prepare a food. Both of which are gorgeous.

Then you get to watch him eat. :-D

I readily admit, every time I see the guy working in his shop, I suffer from an extreme bout of tool envy.

You’ll see him doing everything from forging a frying pan (one of the few videos where he cooks food, but you don’t see it being eaten at the end), to weaving various useful objects (I will never look at a bamboo steamer the same way again!), to making things with wood and resin and…

…succulents?

While there is a lot of focus on traditional crafts, there is definitely a modern, even high tech, side to some of these videos.

While these are hardly “how to” videos, they are still quite inspiring – whether you’re looking for ideas on things to make, or ideas for cooking traditional Chinese food!

Or going fishing with a woven, waterproof hat you just made.

Even if you have no interest making the things or cooking the food, the videos themselves are beautiful to watch, and seeing his exquisite attention to detail is a pleasure in itself.

I highly recommend working your way through all of the videos.

You might not want to do it while hungry, though. ;-)

I know what I’m doing tomorrow!

Today I took my husband into the city for a medical appointment, but of course I had to check the kitties, first!

They are getting more and more active! We’re going to have to put them in something deeper, soon, so they don’t start crawling around the basement. At their size, there are too many things they can get into, that we couldn’t be able to get them out again! :-D

My husband and I left early enough to hit the post office, first, and ended up swinging by home again to drop things off. My husband had finally got his retroactive disability tax credit, and he used some of it to get a much needed new computer. Not something we wanted sitting in the van while we were in the city!

His appointment went well, though the drive was quite painful. It was for some tests in Nuclear Medicine, in the same hospital as the cardiac clinic. I was not allowed to come in with him, though. We arrived early, as is our habit, and I expected to have lots of time to walk around on a beautiful day, playing Pokemon Go. They must have taken him in early, because he was done much faster than I expected. Which is a nice change, even if the reasons for it are not to nice. :-/

His computer was not the only thing to arrive in the mail. I got a parcel I was expecting to come in tomorrow.

My Yukon Gem potatoes have arrived!

Which means I need to get them planted right away. Looking at the forecasts, tonight we’re supposed to reach 0C (32F), and that’s the coldest it’ll get overnight from now on.

I had been thinking about where and how we would plant the potatoes. With our rock hard soil in most places, I decided to go with a completely new and different method from what I’m used to. Here are some videos about what I am going to try.

The only thing is, I don’t have hay, nor was any available. I just have straw. I hope it will do as a substitute. I’ve seen other articles and videos that used straw, so I think it should.

With this in mind, I made use of the frames from the goat catching pen we’d made. The long sides are roughly 8 ft x 4 ft. A perfect garden bed size. So I am using them to mark out where I want to put the potatoes.

I will remove them, after I’ve finished covering the seed potatoes. For the 6 pounds of potatoes I have, this should be enough. I soaked the areas thoroughly, and will soak them again tomorrow before we start again. We are expecting some rain tomorrow (I hope!), but it won’t be much. By Sunday, we are supposed to hit 21C!! (70F) so I want to make sure it’s all thoroughly covered and watered before the heat hits.

We are also going to have to watch out for the Potato Beetle!

He kept us company while we started on the future potato beds.

I had considered setting them up where we’d covered with straw last year, as I am sure we won’t be having as many squash to transplant as I had hoped. There’s still a possibility that more seedlings will come up before the end of the month, so I figured I may as well just go off to one side, instead.

How well this works will help us decide what to do as we increase the amounts and varieties of potatoes we grow in the future. If we can get a good crop, without having to plow or till this hard, rocky ground, that would be really awesome!

The Re-Farmer

Sump pump hose fix

Well, today ended up a bit going off plan, but we still got a couple of things off the to-do list for outside.

The main one being, the broken flexible hose for the sump pump has been replaced!

This is what the connection looked like, before I started.

After talking to my brother, I was confident there wouldn’t be any weird surprises when I took off the flexible hose.

The first order of business was to make sure the pump wouldn’t go off while I was working on it. The reservoir was pretty full, so I lifted the float to trigger the pump and let it drain before unplugging the pump.

My brother had suggested I might want to push the pipe from the inside, through the opening to maybe add a bit of length on the outside. The pipe is so snug in there, though, that it wouldn’t budge. Which told me I wouldn’t need to have one of my daughters in the basement to brace it while I was attaching things on the outside, at least!

Once I took the flexible hose off, I could see that the batting or whatever that is, and the rest of the hose, was wrapped in a thick later of electric tape.

I started taking that off and found…

… something that looked… almost like fabric? Canvas??

It turned out to be hockey tape. Several layers of it.

I got all the old tape and the batting-looking-stuff off and discovered…

… the end of the pipe had a big ole crack.

I guess that’s why it was taped so thoroughly, and why a larger hose was added over it.

I wonder. If the previous hose had indeed been wrecked by someone running over it with a lawn mower, it’s possible the hose was yanked hard enough to crack the pipe at this end, too.

I cut off the cracked part, which didn’t leave a whole lot of pipe sticking out the wall. I did try and push more through from the basement, but didn’t seem to accomplish anything.

The next thing to do was clean up the inside of the pipe, then use the connector piece the guy at the hardware store picked out for me, in case I needed to attach the two hose kits to each other.

Pushing the connector into the pipe did finally start moving the pipe through the opening – making it shorter, of course, but not enough that I couldn’t get it done. I brought out a hair drier to soften the plastic of the pipe, which made pushing the connector the rest of the way in much easier.

That didn’t quite work with the flexible hose part. I could get it through the flat part easily enough, but once the end started to go into the flexible rings, it just wouldn’t go any further.

So I tightened the clamps as it was. It really should be closer together, but I know the important parts of the connector are through to the flexible rings of the hose and, together with the clamp, that should be enough. We’ll just have to keep an eye on it, to see if it leaks. If it does, I should just need to tighten the clamps a bit more. I put a container under the connections, so if it does leak, I’ll be able to see water in the container.

Next, I ran the hose down the side of the house.

There is adequate space along the house to tuck it under, so it won’t be in the way at all. It’s also being held in place by a shelf, garbage can and rain barrel along it’s length. The brick was just a little extra to hold it in place, closer to the pipe.

The hose reaches several feet into the old kitchen garden. I would have preferred an extra foot or two, but this should be fine. If we find it needs to be further from the sun room’s foundation, we can always get another connector and attach the hose from the spare kit onto it.

Once it was all done, the sump pump was plugged back in, but so far it hasn’t had to go off, yet. I’ll be sure to check on it, later today.

While I was working on this, the girls dragged the table saw out of the old shed we’d found the door in and brought it by the house. They plugged it in and turned it on and YES!!! It works!

It is currently sitting in the sun room. We won’t be able to work on the replacement door for the sun room today, as I’d planned. It likely won’t be worked on tomorrow, either.

Oh, I don’t think I’ve mentioned it here, yet. My husband got a call from the cardiac clinic in the city a couple of weeks ago. When they cancelled all appointments, they were looking to June for rescheduling. It seems they were no where near as busy with the Wuhan virus as they expected, and could start re-booking earlier. The appointment is early tomorrow afternoon, but he and I will be leaving in the late morning.

I have to figure out what to do after I drop him off, though, as I will not be allowed to go in with him, as normal. Which is frustrating, but whatever. Unfortunately, it’s not like I can find a coffee shop or something and hang out for more than an hour. My FIL actually lives nearby but, like where my mother lives, the building is locked down to visitors, since so many people living there are very high risk, including my FIL.

If I can find someplace free to park, maybe I’ll get some Pokemon Go in or something. :-/

Meanwhile, I have had to take it a bit easier today than I intended. It’s been a slightly worse pain day, and I don’t want to overdo it when I have what will likely be a long day, tomorrow.

For now, I think I’ll painkiller up and find something more sedentary to work on. :-/ Normally, I’d work on some crochet, but the pain is mostly in my arms and finger joints today, so that might not be possible.

Ah, the joys of being old(ish) and broken. :-D

The Re-Farmer

Morning kitties… and that’s going to have to go

The kittens have been noticeably more active, and I’ve been finding one orange one in particular, at the furthest end of their little nest box, looking out into the rest of the basement.

They are still very quick to bunch up again, though!

Lately, when I got downstairs, I have been leaving the basement door open. Beep Beep goes upstairs to explore, while other cats follow me downstairs. To explore.

Including Keith.

We’ve put the twin size bed frame against the wall for storage, and they quite enjoy climbing up to the top, to check things out from on high! :-D

While doing my rounds outside this morning, I spotted something new on one of the crab apple trees.

It looks like a fungal disease. It seems to be only on the one branch, so I hope that pruning it off will do the trick, but this tree has already had quite a few branches removed due to infection, and trees on either side of it have as well. It might be better to remove the entire tree, to prevent it from infecting the others. I will also be working on the areas we spotted a potentially deadly (to apple trees) fungus, so I might do it all at the same time.

Quite a few of these trees are just not doing well at all. I don’t know that the type of crab apples are particularly prone to fungal disease, or if it’s more a matter of their age making them more susceptible.

The important thing will be to prevent the spread of the fungus, and that means burning the wood. As some of the infections are in stumps already cut level with the ground, I plan to bring one of the metal rings we’ve got lying about to put over where these stumps are, and making a small fire on top of them. We are already under fire ban right now, but it’s not a complete ban, so contained fire pits and burn barrels are still okay.

Something else to add to the to-do list for outside!

The Re-Farmer

Future plans; checking out the old chicken coop

While doing my evening rounds today, I decided to take a look at the building that we had used as a chicken coop, when I was a kid.

Since we first moved here, the roof/attic has been slowly settling downwards by noticeable amounts. The board you see me puling away from the wall used to be directly above the door. As things settled downwards, this board ended up over the top of the door, making it impossible to open. Now, it has dropped further but has weakened to the point I could just pull it away from the wall and the door.

That meant I could pull the door open.

Sort of.

When I pulled on it, that top hinge came loose (the bottom one was already loose). I ended up just lifting the door out of the ground it was being pushed into, and sliding it to the side.

Previously, the only way I could get a look inside had been to shove my phone through the gap in the door and use voice commands to take pictures, hoping it was angled half-way decent. Today is the first time I could actually go in and see what’s in there since… well, since we still had chickens, when I was a kid.

I didn’t go far.

Why are there so many old tires, all over the place? And so many of them still on rims!

At the far end you can see the nesting boxes, and to the right is the roost.

It was so strange to look at it. In my childhood memory, that roost was much, much higher. In my mind’s eye, I was expecting it to be a couple of feet from the ceiling. I actually remember looking UP to the roost, when I went in to tend to the chickens!

I’m pretty sure this old cabin did NOT have a dirt floor, but it was always covered with straw, except for the part under the roost, which was covered in chicken poop, so I can’t quite be sure.

I’m kinda hoping I am remembering that wrong, and this really is a dirt floor. I remember helping clean out the old straw, but not well enough to remember if there was a floor under there.

Whatever it is, I did not go any further in than I could while stepping on some boards near the door.

I don’t know what that material is that’s covering the walls. It’s almost like asphalt shingles, except much thicker.

You can see where the clay between the logs crumbling out in places, such as right by the door in the above photo.

This little side area is where we would keep new chicks. There is another little space at the far end with a door that was basically a frame with a screen finer than the chicken wire I’m taking this photo through. New chicks would have been small enough to squeeze through chicken wire. I can’t quite remember, but I think that’s where the feed was stored.

You can also see the outlet where we plugged in the heat lamp for the chicks. Below the window is an opening for the chickens to go outside. There was chicken yard enclosed around 2 sides of the cabin, with the area on the other side of this wall sectioned off, and another door to access it from outside. This way, the new chicks could be kept away from the older ones, even when they were big enough to venture outside. When they were fully grown, the doors into the chick enclosures would just be left open. In the summer, we would leave the main door into the enclosure open during the day, so the chickens could wander around the barn yard as they pleased, then closed them up in the coop for the night, making sure to close up little opening in the wall, too. Skunks, foxes and weasels were the most common predators we had to keep them safe from. Especially skunks.

To take the above photo, I am standing in what used to be part of the smaller chicken yard. You can see the piece of electrical cord coming out from under the right side of window frame. The cut end is hidden behind a dried up leaf. The outlet itself is in a different location than where that wire is, so I don’t know what it’s actually for. You can also see signs that the outer wall used to be covered in plaster and painted white.

It’s in rough shape and kinda gross, but of the 3 log buildings we’ve got, this is the one that’s the most solid and least damaged. If there is any chance of salvaging it, we’ve got to take care of some things.

One of those things is to cut away the trees that have been growing against it. This one here is growing partially out from under the back wall. Though efforts had been made to protect the roof by adding what looks like a corrugated tin over the original wood shingles, the branches of this tree has torn off a whole section of it, and is tearing more pieces off with every strong wind. You can even see one of the pieces of tin from the roof half buried under debris at the bottom of the tree. Which gives an idea of just how long ago it was torn off and has been sitting there.

Quite a few sheds and outbuildings have trees growing right up against them. They are almost all maples. One near the pump shack had been cut down; there is a rather large stump there. Maple stumps throw out new growth, though, which might be great if you actually want to coppice them, but not so good if you’re trying to protect buildings.

When we moved here, my original timeline has been to work on the inner yard for the first 2 years, then start on the outer yard in the third summer. Last summer was a bit of a write off in some ways, so it’s going to take another year to finish that, but there are things that need to be done in the outer yard that really shouldn’t wait.

Cutting away the self-sown trees that are causing damage is one of those things!

The Re-Farmer

Replacement door: that didn’t quite work

After all that work to resize the replacement door for the sun room, painting it, carving out the recesses (and fixing my goof), touching up the paint, the door finally got hung up today!

Aaaaannnnd…

It doesn’t fit.

Part of the problem is the hinges. The original hinges on the door were put back on, not the hinges from the old door. The screws are stripped on some of those and we weren’t even able to get all of them off to salvage them. The hinges that were on the replacement door position the door slightly differently. Once the door was hung up, the girls found it was too “tall”. By mere millimeters!

The easiest thing to do turned out to be removing the top molding of the frame.

So they did that.

It still didn’t fit.

This is the door, at the middle of the frame.

We’re looking at about 1/8th to 1/4 of an inch here.

This is the door at the top of the frame.

Yeah.

There’s a gap.

So, weather willing, tomorrow we will get that table saw out of the shed and see if it works. If it does, we’ll take the molding off the top and side, cut it and reinstall it.

Straight.

Then carve out a new recess for the plate that gets installed in the frame, because that’ll be cut right off.

Once we’ve got that done, we’ll just repaint the frame.

What a pain in the butt this is turning out to be!

If the table saw turns out to not work… I’m not sure what we’ll do. I’d hate to have to take the door off and trim the door knob side! We can’t trim any more on the hinge side at this point. We’d have to take the door knob assembly off, and I suppose we could use the circular saw again. It would be very difficult to take off such a tiny amount with that, though.

*sigh*

Ah, well. It’s not like we have a lot of choices. We’re just making do with what we have for now.

Speaking of making do…

When my brother and I visited our mother earlier today, I made sure to ask him about the sump pump hose attachment, showing him the pictures I’d taken.

I learned all sorts of details from him! Like why he had to McGyver the pipes in the basement, adding an extension. Someone else had tried to replace the pump and pipes for my dad and… well, let’s just say, after my dad called my brother to come fix it, he found the pump dangling at about a 30 degree angle, because the person who did it couldn’t be bothered to add a section of pipe to extend it, so it could stand straight in the reservoir. So my brother did that, and the pump is now nice and straight. It may not be the prettiest job, but it’s solid, and I should not need to replace any of it.

I also learned that he had installed a flexible hose on the outside. No, not the one that’s there now. He used a proper sump pump hose kit, like what I bought two of. He said it was about 50 ft long, and drained over by the storage house.

Then one day, he came over and the hose that’s there now had been attached. The long one was gone.

From what he’d been able to gather, someone had run over the hose with a lawn mower.

So my dad used what hose he could find and, rather than getting a fitting to attach the larger hose to the smaller pipe, he wrapped something around the smaller pipe, then clamped the bigger hose on. I had thought the stuff looked like batting, and he thinks it was probably stuffing from an old couch or something like that.

I confirmed that the pipe going through the wall is 1 1/4″ pipe, and that it should be just the end of the pipe on the outside of the wall; nothing weird done to it – though it might have been cut shorter on the outside. I’ll know that when I take off the broken hose.

The fittings that come with the hose kit won’t work, though, since they have a threaded end to attach directly to the sump pump. I should have what I need to attach the hose to the pipe, though, in among the extra parts and pieces I got, just in case.

Now that I’ve double checked details with my brother, this is something I hope to get done, tomorrow!

The Re-Farmer

Morning adorableness

Before I head out to visit my mother (outsider her window… :-/ ) for Mother’s Day, here are some adorable, furry worms to make you smile!

I’m glad Beep Beep used this cardboard nest we set up to have her kittens in. The box is the base from a case of cat food tins. Not only did it turn out to be the prefect size, but it makes it easy to slide in and out of the crate (which is on its side) to check on the babies.

The concrete floor is pretty saturated this spring. Under the crate, there is a puddle of moisture. A bit like condensation created by the warmth of cat bodies above. The crate keeps the cardboard from contacting the floor, so it stays nice and dry.

As I was petting the babies, this little mini-Beep Beep (right down to the orange spot on her forehead!) grabbed my hand…

… and started licking my fingers!!!

Yeah, I melted into a puddle of goo over the adorableness of it.

Then it was time to tend to the outside cats, and we had quite the crowd this morning!

At the top left is Rosencrantz! She stared showing up again very recently. I wonder where she goes, when we don’t see her for weeks at a time?

In front of her is Pump Shack cat and in the top middle is Junk Pile cat. While I was able to pet Rosencrantz this morning, these two just won’t let us near. :-(

Butterscotch and Creamsicle are eating on the right of the photo, and Potato Beetle was with them, but he found me more interesting than food!

Why?

This is why.

He just HAD to fling himself bodily across my feet and start rolling! He eventually slithered his way across my feet, around my legs, to eventually end up sitting at my other foot, looking up at me, as if to say “why haven’t you picked me up yet?”

He did it one time while I was looking at something else, and I did end up stepping on his tail a bit. At some point, this guy is going to have to learn that moving feet are not a place to drop in front of! :-D

Happy Mother’s Day!

The Re-Farmer

Historical cooking: chickpea soup with fried bread

One of my Recommended posts was for the Historical Italian Cooking YouTube channel. Recently, they put out a new video for a super simple dish made with ingredients we typically have on hand. Today, I was able to give it a try!

Here is the video.

You can also visit this link for the written recipe.

This is an ancient Roman dish; chickpea and leek soup, with a fried flatbread called lagana.

About the only thing we had to go out of our way to get for this recipe was the white wine.

There was one ingredient we couldn’t find, though. Durum wheat flour. Any type of flour is just now becoming easier to find, but there’s no chance of finding any out of the ordinary flours. All Purpose flour, which is what we have, is made with a blend of hard and soft red wheat. Here in North America, durum wheat tends to be used in pastas. It’s the sort of thing we’d have to go to specialty stores to find. I’m sure I could find it in the city, but certainly not locally.

So I substituted AP, since that’s what I had.

First, the soup ingredients.

Another substitute I made was to use canned chickpeas instead of soaking dried chickpeas overnight. The recipe called for 2 leeks, but has almost no other quantities given. I had 2 leeks, but they were pretty massive, so I used 2 cans of chickpeas to balance out the quantities. There’s also the white wine, some olive oil, and caraway seeds ground with a mortar and pestle. I eyeballed most of the quantities based on watching the video. :-)

The soup was started by boiling everything but the leeks in salted water for 10 minutes. Then, the leeks are added and cooking continues for another half hour.

While that’s being done, the flat bread is made.

The flour was the other thing with a quantity given: 300 grams.

Unfortunately, my kitchen scale disappeared. So we had to use a converter. I used a little under 2 1/2 cups of flour. Salt is added, then a dough is formed with some warm water. That’s it, that’s all!

After the dough is kneaded until smooth, the recipe said to divide it into 10 pieces. There are 4 of us in this household, so I divided it into 12 pieces, instead.

The pieces of dough are then rolled out into rough circles.

The recipe calls for olive oil to be used to fry the bread. Olive oil has a low smoke point, so I modified the recipe a bit more. I added a bit of vegetable oil to increase the smoke point a bit. I was just frying in a pot on the stove, so this was more of a safety issue.

Once the oil was hot, the rolled out dough was fried, one at a time.

The dough bubbled up a bit in the video, but not into big dough pillows like this! :-D This could be because of the different type of flour, or even because of the oil blend.

Not that I’m complaining! :-D

These fried up very quickly. Maybe half a minute on each side, to get them to a golden brown, before placing them on paper towel to drain. The bubbles cracked on a couple of them, allowing oil to get into the pockets. That took a fair bit of draining! The bread was finished well before the soup itself was.

They look absolutely amazing!

Taste test time!

The soup itself was very mild tasting. Possibly because I used more water than in the recipe. I couldn’t distinguish individual flavours of the caraway or the wine, for example. No one ingredient overpowered the other.

The lagana bread had a surprising amount of flavour for something that is just flour, salt and water! The outside was crispy, while the inside was chewy. It went incredibly well in the soup. A real balance of flavours. Making one without the other would not be as good as the two together.

This is a remarkably easy soup to make. The lack of quantities in the recipe made it a bit more interesting to work out, but that just gives room to adjust to one’s one preferences!

I can definitely see us making this recipe again!

The Re-Farmer

No, I didn’t forget!

After an oddly sleepless night and a fair bit of running around, I just didn’t have the energy to post earlier today.

I did, however, get kitty pictures! Here’s a bit of cuteness to make you smile. :-)

That one smooshed kitten… :-D

Creamsicle was very demanding about being picked up this morning!

The Potato Beetle is a trusting soul. Trusting that when he flings himself to the ground in front of my feet and start rolling, I won’t step on him!

The cuteness. It just oozes out everywhere! :-D

The Re-Farmer