Road conditions – extended!

This morning, while switching out the trail cam memory cards, I found a new sign on the main road past our place.

That is not where I expected to see a road closed sign! This road has a lot of traffic, as it’s the main road to get to quite a few farms. I wasn’t surprised that there might be a problem, though. The municipal drainage ditch that washed out the road I’ve been checking crossed the main road about a half mile up from here. I just would have expected the road to be closed further to the east of this intersection.

I saw a large excavator going by our place yesterday, so I decided to walk to the washout and see what, if anything, was done there.

It turns out, nothing. I could see the tread marks continue past the washed out area.

This is the section that’s too deep for me to try and cross with my short rubber boots. The third area I saw yesterday that was starting to wash out has gotten bigger, but overall, things have not gotten much worse. During my walk up, it seemed that the water had receded in a few places in the fields, too.

I did get some video; this is raw from the camera, with no editing.

The winds from the north were quite high – enough to make me glad I wore my winter parka this morning, as I was walking back against the wind!

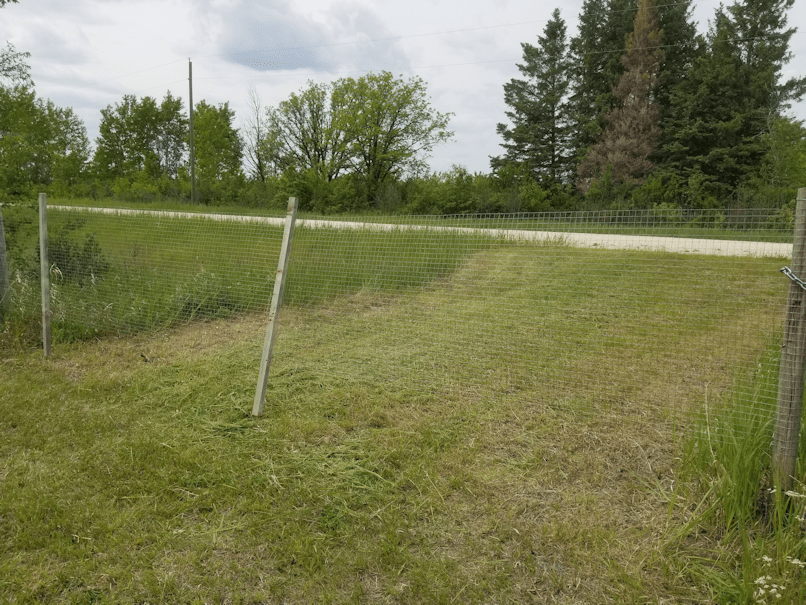
With the amount of snow that has melted away, and the water around the inner and outer yards somewhat receded, I went over to check on the septic field (which, as my brother pointed out when I called it that, isn’t actually a septic field, because we have an ejector. It’s the area where the grey water and, this spring, at least, runoff collects) and the sheds that I could get at. There was enough snow gone that I decided to check our back gate.

I’m glad I did!

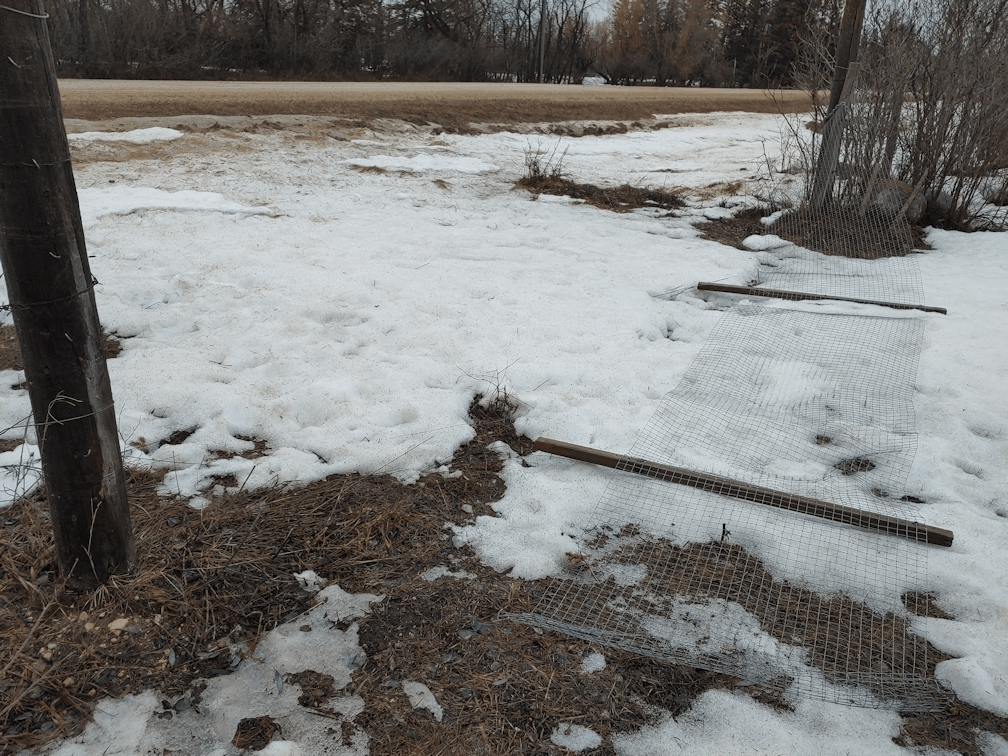
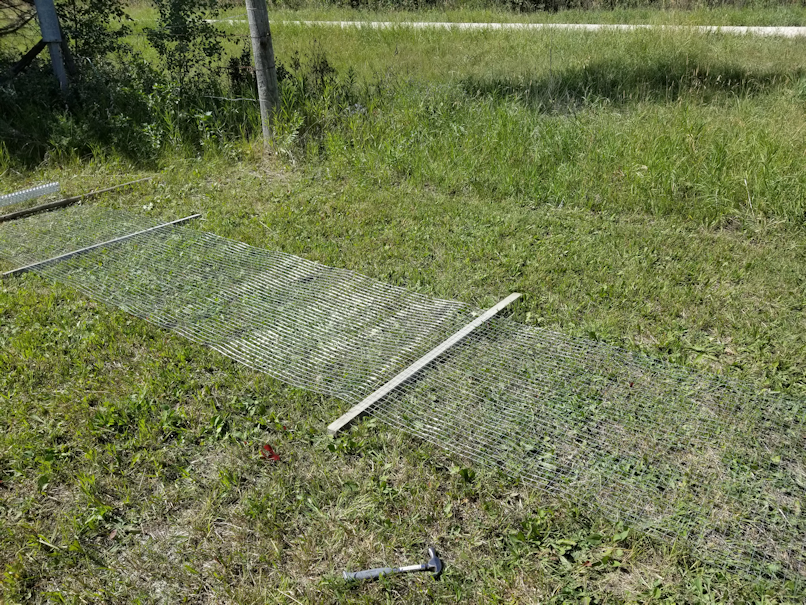
It’s completely torn loose! The other end is held up by the chain and lock. You can see the U nails/staples in the gate post. The wire mesh of the gate was torn right off. Considering there is snow on top of the mesh, this happened quite some time ago, but we haven’t been able to get over this way to see it.

My guess: deer on the road got startled and plowed their way through the gate.

This secondary driveway accesses the main road. Since the gate was down anyway, I decided to walk up the road and see why it was closed.

I found out what the excavator was doing, yesterday!

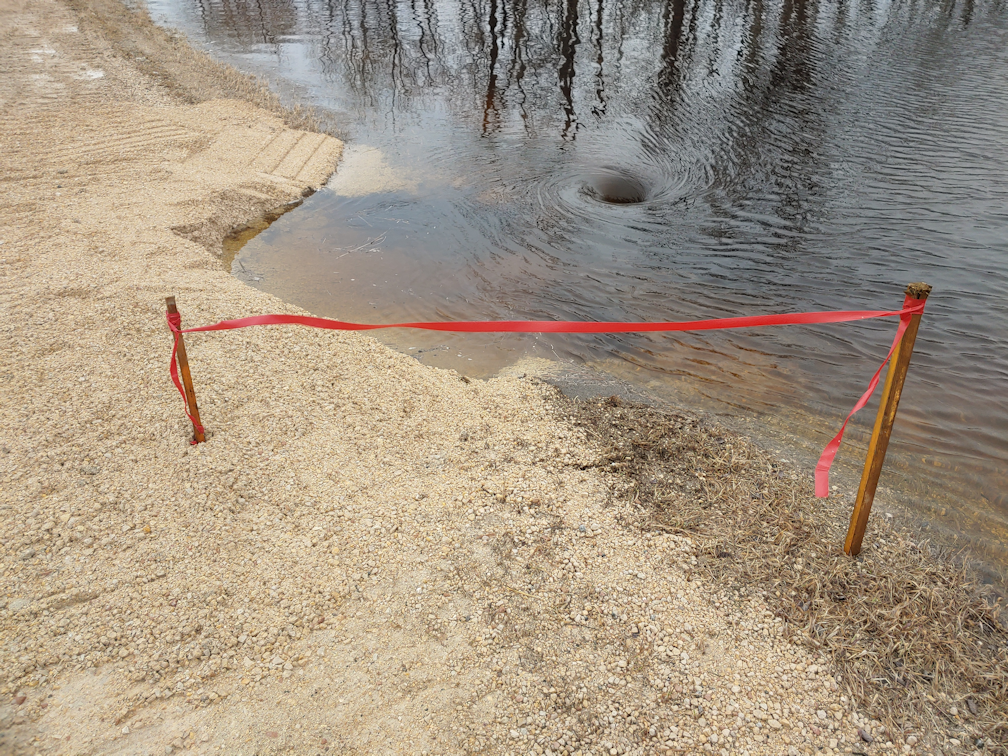
It patched a section of road that had been washed out completely, at a culvert that drains into our quarter section. As you can see, the patch is already starting to wash out!

I didn’t try to walk any further (I’d already walked about 2 1/2 miles by then), but looking further down the road, I thought I could see another area that was washed out, maybe a quarter mile up the road. I’m thinking at, or near, the municipal drainage ditch.

Just look how far that new gravel has been washed down!

This culvert is not part of the municipal drainage ditch system. I believe it’s been here since before my parents acquired the farm. I remember playing in the culvert when I was a kid and, from what I can see of it, I think it’s still the same culvert, and hasn’t been upgraded or anything like that. No need to fix what ain’t broke!

Not far beyond the fence line is an area that I remember being just a really rough spot across the low area. There is water flowing here only during spring melt, or in excessively wet years. When the cows walked through it, their hooves would sink into the mud, squishing the soil into hills and holes. At some point while I was living in other provinces, a pair of narrow culverts were buried here, to create a sort of low driving lane. The washed out gravel is actually starting to go over this “lane”, and you can see just beyond it, where water is flowing through the small culverts. This seasonal “creek” continues on to the field the renter has been growing corn in the past two years, and eventually connects with the municipal drainage ditch. Which means that this water is contributing to the flooding that has washed out the other road.

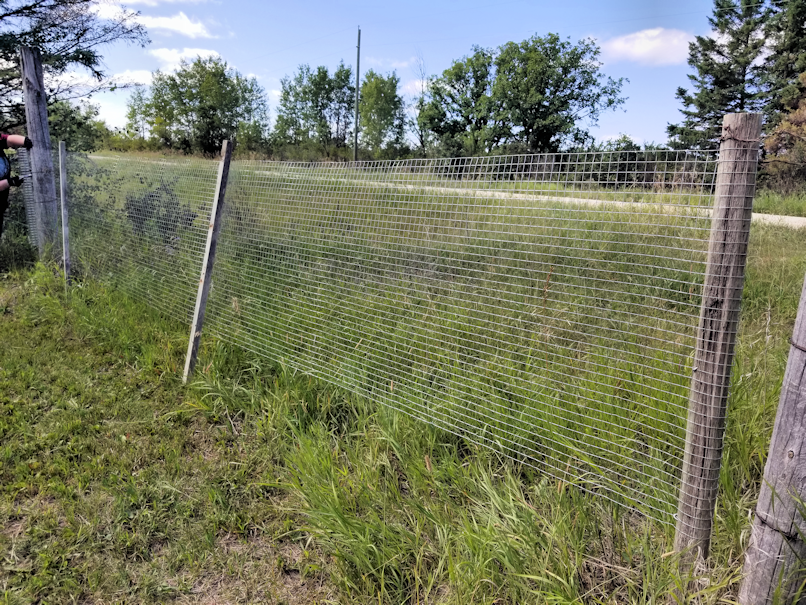
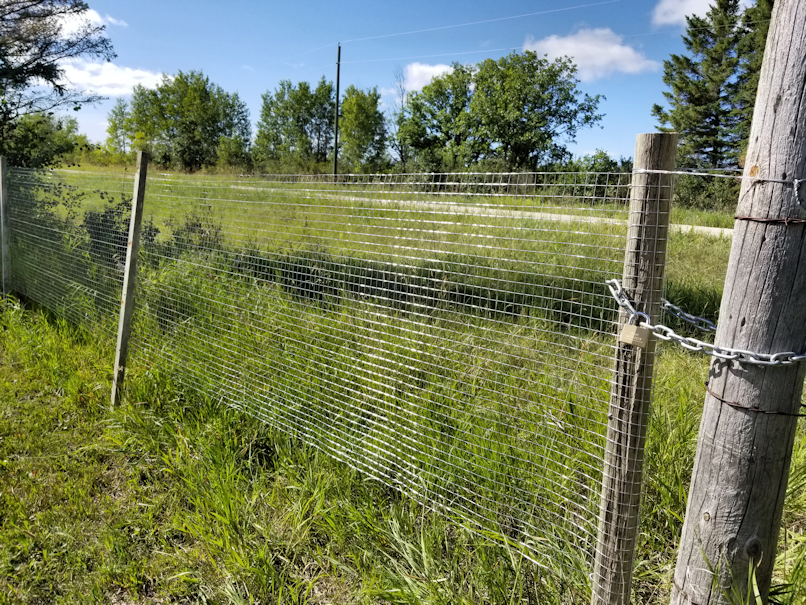
On the way back, I freed up the gate from the remaining snow on it, and make it look like it’s fixed. :-D

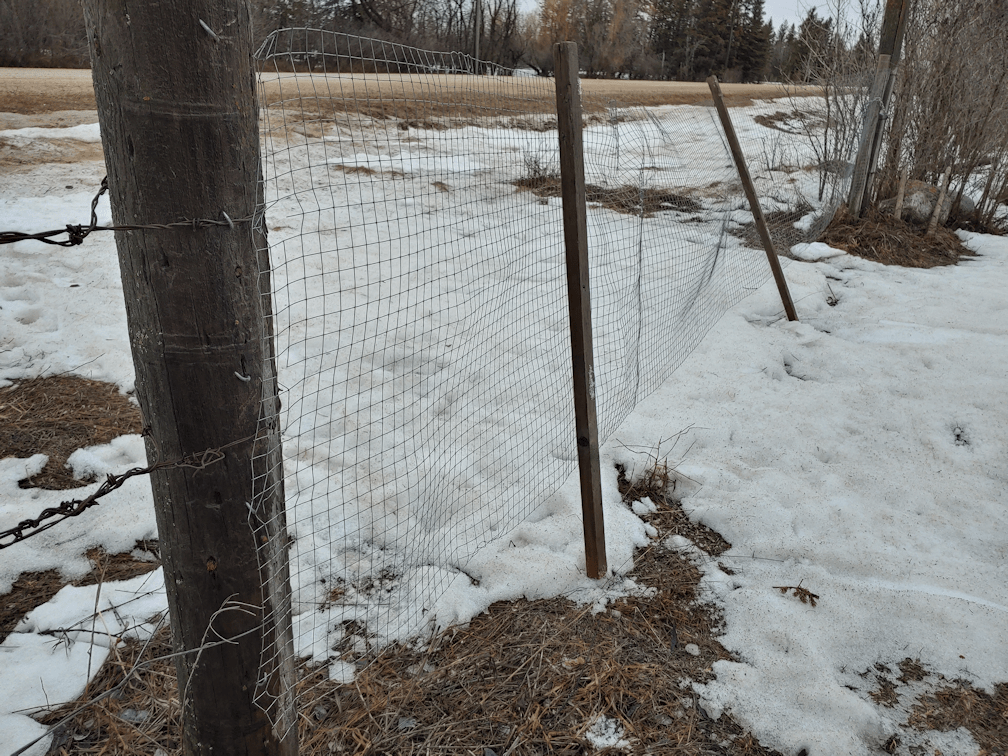
It’s actually being held up by a single barb on the lower strand of barbed wire. We’ll have to come back with tools to fix it properly. For now, it’ll likely come down again with a stiff breeze! :-D What I should probably do is find a post to wrap the wire mesh around, then affix it to the gate post in a way that’s more flexible. Maybe even add hinges. We’ll see.

On the list of things we want to do is extend the main driveway all the way to this secondary driveway with gravel. It came in handy the first time we found our gate’s lock glued shut, and we had to go out this way to get to town – and buy bolt cutters! Once we get past the collapsing log building in the inner yard, it gets very bumpy. At some point, someone had driven through when it was muddy, leaving deep ruts all over an area of it. We’ve tried to keep at least a lane mowed, so we can see where we can drive through without hitting rocks, or who knows what else that’s hidden in the grass and thatch.

When I have the chance, I want to make my way through the fence around the outer yard and check the gravel pit that the renter dug out last year. It should be very full of water, right now!

After checking out the road conditions, I also checked out newly accessible parts of the inner yard and found some things that got me very excited – but that will be for my next post! :-D

The Re-Farmer

I couldn’t help myself – again!

My goal of the day was to finish using the weed trimmer around the yard, then hopefully starting part of the lawn.

Then I read the forecast for the day.

There were thunderstorms predicted for the evening.

On doing my rounds and finding the grass was already dry of dew, I skipped everything else and started mowing. Aside from a couple of short breaks to eat and hydrate, I’ve been outside all day.

The forecast ended up changing to rain, and now even that seems to be off the radar, but the job is done.

The last section I work on is the path to the back gate. As usual, I’ve been making the mowed area slightly wider then before, but in that area, sections are just too rough, and I know there are rocks and logs hidden in the grass somewhere, so I’m very careful about that right now.

While going past the back gate, I found myself looking at the other side each time. It hasn’t had new gravel on there in decades, so it’s grown over. Grass is one thing, but I was seeing saplings start to grow, right under the gate we rebuilt last year.

Then I remembered I still had the gate key in my pocket.

That looks much better!

On the list of things to eventually get done it to add gravel to our driveway. I’ve talked to my brother about it, and he says our little gravel pit is mostly out of gravel and wouldn’t have enough to do the driveway. What I would really like to do is extend the driveway from one gate to the other, so that this entrance can also be used without lurching over the rough areas. At least part of it is from someone driving through the area when it was muddy; a pair of tire tracks cut through, deep enough that I figure the driver was doing a lot of spinning to not get stuck.

This would be pretty low on the priority list, compared to things like a new roof. When the time comes to get estimates, I hope to get 3; a shorter term goal to do the main driveway, a mid-term goal to do the parking areas and up to the old pump shack, and a long term to extend the rest of the way to the back gate.

Until then, I’ll just keep it mowed, so the trees don’t take it over.

The Re-Farmer

I wish I could say this was a surprise

Just over a week ago, we discovered that someone had put glue into the lock on our main gate.

The last time this happened, my daughter and I went through our back gate, which isn’t normally used, to get out.  Then we had to get bolt cutters and a new lock for the main gate.  This was before we rebuilt the back gate, so at the time, the lock and chain where the only things holding the remains of a barbed wire gate up.  It was basically enough to keep the cows from getting onto the road, the first time they broke through by the barn and into our outer yard. Continue reading

Building the new back gate

Today we picked up some fence wire to make a new gate for our second driveway.

The wire we got was 1 inch mesh, in a roll of 36″ x 25′  I was pleased to see the hardware store had 1 inch mesh in stock. When I price checked it a while back, the largest they had was 3/4 inch mesh.  I would have preferred something like a 2 inch mesh, but this will do just fine.

My younger daughter and I then went out to the back gate to replace the old barbed wire gate.

20180801.old.gate

When we moved out here, the gate was open and we had no idea that it was in such bad condition.  When the girls went over to close the gate, they had to replace the post at the end (the lock and chain around it is the only thing keeping it closed) and salvage the wire as much as they could with what was there.

We salvaged the posts for the new gate, cutting down the round one at the end so that it was the same length as the middle ones.

In the process of working on it, I made sure to gather up and set aside the old barbed wire from the gate.

20180801.old.gate.wire

It’s amazing how much rusty barbed wire just disappears in the grass.  There were a couple of times when, even though I knew the wire was there, I still managed to catch it with a shoe, or almost step on it.

Keep that particular detail in mind for later…

On to the new gate!

20180801.new.gate.1

The first thing we did was lay out the wire and position the posts more or less where they needed to be, while using other posts I’d brought, just in case we couldn’t salvage the old ones, as weights to keep the wire from rolling itself back up again. :-D

20180801.new.gate.2

For the end post, we first affixed the end of the mesh to the post with U nails, then wrapped the wire around the post and affixed it again, opposite the first U nails.  Since this post will see the most movement, the wire needs to be secured the strongest here.

20180801.new.gate.3

Once the first post was secured, we slid the next two posts under the wire, making sure their bottoms lined up with the bottom of the first post.  Then, after making sure the wire mesh was pulled taut again, the wire was affixed with more U nails.

20180801.new.gate.4

Next, the gate was put in position and the mesh affixed to the gate post.

The main gate post on the right has a barbed wire loop at the bottom that the first post tucks into.  A second barbed wire loop at the top was then tucked over the top of the post to hold it in place.  You can’t see it, but the chain is hanging down from that wire loop, as it had been threaded through one of the links when the chain was added.

You can see my daughter at the other end, securing the wire mesh to the opposite gate post with more U nails.  The posts in the gate itself each has 3 U nails securing them, but at the end, the mesh is secured with 5 U nails.

20180801.new.gate.5

The space between gate posts is about 22 feet.  Once the mesh was secured, wire cutters were used to remove the last 3 feet or so of mesh.

20180801.new.gate.6

The chain fits through the mesh, which worked out perfectly.

The barbed wire loop at the top was replaced with the wire that was wrapped around the mesh roll, to keep it from unraveling.  It is the same type of wire the mesh itself is made of, but was long enough that we could fold it in half, twist it around itself, fold it in half again, then twist it around itself again (something I do with string or yarn to make cord when crafting).  The loop itself is secured to the gate post with a U nail as well.

Yay!  The gate is finished, and it looks SO much better than barbed wire!

That done, my daughter headed back to the house to put away the tools and supplies, except for the hand saw and anvil shears I’d brought to clean up some of the self sown saplings that were starting to encroach.

Remember what I said about barbed wire, disappearing in the grass?

Well, this was next to the gate.

20180801.barbed.wire.trap.1

The old gate had been on top of this pile of posts and barbed wire (and an ant hill).  My daughters referred to this as the barbed wire trap!  We’ve already had the renter’s cows end up on this side of the fence once (and as bad as the old gate was, it was enough to keep them from ending up on the road, so it still did the job. :-) ), and it’s always possible it will happen again.  I don’t want any cows getting hurt in barbed wired, so I figured I’d take some of the loose wire and pull it out to add to the pile of junk we plan to get hauled away later in the year.

I grabbed some of the wire and pulled…

… and pulled…

… and pulled…

Before I knew it, I was pulling up the wire from an old fence line, long since collapsed.  Since I had already started pulling the wire up, I couldn’t even stop, since lifting it made it that much more of a hazard.

Every now and then, I’d reach a fence post and try to lift it up, only to have the wood disintegrate in my hands.  On some of them, the bared wire was attached to the post with nothing but bail twine. ???

Now, the thing about barbed wire fences is, they never have just one line.  There’s usually three.  Which meant there were at least two more barbed wire lines, hidden in the grass.

About half way down the row of trees, I found myself pulling up two wires at once, because they were stuck to each other in places.  Then one of them ended abruptly, while the first one continued…

… and continued.

When I finally reached the end of the row of trees, at a large willow, I saw the remains of what turned out to be the last post of the fence line (I hope!).  I pulled it up, but the wires attached to were basically all broken off a couple of feet away.  I tucked the post itself against the willow.  I did find some ends and started pulling them up.  Once they were clear of the tall grass and old thatch (that area needs a controlled burn, big time!), I started working my way back, rolling up the wire as I went along, eventually adding in the second line as I found it again.

When I got back to the area of posts in the picture above, it was all pretty tangled together, so I tried lifting the post that looked like it was the furthest out in the line and began pulling on it.

As near as I can make out, the pile of posts were the remains of another barbed wire gate.  But why would there be two of them?  I’m thinking maybe an old gate was replaced with a newer gate, and rather than getting rid of the old one, it was just tossed aside at the fence line.  Then when the fence line collapsed, the old gate came down with it.

But that’s just a guess on my part.

I did, however, find the third wire of the fence!

So back I went down the row of trees, pulling up the third wire until it ended.  Which was about 2/3rds of the way down the row of trees.  Which means there’s probably more of it under the grass somewhere along the way.

Once I found the end, I worked my way back to the gate again, rolling it up as I went along.

This is where the fence line was.

20180801.barbed.wire.trap.2

The tip of the arrow at the back is pointing to the willow the fence line stopped at.

My guess is that, when the row of trees was planted along the fence that’s still there, this fence line was added to protect the plantings from cattle.  Since then, the current fence line was kept up, since the land is being rented out for grazing on the other side, but the inner fence was allowed to just rot away and collapse. [Update: I have since learned that I got this backwards.  It turns out that the collapsed fence is the original one, and it has been there for an estimated 40 years!]

Leaving barbed wire hidden in the grass for anyone, or any cow or deer, to step on, trip over or otherwise hurt themselves on.

Which just blows me away.

20180801.barbed.wire.trap.3

In the end, I couldn’t even get rid of the wire, because it’s all still attached to the main fence line.  I just didn’t have the tools for it.  So I moved the posts and the wire I rolled up into one, more obvious pile that I think even a cow will not bother getting into.

I hope!

After this, I cut away the spreading saplings on both sides of the area I’ve been mowing to the gate we just replaced, including clearing them away from the gate into the garden.

20180801.garden.gate

Notice that this gate has 5 lengths of barbed wire on it.

In the future, as I work my way around, clearing the yard’s fence line, I will eventually cut back that lilac to uncover the gate post it’s growing over.  I checked the area over as I cut away the saplings and it’s clear, so the next time I mow down this way, I will probably mow a path to this gate, too.  (I haven’t done that to the gate by the fire pit yet, as it seems to need some clearing, first; I’m not entirely sure what’s buried under the thatch and tall grass, but it’s very uneven.)

20180801.garden.gate.area

This is the corner created by the garden/yard fence line leading to the roadside fence line.  Though I will be clearing the fence lines themselves, I have not yet decided if I will also clear away these self-sown saplings.  It might be nice to just leave them be.  They’re not blocking anything.  I’ll leave them for now and decide what to do with them later, when we get to the point of working in the outer yard area.

It wasn’t until I was at the computer, uploading these photos, that I noticed this…

20180801.oops

I honestly don’t know what that happened!  I’ve got so many scratches from doing yard work, I don’t even notice them anymore.  :-D

The back gate is finally done.  One more thing to check off the list! :-D

The Re-Farmer