Isolation shelter build started

I’ll be honest, here. We’re really just winging it on this build, even though it’s going to be quite a bit more complex than the kibble house and water bowl shelters. It all comes done so what materials we can scavenge.

There are plans, however!

Plans that needed to change, but still plans! ๐Ÿ˜

The original plan was for a 4′ x 4′ cube, divided up inside to have an enclosed shelter that will be insulated, a not quite enclosed shelter for a litter pan, and two levels with space for food and water bowls, and just hanging out.

We had a couple of pallets that were left by the roofers. My original intention was to dismantle them and use the wood mostly for the floor.

That did NOT work out!

The pallets are nailed together mechanically. The nail heads are deeply embedded in the wood – and the wood is quite thin. When I tried to pry them off, the wood started splitting.

Time for plan B!

The pallet will be the floor, more or less as is.

I measured the pallet’s length and width at the boards inside, and each side was slightly different. I brought over the circular saw and cut the ends flush to the outside boards. The most damaged side will be the bottom of the floor.

I could still work with 4′ lengths on two walls, and the other two will be 40″, to fit on the pallet. The shelter will still be 4′ tall.

For the main parts of the frame, I’m using the true-to-size salvaged 2 x 4 lumber in the barn. There’s hardly any of that left, but there’s enough for this project. It feels like a shame to “waste” it on something like this. The wood is old and the ends have started to rot a bit, but it’s really solid and heavy wood. It is, however, what we have, so that’s what we’ll use. Other parts of the build will have more modern, standard 2×4’s, which are not true to size, and are quite a bit lighter. We have even less of that, so we’ll have to plan accordingly.

For now, I’ve cut lengths to make the front and back panels, which will be 4′ square. The frame will be attached directly to the pallet once put together, but that won’t happen quite yet. The dirt floor of the garage is pretty level, but not flat, mostly due to shallow tire ruts. Right now, the pallet can’t lie flat on the ground. I’m heading into the nearer city tomorrow, and will be looking at what wheels are available, and affordable.

Once the pallet has its wheels, it will be able to straddle the uneven parts of the floor, and be sturdier to work on.

Once the “box” is framed out, the interior will be worked on, including things like extra surfaces for cats to lie on, something they can scratch at, and so on. Once that’s all figured out, access panels or hinged doors will be made so that the litter box, food bowls and enclosed shelter can be reached from the outside. For the enclosed shelter, what I will probably do is make an insulated box that can be removed completely, if necessary.

I haven’t fully decided on how to do the roof. It will most likely be a low slope metal roof. I just haven’t decided how I want to make the slope while not having any gaps.

Last of all, the welded wire hardware cloth will be added to those walls that are not enclosed with wood. We might not be able to pick that up until the end of the month, though. Unless we find something on hand that we can use.

Anyhow. That’s progress so far. Reworking the plans and making the first cuts for the frame.

Little by little, it’ll get done!

The Re-Farmer

Starry night, tiny harvest and not so tiny fluffball

My daughter heard a possible commotion last night, so I popped out to check on the kitties. No sign of raccoons or skunks, thankfully. It was such a gorgeous night, though, I ended up staying out for a while, and even tried to get some photos of the stars.

I was just using my phone’s camera, and I didn’t have a tripod. Instead, I rested the phone on top of the wire covers on garden beds. Which, I discovered, bounced for a while once the phone was laid down! So several of the photos have very shaky looking stars. ๐Ÿ˜„ I did manage to get shots with the streak of a satellite going by, which is neat.

We are supposed to get some rain late tonight, but I decided to water the garden, anyhow. This year’s garden is unusually full of things that require large amounts of water, and from the looks of the weather radar, the system is going to pass to the north of us, anyhow. We certainly aren’t going to be hit with a storm like what hit Calgary last night! I was seeing photos shared on some of my Zone 3 gardening groups on FB, and it was just devastating. The largest hail reported was the size of a baseball! Scary stuff!

After doing the watering, I went back and picked another handful of shelling peas.

I’m really appreciating the logs on the sides of that bed. I can step on a log and reach the peas, without stepping on any winter squash vines! While watering, I noticed a couple of vines, including one with a female flower, that were trying to climb the trellis netting. The Wild Bunch Mix package did say these were all vining types, and they really do want to climb! The trellis netting is strong enough to hold the peas and beans, but nowhere near strong enough to hold the winter squash vines, not to mention any fruit that might show up on them. I got them loose and laid them on the ground, in the process finding tendrils that had wrapped themselves around bean pods and vines, actually cutting off the bean pod in the process!

I’m hoping to have pole beans to harvest by the end of the week.

In other things, I’m hoping to get meet up with the Cat Lady tomorrow or soon after. I know she has medical appointments today. The last time she set up a vet appointment to neuter 4 of our male yard cats, covered by the rescue, a second appointment was made for this month. Then they had emergency vet car needed, which cost a great deal. The appointment is still on my calendar, though – this Thursday (today is Tuesday), for two cats, preferably female. I checked to make sure the appointment was cancelled, as I know the rescue budget was low. She said she’d contact the vet, but I haven’t heard back about that, yet. I hope to hear from her soon, because I don’t want to unknowingly be a “no show”.

Meanwhile, I got some photos of Peanut Butter Cup this morning for her to share among her contacts.

She has really turned into a beauty, and has the softest fur of all the cats! More importantly, we brought her to full health. She was the only female that was done at the time. While the males could go straight outside after a brief recovery period in the cat carriers, she needed 2 weeks. Once they come inside, they don’t go back out. That’s when we found out she had leaky butt issues, but we got that all fixed up. Gotta love that Healthy Poops stuff! Thank you, M, for sending us that first container! I never would have known such a product even existed. We have been using it in place of the ground pumpkin seeds (pumpkin is one of the ingredients) that we’d been using in the cat soup, along with lysine. All of the cats have been eating it, and it has made a real difference in PBC! No more leaky butt! Her respiratory issues have disappeared, too. We now have special shallow trays for the cat soup, big enough for several cats to eat out of at the same time, with one kept in my room for Butterscotch.

Who still refuses to leave my room!

I don’t get it.

Anyhow, I hope the Cat Lady will be able to share the photos and someone will be interested in adopting PBC.

Meanwhile, I’m basically just waiting for the post office to open for the afternoon. The special sheets for my husband’s hospital bed mattress came in yesterday, even though it was a holiday and the post office was closed! So I’ll be picking those up. If they work out, we’ll order more, and he won’t have to fight with having to use top sheets on his mattress, because regular fitted sheets are too short.

While yesterday’s lawn mowing never got finished, I did get enough done that I can park the truck in the shade of the inner yard. Then I’ll set up a work table and power tools in the garage, gather materials and get started on the outdoor isolation cage for when we can start trapping and spaying the more feral cats. Hopefully, the females! Not that we will have much control over which cat gets trapped.

As long as we don’t end up trapping skunks or raccoons, instead! I don’t think the trap that will be loaned to us will be big enough for raccoons. Well. One of the young ones, maybe, but a cat sized trap would not be big enough, nor strong enough, for an adult raccoon.

Speaking of which, the isolation cage we’ll be building has to be strong enough to keep the raccoons out. Once it’s built, we’ll set it up with the door open, so the cats can get used to it, so I would expect the skunks and raccoons to explore it, too. I don’t plan to keep food, water and a litter box in it until there is a cat actually closed up in it, but it will still provide cats and kittens with shelter in the mean time.

As for the build itself, I’ve got general plans drawn up, but ultimately, it will depend on what materials we find in the barn and the sheds. I’m hoping to incorporate at least one of the many salvaged windows we’ve got. Something that can be slid open to access the inside, rather than a hinged door.

One thing we will probably have to buy, rather than scavenge, is more hardware cloth. I’ve got most of a roll of hex type chicken wire, but a raccoon can tear through that easily.

All in good time.

The Re-Farmer

Our 2024 garden goals: review and reset

Okay, now that we’ve gone though and analysed how our garden did in 2023, it’s time to use that information to review and reset our plans for our 2024 garden.

For the past few years, we’ve done a lot of experimenting. We will continue to experiment, but some things will be set aside for now, to try again later.

Photo by Binyamin Mellish on Pexels.com

So let’s go through the different categories again.


Fall garlic, perennials and food forest items

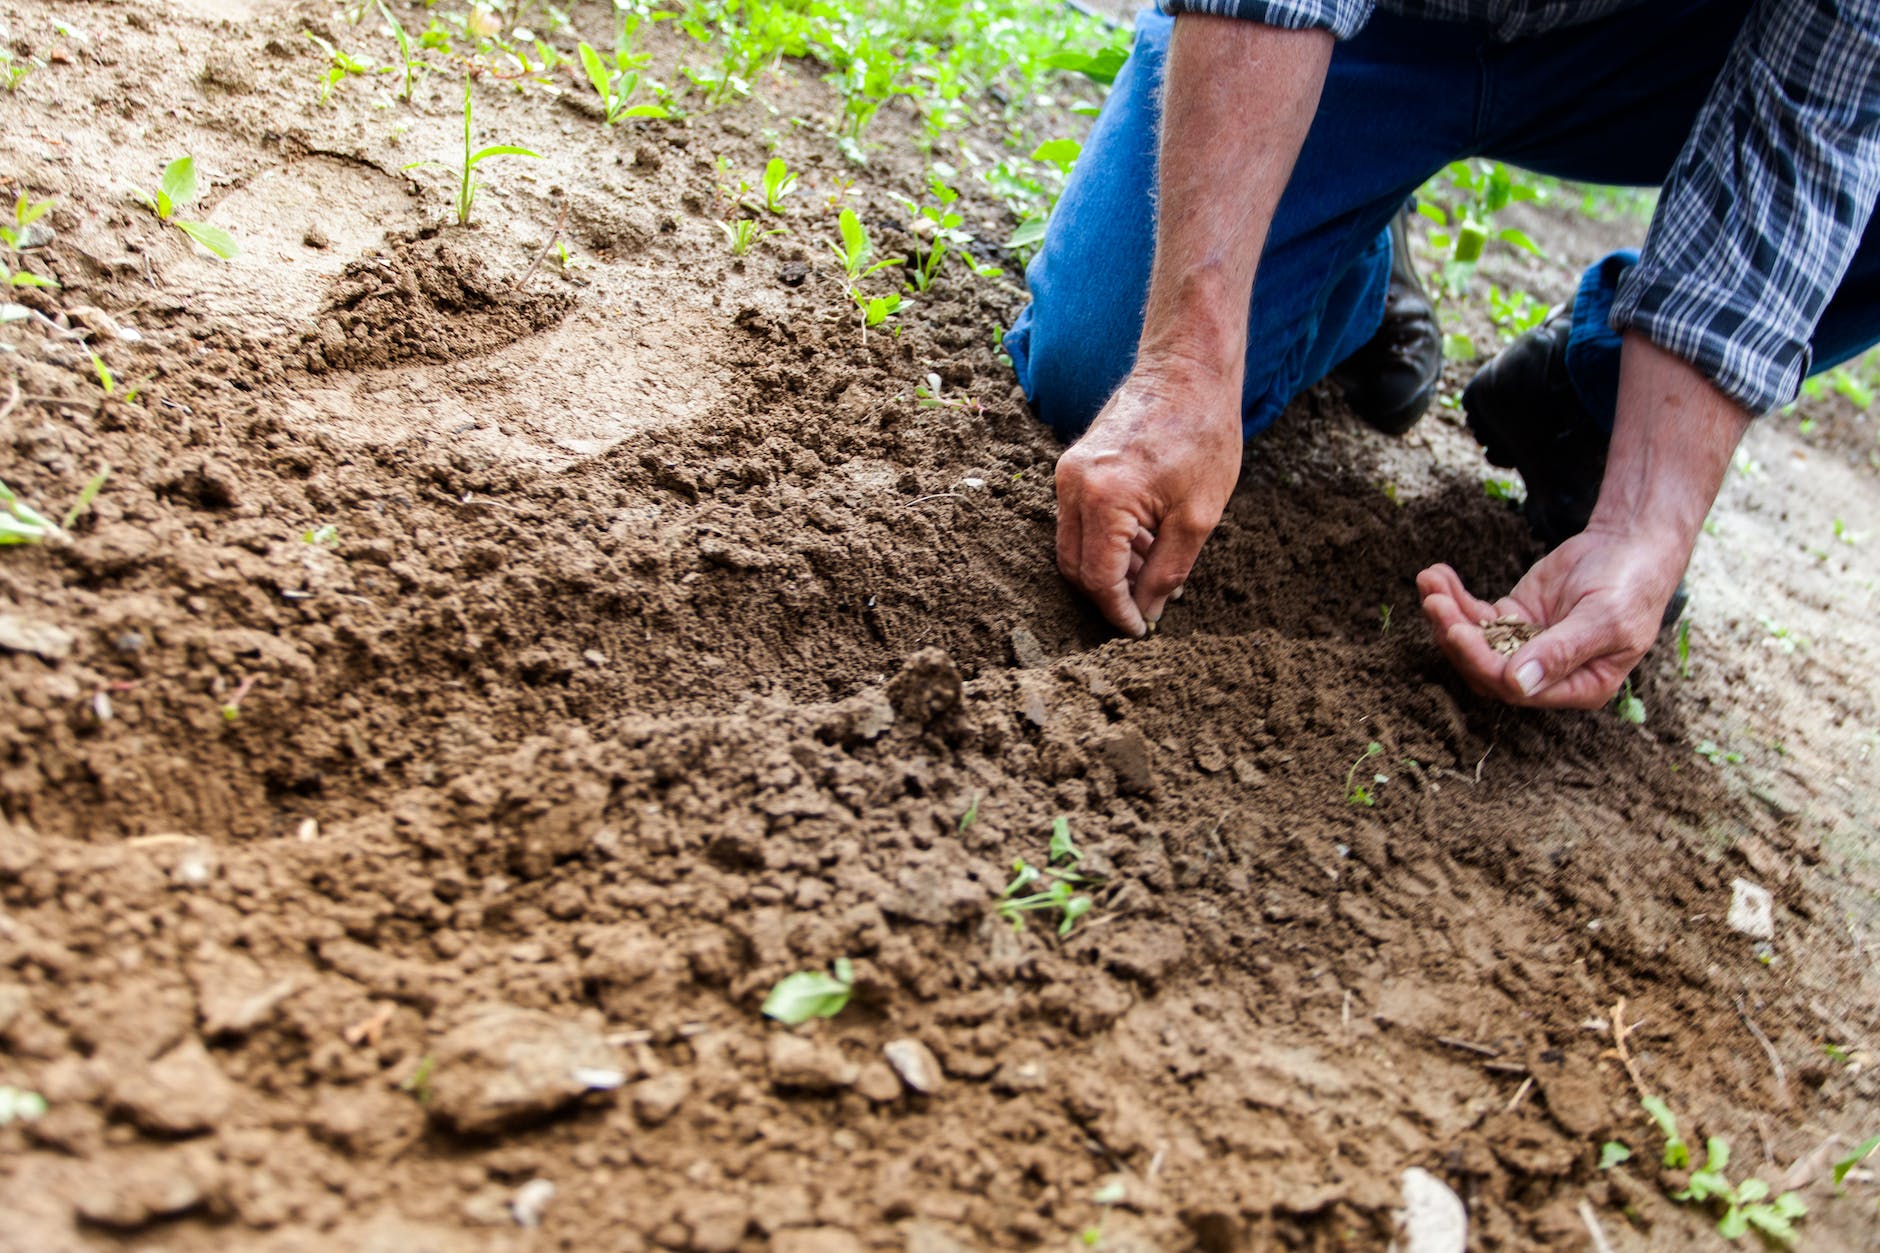
Our fall garlic is already planted. This year, we’re just doing one variety, so we got 3 pounds of garlic and they’re planted in locations, in the old kitchen garden. Hopefully, they will survive the winter in their raised beds, and we’ll have a good harvest out of them. Garlic will be a staple crop. We might still try other varieties to find which one we like best but, at this point, it’s more about figuring out how much to plant to meet our needs.

We’ve also got the unexpected purchase of saffron crocuses planted already. I’m quite excited to see how they do. They’re zone 4 and got extra protection for the winter, but our winter has been so mild so far, they should do just fine.

Berries, fruit trees and expanding the food forest

What we do next here will depend on our budget. With fruit and nut trees, they really should be planted as early as we can get them, since they can take so long before producing. We still need to get more sea buckthorn, since we lost 3 out of a bundle of 5. We got two tiny Trader mulberry along with our Liberty apple tree. They didn’t have stock of the usual sizes they ship, so instead of one 2 yr seedling, we got two 1 yr seedlings. Those were so small, we ended up keeping them indoors. They’ve grown quite a bit and, as I write this, they have gone dormant for the winter. Hopefully, they will start budding in the spring, as we harden them off before transplanting outdoors.

We might get another, hardier variety of apple tree, but we also need to keep in mind that almost all the crab apples we have now are dying of a fungal disease, and once that gets in the soil, there’s no getting rid of it. We’re looking at hardy plum and pear trees, but I’m also keen on getting things like hazelnuts, butternuts or black walnut trees. The hazelnuts bushes, at least, will start producing in 3-5 years, unlike the much longer time needed for the bigger trees.

We have black currants that need to be transplanted out of the shady area they are in now, and the haskap probably need to be transplanted, too. They have yet to produce.

Saskatoons are on our list, as are gooseberries.

More raspberries are definitely on the list. The goal is to have different varieties that mature at different times, so extended harvesting.

I would like to get more strawberry transplants and use them as a ground cover under food forest transplants. Those are something that should to be replanted elsewhere every few years, so that would work out.

We intended to get green asparagus and more purple asparagus, in alternating years, but we are having trouble figuring out where to plant something that we can expect to produce for 20 years, so that will wait.

No change on the sunchokes. They’ll take care of themselves at this point.

We also need to figure out where to plant annuals that we can treat as perennials that we didn’t plant in 2023, like strawberry spinach, dill and other varieties of bread seed poppies.

We also need to get native wildflowers to attract pollinators growing. Those will be scattered about, and bordering other areas.


Root vegetables

Potatoes will, of course, be grown again. I just don’t know where, yet! While I like the fingerling varieties, I don’t like fussing with smaller potatoes as much, so I think this year I will focus on just two basic varieties, one a white or yellow potato, and one a red potato. Scab resistance and storability will be the main factors to consider when choosing varieties.

I think we’ll need to skip beets and turnips for a few years. I’d still like to grow a couple of radishes for their pods but, so far, none have had a long enough growing season to reach that stage, so it might be skipped. We might still grow a few radishes for their roots, for those family members that enjoy them.

Carrots, however, have done well, so we’ll keep growing those for sure. I can’t remember if I still have Uzbek Golden carrot seed left, but do want to grow those again. The only down side is that I haven’t seen a Canadian supplier, and the cost of ordering from the US is getting too high. I’ve got lots of seed for other varieties, though.


Onions and Shallots

These will continue to be staples, even as we try different varieties to see what works. I’ve just got seeds for yellow globe onions and pink shallots in, plus I need to get seeds for a red variety. It’s yellow onions we use the most, so finding something that grows well here, and stores well, is the priority over other types.


Tomatoes

We had so many tomato starts in 2023, and not enough space to transplant them!

While we liked the black varieties we experimented with, my daughters have suggested that for 2024, we stick with just one fresh eating variety, and requested it be a grape or cherry tomato type. Besides that, we will try a different paste tomato variety. Something more resistant to blight!

When cleaning up the old kitchen garden, the Spoon tomatoes still had some ripe tomatoes on them, so I just stuck those into the ground after pulling up the plants. Who knows. We might have some self seeded Spoon tomatoes next year!


Corn, peas and beans

I want to grow peas again, but would like to try them somewhere else. We have yet to have really healthy pea plants, even though we’ve managed to have some to harvest. Deer eating them is only part of the problem!

With beans, I still want to try the varieties we didn’t manage to plant in 2023, with both bush and pole bean varieties, plus dry bean varieties. If we have the space, I’d like to try the seeds I’d harvested from the self seeded varieties that grew in our compost pile. I still haven’t been able to figure out what they are, or where they came from!

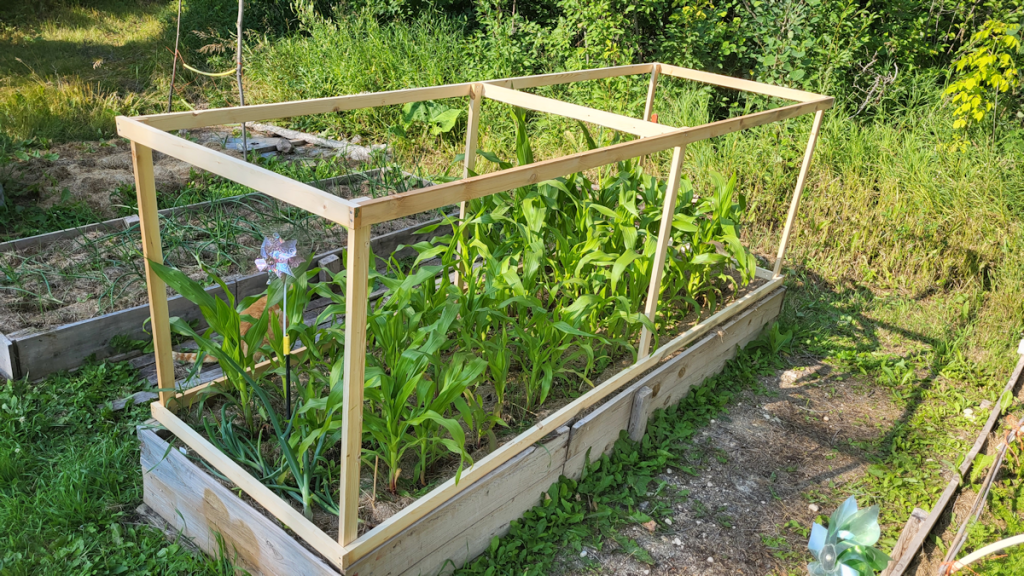
As for corn, I think we’ll save experimenting with popcorn again for another year. Likewise with the purple corn. I want to focus on growing sweet corn. We have a couple of short season varieties that didn’t get planted in 2023, so I want to grow at least one of those, and a decent amount of them!


Peppers, herbs and greens

For the sweet bell peppers, my daughters have suggested we just do one variety, and they don’t particularly care what kind. They find they all seemed to taste the same. I do have a request to grow hot peppers, too. We still have plenty of seeds to choose from.

For herbs, it should be interesting to see what makes it through the winter. Did the chamomile self seed? Will the thyme make it? I normally would expect the spearmint to survive, but they’re in a pot, not in the ground, so they will likely not survive the winter. We will likely find other varieties of herbs to grow, as we convert our old kitchen garden into mostly herbs, but we haven’t decided what to try next, yet.

As for greens, we probably will skip the lettuces again, but I won’t be unhappy if the Jabousek lettuce managed to self seed. I also want to try growing the Hedou Tiny Bok Choy seeds I harvested our of the tiny little plants that survived being choked out by Chinese elm seeds.

At some point, I want to grow cabbage, but I don’t think it’ll be this coming summer.


Melons

We love melons, so we will definitely be growing them again. I just got a summer melon mix of seeds to try, plus we still have seeds left from the varieties we tried in 2023. I would love to get the Cream of Saskatchewan Watermelon growing. It’s a short season variety that I might actually try direct sowing, since starting them indoors was a complete failure!

Summer squash

These are a staple crop, and we still have plenty of seed for the green and gold zucchini, the yellow pattypan squash, and the Magda squash. I might need to get more G-Star seeds, as those seem to do so well here, but I’d also like to try a new variety of patty pans, too. If we can get control of our slug problem, these can be direct sown instead of started indoors.

Winter Squash

I want to try all the varieties we tried in 2023 again! We won’t have the space, though. We have the new Wild Bunch winter squash mix of seeds that just arrived, and those will probably take up most of the space we have available. If we have the room, I’d like to do the pink banana and candy roaster again, as they did so well. There are also others that didn’t do well that I want to try again, with better growing conditions. The main reason I am willing to dedicate so much garden space to these is for their winter storage that will provide food for us for many months.

Gourds

Gourds are something I’ve been wanting to grow mostly for crafting purposes. Especially the larger varieties, such as the canteen gourd and the African drum gourd. Luffa, of course, I want to grow for their sponges. Unfortunately, we’ve had issues with getting most of them to survive at all, never mind bloom and produce early enough to fully mature on the vine, even for varieties that I know should be able to do so, in our short growing season. I need to rethink where to grow these, and focus on improving the soil. I think that’s the source of most of our problems. These are heavy feeders, and our depleted soil needs more work. Whether or not we grow gourds again in 2024 will depend on having that sort of prepared space. They are not as high on the priority list for the upcoming year.


Eggplant

I definitely want to grow both the Little Finger and Classic eggplant again! We had the one Classic eggplant do surprisingly well. I now know not to plant any in those chimney block planters, but the wattle weave bed seems to be a much better space for them.


Salsify

My daughters had requested these, as the roots supposedly taste like seafood, and that appeals to them. With their deep roots that, from what we’ve read, are fragile, they were going to be grown in repurposed garbage cans turned into planters. It just didn’t happen. I’d like to give it a go in 2024 and see if we can successfully grow these at least once!

Sunflowers

We still have the seeds for Mongolian Giant and Hopi Black Dye sunflowers. They need to be grown while they are still viable. When we grew them before, we tried starting them both indoors and outdoors. The main problem was, the deer!

So I do want to grow these again, if we can figure out where, and how to protect them. With the Mongolian Giant, I want them to double as a privacy screen, too. Ideally, I would interplant them in the food forest area, but that’s where the deer traffic is heaviest!

Cucumbers

We still have Lemon Cucumber seeds that I wouldn’t mind trying again. We’ll see if we have the space. I don’t think we’ll bother with pickling cucumbers. The year we grew those, my sister dumped loads of cucumbers from her garden on us. We pickled as many as we could before we ended up having to toss the rest on the compost, because they went moldy before we could finish them.

We haven’t been eating the pickles.

My husband normally loves pickles. We only opened one jar, and that’s it. No one’s wanted to eat any of them, since.

I have no idea if our own pickling cucumbers would have done better, as we never had enough of a crop to pickle, though we did have some for fresh eating (they were a dual purpose variety).

Perhaps some day, we’ll try pickling cucumbers again. For now, though, if we try any, it’ll be for fresh eating, and I think the Lemon cucumber is an interesting variety I’d like to try – if we can get them to germinate and survive long enough to transplant!


So that’s my thoughts on what we want to plant. These are the other related projects we need to work on.

Raised beds

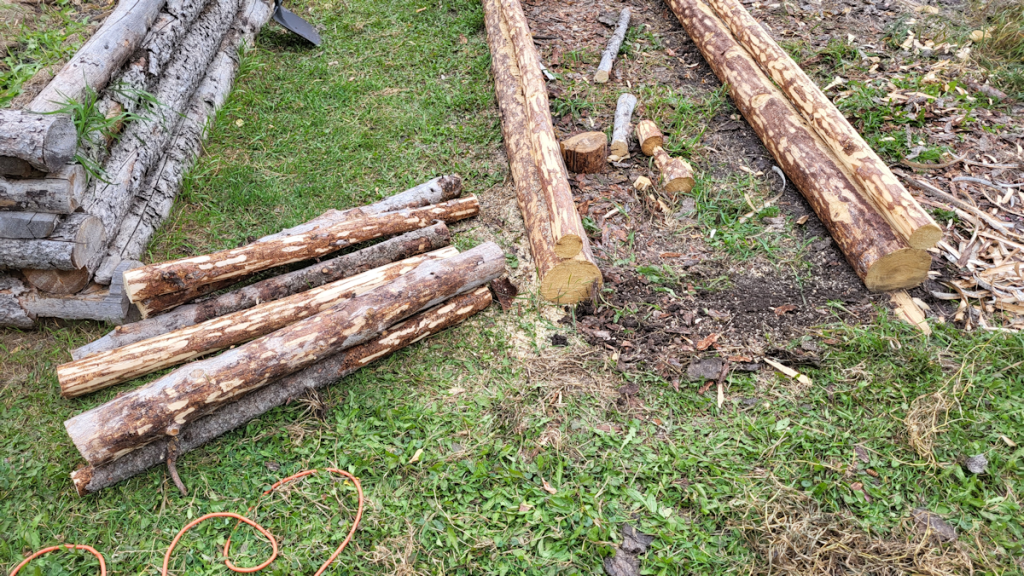
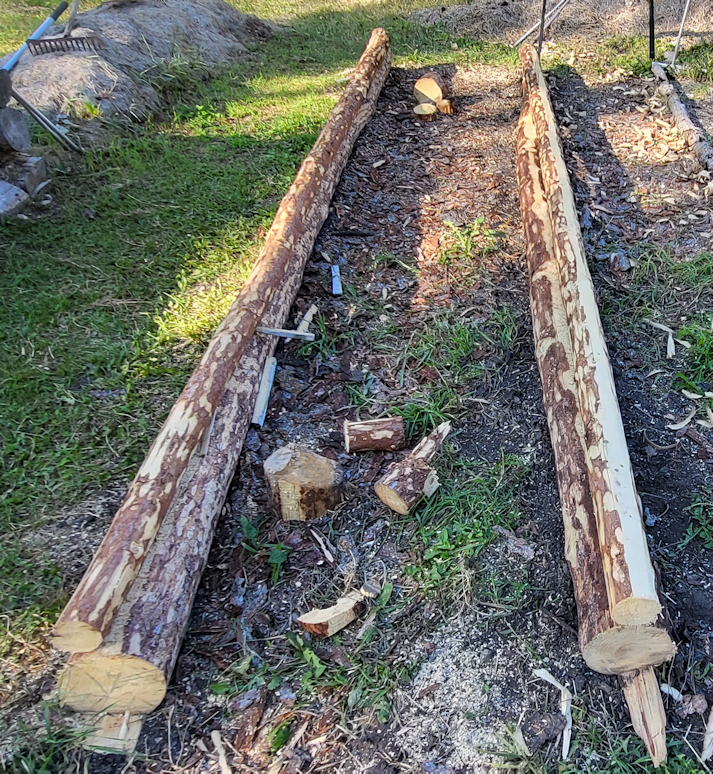
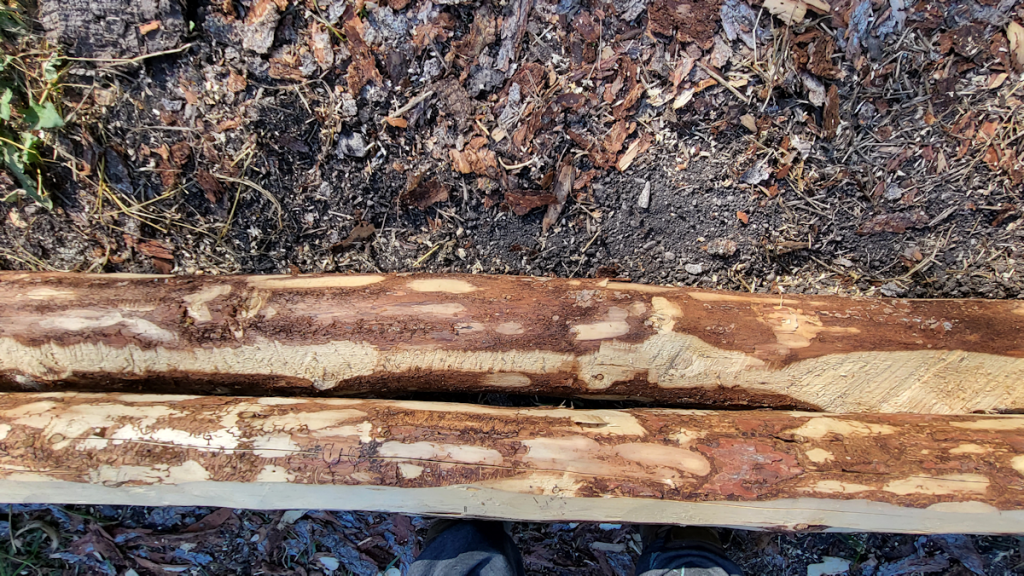
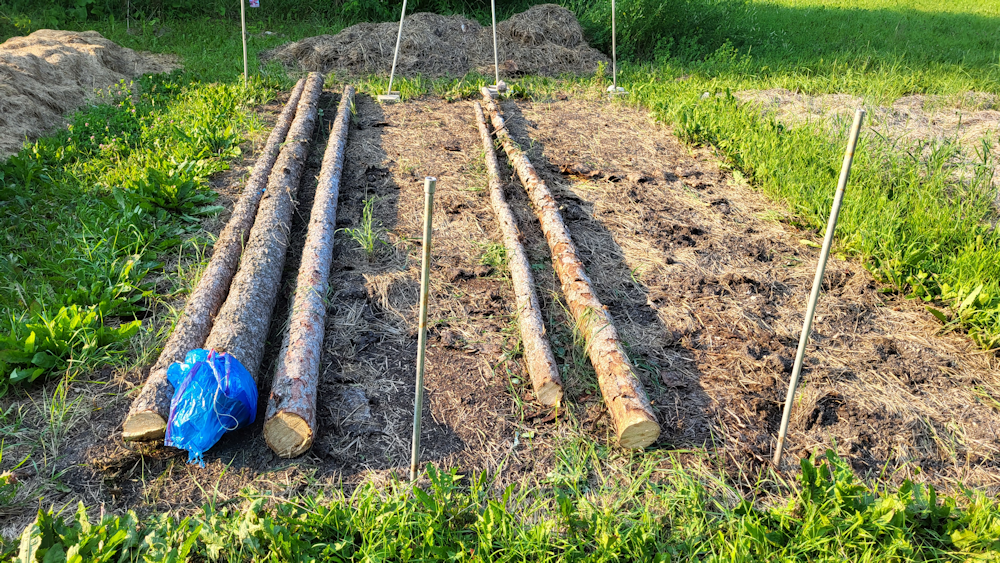
A priority needs to be put onto getting the trellis beds built. Then add the trellises and, if we have the time, join pairs of them to make the trellis tunnels we have in mind. We will also need to have portable trellises for climbers that will be planted in other beds that will not have permanent trellises built in.

The current low raised beds in the main garden area need to be rebuilt into more permanent fixtures, but the priority is to build more beds in general, first. Especially since we won’t be growing squash in the old squash patch again, and still plan to grow a lot of squash. That space will also eventually have raised beds in them.

The soil in the low raised beds, however, needs further amending, particularly to prevent soil compaction. I suspect soil compaction is the cause of a lot of our problems, even though we use mulches to help prevent that.

Rebuilding the garden tap

When I was a kid, helping my mother with her garden here, that tap came in so very handy. I hope to put a priority on getting that set up again, in a way that will last at least another 50 years! Along with the tap, which will be set up strong enough to support a garden hose attached to it, there will be a vegetable washing station and work station.

Garden shed

I want to at least get started on the base of this. We need to replace the old and rotting garden shed. I also want to do a small cordwood construction practise building. The original plan of building a 10’x10′ outdoor bathroom with composting toilet, to replace the outhouse, will be postponed. We’ve chosen a location for it, but when it comes time to fell the rest of the dead spruces, we need to be able to fell some of the trees in that direction, then drag logs through there.

So what I want to build first as a practise building is a smaller garden shed. Because cordwood walls are so much heavier, we need to prepare a base that will support that weight and not sink. That will mean bringing in gravel (now that we have the truck, we can actually drive to the gravel pit to collect some!) to cover the ground and raise the area a bit higher and level it. We plan to visit a ReStore in the city, or a salvage yard, to find concrete blocks or pavers to use as a floor, and a base for the cordwood walls.

The shed itself is planned out to be 6’x8′ on the inside, not counting the thickness of the walls. The cordwood walls will probably be 8 inches thick (for a larger building, like a house, they might be 12 or 16 inches thick, or even more), and have a shed roof, which will probably be a metal roof. The south facing wall will have a window – we have many salvaged windows, complete with frames, in the barn to choose from – and bottle bricks in the wall around it for light inside. We have doors in the barn and sheds, too, and should be able to find something we can salvage.

I want to take advantage of the cordwood construction to include longer logs in the walls, extending outside the northern wall closer to that garden tap, that can be used to build a bench and maybe a counter. Other longer pieces can be extended into the interior, closer to the roof, to build shelves on.

There are other things that are a priority that will take a lot of time and resources, but I do hope to at least get a start on the base. We really do need a good garden shed, and I’d like to build one that will last many, many years.

Well, that’s all I can think of right now. I’m sure I’m forgetting something!

We’ll definitely have our work cut out for us.

I’m rather looking forward to it!

The Re-Farmer

Progress so far

Taking a break for some food. Here are just a couple of pictures of what I managed to get done so far, today.

The first trellis bed is done. Had to mess around to get the ends of the sides the same height as the three end cap logs. Finally, just in case, I sprayed the holes each rod and rebar with clear sealant I got for the eavestroughs. The hollow rods in the middle end cap log I put in today had to be inserted at an angle, which would allow rain to drain right into the holes in the logs. The sealant isn’t made for something like this, but it’s what I had, and I think it should help. The bed is now ready to be filled.

I finally got the stump chair near the chain link fence built. Then, after adding another coat of paint to the sun room door, I painted the seat as well. Both will need one more coat.

While the day is still nice and the light holds, I’m going to tackle the felled trees in the spruce grove next.

The Re-Farmer

Trellis bed progress: first end cap done

Finally! I was able to bring over my tools and equipment, which I just keep in the utility wagon now, over to the garden and get a bit more done on the first trellis bed.

The first step was to cut the two logs set aside into 4′ long pieces. I know for sure I’ll need two per end, but these logs are thinner than the ones in the side walls, so I cut extra just in case.

Before putting one of the end pieces down, I loosened up the soil where it would be lying and tried to level it off a bit, since there was a dip near the middle of the space. Because I want these beds to be 4′ wide on the outside, after laying down the first end piece and matching it to the outer edge on one side, I shifted the other side a bit to line up with the other end.

Steel toes boots are create for kicking logs and not breaking my toes!

I started with the thickest 4′ log for the base log on this end. Using the side wall logs to mark where I needed to cut, I removed wood from the ends to fit over the side wall logs.

What a pain.

For this job, I used the mini-chain saw, a hatchet and hammer to remove the bulk of the excess wood, and even the electric chain saw to remove the excess wood.

A pain, to be sure, but much faster and easier than when I started building the high raised bed and had only hand tools!

Once I was satisfied with how the end piece fit, it was time to secure it. A couple of years ago, I’d bought some plastic coated metal rods to use as supports in the garden. The rods were hollow, and they quickly bent and broke in our rocky soil. I’ve been using the broken pieces to secure things like hoops for garden beds, but I also used some to secure the corners of the tiny raised bed in the old kitchen garden.

I decided to use them to secure the end pieces on the trellis bed, much like I already used rebar to secure the side walls. I drilled matching holes through the end pieces into the side walls, then hammered the metal rods in place.

Then I went through the other 4′ lengths to find one that fit the best on top of the first log and repeated the process. This time, though, I was having to fit them over two very different sizes of log, so that required some extra angled cuts, as well as flattening the length of both logs a bit, so they’d fit against each other better. There’s still quite a gap in between them in one place, but that can be chinked later. Last of all, they were secured with more metal rods, though the top log was thin enough that I could break one of the rods in half and use the shorter pieces.

And here it is! The first finished end cap, viewed from inside the bed.

This all took quite a while to do, so once it was done, I stopped for the day. I’ve got too many other things that need to be worked on.

I’m quite happy with how it’s working out so far.

Since the vertical posts will be added to the outsides of the bed, not down the middle as I’d planned to do originally, I will fill the bed once the other end cap is done. That way the layers of material will have at least a bit more time to break down under the top layer of soil it will get. I may even decide to get more logs to build the next bed, first. We need beds to plant in next year, more than we need the trellis part of it. The trellis posts can even be added after planting, if necessary. The priority is to have more planting space. This year’s garden is so much smaller than I had planned on, simply because I ran out of prepared spaces to plant in. I don’t want to have that situation again, next year!

So, once this bed is built and filled, it’ll be time to cut logs to size from the two downs trees we have ready right now and drag them over. These trunks are so thick, the bottom 10′ will be set aside to be used as supports for the outdoor kitchen we will be building. Using such thick logs in the trellis beds would be a real waste of material.

The first day of fall is tomorrow, and time to get work done before things get too cold is running short!

The Re-Farmer

Trellis bed progress: stripping

The plan for today had been to get the ends onto the trellis bed. Just before I headed outside, however, the power went out.

All I’ve got is an electric chainsaw, so cutting logs to size was out.

Which was fine. I needed to strip the logs of bark, first. I can see into the house from where I’m working, so I could keep an eye out for any lights back on again, letting me know the power was back.

Three hours later…

I started with the 2 dead spruces intended for the end pieces, one of which you can see on the saw horse. Then I started stripping the poplar that will be the vertical supports.

The poplar was much easier to work with, for the most part. The spruces have been dead for quite a while, so much of the barks is dried stuck to the wood. The poplar is still quite green. The draw knife could slide between the bark and the wood quite nicely, and just glide through.

Except for the branch nubs and damaged bits!

I ended up stripping them completely, as I could see critters were already getting under the bark and causing damage. The shorter lengths made them easier to handle, too, though I ended up putting the larger of the spruce logs back on the saw horse, just to stabilize it. With the lighter logs, there wasn’t enough weight to counter using the draw knife, and the darn thing kept rocking back and forth, and threatening to tip over.

Once stripped of bark, I lay them across the log walls to stay dry. Some of the logs I picked up were so damp from the grass, the undersides were covered with slugs!

After I got 9 of them done, my back was telling me it was time to do something else. So I grabbed a rope and dragged over the last 3 posts, then went back for the odd pieces. Those were light enough that I could drag 2 or 3 at a time, so that was done faster. These odd ones may or may not be usable as part of the trellis. If not, they will go into the bases of the trellis beds and buried, to break down over time.

I had just finished dragging over the last pair of odd sized logs when I saw a light on in the house. By then, I was done with this job for the day. I’ll continue tomorrow.

As for the power outage, it was likely due to high winds. Not long after ours was back on, my house sitting daughter let us know the power went out at my brother’s place, too. He’s got multiple back up generators, though, so she is just fine!

The power loss was just for 3 hours this time, but it’s a reminder on how we need to get our back ups done. Like the outdoor kitchen. With the high winds we had today, we could not have done any outdoor cooking, if it came to that. The outdoor kitchen we have planned will allow us to cook outdoors in pretty much any weather conditions.

The other thing is to get that old well checked. If all we need is new leathers for the hand pump, we’re set for water, too. Plus the outhouse will do until we build the more comfortable outdoor bathroom with a composting toilet we have planned.

Little by little, it’ll get done!

The Re-Farmer

Trellis bed shift

I’ve been analyzing that side wall of the trellis bed with the bowed log on the bottom, and decided we needed to make a change.

The plan had been to cut joins into the horizontal logs and the vertical posts, then secure them in place. There will be four of posts, about 6′ apart but, the more I looked at it, the more I realized that in order for the posts to be in line with each other, I’d have to cut away far too much wood. It would weaken them too much.

There was one solution, though, that could be done before the end pieces were attached. The pairs of logs are attached to each other, but not to the ground.

So I snagged my daughter and some rope, and we reversed the wall.

I neglected to take photos at the start. To carry the logs, we wrapped some rope around the ends and used them as handles to lift and carry the logs around to face the other way. It was awkward, but it worked.

The rebar that joins the logs goes all the way through. At the end in the foreground, barely an inch goes through. At the far end, there’s almost 3 inches of rebar that could be jammed into the ground as we lined up and set the logs in place again. Since I cut the ends of the walls in line with each other, we had to make sure they still matched, so that the walls at the ends will be straight once they’re added.

This shows better, why I decided to switch it around. You can see where I used the chainsaw to flatten the top of the base log, for the other log to rest on! ๐Ÿ˜„ That worked out on the ends, at least! This is where the bow sticks out the furthest, pretty much in the middle. The vertical posts would have been on either side of this section. The top log is pretty straight, so I’ll probably just flatten the logs where they will come in contact, rather than actually cut joins.

But that will be done after the end pieces are added. Technically, once those are in place, we could still move the entire bed if we had to, but that would not be a very good idea!

The Re-Farmer

Things that got done today

It was hot, muggy and gross out there, but stuff still needed to be done!

My daughter and I finally got to picking the sour cherries from the tree next to the house.

We picked as many as we could reach using the little household stepladder. The ground is too uneven to safely use the bigger A frame ladder, even with a spotter. Which is okay. We can leave the rest for the birds! We almost filled the colander we were using to gather them. Then my daughter used one of the window screens we found in a shed that have been so handy to lay them out. She gave them a good washing and picked over them to get rid of any damaged or bird eaten ones that got missed. I think we still had about 5 pounds of cherries when she was done. I’m thinking we might make a syrup out of them, but will look up different ideas to try, first.

We’ll have other fruit to harvest, too.

There are SO many grape clusters! I’m still amazed. The most we’ve ever since since moving here. It will be some time before they’re ripe, though. The chokecherry tree by the compost ring and low raised beds will be ready to harvest soon. Actually, there are two of them, very close together. There’s a larger, healthier looking chokecherry tree by the main garden area, but with the tall trees beside it, it doesn’t get anywhere near as much sun as the one by the low raised beds. The berries on there are still mostly green, and there are far fewer of them. These trees are still pretty spindly, as they were quite choked out until we cleaned up around them, but they are just covered with berry clusters, weighing down the branches.

While checking the grape vines, I was on the lookout for more of those caterpillars, but accidentally knocked a big brown one onto the ground!

I tried to pick it up to put it back, but it kept flipping, uncurling and curling. It was remarkably strong! In my attempts to use leaves and twigs to move it, it flipped itself onto the step, which made it very convenient to take photos! I did finally get it on a grape leaf and back onto the vine.

Then I went to get one of the vines out of the spirea, where I found the green spotted caterpillar. So pretty! I was able to untangle the vine without disturbing it.

While I had the timer going for the sprinklers in the garden, I finally finished attaching the fence wire to the raised bed cover frame.

What a pain in the butt that was!

While setting up to work on it, I noticed that a screw in one corner – top right in the first photo – had snapped, allowing the pieces to rotate slightly. Not good!

Propping the frame up with boards helped steady it, but it was a real pain to attach that fence wire. Plus, Gooby decided that rolling around on the ground and sticking his head or feet right were I was hammering was a good idea.

It was not a good idea.

He was very determined, though!

I did finally get the fence wire attached. Between the snapped screw in one corner, and the likelihood of the U nails simply popping out while the frame is being moved, I decided adding extra boards to sandwich the fence wire was a necessity. I cut spare pieces to length, but by then I had worked my way through the sprinkler and soaker hoses, and needed to do the rest of the watering directly. My daughter was a sweetheart and attached the new lengths to the frame for me. That definitely made the whole thing stronger.

The lengths of fence wire for this was 5′, which made for a rather tall arc. This would be perfect for things like the bush beans on the high raised bed. For the next one, though, I’ll use 4′ lengths.

What I will not use, though, is that fence wire again! The twisted wire at every join is just too thick, making attaching it to the wood less secure. I still want to have something structurally sturdy, though, as it has to support any mesh, plastic or netting that is laid over it. Either that or I will need to add hoops to support the material. Hardware cloth or chicken wire would not be enough on their own.

With this one, I plan to cover it with the black netting we have, closing up the ends in the process. That will make sure no cats will get into the beds and lay down on our vegetables!

The buggers.

Meanwhile, the garden got a good watering. We hit 28C/82F today, as we did yesterday, but did not get any of the scattered rain showers that were predicted. Tomorrow, at least, will be a slightly more pleasant 23C/73F but it’s supposed to reach that temperature by noon and stay there until 7pm. To top it all off, we’ve got air quality advisories from all the wildfires. It was definitely on the hazy side, today! Just moderate air quality advisories for our area. Others are listed as extreme, so we don’t have much to complain about, that’s for sure.

I gave up trying to go to bed early today – at least not as early as the last couple of nights. Still debating whether I should try sleeping on the couch to reduce the interruptions by kittens.

Speaking of kittens, Question has absolutely glommed onto me today! She’s constantly climbing up me, whether I’m standing or sitting. While bending over to pick up the adult cat food bowls, I suddenly had a kitten hanging off my butt. Question had been on the bed behind me and went for it. When I stood up, she climbed her way up to my shoulders and stayed there! After feeding them, I sat down to work on the computer with my own supper. Even though she ate her own food enthusiastically, she was determined to eat mine, too! She was not happy that I would not let her! When we were done giving Leyendecker his medications, I settled at the computer again, only to have her climb up me again, to nap on my chest. As I write this, I’m leaning way back in my chair as she sits on my belly. I think she’s nodding off! None of the other kittens behave like this. Mind you, while her sister has been improving in health, Question is still really gooby, and doesn’t have as much energy as the other kittens.

What a handful the litter bugger is, though. Literally. She’s just a tiny little handful. They all are! Not for long, though. They sure are growing fast!

Well, I need to make up my mind on where I plan to sleep tonight.

If I sleep tonight.

The Re-Farmer

First cover done!

This afternoon, my daughter and I were able to get the first raised bed cover done! The frame, at least. We worked on the one intended to go over the popcorn first, as it was the most involved.

Here is the finished product!

It is now ready to support whatever cover material we choose for it. The question is whether or not I will be attaching something to it permanently, or if I want to attach something in such a way that we can take it off and attach something different, later.

Considering that this bed will need protection from deer and racoons, something permanent would be most logical. I have enough chicken wire to wrap around the sides, at least, but racoons will tear right through that. I might have to pick up some 1/2 inch hardware cloth. Until then, however, we could probably still put the chicken wire around it temporarily.

As you can see, the cover doesn’t fit exactly over the raised bed. That was expected. The bed itself has become wonky over time. Not only have the sides been bowing out, but some of the boards are warping. One warped board you can see in the photo has bent outwards enough, it actually snapped one of the screws that was holding it to the 2×4 join.

We will have to find a way to lock the cover onto the walls of the bed, too, or it could simply get knocked right off by a determined critter.

I’m pleased with how it turned out. The frame itself is lightweight, but sturdy. It can be carried by one person, though having two people is preferable, if only to lessen the chance of the frame being twisted or dragged.

We cut extra pieces when prepping the boards, and there are enough to make 3 more frames. I will be away tomorrow afternoon with my mother, but my daughter might be able to get it done while I’m out. They will be much easier, since it’s just the basic rectangle, exactly the same as the bottom part of the frame in the photo above. The only difference is that I plan to add eye hooks to the middles inside the long sides and use cord to keep it from bowing out. I’m still debating whether they will need corner braces. That will partly depend on how they hold up to having the fence wire attached permanently to them. I would rather add them after the fence wire is attached, anyhow. It will be easier to add braces with the wire in place, then add the wire with the braces in place. Since I have to go to the hardware store, anyhow, I will try to remember to look at metal corner braces as a possible alternative.

Little by little, it’s getting done!

The Re-Farmer

Trellis bed progress

Finally!

With last night’s storm, I was happy to see the tree my brother cut down that got hung up on other trees had fallen closer to the ground. It’s not going to drop any further, though. It’s now hung up between the trunks of a group of trees. We can, at least, reach most of it better, though, so we’ll be able to work on it eventually.

With today’s slightly cooler weather and a nice, clear day, I started working on getting those dead spruce trees my brother cut down for me, out of the bushes.

I took photos and will eventually put it all together in a video but, for now, this is what I managed to get done today.

Gosh. That doesn’t look like much, now that it’s done! ๐Ÿ˜„ It did, however, take a LOT of prep work before these logs could finally be dragged over.

The two trees that were on the ground were almost completely hidden by underbrush. I used the weed trimmer to clear a path to them first, then did a bit around the trees themselves. There were too many hidden branches, though, so I had to shift gears.

The top of the first tree extended a lot more than I thought it did. I used the little mini-chainsaw pruner to clear the branches, then remove the most crooked section of the top, before working my way down the trunk. I had the wagon nearby to put the branches in, and made a few trips to the branch pile near the fire pit, cleaning up as I went along.

Once I got it clear enough, I was able to pull the entire trunk out from under the stuck tree, then continue removing a few more branch stubs. Next, I measured 18 feet from the thick end of the trunk, and used the electric chain saw to cut it. I used a rope to drag the top part through the trees and into the garden, which was harder than it should have been. I neglected to roll it over and check it, first. There turned out to be a stub of a broken branch at the end, acting like an anchor!

Needless to say, I made sure to check the 18′ piece before I dragged that away, too!

The top of the tree is around 16-17′ long. Too short and thin to make the long walls of the beds, but it will do nicely, cut into 4′ lengths, to create the end walls.

The other tree that was flat on the ground was looking very crooked – spruces tend to be like that at their tops – and I thought it was shorter than the first one. As I cleared more dead branches and tried pulling it out from under the stuck tree trunk, I realized it was a lot longer, and thicker! In fact, when I finished clearing the branches and measured out 18′ from the end, I was still at the far side of the stuck tree! It was simply too big to pull out first, like I could with the first tree.

The top was moved first. I hadn’t bothered to measure it, since I figured it would be too short, but when I dragged it between the posts that are 18′ apart, it almost reached, end to end! The thinner top, though is still pretty crooked, so it will likely not be used as a side wall.

Then it was time to drag out the rest of it. I rolled it around to cut away any branch stubs that might cause problems, but the trunk was quite a bit larger and heavier, and getting caught on things. While I was working, I was constantly finding very old and rotting branches and pieces of tree trunks hidden in the undergrowth, that have clearly been there for many years. They made for a rough surface to drag on. I ended up tying a plastic bag around the end of the trunk, to reduce friction. It helped a lot but, by then, I was getting pretty hot and tired, so I got a daughter to pause making supper to come help me drag it out.

While working on this tree trunk, I found the fourth tree my brother had cut down. It is another big one, and he felled it in the opposite direction. It’s almost completely hidden, not just by undergrown, but other trees, and I’m honestly not sure how I’m going to get at it.

As for the tree that’s stuck, that one is even bigger. This is one that’s going to have the thickest 10′ cut off and taken to where we plan to build the shelter for the outdoor kitchen we plan to build. These trunks are far too thick to use for raised beds, as they would take up a lot of growing space. Rather than cut them in half or something, we will instead use them as vertical supports for the shelter.

But I was not about to work on either of those logs, today.

I started to put things away, but I really wasn’t happy with having done only two trees. Especially when there were other thinner dead trees, right there.

Yup. I ended up cutting down another tree.

Gosh, that thing felt so light, after fighting with the big one! Even though I used a hinge cut, it still fell off to one side and got a bit hung up on other trees. It was easy to get loose. I just put the rope around the trunk near the stump and pulled it until it fell the rest of the way. It also fell across the stuck tree, which made it much easier to work around.

Then it was just a matter of clearing a few branches – there weren’t very many at the bottom half – measuring out and cutting 18′ and dragging it out.

The top of the tree is resting on top of undergrowth, and I left it there for now. I am not sure how much of it will be useable. It won’t be useable for the walls on the raised bed, but it might be useful in other ways.

I’m still going to have to cut down one more smaller tree for this bed. There’s one that looks like it’s similar in girth as the log with the plastic bag on the end. I’m planning to make these beds 2 logs high, but I want the bottom logs to be the bigger, thicker ones.

This time I have the draw knife, so I want to de-bark the logs and cut away any remaining branch nubs, lumps and bumps. I didn’t do that for the high raised bed, and I can see that it would be much better to do it than not.

I want to get at least one bed built, with the vertical trellis supports in place, before cutting down more trees for the second one. Ideally, I’d put in the vertical supports for both beds, along with the horizontal supports to make a trellis tunnel, right from the start, but we’re going to have to work on things piecemeal for now. Plus, we will be building at least one, probably two, more of these, so this one is the learning experience!

I’m happy with the progress, and I’m paying for it now, but I’m actually not having as much trouble as I’ve had in the past. Of course, tomorrow might prove me wrong, but it seems my body is finally starting to handle things better. Yes, I’m stiff, my left knee tried to make an escape, and a thigh tried to go into a conniption fit, but I’ve certainly had far worse pain, stiffness and joint instability after far less work.

It just feels so good to finally be able to work on this!

The Re-Farmer