2022 garden preparation: fixing up the tomato bed

Today, I took advantage of the lovely, warmer than forecast weather we are having, to clean up and redo the tomato bed.

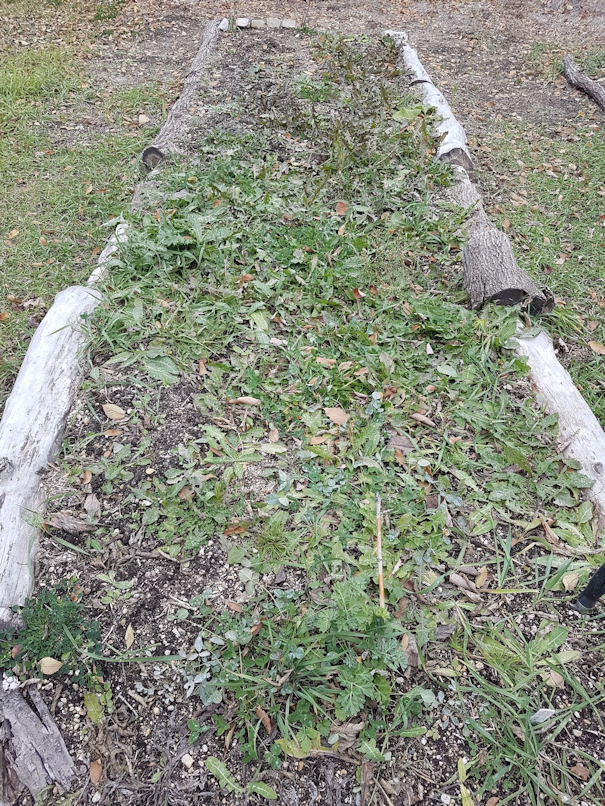
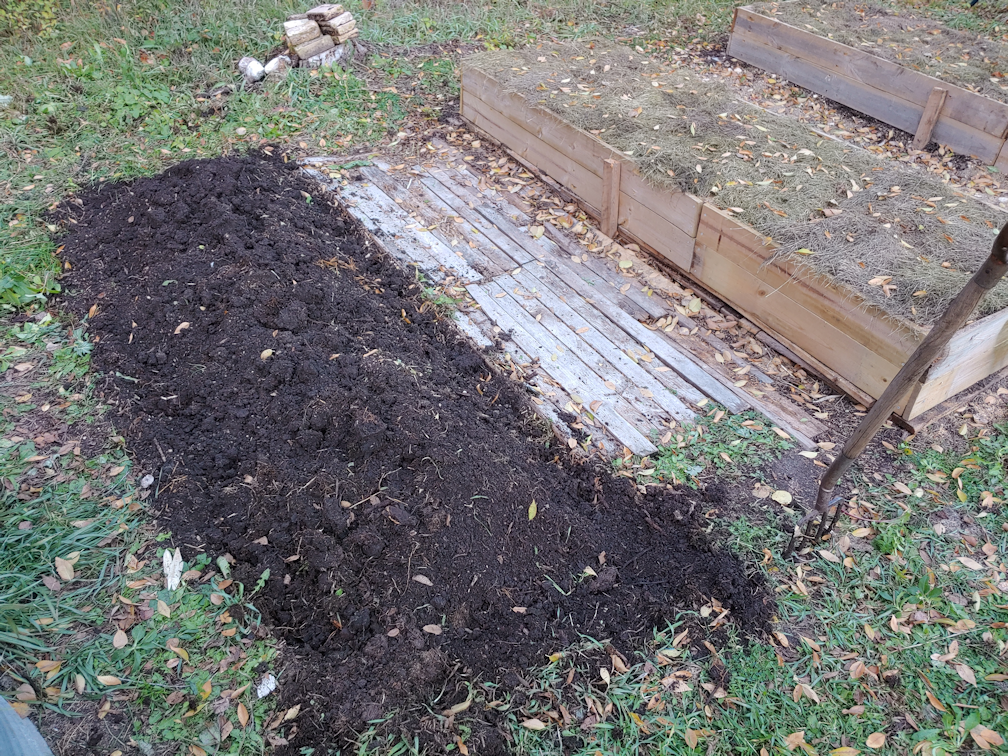
Here is how it looked when I started. This is a new bed, built this spring, and I was very happy to see how deep and strong the roots on the tomato plants where, when I pulled them. I also saw the biggest, fattest worms I’ve seen this year!!

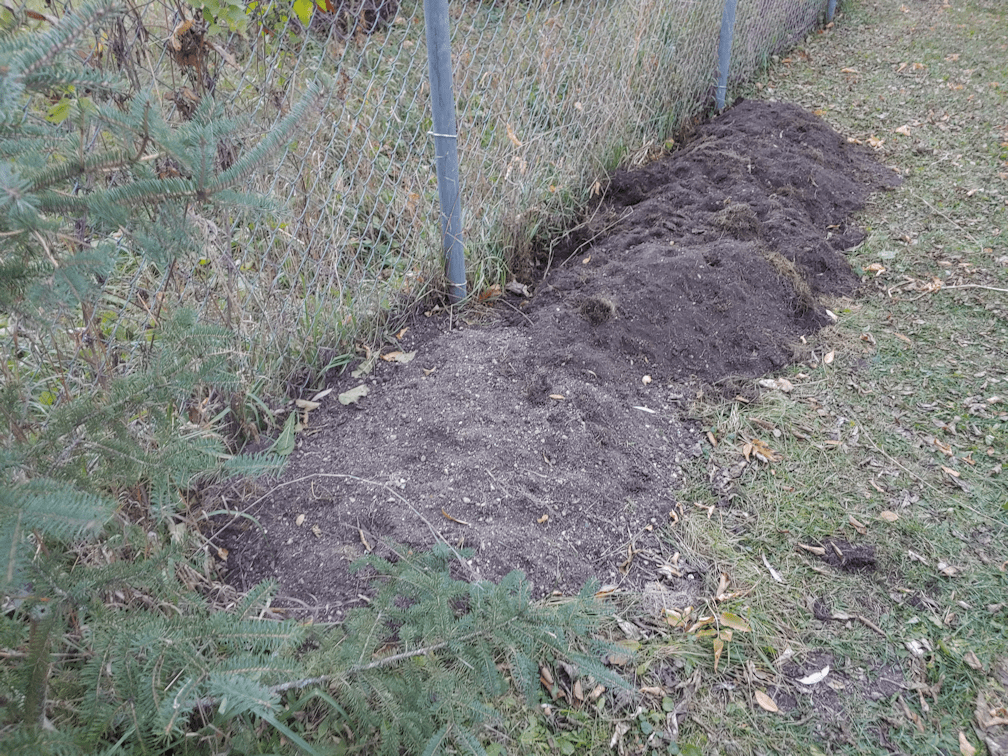
There were two goals to redoing this bed. One was to make sure the soil didn’t go through the chain link fence. When the bed was build, we laid cardboard down on the grass first, with the flaps up against the fence. That cardboard is pretty broken down now. We had to top up the soil part way through the year, and boards I’d scavenged from the barn were used to keep it from going through the fence. The other goal was to use the bricks to create a little retaining wall around the bed. When watering the tomatoes, no matter how gentle we tried to be, soil eroded into the path, exposing roots. Especially at the end by the vehicle gate, which got even more soil added to try and combat the erosion.

The first thing to do was move the soil away from the fence and pull up the boards. Then I went back along the fence with a hoe to make it as even as I could.

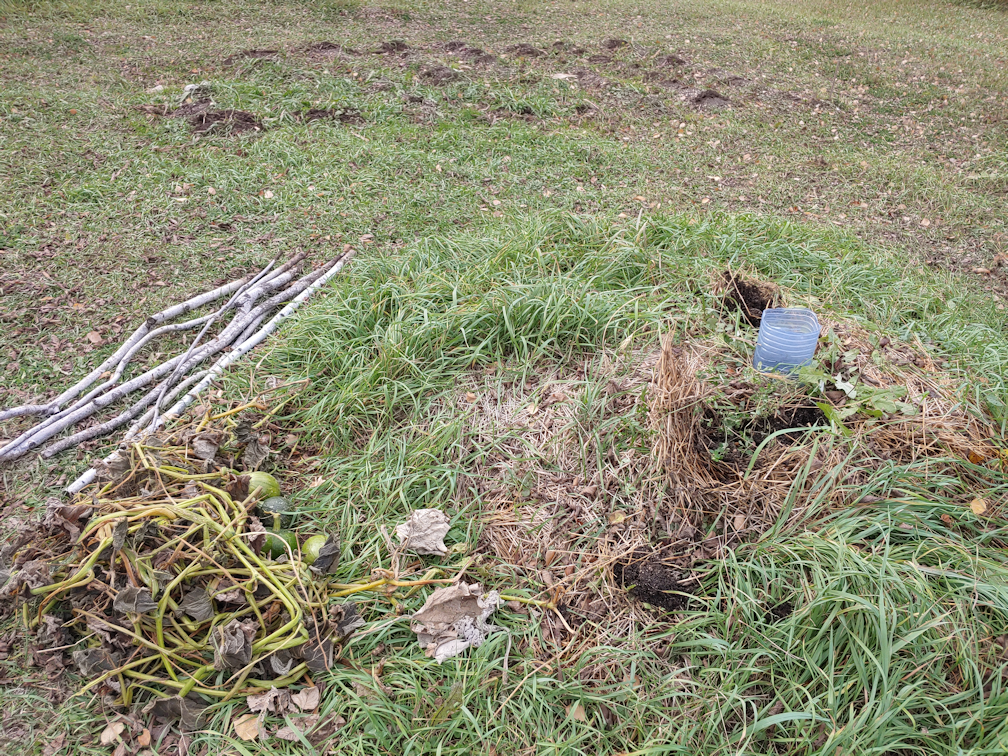
The boards were then put back, this time to fit in between the fence posts. Each section got one full length board, plus another cut to about 3/4 length. I snagged an extra board from the where the cucamelons were planted, on the other side of the people gate, to have enough.

The chain link fence is kind of wobbly, so I used the left over sections of board and placed them at the “seams” between each pair of boards, to support them from the weight of the soil.

Then, in a couple of sections, I also hammered pegs into the ground on the outside of the fence, for extra support.

That done, it was time to start working on the bricks.

First, I had a decision to make.

Should I make the bed two, or three, bricks wide?

I decided on two and a half!

This way, not only would the bed be a comfortable width, but there would be no corner to catch a foot on. Because I just know that I’d be doing that, constantly! :-D

Once that was decided, the soil was moved out of the way and the space where the bricks would go, leveled as well as I could with a hoe. Then the bricks were spread out along the length of the bed.

Would I have enough? It did look like it, but I wasn’t completely sure.

The next job was to use a garden claw to loosen the soil where the bricks would go, so I could push them down a bit. Not too far, though, because I didn’t want to lose any height.

By the time I reached the end, there was a gap of about two inches, so I just moved the bricks at the end to fill it!

Then is was time to level off the soil. This was also the time to pick out any remaining weeds and roots.

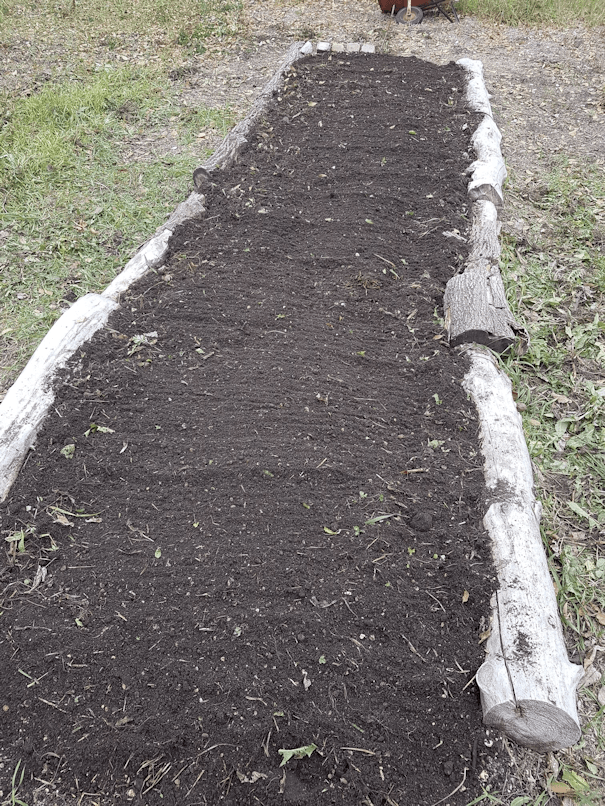
Then I went over it with a hose to wash the soil against the bricks and boards a bit more, and clean off any soil that got on top.

The final touch was to mulch the whole thing with leaf litter.

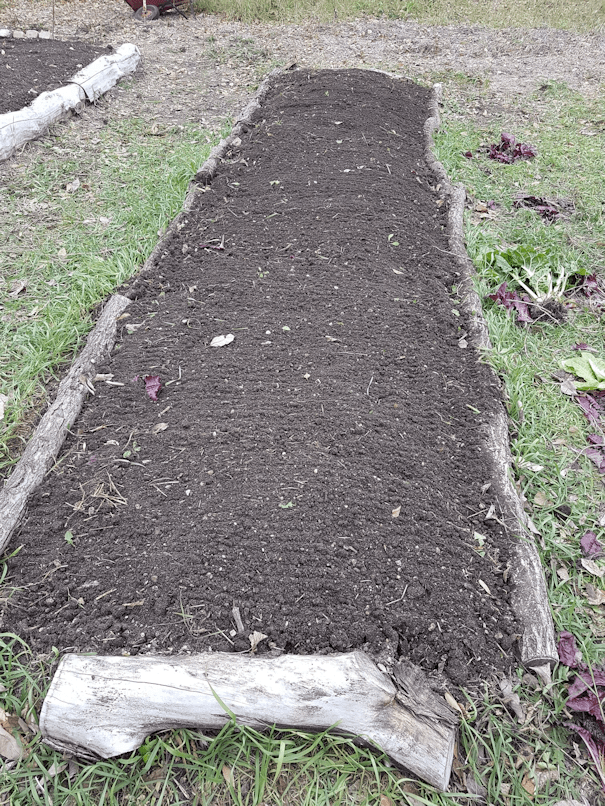
This bed is now ready for next year!

The tomatoes did so well here, we might use it for tomatoes again next year!

The boards and bricks around this bed are temporary. The wood will rot away, and there bricks are just sitting on the ground. At some point, we plan to get to the salvage place and see what sort of bricks and blocks we can find. Maybe even some paving stones. Once we have the materials, the path will be laid with bricks or paving stones, and the bed itself well get framed in a more permanent way. Until we are able to do that, though, this will be enough to keep the soil in this bed from washing away when we water it.

I was pretty much done when the girls finished their stuff inside, and came out to work on the last bed in the main garden area that needed to be cleaned up.

Since we have the straw bale now – and the chipper/shredder – I am thinking of running some straw through the shredder and using that to mulch the top of these beds over the winter.

Aside from that, these beds in the main garden area are now all done and ready for next year.

I’m pretty happy with how these are turning out!

The Re-Farmer

High raised bed – it’s done!

Oh, my goodness, what a difference having that new chainsaw made!

But before I could break it in, I needed to drag down the stuck tree, so I could use the wood in the high raised bed. Thanks to my husband very securely attaching the hooks I got to the rope I got – rope rated to 450 pounds – it was a simple matter to use the van to pull it out.

My goodness, where those top branches ever entangled! When I started pulling it, it didn’t fall, but stayed stuck until I got far enough that the tree was no longer dragging on the ground, but lifting up. At which point, it rolled up and got dragged over the compost ring, then finally it broke free from the branches and dropped.

Right on the cherry trees we are intending to cut away, so there’s no loss there!

After replacing a large divot of sod that got dragged out, I then used the baby chain saw to start cutting away the branches, and cutting away the top of the tree.

Then it got rolled onto the compost ring, so the rest of the branches could be trimmed off.

Finally, it was time to break out the new chainsaw!

Of course, I took the time to read the manual, first, then added chainsaw oil to the reservoir.

Then I measured out and cut a pair of nine foot lengths from the tree trunk.

The bucksaw does a great job, but the chainsaw did in mere seconds what would have taken me probably 5, maybe even 10, minutes, per cut, by hand!

Then, while I dragged the logs over to the high raised bed, I helped a daughter move the rest of the tree trunk aside, so they could set up the wood chipper. They cleaned up all the dead branches from the tree, as well as the little cherry trees we’d cut away to access the last tree we’d cut down.

They spent more time prepping the branches to fit the chipper and shredder, than actually doing the chipping and shredding! Unfortunately, the little spruce branches were so twisted, they ended up clogging the shredder chute to the point that my daughter had to take it off to unclog it. Once that was cleared up, they did a few celebratory shreds before heading inside to start on supper.

Meanwhile…

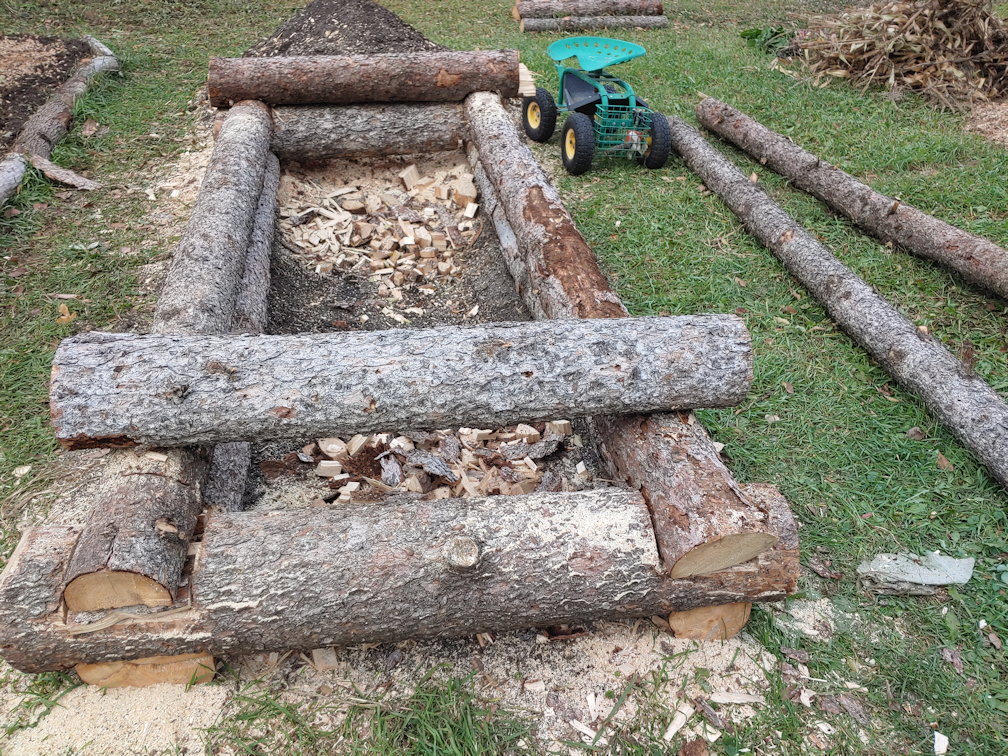
I started working on the high raised bed by first taking it apart! I cut away the notches in the base logs so that the cross pieces would sit lower, and no longer have that gap that was there before. I also was able to clean up the cuts and make adjustments, as needed.

The new nine foot lengths were thicker than I thought, so after I put the bottom cross pieces back, I used the new logs for the next level.

I ended up not needing to cut notches in them at all. Instead, I was able to just adjust and cut the notches in the next level of cross pieces to fit.

It was SO much faster and easier to cut the notches with the chain saw! Pretty much every notch we’d cut before needed modification.

I used smaller, thinner, logs at the top, which turned out to be a pain. These are from higher in the tree, which meant they were not as straight, and had more little branch stubs all over. I ended up having to trim logs along their lengths to get rid of lumpy bits, so things would sit against each other better.

Then I went and cut two more four foot lengths to do the last cross pieces.

There we have it! The high raised bed is built!

Standing next to a corner, it’s just barely reaches my hip. For mobility and accessibility purposes, we could probably have gone higher than this, but I think this will be fine.

Now, we just need to fill it! We’ve got old logs for the bottom, with corn stalks, leaves, grass clippings and garden waste to layer in. I’ll add thin layers of soil in between each layer of organic matter before topping it off with soil for about the depth of the top logs.

That will be a job for tomorrow!

I may have had to juggle the budget a bit to get that chainsaw, but it was worth every penny. There is no way I could have finished this today, without it. In fact, I have my doubts I would have been able to finish it before winter, at the rate things were going!

About the only other thing we might end up doing with this is maybe get some short pieces of rebar, drill holes through the top couple of logs and set the rebar in them to really make sure the logs stay in place.

It’s really a horrible, messy, slapdash job, but it will still probably last us many years.

Now we just need to cut down more dead trees, so we’ll have the material to build more!

The Re-Farmer

Our “second bathroom” – little details

While things were still pretty wet from rain this morning, I used some of the stuff I picked up yesterday and worked on the outhouse.

The chain latch was something we already had in the basement, and the handle was something I picked up yesterday. I got a second one that I put on the outside of the back door into the garage, so I don’t have to pry that open with my fingers anymore. :-D This door is kept closed from the outside by a piece of wood that spins on a nail in the door frame. Turn the wood over the door and it holds it closed, rotate it 90 degrees and it basically just pops open. When we get around to replacing the hinges and rehanging the door so that it is straight, it should close better again, but for now, it needs a way for the door to stay closed while someone is inside!

I didn’t find the switch plate LED light I was after, so for now, I just screwed in a cup hook and hung the LED light I’d already brought over for use in here. You can see the sunlight on the wall from the door – and the reflected light from the mirror, too! The switch plate light I’m after can be mounted either with screws that fit into slots on the back, or with self adhesive velcro strips. When it’s mounted, we’ll use it to cover the hole I made with the cup hook, and the hole left behind by a nail from before. I was going to put the cup hook in the pre-existing hole, but it seems that there is a piece of metal broken off inside the hole!

There was enough light in here with the door closed that the auto-flash did not turn on when I took the photo. :-)

The main thing I wanted to do was add the second shelf, not that I have brackets for it.

Of course, if there is a shelf, there must be something on it!

I rifled through the garage again and found these miniature picnic tables. I believe they are condiment holders. They have larger holes cut into the table tops that look big enough to hold those round mustard and ketchup squeeze bottles, and a pair of smaller holes look like they could hold salt and pepper shakers. There were a few of the same flowers I used to decorate inside the mirror cabinet, left in the garage, so I grabbed them, too.

It occurred to me while I was working that the paint I picked up to do the lettering on the sign would be perfect for the floor in here. I’m in no hurry to do the lettering, so the floor boards will probably not get painted until spring.

I had been concerned that things would start raining again, but the sun came out while I was working on this, which meant I could get the stuck tree dragged down, and finish the high raised bed!

That will be for my next post. :-)

The Re-Farmer

First time canning, and garden clean up progress

Just a bit of catching up on how things went yesterday.

The short version: Long.

It went long. Very long!

For me, it was working on pickling beets using the water bath canner. Until now, we have only done refrigerator canning, and my only experience with water bath canning was helping my mother, as a child. This is the first time I’ve done it myself, from start to finish.

It took WAY longer than I expected!

I have a Ball cookbook of canning recipes. The pickled beets recipe was for a half dozen 500ml jars. They had the basic pickle recipe, but also variations. After looking over our quantities of beets, I figured I could do two batches, with one batch being a “sweet pickle” using cloves and cinnamon sticks instead of the pickling spice mix of the basic recipe.

One batch called for 10 cups of beets. I decided to use up as much of the little beets as I could. Since they would be blanched and trimmed, and their small size would pack tighter than cubed larger beets, I made sure to grab more than 10 cups. I figured, if there was extra, we could just include them with supper or something.

While the first batch was blanching, which filled the blanching pot I found stored in a barely accessible space in the kitchen, I prepped a second batch to blanch. At the same time, I cooked the liquid with the pickling spice bag, and had everything ready to do the sweet spice version.

I was all ready to can the first batch, when I realized I had a problem.

These are the first batch of fully prepared beets.

I doubt I could have filled three jars with that, never mind six!

So I added the second batch.

I still wasn’t sure there would be enough to fill the six jars I had prepped in the canner!

The next step was to put them into the pickling liquid and bring it to a boil, then start filling the jars. After my first jar, I realized I would likely have another problem. Not enough liquid! So I started the spiced version going and continued. I ended up being able to do only four jars with the basic pickling liquid, and the last two got the sweet spice version.

I started working on this before my daughters headed out to work in the garden. They came back four hours later, and I was JUST reaching the point where I actually start putting beets into jar. Most of that time was spent scrubbing beets, blanching beets, removing the outer skins, trimming the tops and tails, and waiting for water to boil.

I know “a watched pot never boils”, but my goodness, it takes a long time for large amounts of water to come to a boil!

But, if finally got done! Our first time canning AND our first time canning our own produce!

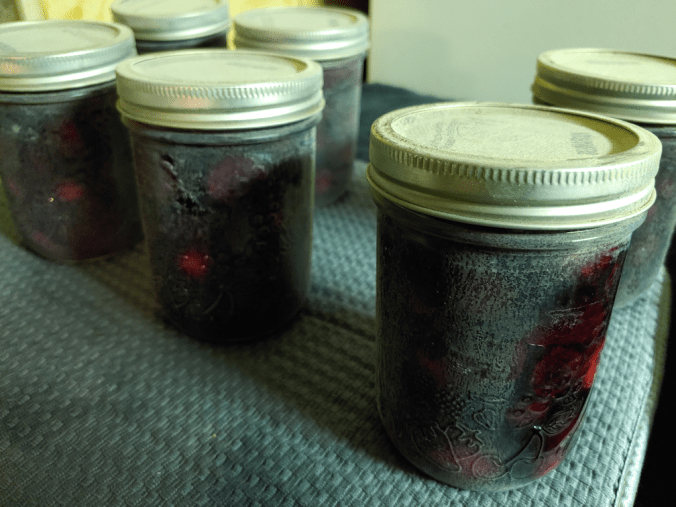
Pulling my first jar out of the water, though, was a bit of a surprise.

I mean, I know our water is hard, but wow! For the jars to come out with a layer of scale like this is crazy! You can see on the jar on the far right, where I wiped some of it with a paper towel. They’re going to need to be washed!

I finally had a chance to remove the rings and check the seals, just a little while ago, and they all came out fine! I made sure to keep track of which ones had the different pickling liquid, for when the scale gets washed off and they can be labelled.

Except the jars we open to taste test! :-D

By the time I was done, it was full dark, so it wasn’t until this morning that I could get a photo of the girls’ hard work outside.

They got three of the four remaining beds in the main garden area done – and most of that time was spent on just one of them! The first two weren’t too bad, but the third one was filled with crab grass, and it took them ages to get as many of the rhizomes out as they could!

I am amused by all the cat footprints in the loose soil! :-D

I’m glad they were able to get these done. Today turned out to be a write-off for outside work, but I will cover that in my next post. :-)

The Re-Farmer

Our 2021 garden cleanup: progress and plans for the day

I worked on some of the garden beds yesterday, until it got too dark to keep it up. Here is what I managed to get done.

The first bed I worked on was the beet bed by the garlic, as this one will be getting a box frame soon. I started by removing the bricks and rocks around the edges, some of which you can see in the background.

I had to come back this morning to get a picture of this area. The beet bed had a row of red bricks along one side, which I moved over by the tomato bed. Then I went around the house and yard to pick up all the red bricks I could find and brought them over. When this bed gets cleaned up, we’ll re-do the boards along the fence, so that they fit better between the fence posts and line the entire length of the fence, to keep soil from washing through the chain link. The rest of the bed will be framed with these bricks, to keep the soil from washing into the path.

Amazingly, even though the vines are quite dead, there are still tomatoes ripening. I did not expect that, with the temperatures we’ve been having!

The beet bed then got weeded, and lengthened to match the garlic beds. I also moved the soil more towards the middle. I will not be digging out the soil to do the layering like I did with the others on this one. We only have wood enough to make a box frame one board high, so even though the boards I found are wider than the ones used in the other beds, it still won’t make a bed as deep as the others. This bed also got layers of material buried in it as it was made this spring, and quite a lot of the new garden soil was added, so it won’t need as much material to fill it. Once the box is built, it’ll pretty much just be laid over the existing bed. About the most I’ll do is make a “foundation” of old boards, like I did with the other two beds. Once that’s in place, I will make a trench in the middle of the soil and bury more organic material from the compost pile, but that’s about it.

The next area I worked on was a quick job. I just had to spread out and level the soil from the potato bags (and even found a few missed potatoes!). Nothing fancy is happening here. There are some lilies that need to be broken up, and they will be transplanted here.

The last spot I worked on before it started getting too dark was where the poppies had been. One of the things my daughters and I observed over the summer is that we needed to make areas to walk through, without stepping on plants. So at one end, by the rhubarb, I used the flat stones I found under the old wine barrel planter along the spruce grove as stepping stones. The rhubarb covered the poppies that had been planted near it, so I’m considering transplanting those somewhere else completely, but that won’t be done until the spring. We have only three interlocking bricks, so I used them as stepping stones at the end nearer the laundry platform.

The poppies that were here would have self seeded, which my loosening of the soil would have disturbed, but that’s okay. I did harvest a few little pods. I will broadcast more seeds some time over the next few days, then do it again in the spring. Once they have established themselves, this should end up being a permanent bed for Giant Rattle Breadseed Poppy. I do plan to get another variety of edible poppies I found from a Canadian source, but those will be planted in a completely different area.

So that’s as far as I got, yesterday evening. Today, I won’t be working on the garden clean up at all. My daughters will be working on that, later today. It’s supposed to warm up a bit more, but I’m really hoping the winds will die down. They made things quite bitter while I did my rounds this morning!

I’ve asked them to take before and after pictures for me. :-D

As for me, I have decided that I will can some of our beets. After going over my recipes, we do have enough to pickle. My daughter has been doing refrigerator pickles with the summer squash, which is great, but they take up a lot of room in the fridge, so I want to do water bath canning, so they will be shelf stable. I should at least get a half dozen 500ml jars.

I’d better get started!

The Re-Farmer

Our 2021 garden: cleanup up and high raised bed progress

While I was working on the garlic, my daughter did a whole bunch of clean up!

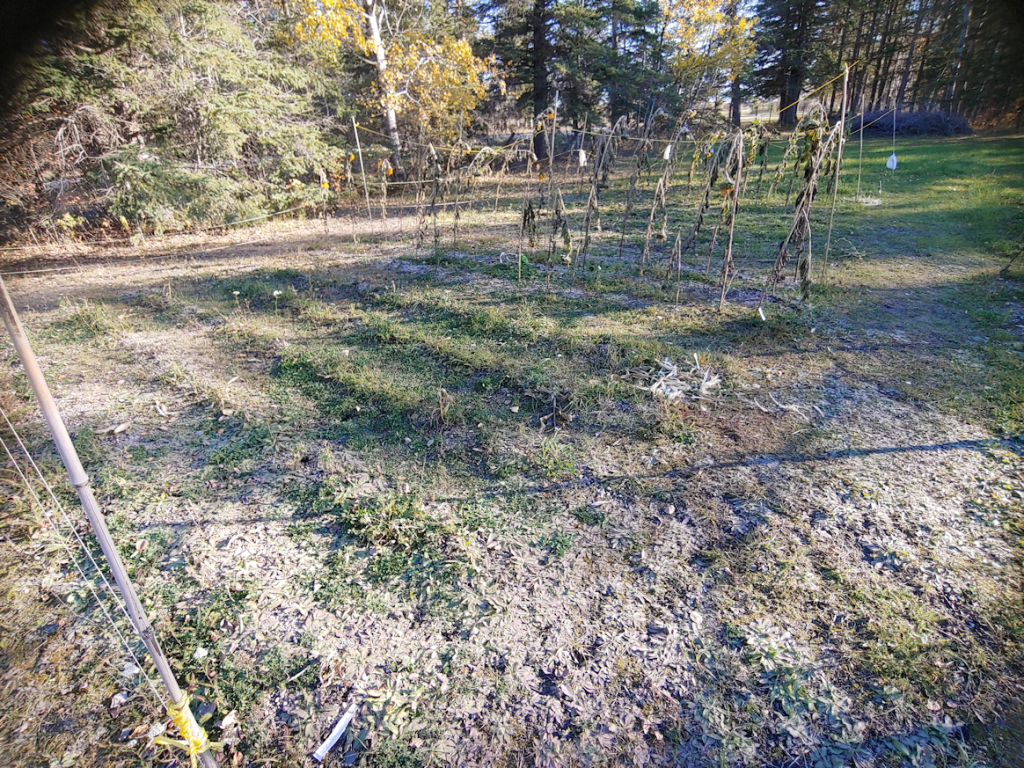
She pulled the Dorinny corn stalks that were next to the squash tunnel, then pulled all the squash, gourds and melon. Aside from the sunflowers, which we will be leaving for the deer to nibble on in the winter, we just need to weed and prep the beds that will be used next year, and put away things like the bin we keep tools and supplies in, empty the rain barrel and put it away for the winter, and take down the last of the critter barriers.

Then she pulled all the purple corn stalks, removed the three layers of barriers we had around the Crespo squash, and pulled those, too. I’m not sure what I’ll be doing with the corn block. There’s some very good soil there. It would be good to plant some sort of legume there, next year, to replace the nitrogen the corn used up. As for the squash hill, that’s something else I’m not sure what do do with. When we plant squash again next year, I want it to all be on the other side of the main beds, where they get more hours of sunlight.

What a sad sight. The Crespo squash had recovered so well from the critter damage! I definitely will be trying these again – with critter barriers, right from the start!

Once I finished with the last garlic bed, I pulled the frozen chard and the remaining radishes we’d hope to grow for pods.

All those radishes we planted, and these are the only ones that survived the grasshoppers!

It’s a shame we don’t have chickens. They would have loved all the greens we pulled today! Not that they will go to waste. They will get buried in the beds as we prepare them for next year. There are still four more beds in the main garden area, including the one with lettuce still in it, to clean up. The lettuce is handling the overnight cold very well, but they have become very bitter tasting, so they will be pulled. Of course, there is still the high raised bed to work on.

I had company while I worked on the garlic. The cats do like the high raised bed. I’m sure the wood is much warmer on their toes than the ground. :-)

My daughter was able to help with the high raised bed this time. She finished making the notches on the next end piece, in the background, while I cut another 9′ side piece from the last tree we cut down. She does not like using the baby chainsaw, and much prefers a hammer and chisel, so I started on the notches on the end piece in the foreground, until the second battery on the baby chainsaw ran out. By then, it was starting to get dark, so my daughter finished up the end piece she was working on and we called it a day. You can’t see the cuts I made on the end piece in the foreground, as I rolled the log onto them. They make it less likely to roll around, should the cats decide to climb all over it again.

The side pieces that are waiting are from higher up in the tree trunk, and quite a bit thinner than the other logs. Almost too thin. Since we will probably make this bed four logs high, I am thinking I should wait until I have thicker logs to use, and save the narrower ones for the top row. The tree that’s still stuck on the branches would give me logs that are just the right size – if we could get it the rest of the way down! :-D It’s either that, or find another dead tree to cut down. The problem with that is, most of the trees that need to be cut down are all really huge. They might be too big!

As glad as I am to have so many dead trees available that are still solid enough for this project, I’m a bit sorry to be using them. These are the trees we intended to use for the walls of the cordwood shed we plan to build as an outdoor bathroom. It’s possible, however, that we will be able to get a load of cast-off electricity poles. These are the remains of poles that broke in storms or had to be replaced for some reason, and we’re on the mailing list with the electric company. They don’t come available often, and not always in our area, but these are cedar poles and would be much better to use for cordwood walls than spruce. So maybe it’s for the better, that the dead spruces are being used to build high raised bed gardens!

The Re-Farmer

Our 2021 garden: clean up, little harvests and high raised bed progress

It was a chilly day for it, but we got quite a bit done cleaning up in the garden today.

My focus was on finishing with the abandoned carrot bed that was half done yesterday.

This is how it was left lat night. The second half had the Kyoto Red carrots planted, and after the groundhogs got at them, most had gone to seed when they grew back among the weeds.

Yet we still managed to have some carrots of an edible size!

There were a lot more twisted ones than with the Napoli carrots. This bed had been built on top of one of the potato beds we’d planted the year before, then basically doubled the length. The half the Kyoto Red were on was on top of non-amended ground, and you could see in some of the longer carrots, where they had hit rocks or harder soil, and twisted their way around. Even using the garden fork to loosen the soil and pull up the carrots was harder than the first half.

What a difference with the carrots that had gone to see!

It doesn’t look like we’ll be collecting any; if there are any mature seeds on some of these, I can’t tell.

Once I pulled as much as I could, I started working on cleaning out the weeds and roots. One of my daughter came out after I started that part, and she started working on the sweet corn blocks.

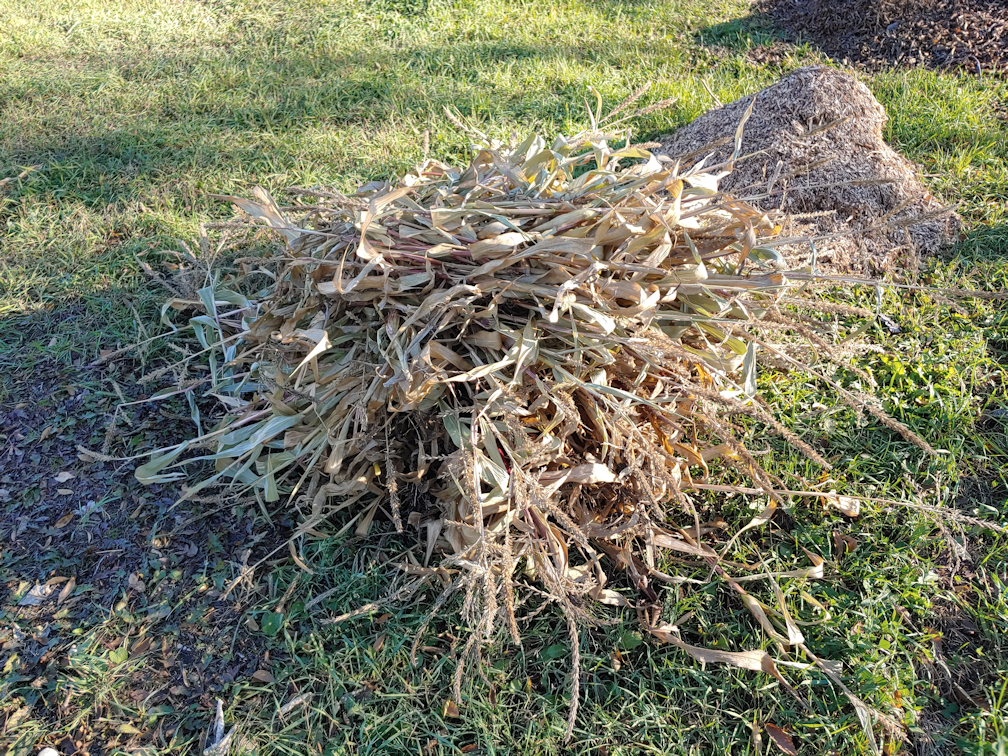
She stacked those next the high raised bed, as I’ll be using some of them in the layers of material used to fill it.

The sunflowers were left for now, but all three blocks of sweet corn were cleared.

She also pulled the summer squash and beans. These beds will be used again next year, so I got her to leave the plants there for now. The beds still need to be weeded and prepped for next year, and I might be able to make use of the plants to improve the soil more.

My daughter also moved the sprinkler hoses, but they were pretty cold and brittle, so they’ve been laid out in the sun for now. It’s supposed to start warming up over the next while, so I’ll wait for a nice warm day before rolling them up for storage.

By the time she got all that done, I was just finishing cleaning the carrot bed. Thankfully, none of the other beds will need as much work to clean them, and will go a lot faster!

My daughter did the final leveling and raking of the bed while I got the tools to continue working on the high raised bed.

I’m finally starting to get a bit of a method down. Between that and the narrower logs, I’m getting the notches cut faster. The logs on the ends are so huge, if I were making this bed only two logs high, I could leave the ends as they are now! As it is, when I add the end pieces for the next level, the narrower side logs means I should only need to cut notches on the cross pieces.

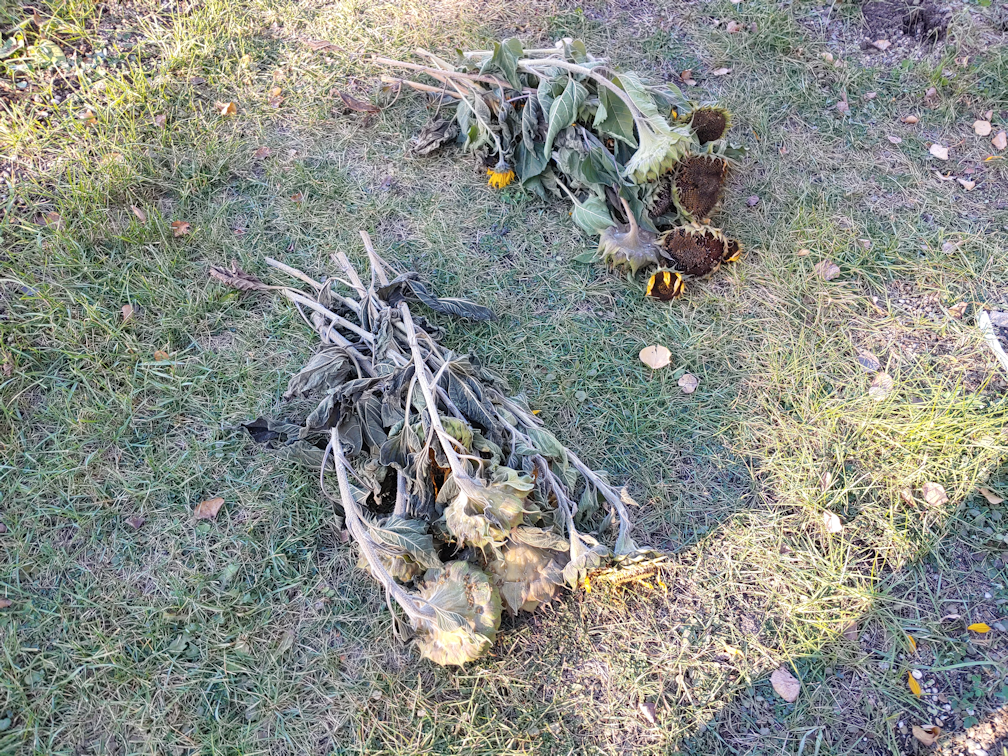
When I got to the point where the second battery on my baby chainsaw needed to sit for a bit before I could squeeze in a few more cuts, I took the time to cut some of the sunflowers. Checking them this morning, I was seeing a lot more losses to birds, so I figured we should get them inside while we still had seeds. :-D

One pile has the Mongolian Giants and the other has the Hopi Black Dye. I don’t know that all the seed heads I collected will give us finished seeds, but we shall see. I cut the stalks pretty long, which meant some of them included the little baby sunflowers that were branching out, too. Those will, for sure, not have any mature seeds on them, but that’s okay.

At this point, we would be hanging them someplace warm and dry. The best place right now is the sun room, and we have no way to hang anything in there just yet, so I made do.

They should still get good circulation around them on these shelves as they dry. I am very curious as to what we will get out of them!

There is a lot more clean up to do, but thankfully we are expected to continue to get mild weather. So much so, that I am still holding off in broadcasting the wildflower seeds for a while longer. Doing this in the fall will only work if there is no chance of germination, so I would rather wait a bit longer. I think one more week will do it, just to be on the safe side.

The Re-Farmer

Our “second bathroom”; footing

Today, temperatures dropped quite a bit from yesterday’s warmer than forecast day. We reached a degree or two warmer than forecast, with rather high winds. I used it to do a bunch of jobs outside. One of them was to finish putting rigid insulation around the bottom of the house, in preparation for winter. The only area I didn’t finish was around the back tap for the hose, since we will be using it for a while longer.

We seemed to be short some insulation pieces, though. My daughters had brought them from summer storage in the old barn for me, so I went to see if maybe some pieces got missed among the junk.

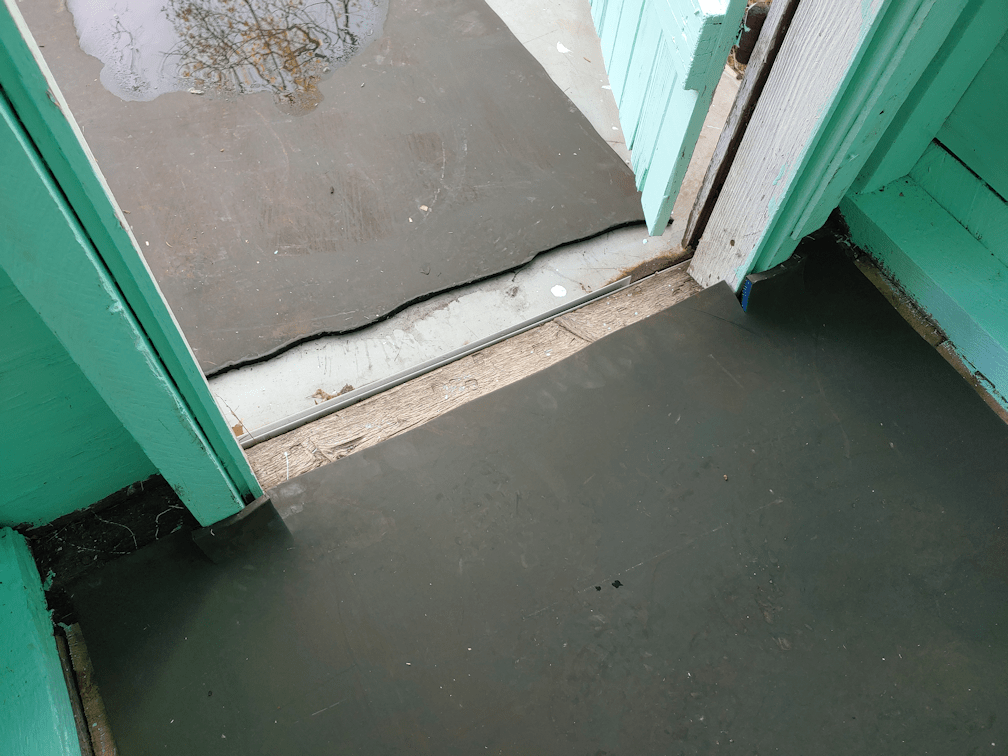
There wasn’t any, but I did use the opportunity to grab some stuff I decided to use on the floor of the outhouse, with an extra piece for outside the door.

I’d noticed these scrap pieces a while ago and thought they were some type of black, high density foam. Sort of like the super durable stress reliever stuff used on shop floors. Well, that’s probably what these were originally used for, but they turned out to not be foam, but some sort of synthetic rubber.

The pieces I grabbed had already been hacked to smaller sizes, though still bigger than the outhouse floor. They also turned out to be far heavier than expected, for their size.

I trimmed one of them to fit on the outhouse floor, then washed them down with a hose…

… and discovered they were actually blue!

I didn’t scrub them any more than this, because I really don’t care about their colour. What scrubbing I did was good enough for the outhouse floor!

I didn’t bother trimming the second piece at all. This stuff is not easy to cut! It just got a bit of a cleaning to get the big stuff off. This piece is to for a non-slip surface on the metal sheet that’s covering the gravel used to patch and fill the hole was under the door.

I had trimmed the rough edge on the piece of inside, then cut slits to match the door frame, so it would fit around it.

This stuff should work well to protect the floor. If one of the boards ever does go, it’ll keep a person from having their foot go through! Plus, it’s not so thick that it would make it uncomfortable to sit while using the… facilities. ;-)

Though it does look like we’ll need to paint the floor, after all. Which will get done when we’re ready to paint the outside, which is a project for next year.

The Re-Farmer

Can you tell?

With the lovely weather we’ve had, the branch piles are dry enough that I went out to do some chipping.

This time, I took the chipper into the maple grove to start on one of the branch piles near the old garden shed. In this location, I didn’t bother bringing the collection bag, since the wood chips would be used in the nearby garden beds.

Before I started chipping, I sorted and pruned through the branches for those small enough to go into the shredder chute, and those big enough – and straight enough – to go into the chipper chute. Just enough to clear space around the chipper and get started.

The first thing I discovered once I started it up without the collection bag is, there is a LOT of air pressure coming out of that thing!

This photo is after I’d chipped the first batch of sorted branches. Look at that hole the air made in the soil! That was after only about 15-20 minutes of chipping.

Here I’m working on the second batch of branches. When I started, the branch pile had extended out to where you can see the larger stick pile, and where you can see the taller grass in the foreground.

Getting the branches ready for chipping or shredding took a lot more time than expected. This is a big part of why…

The red lines in this picture trace a single branch. This was pruned from an apple tree, and they are the worst for branches and twigs going in all directions! The branches that were big enough to go into the chipper chute not only had to be cleared of any twigs or side branches that might get hung up in the opening, but they also had to be relatively straight, to avoid getting jammed.

After chipping and shredding a second batch, I sorted through the branches until my daughter came out to tell me supper was ready, which was my cue to stop for the day.

In the photo, pile 1 is the larger branches for the chipper. Pile 2 are the twigs up to 1/2 inch in diameter for the shredder. Pile 3 is the wibblely, wobblely, twisty branches that can’t go into the chipper. There is also a pile 4 started, well away from the work area, for the larger branches and tree trunks that are larger than 3 inches in diameter.

When I started the second batch, the chips were being blown around so much, I rifled through the junk pile behind the garden shed and found a piece of rotting plywood to use as a deflector. By the time I was done, the hole was so much deeper, I put the brick down. The next time I bring out the chipper, it will hopefully prevent the air pressure from making the hole even deeper.

Also, there’s basically no chips! All those branches, and there’s next to nothing. Yes, a lot of the chips are blown around the area, but even so, the branches got reduced to a very small amount of chips. I did make quite a dent in the pile, too. It basically shows that these branch piles are more air than wood!

The amount of time spent trimming and sorting the branches to fit is much more than I expected. It’s not that big of a deal when working on one of the little piles in the trees, but it’s going to be insane when working on one of the big piles. For those, it might still be worth hiring the tree company with their massive chipper. They don’t need to do any trimming at all, and can shove whole branches into the chute. When I got an estimate done, the guy figured it would take 6 hours to do the two big piles in the outer yard, the one by the garage, and the piles in the maple grove. It took me about 1 1/2 hours to do the amount of sorting and chipping I did today. At that rate, if the girls and I were all sorting and chipping at the same time, we might be able to finish the pile I was working on today, in maybe 4 hours – and we would still have the bigger pieces and twisted branches left over to deal with, most of which their chipper could handle.

I will continue to focus on the smaller piles in the inner yard. Hopefully, next year, we will have the budget to get the tree guys to come out with their monster machine to do the big piles. :-) Meanwhile, we can also use the chipper each time we work on cleaning up the spruce grove, cutting down those dead trees, and not be adding to the piles anymore!

The Re-Farmer

First day with the chipper!

Oh, what fun!

I got the chipper assembled, and we’ve tested it out. Here’s how it went.

This is after lifting the box off, and removing the bubble wrap around that biggest chute. It was deep in that chute, under other stuff, that I found the instruction booklet.

Which included detailed instructions on how to remove the chipper from the box. :-D

Time for assembly!

The tops of the shredder chute had to be put on first, then the handle. It wasn’t until that was on that I could grip it well enough to manhandle the chipper over the blocks holding the wheels in place, and the rest of the assembly was done outside.

Which didn’t take very long at all. :-)

Once it was together, I had to go and get fuel and oil. We had only a few litres of fuel left for the lawnmowers, so I had to refill the 20L jerry can anyhow. This thing takes 10W30 oil, and everything else we’ve got – including our van – uses 5W30. Oh, except the new push mower. That uses 0W30.

In reading the manual, it said to put in about 1.1L of oil, no more.

The oil, however, comes in quarts, or 946ml Which meant needing 1.16 quarts to max the oil level.

I bought two and filled it with one. The level should be checked before each new use, or at least waiting until after it has had several minutes to cool down, so I’ll see if it needs to be topped up the next time we use it.

It came with its own oil funnel, which was greatly appreciated. The opening is tucked well under the engine, and the oil funnels I already have would not have reached, nor fit in the space!

The fuel tank on this thing is pretty massive! If I had not gotten more fuel, I would not have been able to fill it.

A couple of appreciated features. One is the removable gadget in the tank opening, with the red fuel level marker. The instructions made a big deal about not overfilling, and this makes a very handy visual reference. The other appreciated feature is the fuel gauge. Love it!

There was just one down side to the fuel tank, and that was with the cap itself. It takes a surprising amount of uumphf to turn the cap, and I couldn’t do it with my right hand at all, due to a combination of arthritis pain and that injured finger. My left hand has arthritis pain, but I still had enough hand strength to open the tank. Hopefully, over time, it will get easier to open.

Once it was all filled up with oil and fuel, I spent a bit more time going over the instructions before we were ready to test it out.

Ear protection is a must!

We also need to get more safety glasses. The pair I have got all scratched up somehow, to the point that I couldn’t see through them!

My daughter brought over the loppers and starting breaking down branches for me, while I set up the collector bag. It’s attached with only a drawstring. It held well enough once the chipper was started, but there were gaps that allowed chips to go shooting out over the fuel tank and around the engine. I’ll have to figure out if there is some better place to attach it. There is nothing in the instructions other than saying to put it over the diverter.

The collector bag is very durable, and I love the zippered bottom that makes it very easy to empty.

My daughter and I started on the branch pile closest to the garage to test it out. She had a bit of a surprise!

There was an old wasps nest in it. It was an active nest last year, so there were no wasps in it this year, but she didn’t know that when she uncovered it!

The chipper is also a shredder. The larger chute at the top is for leaves and small things, including branches no more than 1/2 inch in diameter. With this pile, that’s the chute we ended up using the most.

With the smaller chute, the maximum diameter is 3 inches, however that’s not just the width of the branch. If there is a bend in the branch, or any knobby bit from a smaller branch that was pruned off, it could be enough to prevent the branch from fitting.

The pile had a lot of very bent branches.

The worst of them, plus any pieces we had to cut off to allow the remaining branches to fit, got set aside. They will likely go into the burn pile.

We went through about 1/4 to 1/3 of the pile in about an hour. We did have to stop to take apart the smaller chute and remove a piece that got stuck. There was a little bit of a side branch sticking out just enough to catch on the opening under the rubber guard.

All those branches gave us this.

The larger pile is in the garden, near the high raised bed I am working on. The small pile is what built up under the chipper itself, that had blown out the top of the collection bag.

The chips are quite small. Smaller than the chips we had when the arborists came and cleared trees from the power lines and roof. I am quite happy with that. This will be used as we layer organic matter in the high raised bed, and will also be used as mulch, so the finer the better!

I’m also happy with how much less space the chips take up, compared to the branches they came from!

Another thing I really like about it; how easy it is to move around! This chipper is designed only to be moved manually; it’s not of a size that can be towed by, say, our riding mower. Which is perfect, because some of the places we will be using it in, don’t have space for a tow vehicle.

This thing is going to make such a HUGE difference in our clean up progress! It’s going to take quite a while to chip away the branch piles, but we have been adding to those piles for four years now, so that’s to be expected! Best of all, as we continue clearing away dead trees, we’ll be able to chip the branches right away, rather than dragging them over to the piles and making them even bigger.

I am just so thrilled with this thing!!!

The Re-Farmer