Makin’ Mayo

Today, my daughters cracked open a new jar of mayonnaise that we bought just a couple of days ago, and discovered the seal was cracked.

Which means it had been sitting in our cupboard, with the vacuum seal broken.

So, that got thrown out.

Since we weren’t about to drive into town just to buy a jar of mayonnaise, and I happened to have the ingredients, I made a quick batch.

This is an easy mayonnaise recipe from the home economics cookbook I got from when I was in junior high school – a cookbook that is still one of my most used, because it’s filled with basic recipes like this one.

Homemade Mayonnaise

I also have these handy little pint canning jars to use to store it, too. :-)  Since this is an uncooked version, I sterilized them first.

mayonnaise ingredients

The ingredients are pretty basic; dry mustard, salt, paprika (that is the amount in the recipe; when I’ve made it in the past, I usually used just a pinch), a large egg, vinegar and oil.

While you can adjust how much paprika is used, to taste, the quantities of the rest of the ingredients should stay the same.  That doesn’t mean you can’t get creative, though!  I’ve made this using olive oil, and avocado oil can be used as well.  You can use one egg, or two egg yolks.  Instead of white vinegar, try another light vinegar, such as white wine vinegar.  I wouldn’t use a dark vinegar, such as balsamic, as it would be overpowering, but go ahead and try it, if you want.  I’ve even successfully used prepared mustard instead of dry (not the bright yellow kind, but there are a lot of flavourful Dijon mustards out there that will work quite well).

The important thing about making mayonnaise is in creating the emulsion.  The original recipe was written before electric mixers were common, and the instructions say to add the oil, one drop at a time, while beating vigorously until it thickens!  Even with an electric mixer, it’s important to add the oil slowly.  Just a thin drizzle.

The need to thoroughly beat in the oil, as it is slowly being added, requires a bowl that is small and deep.  I used my 4 cup measuring cup, because even the bowl that came with my stand mixer was too big for a single recipe.  If I had doubled it, it would have worked fine.

If you are using a blender, immersion blender or food processor, however, the blades turn so quickly, it emulsifies before you know it!  Just add the oil in a steady stream.

Here is the original recipe, with my modifications added in [brackets].

Mayonnaise

1 tsp dry mustard [can use equal amount of prepared mustard, such as a dijon]
1 tsp salt
1/2 tsp paprika [can be reduced to taste, or none at all for an almost white mayonnaise]
1 large egg or 2 yolks
1 cup salad oil [can be any vegetable oil, olive oil, or avocado oil]
2 Tbsp vinegar [white vinegar or any light vinegar of choice]

  1. In a small but deep bowl, mix spices and egg
  2. Add oil one drop at a time, beating constantly until and emulsion forms (mixture thickens). [If using an electric mixer, pour the oil in a steady stream no larger than a pencil.]
  3. Beat in 1 Tbsp vinegar and the remaining oil in larger quantities. [Using an electric mixer, you can add all the vinegar now, or after all the oil has been added.]
  4. Add remaining vinegar and beat vigorously. [Pour into sterilized container.] Refrigerate.


Hint: let the egg come to room temperature, first.

Note: if the emulsion refuses to form and “breaks” (one of the reasons buying mayonnaise can be preferred!), it might still be rescued.  Take an egg yolk and beat it in another small, deep bowl.  Then, slowly add the broken mayonnaise, a little bit at a time, while beating vigorously.

If that still doesn’t work… well… there’s always the grocery store! :-D

The Re-Farmer

Fixing the garage door

With the snow starting to show up, I had no excuses.

Time to fix the garage door.

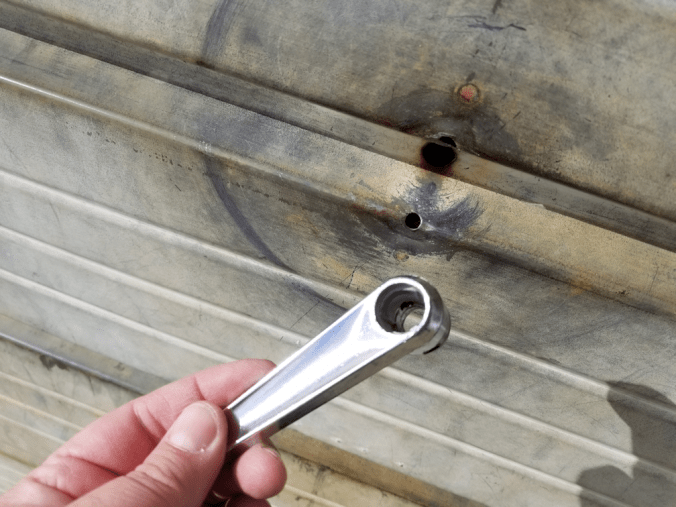
Back in April, the old handle on the door simply fell off.

20180427handle

It wasn’t the original handle to begin with.  I have no idea what was holding it in place, really, since there were no screws.  Just the bar running through.  There had to be something inside the handle, but I never found the pieces.

We were in no hurry to fix it, since leaving the door open was so handy, though we didn’t expect to have to deal with cows getting in. :-D

I got a new handle, but on taking things apart on the inside, found the old cable ends to be quite frayed, and I wouldn’t be able to thread the end through the inner handle again.  So I got new cables, too.

Then the parts and pieces just stayed in the garage, managing to not get lost after being tossed about, including when a cow knocked into the bin they were on.  Thankfully, things fell INTO the bin, and not onto the dirt floor. :-D

So here is the fix I did today.

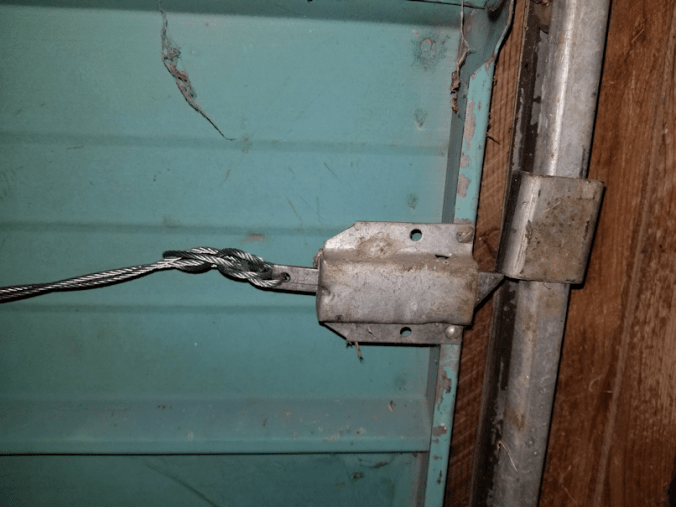
20180924.garage.door.fix.1

Here is the latch end, with the old cable still attached.  This end wasn’t as frayed as the others.

And… I just realized, that’s a dead spider in the old web above it.

Ew.

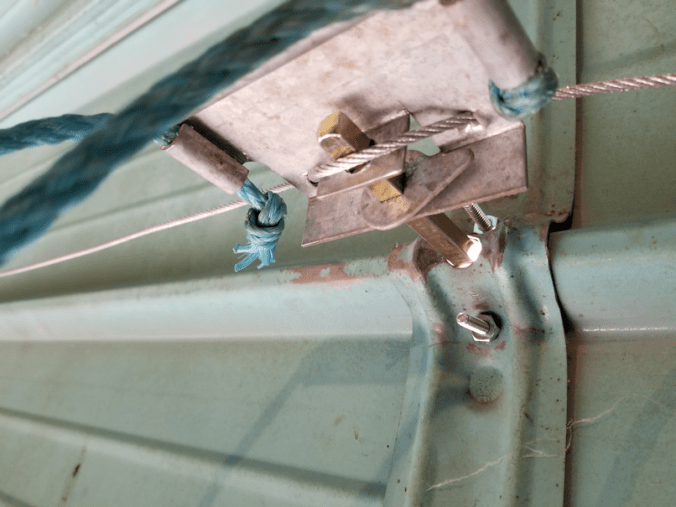
20180924.garage.door.fix.2

This is the underside of the inside mechanism that the handle attaches to and opens the door.  I have threaded a new cable through it.  The new cables came with loops on one end, as you can see in the photo.

The non-loop end of this cable was later affixed to the door on the side opposite of the latch.

20180924.garage.door.fix.3

Here is the assembled door handle mechanism, which took some doing to get right – including reversing things from the first time I put it together, because I couldn’t remember which way that washer was supposed to go.

The door handle came with wood screws, so I had also picked up nuts and bolts to use instead.

That special washer is essential to how this works.  Without it, the squared post of the handle would just spin in place.  That washer ensures the entire plate turns, pulling the cable, which in turn pulls the latch on the side of the door.  You wouldn’t believe how many times that thing almost got lost!  And I have no idea where we would have found another, if it had disappeared.

20180924.garage.door.fix.4

Here is the latched door, with the new cable.

(The dead spider is gone…)

When the door closes, the latch catches on the plate, but as you can see, there’s not a lot catching!  This was an issue before the door handle broke.  When closing the door, we often had to slam it several times before the vibration moved the latch far enough out to catch on the plate.

At one point, after assembling it all, but not tying off the new cables completely yet, I tested the door by closing it from the outside.

Then I couldn’t open it.

The cables had loosened when I shut it, resulting to so much slack, turning the handle did nothing but wiggle them!

It’s a good thing there are other ways into the garage!

There needed to be at least some slack on the cable, though.  Without it, the cable prevented the latch from springing back far enough to catch on the plate at all.

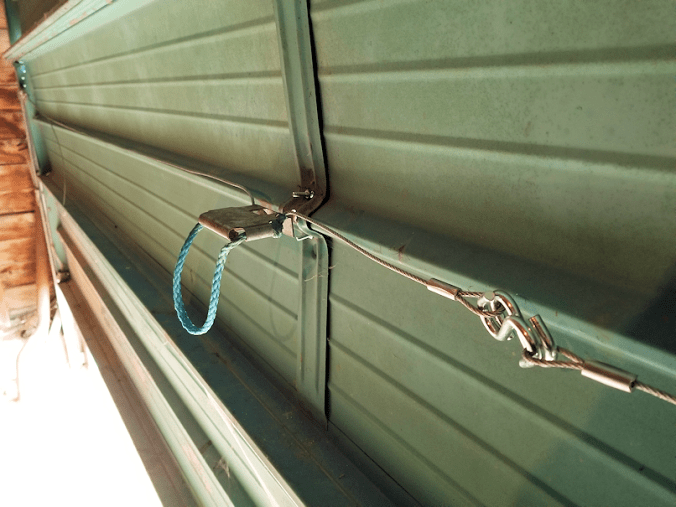
20180924.garage.door.fix.5

The old cables were kept in place with knots.  The new cables came with S hooks, so I used both of them, facing opposite directions, to attach the two cables together.  I figure that, this way, even if one fell of, the other wouldn’t.  And it would still be easy to remove the cables if needed at some point.

The door now opens from the inside with a quick twist of the plate.

20180924.garage.door.fix.6

The new handle came with a lock and two keys.  I can’t imagine bothering to lock it, since there are two other ways to get in that have no locks (or even door knobs), so it’s not like it would solve any security issues.  But I guess it’s good to have.  So long as we don’t loose track of the keys!

Another thing off the list of stuff to get done before winter. :-)

20180924.garage.door.fix.7

That was a much dirtier job than I expected it to be! :-D

The Re-Farmer

Home canned chili

Last night, I made up some chili in the slow cooker, for ourselves and my mother when she gets home form the hospital.  You can see my recipe here, though I slightly modified it this time.  I added a rutabaga with the vegetables, an extra can of beans, and used two cans of crushed tomatoes, instead of one, plus tomato paste.  I also skipped the cream.  Lots of fibre and iron in here, which my mother will need for the next while.

This morning, I put up 12 pint sized jars of the chili.

20180913.home.canned.chili

I don’t have the equipment to pressure can these, but these are not intended for long term storage.  Done this way, they should last 6 weeks or more, in the fridge.

I found a flat bottomed, rectangular roasting pain with rack while cleaning the Old Kitchen.  It was the perfect size to hold all the jars.  I put the jars on the rack and, after setting kettles to boil water to scald them, added hot tap water to the roasting rack, so there would be no chance of anything cracking.  I scalded the lids and rings in a stainless steel bowl, then poured boiling water into all the jars to disinfect them all.  I scalded my jar funnel, too.  I am so glad I picked that thing up!!

Once the jars were scalded and emptied, I could use the roasting pan to carry them all together to the crock pot.  I left the hot water in the pan.  To fill the jars, I would put some chili in, then use a (scalded) fork to poke at it and get out any air pockets, fill it the rest of the way (with a half inch head space) then poke at it again to get rid of the air pockets.  After removing the funnel, I popped a lid in place, then moved on to the next one.  Using the roasting rack made it much more organized.

Once filled, I put on the rings, but did not tighten them all the way, then moved them all onto some paper towel to cool slowly.  Once fully cooled, I’ll tighten the rings the rest of the way.  Not too tight, though.  I don’t want my mother to have a hard time opening them!

This took up about half of our 8 quart crock pot of chili.

So I had chili for breakfast. :-D

The Re-farmer

Some Handy Hooks

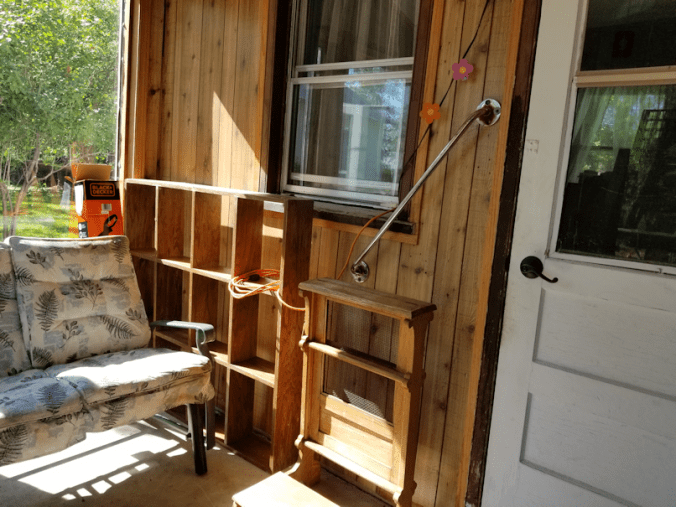
The sun room does not have any power to it, other than the light.  Even the switch for that is in the old kitchen.  When my dad used it, he had a radio and a clock going, powered by a household extension cord going through the window to the old kitchen.  The cord was long enough to go up and over the door, then down to where my dad could reach it from his seat, kept in place behind nails hammered into the door frame.

That cord is still here.

With getting an electric weed trimmer, I needed something other than a household extension cord.  So I added my own heavier duty cord through the window, which you can see in this picture, here.

20180618.sunroom.westside2

I found those flowers while cleaning the room out and stuck them on the household extension cord as it leads up to the top of the door, but the orange cord has been kind of in the way.  Putting it into that shelf works for now but, in time, the shelf will be used for other things.

Today, I came up with a solution.

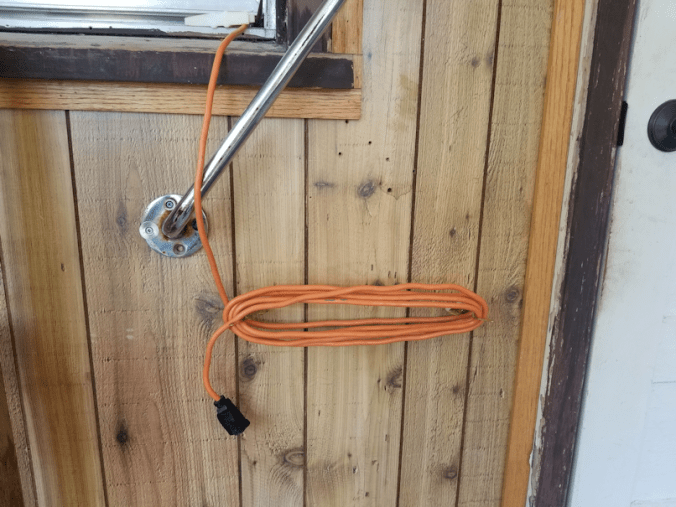
While emptying the drawer in the table we took out of the sun room, I found two coat hooks.  Perfect!

Here they are, now.

20180620.sunroom.extension.cord.holder

I just screwed them into the wall, facing away from each other, and now they keep my extension cord neat and tidy, while still being convenient.

Putting the prie dieu back in front of it, and it’s hidden away, too.

Easy peasy! :-D

The Re-Farmer