Though it is still weeks away, we are already planning our semi-traditional Polish Easter basket.
I say “semi” traditional, because we’ve modified some of the contents over the years.
If you’re unfamiliar with a Polish Easter basket, these are filled with symbolic foods to be blessed on Holy Saturday, and eaten on Easter Sunday. The foods include ham, sausage, bacon, bread, cheese, salt, butter, horseradish and eggs. We also include things like olives, vinegar, and olive oil. It may also contain a bottle of wine and a candle. Oh, and sometimes chocolate or candy. The baskets are decorated and covered with lace or embroidered clothes. As a child, Easter was my favourite holiday, and our traditional basket was a big reason for that!
Some of the contents require more advance preparation, and I was able to start on one of those, yesterday. This is a non-traditional way to include the traditional cheese in the basket.
This year, I found some absolutely delightful mini-jars, and decided to make several small jars of marinated goat cheese, but we’ve also done it by layering medallions of goat cheese in a larger jar. Both ways work fine.
It had been my intention to make two baskets this year, with a large family basket for ourselves, and a smaller one for my mother. She declined my offer, and will be making her own basket.
We’re going to have lots extra out of this batch!
To start with, I scalded the tiny jars I bought special for the basket, plus extra pint size jars. Then I prepared the ingredients. The mini-jars have smaller openings, though, so that changed things a bit.
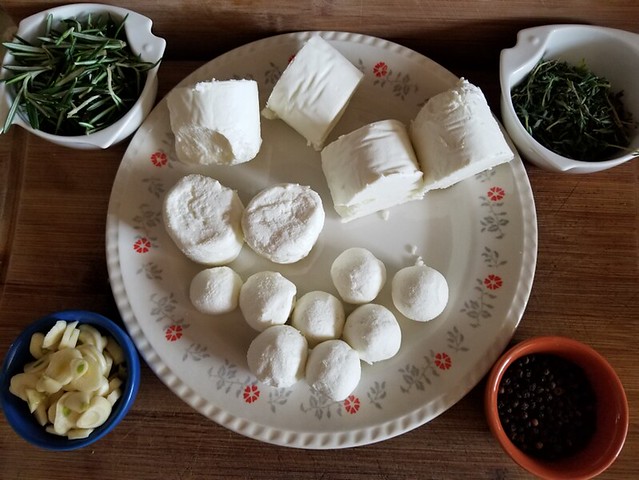
Here we have fresh rosemary leaves and fresh thyme leaves – they came in 28gram packages, and I stripped the leaves from the stems. There are peppercorns and about 8 cloves of garlic, sliced. Not pictured is Extra Virgin Olive Oil.
I completely forgot about the bay leaves. There should have been a bay leaf per jar.
As you can see, this is a forgiving recipe.
The goat cheese came in 300 gram logs; I had 2 of them and cut them each into 4 equal pieces. For the ones to go into the mini-jars, I cut pieces off to try and make them into smaller columns, then gently rolled them between my hands to make them smooth and round.
The first one I tried, promptly crumbed apart. Which is why I have rolled balls of cheese. I broke up each trimmed quarter piece into 4 and formed the smaller pieces into smooth balls.
For the pint sized jars, I didn’t have to be pretty, since they’re not intended for the basket
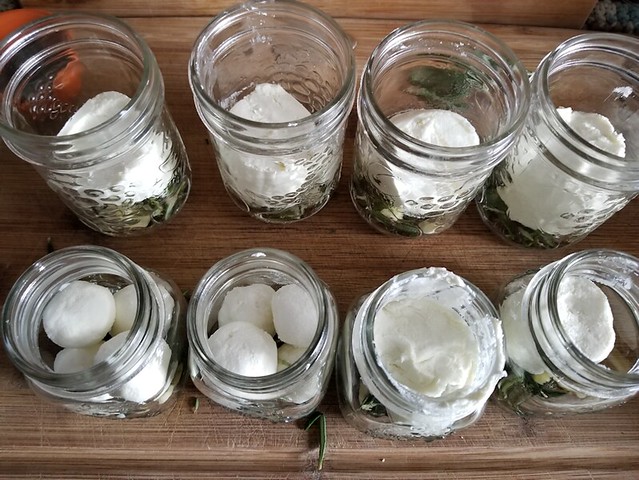
Each jar got some peppercorns, thyme leaves, garlic and rosemary leaves placed on the bottom. If I’d remembered the bay leaves, they would have gone into the bottom, too. Then the goat cheese gets put into the jars.
This is why I make extras…
I didn’t make one of the small columns of cheese small enough. It got messy. :-D
No worries. It’ll still taste good!
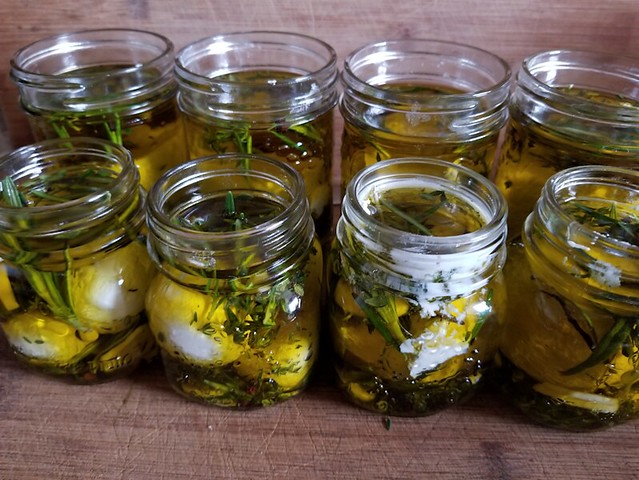
Once the cheese is in, more peppercorns were added, as well as the rest of the thyme, rosemary and garlic slices. Then the olive oil was added.
After the oil was added, the rims were cleaned, the jars sealed, and into the fridge they went.
Next is the hard part; waiting a week before using them!
From the looks of them, I think the balled cheese will be kept for the basket. I do have one non-messy mini-jar with a bigger piece, so I might use one of each. We shall see. The pint jars don’t have to wait for then, though, and I will post pictures, when they are ready. :-)
After marinating for a week, the oil can be drained through a sieve and reserved (the herbs are discarded). It makes for incredibly flavourful oil to use when cooking. The cheese can be served as a spread on bread or crackers, or used any other way you would use goat cheese.
Alternatively, little jars like this can be served as individual appetizers. The jars can be warmed by placing them in a flat bottomed pan with hot water, and placed in a hot oven until heated through. They can then be used as individual servings, eaten straight from the jar.
I intend to put these in our basket, just as they are, without straining them first since the jars are so small. When we made them before, with layers of cheese in a larger jar, we removed the cheese, then put a few pieces into a smaller container with a liquid tight seal. I then covered the cheese with strained oil and closed it up. It made for a nice presentation in the basket. :-)
Though I made five different flavored salts at once, I will be doing a post for each flavor separately.
Using wet ingredients to flavor salt requires a fair bit more time. The typical recommended ratio for a red wine salt was 3 cups wine to 1 cup salt. I chose to use a locally made raspberry wine I found, instead. Most bottles are about 3 cups, but we had to taste it, too! Which means the actual amount of wine we used as about 2 1/2 cups total. Of course, feel free to adjust quantities to your taste!
Also, the raspberry wine tasted much like the raspberry wine my father used to make! I’m not a big wine person, but I think we have a winner, here!
The wine will be reduced to a syrup, which means 3 cups of wine works out to roughly 3 Tbsp syrup.
Raspberry Wine Salt
Ingredients:
3 cups raspberry wine
2 cups Kosher salt
Also needed:
baking tray lined with parchment paper
saucepan large enough to allow roam for foaming
very strong stirring spoon
food processor or coffee/spice grinder
jar with lid
Step 1: pour the win into a saucepan and bring to a boil. Reduce heat to a gentle boil. Continue cooking until the wine is reduced to a thick syrup.
For the raspberry wine we used, it took about 45 minutes to reduce to a syrup. Near the end, it began to really bubble and foam.
Once reduced to a thick syrup, remove from heat and let cool briefly.
Step 2: stir in the salt and mix to thoroughly coat the salt with the syrup. This is where I had to switch to the stronger mixing spoon!
Step 3: spread the salt and wine mixture onto the parchment paper lined baking sheet and spread evenly. Place into the oven with the light on and the temperature at the lowest setting. After an hour or so, turn off the oven but leave the light on. Leave overnight to dry.
Note: you can take the baking sheet out every now and then and turn the salt – this can be made easier by using the parchment paper to fold the salt over itself, then spreading it evenly again. After doing this, reheat the oven to the lowest setting again, then shut it off, leaving the light to help maintain the heat.
Step 4: once thoroughly dry, remove the baking sheet from the oven. Break apart the salt and crumble it with your hands as much as possible. There will still be some clumps.
Step 5: using a food processor or spice grinder, pulse the salt in batches, just enough to break up the clumps.
Step 6: after processing the salt mixture, transfer it to a jar, or divide among small gift jars, and seal.
Though I made five different flavored salts at once, I will be doing a post for each flavor separately.
Bacon Salt
Ingredients:
1 package thin cut bacon, cooked, cooled and crumbled
2 cups Kosher salt
Also needed:
food processor, coffee/spice grinder
small rubber spatula
jar with lid, large enough to have room to shake the salt, or a mixing bowl
a larger funnel or canning funnel would also be handy
Note: the bacon needs to be cooked until very crisp, then drained of as much fat as possible. I find the easier way to do this is to cook the bacon in the oven. Line a baking tray (a 13×9 inch jelly roll pan works well for this) with aluminum foil and top with an oven safe cooling rack. Lay your bacon slices out on the rack. It may take some finagling to get them all to fit! Cook the bacon in a 350F oven until dark and crisp, flipping the slices about half way through. Once cooked, place the bacon on paper towels to get rid of any surface fat. Go ahead and crumble it up with the paper towel in the process. Leave the bacon on paper towel to cool completely – I left it overnight.
Step 1: using grinder or processor, pulse the bacon pieces in batches until they are quite fine.
Note: the bacon may quickly become paste-like, and stick to the sides. Use the rubber spatula to scrape it off in between batches.
Step 2: measure 2 cups Kosher salt into a jar.
Step 3: add the bacon bits to the salt and shake.
I should have used a bigger jar!
Note: it may be necessary to use a mixing bowl to combine the salt and bacon. Use your hands to rub the bacon into the salt and break up any clumps, then transfer to a jar, or divide into small gift jars.
Due to the fat content that may still be on the bacon, this salt is best stored in the refrigerator.
Though I made five different flavored salts at once, I will be doing a post for each flavor separately.
Dry salts are made with a basic ratio of 1 tsp flavors to 1/4 cup coarse salt. Feel free to adjust to your own personal tastes! For the salt, you can use Kosher salt, pickling salt, sea salt, or any coarse salt you prefer. I used Kosher salt, which is fine enough to not need further grinding, but coarse enough to maintain a nice texture.
Note: you can use any dried mushroom you prefer for this mix. I used a gourmet blend from Costco.
Mushroom Salt
Ingredients:
dried mushrooms
Kosher salt
Also needed:
food processor, coffee/spice grinder or mortar and pestle
jar with lid, large enough to have room to shake the salt
a larger funnel or canning funnel would also be handy
Note: you will need about 4 tsp powdered mushroom for 1 cup of salt. I used quite a bit more dried mushroom than needed for my 2 cups of salt. After grinding it down to a powder, I measured out what I needed for the amount of salt I had, then put the rest into a sealed jar to use as flavoring during cooking.
Step 1: grind the dry mushrooms to a powder.
Step 2: measure the Kosher salt into a jar.
Step 3: measure our your mushroom powder and add it to the salt. Cover and shake thoroughly.
Step 4: Label your jar and set aside for about a week, out of direct sunlight, to give the flavors time to meld, giving the jar a thorough shake on a regular basis.
If desired, measure out portions of the combined mixture into gifting jars.
Though I made five different flavored salts at once, I will be doing a post for each flavor separately.
Dry salts are made with a basic ratio of 1 tsp flavors to 1/4 cup coarse salt. Feel free to adjust to your own personal tastes! For the salt, you can use Kosher salt, pickling salt, sea salt, or any coarse salt you prefer. I used Kosher salt, which is fine enough to not need further grinding, but coarse enough to maintain a nice texture.
Rosemary Lemon Salt
Ingredients:
lemon zest
dried rosemary leaves
Kosher salt
Also needed:
food processor, coffee/spice grinder or mortar and pestle
jar with lid, large enough to have room to shake the salt
a larger funnel or canning funnel would also be handy
Step 1: measure out the lemon zest and rosemary leaves (see note below).
Dehydrated lemon zest and rosemary leaves.
Note: For 1 cup of salt, you will want about 4 tsp ground rosemary/lemon mixture. I made mine using 2 cups of salt, so I used about 3 rounded tablespoons total (1 Tbsp = 3 tsp) of the lemon zest and rosemary leaves, to get approximately 8 tsp after grinding.
Lemon zest and rosemary leaves, ground together.
Step 2: grind the rosemary leaves and lemon zest together, to a fairly fine powder.
Two cups Kosher salt.
Step 3: measure out your salt into a jar.
Kosher salt with rosemary, lemon zest powder.
Step 4: add ground rosemary and lemon zest to the salt. Close the jar and shake thoroughly.
Step 5: Label your jar and set aside for about a week, out of direct sunlight, to give the flavors time to meld, giving the jar a thorough shake on a regular basis.
If desired, measure out portions of the combined mixture into gifting jars.
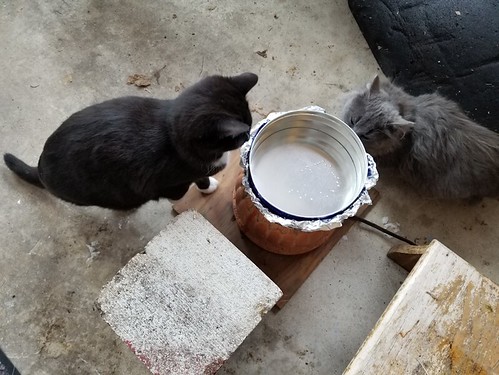
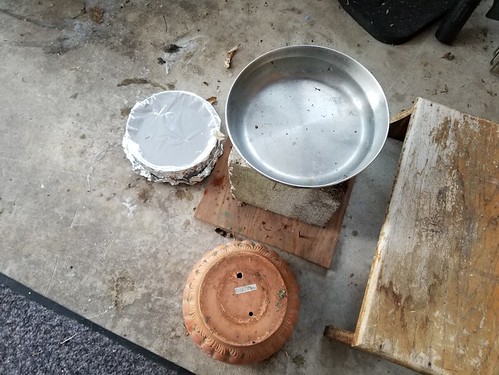
When I checked on it last night, however, I found that the aluminum foil did not prevent water from dripping down. After looking around for something that might work, I decided to commandeer one of the containers we have been using for the cat kibble. A heavy bottomed frying pan that the handle had broken off, long ago.
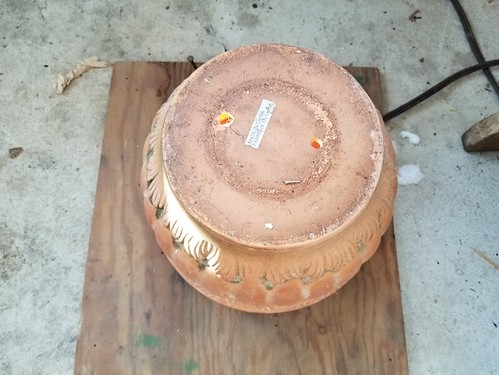
Some time during the night, however, it got knocked over. We could see the light glowing through the drainage holes in the terracotta pot through the bathroom window. When I went out to do their food and water in the morning, I found a small ice patch where the water had spilled.
I am guessing that, when it got to hardly any water left, the cats knocked it over while trying to reach it.
I decided to go with the concrete block.
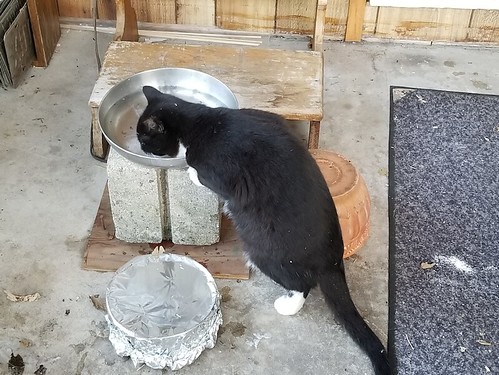
I am hoping the weight of the block will make up for it resting on the edges of the light fixture. It seemed high, though, so I moved it closer to the kneeler, and put the pot and tin upside down near it, so the cats could sit on them, if the wished.
Which promptly got ignored. :-D
At least with the block, though, he can put his paws on the corners to stabilize himself.
When we checked it again, hours later, it had been knocked off again, but it was also completely dry. There was no new ice. Again, it seems that they knocked it over only when the water was almost gone.
So I’ve put it back, and filled it with more water than I had before.
As for the heat; it is clearly working, in that the water is kept from freezing, but neither the pot nor the block seemed to warm up at all on the sides. There is no radiant heat coming off. The heat of the bulb is enough to keep the water from freezing directly above, but not enough to fight off the cold on the sides. I had hoped it would provide at least a little bit of warmth that way, but it I’d probably have to go up to a 100 watt bulb to accomplish that, at which point I think it would be too hot at the base of the pan. That cats, at least, know how to use their own body heat to keep them warm! :-)
A set up to keep the cats’ water from freezing is now set up in the sun room.
We will know by tomorrow, if not tonight, if it will work.
Here is the set up.
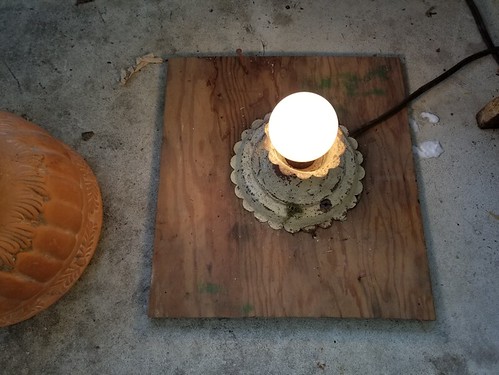
First, the heat source: an incandescent light bulb.
This is what my brother had used under the kitchen sink, to keep the pipes from freezing while the house was empty. The first potential problem I saw was the fixture holding the bulb. While the opening in the concrete block I had would fit the bulb, no problem, the fixture looked too wide. So I had a terracotta plant pot as a back up.
There was already a 60 watt bulb in the fixture. The various instructions I’d read called for a maximum 40 watt bulb, but these were all on sites in US states that don’t get as cold as we do! So I kept the 60 watt bulb.
The plant pot is what I ended up using. The cement block was not stable. I could have removed the fixture, but it’s what was holding the bulb upright.
The narrower bottom (now top) of the pot meant I could not use any of the containers we are currently using for water. So I dug around in the Old Kitchen and found a cookie tin.
The tin is not completely water tight; there’s a slight drip at the seam. So I used aluminum foil around the base, which will also serve to stabilize it.
That left an issue of height. The cats were immediately curious (and Doom Guy was drinking the water in the tin as soon as I had it on the floor, before I put the foil on), and I could see that there were potential issues for them to reach the water if it gets low.
To solve that, I put the concrete block near it, for them to sit on. Between that and the kneeler, they should be able to reach the water.
The terracotta pot should absorb and radiate a gentle heat as well. I would not be surprised to find cats huddling up to it at some point.
For now, though, they are very curious about the whole set up, and even having fun playing around it!
Which means on of the things we have to watch out for is them knocking the water right off the pot. We’ll be keeping an eye on them!
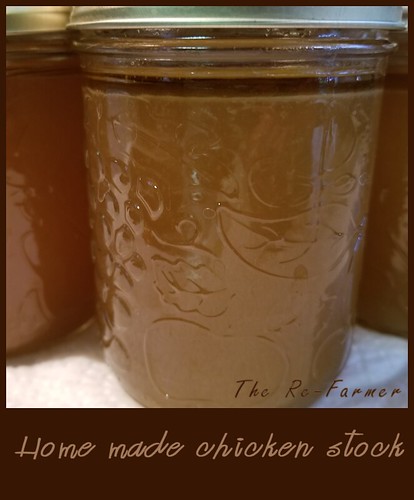
The following is a “use watcha got” recipe to use up the carcasses of your cooked chicken (or turkey). This stock is cooked down to be more concentrated, and should result in a rather firm, gel-like consistency when cool.
Decide ahead of time how you will store your stock, and prepare in advance as needed. I used pint sized canning jars and sterilized the canning funnel, jars, lids and rings during the last hour or so of cooking. You could also pour the stock into ice cube trays for freezing, or use freezer bags.
You will also need a colander and bowl large enough to hold your stock, plus a sieve and cheesecloth for straining. Having a giant measuring cup is also very handy to stain into, making it easier to pour the stock into jars.
Ingredients:
bones and skin from roasted chickens (or turkey)
pan drippings
onion and/or leeks
garlic cloves
vegetables such as carrots, celery (including leaves), celeriac, parsnips
herbs such as rosemary, thyme, savory, sage, bay leaves, ginger, parsley or dill
peppercorns
salt; optional cold water optional additions: lemon or orange zest, a splash of apple cider vinegar or white wine vinegar
Note: Quantities will depend on how many carcasses you are using. For 3 carcasses, I used 1 large onion, a whole head of garlic, 4 carrots, and whatever herbs I had handy in my cupboard.
Seasonings will also depend on how the chickens were seasoned when cooked. When I roasted ours, I first rubbed them with lemon juice and put the lemon pieces, with some bay leaves, into the cavities. I also rubbed lemon salt, paprika, pepper and oil into the skin. Because of this, I was able to be light on the salt and pepper when making the stock. What salt I did use was lemon salt.
Place your chicken bones and skin into a large stock pot. Scrape pan drippings in (cooled pan drippings may be gelled, which is awesome).
Add onions, cut into large pieces (skin can be left on, if you wish), or leeks cut into 2 inch or so chunks.
Crush garlic cloves with the side of a large knife (skins can be left on, but I like to remove them) and add to the pot. Note: If you don’t have fresh onions or garlic, dried can be used.
Vegetables do not need to be peeled. Just scrub them, and remove the root ends. Chop them into about 2 inch pieces, then add to the pot.
Add fresh or dried herbs and other seasonings of your choice.
Add peppercorns (or ground pepper, if that’s what you have) and salt. If you’re not sure about the salt, leave it for later, after tasting.
Add enough cold water to cover everything by about 1 or 2 inches.
Bring to a boil, then reduce to simmer. Do not stir, as that will make your stock cloudy.
Simmer for about 3-4 hours.
Place a colander over a large bowl. Carefully pour everything in the stock pot, into the colander. Gently lift out the colander, allowing to drain, and set aside. Colander contents can be discarded.
Wash the stock pot out and place back on the stove. Pour the stock, through a sieve, back into the stock pot.
Taste for seasonings. Adjust as desired.
Bring the stock to a boil. Reduce heat and continue to simmer the stock down until reduced by 1/3rd.
Line a sieve with several layers of cheesecloth and place over a bowl or large measuring cup.
Gently ladle the stock into the lined sieve.
Fill prepared containers with strained stock (in batches, if need be) and seal.
Refrigerate or freeze, as desired.
Using the carcasses of 3 chickens, I was able to fill 11 pint sized canning jars (all the ones I had available), plus have 3 cups of stock left over.
The second cooking down of the stock concentrates it a bit; if you wanted to, you could continue to cook it down more, for an even more concentrated stock. Keep this in mind when you use it, as you may need to water it down a bit.