Progress! But still no shower or hot water

Okay, so we DID get progress today. Honest!

My main thing was to go into town and talk to my favourite manager. We spent a lot of time looking at the photos I took of the bathtub plumbing, and things like whether or not we will be replacing the copper pipe for the shower with Pex as well as the hot and cold water pipes. Plus, we’d need to replace the pipe to the spout, which is completely different and would be removed with all the other old parts, since it would be soldered in place with lead, too.

My brother had talked about using Shark Bite fittings, but the manager suggested it would be better – and cheaper – to use Pex crimps. That meant getting a crimping tool, which is something we’ll need in the long term, anyway, and a Pex cutting tool. I wish I had that when I bought Pex (a different type) to use on one of the raised bed covers.

As we went through various fittings and joins, crimps and, of course, the Pex pipe, etc., there was one type of fitting they only had two of. We figured I would need at least six. He called another store for me and confirmed they had plenty in stock, so once I was done with the local store, I drove to the next town up the highway to get the rest.

He assured me that, anything we don’t use, we can return. Just hang on to the receipt for both stores, because if we want to return anything, we would have to return them to the store we bought them from, even though they are the same franchise.

I am really hoping we got everything we need.

While I was doing that, my younger daughter scrubbed the exposed walls around the tub, treated it with an anti-mold and mildew spray cleaner, then left the fan running on it. She did that a second time and, when that was dry, she started painting the exposed walls with the mold and mildew resistant primer. So far, that has two coats. I think it’ll need a third.

Once that is done, it will be ready to have the tub surround installed – whenever that will be!

Once I got home, my daughter and I went through the parts and pieces. I was already forgetting what was what. My daughter knew what she was looking at, though.

Having daughters that both used to work in a hardware store comes in very handy at times!

She was in between coats of paint, so I grabbed some tools and headed to the basement. I wanted to see if we could use one of the top elements from the old hot water tanks, and see how to remove the anode rod.

*sigh*

Since both tanks died because they started leaking out the bottom, the bottom panels were already open. Damage on those ones is visible from the outside. I uncovered the top panel on one of the tanks and removed the wires to get a good look.

Hmmm…

After consulting the manual, I realized I would not be able to take them out. There is a special tool – basically, a large socket – to remove them, and we don’t have one.

So I shifted to the anode rod.

Now, this is supposed to be easy. Pop off the cap, remove the anode rod and you’re done.

The cap did NOT want to come off.

I should have been able to slide the tip of a Standard screwdriver under the edge and lever it up, but the edge all around the cap just bent. Eventually, I was able to jam the screwdriver down between the edge of the cap and the metal and pop it off, breaking off something under it in the process.

The opening was full of foam insulation. Oddly, there seemed to be text in the foam. I had to take a flash picture of it to be able to see that yes, there was writing – and it was backwards. Looking at the underside of the cap, I could see the writing that was imprinted into the foam insulation.

There was nothing about this in the manual.

I dug out the insulation until the top of the anode rod was finally uncovered.

Oh… something else that needs a socket.

Back to the tool kit I go and come back with the largest socket we’ve got.

It wasn’t large enough.

*sigh*

So I wasn’t able to get either the rod or the heat element out. With the rod, I just need to know how to do it, for when the powered rod comes in and we replace the one in the current tank. I’d hoped to get the heat elements out and see if at least one of them is still good, so we can switch it out for the burnt out one in the current tank.

I guess I’ll be going back to the hardware store tomorrow. The tool for the heat element is $25. A large socket ranges from about $9 to $14.

I’m certainly glad we still had the old hot water tanks in the basement that I could use to find this out. It would have really sucked to find this out on the current tank!

Since I couldn’t do any more there, it was time to finally start putting away and cleaning up in the garage, so we can finally park the truck in there again, now that the cat isolation shelter is out.

When bringing stuff to store here at the farm, my brother brought me a couple of crane boxes. I have no idea what makes them a “crane” box, other than they are rated to hold up to 1000 pounds. One of them got crushed a bit, but it was still useable. They actually came in handy as surfaces I could use to hold the clear plastic for the isolation shelter. I was able to cut in a gap between the boxes, and have weights on either side to reduce vibration. It worked really well.

The garage walls are unfinished, with exposed joists. When I moved off the farm, the garage was just a single “room”, all the walls were exterior walls, with shiplap boards covering the outside. Over the years, lean to additions were added to each side.

My brother had brought scrap wood they were intending to add to the burn pile, but there was a lot of useful wood in there that I kept, instead. From those scraps, I was able to cut three supports per box and attach them to wall joists, using the shiplap boards as a guide to keep them even, since I didn’t have a level with me.

The boxes each had three “feet” on their bottoms that reached from side to side, made up of stacks of what looks like plywood, nailed and glued together. Unfortunately, they were spaced in such a way that, while two of them could fit in the space between the wall joists, the third one did not. So each box had to have one of these “feet” removed.

That was NOT an easy job. They were nailed together from both the inside and the outside, plus the inside had extra long staples into them.

I had a pry bar handy, though, and was able to get them off.

Once that was done, I could put the boxes on the supports, with the bottoms against the joists. They then got screwed directly to the joists, as well as the supports.

The supports are all longer than the boxes are deep. The boxes have lids. Once I get some larger hinges, I will attach the lids with hinges on the bottoms. This way, they can be opened from the top to form a surface. It will make it harder to reach what’s inside, but I figured having that would be useful enough to be worthwhile.

Once the boxes were hung up, I had someplace to start putting things on my work table away, rather than returning them all to the sun room. Last winter, the cats knocked way too many things down to the ground, so I want to avoid storing things there, if I can.

Here is how it looks like now.

Eventually, we’ll be making more shelves against the walls, and I will be able to clear the space under these boxes. That’s all on a makeshift shelf that’s just a piece of scrap plywood sitting on top of a couple of 5 gallon pails on their sides. It was meant to be temporary. We just haven’t gotten to working on organizing the garage, yet. There’s just too much stuff in there that I have no idea what to do with.

These boxes have enough space in them that we could probably add another shelf across the middle. Maybe in just one of them, and leave the other open for larger items.

That done, I was able to finish clearing off my work table, saving some of the wood scraps for future projects, while others will go to the fire pit, moving the miter saw, and so on, and the work table got folded up and set on the swing bench in where my mother’s car is stored.

The saw horses that I’d been using while painting now had a screen over it to hold the curing shallots. My daughter wants them to cure a while longer before braiding them, so that got moved in front of the swing bench.

Then came the finicky part.

Getting the floor safe to drive on.

I’d already fired up the compressor to pump the flat tire on my mother’s care, then used the air to clear off the sawdust on the work table. For the next while, I used the compressed air to blow away the sawdust on the ground, too.

I’m glad I did, because I found quite a few shards of glass in there! I have no idea where they came from, or how long they’ve been there.

Eventually, I got to the point where I could start raking the dirt floor, and used a magnet to find any nails or other metal bits that might have been lost.

I had to consider what to do with my brother’s lawn tractor. There isn’t room for it in the lean to’s on either side of the garage, and I don’t want it stored in the barn. I ended up moving some bins to the other side of the garage, where they are now being used to hold recycling. There was a lot of weird odds and ends in the ground under them, like rusted out bolts and very old spark plugs that predate us living her for quite some time. The area got raked and cleaned and raked again before I went over it with a magnet.

In the end, I still wasn’t confident in the space. I had rolled up the protective cover that the clear roof panels were wrapped in. It’s got a waterproof surface on one side. I decided to lay that out on the ground against the wall, and that’s what the lawn tractor is now sitting on, close enough to the wall that the truck has plenty of space.

After a bit more raking and a bit more searching with the magnet – and finding more bits of glass in the oddest of places! – I was confident enough to get the keys and park the truck in the garage.

Finally!

By the time that was all done, my daughter had finished more coats of paint in the bathroom.

So while we still don’t have the plumbing fixed, we still don’t have hot water (though if we leave it long enough, we do have very warm water at times), we did get some good progress today.

The next six days are supposed to be warmer, so I’m hoping to be able to finally work on cleaning up garden beds, but if my daughter needs help with the plumbing, that’s the priority.

Little by little, it’s getting done!

The Re-Farmer

Well, that isn’t going to work!

First, Happy Thanksgiving to my Canadian friends, and Happy Columbus Day to my friends in the US.

Before I get into our newest find in the bathroom plumbing saga, I will share some cuteness.

This is what the view out our bathroom window typically is, not that the platform has been set up for the winter.

The cats are just smashed together up there!

I think that’s Shop Towel with his head handing over the edge of the cat bed, being used as a bed by several kittens. He may be aggressive with the adults at times, but he’s good with the babies!

Nosy, I see, is cuddled up with him. Now that Nosy has been neutered, it does seem like he’s no longer involved in any aggressiveness that we still see at times.

Anyhow.

Today’s main job was to see if we could get a panel cut into the wall in my husband’s room, to access the plumbing for the tub and shower. After gathering what tools we thought we might need, my daughter flashed a light into the holes for the bathtub taps, to try and see where the wall joints were.

Turns out, they were pretty much right at the pipes.

Then she went to the other side of the wall, while I used the drill with an auger bit and made a couple of holes above the taps, trying to be close to the joists, but not too close, through to the other side of the wall. The first pair of holes was made using one of the narrowest auger bits. Once those were through and I got the go ahead from my daughter on the other side, I did them again, using a larger bit.

Then my daughter cut an opening in the paneling.

We hoped to be able to use the jig saw, but that would have hit the pipes. She ended up doing the first cut across the top, using the saw on her multi tool. It was the only saw small enough. After that, aside from having to start the first inch or so with the multi tool, she was able to use the pull saw.

My brother thought there might be aspenite behind the paneling, but there was no. It was just open joists. At one point, as my daughter was saying away, the panel was flexing so much, it made things almost impossible. I ended up reaching under her with a broom handle to hold it against the paneling to hold it, so she could finally finish the cut.

She wasn’t able to cut all of one side, though. She was a couple of inches short when she hit something. She pulled back the cut piece as much as she could to see, and thought there was a nail or something, in the joist. In the end, she cut everywhere else, then just snapped the panel off.

Finally, we could access the plumbing!

In the end, there was nothing we could do.

My daughter tried to take off the piece for the taps, but it just would not happen. It turned out it was soldered. I ended up taking pictures and sending them to my brother.

We took out the faucet set we have and discovered another problem.

It threads completely differently.

Here, you can see both old and new.

On the right, for the hot water, you can see that wood was gouged out of the joist to make room for the plumbing. There is also a strange pair of right angle beds in the hot water pipe below.

We don’t know why the cold water side is black.

In the middle, however, you can see the problem.

The old fixture is threaded internally.

The new fixture is threaded externally.

In the end, we put everything away, then taped the section of panel that was cut off back over the hole for now.

After a while, my brother was able to look at the photos I sent him, and we ended up talking on the phone.

It turns out that, 40 years ago, it was standard practice to solder plumbing together with lead. The only way we’re going to get that out is to cut it.

After talking about it some more, and getting a look at that bend in the hot water pipe, my brother suggested that we replace the copper pipe with Pex, including the pipe to the shower. We can then get Shark Bite parts and adapters to install the new fixture. The set we have includes a shower head, but we won’t be using that, since we currently have the accessible hand held shower (it has an extra long hose, and a shut off valve under the handle of the shower head).

I don’t know that I want to mess with the pipe for the shower, if I can avoid that. I have no idea how it’s attached at the top, and I don’t want to cut another hole in the paneling to see!

So that was it for today.

Tomorrow, I’ll be going to the hardware store. There’s a guy there that has been most helpful. I can show him the photos and talk to him about what we need. My older daughter says she can cover the cost, though at this point, we have no idea what those would be.

We did get a few other things done today, though it was nowhere near as productive as I would have liked. I have so much I need to do outside, and I’m just not getting to it!

My daughter and I got the last of the winter squash moved from the garage to the root cellar; we’re supposed to reach -3C/27F tonight, and I figured it was time. We did leave the big Crespo squash upstairs, though. It has the most damage to the shell, so we will see about using that as soon as we can. I definitely want to save seeds from this one, so we can grow them again next year.

The tomato paste I was making in the slow cooker out of just San Marzano tomatoes was finally done last night and left to cool until today. I like using the slow cooker for this, but it does take longer. I probably should have cooked it down more, but we were going to need the slow cooker. There was enough somewhat saucy paste to fill two 750ml jars. We’ll just keep those in the fridge to use as needed. We like to just add a spoonful of paste into various things, almost as a seasoning.

I did taste test it and, to be honest, I don’t find the flavour any better or worse than any other tomato sauce or paste we’ve made. I’ll have to get my daughters to try it. I’m not a good judge of such things! 😄

Our Thanksgiving turkey got deboned, and there is now a stock being made from the bones in the slow cooker. It’s as plain as plain can be. Just the bones and water. Not even salt, so that we can use it for the cats as well as for ourselves. We can add seasonings for ourselves, later.

The last of the vegetables that were under the turkey went into a pot, along with the leftover squash, some of the leftover turkey and some of the freshly jarred tomato paste to make a large soup. Between the soup and the rest of the turkey, we won’t need to take anything out of the freezer for a while!

We’re still having to heat water to wash ourselves and anything else, including the dishes. I have found that, if we leave the hot water alone long enough, we do actually get some almost hot water. It takes a long time for one element to heat up a 40 gallon tank.

Another job for tomorrow. Take the elements out of the previous tanks to see if any of them can be used to replace the burnt out one in our current tank. I took a quick look at one of the tanks while I was done there earlier today. The bottom panel is already open and I could see scale built up around the element on the outside.

There’s a reason we go through hot water tanks so quickly!

I’ll have to grab some tools and have at the old tanks. Aside from opening the panels and removing the elements to see how they are, I want to take out the anode rods. At the top of the tank is just a flat cap. There’s nothing to grip. I can’t see how it’s supposed to be removed without digging under it and scratching up the surface of the tank. Of course, nothing I find online is the same as what we’ve got. It’s probably a simple thing, but with how absolutely everything seems to be breaking at once right now… well, let’s just say I’m glad we’ve got a couple of old tanks to practice on!

Our new powered rod isn’t supposed to arrive until Oct. 22, so we have time for that. It’s the element that I really hope we can get replaced.

Meanwhile, the girls are going to be taking on scrubbing the area around the tub as much as they can before treating with with an anti-mold and mildew disinfectant again. Then, once that’s dry, all the exposed area will get painted with the mold and mildew resistant primer. Once that’s dry, we can look into getting the new tub surround ready to install. The most important part being, cutting the holes for the plumbing in the right places.

The tub itself is going to need a whole lot of CLR, too.

It’s going to be downright strange when all this is done, having a tub and surround that isn’t water stained with rust.

I just want to be able to have a real shower again, with water that wasn’t heated in a kettle, first!

Ah, well. Little by little, it’ll get done!

Very little, by very little, with this particular job!

The Re-Farmer

What a great day, with some excellent updates

I am really happy with how things have turned out today!

First, we have the cat isolation shelter.

It took all day, but it is now useable! It has been moved close to the house, and the cats love it. Here is a short video I took to post on Instagram.

I was able to make the sliding doors, but one of them turned out to be a real pain. The wood lath covering the insulation on the other side, were not all the same widths, with some sticking out further than others. There was no way the panel could slide over it. So I made a stopper, instead, and it can only slide the other way. We’ll just have to be careful not to slide it out so far that it’ll fall out.

The other side was downright easy, after that!

Once those were in, I got my daughter to hold the front window in place while I drilled some pilot holes and put screws into the corners. Once that was done, she could let it go, and we added more screws to secure it.

Then, finally, we could put the roof pieces on.

Which turned out to not be as long as the boards they were being attached to. We have excess wood sticking out, front and back The back is the “handle” to lift the roof, anyhow, so I’m not too concerned about that, though at some point we’ll want to replace the strip of wood lath across the back with something sturdier. As for the pieces sticking out the front, I ended up using them to help steer as we moved it. We might cut them flush with the roof later, though.

I had to abandon my daughter part way through moving it, as my brother arrived with another load to drop off. After greeting him and he went to unload, I had a chance to take a short video of the isolation shelter. My daughter had left it in an open spot for me to do that. Eventually, I will put together a video of the entire process, which dragged on for so much longer than expected. After that, I moved the shelter closer to the house.

The door/ramp doesn’t have a latch, though – the ones I had were not large enough – so it kept dropping open, even though we’d taped it shut. The down side of using salvaged materials. One of the boards of the ramp cracked after hitting the ground. I had to add a couple more screws to fix it. Which was fine, but it required closing the door to do it.

The kitten that was inside the shelter was not happy about that! 😄

The last thing that really needs to be done is to find a latch for the door/ramp. We also need to get more paint, but that’s mostly cosmetic.

Once we work out exactly where it will stay for the winter, we’ll hang the clamp lamp with the heat bulb under the roof and get that ready for plugging in for the winter, preferably with a timer. I’d also like to attach handles to make it easier to move. The handles I had that I thought we could use are not strong enough.

After moving the isolation shelter closer to the other cat shelters, I grabbed a couple of winter squash as a gift for my brother, and went to join him while he worked. While we were there, we started hearing a noise.

A noise he identified as splashing water on metal.

From the septic expeller.

I couldn’t believe that’s what we were hearing, so we went to take a look. Sure enough, there was water coming out of the pipe!

It was not coming out as well as it should have been; it was almost dribbling down the outer pipe, and the sheet of metal that’s there to prevent erosion at the base was being partially missed. The pipe itself is leaning a bit back and to one side, instead of being straight up, which I’m sure isn’t helping, either.

I’m amazed that it was working at all. I was just there earlier today, taking photos, and saw no sign that water was being ejected from that pipe.

Oh! I completely forgot to mention!

With the one septic company ghosting us, I called the other and left a message this morning. The owner called me back less than half an hour later. They will be able to do the job for us. They are really busy and he couldn’t tell me when they can come out to fix the leak – it might be 3 or 4 weeks – but he told me that they could do the work even if the ground were frozen.

So that was definitely good news!

He asked me for photos of the expeller. While I was there, I made a point of looking to see if there was any sign that greywater has been flowing over the sheet of metal. That fact that there is some water flowing out the pipe, and not all just seeping into the ground, is actually a bit of a weight off my shoulders, making the timing of getting the repair done is not quite as urgent.

So that was more good news.

My brother had been able to come out sooner than he expected. It was still light out when he was done unloading, so he and I did a walkabout, including out to the car graveyard and the old farm equipment. I now know which things he wants to keep, and what can go to the scrap dealer – and it’s added a lot more to what the salvage company can come out for!

Oh, it’s going to be good to clear out this stuff.

My brother then came in to take a look at the bathroom, and the rot on the walls.

In the end, he said it’s not actually that bad. He said he wouldn’t bother taking it out at all, which would require taking the tub out. He suggested we just fix the taps from the other side, then cover it all with the new tub surround we already have.

Then we went around to the other side of the wall to talk about cutting an access panel. He’s pretty sure there is more aspenite under the paneling. We could take off the entire panel, but that would require removing the molding that’s over it, too. He suggested drilling through from the bathroom side to mark where to cut. Which is what I had been thinking, but only after cutting away the rotted aspenite around the taps. We have to figure out where the joists are; they should be 16″ apart, but the bathroom was installed while he was away in college, so he never saw how things were done.

So that is more good news. We don’t have to remove the tub and cut more of the walls away. He recommended we treat the aspenite with bleach, but we have some anti-mold product specifically for bathrooms we can use.

We can now put together a plan of action to get things fixed so we can use our tub and shower again!

Then my brother got his meter and we went to check the hot water tank – after shutting off the breaker! He tested the elements, and it turns out that it is the top element that is burnt out. The bottom one is working fine.

So we’ll be looking into getting a replacement for the top element.

I told him about the powered anode rod we are getting. Looking at the outlet near the hot water tank, I mentioned my thought of unplugging the extension cord that goes into my husband’s closet, then moving the plug for the well pump up, so we have room to plug in the new rod.

He advised against it.

As he put it, we’re already on borrowed time with that well pump, and he wouldn’t touch anything if it can be avoided.

We looked at the other outlet, where the sump pump is plugged in. He suggested running an extension cord from there, instead.

I will trust his advice and do that.

So we’re still without use of the tub and shower, and have only tepid water, but we now have a better idea of what to do next.

Which will be to get at the plumbing for the faucet set from the bedroom side and get that working, first. Then, even if it takes longer to get to the point we can install the tub surround, we can temporarily put plastic over where it’s cut open, so we can use the tub and not have to keep sponge bathing!

So… I rate that as more good news.

There was only one hiccup in the day that is more strange than anything else.

While my brother was unloading his truck, he got a voice mail notification on his cell phone – but his phone never rang. He joked that it was our vandal, because that’s who it was the last time this happened.

Well, after he left our place, my brother checked the voice mail, and it really was from our vandal!

I’ll get a copy of the message later, but it was much the same as last time. He’s wondering why my brother is “catering” to me – and we have no idea what he’s talking about. He also said that his doctor told him that the reason he got cancer is because of us, and that we are evil, evil, evil! He’s dying of cancer, and it’s our fault.

???

I’d say, he was drinking behind his wife’s back again.

At least he didn’t threaten us with “retribution” so extreme, even the Pope would be reading about it in a magazine, this time.

We are perplexed as to what triggered the call. Particularly since my brother was here when the voice mail was left. My brother thinks our vandal has been watching us, and saw that my brother had arrived, but I don’t see how.

Whatever the reason, my brother has our vandal’s number blocked, so he shouldn’t have been able to leave any voice mail message at all. The phone company is going to be getting a call about it, that’s for sure!

One thing else is for sure. When the scrap metal company comes to clean things up, we will have to watch out for our vandal, because he is going to go ballistic. He believes all this stuff rightfully belongs to him – but then, he thinks the entire property rightfully belongs to him.

Well, we’ll deal with that when the time comes. I’ll just be glad to get all this stuff cleaned out – and I’m sure the renter will be glad to see it gone, too, since his cows graze around almost all of it!

Oh, and I told my brother about the guy that wants to buy a couple of cars for parts, and how he will need to bring in special equipment to be able to get them out. I also told my brother that I’d arranged for him to use part of the money for the cars to pay back the guy that put a down payment on the old Farm Hand tractor, since I could see my brother wasn’t happy with the sale. My brother was happy to hear this.

So good news for him, too!

It’s just been a good day, overall, I’d say!

The Re-Farmer

Cat isolation shelter progress; starting the roof

Today has been a very windy and rainy day, but I still managed a bit of progress on the cat isolation shelter. I kept the garage door closed because of the weather, or course. Usually I have it open for light and fresh air, but the winds were blowing in from the south today, and that door faces south. I was surprised by just how much that door was rattling and shaking in the wind, even with the truck parked outside, right in front of it, acting as a bit of a wind break!

All was warm and dry inside the garage, though, so that worked out well.

I decided to work on the frame that will be supporting the clear roof panels, starting with the board that would support the piano hinge in front.

The piano hinge has 18 screw holes in each half, and came with its own little baggie of screws. I started by centering the hinge on the board, with a plan to attach the hinge at each end, then continuing on the shelter itself.

I had problems with the very first screw.

The head broke off!

If the screws that came with it were going to break that easily, I was not going to use the rest!

I did have the remains of a box of small screws that I used on the catio roof that were the right size, so I used those, instead.

After securing the hinge to the board at each end, I set it up on top of the shelter. I dug around the garage and found a strip of aluminum thin enough that I could use it as a spacer between the frame and the board. The board had a slight bend in the middle, so that got weighted down with a couple of bricks.

I didn’t have enough screws for all the holes in the hinge, but there’s enough to hold it in place. I’ll have to pick up more screws later to finish the job.

In the first photo above, you can see some of the empty screw holes. I made sure the ends and the middle were secure. I supposed I could use the screws that came with it for the rest, but it’s not worth potentially filling the holes with broken screws I won’t be able to get out later.

Once that was in place and the spacer removed, I had three boards to attack to the hinged piece. I used one to work out exactly how I wanted them positioned. The overhang is slightly longer in the front than the back. After marking where it lined up with the frame, I used that to mark the other two boards.

I spent a fair bit of time making sure they were exactly where I wanted them, then screwed them in place.

That left three ends in the back that needed something to keep them from wobbling around when the roof pieces are attached.

Once again, wood lath to the rescue!

The distance from one side to the other is 4′, which is the length of the wood lath. I find the most even piece out of the new bundle I could find, and simply nailed it to the ends of the roof supports.

If you click through to the next photo above, you’ll see what it looks like, open. Instagram doesn’t work with having both portrait and landscape orientation photos in a slide show, so things are a bit cut off in the image. The end of the roof support reaches the rafters!

While the piano hinge would allow for the roof to open all the way flat, the overhang will let it open only so far. Later, I might at something that can be used to hold it propped open, but that can wait.

Last of all, I added another piece of wood lath under the three boards. You can see it in the last photo. I lined it up with the edge of the frame, and then used wood glue to secure it, with the bricks to weight it down as it dries. This piece is to make sure the boards don’t slam right against the frame when it closes. It will eventually be further secured with nails.

The roof panels will not be added until last, though.

From this, I started working on attaching the front door/ramp. After checking how it fit into the opening, I cut a small piece of wood to attach under the horizontal top, as a stopper for the ramp.

It was remarkably difficult to attach this to the underside of the 2×4! Quite awkward, and one of the screws seem to be hitting something harder in the wood.

The next step is to attach the hinges to the door, then to the frame, but that’s when my husband came to the garage to let me know my daughter needed help with the taps. There is no signal in the garage at all, so they couldn’t message me to ask me to come to the house.

Well, at least I got a bit done!

Once the door/ramp is on, and a latch installed, it’ll be time to add the clear panels – which still need to be cut to size! It’s starting to look like we won’t be able to set up the table saw in the sun room, after all, so I’ll need to figure out some other way to cut it. If I can keep it from vibrating too much, I could use a jig saw.

I’ll cut it by hand with the pull saw, if I have to.

Ever since my brother told me this stuff can possibly shatter while being cut, I’ve been incredibly hesitant about using any of the tools we have.

It’s so close to being done, but there have been so many interruptions!

Of course, getting those shut off valves and installing them so we could have running water in the house was most definitely a higher priority!

Little by little, it’s getting done.

The Re-Farmer

Okay, we did know this was going to happen

Did it have to happen now?

For those who have been following this blog for a shorter time, I’ll give a bit of a back story.

When we moved into this “perfect” house, at the request of my mother, we of course found all sorts of problems all over the place.

One of those was the hot water leaking in the bath tub. The rust stain below showed this was not a new problem.

When we had septic backing up into the basement (again) a few years ago, we had a plumber come in to auger the floor drains. While he was here, I asked him about the leaking tap. He asked me some questions I couldn’t answer, like whether or not the pipes could be access from the front, of if they had to be accessed from the bedroom on the other side of the wall.

There is no access panel, there.

When my father got running water and an indoor bathroom for the house, in the early 70’s, the bathroom walls were covered with waterproof paneling make to look like tiles.

The tub surround was installed on top of this paneling, with arm bars added later on.

The caulking for the tub surround was coming loose, and we had no idea what the state of the caulking on the fake tile paneling underneath was like.

The plumber gave us an estimate of $400 to replace the taps – he thought he could fix them, but we wanted to replace them – but he told us the tub surround would have to be removed, and that was not something he did, so we would need to be prepared to replace that.

With this information in hand, we got a replacement faucet set with level taps in stead of knob style – something better for arthritic hands.

We also picked up a new tub surround, adhesive and caulking.

Which has all just been sitting there all this time.

After the illegal lockdowns and various economic disasters, I eventually called the plumber to ask for a new estimate, but he never called back. Considering all the hits to our finances recently, from now having payments on the truck, replacing multiple desktop computers, etc., it really didn’t matter much.

Of course, over time, the leak just kept getting worse. The strangest thing was that, if only the cold water tap was turned on, the hot water tap would start leaking!

Well, today, it finally happened.

My daughter was just finishing her shower, went to turn off the hot water, and the tap just kept spinning and spinning!

Which bring us to another problem with the plumbing in this old house.

A severe lack of shut off valves.

To shut the water off for the tub, we had to shut off the water for the entire house.

Once she was able to get out of the shower, my daughter started working on taking off the taps and faucet.

Yikes.

The one with more rust on the inside was the hot water tap.

Click through to the next photo, and you’ll see the inside of the faucet.

The rust and scale I can understand, but cobwebs???

My daughter then had to start tearing off the tub surround, starting with the one behind the taps.

That was a messy and difficult job.

We then learned three things.

First, we would have had to access the taps from the other room to be able to replace them. We might still have to.

That will require almost emptying by husband’s bedroom. The only thing that wouldn’t need to move would be his hospital bed.

Then we’d either have to remove an entire sheet of paneling – which is what I think has been done over the years – or cut an access panel. Either way, it’s going to be a major issue for my husband.

Second, the rot in the fake tile paneling is really bad. I expected it to be bad, but… yuck.

No, I’m not going to post picture of it.

The water damage extends all around the tub, but the other two walls are not as bad as we feared.

Still, we’re going to have to cut off at least the bottom 16″ of the paneling (4 “tiles” high), then see how bad the damage is, behind it.

Third, this is going to take a long time to get fixed. We don’t even know what we’re going to need to do to get it all useable, yet, anyhow.

Meanwhile, the entire house is without water.

That meant a trip to the hardware store for a couple of Shark-bite style shut off valves.

My daughter then spent almost 3 hours installing them, with me as her flashlight holding assistant. It was incredibly awkward, and hard to get at.

Once they were finally installed, we added a sealing tape around each end of the valve, then went over that with electric tape, just to be on the safe side. We had to install a shut off valve in the hot water pipe to the laundry sink, and it now leaks every time we turn it on to use the tap. That on is an actual Shark-bite brand, and one end never gripped properly.

So we wanted to play it safe.

The first image above is the cold water pipe. That one had to be installed directly above the sump pump reservoir, which made reaching it a bit precarious. It was the easier one to install, though!

If you click through to the next photo, you’ll see the hot water pipe, which is just off where it branches to the kitchen and laundry, and next to the pipe that goes up to the toilet tank, and next to the furnace duct…

That pipe didn’t have as much play in it, either, and my daughter ended up having to cut off more pipe just to be able to get it into the valve end.

To top it off, there was all the water to deal with. My daughter did the hot water tap first, and after the first cut, the water just wouldn’t stop flowing! We ended up having to drain the hot water tank and open other taps, and still had to kept lifting the pipe at a bend to try and get more water out of the pipe. The cold water pipe did that, too, but not as much as the hot water pipe!

Needless to say, my daughter was feeling wet and gross by the time it was all done.

The important thing, though, is that they work. We could turn the water back on for the rest of the house!

While my daughter was finally able to leave, I stayed to monitor the refilling of the hot water tank. We couldn’t just turn the valve on all the way, as it would drain the pressure tank faster than the well pump could fill it again, which causes problems for the pump.

Yes, that still needs to be replaced, too.

Every now and then, I’d have to shut the valve off completely and let the pump finish filling the pressure tank before opening it up again, to stop the grinding noise it was making!

After the hot water tank had time to fill for a while, my daughter turned its breaker back on, so it could start heating up, too.

Then we had to run all the taps in the house to get the air out of the pipes.

That will be all we do about the tub for today!

While we figure things out there, we’ll all be sponge bathing for the next while – and I can’t even guess how long it will take for us to be able to use the tub and shower again! I supposed if we are at least able to install the faucet set, we could use the tub to wash in, and make sure not to splash. We just won’t be able to use the shower until this is all done.

*sigh*

It’s a pain, to be sure, but right now, I’m just thankful that the rest of the house has water, and it’s just the tub/shower that’s out of commission! We’ll just have to deal with things as they are.

It’s not like we have any choice in the matter!

The Re-Farmer

Cat isolation shelter progress: the wire mesh is on, and laying down framework

I finally got to spend some time working on the cat isolation shelter today! It’s been way too long.

I decided to go ahead and put on the rest of the wire mesh on the lower level, and start preparing the upper level.

Here is a slideshow of one side that gave me a bit more trouble.

All the areas needing mesh were done, with the mesh first tacked on with staples. For the short sides, I started securing the mesh with wood lath across the bottoms. I then spent a bit of time working out how best to start framing for the clear panels that will be sliding doors, while further securing the mesh on the bottom half.

The clear panel, which still needs to be cut to the sizes I need, is a quarter inch thick. The wood lath is also a quarter inch thick, though individual pieces have variations in width, so that will work out perfectly for sliding channels.

For this side, I added long, vertical pieces of wood that would both secure the wire mesh on the bottom, while also starting to form a frame around the opening that the clear plastic will be covering. This is so that the panel will slide towards the back, over the section that’s insulated and covered.

If you click through to the next photo, though, you’ll see my problem on this side.

The floor boards were placed flush with the edge on the other side. A couple of boards were slightly longer. When covering the section on this side, I took advantage of that and rested the first piece of wood lath right on top of the parts that stuck out, then worked my way up.

There was no way a door panel could slide across with those there. Mostly, it was the one piece that stuck out the furthest, but a second piece had to be dealt with, too.

Thankfully, I have a pull saw with a very thin and flexible blade – a Bear Saw, which I think is a model, not a brand. You can see how flexible the blade is in the next photo of the slideshow. I was able to saw off the parts that stuck out, then use a rasp to take off any bits that were left.

In the last photo, you can see the rest of the framing in place. Some of this will be hidden from view when the sliding channels are complete.

For the sliding door’s channel, I will need to set pieces across the top and bottom, positioned so they will be flush with the panel. I’ll need to find the thickest and straightest pieces for this part!

I am pretty sure I’ll need to add more framing pieces, but I won’t be positive until I have the panels as a guide.

I’ll probably give a bit of extra space for the panel at the top, so it’s not too snug – but not too much space, or it’ll wobble when being opened and closed. Once those pieces are fixed in place – and I’m sure the panel can slide over the covered and insulated section unobstructed – two more vertical pieces will be added that will overlap the top and bottom of the panel, holding it in place.

If we need to remove the panel for some reason, it can be slid right out one end.

The rest went much more easily.

This is the front section.

The mesh for this section was just a square, but I made sure not to secure it too high. There needs to be enough space for the clear panel that will cover the front of the top level to have the overlap it needs to be screwed in place.

Here is the second short end.

The covered section is over the opening to the second level, so there are no floor boards at the bottom. The bottom piece of wood covering the insulation was lined up with the horizontal frame piece, which made the whole thing slightly lower than the cover on the other side. That gave me room to put a long piece of wood lath across the top as well as the bottom. The rest was done pretty much the same as the other side.

That was it for today. Tomorrow, we need to get the table saw set up so we can cut the clear panel pieces.

Once the clear panels are in place, the door/ramp on the bottom will be installed. Last of all, the roof will be assembled. I have some handles I can add to the sides to make it easier to move it around, too. They were meant for something else, but are needed here, more.

After that, it’s done until we can pick up more paint! With or without paint, though, we can bring it over to the house and set it where the cats can start checking it out and getting used to it.

We’ll need to pick up more heat lamps so that we can have one to set up inside the upper level of the isolation shelter during the winter. Even with insulated walls, the plastic room and clear panels have no insulation. They may be good for passive solar heat during the day, but not very good at night!

I just checked online and the lamps I had in my wishlist are on sale right now, so I’ve just ordered a pair of clamp lamps and a pair of ceramic heat bulbs. I think we still have a timer laying around, too. If it has a light sensor, we can set it up like the one in the cat shelter, so that it will automatically turn the heat on at dusk, then off during the day.

Hopefully, the cats will get to enjoy the shelter soon. Especially the ladies we’re building it for, and their post trap and spay recovery period!

The Re-Farmer

Fourth raised bed cover done – mostly – and my conclusions

After yesterday’s lumberjacking, we were pretty sore this morning, but not as bad as I expected. Still, my daughters were sweet enough to feed the outside cats in the morning, so I could sleep in a bit before doing my morning rounds.

My daughters had some shopping to do in town, so my younger daughter and I left after my morning rounds were done. One of her stops was the pharmacy, forgetting that today is a statutory holiday in Canada, and the pharmacy was closed.

I did notice that a BBQ food truck was out so after our last errand, I checked it out. I had enough cash on hand to get some take out to bring home as a treat. I miss food trucks! 😄 There’s actually quite a few in the region, but where we are just doesn’t have the population base to support one.

One thing I noticed while I was waiting for the food was a sign on the nearby hardware store. Along with cycling through their hours, specials, etc., they show the local temperature. According to my apps, the hottest I was seeing was 26C/79F with a “real feel” of 29C/84F at home. The sign, however, was showing a temperature of 32C/88F! Judging by how I was feeling while standing in the shade, I’d say the sign was right.

We really ought to get ourselves a weather station. I did find the parts of one while we were cleaning up the house, but the outdoor reader was (still is, actually) mounted to one of the steel clothes line poles, so the readings would be quite off!

Speaking of the weather, we started to get alerts for severe thunderstorms this afternoon. Looking at the weather radar, I could see spots of storms, scattered like confetti, sweeping across the prairies.

So far, none have hit us. The most we got was a smattering of rain. I was outside at the time, working under a tree, and never noticed until I saw parts of the sidewalk were wet!

This is what I was working on.

The last frame for a raised bed cover now has wire on it.

Of course, it was more of a pain than expected.

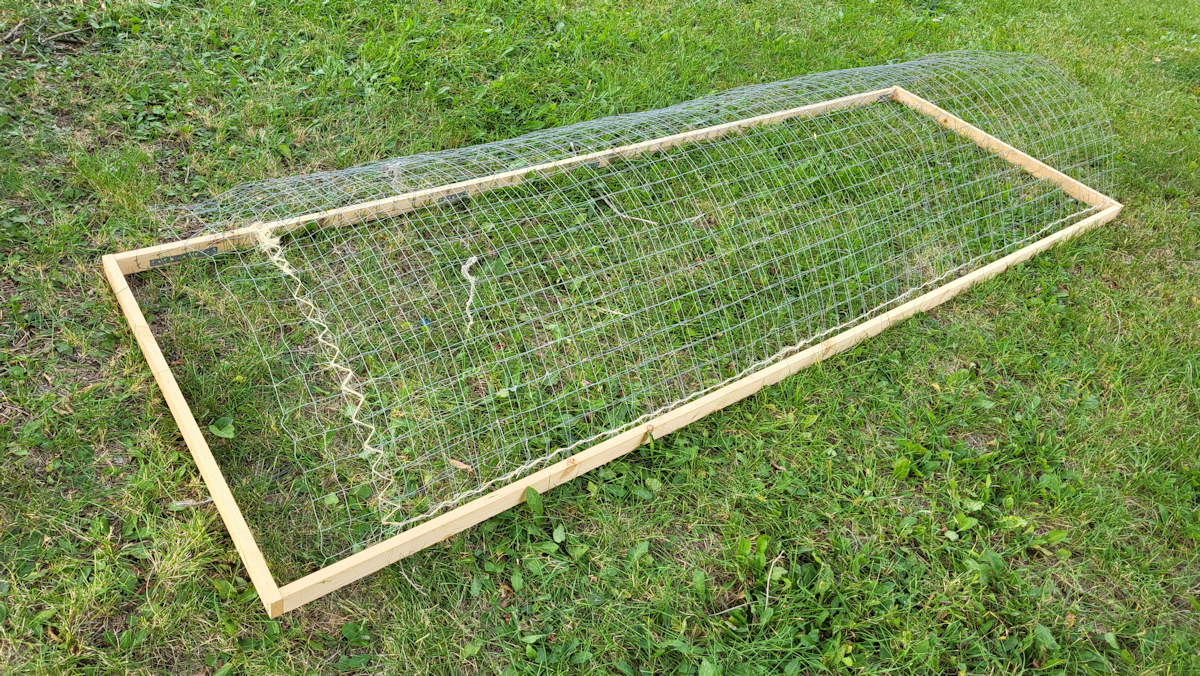
The wire I used was 2″ hardware cloth salvaged from the old squash tunnel. The roll is 4′ wide, so I could just use the length, rather than cutting strips, like I had to with the fence wire and the plastic hardware cloth. I was going to cut it to 9′ until I realized I had close to double that, so I folded it almost in half.

Putting the first side on was fairly easy. I used the steel strips again, as they are a lot more secure. In the past, for wire like this, we used staples, and there’s no way staples would hold this in place while being manhandled on and off raised beds.. The only real hard part of attaching the first side was having The Phantom suddenly decide she absolutely had to have attention! She’s been making strange lately, and I thought she was getting more feral, but not today!

Also, as she rolled around, I could see a single active nip. I had been wondering, as she never looked pregnant, if perhaps she were infertile, but she does have a single kitten somewhere.

Speaking of kittens, they were all over the place, and more of them are showing red and/or sticky eyes. None as bad as the two we regularly bring inside to wash their eyes, thankfully, but my goodness, it’s bad this year!

Anyhow… where was I? Oh, yes… the wire.

Once the first side was attached, getting the second side done was a real pain. The two layers of wire mesh kept getting stuck on each other and misaligning. After fighting with is for about half an hour, at least, I finally got some jute twine and wrapped the length of it near one edge, from the fold to where one end was a few inches shorter than the other, then secured the short end as well. Only then could I finally attach the other side to the frame.

Unfortunately, I started to run low on the short screws I was using the attach the steel strips. I had just enough to secure the length, but only on the bottom edges. What it needs is more of them to secure the wire to the top edges, to keep it from pulling away.

So… more of that size of screw is on my shopping list. I did try to secure it a bit better using the staple gun, but didn’t finish. Even with the steel straps, they will easily pop out.

Aside from securing the wire to the frame some more, I am thinking it will probably need more support. The wire can hold itself up, but it bends very easily. It would take next to nothing to crush the arch. If a cat decided to jump on it or something, it would collapse completely. I think I have a couple more lengths of the PEX pipe, but I would want at least 4 preferably 5, to support the wire.

So the cover is done to the point that it can be used, but needs a bit more to make it stronger.

For this one, I’m glad I decided to fold the hardware cloth in half rather than cut it too length. If it were 1″ squares or less, it would be stronger, but with 2″ squares, it’s relatively flimsy. It will be okay when we use other strips of the 2″ hardware cloth on the box frame to protect the bed with the popcorn in it, but not so much as a self supporting arch.

So, here are our experimental results.

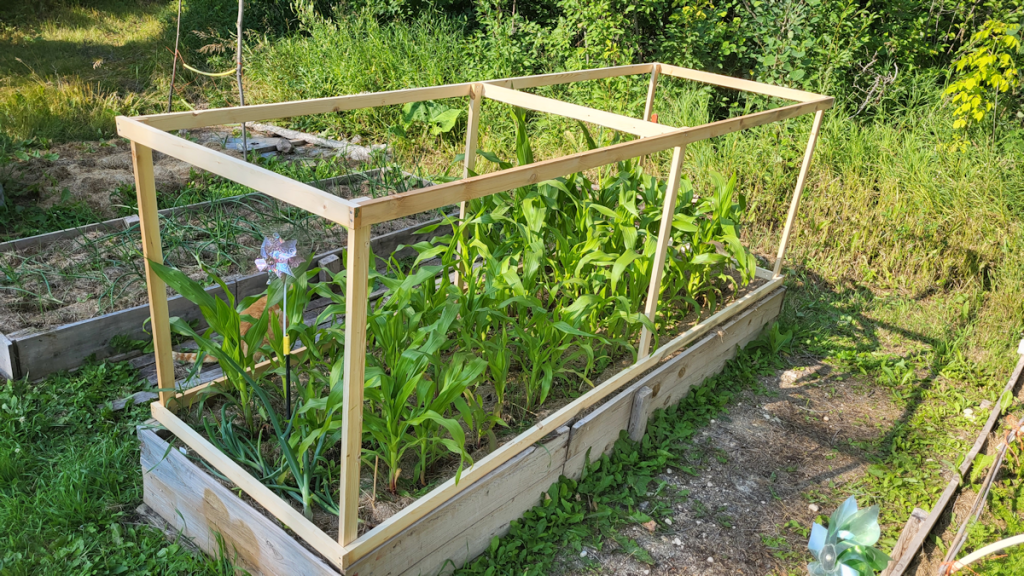
The first one we built was the box cover, designed specifically to go over taller things like the Tom Thumb popcorn. It is intended to support wire, shade cloth, etc., as needed. It is probably the most structurally sound of the frames we made. It is unlikely we will need to build more like this, simply because things we grow that are taller are more likely to need other types of support or protection.

I can see two problems with this design. 1) Once the sides are wrapped in wire, there is basically no way to tend the bed without removing the entire cover, and 2) for anything needing a cover this tall, removing it would require 2 people, to avoid damage. If, however, it were wrapped in fabric mesh or netting, it could be done in such a way that the netting could be lifted for access. Fabric won’t keep the racoons out, though.

Conclusion: I’m happy with it. This frame is worth making again, if we ever need to protect tall plants, but there would be little need for more, based on our current garden needs.

The second one used fence wire we found in a shed. The fence wire turned out to have varying sizes of openings, from 6″ square to 6″ x 3″ The roll was just over 3′ wide, so we had to cut 3 strips to fit into the frame, with overlaps. I went with 5′ long strips to create a high arch, which worked out well for the bush beans.

The first problem we found was with how the vertical and horizontal wires were joined. Each intersection has a wire wrap, adding significant thickness to those spots. We were using U nails to attach them, hammering them diagonally over the joins to secure them. Between the nails themselves and the thickness, this was far more difficult than it should have been.

The wire itself was stiff enough that a couple of screws snapped in the frame’s corners, which resulted in them starting to rotate. Thankfully, we had a couple of scrap 9′ lengths that cut wonky, and were able to add those to the inside of the frame, sandwiching the fence wire in between. That also strengthened and secured the corners.

We currently have the frame over our bush beans, with netting on top, to protect the beans from critters. The wire wraps at each intersection is a problem, as the net catches on them, but aside from that, it’s ideal. The net strip is wide enough that I’ve even been able to secure the edges with ground staples into the soil under the frame, too.

Conclusion: I’m really happy with this one. I’m able to lift the netting and harvest through the fence wire without having to move the frame. If I can find 6″, or even 4″, square welded wire fencing, instead of the wrapped wire, that’s what I would use to make the majority of future covers. It’s strong enough to support itself. I could probably use 6′ lengths for an even higher arch, and it could still support itself, plus any shade cloth, insect netting, greenhouse plastic, etc. Though we would not use U nails again, and go with the steel strapping, I would still be good with that double thickness of wood on the long sides, which makes the whole thing much more structurally stable, while also securing the wire. In the future, I can see most of any new covers we make to be like this one, with a few modifications.

The third one is the one with the “rigid plastic” hardware cloth. Which turned out to not be very rigid at all. This is when I remembered I had the steel strapping and used that to secure the mesh. After the first hoops I tried to use, snapped screws in all the corners, I had to add extra pieces of wood inside the short ends. Switching to PEX pipe hoops worked much better, and the steel strapping worked well to secure the hoops, too.

The plastic hardware cloth rolls came in 3′ widths, so it took three lengths to cover the frame, which then had to be lashed together. I went with 4′ lengths this time, for a lower arch compared to the fence wire cover. Once the hoops were snugged in place and trimmed to size, I used garden twist ties to secure them to the mesh and prevent them from being pushed sideways.

With the outward pressure of the hoops, this frame had a couple of screw eyes added to the middle of each long side and cord strung across, to keep the sides from bowing outwards.

Conclusion: This frame is definitely the most aesthetically pleasing of them all. It’s easy to move around with 1 person, and the lower arch is good for shorter crops. I would not, however, use this plastic hardware cloth again. It creates too much shade. Which is great if I have it over a bed of lettuce, but obviously, it wouldn’t be good to use over something that needs full sun. I also would rather have the flexibility of using whatever cover I need for a particular bed. I want these frames to be interchangeable as possible, whether a bed needs shade cloth, greenhouse plastic, or frost protection. If I need to use hoops for support again, the PEX pipe is definitely the way to go.

Last of all is the frame done today, so I’ll just go straight to the conclusion:

Conclusion: As this one didn’t need any extra wood added to the sides or ends, it is the least structurally secure, but that’s an easy fix. I would not use this 2″ hardware cloth again, though, for the same reason I wouldn’t use chicken wire. It’s just not strong enough, and bends too easily, even doubled up.. It will also need support hoops added at some point. It’ll be used, but that’s about it.

As we build more high raised beds, we will also build more covers Experimenting with the different materials has shown me a lot of what works best for our needs – and what to avoid! Armed with this information, I’ll know what to keep an eye out for and pick up as the budget allows, to have on hand for when we have more beds to protect!

The Re-Farmer

A bit more progress

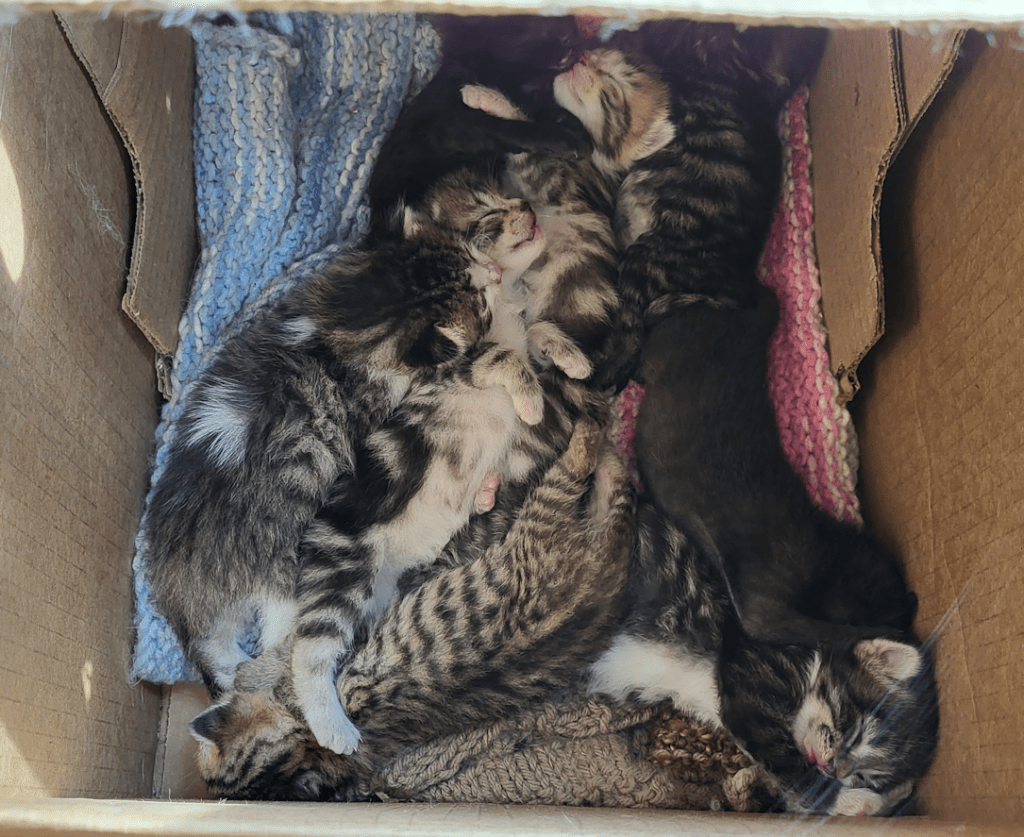
When heading out earlier, I carefully checked on the babies, and they seemed very comfortable in their new nest!

I’ve seen the mama around, but not in the sun room. While she was willing to put up with me when I put the evening kibble out, once she’d eaten, she kept her distance. I was concerned when I started hearing the kittens from the sun room, but she was going in the other direction, so I made a wide circle around her to use the main doors, in hopes she would go towards the sun room to get away from me but, instead, she went up the sidewalk to the gate. So I went inside to not disturb her, and hope that she hears her kittens and tends to them. Earlier, I even made sure to leave little piles of kibble around where the nest is, to treat her when she does.

This is what I started working on while outside.

What a flippin’ pain to attach the fence wire to the frame! I was using U nails (aka: staples) to attach them, but they were the biggest problem. They were poorly cut, and the ends were often jagged instead of pointed. There was really nothing we could do about that, either. I also had to hammer most of them to be more closed, so that they wouldn’t splay while being hammered into the wood.

I tacked a section of fence wire to the ends first, the added the third section to the middle, so that it overlapped the end pieces evenly. Once that was tacked in place, I went back and added a U nail over every joint in the wire, with my daughter holding the frame steady and passing me the best U nails out of the bag that she could find. I would not be at all surprised if the U nails simply popped right out.

I was very frustrated with them.

Ideally, I would strength the whole thing by sandwiching the fence wire between another piece of wood, but the horizontal and vertical pieces of fence wire are joined by one being wrapped several times over the other, making each join triple the thickness of the wire on its own. It would still work, but there would be a larger gap between the boards than I would want. It would certainly make the corners more stable, though. Hmm… We do still have a couple of 12′ pieces that were cut wonky. Maybe I could experiment and try it with just one frame.

By the time I was hammering the last of the U nails in, it was starting to rain again, so we left the other half for another time.

Once inside, I was going to start supper, but the girls took that over and are working on it as I write this. We did decide that there really wasn’t enough of the potatoes I picked earlier for the four of us – we do like our potatoes! – so I went out and harvested some of the Red Thumb potatoes, too.

That colour is amazing! These are red all the way through, too.

After passing them on to my daughters to prepare, I went back out and harvested some fresh dill leaves from the self seeded dill we have along the edge of the old kitchen garden, to go with the new potatoes. When the old kitchen garden is set up to be more of an herb garden, we plan to include a variety of dill that is grown more for its leaves than for the seed heads, since that’s how we use it the most. We have another variety that is more for pickling, and we plan to sow those somewhere further away, where we don’t mind them self seeding and can treat them as a perennial.

I’m really looking forward to trying these potato varieties!

The Re-Farmer

First cover done!

This afternoon, my daughter and I were able to get the first raised bed cover done! The frame, at least. We worked on the one intended to go over the popcorn first, as it was the most involved.

Here is the finished product!

It is now ready to support whatever cover material we choose for it. The question is whether or not I will be attaching something to it permanently, or if I want to attach something in such a way that we can take it off and attach something different, later.

Considering that this bed will need protection from deer and racoons, something permanent would be most logical. I have enough chicken wire to wrap around the sides, at least, but racoons will tear right through that. I might have to pick up some 1/2 inch hardware cloth. Until then, however, we could probably still put the chicken wire around it temporarily.

As you can see, the cover doesn’t fit exactly over the raised bed. That was expected. The bed itself has become wonky over time. Not only have the sides been bowing out, but some of the boards are warping. One warped board you can see in the photo has bent outwards enough, it actually snapped one of the screws that was holding it to the 2×4 join.

We will have to find a way to lock the cover onto the walls of the bed, too, or it could simply get knocked right off by a determined critter.

I’m pleased with how it turned out. The frame itself is lightweight, but sturdy. It can be carried by one person, though having two people is preferable, if only to lessen the chance of the frame being twisted or dragged.

We cut extra pieces when prepping the boards, and there are enough to make 3 more frames. I will be away tomorrow afternoon with my mother, but my daughter might be able to get it done while I’m out. They will be much easier, since it’s just the basic rectangle, exactly the same as the bottom part of the frame in the photo above. The only difference is that I plan to add eye hooks to the middles inside the long sides and use cord to keep it from bowing out. I’m still debating whether they will need corner braces. That will partly depend on how they hold up to having the fence wire attached permanently to them. I would rather add them after the fence wire is attached, anyhow. It will be easier to add braces with the wire in place, then add the wire with the braces in place. Since I have to go to the hardware store, anyhow, I will try to remember to look at metal corner braces as a possible alternative.

Little by little, it’s getting done!

The Re-Farmer

Project progress: finally getting started!

Today, after many, many delays, we finally got some progress on those raised bed covers we need to build!

My daughter and I set up the folding table we made using the legs we found when cleaning up the new basement, and a section of 3/4 plywood found in the pump shack. The hard part was finding level enough ground for it, and still be close to the outside outlet. We ended up putting it almost against the house, and that’s where we set up the miter saw. Then we moved the swing bench that’s been sitting on the sidewalk block patio under the kitchen window for the past while, so we could set up the table saw close enough to plug it in without an extension cord.

The first thing we tried to do was cut the 12ft long 1″x4″ boards in half, lengthwise. My daughter, sweetheart that she is, found where the saw blade could be adjusted up and down. My husband and I had tried everything to raise that blade and finally concluded it couldn’t be raised. Turns out, it was just badly rusted and that’s why it wasn’t moving. !! I wonder how many years it sat in that shed before I found it?

The first two boards we cut in half did not go well! My daughter was feeding the board from one side while I supported it from the other, but it just did not want to stay against the guide. We ended up with some wobbly cuts! So we cut the others shorter first, then cut them in half. We measured the beds first to confirm the dimensions. The side boards total 9′ long, but then there’s the width of the end boards; I forgot I’d attached those to the ends of the side boards, and not to the insides. That made the beds 9′ 2″ long. The end boards were 3′ 1/4″ long.

So we will be cutting 9′ and 3′ for the cover frames.

The boards were exactly 12′ and 1/4″ long, so we just measured off the 9′ and cut it. The cuts take off a fraction of an inch, so the remaining sections should be almost exactly the right length for the short ends.

It was much, much easier to cut the shorter lengths in half on the table saw!

All the pieces are now cut. The 3′ lengths are in the front, then the 9′ lengths. In the back is one of the two first 12′ boards we cut in half, with the wonky cuts. The other one was used to cut more 3′ lengths, since being a bit wonky won’t be an issue for some parts of the build.

There is also one board at the top of the photo that was set aside because it has damage on it in two places. We will still be able to use the undamaged parts at some point.

As for the plans, I sketched what I had in mind out for my daughter.

We will be building four 9’x3′ frames, but two of them will be used in one cover. The Tom Thumb corn is going to need taller protection from deer, so two frames will be joined by 3′ vertical supports. One more support will be added across the top in the middle, to keep it from bowing outwards. I also plan to add screw eyes inside the middles and tie a cord across, to keep the sides from bowing out. A cord that close to ground level will be less in the way of growing plants.

At this point, we could just put a net around it, though if we wanted this over a bed with taller plants in it, we could potentially add hoops to the top for extra height.

That box frame is the one we need to get done first, as the corn is most at risk for getting eaten. Between the deer and the racoons, it’s going to become an issue in the near future! If we want to keep racoons out, though, we’ll have to use hardware cloth and find a way to secure the cover to the frame, so they don’t just knock it off.

The other two frames will have rounded tops. We have some wire fencing with 4″ squares that I plan to use with one of them, making a slightly higher cover. The fence wire can then support things like netting, plastic or shade cloth, as needed.

With the other, I was thinking of using the hoops that are currently still over the carrot bed, but… now that I’m looking at the plans, I realized we have enough of that wire fencing to use on both frames. We could make them different heights, for different needs. A shorter one, for example, would be handy for shorter produce, or to create a mini greenhouse over newly sown beds. A taller one would be great for plants that grow higher, but not high enough to need that box cover we’ll be putting over the corn.

As we build more high raised beds, the plan is to stick to the 9’x3′ size, so that these covers can be used interchangeably on any of them. We’re doing three covers for now. One of them should be useable on the high raised bed we have now, which currently has hoops to protect the beans from the deer. The box bed with the red onions does not really need a cover, except maybe to keep the cats from lying in it, or the birds from digging in the mulch. Over time, we plan to build enough covers for all the raised beds we make.

As for cutting the pieces, I was really happy. We will definitely need to get a new table saw, as this one was having issues. It will do for now, though. What I was really excited about was the miter saw. I bought it at a garage sale, and this is the first time we’ve tried to use it. Of course, it didn’t come with an instruction manual! Which is fine. It’s easy enough to figure out.

Up until now, I’ve been using a hand saw to make cross cuts. No matter how careful I am, I always end up making crooked cuts, and there are always those little bits of wood that break before the saw can cut them that need to be sanded. So excited to get beautiful clean cuts! Plus, the speed of it was fabulous!

Once the cutting was done, I realized we would not have enough screws to assemble them all, so we decided to go into town and get more. The table and miter saws got put back into the sun room, and the cut pieces went onto the table we used for the miter saw. We were getting hints of rain, and we didn’t want to take a chance. It’s a good thing we did, because there was a downpour while we were out!

When we got to the hardware store, we drove around the block a couple of times but could find no parking, so my daughter offered to buy us lunch! By the time we were done, things were no longer so busy, and I was able to park and run in.

Before we left home, I took a pair of calipers to the water pipe leading from the house to the garden that needs to be repaired. It’s a 1 inch pipe. After finding the screws we needed at the hardware store, I went looking for a flexible PVC coupling with metal clamps. The smallest size they had was 1 3/4″. That would leave too big of a gap for the clamps to be able to seal it on a 1 inch pipe. I talked to an employee, and showed her the picture I took of the calipers on the water pipe, which also showed the crack in the pipe very clearly. She tried to find something else that would work, but there wasn’t anything they had. In the end, she recommended I talk to a plumber.

What I will most likely do is go to the hardware store in my mother’s town, which is where I first had the flexible coupling recommended as a possible fix. They are a bigger store with a larger plumbing section, and may have a smaller size coupling in stock. If worse comes to worse, we can order them online. In fact, I’ve already found some sized specifically to fit on 1″ pipe.

As you can tell, I’m really hoping to avoid having to dig up and replace the entire length of pipe!

By the time we got home, the downpour my other daughter told us about was done! I don’t know if it’ll be dry enough for us to start assembling the first cover today. We’re supposed to get more rain, too.

This is where I really wish the storage shed wasn’t full of my parents’ stuff, that my mother insists we keep and is constantly afraid someone might come in and steal. As if anyone would be interested in the bags and bags of their old clothes, boxes and boxes of household stuff, or their old furniture. My late brother had used that building as a workshop, but that was more than 10 years ago. We never had a chance to even see what all was still in there, as my brother and his wife had already started moving my parent’s things into there before we moved in, and it was being used as storage for other things even before then.

So we make do with working outside, when the weather allows!

Well, this project has been delayed repeated for about a month now. One more day won’t hurt, if it comes to that!

The Re-Farmer