Yesterday, we made some seed tape, and – best of all! – were able to do some outdoor garden prep. While the main garden area is still buried in snow, the south yard’s garden beds are almost completely clear of snow, and even thawing out a bit.
We’ve got a beautiful day today! Bright and sunny and mild. While we did have high winds and blowing snow last night, there was just enough new snow on the ground for the fresh deer tracks around the cat houses and paths to stand out. Unlike other parts of the province that got hit with blizzard conditions last night!
I counted 23 yard cats this morning.
Perfect timing. Not only did I catch that grey tabby on the top left, just as he jumped up onto the roof, but I got a perfect tongue blehp on Pinky! Gosh, His fur looks so orange in the picture.
I picked up more cat food at Walmart yesterday, though there was still almost a whole bag left of the kibble I got at the feed store. For the outside cats, I got a 10kg bag of Meow Mix (they were out of stock for the 11kg bag in another brand), which is still pretty cheap per kg. I mixed up the two brands in the kibble bin, so they got a bit of both, and I can really see how much they prefer the other brand to the feed store branch.
Yesterday, I also finished assembling the cat barrier for the shelf, but as its held together with wood glue, I had to let it sit overnight.
I have only one clamp, so I taped the halves together, put the clamp over the side that was wonkiest, then weighted it down with the told tool box on boards laid across the frame. I did that in the morning, then in the afternoon, I removed the clamp and tape, flipped the frame around, then put back the boards and weight to finish drying.
The space it goes into has moulding on each side that made putting the frame in a bit tricky. I’d tested it out when I made the box frame half, but the extra thickness after adding the flat frame almost made it too much! I ended up not needing to add the self adhesive foam to a narrow end, and only one strip across the top to hold it in place. I pushed the box frame side right against the moulding on the living room side. This let me run the cord for the salt lamp – which is completely hidden by David in the photos! – through the wire. There are a few things we keep on that shelf, which is now all organized in a box, but otherwise, the space is available for the cats to sit on.
The girls finished the door for the entry, which took way more adjusting than it should have. There are large gaps around the door at the top and at the latch side. With the space so wonky, and even the floor being crooked, the gaps are noticeably different in size! The only problem remaining is that, when fully open, the weight of the door pulls on the box frame and it starts tipping at the top. Hooks will be added to the ceiling, and the box frame secured to the hooks, to keep the frame from tipping, while still being easy to remove when we need to.
With the door closed, only the more agile cats were getting in and out of the living room, through the shelf opening. Once I had it open to work on the small barrier, the cats took advantage of the situation. When I was done, Beep Beep was on her favourite spot on the warm light fixture over the big aquarium greenhouse, Tissue was in the sun spot on the seat of the exercise bike, with four more cats sprawled on the sun spots on the carpet below, like giant puddles, and two more on a shelf in the mini greenhouse frame at the window, all sleeping peacefully!
Oh, and two more were in the baskets on the piano.
They really missed not having access to the living room!
Tissue is quite enjoying the warmth of the sun – and so far, none of the cats seems to have tried to destroy the smaller plants that have been temporarily moved onto the shelves that will soon be holding seedlings.
Soon, she will not be able to spend time on the window sill in this room! My daughter and I finally made it to the city to pick up what we need to make the cat barriers (which my other daughter is paying for, sweetheart that she is!).
And I’m looking forward to having a carpet that doesn’t get completely covered in cat hair and the bits of rope torn off their scratch tower, immediately after vacuuming.
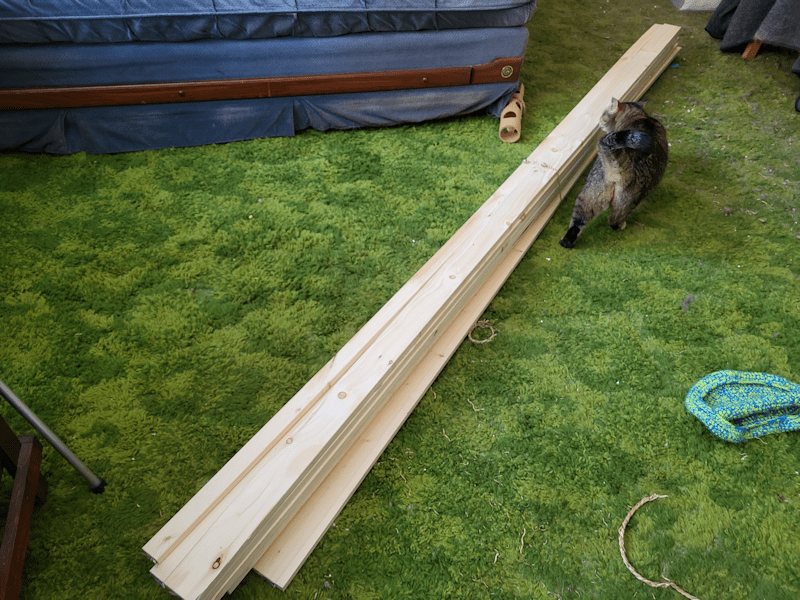
We’ve got three sizes of boards. We were going through the cheap contractor grade pieces, and it was hard to find any that weren’t damaged, or wonky.
We also got chicken wire, aka: hex wire, instead of the hardware cloth I wanted to get. It was the only thing they had that was wide enough and long enough for this.
We’re actually doing a simplified version of our original plans. Instead of a box frame for the entry, then a door frame inside, and finally the door, we’re just going to do a box frame and a wide door.
For the box frame, we’ve got 1″ x 4″ boards. The frame is meant to slide into the entry into the living room, with self adhesive foam on the sides to hold it in place, but still allow us to remove it, if necessary. The problem was, we couldn’t find the thickness we needed. There is moulding at the top and bottom of the entry, so the foam was supposed to fill that gap. After debating our options, we decided to go with the thickest they had, and we’ll remove the molding from the bottom of the entry and make the box fit top to bottom more snugly. It won’t be completely snug; when the girls measured the space, they found a half inch difference between the top and the bottom!
For the door, we’ve got 1″ x 3″ boards. We will also need to create a barrier for an opening in one of the shelf dividers, so we got 1″ x 2″ boards as well – one of which will also be used a side jamb.
We spent some time looking at our latch options and ended up going with a simple hook and eye latch. We decided against getting a handle. We had use the latches as handles, but if we really wanted a handle, I’m sure we’ve got something lying around the house somewhere.
Unfortunately, it does look like the hinges I picked up will be too wide. Possibly. If we do have to get smaller ones, I’ll be sure to pick up three hinges, not a set of two.
Securing the chicken wire was another thing we had to consider. We’d both bounced around the idea of sandwiching the wire between boards, but we’d basically double the wood need for the door, so we’re going to make it the same was as the barriers we’ve made for the basement doors; The horizontal boards will overlay the verticals, with the wire sandwiched between, and the rest of the wire will be secured with something else.
My thought had been to use small U nails (I think some places all them staples), but they didn’t have any small ones. The alternative is to use actual staples, but our staple gun isn’t very strong, and we’ve found the staples pop out way too easily. So we looked at staple guns, only to find that ours was there, and is a heavy duty gun. So we ended up getting stronger staples, instead! We’ll see if that works. If it doesn’t, I know where to go in town, where I can get what I was originally thinking of, in bulk.
I might need to go into town, anyhow. I think what we have at home is all too large for the size of wood we are using. The cats have knocked most of the boxes off the counter in the sun room, anyhow, along with all sorts of other things now scattered around the floor in there – and we won’t be able to clean it up until we can take things like the table saw and my husband’s walker, outside, so we can get at it all.
Meanwhile, construction starts tomorrow. Hopefully, we’ll be able to get both the doorway and the shelf opening done, and we can finally have cat free space for more seedling trays, and not worry about them being destroyed! And hang the shop lights we will be using as grow lights from the ceiling without worrying about cats jumping on top of them. We have seeds that need to be started indoors 12 weeks before last frost, and that’s in four days.
In other things, I got an email from my bank this morning, congratulating me on getting approved for the low limit credit card I applied for (and approved for) last week, and letting me know it just got mailed. I was also informed that I could start using it right away – if I just get the Apple Pay app and set it up through my online banking.
No, thankyou!
For the card I chose, there is no annual fee, however there is also a 21 day interest free grace period on new purchases. As long as I pay off any and all new purchases within 21 days, and never use cash back, I could theoretically never pay interest on this card. Since I plan to only use it for purchases within budget, and pay it off right away, that should actually work out.
On another unrelated note…
One of the things we got done today was set up an eye exam appointment for my younger daughter. I was going to wait until my husband and I got our tax returns, and we’d get glasses for all four of us (which we planned to do last year, but ended up with unexpected bills, instead). Unfortunately, my daughter’s glasses have gotten so scratched up, she can actually see better without them than with! I’d been told that in our current province, eye exams are covered by the provincial health care plan, once every two years. When I called and asked about it, however, it turns out that it’s only partially covered – and the remainder that we would pay is $105. !!! I hate to think how much it would cost if it wasn’t partially covered! That is massively more expensive since we last got our eye exams. At least I’m still covered 90% by my husband’s health insurance, and I confirmed that they direct bill.
We just have to get our taxes done. I picked up different software than the TurboTax we usually use and did try to get it started, but quickly gave up. I had to manually include the T4A to their list of different T4s (I had no idea there were so many), but while I could input how much he paid in taxes, there was no line for his disability income. The line number on his T4A simply doesn’t seem to exist in the software, which makes no sense at all. There was also nowhere I could input that I qualify for the caregiver’s tax benefit, nor anywhere for my husband to include that he gets the disability tax credit.
It takes a lot to be even worse than TurboTax.
Frustrating.
Ah, well. It’ll get done, and the sooner the better!
I have been having major issues with Nosencrantz in particular, trying to get at the north window in my room. My craft table is under half of the window, and that end of the table has my tea station and phone base/answering machine, among other things. They keep trying to get to the top of a set of shelves I have to hold supplies. The selves are repurposed wire shoe racks, so they can’t handle having cats jumping on and climbing them.
In trying to keep the cats out of my craft stuff, I’ve basically rendered my craft table useless, filling it with stuff to discourage them from jumping on it. Most cats have learned to stay off, but Nosencrantz won’t. She keeps digging into things, clambering over the stuff I’ve put on the table to block her, and basically driving me rather bonkers.
The thing is, I have no problem with them having access to the window. There just isn’t any way for them to get to it, without knocking things about or even collapsing my shelves of craft supplies.
Today, after repeatedly having to chase Nosencrantz off my craft table, I just got tired of it, went into the basement and scrounged together supplies to make her a shelf at the window, that will also protect my stuff on the table.
This is the result!
At some point, I’ll probably sand it some more, maybe paint it, and make a more padded cushion for the top, but for now, it does the job! The other cats are oblivious to it, but Nosencrantz has tentatively gone onto the table, which I’ve cleared enough for her to get to it. She has yet to jump onto it herself. Instead, she’s tried to get into a container behind my phone! I’ve figure out what she was after and have tucked them into a tin, so hopefully, she’ll stop doing that and just use the shelf to sit and watch things outside the window!
Now that we’ve got so much lard available, we can do things with it that have nothing to do with cooking.
Yesterday, my daughter looked up some lotion recipes and picked a really, really basic one.
It was too messy an involved a job for her to take process pictures, so here’s the finished product!
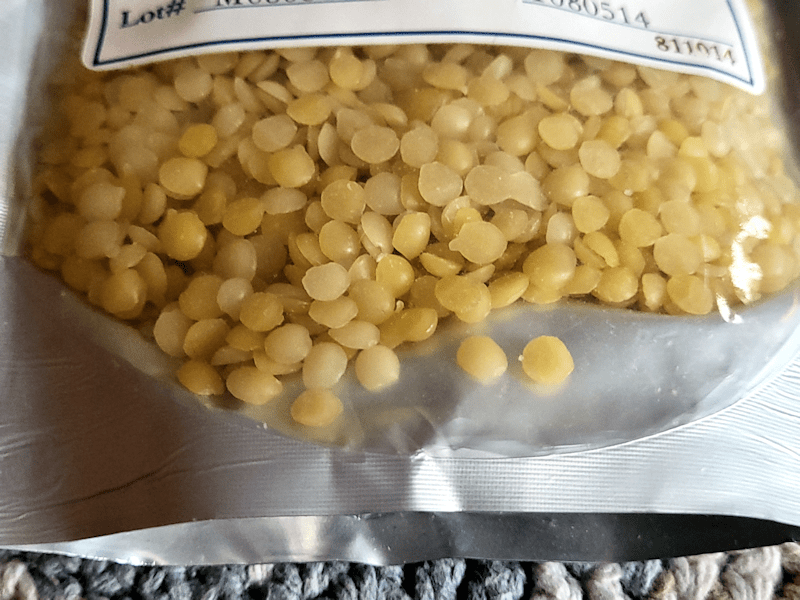
She use one pint (500ml) of lard and beeswax.
We just happen to have some cosmetic grade beeswax, left over from when my husband was making his own mustache wax for a while. Expensive stuff, that’s for sure!
The instructions my daughter found were pretty vague, so she didn’t measure how much beeswax to use. She melted the lard on a makeshift double boiler, then added the wax until she felt there was enough. She things the might have used a bit too much. It doesn’t take a lot.
She also added a bit of Jasmine, from the Demeter Scent Library, that she had. Once it was all melted, she beat it with an electric blender until it was cool, the poured it into sanitized 250ml jars. Of course, with 500ml of lard, there was extra, but not enough to use another jar, so that’s just in a bowl to be used first.
The lotion seems to work well. It doesn’t absorb very well, but then, I find the commercial lotions don’t absorb well, either. The Jasmine scent is very light. I like it! I look forward to other such experiments.
I started working on the pork fat well before it was thawed out, as it’s much easier to cut it while it’s partially frozen. I have two large slow cookers, and I was planning to use both of them to render the fat out. It should be done over low heat for a long time, and I wasn’t about to monitor a pot on the stove all night.
Thinking back, my mother never rendered lard on low heat. She didn’t have the time for that. I remember it being quite hot by the time she scooped the crispy cracklings out. I’m pretty sure I’m remembering burned bits, too! 😄
Having a large slow cooker or two would have made the job much easier for her!
Part way through cutting the fat up, I changed my mind.
I wasn’t going to do two slow cooker’s worth!
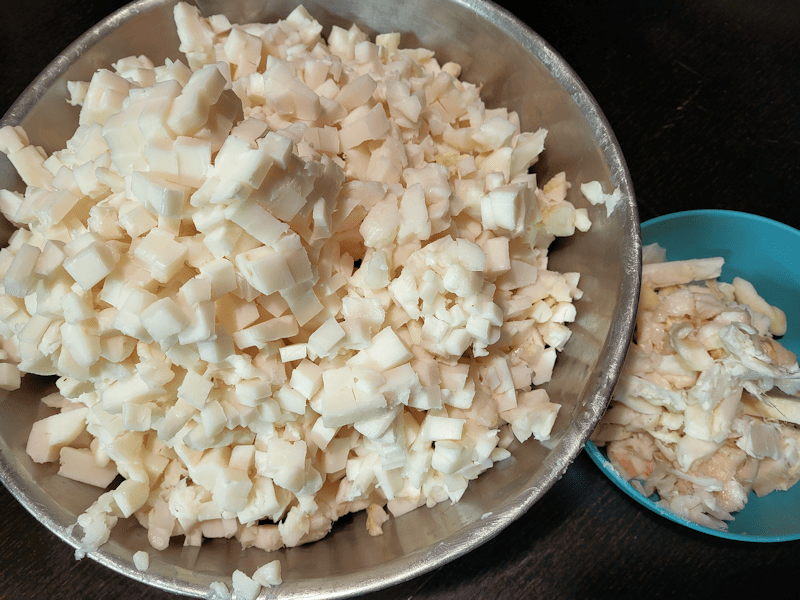
To fill this bowl, I finished off all the smaller pieces I could find. All three of them. 😄 I started cutting into the larger pieces, but they were still too frozen. Plus, I didn’t want to push my hands too far. They’ve been relatively pain free of late, and I would rather they stayed that way!
The small bowl on the side is the janky bits, with blood vessels or meat and the sliver skin. That was saved as a treat for the outside cats, which they were very happy to get!
There was enough pork fat left in the giant bowl that the lid still didn’t quite fit all the way closed, and I had to use the foil to cover it completely again. It’s now sitting on top of the freezer in the old kitchen. It’s going to be a very slow thaw in there! Which is okay. While I was cutting, the outside of the fat would be getting too soft to cut easily, while the inside of the bigger pieces were still too hard. A slow thaw won’t have the two extremes, and it should be easier to continue cutting up tomorrow.
They kinda look like cheese curds in there! 😄🧀
For a moment, while filling the slow cooker, I thought I’d have to dig out the second one, after all! I squished it just flat enough to make sure nothing would touch the underside of the lid. As it renders, it’ll get lower.
The slow cooker is now set on low for 8 hours, and then it’ll automatically switch to warm. It might need more time, so I’ll be checking it off an on throughout the night. I did add a small amount of water to get it going, and make sure it the bits don’t start burning before the fat starts rendering out.
Once it’s getting close to done, we’ll sterilize some jars – probably in 500ml sizes (pints) – to store the lard in. If we do decide to go with a larger size, I’d go with the 750ml jars, rather than the 1L/quart jars. I don’t see us using it fast enough to warrant that large of a jar.
Based on how much is left that needs to be cut up, we might actually be doing two more batches! It’s a shame the meat grinder I found while cleaning out the old kitchen has parts missing. A grinder would make the job much easier, and more fat would render out of the smaller pieces, too.
No matter! The job is getting done, and we’ll have a good supply of shelf stable, high smoke point, flavour neutral fat for our pantry.
I put together images of the wattle woven raised bed and made a video out of it. This time, I borrowed my daughter’s microphone for the narration, and WOW was it better! I didn’t have to use background music to camouflage the background noises my headset microphone always made.
Something got glitchy when I saved it. I had to save it several times to get rid of some strange coloured stripes that showed up. They were only visible after I saved the file and checked it, never in the editing software. I uploaded the video, only to find the glitch had simply moved to the very beginning of the video. I had to re-save it and re-upload it, and I think this one worked.
I went and borrowed my husband’s phone to take a picture. It’s my old phone, but of course he’s set it up to how he wants it – which turns out to include fingerprint scan to unlock it. I really hate that function. I find they don’t scan fingerprints well, and the last thing I’d want is to get locked out of my own phone because the thing can’t recognize my fingerprint. It could well be because my hands are so rough, it messes up my fingerprints. Either way, it looks like I won’t be borrowing his phone when I got into the city after all. It’s changed so much, I had to get him to tell me where the camera icon was! He does love his funky themes and designs. 😁
Anyhow…
Here it is!
I had enough long poles that I could do the back without having to overlap any. The only problem came when it was time to do just the taller posts. It wasn’t too bad when I was weaving around seven of them, but when it came to just the three at the turn, it was more difficult. I had the shorter pieces for it, but three poles just isn’t really enough to hold the wattles in place, though for some of them, I could push the more flexible tips into the previous wattles to lock them down.
There was lots left over when the inside of the L shape was done, and I wanted to use them while they were still green and flexible, so I went ahead and did the outside. The first thing that needed to be done was to hoe the soil out of the path and back into the bed, while also clearing and leveling where I estimated the uprights would go. Once that was done, I measured two feet from that long pole right in the corner, marking three places; the left and right are lined up with the back walls, while the center one is in the middle.
Knowing I would be working with much thicker poles, I spaced the uprights further apart along the sides, compared to the previous ones. That left me with four extra prepared posts. After using the pencil point bar and a sledge hammer to make holes for the posts, then sledge hammering the posts in place, I could see I wouldn’t be able to use the uprights at the ends, so I added another post at each end, just inside the posts supporting the end wattles.
When it came time to weave the wattles in, I used the longest poles first, with the thickest parts at the ends, so that the more flexible tops would go around the curve. Some of the posts were long enough to actually bend all the way around the curve! When I put in the second side, I was able to wrap the ends around the wattle in the first side. I was able to do this for the first several layers before I found myself having to weave a shorter third pole around the curve. Unfortunately, a few of the poles just couldn’t go around the curve without breaking.
With the more flexible ends going around the curve, this meant the ends built up higher, faster. Which I’m okay with. For the last few pieces, they weren’t long enough to go around the curve at all.
I will need more material to build up the curve, but I also want to build that corner higher, too. So what I need to look for now is a lot of thinner and flexible, pieces. If I can find enough of them, I might be able to not only build up the corner and the curve, but wrap a nice edging along the top, all the way around.
Finding appropriate materials to do this was surprisingly difficult, but I’m really happy with how it’s turning out. By the time this is finished, though, we probably won’t be able to accumulate enough materials to do it again anytime soon, except perhaps for some very small beds.
Once the walls are done, we can add amendments and more soil to this bed to build it up, and it will be MUCH easier on the back to work in it.
At some point, I’m going to have to borrow my husband’s phone or something, just to have handy to take some progress pictures!
And kitty pictures.
I counted 26 this morning. !! And I didn’t see Rosencrantz until much later, nor did I see Rolando Moon, who seems to have moved on again.
My new phone is expected to arrive on the 28th, which is the day I’m taking my mother’s car in to get the tire fixed. The shipping notice originally said the 27th, which I would have preferred, since that meant I could have the phone set up and ready before going in for our first city shopping trip for next month. I’ll definitely borrow my husband’s phone for that trip, at least.
Once I was done my morning rounds, I grabbed the loppers and went into the south side of the spruce grow. We haven’t done any clean up in there for quite some time. Much of that area was under water this spring, anyhow.
This area has been mostly taken over by poplars, and that was what I was after. As we clean out the spruce grove, one of the things I want to do is cut back a lot of the poplars and plant more spruces. I want it to stay a spruce grove, not turn into a poplar grow. Spruces are better for cutting the wind and snow year round.
What I was looking for were tall, straight poplars small enough to cut with the loppers. At that thickness, they should still be flexible enough to bend as I weave them around the uprights. If it’s too thick to cut with the loppers, it’s too thick for the wattle weaving.
While I was doing that, I found myself working around the apple trees we’ve been uncovering out there. I asked my mother about them, and these were trees she’s planted herself, mostly from seed. My mother still has a hard time understanding that you don’t get the same type of apples from seeds at the tree they came from (as far as I know, there is only one type of apple that grows true from seed). We have no idea what kind of apples these can produce. The area is so overgrown, the much shorter apple trees barely had enough sunlight to start blooming. I was even cutting poplars that were growing through the branches of an apple tree!
Since I was there anyhow, I went ahead and pruned several of the apple trees, cutting away dead branches, and opening them up to more light. With the number of poplars I cut away from around them, that will be a help, too. We will need to come back with other tools to cut away the ones that were too big for the loppers to cut through, as well as other bushes I can’t identify at this point. I was happy to spot little spruces trying to grow through the tall grass and fallen trees and branches, which also need to be cleared away. I was also very thrilled to find a single Tamarack tree. There were three others planted closer to the house, in between some spruces, that are way too crowded together. I’m hoping to save them, but that might require cutting down the spruces next to them, and I don’t want to do that if I don’t have to. This Tamarack, however, as all on its own and would not have been deliberately planted there. I really like Tamarack, and would like to eventually plant more of them.
Anyhow.
I kept finding more of these apple trees, but I couldn’t get at most of them. Of the ones that I was able to prune, though, I’m hoping they will finally get enough light to bloom and produce. I did see some flowers on one of them for the first time last spring, but no apples developed.
I am quite happy with how many small, straight poplar I was able to get at and harvest. Once I was done, it took several trips to drag the piles of them I’d made, over to where the burn barrel is. The branch pile may be chipped, but I’m already adding more to the remains that need to be burned! The next while was spent trimming all the branches and twigs off, adding those to the burn pile, then sorting the remaining poles more or less by length. Then they all got dragged over to the old kitchen garden.
I should actually have enough to finish wattle weaving the inside of the L shaped bed, and even start on the outside of it. What I think I will do for the outside is not have a 90 degree corner, like there is around the double lilac, but to have a curve, instead. I haven’t quite decided yet, but if I think having a curve would actually make things easier, and more even.
By the time the poles were dragged over to the old kitchen garden, I had to go inside to warm up! I don’t know what the temperature was outside at the time, but the thermometer in the sun room was at only about 3C/37F. Which is what our high of the day is supposed to be. It’s almost 2pm as I write this, and we finally reached that temperature outside. Tomorrow’s high is expected to be only 4C/40F, but after that, we’re supposed to have three days with highs of 13C/55F.
I have to get back at work with the poles I cut this morning, though, while they are still at their most pliable. It’s definitely going to be chilly work!
After finishing up my morning rounds, I did as much as I could with the wattle fence, using what materials we had been able to gather. There wasn’t much I could do with the longer sections. With the shorter part of the L shape, I was able to use a few single lengths, but even there I had to start combining them in pairs.
The girls had gathered some really nice, even pieces of maple suckers, though, and they were the perfect length for the wider end bit.
The red barked lengths are the maple the girls had gathered. When I used those up, I went to the pile of small willow branches I’d set aside and brought over the pieces that were close in size to the maple. Those are the greenish coloured branches. Last of all, I topped it with two thicker pieces of maple that I’d pruned from the nearby maples that are now clear of the branch piles. Those are are lot tighter, and will lock everything in place. I didn’t trim the top one to size yet, as I might need to move it out while the other section of wall is worked on. However, as it is now, that is as high as I intend to go for most of the bed.
It would be great if the whole thing could have been done like this! It looks so much prettier, with smaller gaps and more consistent sizes. The only down side is that such small pieces will also break down faster than the larger ones. It will likely still take a few years, but it’s something to be aware of.
I used more of the maple suckers I had gathered at this end, along with more willow that was left, and locked it down at the top with two thicker pieces of maple.
This corner looks a mess right now! It will be built up, end to end, until they are the same height as the walls at the ends. After that, it will be build up higher to match the heights of the debarked posts. By time I’m working on just the three tallest posts, I’ll be working with much shorter pieces, and should be able to tidy up the whole thing a lot more. Right now, it’s looking quite the mess!
That piece of 2×4 is my mallet.
At this point, I am out of useable materials. I think I will go hunting around the spruce grove for more material, before I start wandering father afield. The Red Osier Dogwood that we have would make excellent, flexible pieces, but that’s something I’m trying to encourage as undergrowth. I might still be able to harvest some, though. There might even be some young poplar I can harvest. Mostly, I just want to find enough material to finish this back wall. The remaining sections can wait until spring, if we have to. Once the back wall is done, the soil that has eroded into the paths can be hoed back into the bed and tidied up. I will likely use grass clippings that we still have all along the bottom of the wattle wall to keep the soil from falling into the gaps. Slowly, this bed will be built up to the height of the lowest sections of wattle, which will make growing in it MUCH easier on the back!
That’s about all I’ll be able to get done today, though. We’ve had another change in plans, with company coming tomorrow. We’re hoping to be able to have a bonfire with the remains of the big branch pile that got chipped, but it will depend on the weather. The forecasts keep changing. Just in case, we need to be prepared to move indoors, so we’re going to have to start moving things like our canning supplies back into storage, and all that other stuff that just sort of takes over every flat surface! We’ll need to be able to expand the dining table, too, which will take up twice the space.
We are terrible house keepers. 😂
But I’m really looking forward to seeing my BIL and his family, and really appreciate that they are willing to make the long drive out here, knowing that my husband can no longer go to their place. It’s going to be awesome!