Sadly, we didn’t get any more rain today, but it has been very windy. Enough that we lowered the canopy tent as far as it can go, so reduce the chances of wind damage. It still has our camp chairs and makeshift table that we were using to cure onions on a screen, under it, and we can still duck under to sit in it.
I feel like a little kid in a fort. It’s awesome!
But I digress!
There was a break in the wind, and I took advantage of it to build the second low raised bed box to go where the garlic had been.
The build went much faster than the first one, now that we’ve got it figured out.
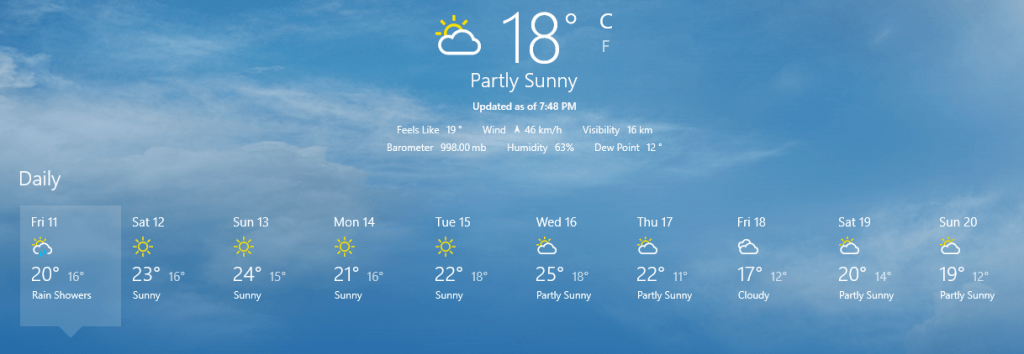
With stuff we’ve got going on over the next few days, we won’t be able to work on the third one, nor prep the empty beds for next year, until after the weekend. Which rather sucks, because the next couple of days are going to be really nice, then by Sunday, we’re expected to hit 33C/91F, and stay above 30C/86F for at least a few days. At least there is the possibility of more rain as well.
The third box will be a very quick build, since it will be only 1 board high. The bed it’s going to go on still has beets growing in it, so there is no hurry on that one. :-)
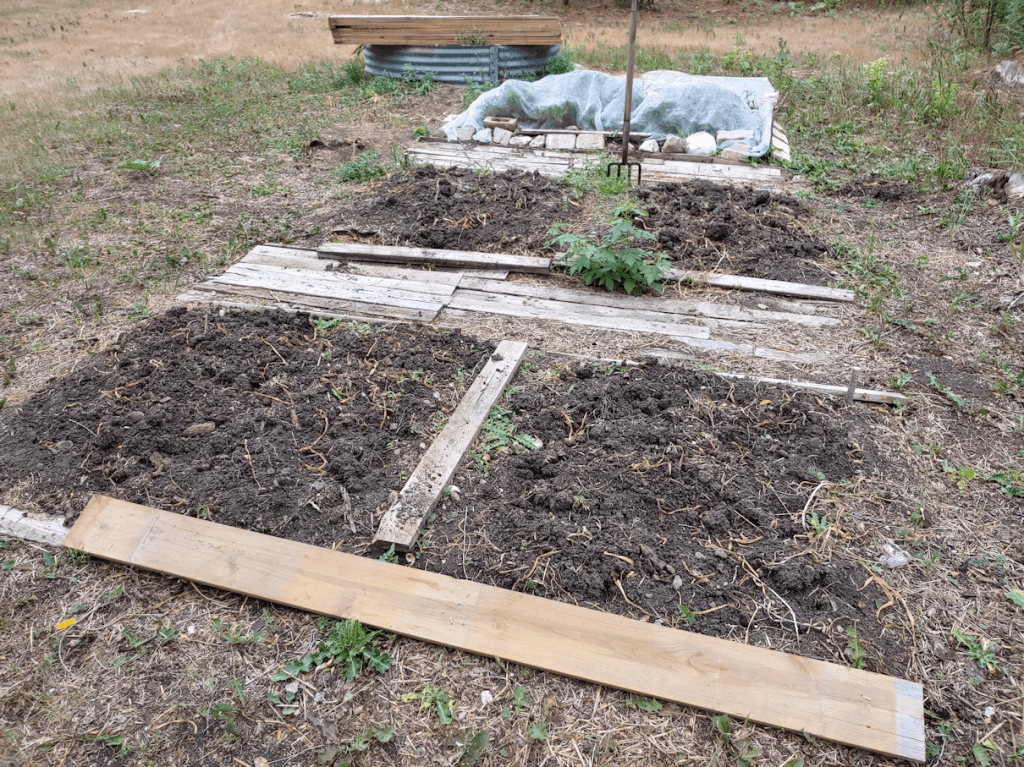
With the garlic all harvested, we’ve got two empty beds that need to be readied for next year’s garden.
With these beds, we had dug into the soft soil we found under the wood pile, mounding soil into beds and making paths in between. This worked out quite well, but there were a couple of issues. One was, for such low raised beds, I found them too wide. They were about 4 feet wide, which would be fine for a high raised bed, but awkward to reach the middles on a low bed. That was partly solved by putting a board across the middle, which served to both mark where the different varieties of garlic were, and to give something to step on while trying to reach into the middle.
What can I say. I’m short.
The other issue was that the soil along the edges would end up in the paths, either from watering or from when the birds were digging around the garlic, early in the season.
The solution to both issues was to build a narrower box frame.
After scavenging in one of the sheds, I found some boards that would serve the purpose.
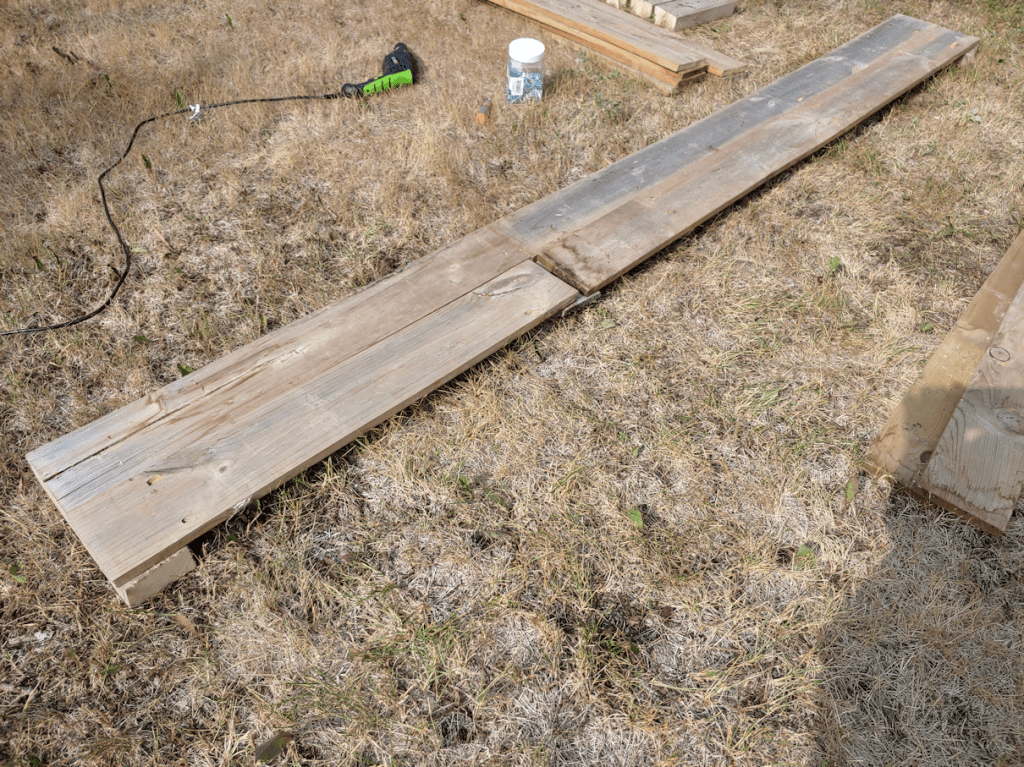
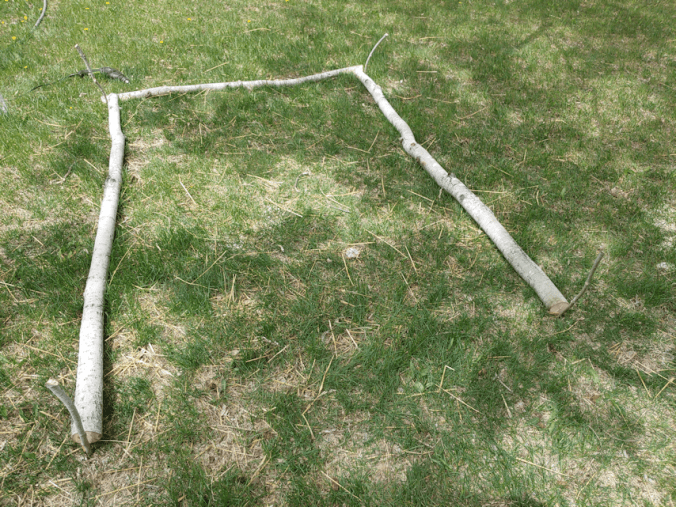
I dragged them all over to the beds. Here you can see one of them laid at the first bed I want to frame.
In total, I had 17 boards like the one in the foreground, plus 4 more that were the same length and thickness, about about an inch wider.
I decided to keep things simple.
I left four boards as is, then cut another four in half. The boards were all 6′ 1/2″ long and 5 1/4″ wide. Some of the half pieces would be used to increase the length, while the rest would be for the ends of the bed. I cut support pieces for the corners and to join the lengths together from some wood leftover from another project. Those were cut to match the width of two boards together.
The long sides were made by screwing the boards to the support pieces. The boards all have damage to them, ranging from old water damage and some rot, to splitting and cracking from being so very dry. Which is fine. They will do the job, and will last a few years, at least.
What wasn’t fine was flipping a board and almost catching my hand on these!!! They look like the screws were broken off on the other side, so there is no way to unscrew them from the wood. I have to think about the best way to get rid of these, using what tools we have, but for now, we’ll just have to watch out for them!
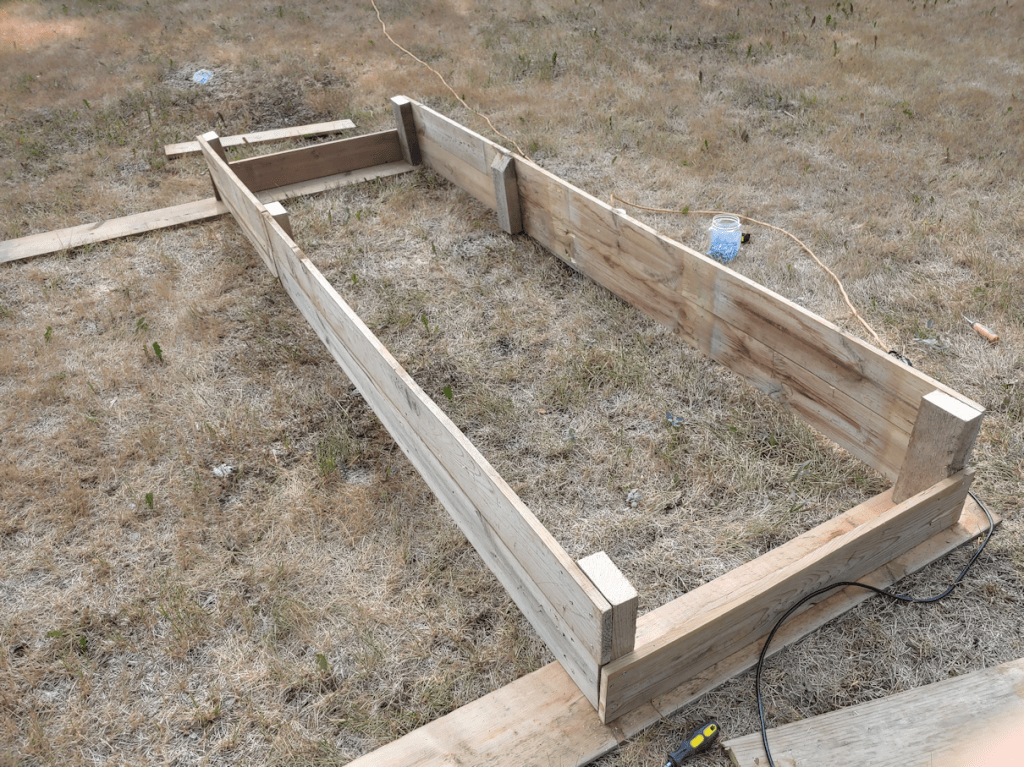
Once the side pieces were screwed together, making sure they matched in length, I brought over a couple of the wider boards to give a flatter, more even, surface to work on while putting on the end pieces.
Then I quickly tacked it together with just a single screw at each corner, to hold everything together while I worked.
Oddly, one piece was almost an inch longer than the others! Which is okay; the excess can be sawed off, later.
Here we have it! The finished box, next to the bed it will be placed at.
Here, you can see the difference in the dimensions quite clearly.
The box is about 9 feet long by 3 feet wide, and about 11 inches high.
In preparing these beds before planting the garlic, we dug out the soil and buried layers of straw and compost material at the bottom. Since the dimensions are being changed so much, I plan to dig out the beds again, then once the box frame is in position, will start filling it, hugelkulture style, by burying some of the branches we’ve been pruning for the past few years at the bottom, then layering the contents of our compost pile on top of that. Straw decomposes slowly, so I expect to find it when digging the bed out. If I do, I’ll be keeping it separate from the soil, so it can be layered back on again. As for the top layer of soil, I’ll take advantage of the situation to get rid of the weeds by their roots, then mix in some of the garden soil we purchased this year, before returning it to the bed. This soil tested healthier than anywhere else we took samples from, but it was still low in nitrogen, so adding the fresh soil will be a benefit. Once we have the materials again, the top will get layers of mulch to protect the soil.
I have enough wood to make a second box frame just like this one. I plan to build the second box before I start digging out soil. With the wider boards, there is enough to make a third frame for the bed that still has the beets in it, though it will be only one board high.
When this area is done, there will be three longer, narrower, framed beds with wider paths in between. This will make them much more accessible, even at their relatively low height.
Hopefully, I will be able to continue working on this tomorrow, but we’ll see how the day goes. I’ve got our rescheduled court date for the restraining order against our vandal in the morning. Hopefully, it’ll actually happen this time – and if the security guards try to tell me to leave and come back later, I will stay close this time.
I had cleaned up the dead spruce tree I’d cut down, a few days go, but only now got to continue working in the area.
Because of how the tree had landed, I used the baby chainsaw to clear away all the non-weight bearing branches first, and was left with this giant insectoid shape! :-D After clearing away the last of the branches, I was going to break the trunk down further with the electric chain saw, but when that turned out to not be working properly, I just left the trunk to the side. We’ll have to take care of it later.
Today, I broke out the reciprocating saw and used it to finish trimming the top of the stump.
Happily, the wood in this stump is nice and solid.
The other trunk, from the tree we took down 3 summers ago? Not only did it have ant damage, but as I was trimming it with the reciprocating saw, it was vibrating at root level!
Well. That changed my plans.
At first, I figured I would just make a seat instead of a bench, but I really wanted a bench.
I used one of the boards that would be a horizontal support to mark off and cut the stump, using the reciprocating saw. At this point, I was still thinking of making a seat, but figured this stump was solid enough to support a bench. I cut the support pieces to a couple of inches shorter than the board that would be the seat, found the middles, then drilled pilot holes.
Despite using a level when positioning the support pieces, they still ended up uneven!
Though at least part of that is because one of the boards was warped.
Ah, well. I wasn’t going to start over! The only thing I did have to do was trim the top of the stump with a hand saw a bit, to make it even with the support pieces.
Then it was time to screw on the board for the seat.
You can see on the far right, that there was a substantial gap! I ended up making a wedge from a scrap piece of wood and jamming it in, then screwing the board in place, though the wedge and into the horizontal support.
As I was doing that, I could feel the bench wobbling a bit and decided the ends needed extra support. I didn’t want to put too much stress on the screws holding it to the stump, even though there are quite a few of them, and they are longer than needed. I had the pieces of wood I’d cut off the horizontal supports, so I trimmed those to size and added them at the ends to make legs. The main support is still the stump. The legs are just enough to give a little extra support, if there is too much weight at an end. The ground under them is soft, so if they were to be weight bearing, I would have wanted to add something solid under them, like a brick or some flat rocks
And there we have it! Our very first tree stump bench. :-D And I must say, it felt SO good to have someplace to sit down when I was done! It was the perfect height for me and my messed up knees, too. In fact, I used my knees to judge what height to trim the stump down to, and with the height added by the thickness of the seat board, it worked out just right.
Now it just needs a good scrubbing and a paint job to protect it from the elements. The board I found for the seat still has some paint on it, so it’s not too urgent.
I am quite pleased with how this turned out. We have so many dead trees in the spruce grove that need to be cut down, with some of them fairly close to each other. My thought was to cut them to leave stumps that could be used to make seats and tables, making sure that some of the seats are a bit higher, for my husband to be able to use comfortably. This bench is the first experiment to see if the idea is viable, and I’m happy to say that it is. Most of the greenery you can see behind the bench are a flower patch that we uncovered when cleaning up in this area, and have been leaving alone, as we mow or trim around it. Which means that, over time, we’ll be able to sit here in the shade, surrounded by lovely yellow flowers. :-)
Over time, we will have many seats like this, scattered all around the the inner yard, as we continue to clean up among the trees, and turn the inner yard into a lovely haven.
Today, I finally started painting the kibble house. The temperatures were pretty warm. It is “only” 22C/70F as I write this, but after today, we’re supposed to get hit with another heat wave over the next week, peaking at 34C/93F, so I’m glad to get it started today. And glad we aren’t expected to see the 40-45C/104-113F temperatures that some provinces are getting hit with right now!
Under the tent, it was much more pleasant. If fact, I could forget the heat, until I stepped out into the sun for a few moments!
The first coat, I’m happy to say, is done.
Mostly.
We won’t be able to do the rest until the paint has cured enough to flip it, and the floor pieces, upside down.
The roof may or may not get a second coat. We will likely shingle it, but until we do, the paint will be enough to protect it from the elements for now.
Even with just one coat, it’s looking so much better already. My daughter chose a lovely colour. :-) This is REALLY going to brighten up the yard!
If we end up not putting on shingles, I’m thinking we should paint garish designs all over the roof. :-D
I tried to get the more reachable parts underneath, but not under the overlap of the roof itself. And not just because I didn’t want to disturb this beauty!
What a gorgeous moth!
As far as I know, it’s still there, too. :-)
I’m not sure if we’ll bother painting the underside of the roof. Maybe just around the overlap, if at all. I do want to get the inside walls, though. That will make it easier to clean up after dirty kitties! The gaps under the roof are there partly so the cats and get in and out through them, if needed. They did use those gaps over the winter, which meant muddy paw prints, all the way up the walls. :-D
Today was set to be a scorcher, so when I did my morning rounds, I took the time to water all the garden beds before things got too hot, even though they got a thorough watering last night.
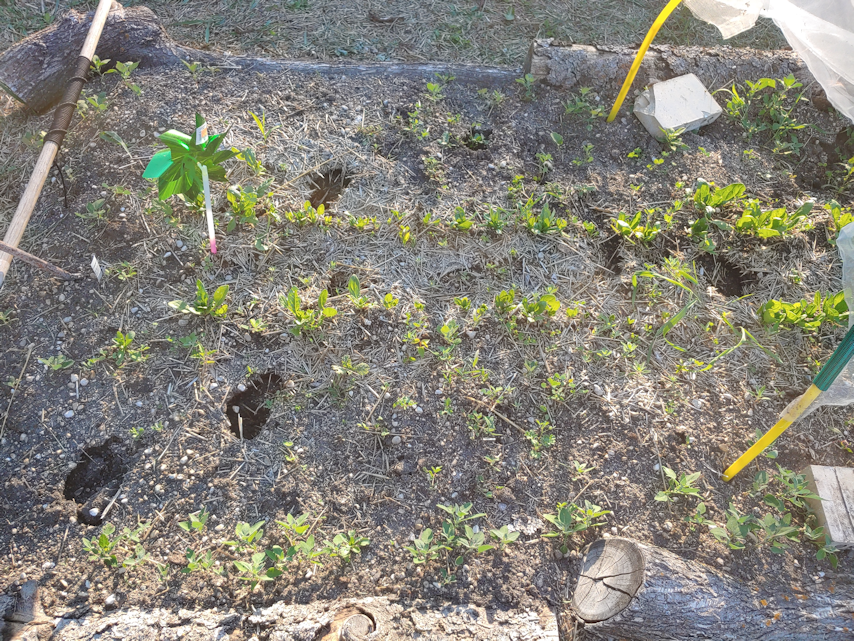
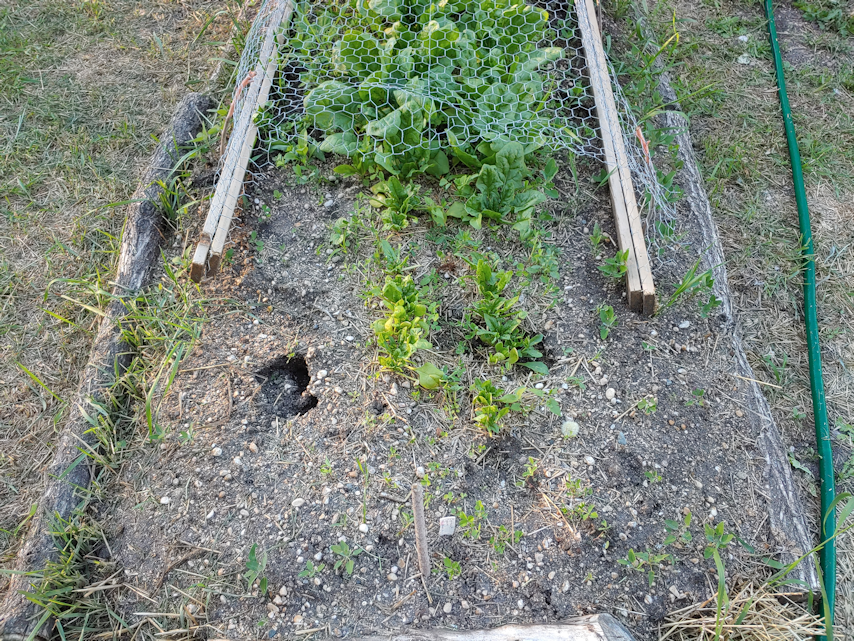
When I got to the spinach beds, I saw evidence of skulduggery!
The sacrificial spinach, at the ends of a couple of rows, were duly sacrificed.
I moved that pinwheel over from one of the beds with the wire mesh covers, after the fact. Not that they seem to be accomplishing much, anymore!
No surprise, when I finally went inside and checked the trail cams, that a deer was captured, wandering through the corn beds, on the way out of the yard. Considering that the deer did not even pause to nibble on anything, I’d say the sacrificial spinach did its job! ;-)
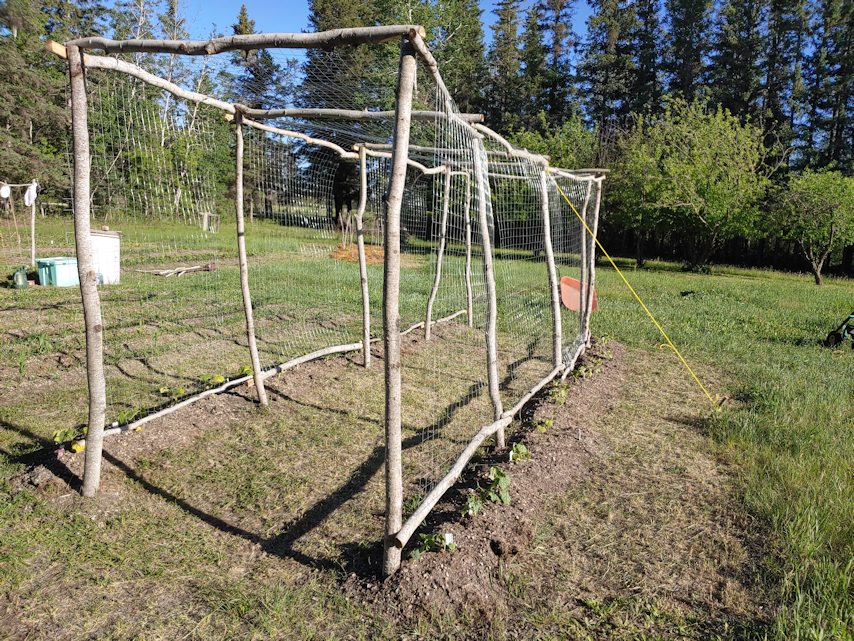
Late this afternoon, when things were supposedly getting cooler again, the girls and I finished the squash tunnel.
Almost.
We got the cross pieces put in place, then brought over the wire mesh for the vines to climb.
The roll of wire mesh I got was 50 feet long, and that was enough to cover 3 of 4 sections. At only 4 feet wide, there are gaps at each post, but we can weave twine between the sections of wire mesh, if it’s necessary.
My original thought was to use U nails (also called staples) to attach the mesh, but we ended up only needing to attach it to the bottom cross pieces. With one, we used wire saved from a previous roll of wire mesh that had been wrapped around it to keep it from unrolling. In cutting the first length, the second length had one end with the wire ends sticking out, and we were able wrap the end around the cross piece, then just twist the wire ends around to hold it in place. Other sections were tied in place with twine.
We just need to buy another roll of this mesh, and we can finish the last section. The main thing is that the end where the luffa is growing, now has something for them to climb.
The girls also noted that one post seemed to need support, so they added the rope and peg to hold it in place.
It’s a good thing this is meant to be temporary! :-D
By the time we were done, we were totally baked and headed inside to cool down for a while. We were at “only” 25C/77F with a humidex of 28C/82F but we were also in full sun, and there was no breeze. At least we could pop into the shade of the nearby lilac hedge, every now and then.
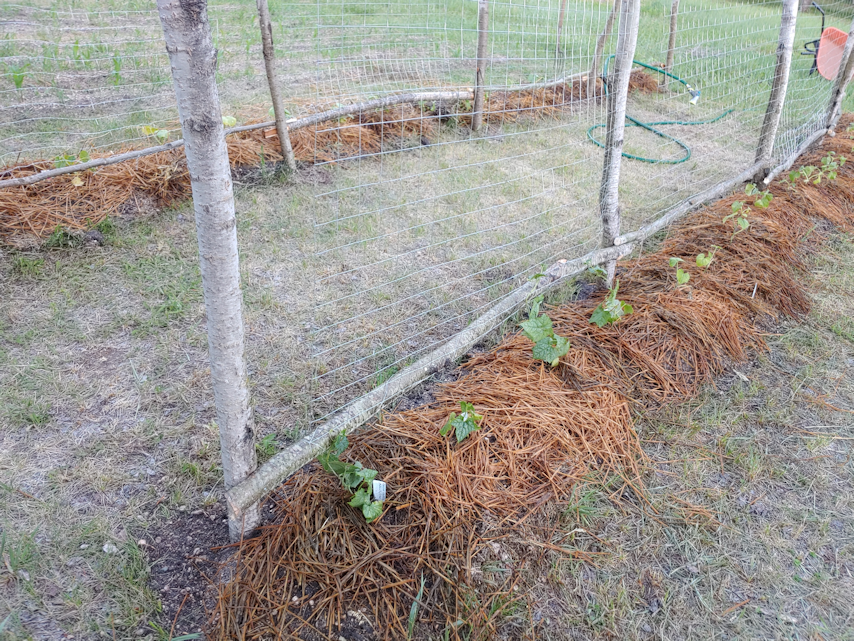
While I was doing the evening watering, the girls brought over the last of the straw and mulched around the squash tunnel. You can see in the photo that some of the luffa was grown long enough to reach the mesh, already. Hopefully, they will soon be making their way up the side on their own.
This whole thing really is rather slipshod and wonky. I look forward to when we have our permanent raised garden beds, and can build something more solid, elsewhere. But this will do for a year, maybe even two, depending on how our plans to plant trees in this area progress. Well, Not where this tunnel is, I don’t think. There are telephone lines buried somewhere under here.
Anyhow.
I’m glad we finally got this done. At least as done as possible until we get more mesh for that last section. The forecast has changed again. Tomorrow, instead of thunderstorms, we’re expected to hit 31C/88F and maybe get some showers at some point. While I was doing the watering this evening, I used the water to make doing some hand weeding easier, and I could not believe how dry the soil was. I’d hate to think how dry it would have been if I’d decided it was damp enough this morning, and skipped the watering! The added mulch at these squash, gourds and melons will help keep their moisture better, at least. I look forward to having more mulch to add to the other beds as well.
Meanwhile, I hope we have some happy little squash, gourds and melons!
Today has been another day of rain and high winds.
After today, we’re going to be back to high temperatures and sun. My Weather Network is forecasting 37C/99F on Wednesday! I think that must be some kind of typo, because I’m not seeing that anywhere else. The highest I’m finding is on my phone’s app, which is forecasting 27C/81F on the same day. Even so, it’s going to get hot again, and I am really, really glad we’re getting this rain right now!
In between rainfalls, we managed a trip into town, and I even got a bit of weeding done in the garden. We’re going to need to do a LOT of weeding once this rain passes. The weeds are loving the rain as much as the things we actually planted.
Speaking of which, while weeding among the corn earlier, I did find some radish sprouts. They are recent sprouts, not the ones that came up before the corn did, then disappeared. So we will have at least a couple of radishes. Unless these sprouts disappear, too!
Gosh, I’m just watching the trees outside my window as I write this. If a section of that big maple came down right now, it wouldn’t surprise me at all!
With this weather, our internet is seriously cutting out. It’s taken me more than an hour just to be able to start this post, and I still can’t get images to load. So this will be a quick one!
I wanted to share some of the new things we’re trying this year. The chives are blooming, and we decided to try making chive blossom vinegar.
I got a small bottle of white wine vinegar, and we’re simply putting clean, dry chive blossoms into it (after removing a bit of vinegar to make space. Some of the blossoms are left whole, while others had the bit at the bottom taken off, so all the individual flowerettes are loose. We’ve been adding to the bottle as more blossoms open up, then we’ll let it sit for a couple of weeks, in a cool, dark place, giving it a few turns every now and then. After that, the vinegar will be strained and re-bottled. I’m looking forward to seeing how this turns out!
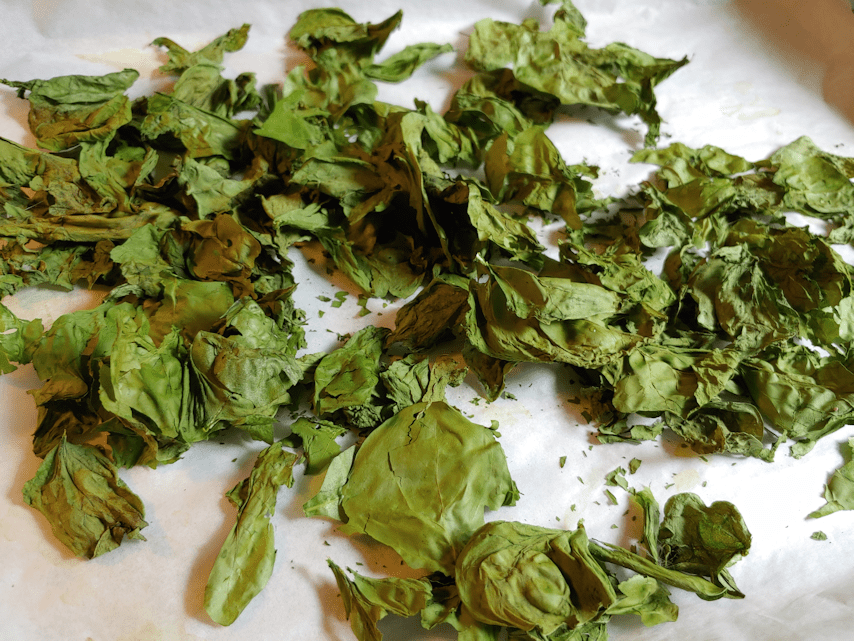
I’ve also started to dehydrate spinach leaves.
I use our oven to dehydrate things, using the “warm” setting, reduced to it’s lowest temperature of 145F (default is 170F). For something as light and thin as spinach leaves, I shut it off and let the oven light on to stay warm. We can only fit two trays in the oven at a time, but after I went to turn the leaves and found they’d shrunk enough, I combined them into one pan and left it for the night. In the morning, I just crushed them lightly, and put them in an air tight canister. There’s maybe 1/3rd of a cup of dried, crushed leaves from the 2 trays. We’ll keep doing small batches like this and, eventually, we’ll reduce them to a powder instead of flakes. It kind of reminds me of dehydrating celery. You start off with what looks like so much, but by the time it’s completely dehydrated, it looks like there’s nothing there! :-D
Now it’s time to see if I have enough connection to publish this!
We managed to get outside for a bit more progress on the garden. One of the things I did was go through where we planted sunflowers last year, and dig out any remaining stumps. I am really impressed with how much softer the soil is. Well. When I managed to not hit any rocks, at least. ;-) I think using this area for the summer squash will work out. We just have to fight back the grass and weeds. :-/
Not yet, though. The new corn block will be the priority for transplanting.
This area has been covered with black tarp for at least 2 months. Almost, but not quite, enough to kill off the grass and weeds.
This area is remarkably rough, though. I had the hardest time mowing on this side, without hitting rocks or lumps of dirt. Partly because of this, I will be going things differently. I will actually be turning the soil here. Nothing extreme. Mostly just loosening it with a garden fork, while pulling out the larger roots and rocks. Once it’s loosened up, I plan to go over it with a thatching rake (we only have 1 thatching rate, and a bunch of fan rakes, so that’s the tool I’ll use! :-D ). That should pull up more roots, but mostly I want to level it off enough that I’m not tripping over dirt clumps every time I walk through!
I had gotten a start on loosening the soil at one end, when one of my daughters was able to join me. Together, we got to work on the squash tunnel.
We were able to get all the side cross pieces in place at the tops. A job that was much more difficult than it looks!
I may have mentioned this before, but… we’re a bit on the short side.
Oy, did that make a difference!
My daughter held the cross pieces in place while I climbed the ladder to drill the pilot holes, then put in the screws. It was very awkward and painful for her – especially with her gimpy shoulder! – to try and hold the pieces steady until I had the screws in far enough that she could relax. Some of the uprights had shifted, too, so not only was she holding a cross piece in place, above her head, but sometimes holding an upright in place as well. The fact that everything was different sizes and shapes didn’t help, either. Doing this in 27C/81F heat, and winds high enough to blow over the step ladder, certainly didn’t make things any easier.
Also, we really need a power screwdriver. Driving in 3 inch screws manually, while someone else was struggling to hold the pieces together, was another thing that made the job more difficult than expected!
But we got it done!
It is still incredibly wonky, of course. Good thing it’s not intended to be permanent! We also didn’t use as many screws as I intended. For some joins, it was because the pieces were not of a size or shape to add more than one screw. With others, we just needed to get it in place and move on to the next, due to how painful or awkward it was for my daughter to support the cross pieces.
I now need to cut cross pieces for the bottoms. When I put those in, I will take the time to add extra screws were they are needed at the top. If necessary, I’ll add extra support pieces at the corners, but I think once we add the wire mesh for the vines to climb, that will help stabilize it a bit more, too. I’m actually not sure how we will get the mesh over the top.
Did I mention we’re short? LOL
At least it’ll be easier to put in the bottom cross pieces.
When we did as much as we could, I was ordered by my daughter to head indoors and out of the sun. Apparently, I was looking rather overheated!
So I am taking a bit of a break in the cool of the house. By the time I get outside again, more of the corn block I want to work on will be in shade, so that will help. I’m hoping to be able to get the corn transplants out by the end of tomorrow. We’ll see how it goes. I’ll be helping my mother with her grocery shopping earlier than usual, so that should work out.
Well, I’d hoped we could actually finish the squash tunnel today, or at least get the side cross pieces at the top done, but we didn’t get quite that far.
But, progress was still made.
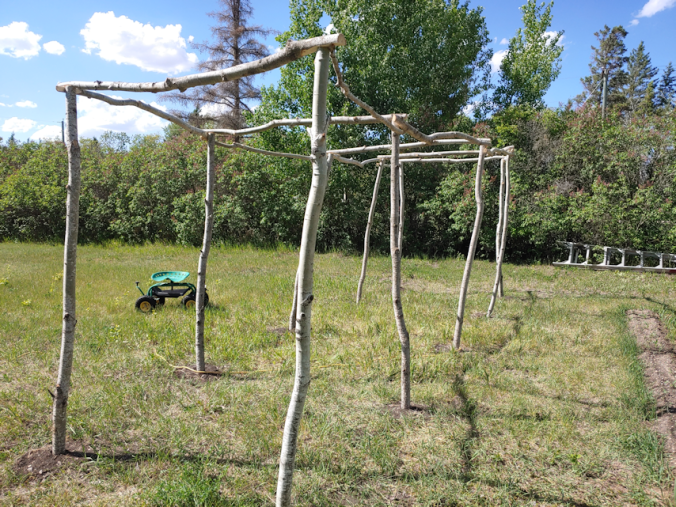
Most importantly, we got the supports up in the post holes.
In refilling the post holes and tamping the soil down, a few of them did need to have more soil added. A good way to reduce some of the lumps in the old garden, left from when it was last plowed before we moved here.
It’s very… rustic looking. That’s a trend now, right? :-D
And no, that middle pole isn’t actually tilted. The tree it’s made from is bent. All the pieces are wonky in shape! :-D
It’s also still very flimsy right now. Joining them at the sides with cross pieces should fix that.
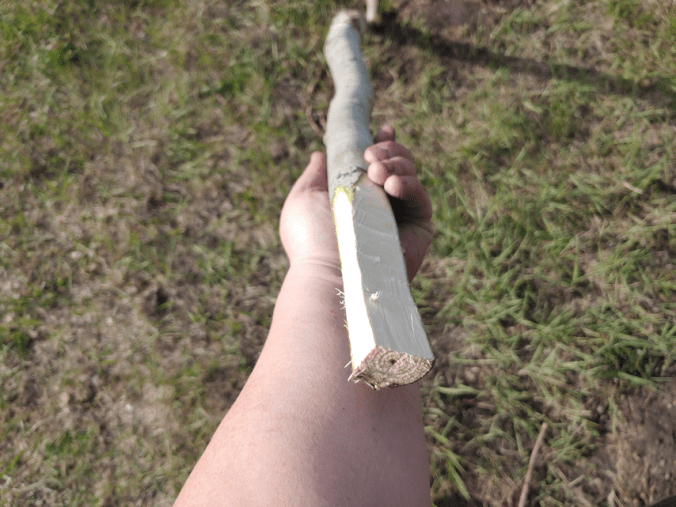
It was already starting to get hot by the time this was done, so we took advantage of the morning shade to transplant the Mongolian Giant sunflowers. It wasn’t until evening that I was able to work on the next step for the squash tunnel. I cut a total of 8 of the 16 cross pieces needed at 5’6″, then trimmed matching flat pieces at each end.
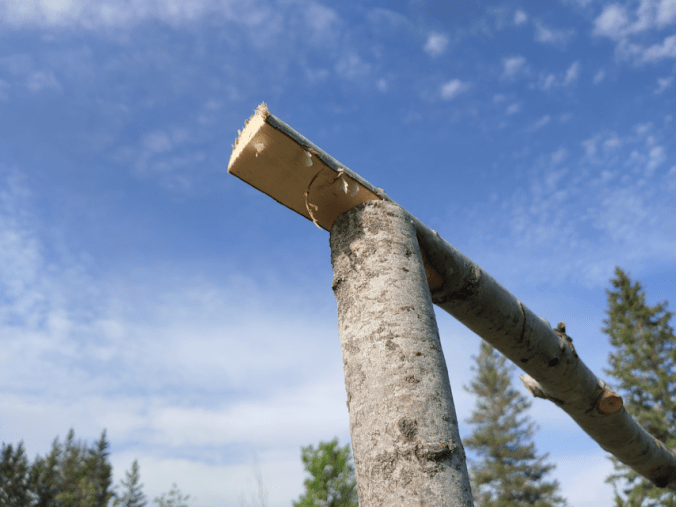
I also trimmed one side of the flattened ends a bit; just enough to have a narrow flat surface on what will be the top.
The flat parts are intended to butt up against the upright and the top cross piece. It will wait until tomorrow, but the plan is to screw the cross pieces to the upright, then add one more screw through the top cross piece, down into the side piece – and hopefully not hit another screw in the process. This should give it some more stability. The other 8 cross pieces will be attached a few inches from the bottoms, which should strengthen it even more, as well as provide a place to attach mesh for the vines to climb.
There are a couple of problems we need to figure out how to get around, to finish the job. We do have a cordless drill, but both batteries no longer hold a charge, and the company doesn’t make them anymore. Until we get around to buying a new one, we have several corded drills to choose from. Getting extension cords to reach this far, though… that’s going to take a bit! We have a pair of 100′ extension cords, which won’t reach reach from the outdoor outlet on the side of the house. I remember how far I could reach while using the electric weed trimmer, and three extension cords. We’ve since gotten more cords, so I think we’ll have enough to reach around the structure.
The next challenge is, we’re short. Well, except my husband, and he’s broken. ;-) To be able to drill a pilot hole through the stop cross piece will require clambering up and down a step ladder. For our gimpy household, that is somewhat risky!
But, it’ll need to be done. With this structure, we can’t get away with tying the cross pieces on with twine, like with the pea trellises.
With 5 uprights and 4 cross pieces per side, only two cross pieces can be placed up against the overhangs at the top, so each side will have two cross pieces mounted just under the other two. Which will hopefully also contribute to the stability. If that’s not enough, we’d have to add supports on the inside of the corners, and I really don’t want to get that finicky with a temporary structure.
We may not have finished the squash tunnel, but we accomplish other things, but that is for my next post! :-)
Not that long ago, we were dealing with freezing temperatures. Now we’ve got a heat wave!
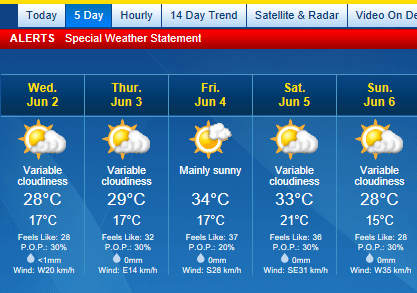
Today’s high was predicted to be 24C/77F. Instead, we reached 28C/82F. Tomorrow’s high is supposed to be 28C… does that mean we’ll be going to break 30C/86F? :-(
Hot as it was, we needed to get started on the squash tunnel. Thankfully, we could at least work in mostly shade.
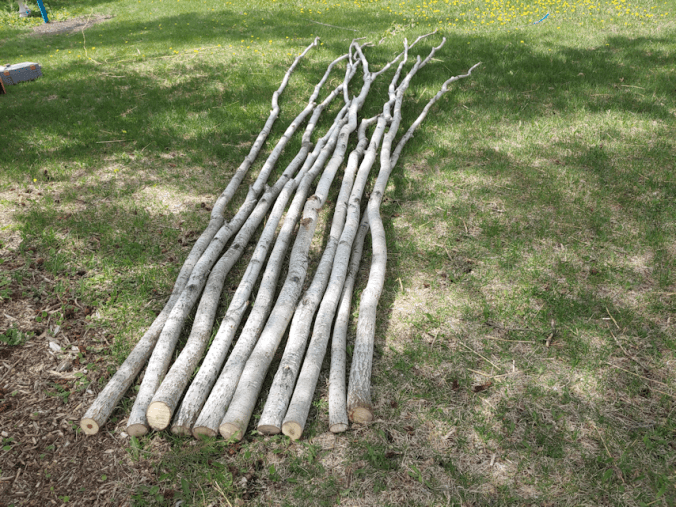
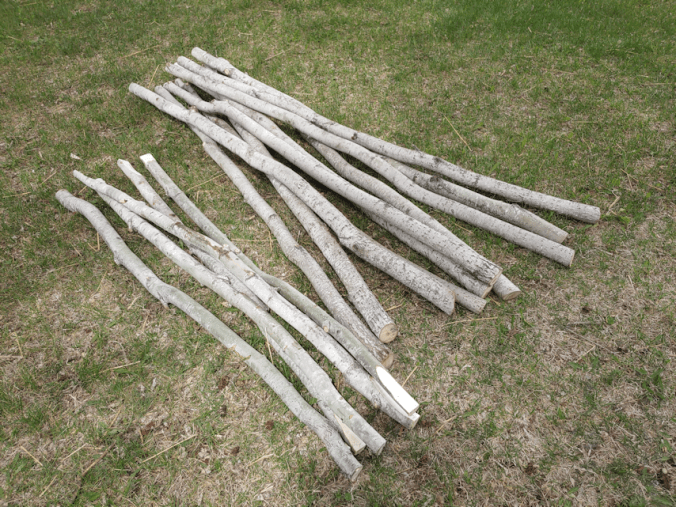
The first thing to do was go through our pile of poplar we’ve cleared out of the spruce grove, and pick the strongest, straightest ones. Straight for the first 7 feet, at least!
The upright supports were cut to 7 feet, but there was still enough from each of them to cut cross pieces at 5 1/2 feet. Of those, the strongest ones were selected, and at least 3 inches was trimmed from each end to have a narrower, flattish part to attach to the uprights.
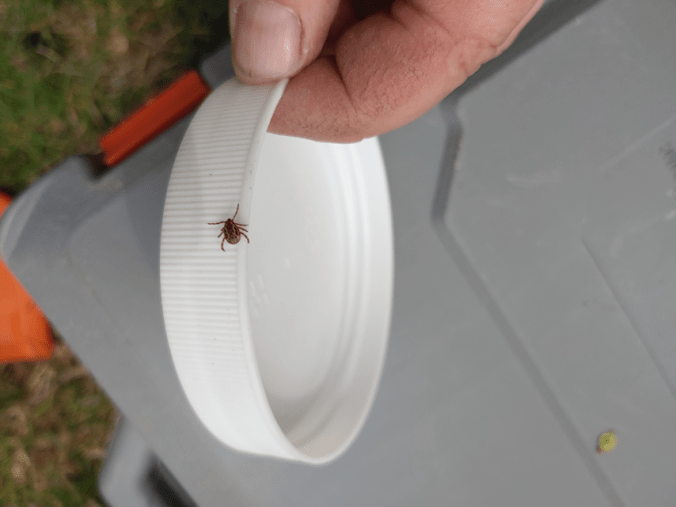
While preparing to screw the pieces together, I found our first wood tick of the season! We ended up finding a couple more, later on.
Time to dig out the bug spray to go with the sun screen… :-(
The uprights need to be 5 feet apart, and the cross pieces were to be attached to their tops. I measured out and shoved some sticks into the ground as guides. The bottoms of the uprights would be centered at the pegs at their based, while the tops would be placed with the two sticks at the top on the outsides, to have them lying parallel at 5 feet. The cross piece could then be laid out and the flat sides lined up to the tops. Pilot holes were then drilled and they were screwed in place.
Which sounds a lot easier than it actually was. A few cross pieces needed extra trimming to rest against tops of the uprights. Sometimes, the uprights needed to be turned until they all fit together as flush as possible. Still, it got done.
There they are! Five sets up upright supports for the squash tunnel! They just needed to be dragged out to where the squash tunnel will be set up.
At this point, they are very rickety. Unfortunately, with some of the screws pulled right out of the wood, so we had to redo them with longer screws. Which, thankfully, we had!
By this point, we’d reached that 28C/82F, so once we finished with these, we packed everything away and went indoors to get out of the heat for a few hours. The next stage was to dig the post holes, and there wasn’t any shade to be had, so we waited.
When I finally did head out, I first took the time to water the garden beds and blocks from the rain barrel by the peas. I was able to use the watering can to water everything but the Dorinny corn before the barrel was too low for me to refill the watering can anymore.
While I was watering, I found a friend.
Such a cute little frog!!
Then it was time to start the post holes. Each spot was marked with a flag, so I started by using the space to stab out a circle around each flag, then moving it so I could remove the sod. Once the sod was out, I went in with a hand trowel to take out the bigger rocks, then used a lopper to take out the many roots I found.
I had company.
I love how Rolando Moon will just hang out while we’re working outside. She doesn’t want us to pay attention to her. She just wants to be close by. She even settled down for a nap!
Finally, I brought over the post hole digger and got to work. It’s pretty much a one person job, so the girls took care of the evening watering, refilled the rain barrel by the peas, and watered the last corn block. Once the barrel was full, I decided to set up the sprinkler over the corn and sunflower blocks, to make sure the seeds got the moisture they need to germinate. Going over them with the watering can may or may not have been enough, so I wanted to make sure they got a thorough soaking while I continued digging post holes.
All done! Ten post holes, all 5 feet apart.
That was it for today!!
Getting those supports in will be a three person job. Particularly since they are still so wonky. Two people will be needed to place the supports into the holes, while the third person will back fill the holes. They will still be rather fragile until the cross pieces are added to the sides. We weren’t able to pick up a cordless drill on this month’s budget, so we’re going to have to string together a whole bunch of extension cords to drill the pilot holes! The cross pieces at the top should have enough extra length that we can put a screw through them, into the side cross pieces, too. We’re all short, though, so we’ll need a step ladder to do that!
I want to add cross pieces near the bottoms of each side, too. We’ll need a total of 16 pieces to do tops and bottoms of both sides, and then we can put either wire mesh or netting for the vines to climb up and over the tunnel. Then, we can start making the beds themselves, to transplant the winter squash, gourds and melons into. These will be on the outside of the tunnel supports only, keeping the tunnel nice and wide on the inside. If all grows well, it should create a nice shaded space that we can put chairs in, to rest and enjoy while tending the garden. :-)
Next on the list are the beds for the summer squash, and the block for the Montana Morado corn. They’re getting quite big in their cups, and hardening off nicely. I hope they handle being transplanted okay! I do with the toilet paper tubes had worked out. That would have been much better and less disruptive to the roots. Well, we’ll know for next time: pre-soak the growing medium before putting it into the tubes!
The next week or so is going to be very, very busy!
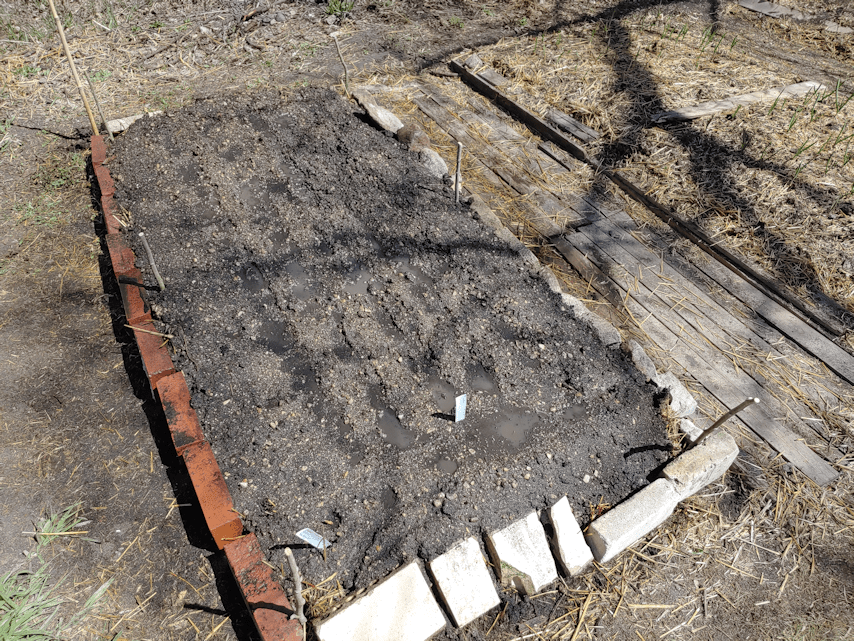
This morning, I wanted to get that half-bed planted with carrots. I was happy to discover that the Kyoto Red carrots I’d ordered were pelleted seeds (I’m sure I knew that when I’d ordered them, but completely forgot!), so they could go in right away. Before I did, though, I cooked up some cornstarch gel, and set the other two varieties of carrot seeds to soak. Last year, we used the technique described in the video below to plant carrot seeds, and it worked very well, so I wanted to do it again.
Those will wait until tomorrow, though. For now, the carrot bed in the old garden area is fully planted, and I covered them with plastic after watering them.
They’ll be checked often, and as soon as green can be seen, the plastic comes off.
The next job was the new garden bed beside the garlic.
Before topping it with fresh garden soil, I found what I could to shore up the sides, so things wouldn’t erode. This is a pretty small bed, so it only took two loads of soil to cover it.
Then began my experiment.
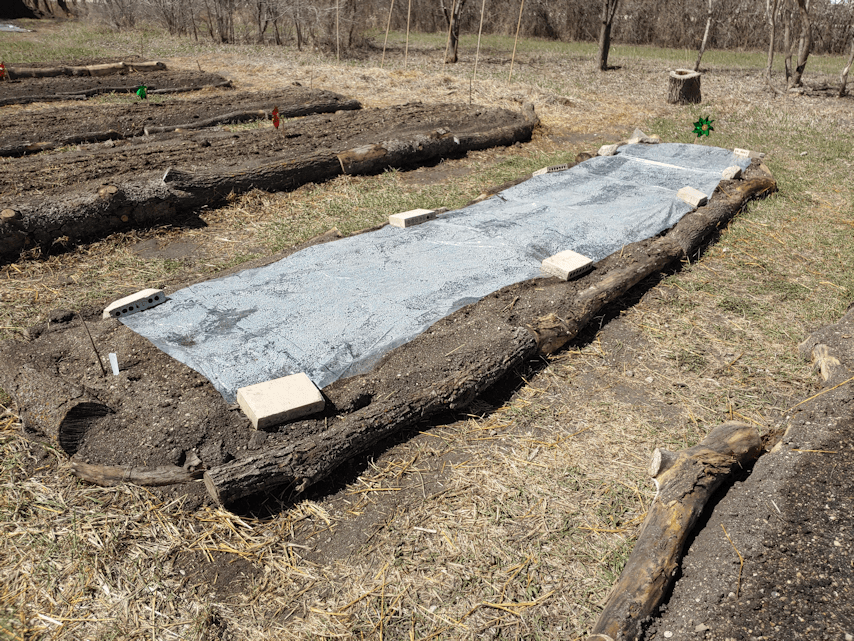
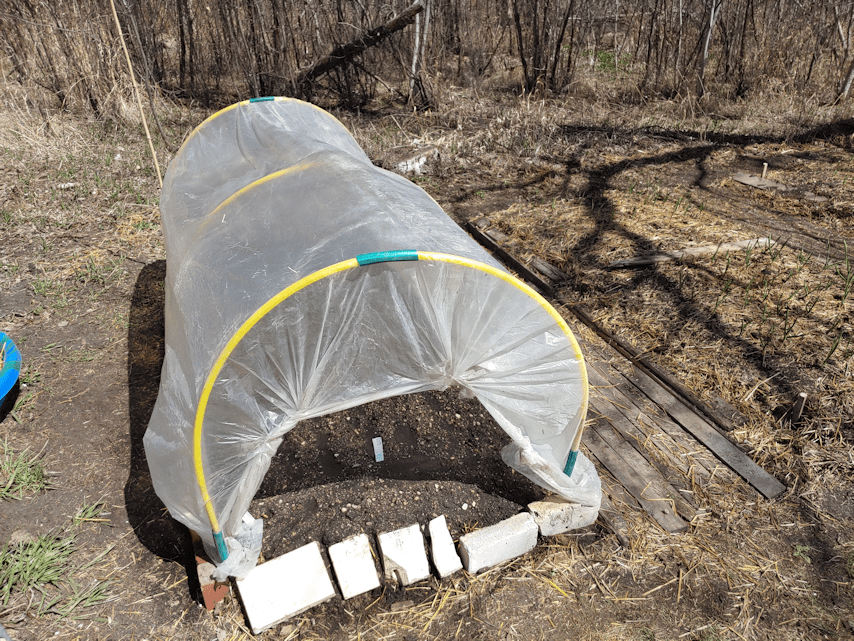
After planting the middle with Merlin beets, then surrounding it with the last of the yellow onion sets, I cut small lengths of poplar that were fairly thin. I’d opened up the three dollar store hula hoops I’d bought and removed the bits of what looks like decorative rocks that were inside, to make a rattling noise. The sticks were of a size to fit snugly into the openings of the plastic. I also cut lengths of old garden hose and split them lengthwise and grabbed some plastic that was used to cover one of the garlic beds over the winter.
I suppose I could have cut the plastic tubes from the hula hoops shorter, but I really didn’t want to fuss with it. I was able to fit the ends over the sticks and push them down quite far, even though some of the sticks were nubbly from twigs I’d cut off.
I used the pieces of hose to hold the plastic sheet to the hula hoops. Then I used packing tape to gather up the loose pieces at the end and pull things taught. I ended up getting a couple more piece of hose and used them to attach the plastic to the sides of the center hoops as well.
This thing is going to blow away in our next stiff wind! :-D It is by no means durable! This is more about keeping the deer away than anything else.
One of the wind socks we got to help deter critters ended up being spun so much in the wind, the twine I used to tie it to a tree broke. It’s in the shape of a spiral, so I hooked it to the top of a bamboo stake, then wrapped the spiral around the bamboo. It won’t get blown around as violently anymore, but still moves around the stake, so it should still help startle critters away.
So that bed is now done and planted!
In between watering the new bed, I made sure to water the strawberry spinach bed, and covered that with plastic, too. Though we’ve been diligent about watering, these are almost surface sown, and the surface dries out very quickly. I’m hoping it’s not too late to put the plastic over them. :-/ We shall see!
So that worked out rather well. Tomorrow morning, I’ll see if the hoop cover is still there, of it it blew away during the night. :-D
The next job was much larger! But that will in in my next post.