Testing, testing!

Well, I’m certainly glad I decided to switch memory cards on the trail cam over the tulips after I finished my last post.

With this camera, if it happens to be recording when I pull out the memory card, I have to manually turn it back on again after putting in the new card. This time, it wouldn’t turn back on again. After much fussing, and even loosening the camera so I could reach things better, I finally got it going again.

When I checked the card, there was nothing on it. Whatever happened that caused it to turn off and stay off, happened while I was positioning the camera in a new location.

So I went back, made a point of triggering the camera so I would have at least one file from it in position, then switched cards again.

I then went back and forth between re-positioning the camera, switching cards and checking the files, several more times.

There were a couple of problems. The first was, no matter how I positioned the camera on various parts of the apple tree, I couldn’t cover all of the tulip area.

The other problem was physically moving the camera. It is held in place by a long strap. One end has a gripping clasp that the other end is woven through. This is great if I have to put it on a large tree and leave it there. It also doesn’t make much difference when it was on a fence post, as I could just loosen the strap and lift it off the top of the post. To move it from place to place on the tree, the strap needed to be pulled through the clasp, every time, then placed around the trunk, reinserted into the clasp and pulled tight again. Meanwhile, the strap runs through slots in the back of the camera that grip nothing, so the weight of the camera itself kept causing it to slide around and swing.

Since it was still on while this was being done, I had a lot of videos that were very hard on the eyes to watch!

In the end, there was simply no place I could put the camera that would cover the area needed. And there were no other trees in suitable spots that I could attach the camera to.

I could see where the camera needed to be set up. What I needed was something there I could attach the camera to.

I found something.

I grabbed one of the old sawhorses. We have three, and this one is the odd sized one, so it doesn’t get used as much. I set it up on its end, and attached the camera to the cross bar. The bonus is, now that the camera is strapped onto it, making adjustments is easy. I just shift the saw horse instead of trying to move the camera. With the camera mounted so low to the ground, I can switch the memory card more easily by tipping the sawhorse onto its side, then popping it back up again, without shifting its position. If I check the files and find that it does need to be shifted, it is much, much easier to do so now, then trying to do it on a post or tree trunk.

I already have a file of Creamsicle Jr. walking past the camera!

This should work out just fine.

And yes, I did move the string of bells and plastic spinner to the sides, so that they wouldn’t trigger the motion sensor in the wind!

On the one hand, I hope to capture the critter that’s abusing our tulips. On the other, I hope the critter never shows up, because there aren’t many tulips with flower buds left. We have not found other materials we can use to protect them (the fence wire I was thinking we could use would not stop a skunk), and won’t be able to buy anything until at least tomorrow. We’ll be making our monthly bulk shopping trip to the city tomorrow, but I’m not sure if we’ll be able to find anything useful. Now that we’ve added Canadian Tire to our list of places to shop at, to get the stove pellets we’re using for cat litter, I’m hoping to at least be able to find some chicken wire or something like that.

We’ll see how things work out!

The Re-Farmer

Our 2021 garden: last beets, and mulching

I’m taking a bit of a break from working outside, to avoid the hottest part of the day. We’ve reached 22C/71F, and our high is supposed to be 23C/74F.

One of the things I’ve been trying to do early in the day is water all the beds that we’ve planted. I’ve been concerned about them, since we are so incredibly dry right now. It’s hard to give the beds even a shallow watering, never mind the deep watering they need. The problem is that the surface dries out so quickly. What we need is a mulch. The only thing we have for mulch right now is straw. Which is fine if I’m mulching around larger plants, like when we transplant our squashes, etc. Not so good for things like greens.

What I do have, however, is a lawn mower.

So after I planted the last of our beet seeds – three types all mixed up – in the L shaped bed in the old kitchen garden, I brought out the mower.

We already had some chopped up straw that had been on top of the garlic beds; we’d removed most of it and it’s been sitting in the kiddie pool, waiting for use. I chopped all that up a couple more times with the mower, then filled the wheelbarrow with more straw and chopped it up several times, too.

The finished mulch, which now included leaf litter that was on top of the lawn, went back into the kiddie pool, which made it very easy to drag around to where it was needed.

The mulch is so light, I could let the wind distribute most of it for me!

The L shaped bed is all beets. I had thought to put some carrots along the edge of the bed, but there was no room! In fact, I ended up broadcasting the last of the seeds in another little spot.

The patch of mulched soil near the plastic and the tree is where the last of the seeds went. Almost all of these beets are last year’s seed, so who knows how many will germinated.

I then scattered mulch onto the poppy bed, too.

After thoroughly watering everything, I moved on to the big garden.

Once again, I could let the wind lightly cover the beds for me. The beds at each end, with the onions, got fully covered. The spinach beds have their first sowing in the middles only, so I just focused on that area. When we sow more in another week, we can add more mulch then.

Everything got another thorough watering. All the beds will be watered again this evening, when it starts to cool down.

Until then, my next job is to mark off and start preparing the block to direct sow the one variety of corn we have that needs to be planted before last frost. That’s going to be out by the peas, and that’s where we’ll be working on for the next while, as we prepare beds for the beans, corn and radishes, sunflowers, squash and gourds. Then, last of all, the block at the opposite end of the garden, where the Montana Morado corn will be transplanted. None of the sunflowers or corn starts have germinated yet, but it hasn’t been very long yet. I’m just impatient! :-D

We will also use the lawnmower to chop up more straw for more light surface mulch. That, at least, I’ll be able to work on in the shade this time! :-)

The Re-Farmer

Our 2021 Garden: expanding onions

After seeing how much the K-cups were drying out, I had to find a way to move them out so they can be watered thoroughly, without over watering the Jiffy Pellets.

At our last city shopping trip, I picked up a couple of cheap little baking sheets, to make it easier to move the red solo cup transplants later on. I wasn’t sure if it would fit on the shelf with the other tray, but I figured I’d give it a shot.

It fit. :-)

Because I have a heat source below, both trays need to be on the same shelf, so I’m glad it worked out.

I discovered an unexpected potential problem after taking out the K-cups.

As you can see, trying to keep the K-cups hydrated left the Jiffy pellets really damp. The algae growing on them should not be a problem, though. The potential problem is that, protected by the larger K-cups, the seedlings have roots growing through the mesh of the Jiffy pellets – and you can see where one seed grew out the side!

With the K-cups moved away, those roots are now exposed and will dry up.

What to do? I didn’t want to move them and cause more damage to their roots.

Well, it’s a good thing I don’t like to throw away anything that might be useful. Even old Jiffy pellets.

When I started squash and gourds last year, with their large seeds, I planted one seed per Jiffy pellet. I ended up with a lot that did not germinate, and they’ve been sitting, all dried out, in an old ice cream pail, ever since.

Except for the ones the cat dig out. They really, really like to bat them around and tear them apart. Which is disconcerting, in the wee hours of the morning and I don’t have my glasses on, but I can see enough to tell there’s a pile of brown on the floor. :-D

Well, it turns out I had juuuuusssttt enough left to fill in the spaces.

Two spaces were bits and pieces of Jiffy pellets, rescued from the cats. :-D

I added more water to the reservoir below for them to absorb and expand a bit, and the roots can grow into them.

I did transplant the one growing out the side of a Jiffy pellet into another one that didn’t have anything in it.

I didn’t expect growing onions from seed to be this troublesome, but I guess that’s to be expected when resources and options are limited! The water also has half-strength vegetable fertilizer dissolved into it, so I hope that helps.

We’ll see if the spindly seedlings make it!

The Re-Farmer

Trying again

We had another fairly chilly night, but things are definitely warming up again. Enough that the outside cats were all running around by the door when I came out this morning!

They were both hungry and thirsty! Even Junk Pile cat didn’t quite run away, waiting for some food. The kibble bowls were all empty, and even their heated water bowl was almost dry. The other bowls were frozen, so they were very happy for the warm water.

We really need to work on getting Creamsicle Jr. to let us near him. I want to get a look at one of his eyes. It seems to be leaky.

This is the same pussy willow I posted a picture of, less than a week ago. It’s really, really trying to develop those catkins! It should be warm enough from now on for them to finally develop fully. The brief cold of the past few days set it back quite a bit.

We never got much snow out of what should be the last winter blow out, and it’s already pretty much gone. Which means things are still very dry out there. I’m hoping we will get some good rain this spring. We’re going to need it!

I received an interesting hint that the weather is warming up and expecting to stay that way. I got a bank notification that a charge from Veseys came through. I expect to soon get a shipping notification. The only things we have with them right now are items that will be shipped when it’s time for planting. It was a very small charge, so not everything that’s waiting is going to be on it’s way, but the ground it still frozen solid. I’m curious to check what we ordered that can be planted this early in the season!

We had another bank transaction that had my husband and I wondering. Something got credited to our account, but neither of recognized the listing it was under. It seemed to be a refund of some sort. It took me a while, but I finally found the original debit, almost a month ago. After some searching, my husband finally figured out it was the new ergonomic keyboard he had ordered for me that we were waiting for (not the only thing we are still waiting for, either). For some reason, we got refunded, but have had no notification. He’d ordered it from this company (the name of which was not what was listed in the bank statements, lending to the confusion) as a “guest” and gave them my email address, but I’d received no notifications from them. I even searched my spam folder. He thinks he may have accidentally put in an old email address of mine that I no longer have. We decided to try and order the keyboard again, but this time he created an account with the company, rather than ordering as “guest”.

Which is when he found out what happened. As soon as he tried to place the order, he got a warning that they don’t ship to box numbers. He never got that warning when ordering as a guest, and since the email address was likely goofed, they couldn’t get through to us to fix the problem, so they canceled the order and refunded the money.

Unfortunately, he’d ordered it originally at a sale price. The sale is over, so this time, it’ll be full price. Ah, well.

While he was going through the purchase, he just had to call me over to see the shipping costs. There were three options, with different expected delivery dates. Two of them were free, but the expedited shipping cost was actually more than the full price of the keyboard. Including taxes!

There was still the issue of their not delivering to box numbers. We don’t get postal delivery, so there’s no point in giving them our physical address. Hardly anyone can find our place, even then. This is not a new problem, unfortunately, but my husband found a workaround. He inputs the physical address for our post office/general store. Since the package would have his name on it, and the population here is so low, the post master knows which box number such packages belong to, so we still get our parcel pick up card in the mail box.

It may still take 2 or 3 weeks to get here, but it should work.

It’s interesting how much more difficult it has been to get things delivered out here today, compared to when I was growing up here. We didn’t even had driveway markers until not all that long ago, but people could still find us with our section number. The modern delivery systems just sort of assume people live in cities and towns, with street addresses. Box numbers are now associated with security problems or scam artists. Never mind that so many people still use box numbers, even if they live in towns. The town we go to for most of our shopping and errands, for example, has an organized street address system (unlike our hamlet, which does have some street names, but no street numbers), but all mail goes to box numbers at the post office. If there is only a street address, the post office employees have to figure out whose box number it belongs to. A little more difficult when the population is several thousand, instead of a couple hundred.

You’d think, with modern technology, it would actually be easier, but the systems don’t recognize section numbers, can’t figure out our rural road systems, and don’t accept box numbers.

So we have to get creative, just to get things to go to our nearest post office!

I love my technology, but sometimes, it just makes things harder! :-D

The Re-Farmer

Ginger update and… that was weird!

This morning, I went ahead of my daughter to visit with Ginger, so I could first give the outside cats some warm water.

There was a slight delay on that.

Since we took the extension cord that was providing power to the cat house, so it wouldn’t be in Ginger’s way, the heated water bowl is no longer heated. And it got chilly last night!

So I decided to quickly pop into the sun room to give Ginger some warm water first, and the little bugger actually managed to get outside!! Thankfully, he didn’t get too far, and I was able to get him back into the sun room. His food bowl was empty, so I topped that up to tempt him away from the door.

We can give him normal amounts of food and water now, too.

My daughter joined me with his medications and we took care of that, then she stayed with him to make sure he didn’t run outside while I fed the critters, returned the containers, and got her to pass me one of the 100ft extension cords, before she could finally close up the outside doors to the sun room and safely leave.

I then plugged the 100ft extension cord to the outlet on the side of the house, ran it across the entry, making sure it was tucked under the door, and plugged in the cat house.

We shouldn’t need to keep power into here for much longer!

That done, I quickly finished my rounds, then headed into town. We decided to go ahead and buy a surgical shirt for Ginger, rather than make one.

Which is when things got weird.

When I opened the door, I was immediately greeted by a dog in the doorway. His two humans were just finishing up and on their way out, so I held the door for them to come out.

The dog insisted on more pets, so that took a little while.

Which is when one of the staff came over. She had recognized me and was all “this is the person I was telling you about! The one with the poster…” They still have posters with the kittens we have for adoption on there. The woman held up a paper where I could see a hand drawn map, saying “we were just on our way over there!”

Now, the first thing that came to mind is, who at the clinic knew where we lived enough to draw a map?

The next thing to come to mind was, having people suddenly show up at our gate might not work out too well. So I quickly suggested they wait until I was done, then they could follow me, which they agreed to do. As soon as I was done getting the surgical shirt, I sent a quick message to the family, letting me know someone would be following me to look at cats to adopt. I didn’t have time to tell them any more than that!

So off we went, with them following me, until we reached the gravel road. It’s incredibly dusty, as well as lots of rocks showing through the gravel, so I drove slower than usual. Even so, I noticed after a while, that they didn’t seem to be following me anymore.

I stopped on the side of the road and waited for the dust to settle and, sure enough, they were well behind, and looked like they were in the process of turning around.

??

They seemed to see that I had stopped and starting heading my way. They caught up to me and we stopped alongside each other to talk.

Her first comment was, “I think I’m following the wrong person!” They thought they were going to somewhere in town, to the humane society. That’s where their hand drawn map was for.

What we eventually worked out is that, while at the clinic, the person at the counter had told them about us having cats to adopt, as well as the humane society. I mentioned we’d never been able to get through to the humane society, and she said they’d told her that at the clinic! So it looks like they thought the staff member was telling them I was with the humane society. After confirming that yes, we do have fixed female cats up for adoption, they continued to follow along.

The gentleman was older and not up to getting out of the vehicle, so I quickly went in to talk to whatever daughter was around. Susan was near the door, so I took her out while my daughter went looking for Two Face.

Susan hasn’t been outside since she’s been fixed, other than one very brief escape attempt in the winter.

She really wanted to be outside! I ended up having to put her down, hoping she would be too nervous to go far, but nope. She was ready to explore! I managed to catch her again, but had to bring her inside at that point.

My daughter had Two Face, so I grabbed her and headed for the door.

The woman saw us through the window and her immediately response was, “oh, I like her!!” One look at that beautiful face, and she was in love.

Two Face was also a lot calmer, and we were able to bring her to the car for the gentleman to see her.

The main problem was, they had their dog in the back. I have no doubt the dog would have been fine, but Two Face would probably be too nervous.

We spoke for a while, and figured things out. Two Face is due for her annual shots, and their dog has to go back to the clinic in three weeks. They’ll make an appointment for both of them, then call us to let us know when that will be. They have a cage they can put Two Face in, so they’ll come here first, with the cage, then take her to the vet for her shots. Since the clinic has Two Face on file, they can transfer her file to them at the same time, and they will take her home from there.

Unless something happens in the between now and then, Two Face will finally be adopted out!

It was really weird, but it worked out in the end!

The Re-Farmer

Our 2021 Garden: solution found… maybe?

As the temperatures have gotten warmer and the snow melts away, I’ve been able to expand my morning rounds. Today, I was able to reach the barn and a shed near it, for the first time in months.

I had a purpose in mind.

One of the things we have found all over the place, beside mirrors and tires, are windows. All kinds of windows.

If there are windows, could there be… ??

… yes there could!

I found a fairly large screen at first, then found at least three like this one. It has an aluminum frame, and a very strong metal mesh.

This may work as a “lid” for the small fish tank greenhouse. It’s much bigger than the tank itself, but if I can secure it safely, I should be able to use it, even with the amount of overlap there will be at the front and sides. I can remove the light fixture from under the lid of the tank, and attach it to the underside of the screen – unlike the light on the big tank, this one can’t handle the weight of even one of our skinny cats on it. There is even a space I can use for the power cord from the light.

The screen itself is probably strong enough to hold even Dah Boy and Cheddar’s weights! As long as no jumping is involved. They don’t tend to try and get on the tanks in general, so I’m not too concerned about them.

The screen has been scrubbed and sanitized and is now set aside to dry. I have time to figure out what I can use to secure it to the tank, while still being able to open it easily to get at the seedlings inside.

Here’s hoping it works!!

Also, there are a LOT of old windows in the barn and shed. Some are broken, but others are still intact. I took a closer look at some in the barn. I am continually amazed by one group of reclaimed windows. They are so filthy with years of dust and grit, I actually didn’t realize they were windows until my brother told me that’s what they were! While some sort of canvas was draped over the middle one, to keep them from touching each other, they are thoroughly stuck to each other at the ends. I estimate them to be about 7 ft by almost 5 ft, and they are at least double pane. Possibly triple. There are a couple of others about 4 ft square that are double pane.

I am sure we will be able to find some use for these. Especially the big ones, if we can manage to separate them without breaking them. I see potential cold frames and mini greenhouses in them! :-)

The Re-Farmer

Our 2021 garden: making grow bags

One thing about our internet being a problem is that we’re really learning what browsers and websites are data hogs of one type or another. Chrome is better than Firefox, and WordPress is just awful. Not just the editor, but simply trying to view other WordPress blogs. I don’t know what they’re trying to do in the background, but it’s more than our internet can handle and they are constantly timing out or only partially loading.

Today, I’m trying a new browser, and it seems to be working MUCH better. Which is weird, because I’m using Tor right now, and it’s an onion, so you would think it would be worse, not better!

Either way, here I am, able to write a blog post!

As much as possible, we keep Sunday as a day of rest. What often happens during that rest period is that it becomes a time of inspiration. Today was one such day, and I came up with a garden solution.

When I posted about our layout plans for this year’s garden, one of the things mentioned is that our potatoes aren’t anywhere on it; we are planning to grow potatoes in containers this year.

The question was, what to use as containers?

The easy solution would be to buy grow bags. That requires money, of course. Money that would be more efficiently spent elsewhere. We had a number of things around the property we could use, but each had more negatives than positives about them.

So that problem got set aside, and we got to thinking about other things. Like how to preserve our harvest. Particularly the root vegetables. I got to thinking about the bags from deer feed and bird seeds we’ve been accumulating, and how they might be usable.

Which is when the inspiration hit.

The feed bags would make excellent grow bags!

The bags are simple tubes with seams sewn on the top and bottom. The seams are basically slip stitched, so to open them, I trim one end of the thread close to the bag, then yank. The whole thread pulls out, leaving the top of the bag undamaged. Once the bags are empty, they lie flat.

So I grabbed one to experiment.

To use them as grow bags, they need a flat bottom. To create that, I folded the ends of the seam so the points met at the middle, then stitched them in place. Because of the layers of thickness from the seam, I had to do two rows of stitches on either side of the seam. I used a back stitch, as that would hold better. The thread I used was salvaged from the inside of a very long length of paracord. My younger daughter had made herself a corset, but the lacing she got was not long enough. The lacing is the same as the outside of paracord. My husband bought a 1000 yard roll of black paracord a while ago, so we had plenty to use. It took a while, but we got the inner strands out, which we then separated into individual strands to keep for other things. It’s remarkably strong, and we didn’t want to waste it! It was perfect for this job.

This is the end result. A flat bottomed bag with sides that can be rolled up or down to the height desired. The bags will allow for drainage, and are strong enough that we will be able to move them around as needed.

They’re fairly small. The bags are more long and narrow than wide, and the bird seed bags are taller than the deer feed bags. They are large enough for just a couple of potatoes, or maybe three or four fingerling type potatoes, at most. So we’ll need a lot. I don’t mind the smaller size, since that means they’ll be easier to move after being filled. We are pretty sure we know where they will go, but if that doesn’t work out, being able to easily move them is a bonus.

I brought in the rest of the bags from the sun room, which turned out to be another 12 bags, plus we’ve got two more bags of feed on the go. Over the next month or two, we will be getting more of both deer feed and bird seed, which will likely give us another 8 bags to work with. After that, we’ll just be buying bird seed, but by then, we’ll be planting, so it won’t matter. Until we actually get the seed potatoes, we won’t know how many we’ll have, since they’re sold by weight, not number of potatoes. If we don’t have enough bags, we’ll just try some of the other ideas we were thinking of.

I’ve stitched up three, altogether, to get the hang of it, and now they are set aside. Over the next few weeks, we’ll stitch up the rest so that they will be ready for our planting in late May or early June. Being in bags, we should be able to get away with planting earlier.

The cats, meanwhile, are absolutely fascinated by these bags, and all the smells that came in with them! :-D

The Re-Farmer

Our 2021 garden: Layout

Okay, so my last post actually uploaded, so here’s hoping this one works, too!

I mentioned previously that the girls and I have been going over the layout of the grounds we have to work on, trying to figure out where we will be planting things. Today, I worked up a new diagram on the computer, this time keeping the satellite image in the background.

This is what we’ve got to work with; what I call the inner yard.

The long blue lines at the bottom (which is South) are fences. Black lines are around the house, storage house and garage. The one yellow line extending from the house is an important one for us to remember, when it comes time to making our permanent garden beds in the outer yard. There are pipes buried under there; water from the well next to the house, leading to the barn and to water fountains that were used when my parents still had cattle, and the septic pipe that diverts to the septic field, well away from house and barn. Since we plan to build accessible raised beds, and hopefully a polytunnel and/or greenhouse, we need to make sure to keep that area clear, in case we ever need to excavate it for repairs to the pipes.

The masses of green are treed areas. The spruce grove is on the right. The little yellow dot in there is where we will be planting the mulberry tree that will be arriving in the spring. We need to clear away dead spruces and underbrush, but there will be enough mature trees around it to protect it from the elements. Necessary, since it is a zone 4 tree and will need extra protection.

The blue rectangles are existing beds. The two little ones along the spruce grove are where the hard neck garlic is planted. I’ve marked where I will be making a third bed in that area. This is the only place we have soft soil, exposed when I cleaned up where the wood pile used to be. While clearing away the dead trees and underbrush around there, we will also be clearing the space where we are planning to build a cordwood shed to be used as an outdoor bathroom with composting toilet. No pit! The existing outhouse is between those beds and the garage to the south.

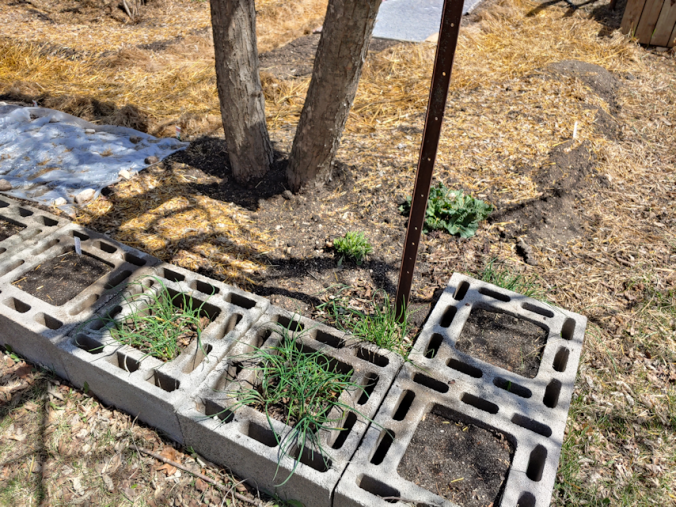
The blue next to the house is the old kitchen garden area, with its retaining wall of chimney blocks that we planted cucamelons in, last year. This is a bit of a problem area, overshadowed by two ornamental apple trees. There is also a double lilac, a honeysuckle and some roses in there that we will have to work around.

Then there is my mother’s old garden area!

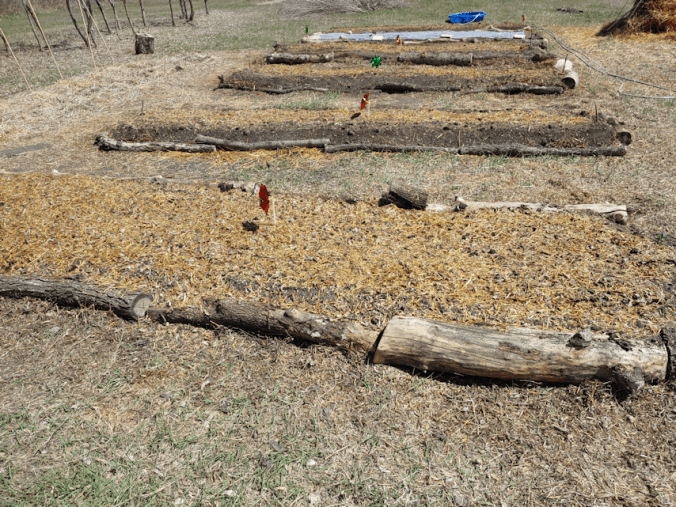
The existing beds marked in blue are where we grew our squash and potatoes. The two little beds to the right are where the potatoes where. Summer squash were in the larger, North-South oriented beds. The long skinny bed on the north side had birdhouse gourds in it, but those got killed off by frost. The three East-West oriented beds had started out as pumpkin mounds, but when I cleaned it up for the winter, I turned them into larger beds.

The green rectangles are potential new plots. The slightly darker green ones are pretty much decided on, while the lighter green ones are in areas that are probably not worth putting beds in, but we could if we needed to. There is a row of self sown trees to the North of the existing beds that we really should take out; they should never have been allowed to grow there. They split my mother’s old garden area in a way that made a substantial part of the garden unusable. There’s also a chokecherry tree growing, all by itself, in the gap between two light green squares.

There is also a green garden area marked along the fence line to the south of the house. There should actually be two of them, on either side of the person gate, which is near that yellow line. On one side is where we will be planting cucamelons, using the chain link fence as a trellis. The other side will have tomatoes. Hopefully. The seeds have not arrived yet, so that will depend on whether they get here in time to be started indoors.

The bed I will be making next to the hard neck garlic will probably be for our 2 varieties of beets. Either that or carrots, given how soft the soil is there. We have 4 varieties of carrots to plant, so we’ll see.

The garden by the old kitchen will likely have our poppies, lettuces, and possibly the pink celery that will hopefully arrive in time.

The three beds that used to be pumpkin hills are where we will plant our three varieties of spinach. The longer beds on either side will have the bulb onions, likely interplanted with the purple Kohlrabi (onions repel insects that go after plants in the cabbage family). The former potato beds will have the shallots and bunching onions, and will likely have something interplanted with them, too. Possibly kale. We got purple kale as free seeds from Baker Creek, and we seem to be going with a pink and purple theme this year, so … we’ll see.

Speaking of purple, to the left of the existing beds is where we are planning to plant the purple corn. There are areas that can fit potential beds to the north and south. This whole area has to be carefully planned. Where the current beds are now will be permanent garden areas; I’m not so sure that where the corn will be planted will be included. With the horrible plow job that was done before we moved here, the area we’ll be putting the corn is the roughest (another reason we need that load of soil!), but where I’ve blocked off space for the corn is the best part. To the south, there’s too much shade from trees, so if we do make beds there, only shade friendly vegetables can be planted there. To the north, it’s basically lawn, and was never part of the original garden. I’ll touch on those areas, later.

Let’s leap over to the massive area on the right (east). There will be alternating blocks of corn and sunflowers there. We have 3 varieties of peaches and cream corn, and 2 varieties of giant sunflowers. We may interplant our 2 varieties of peas with the sunflowers, which can provide very strong supports for the peas to climb, while the peas fix nitrogen into the soil.

Legumes are supposed to be good to plant near corn, as corn depletes soil of nitrogen very quickly. We have 3 varieties of bush beans and, while I am considering staking them (which is supposed to help prevent fungal disease, rot and insect infestations), they are not climbers, so we won’t be interplanting them with the corn. They will go where I have two long strips near the big block. They are not as long as the block for corn and sunflowers, because of shade from the row of crab apple trees.

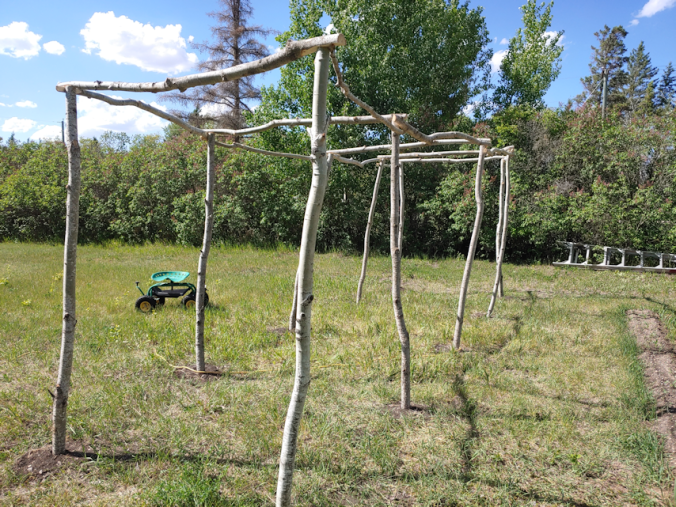
The other blocks will be used to plant summer squash, which I want to try staking this year, plus winter squash, gourds and melons on trellises and/or arches. Possibly peas, if we end up not interplanting them with the sunflowers. We have one more variety of corn that will be among those blocks, too.

We have two types of radishes, which will be interplanted with other things. Likely corn. Even though we will be able to buy soil that will enable us to do all this (barring some sort of emergency that takes up the funds), much of this area will later have fruit and nut trees planted in it. Anything we do to break up the soil will make it easier for us to dig holes to plant trees into.

It is with that in mind that we are breaking ground in areas that were never part of my mother’s garden. The area where we will be planting the corn and sunflowers is all grass, as is the strip along the north side. That row of self-sown trees is in the old garden area (my mother had a raspberry patch there, and when she transplanted the raspberries, she left the saplings). The old garden area extended a small plow’s width past them – and they are probably why the plow job on that side is as rough as it is (though it could also be that the person who did the plowing may have been drunk at the time). Planting on that north strip is another area we need to be wary of, as there are telephone lines buried somewhere in there.

There are a few other things we will be planting that are not on the layout. There are no potatoes on there. We are going to try using grow bags, or something similar, for our 4 varieties of potatoes this year. They will likely be set up in the south yard, near the storage house (the building marked off to the west of the house in the middle).

We also have to consider where we want to plant the purple asparagus. It has to be somewhere where they can stay for their 20 years of productive life! We also need to think about where to plant the strawberry spinach, which I’ve learn will self seed! So for those, we need to think about more permanent locations.

As you can see by the dark green lines around the inner yard, we are surrounded by trees. The spruce grove will need a lot of cleaning up, as it has so many dead and dying trees. There are a lot of poplars that are taking it over the south side of the spruce grow, and along the fence to the road, where my parents had planted elms and more apple trees. The apple trees there are too shaded to be able to produce. As I clean up all the little poplars, they will be used to build trellises and arches. As we can, we will plant more spruces in the spruce grove again! :-D Eventually, I want to take out the fence leading to the road – it’s barbed wire, and many of the posts are already rotted and falling over. For now, though, it is needed in case the renter’s cows get through the fence around the outer yard again. :-D

The area on the far right, past the fence line and trees, is a flat area next to the ditch by the road. The north side of that area is going to be prepared for planting a mix of wildflower seeds in the fall. I want to make sure this area doesn’t get taken over by trees, as has happened on the other side of our driveway, which causes a number of problems, so we’ve been mowing it. Which is hard on the mower! Introducing native wildflowers will help solve that problem, while also encouraging native pollinators. That will be good for our future fruit and nut trees.

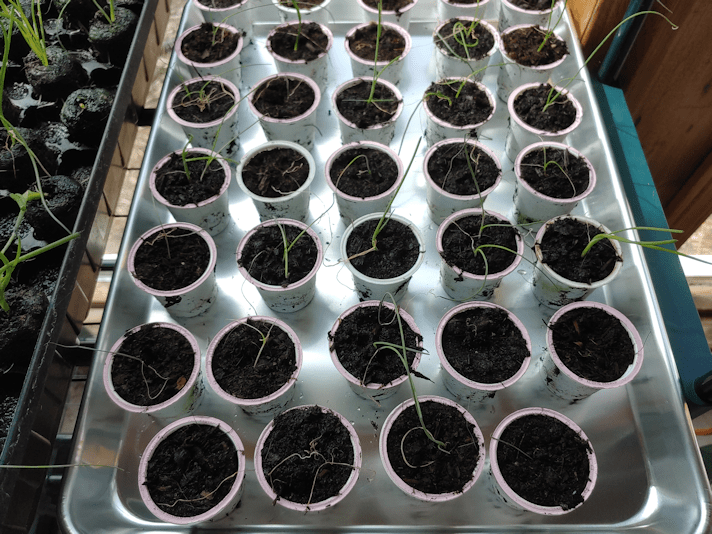
One of the problems with figuring out where to put things is that it’s really hard to maintain a perspective of just how much space there is, versus how much space we’ll actually need for what we’ll be planting! Things might change quite a bit, even based on how many of what we start indoors germinates. Everything is flexible, but this does give us a general idea of what we have to work with.

Oh, and somehow, we need to keep the deer out of all this!

That will probably be the biggest challenge of all.

The Re-Farmer

Converting the fish tanks into greenhouses, part 5: all set up and pretty much done

Today, I was finally able to continue setting up cat proof greenhouses in our unused fish tanks, to start seeds.

What I wanted to do was line the tanks with rigid insulation where they were near walls. Since there is no way to lower the lights to be closer to the seed starts, I was going to line the insides with foil for reflective light.

I may not need to do that.

Here is the big tank.

I got photo bombed by a Susan.

I had three boxes with identical dimensions, which allow me to raise the rigid insulation floor high. As the seedlings get bigger, I can change the positions of the boxes to get different heights. I’ve got 3 boxes in there, but I might try to squeeze a 4th one in, to stabilize the floor better.

Because of how the top of the tank is designed, to hold glass covers that broke long ago, I had to cut the insulation to fit the opening, rather than the space I wanted them in. That meant the floor piece has quite a gap around it. The sheet of insulation I cut to size for the long, back wall had to be cut into thirds to get it in. Plus, there is a sheet at the end. The wall in the back of the picture is one of the original log walls. The wall at the left is an exterior wall. Yes, it has more modern (almost 50 years old) insulation, but it’s still pretty cold!

The insulation on the sides helps to fill the gaps around the floor piece, which stabilizes it as well.

At these dimensions, I can only fit two seed trays in here, which means there is a fair amount of space around them to add more containers with seed starts. I just have to figure out what waterproof surface I can fit in there to put them on.

I think I can get away with not adding foil, though. What do you think?

The second tank was much easier and faster.

Once again, I had to cut pieces smaller, to be able to fit them through the top. I only needed to add insulation to the back, which is against the exterior wall, but I added more to the sides to help fill in gaps around the floor piece.

I’m going to have to find something better to raise the floor. The orange box is a bit too small.

Photo bomb, courtesy of Saffron!

As you can tell by the dusty footprints, the cats like the lid of this tank!

At this point, I should be ready to start seeds in here. According to the package instructions, I don’t need to start my onion seeds – the ones that need to be started the earliest – until the end of March, but experienced zone 3 gardeners in groups that I’m on have already started theirs, and say they should be started now. The seed trays I have are too big to fit into the smaller tank, so I will have to find something else waterproof to hold seed starts in the little tank. I want to buy more seed trays, anyhow; I’ll have to take a good look at what dimensions are available.

There is only so much I’ll be able to fit in these, even if I’ll later be able to move the onions into the sun room and make room for something else. I did find something that I might be able to use, for when I’m starting the squash and gourd seeds.

The squash and gourds need more space to grow, and they are the things that need to be started soonest, after the onions. I’ll be using these cups, with drainage holes punched into their bottoms, as pots. The storage container is designed to fit under a bed, but the hinge on the lid is broken, so it has been languishing in the basement until now. I have a second one. Once I figure out what to do with the stuff stored inside it, I’ll be using that as well.

We have so many varieties of summer and winter squash, as well as gourds, to try. Depending on how many seeds are in each package, I may not plant them all. Some are packed by weight rather than number of seeds. I figure, at most, I’ll start 10 seeds each of the summer and winter squash. Whatever the germination rate turns out to be, that’s what I’ll be planting. If I get just a 50% germination rate, we will still have lots of each variety, and with the number of varieties, we should have plenty for both fresh eating, and preserving and storage. For the gourds, I’ve decided to start 5 seeds of each, and see how they do. One of them is an eating variety, but the others are to dry and use for crafting purposes. Curing them takes about a year, so the sooner I can get some grown, the sooner I’ll have materials to work with! If space in an issue, though, I’ll drop the gourds for this year.

I still have the mini greenhouse that my daughter bought for me last year, which can hold three of the trays that are in the big tank. The cats still managed to get into the closed plastic cover, and it gets knocked over easily, so anything we start in there will be done later in the season, and in the sun room!

With the trays I have now, all I need to figure out is what to use in the small tank, and I should be able to start the onion seeds very soon!

The Re-Farmer

Converting the fish tank to a cat proof greenhouse, part 4: padded

Today, I found the self adhesive felted pads that I wanted to use on the covers for the fish tank.

I found them while looking for something else, of course. :-D

Here is where, on the tank, I want them to sit.

The bar across the middle has extra surface area in the corners of the ledge the covers rest on. There’s lots of room, here.

The outer corners, however, don’t have that, so there’s a lot less margin for error in positioning the pads well.

The first step was to clean off the ledge the frame rests on. An old toothbrush worked very well for that!

Since the cross pieces of the frames have an angled edge, to better fit into the space, I figured it would be easier to place the felt pads in position on the ledge first, adhesive side up, then placing the frame on top.

The felted pads I have were from a larger package with mixed sizes of circles, plus long, narrow ovals. The larger circles were used up, and all I had left were smaller ones, and some of the long ovals. I’d hoped I still had some larger circles left. If I had, I would have cut them in quarters, and fit them right in the corners, but half circles would have to do!

Once they were in position, I lined up the cover and dropped it down, pressing just enough to make sure the adhesive stuck, then removed it to press the adhesive in more thoroughly.

In this corner, you can see the pad will protect the tank’s frame from the wire. This was the edge of the roll, so no sharp bits sticking out, like the edges I had to cut, so I didn’t trim it.

And this is why I lined the pads up to the corners of the tank, rather than the frame. Yes, there’s a likelihood that the pad will get pulled off where it’s overhanging, if I leave it like that (I will trim it later), but it also isn’t sitting on the screw head. It was supposed to be countersunk, but some of the screws simply stopped and would not screw in any further. I am not sure what was stopping them but, whatever it was, I was wrecking my screwdriver’s tip, trying to get them to go in further, so I stopped. The others were just fine.

So the corners are padded now, protecting the tank’s frame from being scratched up, should a cat decide to jump onto the cover.

When I was fussing with everything to prepare for this, I did have a kitten not only jump onto one of the covers while I was there, but also walk across on the light fixture! Not a problem for a light kitten, but a potential problem, if one of the heavy adults tries to do it. Thankfully, they seem to not like the new covers and are staying off. At least while we’re around to see! The few times I’ve seen one of the adult cats up there, they have stuck to walking on the wood and stayed off the wire and away from the light fixture.

Meanwhile, the baskets and other items stored in the tank have been removed. I’ll need to take a vacuum to the bottom to clean it, then see how my seed trays fit on the bottom. That will help me decide whether the rigid insulation will be lining the inside, or the outside, of the tank. Whatever I do with the sides, the bottom will have its own layer of insulation lining it, too.

It’s remarkable how handy that insulation has been. I’m glad my daughter bought so much extra!

I’m going to need the little step ladder to be able to access the bottom of the tank. I could barely reach to get the smaller baskets out!

The joys of being short! LOL

Another little bit of progress made! :-) I can hardly wait to see how this works for starting seeds!

The Re-Farmer