Oh, what a lovely day!

It’s almost 6pm as I start writing this, and not only have we reached our predicted high of -10C/14F (my app says there is a wind chill of -19C/-2F, but I just got back from topping up the outside kibble, with no jacket on, and there was no wind), but it’s supposed to keep getting warmer overnight!
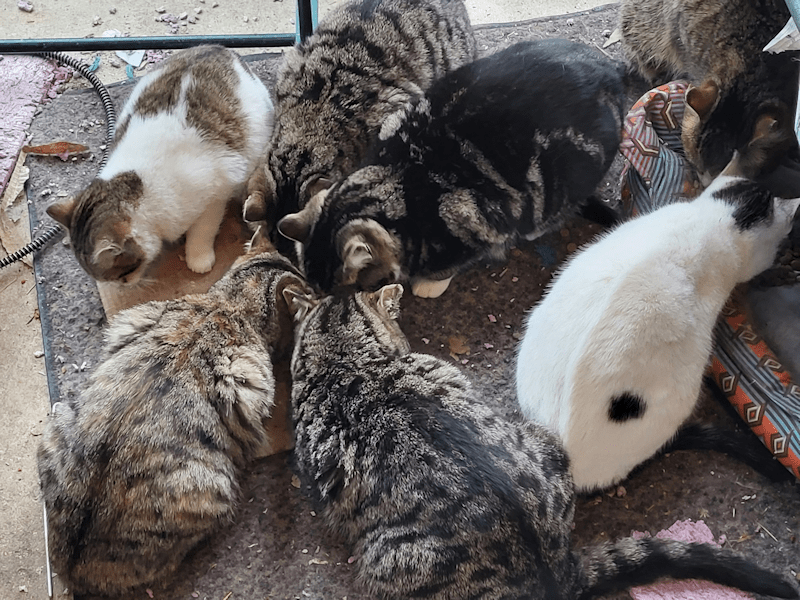
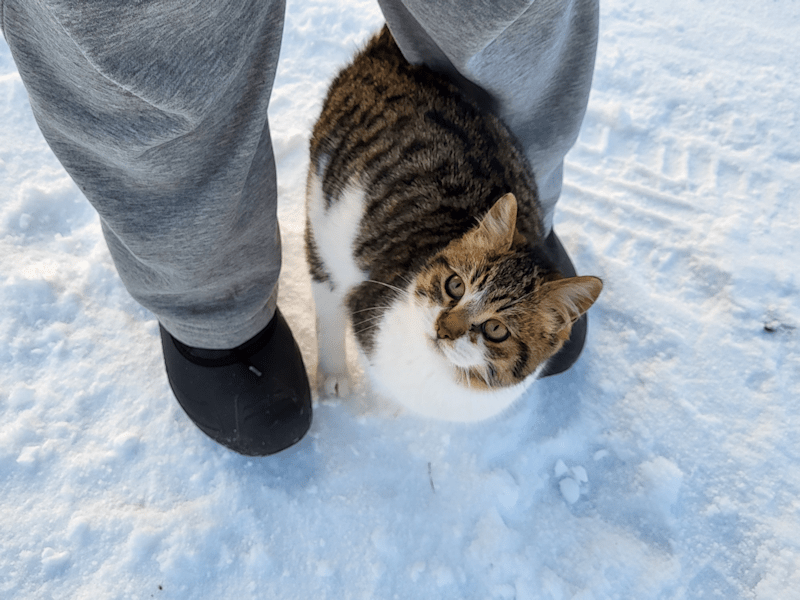
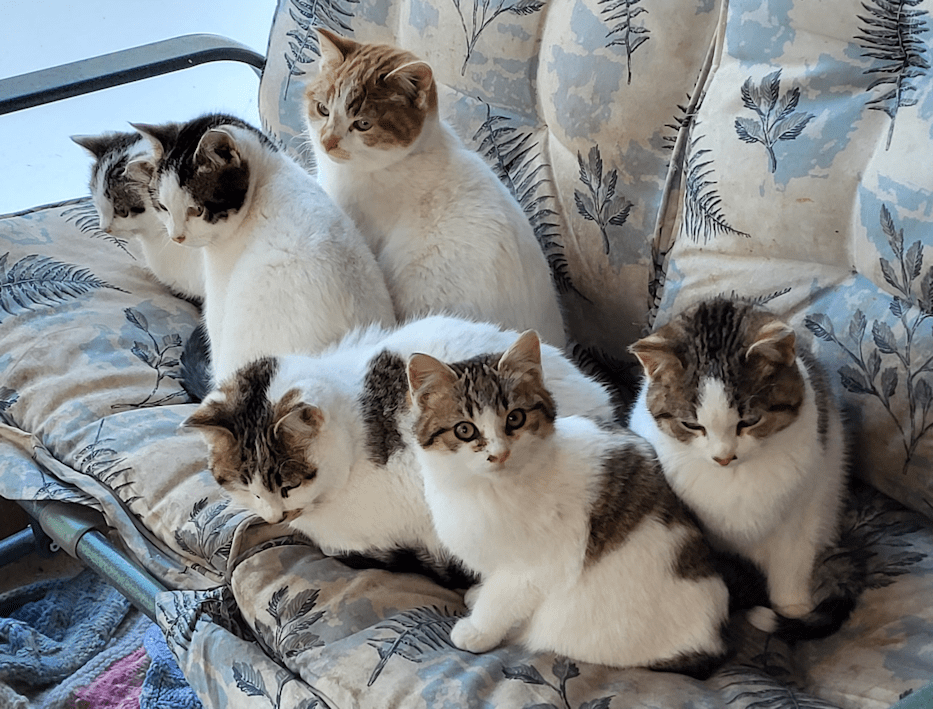
The grey tabby that has suddenly become friendly – it’s the one between the black tabby and the white and grey at the top – managed to sneak into the old kitchen while I was coming out with kibble. He not only let me pet him, but I was able to confirm he is male.

Now why can’t any of the females suddenly become friendly? They still won’t let us anywhere near them! The calicos and torties are pretty much guaranteed to be female. Not sure about the rest of the tabby cattens, besides Judgement and the newly friendly one.

They are just loving the warmer temperatures, and so am I!

I’d made arrangements to get some farm fresh eggs this afternoon. Then I got a message saying they had to make a trip to the city to try and find a part, so that got postponed until they got back. With the warmer temperatures, I’ve been feeling so energetic and antsy, I ended up going into town to pick up a few things, even though we were planning a trip to the city soon. I was home long enough to get a chicken carcass in the slow cooker to make stock when I got the message that they were heading home, so I was back on the road soon after.

Aren’t they beautiful? I love the green ones!

I am always so inspired when I visit this place. This is the same person we’ve been getting our cardboard from, to use while making new garden beds. Today, I got to meet their new additions – a pair of fainting goats, and two emus!

Emus are flippin’ huge!

This is in addition to their alpaca, horses, donkeys, hens, Guinea hens, and probably other birds I don’t know about. Once we have our coop, I’m hoping to be able to buy chicks from them, too.

While I did a small trip today, I’ve decided to do a big city shopping trip tomorrow. We’re expected to have a high from 0C/32F to 2C/36F, depending on which app I look at. I figure I may as well take advantage of the warmth. This time, we’ll be going to a different wholesale place, where I know I can get things like the big buckets of ghee and restaurant size bags of pasta. It’s time to restock pantry supplies we’ve been using when we weren’t able to make our usual big trips. We didn’t have the extreme cold we usually do, other than the past week or so, but with the holidays, December and January are always the worst months for making these trips. I’m actually looking forward to the outing, even though I’m not at all looking forward to the shopping!

My younger daughter has different plans for tomorrow. Getting back to cleaning the basement! The cats have made a mess of the new basement, and she’s using that as an excuse to do a deep clean and organization of the space. That basement, however, isn’t much warmer than outside, even with the extra insulation added around the base of the house in the winter. During our recent deep freeze, it simply got too cold to work down there. It should get much better, and stay better, from now on. She wants to get it to the point that they can paint the basement. White paint on the ceiling (which is the exposed beams of the floor above) and special anti-mold and mildew paint for the walls. I don’t know if they want to do the walls white, too, but definitely a light colour. There are quite a few lights down there, but it’s still really dark.

We have a lot of big projects planned for when things warm up. Too many, really. The girls are focusing more on the inside, and are also talking about getting flooring for the kitchen and dining room, and refinishing the kitchen cupboards. Outside, I want to get that mobile coop built (and if that isn’t possible, we’re supposed to be getting a shed given to us that can be used until we can do the mobile one). Another project that will take probably quite a long time, as we acquire materials, is the outdoor kitchen. First priority is the timber frame roof. Once there’s a roof, we can be more leisurely about what we build inside. One side will have a smoker, clay oven, a “stove” opening to fit a large wok, and a grilling area. Two sides will have moveable work stations, and the fire pit will be added. The eaves of the roof will be longer past the wall of one side, where my daughter wants to have a forge.

Since we aren’t able to build the outdoor bathroom where we want to, until after a number of dead trees are removed, I want to do another, smaller, cordwood practise building. We need a new garden shed, so we can build a smaller shed – about 6’x8′ on the inside – in the maple grove, where a couple of trees had been removed while the power lines were being cleared. That is less of a priority, but since things will need to be built in stages, as we get materials, we might actually be able to get started on it this year.

Of course, there are also the high raised beds that need to be built. The outdoor kitchen actually solves something I was trying to figure out. The dead trees that we need to take down are quite large around. Too large to be practical for the high raised beds. I was considering cutting them in half, length wise, but now I’m thinking they’d be extremely strong upright supports for the outdoor kitchen frame. We can cut the lower, thickest, part of the trunks to the length we want, and then use the rest of the trunk for the high raised beds. It’ll mean more trees need to be cut down, but we need to do that, anyhow. With more than 20 dead trees that need to be removed, that’s more than enough to do both uprights for the outdoor kitchen, and the high raised beds.

Of course, there is the garden that needs to be worked on, including building new, permanent trellis tunnels, and other mobile trellises and supports. Plus trees and berry bushes to plant.

Oh, and on top of all these projects, we still need to dismantle that shed with the collapsed roof. We’ll be salvaging parts of it for building projects, such as the chicken coop I want to build. Plus, if we get that done first, I can use the space to build the outdoor kitchen, leaving more space available for the eventual garden beds we’ll be making nearby, where we get much better sunlight.

Feeling so energetic as the weather warms is kind of dangerous. I’m starting to plan way too many things! In the end, how much we actually end up accomplishing will depend on weather conditions. Last year, the flooding prevented a lot of the work I wanted to do, and the year before that it was the extreme heat. But if all we manage is to dismantle the shed, cut down some dead trees, and start setting aside the logs to use for the timber frame, that would be good.

I am so praying for good weather conditions this year, for the garden and for all the work we need to do outside! The last two years have been so brutal, we could really use the break!

The Re-Farmer

One step forward…

… one step back, shuffle to the left, take another step forward and do-see-do!

Ugh.

What a day yesterday was!

But first, let us appreciate this handsome boy.

Gooby followed me out to the gate while I was doing my morning rounds. This little boy LOVES attention and wants to be held.

Nothing like having a cat claw its way up your leg, while you’re trying to switch the memory card out of a trail cam!

Once in my arms, he happily burrowed into my neck and violently started licking my nose.

He has a thing about noses!

As I was heading back inside after my rounds, I was greeted by this.

Walnut’s siblings and cousins, minus one. The three smaller ones (two in front, one in the back) are siblings. The three larger are from a slightly older litter, as is the one that was elsewhere when I took this photo. The one with the orange head is called Pinky. His fur is an unusual combination of orange and grey that sometimes makes him look pink! The little one in the back has spots that are almost completely black, rather than the grey tabby markings the others have.

Walnut, meanwhile, did get spayed yesterday and, while it took a long time for her to wake up, is doing very well. Walnut and the bitties are all getting treated for ear mites, and getting medications to treat upper respiratory infections. Itty Bitty Bobby was found to have some fluid in his lungs, but Sprite has just “uncomplicated” URI.

Oh, and guess what?

They all already have homes waiting for them!

Walnut will be going to a household that has one cat – a rescue the Cat Lady placed awhile ago. The bitties will stay together, going to a home with an older couple, and first time cat owners! They’re going to be hooked on cats with those two. 😊

Tissue, on the other hand…

I’m still waiting for word on whether or not she’s been caught. They found no sign of her. The garage is being renovated, so there’s not a lot in there, but they even opened up the drywall, looking for her. Nothing. Not even a peep. There’s no possibility that she got outside, as there was no access to outdoors. They did finally open the garage doors, with the workers all standing there, to back the car out (after checking to make sure she wasn’t in the engine block) and look again. Nothing.

It’s a heated garage, and they set a trap up. Hopefully, they will find her today, but I’ve not heard anything yet. Once they have her, they will leave her in the trap, and we will meet in town. We will take her back, trap and all, and hang on to the trap until we connect again. The vet, meanwhile, as offered a free spay near the end of February, but if we want to get Tissue done, we will have to take her to and from the vet ourselves.

Honestly, at this point, I’m not worried about getting her fixed. Clearly, she is not adoptable, and I just don’t want to put her through that again. She will stay with us, indoors, permanently.

As for her escape, they are utterly amazed. We knew Tissue was a burly girl, but they were astonished by how strong she is. She was in a hard sided carrier that they’ve used to transport ferals. They’ve never had a cat break out of it before. The Cat Lady had set the carrier down to open her car door when it “jumped” and Tissue was gone. The door was torn off and the carrier broken apart.

The Cat Lady is just beside herself with worry over Tissue. They’ve all been looking for her, off and on, all day yesterday. All they could do in the end was set the trap and leave it. At least they can look into the garage from inside the house, through a window, and check regularly.

For now, it’s just a waiting game.

While that was going on, we heard from the financing company about our application for the replacement vehicle. Since my husband is the one with the income, we were doing this all in his name. He got an email from them, saying it was tentatively approved. They just needed some banking information to confirm our income on the application, an ID such as a driver’s license, health care card or passport, and a few other little details confirmed.

Well, my husband doesn’t drive anymore, and we never got his driver’s license transferred after the move. The one time he went in to try, they wouldn’t do it, because his name on his old license didn’t perfectly match his birth certificate. In my husband’s family, no one uses their first name. Tradition is, everyone has three given names, and uses their second name. This was a bit of an issue when he was in the military, but all they did was reverse his first and second names on some paperwork. Everywhere else, he just used his second name and surname. Well, that’s not okay here anymore, and after much painful waiting, he was finally told he needed to change his legal name to…. His legal name. We did eventually contact the ombudsman who confirmed my husband only needed to have at least two bills or bank statements with his full legal name on it, and he could get his license. By then, however, he was in no condition to go physically go back and go through the process. Not even to just get a photo ID.

Well, it turned out the bank the financing company works with wanted a driver’s license or passport – our health care cards don’t have photos on them. He has neither.

So we had to transfer the application to my name. The financial information didn’t change, since it’s household income and we’re working with a joint account, however they not only needed my driver’s license, but the banking information we sent needed to have my name on it. Which doesn’t show up on the paperwork unless I selected the print option, with letter head. We’ve been sending in phone scans of the required documents, which does make things easier.

It took a few tries to get something legible but, by then, it was late in the evening. On top of that, yesterday was a statutory holiday, which meant few staff and everything was slower. Which is understandable. We’ll find out today whether the application, under my name, is approved.

Oh, one of the things that they needed to know is what “company” I worked for. Which confused me until she mentioned that we said we had a custodial arrangement, leaving us with no rent or mortgage payments. She thought that meant we were the custodians of a building, like an apartment building or something, owned by a company. So I explained that, and now my brother’s name is on the paperwork as the company/owner we have an arrangement with. They don’t need to contact him. They just needed something on the paperwork. I also explained to her that I can’t have my own income, because anything I earn would be deducted from my husband’s disability payments. That cleared up some confusion on her part.

Meanwhile, a daughter and I went out and emptied the van of our belongings, then put the set of all-season tires in the back. We won’t need them anymore, and with dozens of tires scattered around the farm already, I didn’t want to add to the piles! If the approval goes through, I can just grab the van and go, and come back with the replacement vehicle.

If it doesn’t go through, well… we’ll just put the stuff we need back, and keep going as is.

I’m really trying not to get my hopes up about getting this vehicle. True, we’d do better with a truck or van but, my goodness, even a 2013 Escape will be the most luxurious vehicle we’ve ever owned if we get it! We’ve never had a vehicle newer than our 2007 Grand Caravan, and that was quite a few years old when we got it.

Well, we shall see how it goes.

Hopefully, we’ll get all sorts of good news today, both about the vehicle, and Tissue!

The Re-Farmer
Analysing our 2022 garden: starting seeds indoors, and other physical challenges

Okay, it’s that time! I’ll be working on a serious of posts, going over how our 2022 garden went, what worked, what didn’t, and what didn’t even happen at all. This is help give us an idea of what we want to do in the future, what we don’t want to do in the future, and what changes need to be made.

Our 2022 garden had a lot of challenges, and a lot of failures. Some of challenges and failures started well before we planted a single thing outdoors.

With our short growing season, we need to start a lot of things indoors. That, in itself, is expected and not a big deal. Our circumstances, however, have thrown in some major difficulties.

Fourteen of them, in fact.

Well. Sixteen, when we were trying to get them going this year.

Our indoor cats.

The other challenge is a combination of space and light. This house is oriented to the East. Our largest windows face the sunrise – with a grove of 60’+ spruces not far away. Our south facing windows are smaller and inaccessible for the purpose. The exception to that is the sun room, however the sun room is not warm enough to start seeds in when we need to. Plus, during colder weather, we allow the outside cats to use it for shelter.

Which means we need to figure out how to start seeds indoors, provide adequate artificial light, and protect the seedlings from cats that are determined to either roll on them, or eat them!

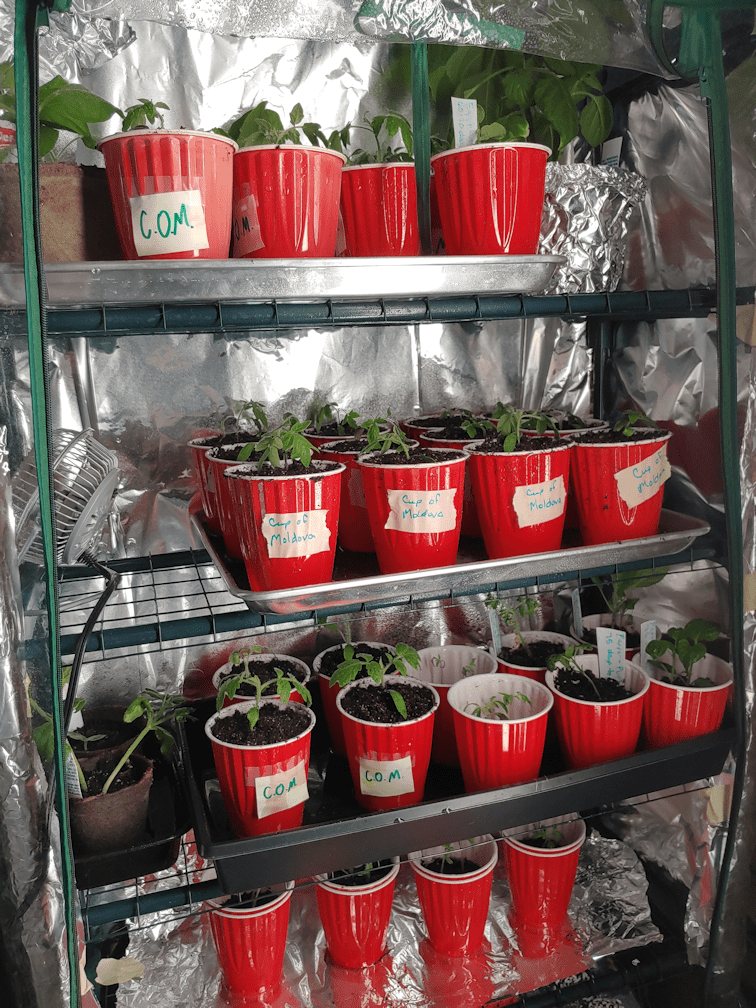
The first solution was one that we started doing last year. We have two aquariums that we have been able to convert into greenhouses, of a sort. When we moved out here, we brought our big tank, with a second light fixture to replace the kit light. Both work just fine, and provide adequate light for starting seeds.

The corner of the living room the tank sits in gets cold, so we added rigid insulation against two walls for extra protection. We were also able to get a warming mat to place under seed trays of things that needed extra heat. Since the lights can’t be raised or lowered, we used cardboard boxes under the seed trays to adjust the height, with new plantings closer to the lights, and larger ones lower down, rotating and adjusting as needed. We built frames with hardware cloth to cover the top of the tank, which both protected the seedlings from the cats, but also allowed more air flow.

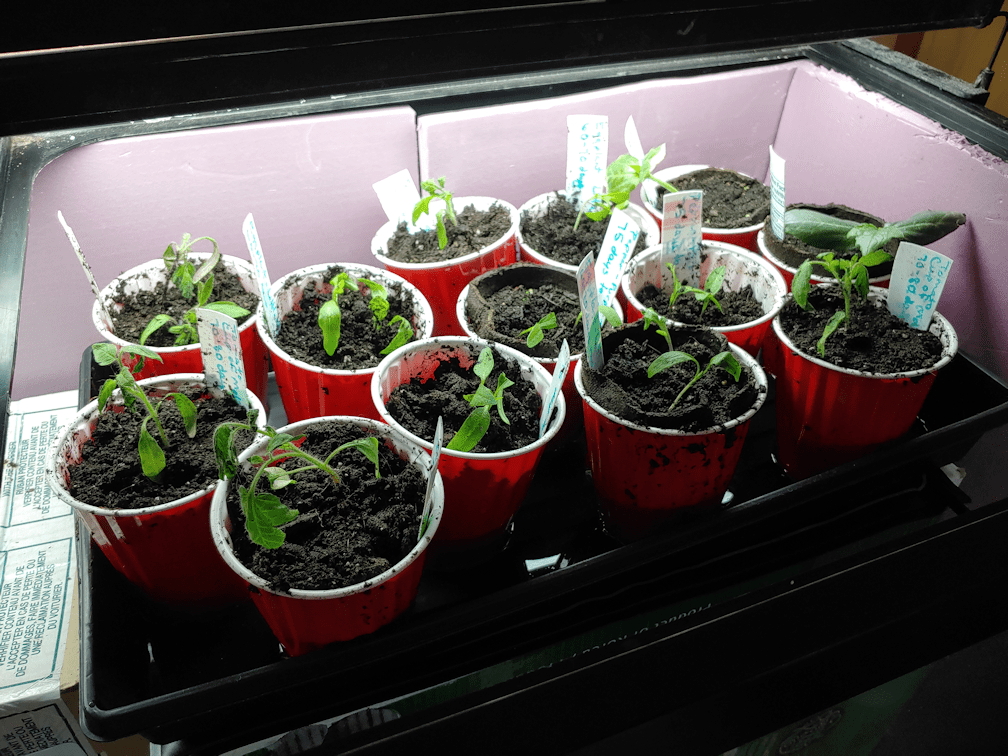
This above picture was taken with the hardware cloth covers removed for access. As you can see from the bedraggled seedlings, we didn’t quite manage to protect them from the cats. More on that later.

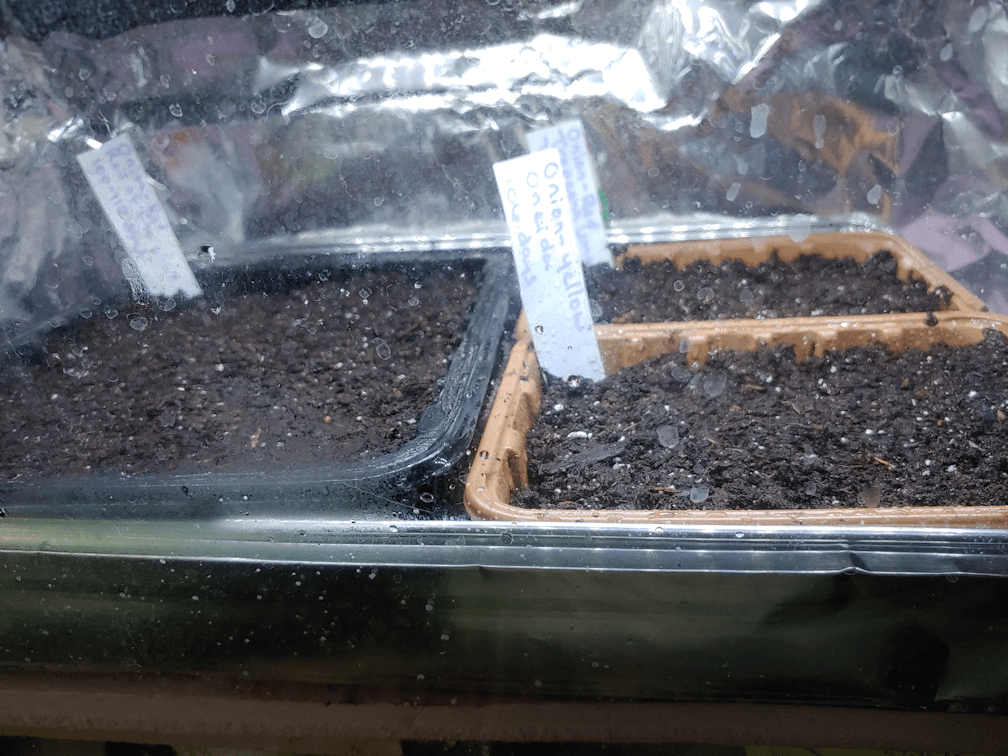
The other tank is much smaller; just a 20 gallon tank. It, too, tended to get chilly, plus the light it came with was not as bright as having two lights, as with the large tank. It has insulation on three sides to protect from the chill walls, which also got covered in aluminum foil to reflect the light.

When we first started using this tank the previous year, we used the original lid it came with. The cats were incredibly determined to get at the trays below, and were able to reach through the opening for the filter, no matter what we used to block it, completely destroying the trays below. This year, we found some window screens in a shed, and used one of those as a lid, weighted down with hand weights. We removed the light from the bottom of the original lid and attached it to a foil lined piece of rigid insulation, and simply set it on top of the window screen. The cats still sometimes managed to knock the weights around and displace the screen but, over all, it did keep them out.

The problem with both tanks, but especially the little one, was air circulation. For that, we used a tiny fan we found in one of the basements while doing clean up. We could put it right into the big tank, or on top of the hardware cloth covers, aimed downwards. For the small tank, we could just set it on the screen, also aimed downwards. Ultimately, though, we used the small tank as little as possible.

We had an awful lot of seeds to start indoors, however. Way too many to fit in the tanks. Since the seeds needed to be started at different times, we could start the earliest ones in the tanks, then rotate them out when the next seeds needed to be started.

The question was, rotate them out where?

One of my daughters had bought a mini greenhouse for me the year before, so we brought that into the living room. We also bought a long, narrow, LED shop light to illuminate it better. That worked out well enough that we later bought a second one.

We set it up as close to the window as we could, on a chair to catch more light. The only way we could use the light, however, was to hang it from a plant hook in the ceiling above, so that it rested on the chair as well, oriented vertically.

The cats were absolutely determined to get into it!

They managed to squeeze in from under the chair, so we tried taping the plastic cover to the chair.

That wasn’t enough.

We added pieces of cardboard to block the spaces they were squeezing through.

It… mostly worked.

In the end, it was a combination of taping the bottom, the cardboard, and covering the back and sides of the frame with aluminum foil – which also helped reflect light onto the seedling better.

They still managed to get in.

I came out one morning and found cats had somehow squeezed through one of the zippers, pushing it open more, and rolled all over a couple of the trays.

It was such a disaster!

We did managed to save some of the seedlings, but not all. Thankfully, we had seeds left for some of them and were able to start over.

We were eventually able to keep the mini greenhouse sealed up well enough to keep the cats out, but it meant keeping the plastic cover on and closed up at a time when the seedlings didn’t need a cover. This meant no air circulation in there at all. Even so, there were times when a cat or two managed to get in, and try to eat some of the seedlings!

I was able to rig the little fan up inside the mini greenhouse, aimed at the walls in such a way that the air flow would be pushed upwards and around the whole space.

That little fan got one heck of a work out!

So we finally got that working, but there’s not a lot of space in between the shelves. Before long, some of the seedlings began to outgrow the mini greenhouse. They needed to be moved out, and the only place we could move them to was the sun room – but we had to wait until it was warm enough!

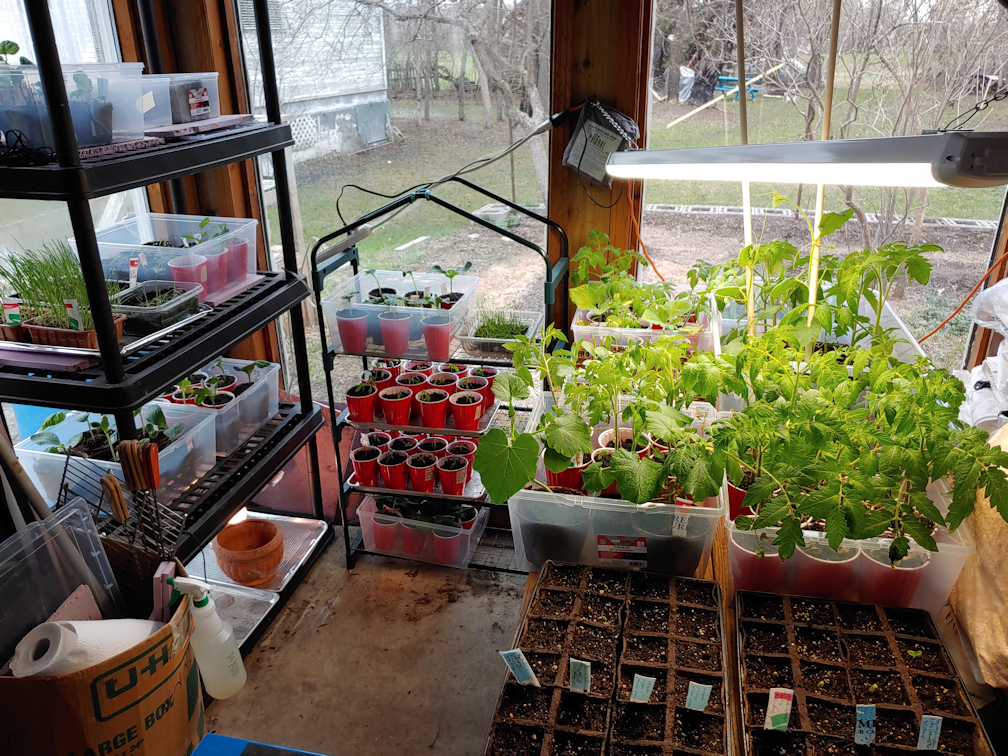
Eventually, we were able to move the largest seedlings onto shelves in the sun room, while other seedlings got rotated into the mini greenhouse, and newly sown trays were set up in the aquarium greenhouses. We had our seeds organized by when they needed to be started, with the earliest started 10 weeks before our average last frost date, then 8 weeks, 6 weeks and finally 4 weeks.

We still ran out of space.

In the end, we set up a surface to hold seedlings over the swing bench, and eventually we could move the mini greenhouse to the sun room – and finally take the cover off! The second shop light was hung above the plants over the swing bench, and we eventually hung the one from the living room on the inside of the shelf.

For a sun room, the sunlight doesn’t actually reach far into the room.

There were so many things that needed to be started indoors! In fact, most of what we were growing needed to be started indoors, with only a few things that needed to be direct sown.

That’s not really going to be changing, so we need to figure something better out. How do we provide the seed trays and seedlings with the light, air flow and space they need, while also protecting them from the cats?

Well, the girls and I have been talking about it, and the only real solution we have is to find a way to keep the cats out of the living room completely, and turn the living room into a plant room.

The question is, how?

There are floor to ceiling cabinets between the living room and dining room. On one set, the living room side is completely covered. On the other, there is a “window” at one shelf that allows access from both sides. It’s a favourite lounging place for David! Between the cabinets is an open space somewhat wider than a standard sized door for access between the two rooms.

The only way to prevent the cats from getting into the living room is to build a barrier in that space, with a door in it, plus another barrier to cover the “window” in one of the cabinets.

Barriers which need to be strong enough to withstand cats trying to get through, yet still be easily removeable.

One of my daughters has drawn up plans for a barrier with a doorway, while the “window” will just need a simple rectangular frame to fit the space. It’s basically going to be all wooden frames and hardware cloth.

Unfortunately, we’ll need to actually buy the lumber for this, and lumber is extremely expensive right now. There is nothing in the piles of salvaged lumber in the sheds and barn suitable for what we have in mind.

It’s something we’ll have to figure out soon. Some things, like onion seeds, could be started as early as January. February at the latest. Honestly, I just don’t see how we can get the materials and build the barriers that quickly. We could start off using the large aquarium, which might give us until March to get it done, but… I’m not very hopeful.

It would be a lot easier, if the cats weren’t so absolutely determined to destroy the seed trays!

The Re-Farmer
Sun room progress

I was able to get at least a bit of progress in the sun room today. This is what where it was left off after my daughter worked on it.

The only thing different is the addition of the new kibble bin that doesn’t fit on the shelf. The room has been slowly becoming a disaster, and using it as a recovery ward for the cats certainly hasn’t helped. Where the swing bench had been was the worst of it, with so much stuff fallen behind, and the messes the cats made. The rest was going to be easy after that!

Because of the mess the cats made on this side of the sun room, it needed extra cleaning after being emptied out.

It got emptied, then vacuumed, including around the windows and walls – lots of cobwebs! The windows finally got washed on the inside. The shorter extension cord could finally be wrapped on its hooks (there are no outlets in this room), and I added some hooks so the longer extension cord that is powering the kibble house is now running through the tops of the doors rather than the bottom.

Then the kittens got kicked out and the door closed so that floor could get a thorough washing. Some areas needed to be scrubbed by hand, and I still couldn’t get all the stains out. Last of all, it got rinsed of cleaners, with the ceiling fan running to help it dry faster.

It was getting pretty dark by the time I starting to bring stuff in again, though mostly to protect some things from critter damage. The floor is still damp, too.

After five years, I think we’ve got a pretty good bead on how we need to use this space. The main thing is mobility friendly access. When we first moved here, my husband kept his walker in the main entry, folded up against the washer and drier. There were two problems with that. First, it was in the way of using the washer and drier, and second, it became increasingly difficult for him to get in and out with it. The door’s threshold is fairly high, requiring him to lift the walker wheels over it, and then there are two steps to go down. He didn’t mind it too much at first but, over time, his back just kept getting worse. Then we finally cleared and cleaned the sunroom, which was a HUGE job (I still can’t believe all the stuff my parents had in there!). My dad kept his own walker in the sun room, and now my husband’s walker is kept here, and it’s much easier for him to get in and out. I still want to get little door ramps for him, as he does still need to lift his walker a bit to get through the door, but it’s greatly improved his ability to get in and out by using the sunroom.

So access is a primary concern when it comes to how we want to set things up.

We also use the room a lot for keeping tools and supplies, and we need to find a better way to organize those. The table saw I found in one of sheds had been by the door into the old kitchen, but there it ended up blocking access to things, It’s now set up near the counter shelf by the doors to outside, with the miter saw I got at a garage sale sitting on top of it for now. The swing bench will stay where it is now – right in the corner, with no shelf behind it. The last time we moved things around, I’d set it up against the wall with the two windows, but my husband moved it against the shelf, so he could sit on it and see outside. That blocked access to the shelf and, before we knew it, all sorts of things were falling behind it and getting stuck – and of course, the cats took full advantage of that! So now the cube shelf will go against the wall under the bathroom window. I’m going to try and keep all the tool related stuff on that side.

We found using the room as a greenhouse was handy, but we need to figure out a more efficient way to do it. Being able to set up a surface to hold transplants over the swing bench worked out pretty well, even if it meant only the cats could use the bench! So this side is going to be organized in a way that we’ll be able to set transplants up again in the spring, including a better way of setting up the lights. For a “sun” room, it’s actually pretty dark in there!

One other thing we use this room for is an isolation ward for recovering cats. Which means we’ll be wanting to set up food and water bowls, and a litter box, which is currently in the cats’ house outside. It hasn’t been used yet but, once snow is on the ground, I think the kittens will figure it out! We’ll get another one for the sun room.

We will also be using this room to store things for the winter, until they’re needed again in the spring.

All of this, we will need to figure out as we bring things back inside. Now that that floor has been cleared and sanitized, we can work out how to organize things most efficiently.

While I was finishing up and things were getting dark, I was very happy to see how well the new solar powered motion sensor light was working out. When I checked on it last night, it didn’t turn on. It’s mounted to the top of the outer door, so it should have turned on when I opened it. It didn’t turn on, but I startled some critter out of the kibble house! I could hear it run across the yard, and slam into the chain link fence as it went under it. It sounded bigger than a skunk. I’m thinking racoon, but they usually freeze instead of running away, so I’m not sure. As I came out of the sun room to check, I heard more noise – from the four deer in the yard that got startled and ran out towards the barn! I grabbed a flashlight and went back out again. I could hear something was crunching kibble, but couldn’t see what it was. From the sound, I was pretty sure that one, at least, was a skunk, which turned out to be correct.

With all that going on, the new light would have been very helpful, but it just wasn’t turning on. I knew it worked, because when switching it from off to either high or low light, it turns on and stays on for about a minute before shutting itself off. I had turned it on just before starting to screw it onto the door. Thankfully, the way it is sitting, I didn’t have to unscrew it from the door, and could shift it enough to reach the switch and turn it on. I’m not completely sure why it was off, but my guess is that I switched it off by accident. While I was attaching it to the door, at one point it slipped and started to fall. I managed to catch it, but must have hit the switch in the process. Whatever it was, I got it going again, and set to the brighter light.

Which was really handy as I finished up! I had plenty of light to see what I was doing – and it even lights up as far as the inside of the kibble house. The cats running around also triggered the motion sensor, which means any skunks, racoons or deer will also trigger it. Hopefully, that will be a deterrent.

Ha! Who am I kidding! It won’t deter them, but it’ll make it easier for us to see what’s stealing the kibble!

If all goes well, we should have the sunroom organized and finished tomorrow. Then we can go back to putting the garden to bed for the winter. We’ve got some nice, warm days coming up, which means we can give the trees we planted one more deep watering before the temperatures drop again.

As long as the weather holds, there will always be a bit more we can get done!

The Re-Farmer
Old Kitchen Garden, wattle weaving progress

Oh, I am so happy!!! It’s almost completely done!

I went and borrowed my husband’s phone to take a picture. It’s my old phone, but of course he’s set it up to how he wants it – which turns out to include fingerprint scan to unlock it. I really hate that function. I find they don’t scan fingerprints well, and the last thing I’d want is to get locked out of my own phone because the thing can’t recognize my fingerprint. It could well be because my hands are so rough, it messes up my fingerprints. Either way, it looks like I won’t be borrowing his phone when I got into the city after all. It’s changed so much, I had to get him to tell me where the camera icon was! He does love his funky themes and designs. 😁

Anyhow…

Here it is!

I had enough long poles that I could do the back without having to overlap any. The only problem came when it was time to do just the taller posts. It wasn’t too bad when I was weaving around seven of them, but when it came to just the three at the turn, it was more difficult. I had the shorter pieces for it, but three poles just isn’t really enough to hold the wattles in place, though for some of them, I could push the more flexible tips into the previous wattles to lock them down.

There was lots left over when the inside of the L shape was done, and I wanted to use them while they were still green and flexible, so I went ahead and did the outside. The first thing that needed to be done was to hoe the soil out of the path and back into the bed, while also clearing and leveling where I estimated the uprights would go. Once that was done, I measured two feet from that long pole right in the corner, marking three places; the left and right are lined up with the back walls, while the center one is in the middle.

Knowing I would be working with much thicker poles, I spaced the uprights further apart along the sides, compared to the previous ones. That left me with four extra prepared posts. After using the pencil point bar and a sledge hammer to make holes for the posts, then sledge hammering the posts in place, I could see I wouldn’t be able to use the uprights at the ends, so I added another post at each end, just inside the posts supporting the end wattles.

When it came time to weave the wattles in, I used the longest poles first, with the thickest parts at the ends, so that the more flexible tops would go around the curve. Some of the posts were long enough to actually bend all the way around the curve! When I put in the second side, I was able to wrap the ends around the wattle in the first side. I was able to do this for the first several layers before I found myself having to weave a shorter third pole around the curve. Unfortunately, a few of the poles just couldn’t go around the curve without breaking.

With the more flexible ends going around the curve, this meant the ends built up higher, faster. Which I’m okay with. For the last few pieces, they weren’t long enough to go around the curve at all.

I will need more material to build up the curve, but I also want to build that corner higher, too. So what I need to look for now is a lot of thinner and flexible, pieces. If I can find enough of them, I might be able to not only build up the corner and the curve, but wrap a nice edging along the top, all the way around.

Finding appropriate materials to do this was surprisingly difficult, but I’m really happy with how it’s turning out. By the time this is finished, though, we probably won’t be able to accumulate enough materials to do it again anytime soon, except perhaps for some very small beds.

Once the walls are done, we can add amendments and more soil to this bed to build it up, and it will be MUCH easier on the back to work in it.

The Re-Farmer
Old Kitchen Garden: Wattle weaving progress

After finishing up my morning rounds, I did as much as I could with the wattle fence, using what materials we had been able to gather. There wasn’t much I could do with the longer sections. With the shorter part of the L shape, I was able to use a few single lengths, but even there I had to start combining them in pairs.

The girls had gathered some really nice, even pieces of maple suckers, though, and they were the perfect length for the wider end bit.

The red barked lengths are the maple the girls had gathered. When I used those up, I went to the pile of small willow branches I’d set aside and brought over the pieces that were close in size to the maple. Those are the greenish coloured branches. Last of all, I topped it with two thicker pieces of maple that I’d pruned from the nearby maples that are now clear of the branch piles. Those are are lot tighter, and will lock everything in place. I didn’t trim the top one to size yet, as I might need to move it out while the other section of wall is worked on. However, as it is now, that is as high as I intend to go for most of the bed.

It would be great if the whole thing could have been done like this! It looks so much prettier, with smaller gaps and more consistent sizes. The only down side is that such small pieces will also break down faster than the larger ones. It will likely still take a few years, but it’s something to be aware of.

I used more of the maple suckers I had gathered at this end, along with more willow that was left, and locked it down at the top with two thicker pieces of maple.

This corner looks a mess right now! It will be built up, end to end, until they are the same height as the walls at the ends. After that, it will be build up higher to match the heights of the debarked posts. By time I’m working on just the three tallest posts, I’ll be working with much shorter pieces, and should be able to tidy up the whole thing a lot more. Right now, it’s looking quite the mess!

That piece of 2×4 is my mallet.

At this point, I am out of useable materials. I think I will go hunting around the spruce grove for more material, before I start wandering father afield. The Red Osier Dogwood that we have would make excellent, flexible pieces, but that’s something I’m trying to encourage as undergrowth. I might still be able to harvest some, though. There might even be some young poplar I can harvest. Mostly, I just want to find enough material to finish this back wall. The remaining sections can wait until spring, if we have to. Once the back wall is done, the soil that has eroded into the paths can be hoed back into the bed and tidied up. I will likely use grass clippings that we still have all along the bottom of the wattle wall to keep the soil from falling into the gaps. Slowly, this bed will be built up to the height of the lowest sections of wattle, which will make growing in it MUCH easier on the back!

That’s about all I’ll be able to get done today, though. We’ve had another change in plans, with company coming tomorrow. We’re hoping to be able to have a bonfire with the remains of the big branch pile that got chipped, but it will depend on the weather. The forecasts keep changing. Just in case, we need to be prepared to move indoors, so we’re going to have to start moving things like our canning supplies back into storage, and all that other stuff that just sort of takes over every flat surface! We’ll need to be able to expand the dining table, too, which will take up twice the space.

We are terrible house keepers. 😂

But I’m really looking forward to seeing my BIL and his family, and really appreciate that they are willing to make the long drive out here, knowing that my husband can no longer go to their place. It’s going to be awesome!

The Re-Farmer
Garden bed and kibble house progress

Today’s high was supposed to be 19C/66F. I don’t know if we reached it, but with the blustery winds, it never felt that warm. I’ve been keeping a close eye on the weather, and my app on my desktop includes historical data for each day, including 30 year record highs and lows for various data. I noticed that today had a record high for snow of 14cm/5.5in in 2019. In fact, we set record highs for snow on the 10th, 11th and 12th, all in 2019. We were just coming to the end of our second year here, so I went looking at my blog posts for those dates.

Ah, yes. I remember that blizzard!

The amazing thing is that, just days later, all that snow was gone, and while we were still cleaning up storm damage, everything was back to green and sunny!

Depending on which app I look at, however, we might be getting a mix of snow and rain starting tomorrow night, and by Friday afternoon, we’re expected to get between 3-6cm (roughly 1-2 inches) of snow.

That meant my focus was preparing to build up walls around the L shaped bed in the old kitchen garden.

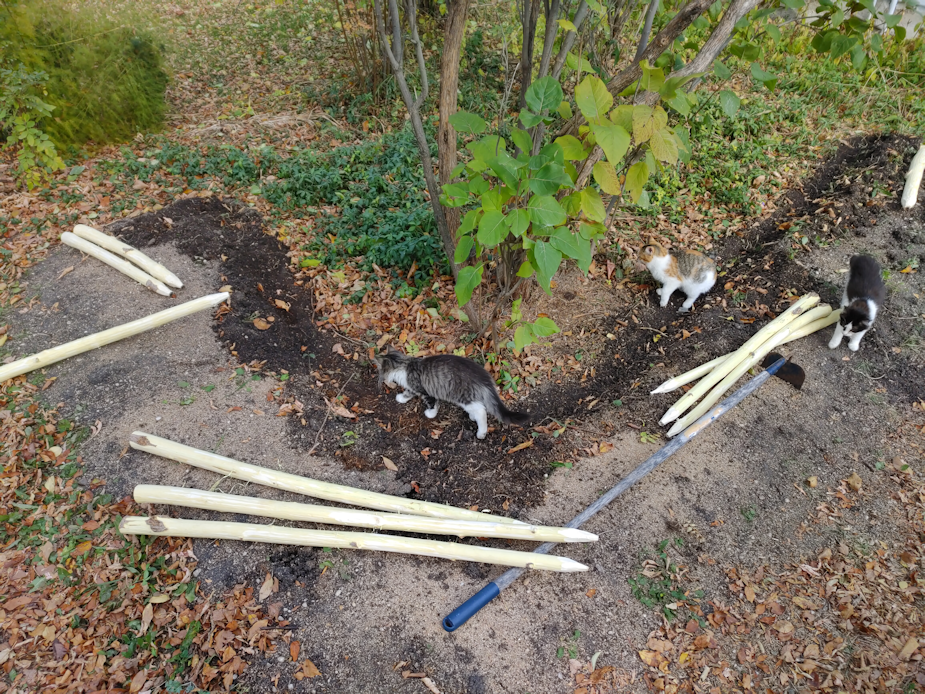
I went through the maple pieces I’d cut yesterday and started cutting them to size, cutting points on them, and debarking some of them.

I had lots of furry help. So much help, one of the kitties got plumb tuckered out!

From the longest, straightest pieces of maple, I cut three into 4 foot lengths. Then I went through some of the strongest pieces to cut four 3 foot lengths, then four 2 1/2 foot lengths. After that, I just cut as many 2 1/2 foot lengths from the thinner straight pieces as I could get out of them.

I used a hatchet to cut the points on all of them. That was probably the most unpleasant part of the job. Not so much for the thinner pieces, but for all the thicker ones. I’m ambidextrous for most things, left handed when it comes to fine motor control, but for some things, I am completely right handed.

Using a hatchet is one of those things, and my right hand has been in terrible shape lately. I had difficulty gripping the hatchet, and had to stop frequently to give my hand a break.

The draw knife was awesome for debarking the wood. It’s still quite green and came off easily. I don’t have a way to secure the pieces I’m working on well, so there were quite a few times when I was pushing instead of drawing the blade – and it works just as well that was, too. For some of the thinner pieces, though, it was easier to just use a knife to debark them.

Also, no, that is not rust on the blade of the draw knife. It’s stained with tree sap.

The stack of the thinnest pieces did not get debarked. It would have taken forever and, at their sizes, it would have been awkward. The pieces that will be taking the most stress, however, have been debarked.

That all took a few hours.

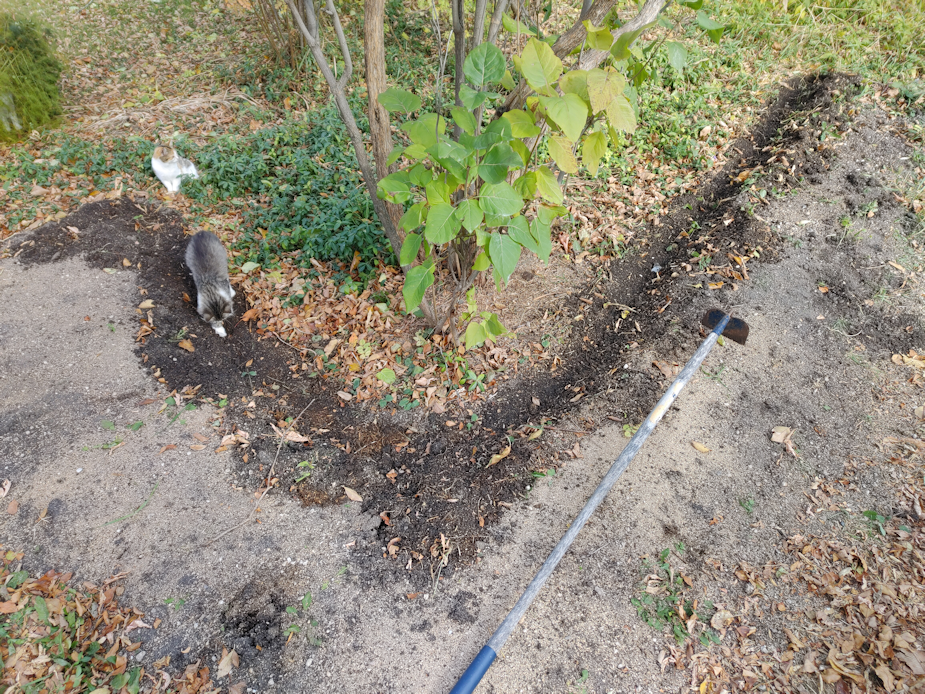
Then it was time to get to the garden bed. I pulled the lettuce I’d left to go to seed (it looks like we’ll get seed from just one of them) and got ready to prep the bed. Without walls, soil was falling into the path and the inside of the L shape, and I don’t like wasting good soil!

I used a hoe to draw some of that soil back into the bed, and level off the edge, where the uprights will be going.

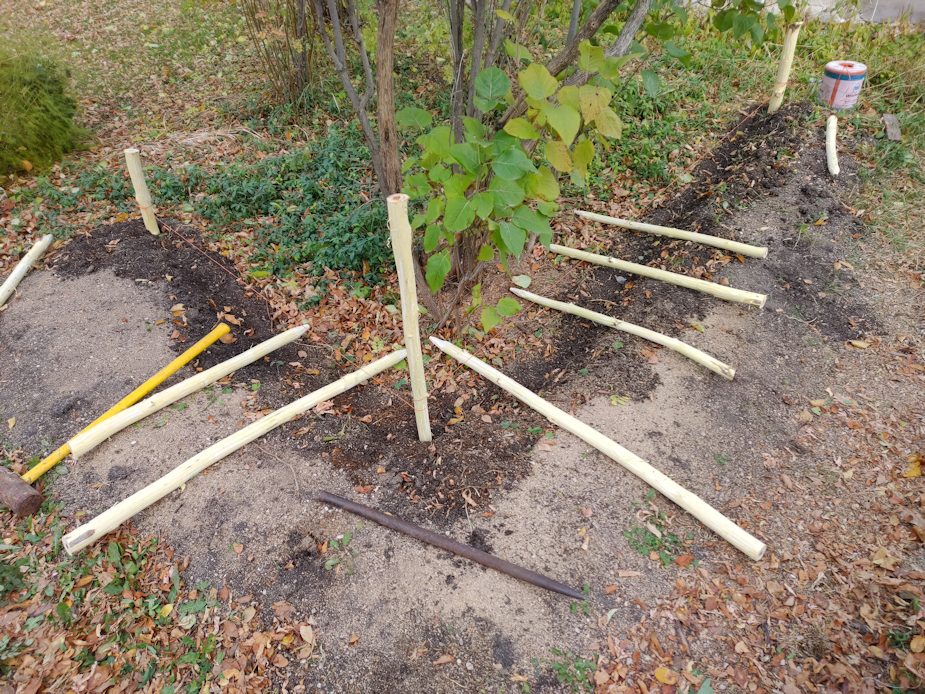
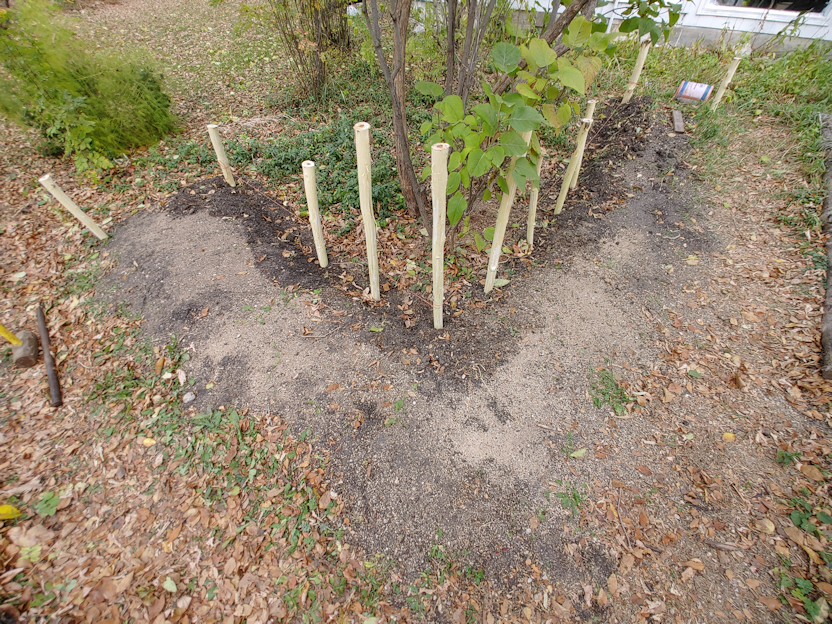
The three longest pieces will form a triangle at the inside of the bend. When we start weaving branches through the posts, these will be taking the most stress. Working out from there, one 3 ft piece will go along the short end, and three down the long end. If I have enough materials to do it, I plan to build up the wall higher at these posts, as much to wall around the lilac as to create a wall for the bed.

The four 2 1/2 ft pieces are for the corners at the ends of the bed.

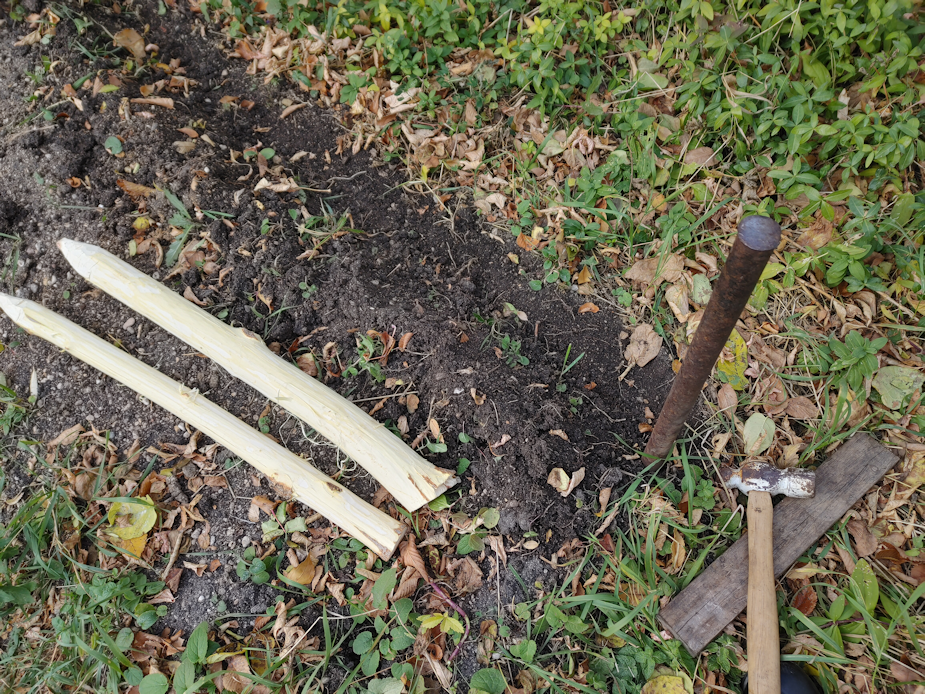
To install the posts, I used the pencil point bar and hammered it into the ground.

Unfortunately, that old hammer doesn’t have the right handle on it, and the head fell off again. I had to switch to a sledge hammer.

I really didn’t want to switch to the sledge hammer.

Ah, well. It worked better. I’m just going to be in a world of hurt, tonight!

I started by placing three posts in, then tied twine between them as guides for the rest of the posts. Then I laid out the spacing for the remaining two 4 ft posts, and the four 3 ft posts.

At this point my daughter, who had been working on putting salvaged shingles on the kibble house, ran out of roofing tar. I’d only picked up a small can for patch jobs, never expecting to need more.

So I left my daughter to continue pounding in the posts while I went into town to pick up more tar, and a few other things while I was there. When I came back, I found my daughter lying on a tarp on the ground surrounded by kittens. She is having much more success at socializing than I am!

She had even pounded the other two corner posts at the ends of the L shape.

The weather was starting to get worse, so I quickly filled in the gaps with the smaller 2 1/2 ft posts.

The long end of the L shape will be only 2 feet wide, so the end posts needed just one more added in between them, plus three more along the north side. The short end of the L shape needed only 2 more to fill the gap. Since this end can be accessed from three sides, we’re okay with it being wider than 2 feet, so the end posts there got two more in between. The rest of the posts will be for the outside of the L shape.

From the looks of it, I’m going to need to find more pieces to be able to finish the outside of the bed, but I’m not concerned about that right now. It’s the inside of the L shape that I need to get done first.

By this time, however, dark clouds were rolling in and it was starting to look like rain, so I left the job at this point and focused on cleaning up and putting away anything that might blow away. My daughter, meanwhile, finished the roof of the kibble house.

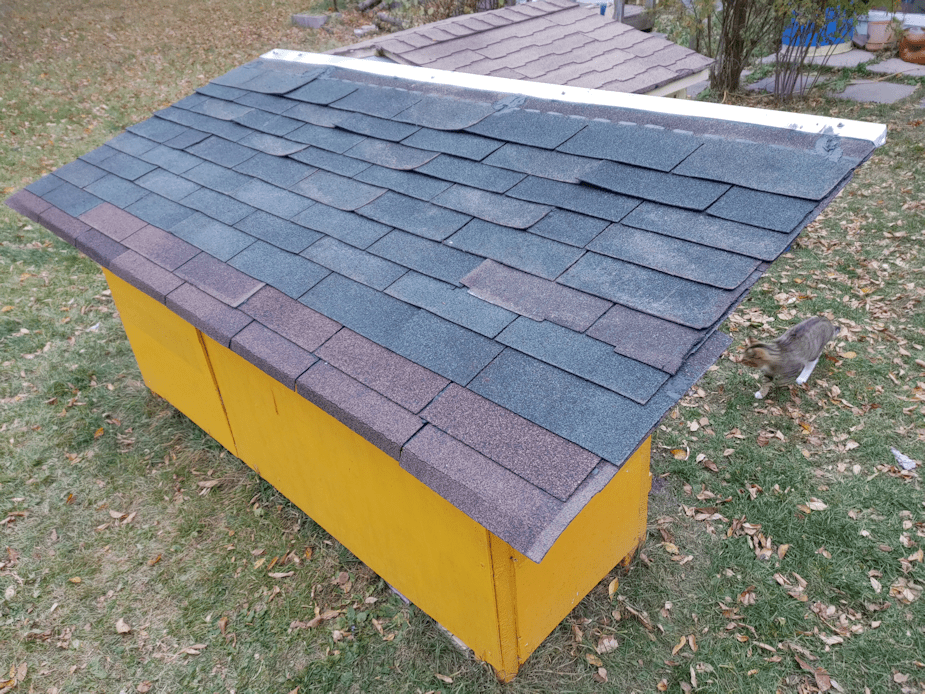
The green shingles are almost 50 years old and are in pretty rough shape. The brown ones are better, but they’re almost 30 years old.

The water bowl house roof is thinner plywood, so we’ll be using pieces of metal roofing that we’ve been scavenging for various things since we’ve moved here. If we used shingles, the nails we have would go right through by nearly half an inch, and that would be a problem! I dragged a piece of metal roofing out from the barn that we can cut in half and lay side by side to cover the roof of the water bowl house, but I also spotted a stack of corner pieces. I brought one over, and helped my daughter put it on the edge of the shingles on the kibble house. I found a bin of metal roofing screws in the warehouse, so I grabbed a bunch for when the water bowl house is done, and my daughter used a few of those to install the metal cap on the edge of the roof, using the screw holes that were already in the metal – after making sure to put some tar under each hole, first.

Almost everything about the kibble and water bowl houses has been done using scavenged bits and pieces we’ve found around the property, and a lot of it is pretty old and starting to rot. We don’t expect these to last long, but using paint and even decades old shingles will help them last longer. At some point, it’ll be nice to be able to build versions using new materials, all well measured and cut and leveled, etc. But this will do for now.

Once this was done, I set up a longer extension cord I found that was in good shape, and was able to plug in the cat’s house. We lifted the roof and put in the high density rubber mats I’d dragged out of the barn, which will help insulate the floor. There’s a thick scrap yarn crocheted blanket that is laid out on top of the mats, too. We will not be using straw this year. As much care as we have taken with the terrarium heater bulb, I would much rather not have straw in there! The heat bulb is working fine, with the heat shield still in place, and the timer is set to light sensor, so it will turn on when it gets dark, then off again when it gets light. The smoke detector was tested, too, and it’s working fine.

Once the water bowl house is done and set up where it will go, we’ll be able to plug in the heated water bowl through the cat’s house entry, too.

Tonight, the cats will have a warm and cozy place to stay if they start feeling too chilly. I especially hope the tiniest kittens will start using it!

As for me, I’ve pain killered up and hope I’ll be able to continue in the old kitchen garden tomorrow. For the weaving, I plan to cut the willow branches and use them right away, while they are still very green and flexible.

I really hope this works out. Otherwise, that’s a lot of work for nothing! Well. Not for nothing. Now that those posts are in, even if wattle weaving doesn’t work, I could still use them to hold whatever we find to use instead. It’s all fly-by-the-seat-of-our-pants work, anyhow!

Which is half the fun. 😊

The Re-Farmer

Multipurpose clean up

Today did not work out at all as planned. My daughters and I were originally going to take my mother to a marsh in the area to see the migrating birds – something my mother tries to do every fall. Unfortunately, my daughters weren’t feeling well, so we’ll be rescheduling that. We only have today and tomorrow for good weather, though, so I was going to go over to deliver some thanksgiving dinner to her and, if she felt up to it, maybe head to the marsh anyhow. Before heading over, I pulled my mother’s car out of the garage to do a bit of fall clean up – and discovered a flat tire! I pumped it up, then used our van. I couldn’t see anything that could cause a flat, and when I came home, the tire was still holding air, so I don’t know what’s going on there. I’m just glad I decided to clean out the car first, which requires moving the car out of the garage. Where her car is parked is so tight, I might not have seen it before leaving, if I hadn’t. I’ve left it out so we can check the tire any time we’re outside.

So there was no going anywhere with my mother, since it’s difficult for her to get in an out of our van. Instead, we had thanksgiving dinner together with the food that I brought. I am happy to say that she actually tried and enjoyed the peanut soup (after having an angry outburst over the fact that I brought soup at all), and even the roasted vegetables – though she did do a double take when she spotted a sunchoke, asking me what it was. When I told her, she started lecturing me about how I shouldn’t be growing “strange” things – after she had already eaten it! 😄

Overall, it was a good dinner, and I’m glad we were able to do it, in spite of some of the very strange attacks she came up with during conversation. 😄

It also meant that I was able to get home with the conditions still good enough to get some work done outside – though it did get very windy!

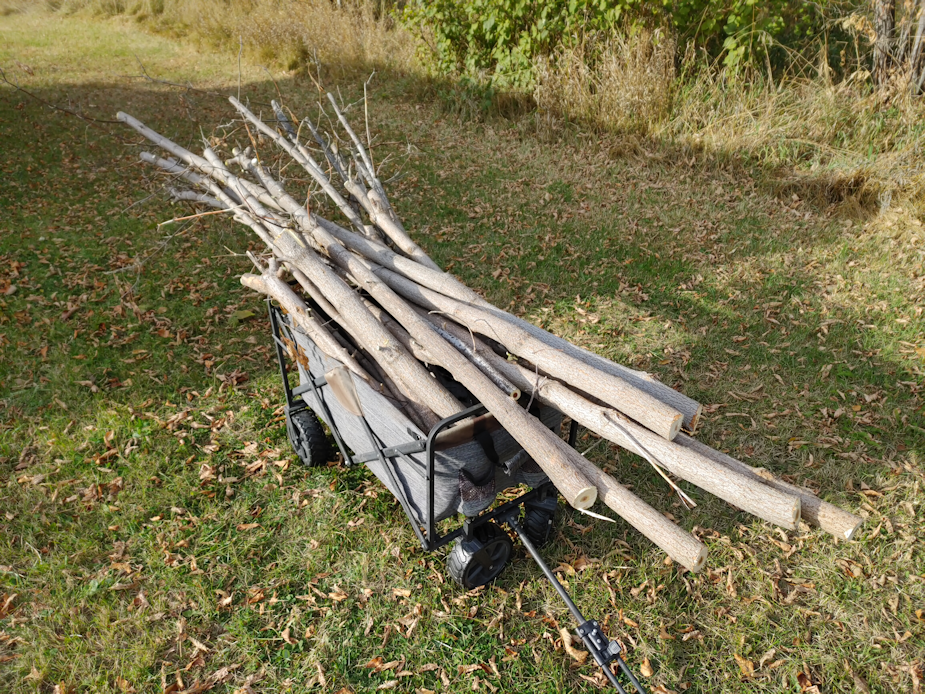
I need to build a wall along the “inside” of the L shaped bed in the old kitchen garden. Given what materials we have on hand, I was thinking of doing a wattle weave. I had intended to use lengths of maple suckers that I need to clear out of the maple grove, but after looking more closely at them, none of them were suitable for weaving, nor did they seem adequate for supports.

While bringing kibble to the tray in front of the pump shack, I took a closer look at some maple growing next to it. There was a maple that had been cut down, and suckers have been growing out of the stump for some years, to the point that they were getting into the power line running into the pump shack.

Lots of nice, straight and strong suckers, that would make good upright supports.

So that’s what I worked on today.

At some point, we should come back to the stump with a chain saw and try and clear it away even more. Maple stumps will send up suckers from the stump of a dead tree for ages, if something isn’t done to make sure it’s completely killed off. From what I could see, this maple has been cut down at least twice over the years, and been trimmed of suckers a number of times, too.

You can see where the power line attaches to the outside of the pump shack and runs in. That dangling board used to be attached to the side of the shack somehow. Something needs to be done about that, since it’s supposed to be supporting the line, not hanging off of it! Some of the suckers I cut away had branches tangled up in there. I’m very glad to have them clear of the shack!

I saved the straightest pieces. Hopefully, they will be easy to debark I wouldn’t want them to root themselves and start growing.

There was a lot of material that could not be used, too.

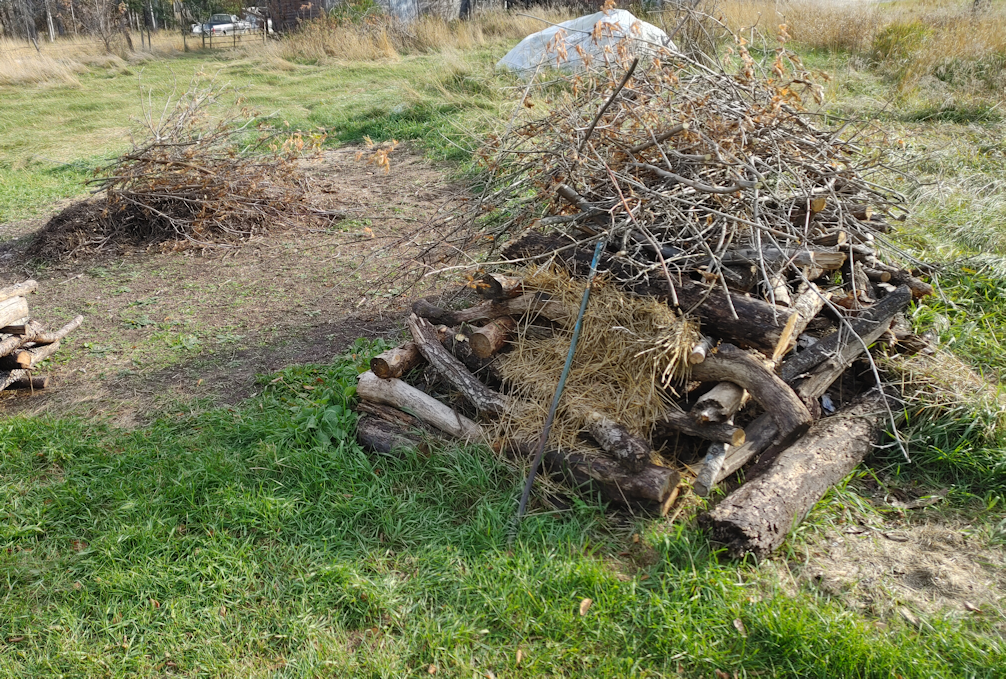
At first I put the cleaned up branches on the pyre stacked over the burnable garbage that’s too much for the burn barrel. On a calm day, we’ll have ourselves a bonfire! I ended up putting the last of the branches on the mostly composted bits that are left over from the branch pile that got chipped, just because there was getting to be too much on the bonfire pile.

I like being able to get more than one job done at once. I got to do some necessary clean up by the pump shack and it’s power line, and at the same time acquire materials to use for a garden bed or two!

As for the branches needed to weave around the uprights, I should be able to prune away suitable pieces of willow branches from the trees in the yard. Trees that have already been trimmed professionally to clear branches from the power line to the house, and that we need to keep trimmed. Willow is very enthusiastic about growing new branches after being pruned, and it’s been a couple of years. I’m just not sure we’ll have enough to do the wattle weaving I have in mind, but there are other willows in other areas in and around the yard that could probably use a good pruning, too!

I’m looking forward to trying to figure it all out, tomorrow. The temperatures are supposed to drop after tomorrow, but we’re also still expecting rain rather than snow, so it shouldn’t be too bad to get work done outside.

Now, if the wind would just die down, that would be great!

The Re-Farmer
Small builds, and green tomatoes

It has been absolutely gorgeous outside today. As I write this, we are at 14C/56F. Just perfect to be outside for many hours!

I was planning to build a soil sifter today, but after fussing with the trail cams this morning, I decided I needed to build a new stand for one of them, first. The gate cam had stopped working again, even though I’d just changed the batteries. The day before, there were only 3 files recorded before it stopped working. The gate is more of a security priority, so I took the new solar powered camera from by the sign and set it up on the stand at the gate. Which was not as good of a set up, but it would do.

I brought the camera that had been at the gate inside and tested the batteries. They had gone down a lot, for being used only for a day, but they were still well into the green. After checking the camera itself out for a bit, I decided to take a scouring pad to the battery contacts in the flip-down cover. Water had gotten into it at some point, and there was rust, but I had given them a scrubbing before, and things were quite dry. Still, it was really the only thing that was available to do. Sure enough, it worked!

I wanted to leave the solar powered camera at the gate, so I took the now working camera to the sign. I could screw it onto the mounting plate, but it’s a very different design. Instead of screwing into the bottom, it screws into the back. With the other camera, I could swivel it into an angle that covered the front of the sign and, because it’s a wide angle camera, it also included the road and intersection. Not being able to swivel this camera meant that it was basically facing the sign, on edge.

I figured my best bet was to use the old flag stand the camera was mounted on at the gate, and bring it to the corner by the sign. That would actually work better than having it mounted on one of the supports holding up the tipping corner fence post. Which meant making something for the new camera, that I could attach the mounting plate to, for the gate.

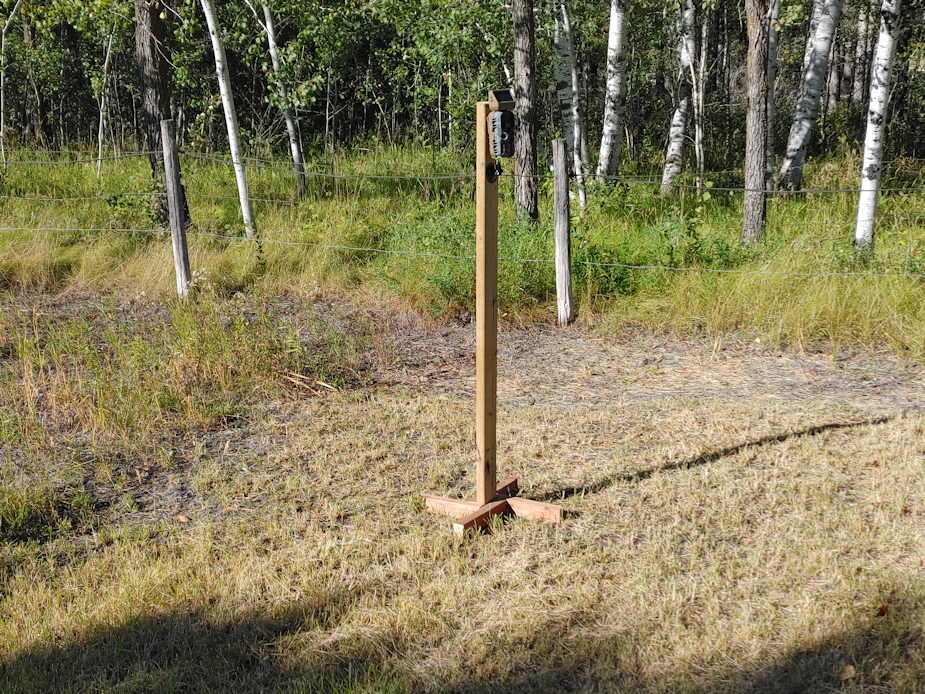
After scrounging in the barn for some scrap wood (I spotted a couple of Rosencrantz’ kittens just outside the barn!), this is what I made.

The solar panel makes the camera very top heavy. When it was mounted by the sign, there were many files motion triggered not by someone or something going by, but by the wind making the camera wobble on its mount. I made this stand taller, and attached the mounting plate low enough that I can use the strap that also came with it, to secure it more firmly and ensure no wobbles will trigger the motion sensor.

I moved the camera to the other side of the driveway, so that the solar panel will get maximum exposure to sunlight. With the wide angle lens, it also needs to be closer to the gate than the other camera. Once I find the sweet spot for coverage, I am thinking of pegging the legs to the ground, for extra stability. It would be better to have something like a sandbag, though, since I’d have to move it when mowing in the area.

Once that was done, I could start on the soil sifter.

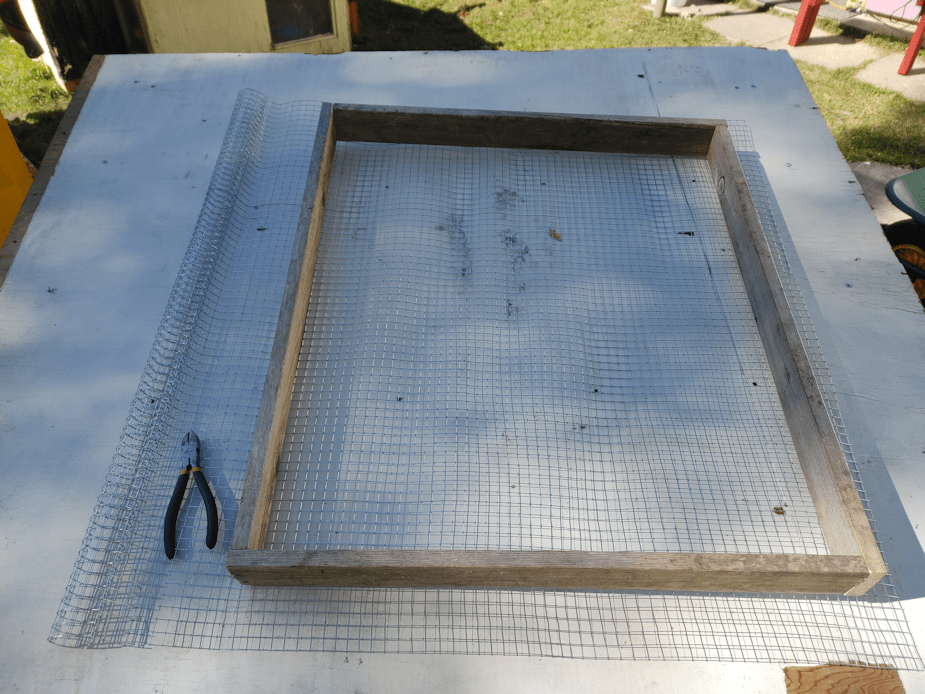
I measured our wheelbarrow and cut pieces for a 2’6″ x 2’4″ sifter. The straight pieces would form a box, and the angled pieces would make a frame.

At this point, the only thing holding the frame together are the metal right angle brackets on the corners. The frame would be secured to the box, with the hardware cloth sandwiched in between.

The roof of the water bowl house made an excellent surface to unroll the 1/2 inch hardware cloth, then use the box to measure out where to cut the wire. Once cut to size, I tacked the mesh to the box with a few staples, just to hold it in place while adding the frame.

There is, a problem with using salvaged wood for everything.

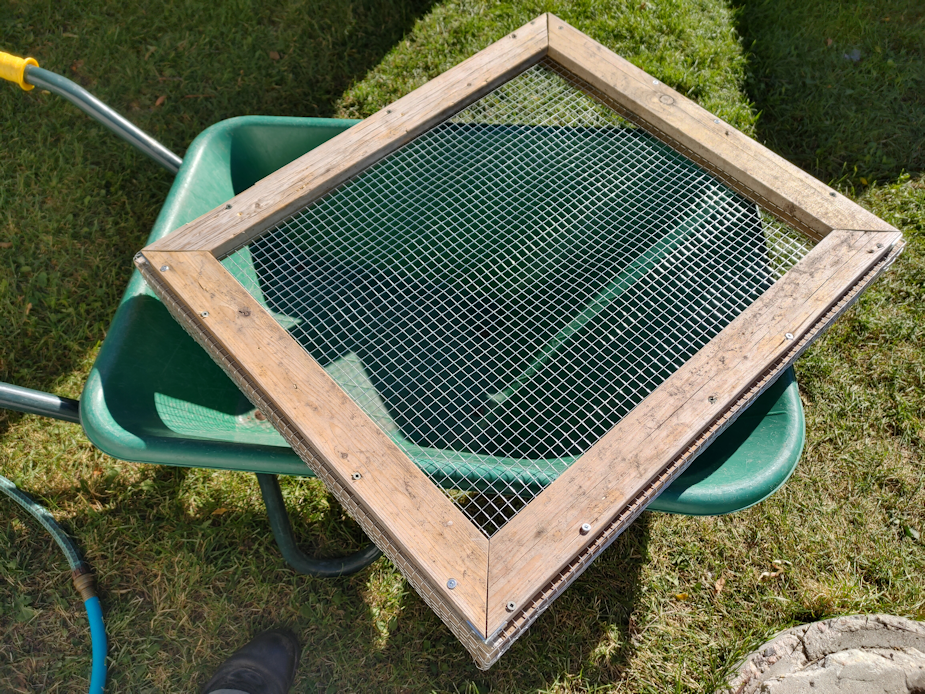
I should have made the frame pieces about an inch longer. I didn’t compensate for the slightly extra width the box got from how I attached them at the corners. However, the wood is warped and uneven, which meant there was no way I could match the frame to the box, even if I’d made the frame part bigger. In several places, I had to put the screws in at an angle to catch the edge of the box. I had been using a drill to make pilot holes, only to break the bit part way through, and I didn’t have another in that size. The wood is old and very dry, so it was easy to put the screws in without a pilot hold but, as you can see, the wood started to split in a couple of places. Some of the wood was already splitting on its own.

Once the frame and box were secured to each other, I folded the excess mesh onto the sides, cutting at the corners so that a piece could fold around the corner to be secured.

The mesh was secured with a LOT of staples around the outside of the box, and more staples were added to secure the mesh to the frame on the inside. These won’t hold well, though. We need a heavier duty staple gun for projects like this.

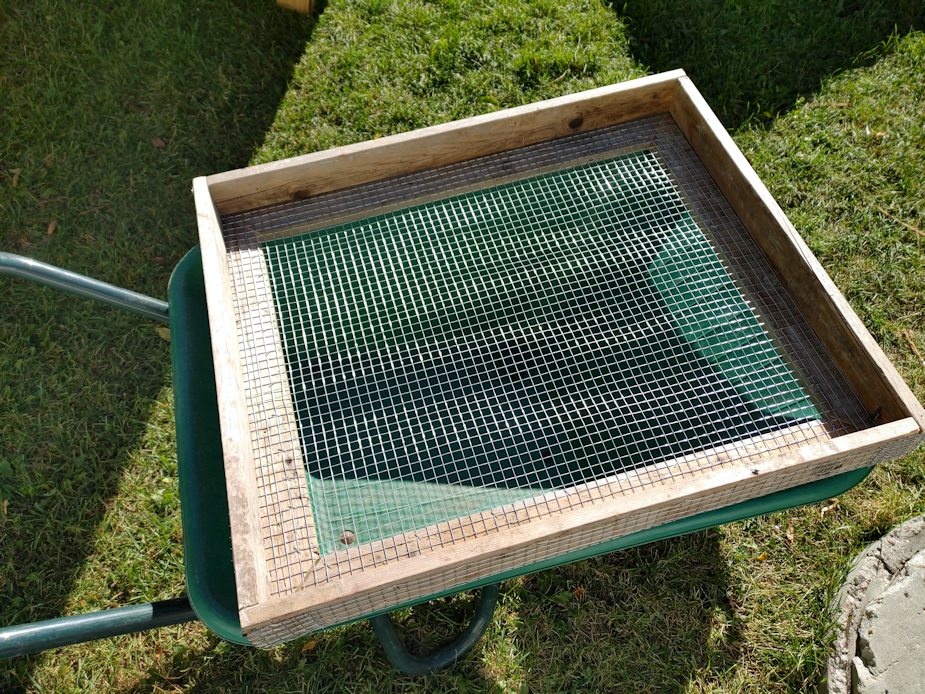
Once done and set up on the wheel barrow, I could really see how warped some of the wood it. It can’t lay flat. Which is okay. I am not expecting this to last very long, but if I can get a year or two out of it, that’ll be enough. I am planning on using it while cleaning up and preparing garden beds for next year, to sift out rocks and roots. I want to use it on the wood chips, too. The smaller chips can be used as mulch right away, while any larger pieces can be set aside until we can bring the wood chipper out and use the shredder chute to chop the bigger pieces finer.

While I was working on that, one of the things the girls worked on was picking through and sorting all the tomatoes we picked. They found more slugs inside some tomatoes! The ripest tomatoes were set aside to use right away, while the greener ones were to be laid out on screens.

The problem was finding a place the screens could be laid out that the cats won’t get at.

We ended up using the sun room.

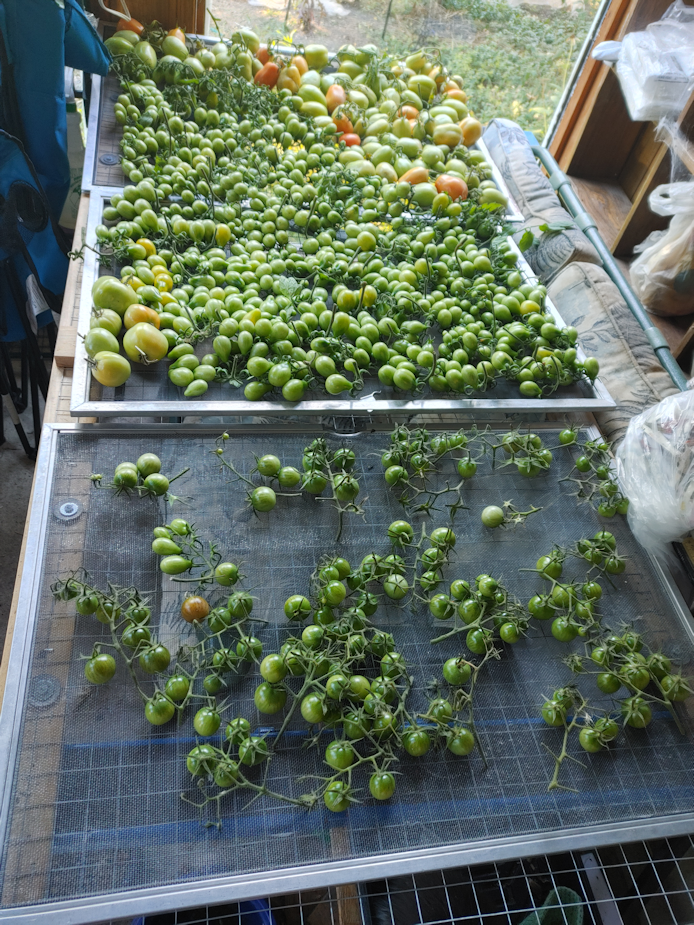
The onions were still laid out to cure on the wire mesh door we use for this, so we prepped them by trimming the roots, brushing off the dried dirt, and thinning the greens, before and my daughter braided them. It made for one very heavy braid! Once those were out of the way, we set screens up over the mesh door, and many of the tomatoes would fall straight through the mesh.

In the foreground are the chocolate cherry tomatoes. Then there’s all the yellow pear tomatoes, with the few remaining Sophie’s Choice tucked in with them. At the far end are the Cup of Moldova tomatoes.

They can stay in the sun room to ripen, though we will also be looking up recipes for using green tomatoes, too. There are plenty of ripe ones to start on first, though. Now that these ones are laid out on the screens, they can sit for a while before we have to get at them.

And the kittens can still use the swing bench, below. In fact, there was a kitten sleeping under the tomatoes when I took the picture! Unlike the inside cats, they have no interest at all in what’s on top of the screens. They just want soft, warm places to lie down and sleep!

The Re-Farmer

Have I mentioned I’m a suck for the cats?

It was a gorgeous afternoon and evening yesterday. Not only a pleasant temperature, but even the mosquitoes weren’t as bad. I didn’t want to go back inside when I was done what I needed to do!

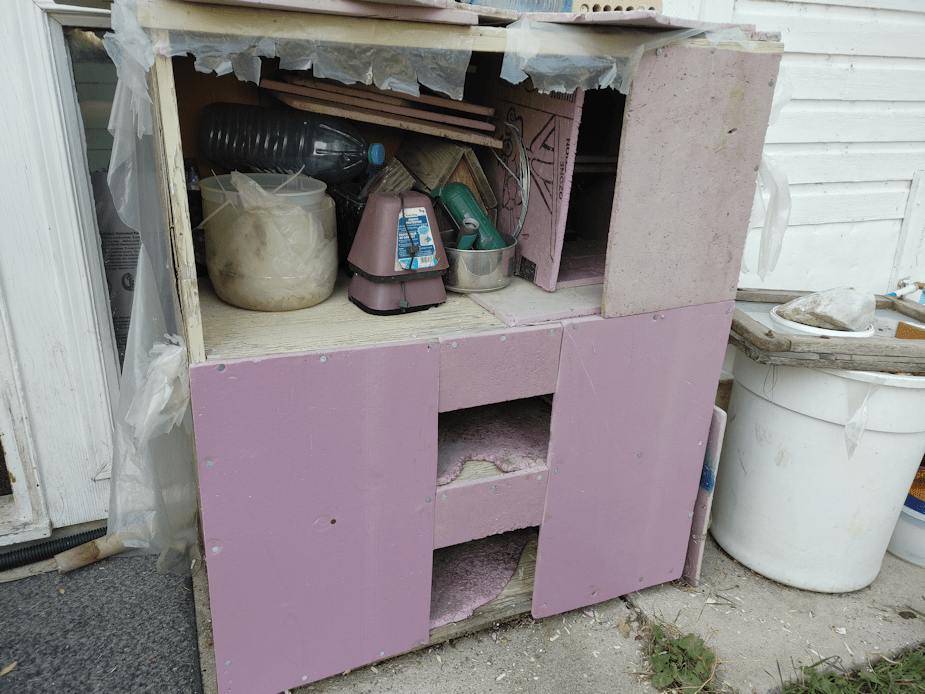
One of the things I did was re-do the shelf shelter for the cats. I noticed that the little kittens have been climbing all the way to the top shelf, which was actually use to store stuff, and have been snoozing in a corner, where I’d stacked some smaller pieces of rigid insulation.

The insulation over the bottom two shelves were getting ratty, so I decided to empty the whole thing, give it – and some of the insulation pieces – a hose-down and redo it.

Including making a next in the corner of the top shelf for the kittens, even though it meant not being able to fit everything back in again!

The sheets of insulation lining the bottom shelves were used again, since they fit the best and, aside from a few edges, still intact. When covering the fronts, I left the openings wider than before. When startled, the cats would dash out, catching on the edges of the insulation, sometimes hitting them hard enough to pull them right off the nails holding them to the shelf. I decided to try reducing the height of the openings. I want it open enough for them to easily get in and out, but small enough to let less of the weather in. Hopefully, they won’t get ripped right out by a startled cat!

As for the top shelf, I tucked a small pedestal plant stand in the corner and used it to support two levels with the rigid insulation for the kittens to lie on. There’s more space in front with an insulated floor, and there is insulation along the side and back walls, too. An extra piece across the front, and the kittens have their own little cubby hole to settle in.

Now I just need to clean up and redo the outside of the shelf. It had been wrapped in plastic to protect the wood from snow and rain, with an extended “roof” of rigid insulation, but the wind tore the plastic to shreds, and the cats have broken up the insulation. I’d like to find something sturdier to replace them with.

After I had emptied, swept and hosed down the inside, I had to give it time to dry before continuing, so I started another project.

A new cover for the rain barrel.

A couple of years ago, we made covers for the rain barrels out of window screen mesh and hula hoops. One for the barrel at the corner by the sun room, and the other for the barrel we fill with the host, at the far corner of the garden. The covers were partly to keep debris out, but also to make sure no critters fell into the barrels.

After a couple of years, however, the plastic hula hoops became brittle and started to crack. The cover for the garden barrel had been stored in the old garden shed for the winter, and it looks like something chewed holes in the mesh, too.

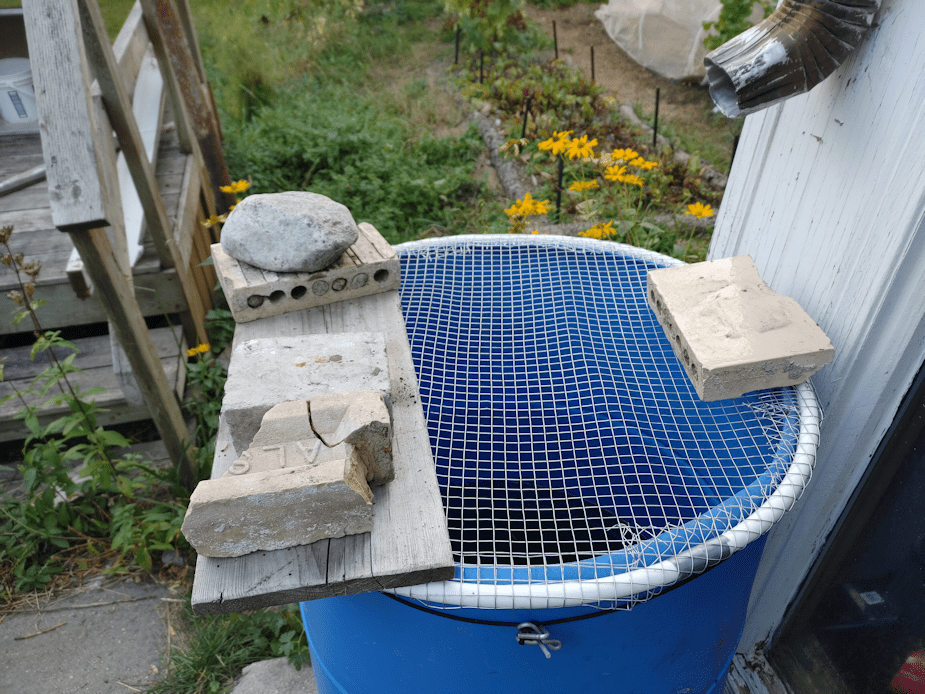
The sun room barrel’s cover is held in place with a board weighed down with bricks. When the barrel is getting full enough that more rain would cause it to overflow, the board and bricks hold the rain diverter in place.

Not long ago, I found the cover and its mesh broken up. Something had jumped onto it or something. The mesh had torn, but thankfully whatever did it, did not end up trapped in the water. Then we heard a commotion one night, and I came out to find the board and its weights, and the rain diverter, all knocked off the barrel, and the cover damaged even further. I put the board and its weights back, then found some pieces of rigid insulation to cover the rest of the barrel, with weights to hold them in place, to ensure no critter could access the water, until a new cover could be made. Even that ended up being pusher around a bit, as if some critter was trying to get at the water below – even though we have several bowls of fresh water critters can drink from. A new cover had to be made quickly.

Which is what I did while the shelf shelter was drying.

The materials used are much sturdier!

I considered using some chicken wire, but the openings are too large and the wire too easily broken. I went with some half inch hardware cloth I had, instead. The hoop is the same PEXX tubing I used to make arches to support netting over the old kitchen garden beds you can see in the background.

I used the barrel itself to measure the size needed to make the hoop, then cut a square of the hardware cloth to size, removing excess mesh from the corners to make it closer to “round”. The hardware cloth is a lot stiffer than chicken wire, but the extra strength is, I think, well worth it being such a pain to wrap around the hoop. Definitely glad for gardening gloves! The last step was to use a hammer on the underside to get the mesh right up against the hoop as tightly as I could.
There was, however, one problem.

The top of the barrel is not round. It’s more of an oval shape, and a wonky oval at that. The old hula hoop I’d used before was quite a bit larger than the top of the barrel, so it didn’t matter, but this hoop was cut for a more snug fit. The less sticking out, the less likely a critter will knock it off, even with the weights. I thought I’d still made it large enough to fit over, but the barrel’s shape was just too wonky.
I ended up tying some paracord around it as tight as I could, then used a metal tent peg to twist the cord even tigher.

Yeah. That bend up piece of metal was a tent peg.

Between the paracord pulling the top of the barrel into a more round shape, and the hammering of the hardware cloth tight against the hoop, I was finally able to get it in place. The board and weights were added to support the diverter when we need it, and the extra brick at the back, just in case something knocks the board off again, so the whole thing doesn’t flip off.

I might still add window screen mesh to this, since things like small frogs or insects, as well as small debris, can get through the half inch mesh. As it is right now, a cat – or even a racoon – could jump onto the cover and it’ll hold their weight without issue. The PEXX tubing will also last a lot longer, too.

All in all, I think it worked out rather well for using stuff I got for other projects! 😁 It didn’t even take that long to do. It took long enough for the washed out shelf to dry, at least.

So we now have a shelf shelter for the cats all cleaned out and ready for winter – on the inside, at least – and a cat and other critter proof cover for the rain barrel.

Ah, the things I do for the kitties!

The Re-Farmer