We have nasturtiums!

They’re finally big enough to get a decent picture, too.

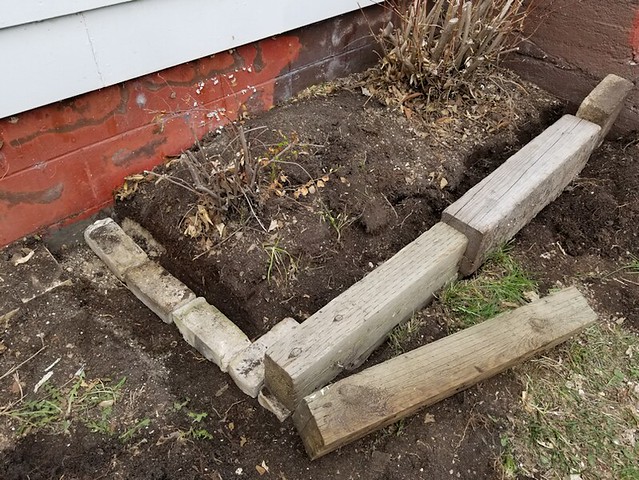
I re-sowed into the little flower bed at the end of the high raised bed, when nothing at all made it from the winter sowing experiment. Actually, some may have started to germinate, only to get killed off. Mostly by rolling cats. What did come up was massive amounts of tiny weeds.

Which happened her last year, and is starting to happen again now!

The pairs of roundish leaves are the nasturtiums. They have such large seeds, I was able to push them into the soil in two evenly space rows. They are very easy to identify. The other seedlings, not so much! There are asters and cosmos in here, but it’ll be a while before we’ll be able to know for sure what their germination rate is.

What I can identify, however, are the weeds. The darker green sprouts with the red stems. Those are the weeds that infested this bed, even with the gourds and pumpkins covering everything. When I started cleaning up the bed in preparation for sowing new flower seeds, these same weeds were already starting to take over, and now they’re back again!

I don’t know what it is about this particular bed. The garden soil is from the same pile we bought a few years bag and used to amend all the other beds, and none of them have it. These are a common weed for our area, and I remember pulling them when helping my mother weed her garden here, decades ago. Since we’ve started gardening here, I haven’t seen many of them, until they showed up in this bed, last year.

For them to come back again, in such numbers, several times in the same space really has me wondering how this particular patch of garden got infected with their seeds so badly!

I can’t even try and weed them right now, as at this stage, as there are so many, I’d be pulling up other seedlings, too. It’ll have to wait until everything gets bigger.

I know asters can grow here – we have them growing wild, even – and I remember my mother used to grow cosmos here, too. I’ve never grown nasturtiums, though.

It should be interesting to see how they do, here!

The Re-Farmer

Our 2025 Garden: reclaiming and replanting the flower bed

So the winter sown flower bed was a total failure. If any seeds did survive the winter, I saw no sign of them. While the bed did get covered with plastic, eventually, once that mulch was removed in the spring, it became a favourite spot for the cats to roll around on!

And did in, of course. 🫤

I decided it should be safe to direct sow more flowers into this bed.

The Dwarf Jewel mixed nasturtium is one of the flowers that had been planted here in the fall. I recently picked up the Cosmos, as I know for sure they grow here; my mother grew them here, and even after we moved back, I remember seeing a few of them show up in places were they’d self seeded. The Aster are seeds that were included in a memorial card for an old friend that passed away suddenly, last year.

The plastic cover on the bed had torn at one end, where the end of a bamboo stake was. That tear was all the wind needed to rip the whole thing in half. So that was the first thing to get removed. Then the hoops and the bamboo stake pieces holding them in place were pulled out and set aside.

The bed itself was full of weed seedlings, plus the dandelions, crab grass and creeping Charlie around the edges. There was even some burdock coming up, next to the high raised bed. It took a lot of loosening with the garden fork before I could start pulling the weeds and trying to get as many of the roots out as possible. Unfortunately, I was also finding elm tree roots in there, too.

Once weeded, I went over it with the rake to pull the soil more towards the middle, making it narrower than before. Partly because fewer seeds were going to be planted here, and partly to make it easier to cover and protect. After everything was levelled, it got a thorough watering, before the smaller seeds were scattered about. The nasturtium seeds are large enough that I planted those, individually.

While cleaning up the bed, I did find at least one nasturtium seed that had been planted in the fall; they were the only seeds large enough that they could be seen. Which means that it is possible that some of the seeds planted in the fall might have survived and could still germinate. Unlikely, but possible! 😁

Then it was time to set the hoops back in place, over the broken pieces of bamboo stakes holding them in place. With the hoops still attached to the bamboo stakes across the top, it didn’t talk long to get them back in place.

While gathering my supplies for this, I had grabbed a folded up piece of mosquito netting I thought might be good to set over the hoops, but it turned out to be too short for this bed. So I went and got the rolled up netting that had been over the garlic, before they got too tall. That turned out be just the right length! I weighted down one edge at the based of the high raised bed, then unrolled the netting. This netting catches on everything, so that was not as easy as it should have been! Once the netting was pulled snug, there was just enough slack to roll back around the stick it had been stored on. I then used the bricks, rocks and pieces of wood that had been used to hold the plastic over the hoops to secure the side, rolling the weights up in the excess netting. I was able to get the netting nice and snug over the hoops.

Hopefully, this will be enough to protect the area until the seeds germinate and get big enough that they won’t need the hoops and netting anymore. The nasturtium are edible, but they can also act as a trip crop, to keep insects away from other edible greens.

Once I gather the materials, I’ll build frame to fit over this area and attach these hoops to support whatever wire mesh I have to put over it, making sure to close up the ends, too. That will be much handier than setting hoops over sticks in the ground! I’ll be making several such covers, little by little, all with the same frame dimensions, so they can be interchangeable. The prototypes I’ve made so far have been incredibly handy!

One more job done. Time for another hydration break, then one more bed to work on!

See you in my next post…

The Re-Farmer

Clean up: wood chip pile and jasmine bed

I was able to tackle two areas in the East yard today. The first was planned; I decided to leave the remains of the wood chip pile where it was, and spread it out along Northwest corner of the spruce grove.

20190511.cleanup.mulch.1

Some of the pile got moved to the cross, as the pile at the other end didn’t have enough chips to extend that far. This will make mowing around this corner easier. Eventually, I will be clearing further into this area, but that will have its own natural mulch of leaves and spruce needles.

20190511.cleanup.mulch.2

This side is where they chipped the branches from the 2 big maples directly onto the ground. There is more cleanup needed here, plus that dead tree will need to come down at some point, so I wasn’t too particular about how much this area was spread out.

I have some thoughts about that dead spruce tree. I could have it cut flush with the ground. I could have the stump leveled at about a foot and a half high and use it as a seat, or put boards across it to turn it into a bench. I could have it cut a bit higher and put a table top on it, then add benches or seats around it. Or I could have it cut to a couple of feet, hollow it out and turn it into a planter.

Feel free to let me know what you think about these ideas in the comments. :-)

Once that was done, I finally got around to removing the foam insulation we put around the house in the fall. That got me eyeballing this odd little flower bed my mother made where she had transplanted a jasmine.

20190511.cleanup.jasminebed.1

This is what it looked like after removing the foam insulation; I had tossed the little plastic fence things in there, just to get them out of the way.

It’s falling apart and, when I try to water the jasmine by the steps, the water just runs downhill, past that piece of pressure treated wood and the miscellaneous pieces of brick. I had a couple of other pieces of pressure treated wood, as well as other bricks. I figured I could use both to build up a little retaining wall, bricks as a foundation for the wood, then more bricks on the wood to create a higher wall.

The first thing to do, of course, is take out the bricks that were already there.

20190511.cleanup.jasminebed.2

From where I was pulling things out, I get the impression that a bed was built up around the jasmine by the stairs when it was transplanted, and then it was extended when the second plant (I am not sure if it’s another jasmine; I don’t think so) was added.

I wanted a rectangular bed, since I was using the pieces of wood for walls, so I started digging it out to create level trenches to put them in.

20190511.cleanup.jasminebed.3

I kept finding more bricks!

20190511.cleanup.jasminebed.4

Using one of the pieces of wood as a guide, I began putting bricks into the trench as a foundation, leveling them off by eye. This is not intended to be permanent, so I’m not too worried about getting anything exact, but it will be there a few years, I’m sure, so I still want to get it solid.

After reaching the steps, I discovered a bit of a problem. Even using a block of concrete that was already there, the length of the bed was greater than the combined length of the wood I was using. I did have another piece that turned out to be just wide enough to fit, but…

20190511.cleanup.jasminebed.5

Yeeeeaaaahhhh…

No.

I mean, I could cut it to size with a chainsaw (now that I have one that works), but it’s quite rotten and…. nah. Not happy with it.

20190511.cleanup.jasminebed.6

So I moved the end in a few inches, instead.

Once the brick foundation and wood pieces were in place, I used the soil I’d taken out to fill in the gaps.

20190511.cleanup.jasminebed.7

Once that was done and stamped down, I realized I didn’t need to make it any higher.

I will likely need to bring in more soil for the outside of the bed, to tamp down and make sure the pieces of wood don’t just fall off their brick foundation. That can be done little by little, as needed, over the summer. I will also be mulching it with straw, when I start working on the bale.

So I now have to figure out what to do with the bricks. :-)

The Re-Farmer

Clean up: south yard, mulching second bed

Today, we got the second area in the south yard mulched with wood chips. It’s not as long as the first one done, so it was faster.

It was also faster because I changed equipment.

Among the things that disappeared from here before we moved in were things like shovels and spades – the stuff that didn’t get taken are almost all broken in some way. Yesterday, we made do with snow shovels to load up the wheel barrows. It was a pain in the butt, but they did the job.

Today, I dug out a spade I’d found last year. It’s broken, of course, but just the handle on the top. I was able to use the sleeve of my sweatshirt to protect my hand while using it, and things went much easier.

Here is how the bed looked before.

20190510.cleanup.mulching.southwest.bed.before.1

This is the largest of my mother’s white lilacs, at the West end of the bed, and where I cleaned out a big pile of horse droppings in between all those stems. I’ve never been able to figure out how that happened. I just can’t see a horse backing its hind end right into the bush and taking a dump. :-D

20190510.cleanup.mulching.southwest.bed.before.2

This is where we had cleared out the remains of some fencing that had been used as a trellis for vines. I’m guessing this was done before my mother discovered that Virginia creeper is so invasive! Hopefully, the mulch will prevent it from growing back.

The dirt patch by the tire around the tree is a favourite place for the outside cats to roll around. :-D

Here is how it looks now.

20190510.cleanup.mulching.southwest.bed.after.1
20190510.cleanup.mulching.southwest.bed.after.2

Alas, the cats have lost their rolling spot. ;-)

A lot of the wood chips were used for this, but there is more left than I expected.

20190510.cleanup.mulching.chip.pile

I’m debating whether to use it on a nearby flower bed, or just spread it all out, right where it is.

For the amount that’s there, I’m leaning towards spreading it out where it is.

While doing my rounds this morning, I took some pictures at the logs from the two maples that were taken down. Check this out.

20190510.tree.pieces.rotten.core.1

You can see how the ant-damaged, rotten core is slightly pushed in. I was curious to see just how loose it was.

The answer is:

Completely.

20190510.tree.pieces.rotten.core.2

There were a couple of pieces like this, where I could pull the core right out!

Have I mentioned what a relief it is to finally have these trees down?

The Re-Farmer

Clean up: south yard, mulching first bed

Today we were able to head out and do some more aggressive yard work, and I am happy as a clam!

I decided to start on an area in the South yard that we had already started to mulch with leaves in the fall.

Here are the before pictures.

20190509.,cleanup.mulching.southeast.section.before.1

This is the bed that runs between the people gate and the vehicle gate.

20190509.,cleanup.mulching.southeast.section.before.2

I even considered mulching all the way to the fence, as it’s difficult to mow in there, but decided against it for now.

My mother planted some bright yellow flowers in here that self-seed. They did rather well last year, but I was pulling a lot of Virginia creeper out of it, near the Chinese elm. Also, being self seeding, the flowers are sort of spreading in an uncontrolled way.

Here is what it looks like now.

20190509.,cleanup.mulching.southeast.section.after.1

On this end, my mother’s yellow flowers did rather poorly. The Korean lilac shaded it too much, blocking both sun and what little rain we had. It was being taken over by crab grass.

I’m pretty sure that maple is self seeded.

20190509.,cleanup.mulching.southeast.section.after.2

I could see the flowers were already starting to come up, and I think they will find their way through the mulch. If they can do that, however, the Virginia creeper will do so, just as enthusiastically. With the mulch in place, they should be easier to pull up.

We put a big dent in the pile of wood chips in the process! This was before…

20190507.tree.removal.after.woodchips.2

This is what it looks like now.

20190509.,cleanup.mulching.woodchip.pile.used

The next area I plan to use these on is on the other side of the sidewalk, between another Chinese elm and the willow that got trimmed. There are white lilacs there that I’d cleaned up around and pruned last year; while there is some kind of greenery growing near the base of the Chinese elm, there were no other flowers or anything. We should be able to finish off the pile of chips in that area. Anything left on the ground where the pile is now will be raked out as mulch, right where it is.

I also got an after picture of the maples removed from overhanging the roof. This is the before photo I had posted previously…

20190507.tree.removal.maples.house.before

This is what it looks like, now.

20190507.tree.removal.maples.house.after

That one tree in there that’s leaning waaayyyy over is just funny!

I’m hoping to get that junk around that old shed hauled out of the yard this summer. First, though, we need to get the straw bale used up. It’s rather in the way, where it is now.

I’m so happy to be able to get out and start on all this again! :-D

The Re-Farmer